• TalkBass has been independent since 1998. Add your voice.
    Create a free account to reply to discussions, view embedded media, and browse with fewer display ads.
    Join freeLog in
    Want zero display ads or expanded classifieds tools? Compare plans.

SBO 2022 - GMC Basses #9: Back to the beginning

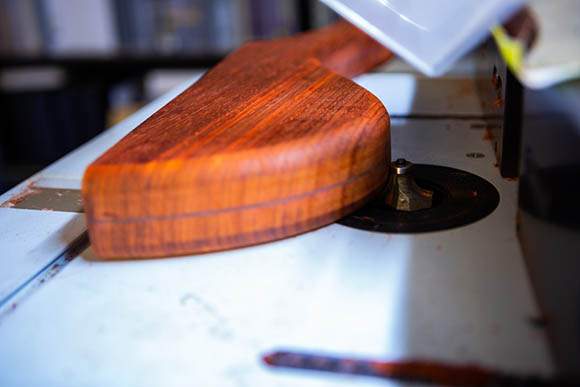
I spent some time today re-assembling my bandsaw. I then got my router table out and fitted my large rounder over bit. I then cut a sweet round over around the body wing external edges.
20220730-_75C3742.jpg
20220730-_75C3743.jpg
20220730-_75C3747.jpg
20220730-_75C3755.jpg
20220730-_75C3758.jpg
20220730-_75C3759.jpg
 
It's not bad progress for the first calendar month. Hopefully, I'm about the half way point. That's the frets in and trimmed flush the side sides of the fretboard. I also trimmed off the overhangs of the fretboard. I like the fret first and then cut off the excess at the nut end because I find the extra material stops the zero fret from snapping off when I bang in the fret. My next task is to make some more router templates. I'll soon need Bridge, Pickups and Control Cavity templates. Plus a drilling template for the pots. Maybe a new router sled so I can use a router to carve the body surfaces. Concave on top and convex underneath. On my previous two basses, I did this by eye with a set of hand planes and rasps.
20220801-_75C3767.jpg

20220801-_75C3768.jpg

20220801-_75C3769.jpg
 
Last edited:
Today's progress doesn't translate too well into photos. I skimmed the back of the neck as it was way way too thick. Probably a symptom of my Bandsaw issue earlier last week. I did this with a fresh 60 grit on my disc & Belt sander....wowa that was fast! Even with dust extraction...most of it seems to go into the air!
I then worked on the back of the head stock / volute area using a drum sander kit in my drill press. I then attached the headstock template and routed the neck to headstock curves using my router table. I've still left a bit of material there, for tidying up later when I've added the extra sides and I'm ready to cut out the headstock shape. This went well. It's good the see where the curves will be and how it affects the volute and neck to head stock areas. For my daily hour in the workshop, not bad progress.
20220802-_75C3835.jpg
20220802-_75C3838.jpg
 
I had a crazy busy day at work yesterday, so no lunch...no progress.
However, today I managed to create a new jazz pickup routing template. I hate these types of pickups....so hard to route. Gimme a P4 soap bar any day! I then transferred these to one of my master body templates. , along with the bridge route. I then fixed the template to the neck beam and cut the pickup slots and bridge slot on the neck beam.
20220804-_75C3842.jpg
20220804-_75C3839.jpg
20220804-_75C3840.jpg
 
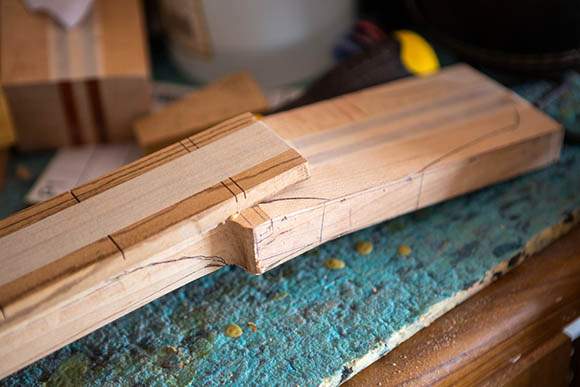
It's often said that Lutherie is a game of hiding your mistakes and making the results look intentional! So what did I do wrong? I accidentally cut the neck heel using the lower horn's profile and not the upper horn's profile. I made the same mistake on my 7 string headless. You'd think I'd learned! I can fix it with some careful carving...and blame it on weight savings!
20220804-_75C3844.jpg

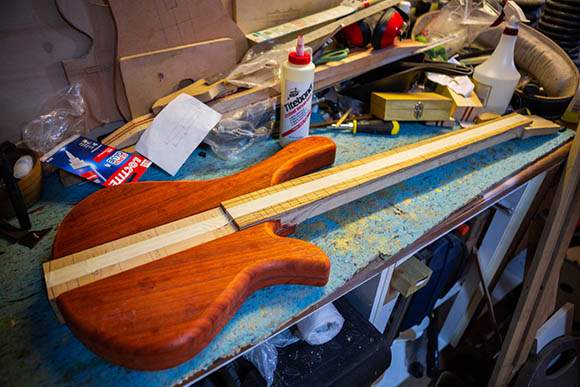
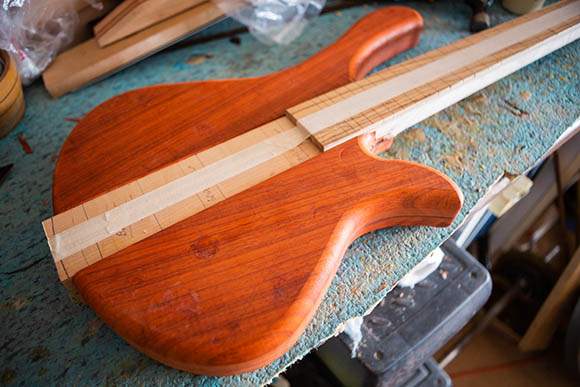
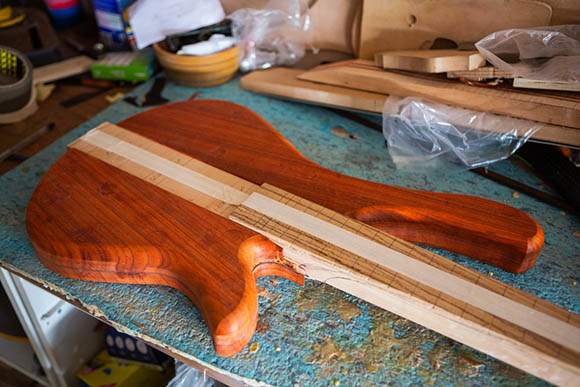
So here's a few comfort pictures with the body sides placed next to the neck to cheer me up!
20220804-_75C3845.jpg

20220804-_75C3846.jpg

20220804-_75C3843.jpg
 
Is there a reason you rout those recesses in the neck blank before gluing the body wings on?

Ha! lol no...no functional reason at all other than I already had the router table out...the bit was loaded and I could...do it...
It was kind of a distraction from the fact that this bass has still got a long way to go before it's complete. I've not stuck the body wings on yet and top and under side need some heavy carving too.
I was thinking about earlier. I also did this with my 2nd bass, a 5 string headless and my 7 string headless.
 
One of the headaches with this particular bass design is the curved body. Way back when I designed and built my first bass I was heavily influenced by the Warwick Fortress. Although the Fortress has a flat bolt on body, I don't like to copy directly. I like to draw inspiration and innovate / mature and idea into something that is new but clearly inspired. I when I drew on inspiration from Warwick, in came the need for a curved body. So that's a radius to the top and a concave to the bottom so it looks like the body wood have been rolled over a curved surface, or melted onto one. At the time I didn't know that Warwick was heavily influenced by Spector who originated this idea.
With my first bass and the later fretless copy I built, I used a solid body and carved the top with an array of hand planes. The underside I attached with a hand angle Grinder to rough out and then smoothed with hand planes, scrapers and sand paper. It was a slow and labour intensive job, which I don't mind but if there's a quicker way....
Anyhow, with this bass there is a further complication that the body horns on either side are two pieces of body material with three veneers running through them. If I glue these horns to the body at 90' then I loose a lot of material to the carving and the two black veneer pins stripes will go through the wood and weird heights as the body curves off. I'm certainly not in the place with my carpentry / machining skills to be able to mill the body sides so the veneers follow the same radius...however cool that would look. So my hybrid solution is to taper the neck sides so that the body wings present at a slight angle. This will means the pin stripes will angle out more to the centre line (If I get my carving and angles right) once the top and bottoms are carved. Theoretically, there is less carving required too.
I measured the angle that I think will suffice. I transferred this angle to my table saw's inclination and carefully ran either side of the neck beam through the saw. I then re-measured and neatened the surface of he newly sawn sides using a no#5 hand plane. It's been a good success and gets me ready to start to think about gluing the body sides to the neck beam.
20220805-_75C3849.jpg
20220805-_75C3848.jpg
20220805-_75C3851.jpg
20220805-_75C3853.jpg
20220805-_75C3855.jpg
20220805-_75C3857.jpg
 
I had a spare hour this evening, so I stuck the headstock extensions on. I also took the time to prepare some veneers to go between the body horns and the neck beam. I also tidied up the surfaces a bit and did a dry run of clamping the lower horn to the neck. Made a little bit more tricky by the angled sides! As a dry run it was fine. However once there is glue in that join it's going to slip all over the place...hey tomorrow's problem!

20220805-_75C3862.jpg
20220805-_75C3863.jpg
20220805-_75C3864.jpg
 
Interesting idea, Did you make a drilling jig for the dowel alignment or did you measure and mark it well?
Hahaha, it was much more rudimentary than that. I placed the neck beam in the ShopSmith, in "Drill Press" mode and drilled holes through from one side to the other. I then used "the trick" to tape one wing to the neck beam and use a forstner bit to reach through the hole in the neck beam and start a hole in the wing. Then I put the wing in the drill press and ran the hole in a little deeper. Repeat the process for the other wing. ;) :thumbsup:
 
Hahaha, it was much more rudimentary than that. I placed the neck beam in the ShopSmith, in "Drill Press" mode and drilled holes through from one side to the other. I then used "the trick" to tape one wing to the neck beam and use a forstner bit to reach through the hole in the neck beam and start a hole in the wing. Then I put the wing in the drill press and ran the hole in a little deeper. Repeat the process for the other wing. ;) :thumbsup:
Oh....THATS Smart...I like that a lot.
 
I had a few hours to play with today. I removed the clamps form the headstock and inspected. I planed off a lot of the excess glue. I left this for most of the day to continue curing. This evening, I cut out the rough headstock shape on my bandsaw and then used my sanding machine to neaten and take the edge close to the line.
Last night I glued up some veneers to go between the body wings and the centre beam. I took these out of my make shift press and inspected. Pretty good. I glued one of them to the edge of the lower body horn and put it in with my sash clamps rig. I left them for half of the day, removed them and neatened the edges. Then I set the neck and lower horn up in the clamp for a dry run. I hammered three fairly big nails into the neck beam and snapped off the heads so they would punch into the body wings and prevent slippage. This worked well but the padauk is very hard...I just kept tightening the clamps every few mins until I had a flush join. Once I was happy with the line, I removed it all, applied my glue, spread it evenly and then re-assembled it in my sash clamp rig. It took about 20 mins to get everything right and fully tightened.
I guess I'll find out in the morning if it worked!

20220806-_75C3865.jpg
20220806-_75C3866.jpg
20220806-_75C3868.jpg
20220806-_75C3875.jpg
20220806-_75C3871.jpg
20220806-_75C3876.jpg
20220806-_75C3877.jpg
 
Overnight, the glue has really hardened and the lower bogy wing is now permanently fixed on to the neck beam. I think maple allows moisture movement better than padauk. I had another successful evening in my garage / workshop. I glued on a set of veneers to the upper body horn, left it for 4 hours to mostly set and trimmed off the excess. I then thinned down the under side of the headstock using my my sanding machine. It's good for a 1st pass, but needs more work.
Then I did a dry run fixing the upper body wind to the neck section. I used the same method of using three headless nails sunk into the two surfaces as a clamping guide, so I can get the piece exactly where I want them and eliminate slippage.
20220806-_75C3867.jpg

20220807-_75C3878.jpg
20220807-_75C3879.jpg
20220807-_75C3880.jpg