

Enjoy the benefits of a premium membership!
Upgrade Account
-
TalkBass has been independent since 1998. Add your voice.
Create a free account to reply to discussions, view embedded media, and browse with fewer display ads.
Join free Log in
Want zero display ads or expanded classifieds tools? Compare plans.
You are using an out of date browser. It may not display this or other websites correctly.
You should upgrade or use an alternative browser.
You should upgrade or use an alternative browser.
SBO 24 - Woodrow
- Thread starter Markshan
- Start date
More options
Who Replied?

That used three pieces of each wood. The kit had five of each. So that left two pieces of each color remaining. If this goes well and I decide to do another, I figure I can just add a couple pieces of purple heart and make the next one even more colorful. Maybe I'll be ready to attempt building a neck by then.

ATM I am more comfortable calling it ambitious. If I can actually pull off my vision it will be amazing. I already made a couple mistakes on the lower horn glue up.
Not mistakes, “new, revolutionary features!”

Thank you. On the link I gave in the first post I talked about being inspired by going to the Penn State Arts festivals and seeing the woodworkers who make bowls or toys out of different colored woods. I just thought they were so beautiful it's always stuck with me.That's awesome. Good aesthetic-functional mesh.
I also felt like using the different woods at an angle rather than straight up and down would add geometric interest. From there it just seemed reasonable to start with the longest board being the one that's going to hold the end pin at the top horn and then having that solid piece carry the whole way through to the other end and be the center point for the glue up. I felt that would be beneficial not only aesthetically, but that it would also minimize the possibility of over taxing any of the glue joints.
Who says the lower horn has to be the same diameter as the upper horn?Not mistakes, “new, revolutionary features!”
I'm thinking I should either...
A. Move the center line left a bit.
or
B. Make the top rounded body section a bit smaller.
Opinions?
A. Move the center line left a bit.
or
B. Make the top rounded body section a bit smaller.
Opinions?

They absolutely don’t. My Long Black body style has a much thicker top horn than the bottom, and I like it just fine.Who says the lower horn has to be the same diameter as the upper horn?
Attachments

I'm thinking I should either...
A. Move the center line left a bit.
or
B. Make the top rounded body section a bit smaller.
Opinions?
I looked at the ergodyne again and the bridge is right in the middle horizontally. I think that when I compared the two outlines I did a lot of cutting to the treble side but not any cutting to the bass side. They're still enough meat to the neck pocket that changing the angle won't cause me to run out of material to rout into, so I am going to move the centerline to the left and trim that big round circle on the bass side just a little bit. Changing the deck angle a degree or two will also make the spacing of the upper horn closer to the other instrument.
I guess it's easier to come to this realization when it's just marker drawings rather than after I've already drilled and routed things.
I wondered if you were going to do that or if the offset centerline was intentional.I looked at the ergodyne again and the bridge is right in the middle horizontally. I think that when I compared the two outlines I did a lot of cutting to the treble side but not any cutting to the bass side. They're still enough meat to the neck pocket that changing the angle won't cause me to run out of material to rout into, so I am going to move the centerline to the left and trim that big round circle on the bass side just a little bit. Changing the deck angle a degree or two will also make the spacing of the upper horn closer to the other instrument.
I guess it's easier to come to this realization when it's just marker drawings rather than after I've already drilled and routed things.

The center line was carried over from the endpin point on one of the drawings. Since the lumber is running on a diagonal I didn't realize right away that my center line was not centered. Here is the corrected version. Everything measures right for me now. Does it look right?I wondered if you were going to do that or if the offset centerline was intentional.
For future reference, if you're ever wondering if something was deliberate or a bleep up, please go ahead and ask because I may not know that I bleeped up. That's kind of one of the reasons I'm here.
It looks pretty good from this angle.  If I want to find the centerline that 'balances' the sides from the center, I usually mark the center in the neck pocket first, then I put a long ruler across the lower bouts and find the midpoint. I then draw a line from the neck pocket center through the midpoint of the bouts and that usually visually looks like a balanced 'weight' on each side. I was hesitant though, because there's a whole perfectly valid school of thought regarding offset instruments, especially in the realm of ergonomics.
If I want to find the centerline that 'balances' the sides from the center, I usually mark the center in the neck pocket first, then I put a long ruler across the lower bouts and find the midpoint. I then draw a line from the neck pocket center through the midpoint of the bouts and that usually visually looks like a balanced 'weight' on each side. I was hesitant though, because there's a whole perfectly valid school of thought regarding offset instruments, especially in the realm of ergonomics.
So I downloaded some graph paper and printed it and used that to come up with a template for the router sled. The ergodyne has a gradual curve throughout but it also has individual Bridges. I'm using a more standard bridge and am more remedial of a builder obviously, so I decided to make the middle 10 cm flat. That way if I don't get the bridge right the first time and have to move it I don't have to rerout another flat surface or make any correction that way.

Okay this time the one side being more curved than the other is deliberate. That's actually how the instrument is. And I like the way that it fits my body so I'm trying to replicate that. This is a very hard thing to photograph because the top horn doesn't line up in the picture, but I think this is actually pretty close. And if it's not exactly the same, it doesn't have to be. This is my design, not theirs, right?

Okay this time the one side being more curved than the other is deliberate. That's actually how the instrument is. And I like the way that it fits my body so I'm trying to replicate that. This is a very hard thing to photograph because the top horn doesn't line up in the picture, but I think this is actually pretty close. And if it's not exactly the same, it doesn't have to be. This is my design, not theirs, right?
Dear anyone in southwestern Pennsylvania who was hoping for rain, you're welcome.
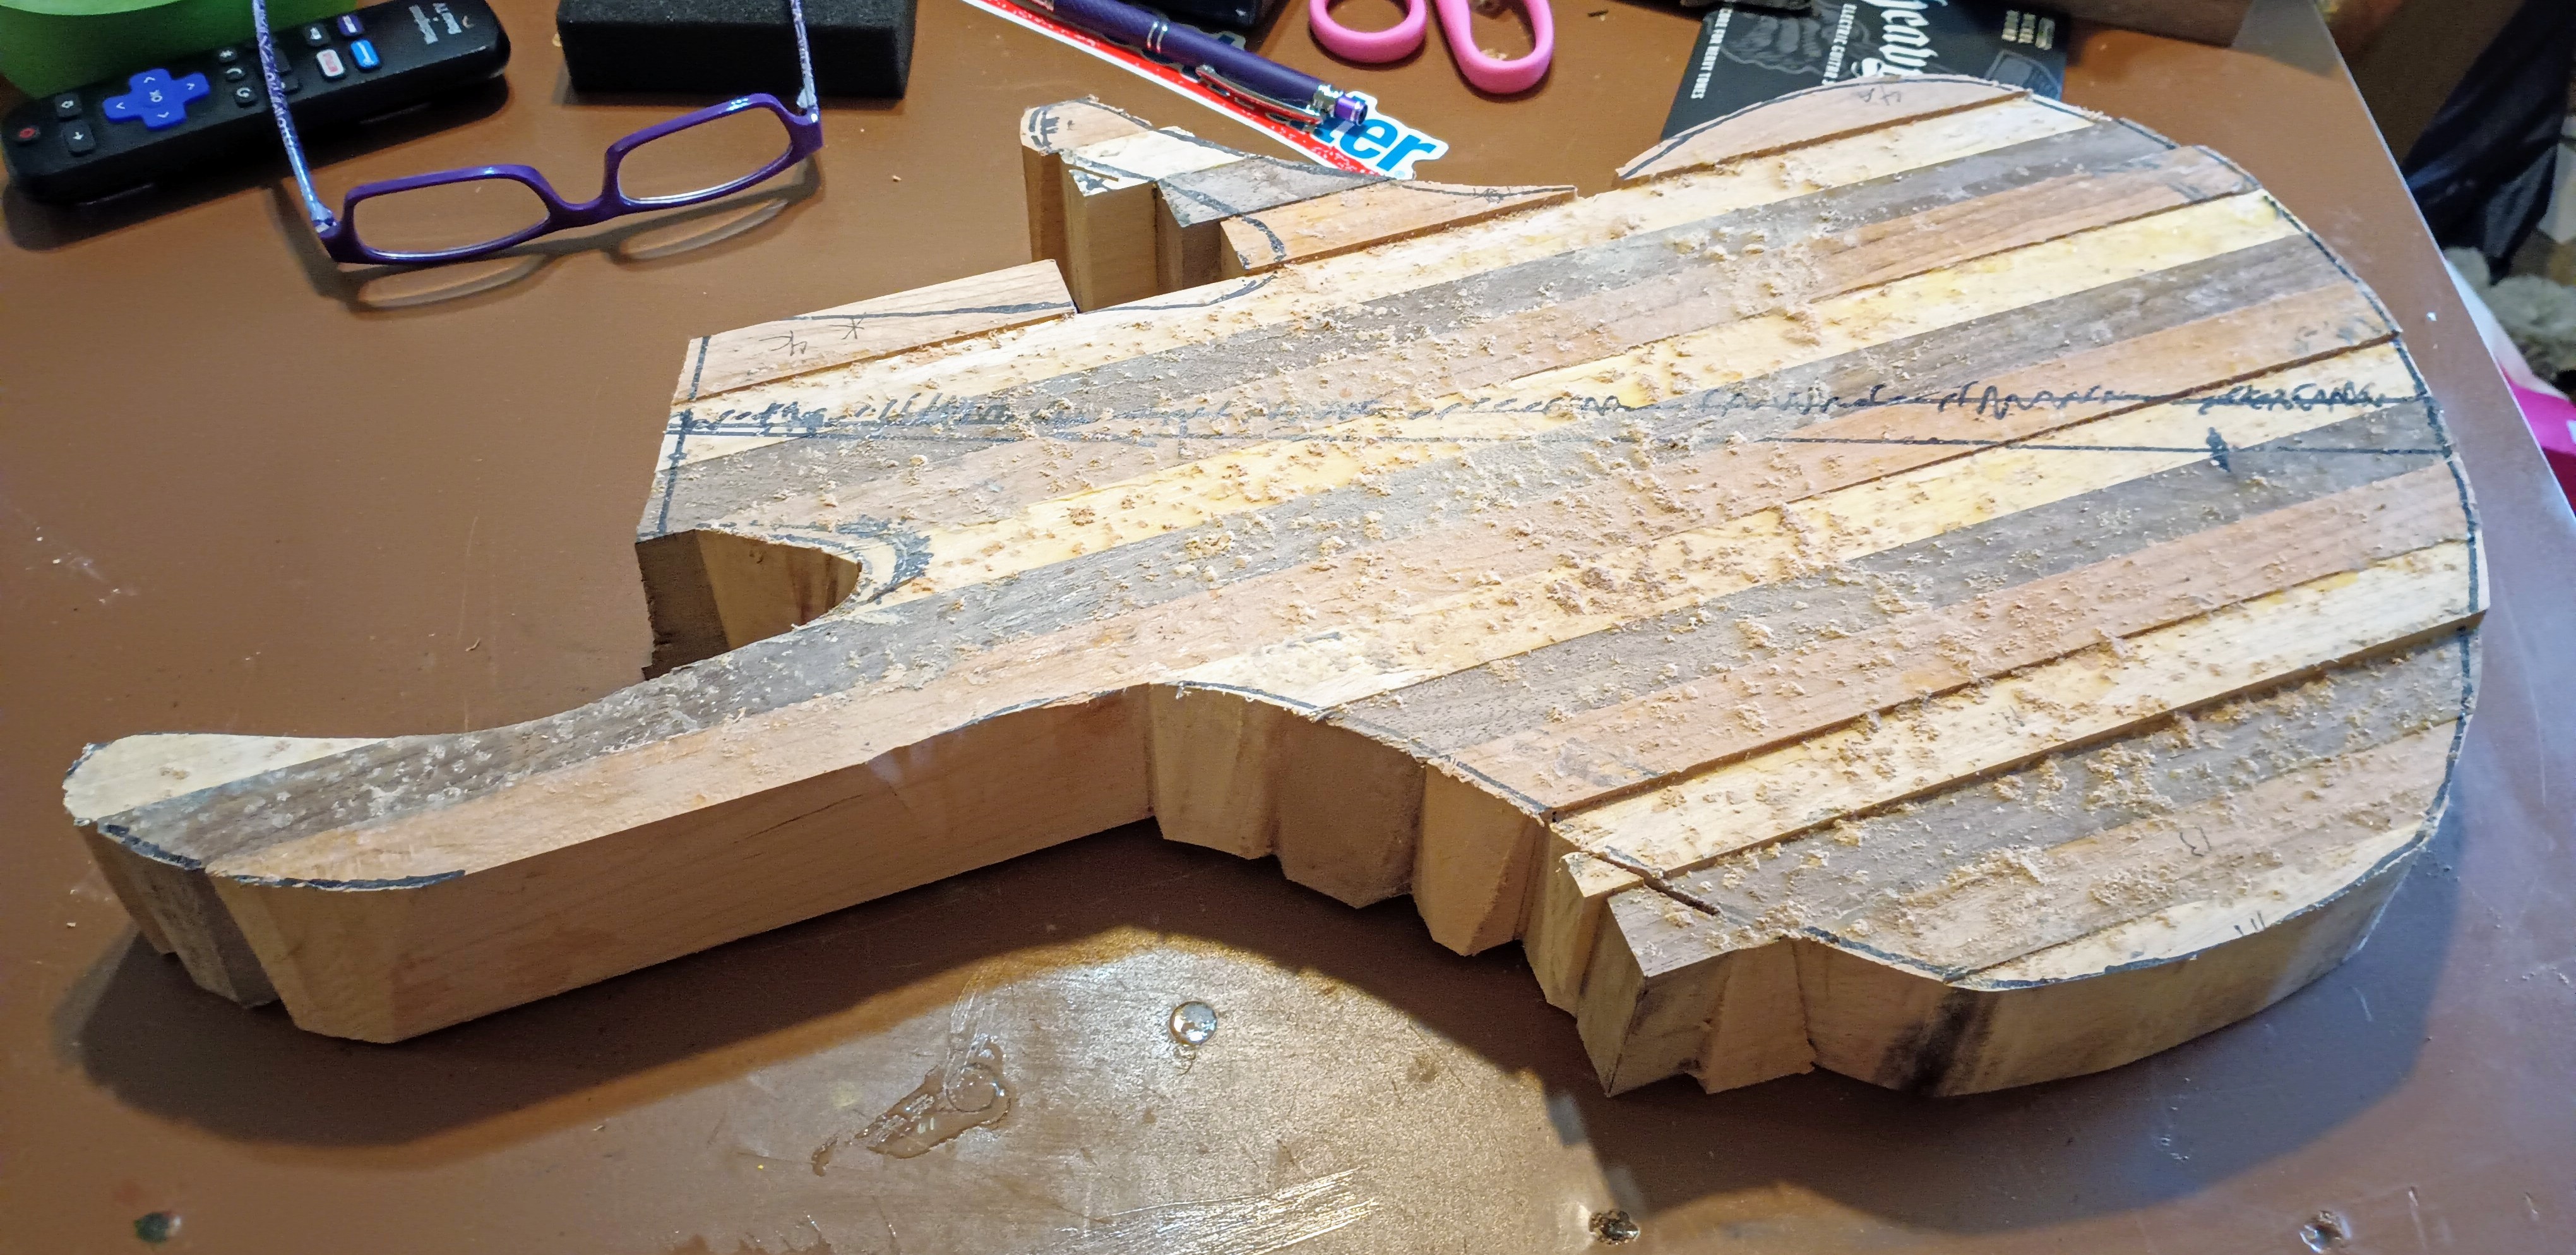
I wish I had a shop and a bandsaw rather than a deck and a jigsaw. No matter how I adjust or tighten, it always cuts at a five degree angle. I find on thick material like this if I do one pass in each direction I can clean most of that up.
I wish I had a shop and a bandsaw rather than a deck and a jigsaw. No matter how I adjust or tighten, it always cuts at a five degree angle. I find on thick material like this if I do one pass in each direction I can clean most of that up.
Ain't that the truth. Even when you pre-angle the jigsaw against the 5 degree cut angle, it somehow cuts an additional 5 degrees.Dear anyone in southwestern Pennsylvania who was hoping for rain, you're welcome.
View attachment 5492995
I wish I had a shop and a bandsaw rather than a deck and a jigsaw. No matter how I adjust or tighten, it always cuts at a five degree angle. I find on thick material like this if I do one pass in each direction I can clean most of that up.

One good thing about the jigsaw. It bounced around so much that I feel really good about my glue up. It stopped raining and I think this is as far as I will be going with a jigsaw.
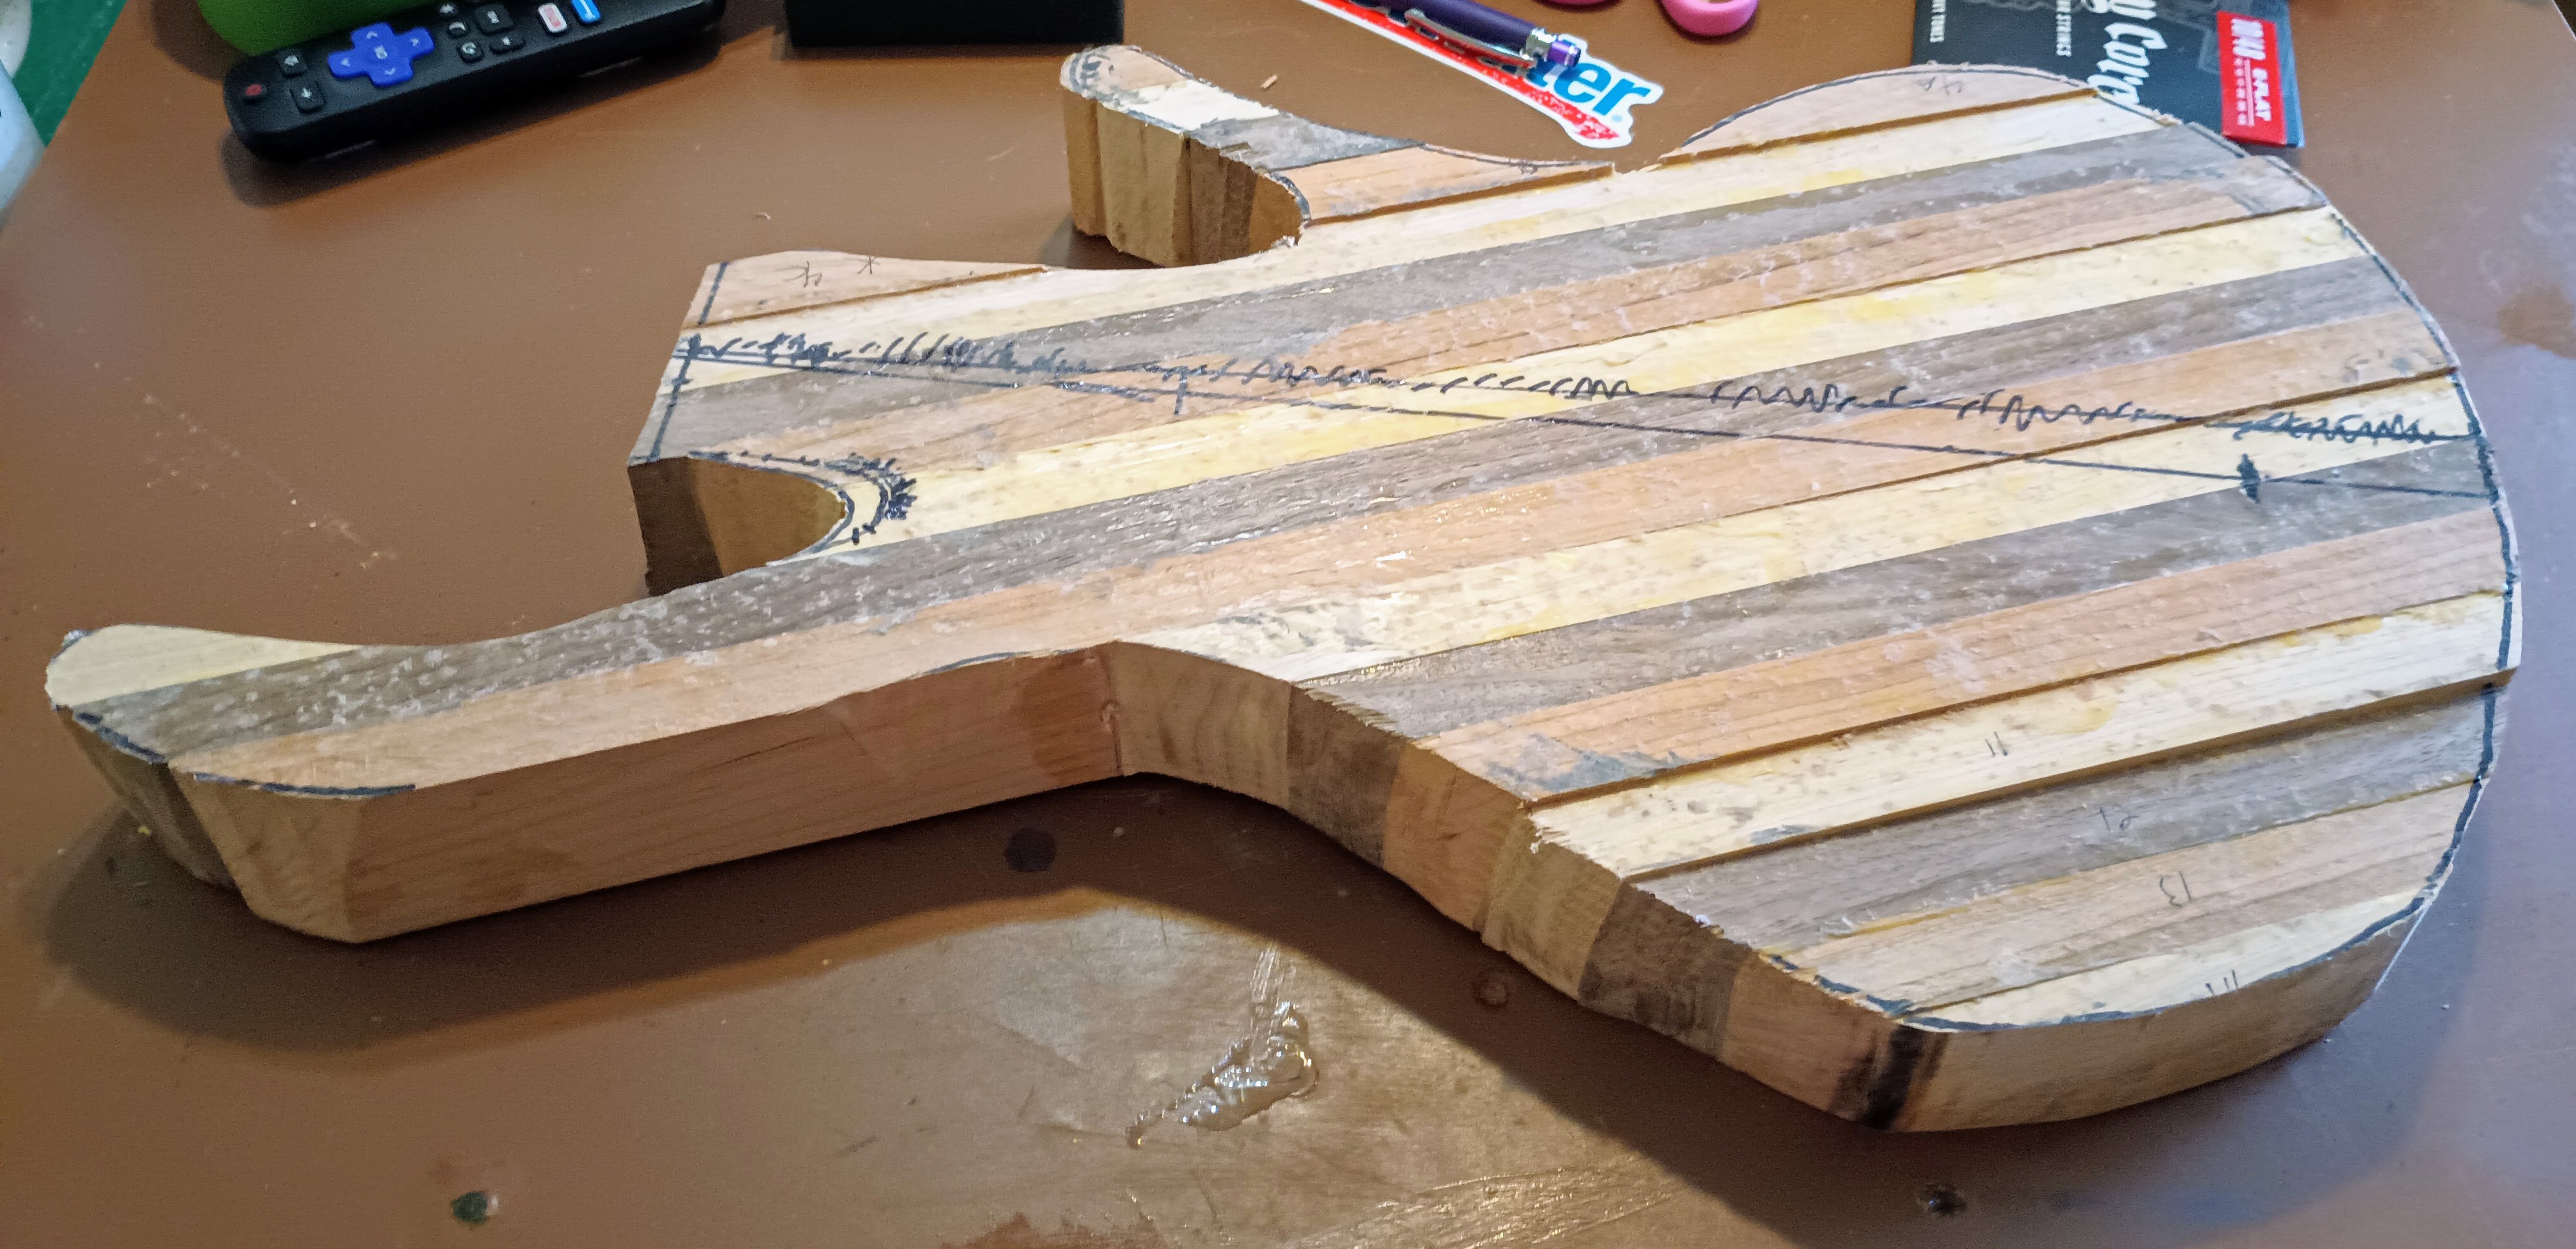
My next two steps will be shallow routed neck and pickup cavities. Then shaping the faces with a router and curved jig, but even with that I suspect there may be a drum sander in my future. Maybe I'll be able to get by with the hand orbital and drill drums, but it doesn't look that way at the moment. We'll see what happens once I remove a lot more material.
My next two steps will be shallow routed neck and pickup cavities. Then shaping the faces with a router and curved jig, but even with that I suspect there may be a drum sander in my future. Maybe I'll be able to get by with the hand orbital and drill drums, but it doesn't look that way at the moment. We'll see what happens once I remove a lot more material.
I would personally flatten the faces first so that I had a clean and square slate to work from when routing the cavities. That said, it's because that would work best with my own templates, jigs and process, so your approach may be just fine.


