• TalkBass has been independent since 1998. Add your voice.
    Create a free account to reply to discussions, view embedded media, and browse with fewer display ads.
    Join freeLog in
    Want zero display ads or expanded classifieds tools? Compare plans.

Short scale semi-hollow body build

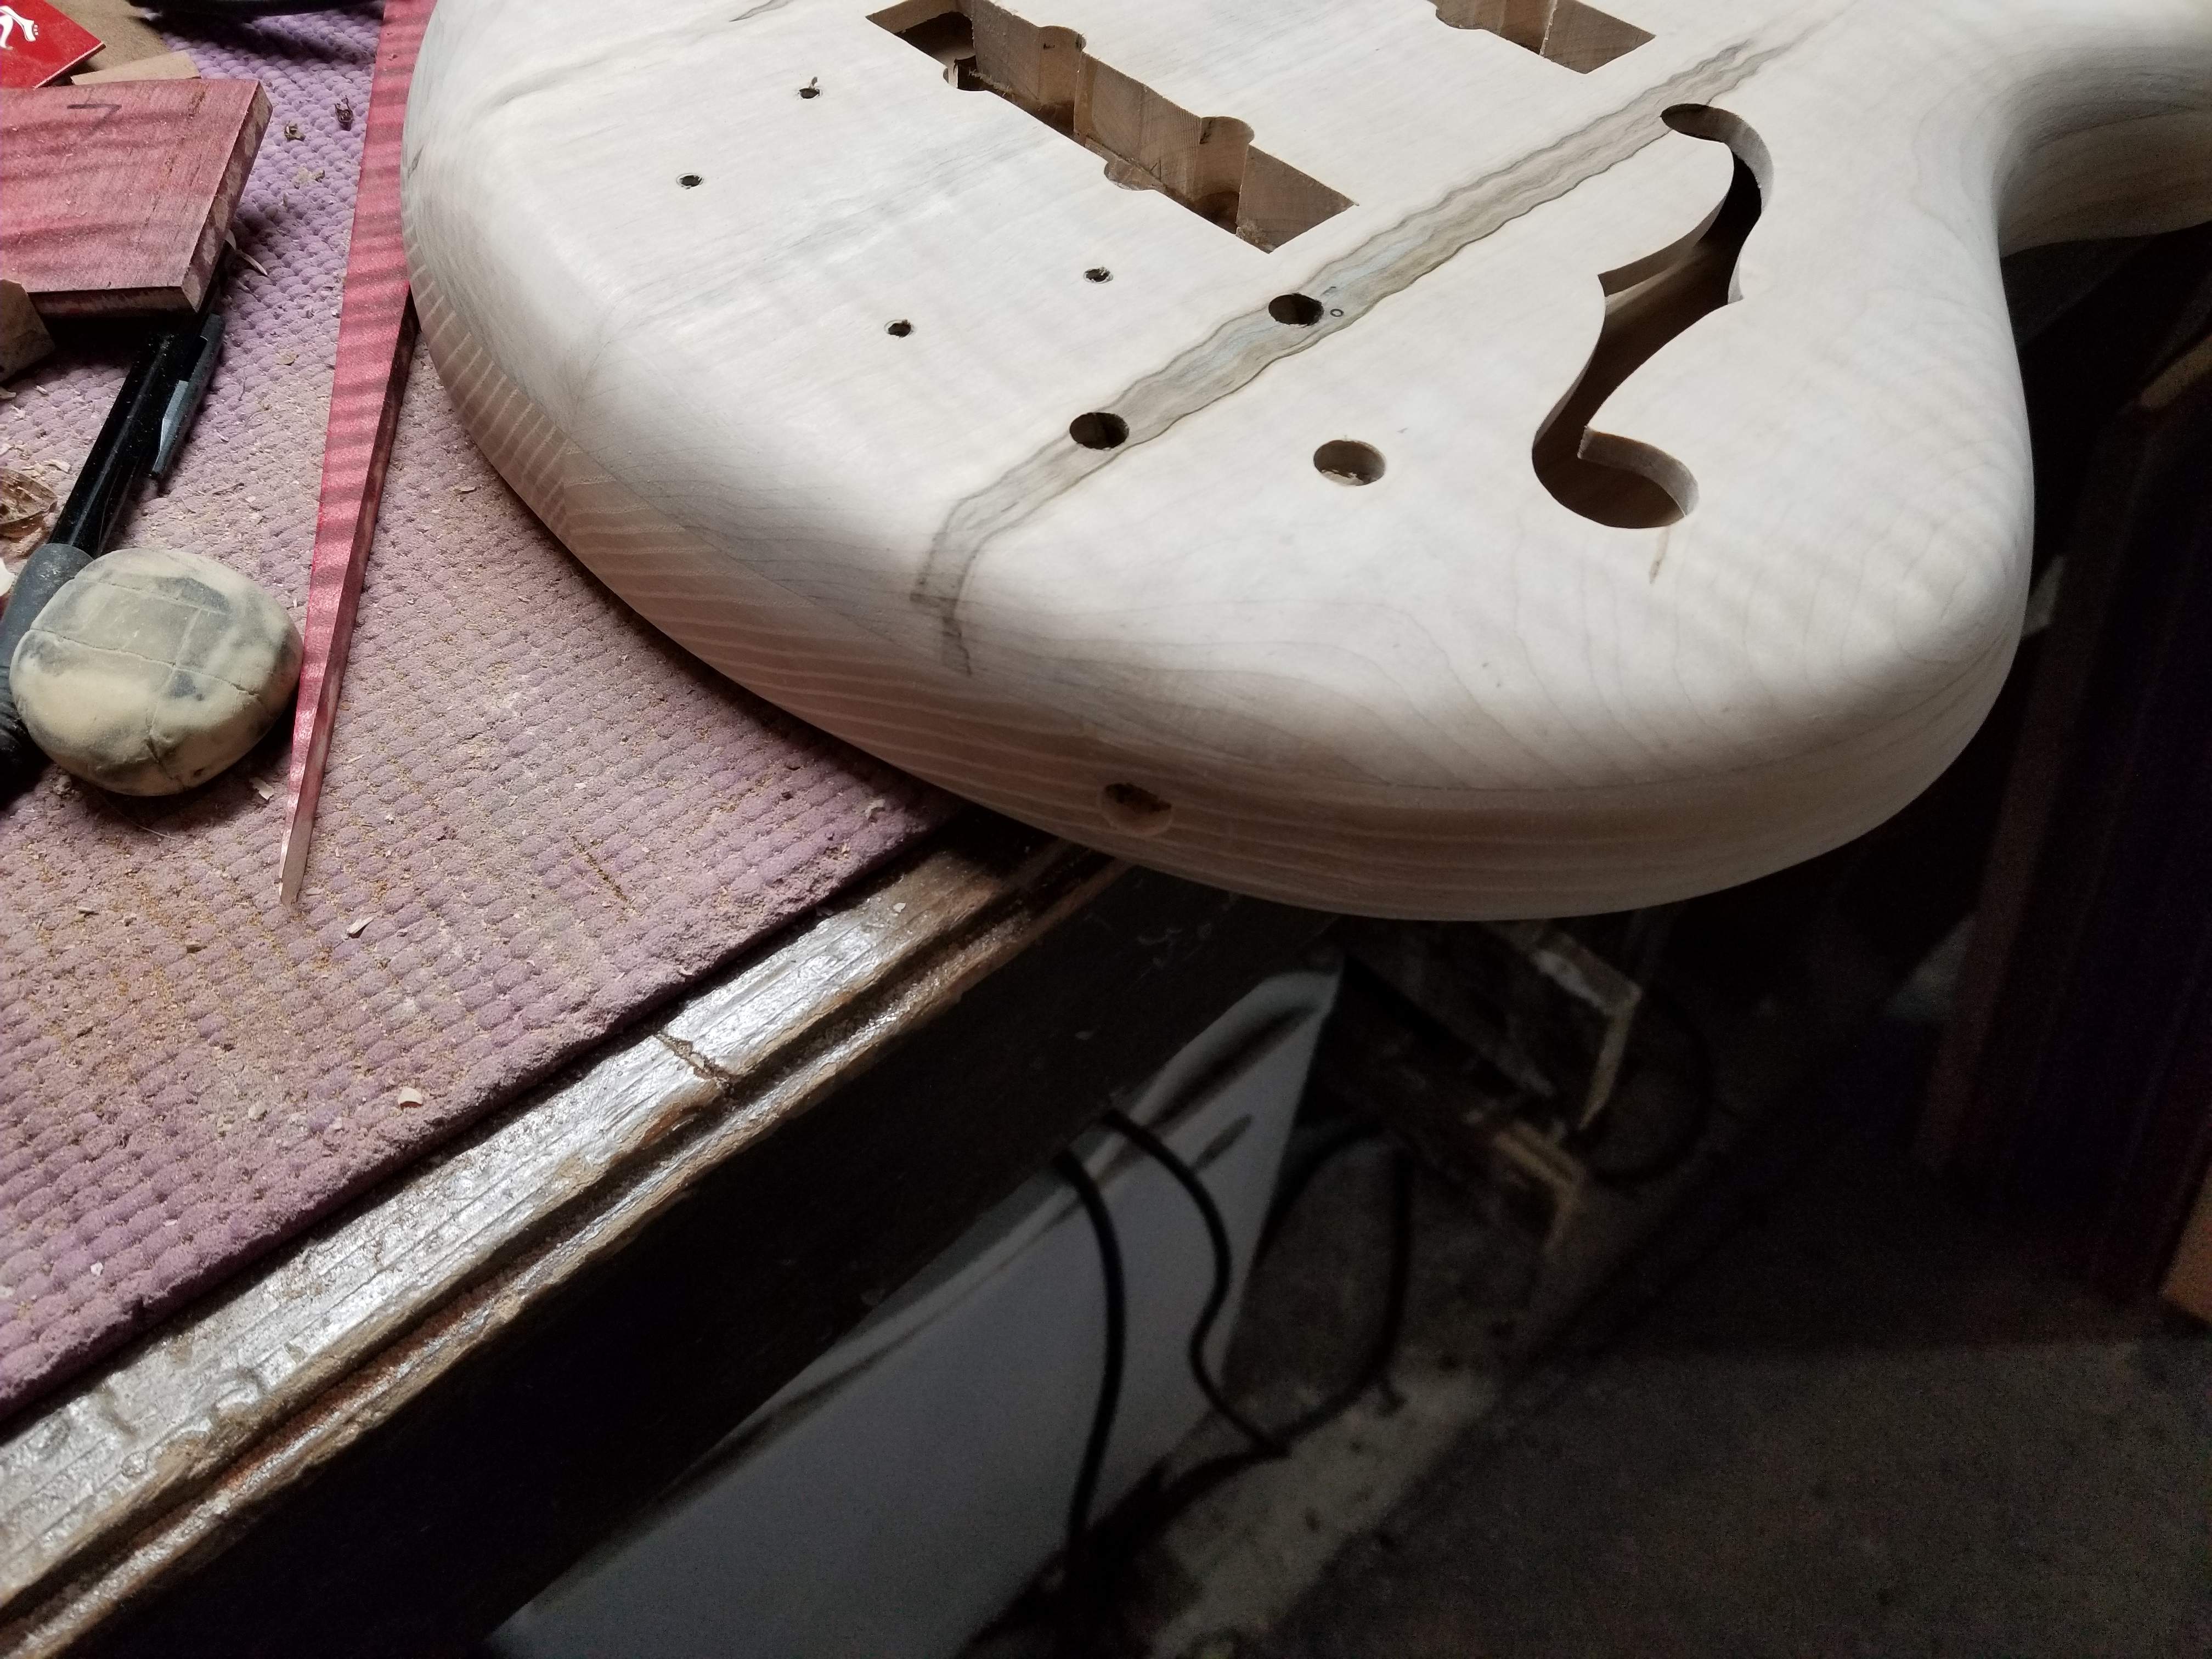
Controls and jack drilled. This looks simple, but keeping the pots out of view through the F hole and not interfering with the jack took a bit of creative work with the dremel through the control cavity opening.
20181224_075852.jpg
 
I was ready to dive right in on the prep for doing the dyeing, but I immediately saw a lot of small spots that needed more sanding. So that was the next two hours. I also put the magnets in to hold the control cavity in place (I forgot to take pics of that). In that small opening with super glue that's sticking my fingers to everything and each other and magnets that are jumping all over the place, it's quite the exercise in patience.

Then I got out the blue tape and taped off the maple. I then coated the ash with shellac. This stuff dries fast so I'll probably be able to dye it this afternoon, although I have to raise the grain on the maple, let it dry and sand it before I get actual dye. It's likely that I'll sand off most/all of this shellac. I did find some glue spots on the neck, not a big deal, I'll sand it off as necessary.

Getting this taped around the body was another exercise in patience, in my mind this was going to be easy with one piece of tape. I could use one piece for outside corners, but inside corners necessitated multiple piece to make the corners.
20181226_115700.jpg
20181226_115706.jpg

For xmas my son got me some paper to draw out designs. I transferred the drawing over to it while hanging out with my daughter before she left this morning.
20181226_115720.jpg
 

Attachments

  • 20181226_115712.jpg
    20181226_115712.jpg
    440 KB · Views: 38
I got the dye job done. Following the recipe I used in the tests, I started with amber followed quickly by black. The amber wasn't dry and I didn't sand between them. After they were dry I sanded back. I tried to sand back to the point where the body (outside of figuring) was a consistent color.
20181226_150302.jpg

Then I added a mix of red and black dye 8:1 ratio:
20181226_151414.jpg

I will admit I was pretty scared at this point, it's so brash. Then I followed with a coat of black, then another coat of the mix, then black.
20181226_152124.jpg

Feeling a bit better. At this point I let it dry a bit then removed the tape. Between the tape and the sealer on the back I got a really well defined line between the two sides. There was one spot where the tape lifted, apparently on both the sealer and the dye. It's a tight spot, so I can see how it could happen. I scraped it with a razor blade and got all the color off. This is about half way through my scraping job.
20181226_152525.jpg

As it dried it turned more pinkish, but I know from my test piece that it will go back to red once I get the finish on it. I'm pretty dang happy with how this came out.
20181226_152340.jpg
20181226_160031.jpg

And I had a failure on one of the magnet holders, so I added two more (the one in the middle won't connect to anything). I found a better spot where the glue will hold better, there wasn't much of an overhang in that center spot.

I'll let it dry overnight and start with Tru Oil in the morning.
 
I got the dye job done. Following the recipe I used in the tests, I started with amber followed quickly by black. The amber wasn't dry and I didn't sand between them. After they were dry I sanded back. I tried to sand back to the point where the body (outside of figuring) was a consistent color.
View attachment 3260821
Then I added a mix of red and black dye 8:1 ratio:
View attachment 3260832
I will admit I was pretty scared at this point, it's so brash. Then I followed with a coat of black, then another coat of the mix, then black.
View attachment 3260834
Feeling a bit better. At this point I let it dry a bit then removed the tape. Between the tape and the sealer on the back I got a really well defined line between the two sides. There was one spot where the tape lifted, apparently on both the sealer and the dye. It's a tight spot, so I can see how it could happen. I scraped it with a razor blade and got all the color off. This is about half way through my scraping job. View attachment 3260838
As it dried it turned more pinkish, but I know from my test piece that it will go back to red once I get the finish on it. I'm pretty dang happy with how this came out.
View attachment 3260845 View attachment 3260846
And I had a failure on one of the magnet holders, so I added two more (the one in the middle won't connect to anything). I found a better spot where the glue will hold better, there wasn't much of an overhang in that center spot.

I'll let it dry overnight and start with Tru Oil in the morning.
Nice job...looking great!....drool
 
  • Like
Reactions: Jisch
This is a pretty accurate representation of the color. I was going for a bit darker red than this, but it's really growing on me. I'll do one more coat tonight then do a quick sand in the morning. I will probably do a slurry sand on the back of the neck. I typically do that with ash as well, but I'm liking the way the back of the body looks right now where you can see the grain.
20181227_173326.jpg
 
This is a pretty accurate representation of the color. I was going for a bit darker red than this, but it's really growing on me. I'll do one more coat tonight then do a quick sand in the morning. I will probably do a slurry sand on the back of the neck. I typically do that with ash as well, but I'm liking the way the back of the body looks right now where you can see the grain. View attachment 3262163
Nicey....:thumbsup:
 
  • Like
Reactions: Jisch
I've been putting coats of Tru Oil on in between working on the build off bass. I sanded it flat with 400 last night and it's got two coats since then. I'll do another 3 or 4 coats then it should be ready to build. I do wish the color was a bit darker, but it's still in range.
20181229_083716.jpg


I love the look of this neck. I did a slurry coat on this and it took most of the grain out - the grain was transmitting hard through the finish. I might do another one. I will knock the shine off this and wax it up.
20181229_083734.jpg
 
I know there hasn't been many updates on this build. I've been working on it a bit in between the other one. Mainly adding coats of Tru Oil. I also finished off the neck by knocking down the shine and applying wax. It feels great, I love that neck treatment. I am satisfied with the finish on this body. I'll buff it up with anti-swirl then get to putting things together. Time is now at a premium as I'm back at work, but I'll try to get it done by the weekend.

This pic looks weird because I took it with the body upside down, then flipped it in my phone. Weird how your brain can tell that something's not right, I'm not sure what clues are in this pic, but somehow your brain knows it's not right.
20190102_083337.jpg
 
I really shouldn't have done this, but I buffed the body at lunch and while on a call I put all the pieces together. There are a myriad of problems that I'll have to deal with:
  • There's no nut, just a strip of wood
  • I'll need to put washers under the pots to put them a bit lower
  • The bass/treble pot is crooked for some reason
  • The battery is floating around in the body as are the wires, I have to figure out how to secure them
  • I need to install straplocks (I'll use the ones that go inside the body)
  • The electronics are not working correctly, I have output, but it's super low and the volume pot doesn't work at all
  • the E string needs to be shorter, due to the string length I've got the full winding wrapping around the post, can't do 3 of those wraps
but hey it's together?
20190102_135928.jpg