• TalkBass has been independent since 1998. Add your voice.
    Create a free account to reply to discussions, view embedded media, and browse with fewer display ads.
    Join freeLog in
    Want zero display ads or expanded classifieds tools? Compare plans.

Talk Bass inspired 5 String Build Semi Accoustic

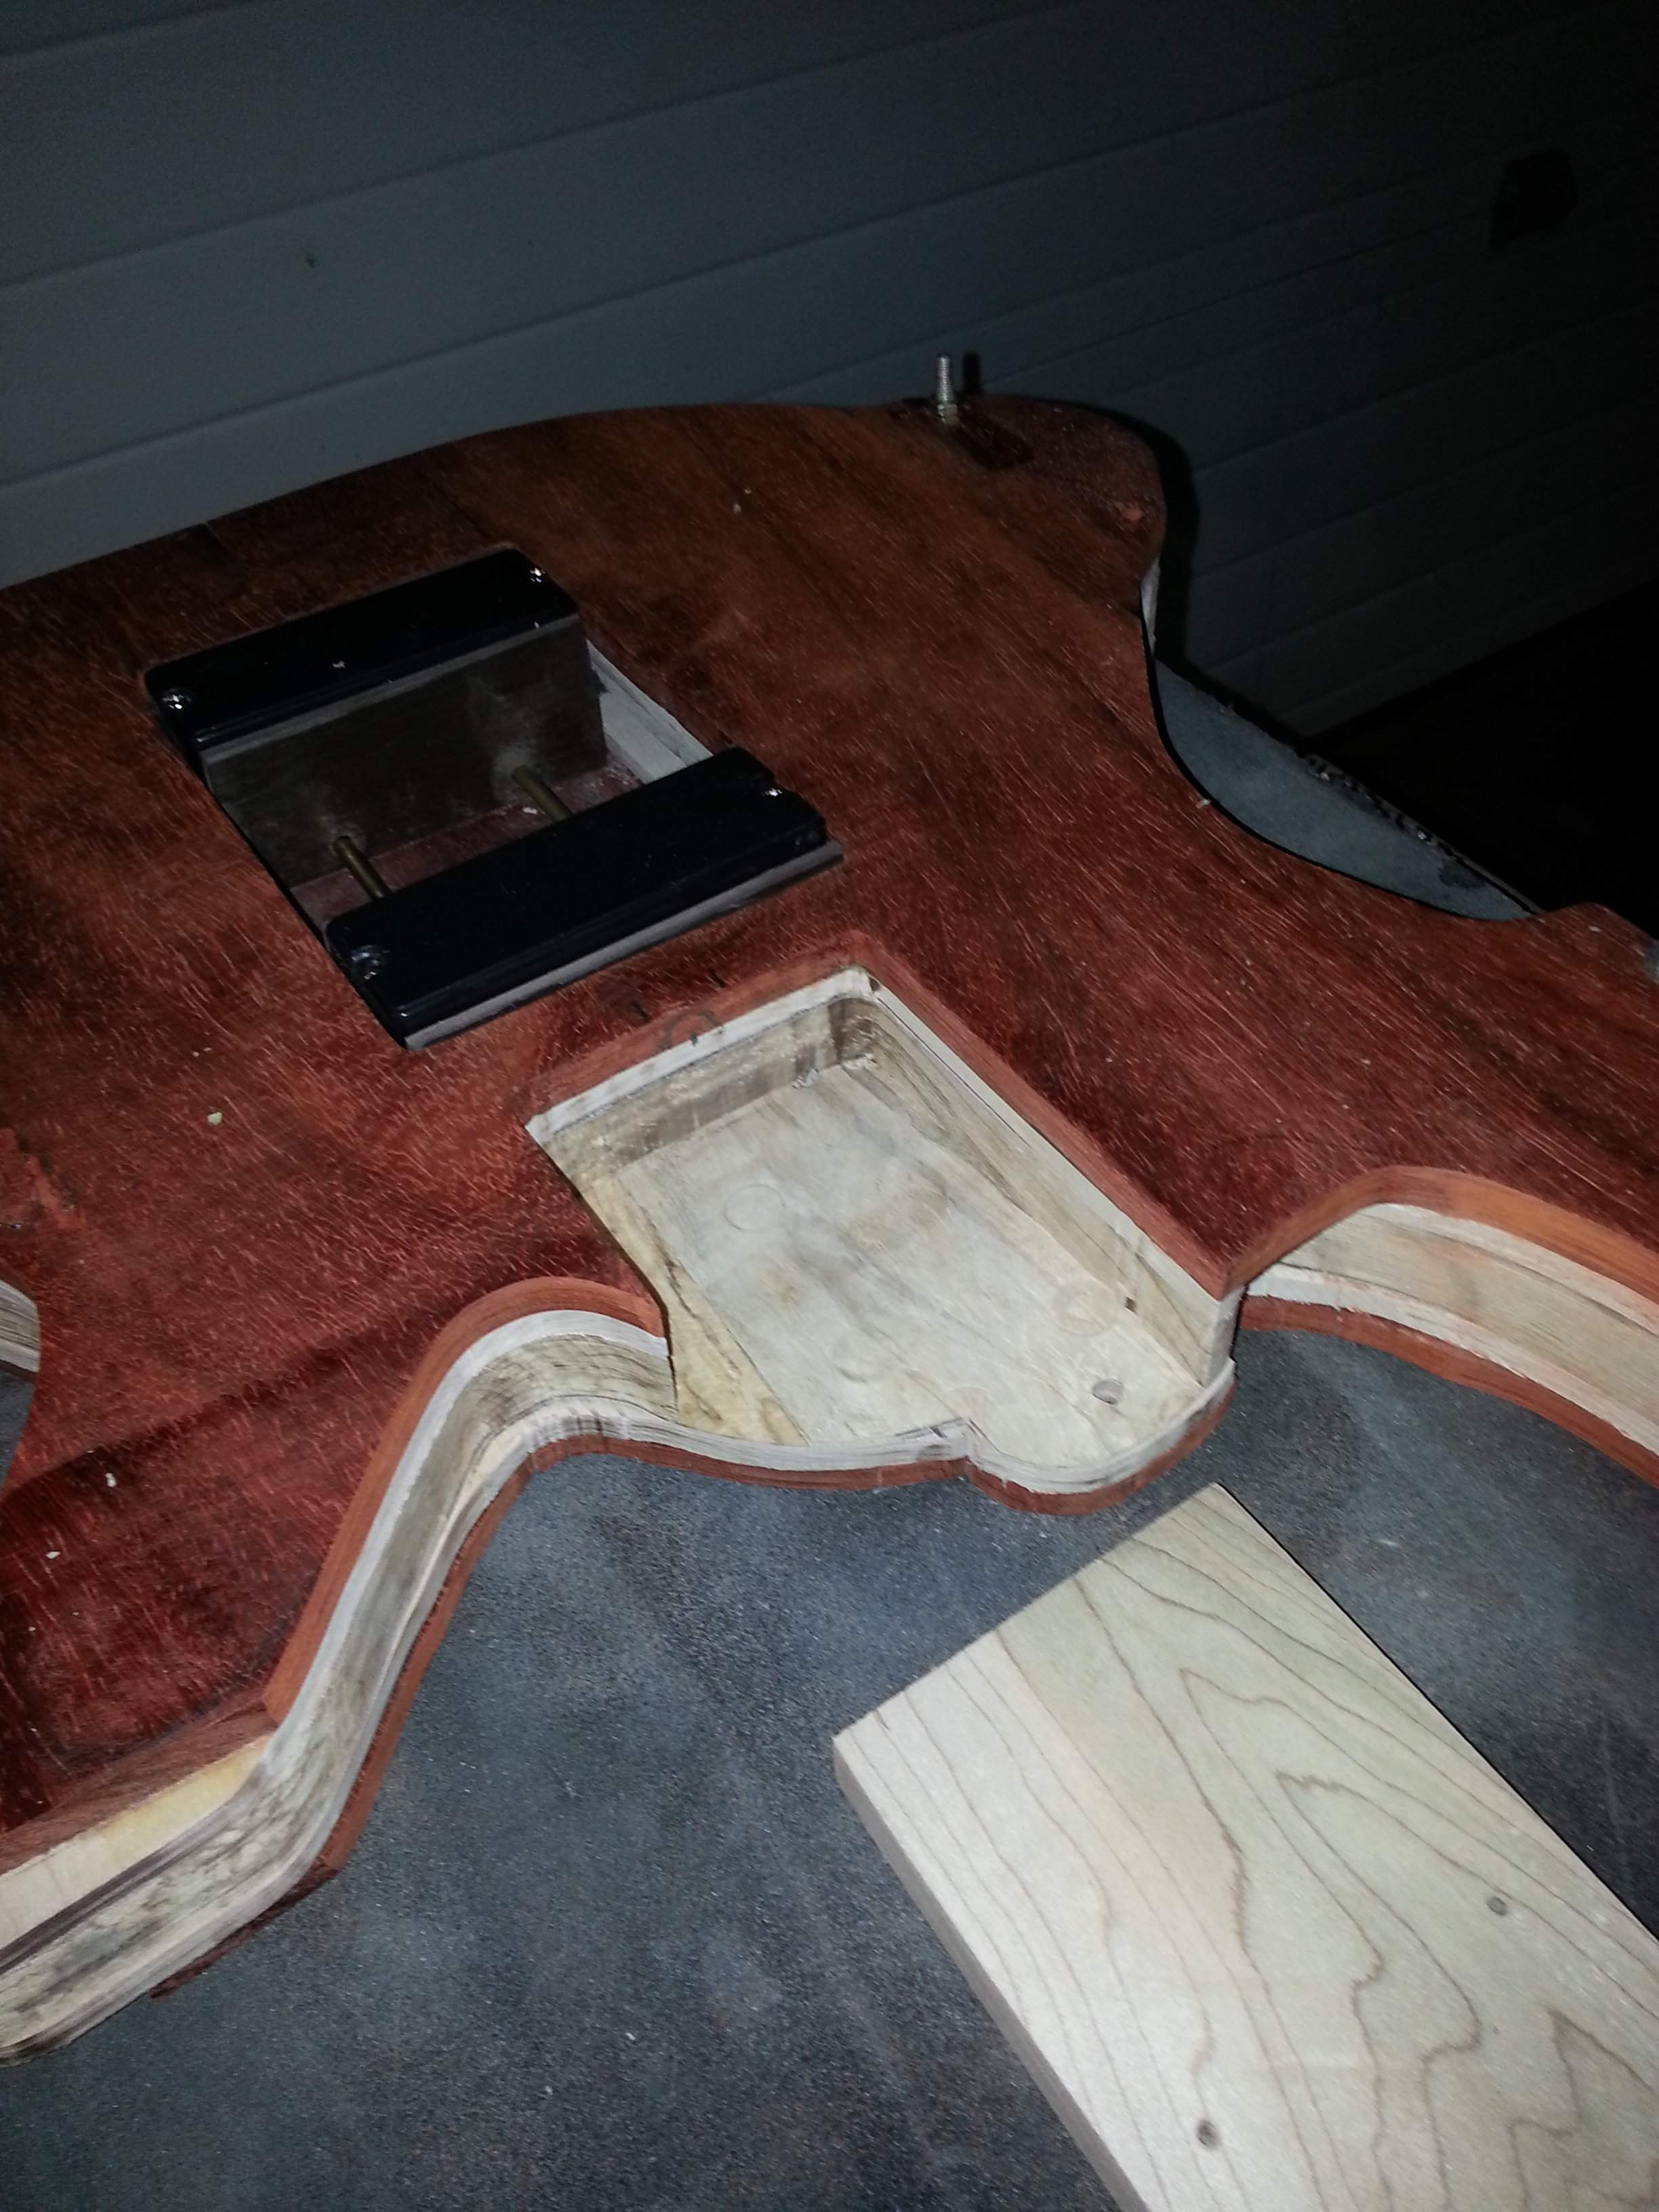
So I did a little more work today, I cut the neck pocket to depth, I am adding a heal to the neck but don't want to glue it up just yet until I have the fretboard cut.
20141108_142719.jpg


as can be seen in this photo the pups now are covered on each side to hide the foam, this material is actually plastic that I had lying around my workshop that was left over from a set of window blinds I installed in the kitchen. I will clean and polish before the final back glue up.
20141108_142803.jpg


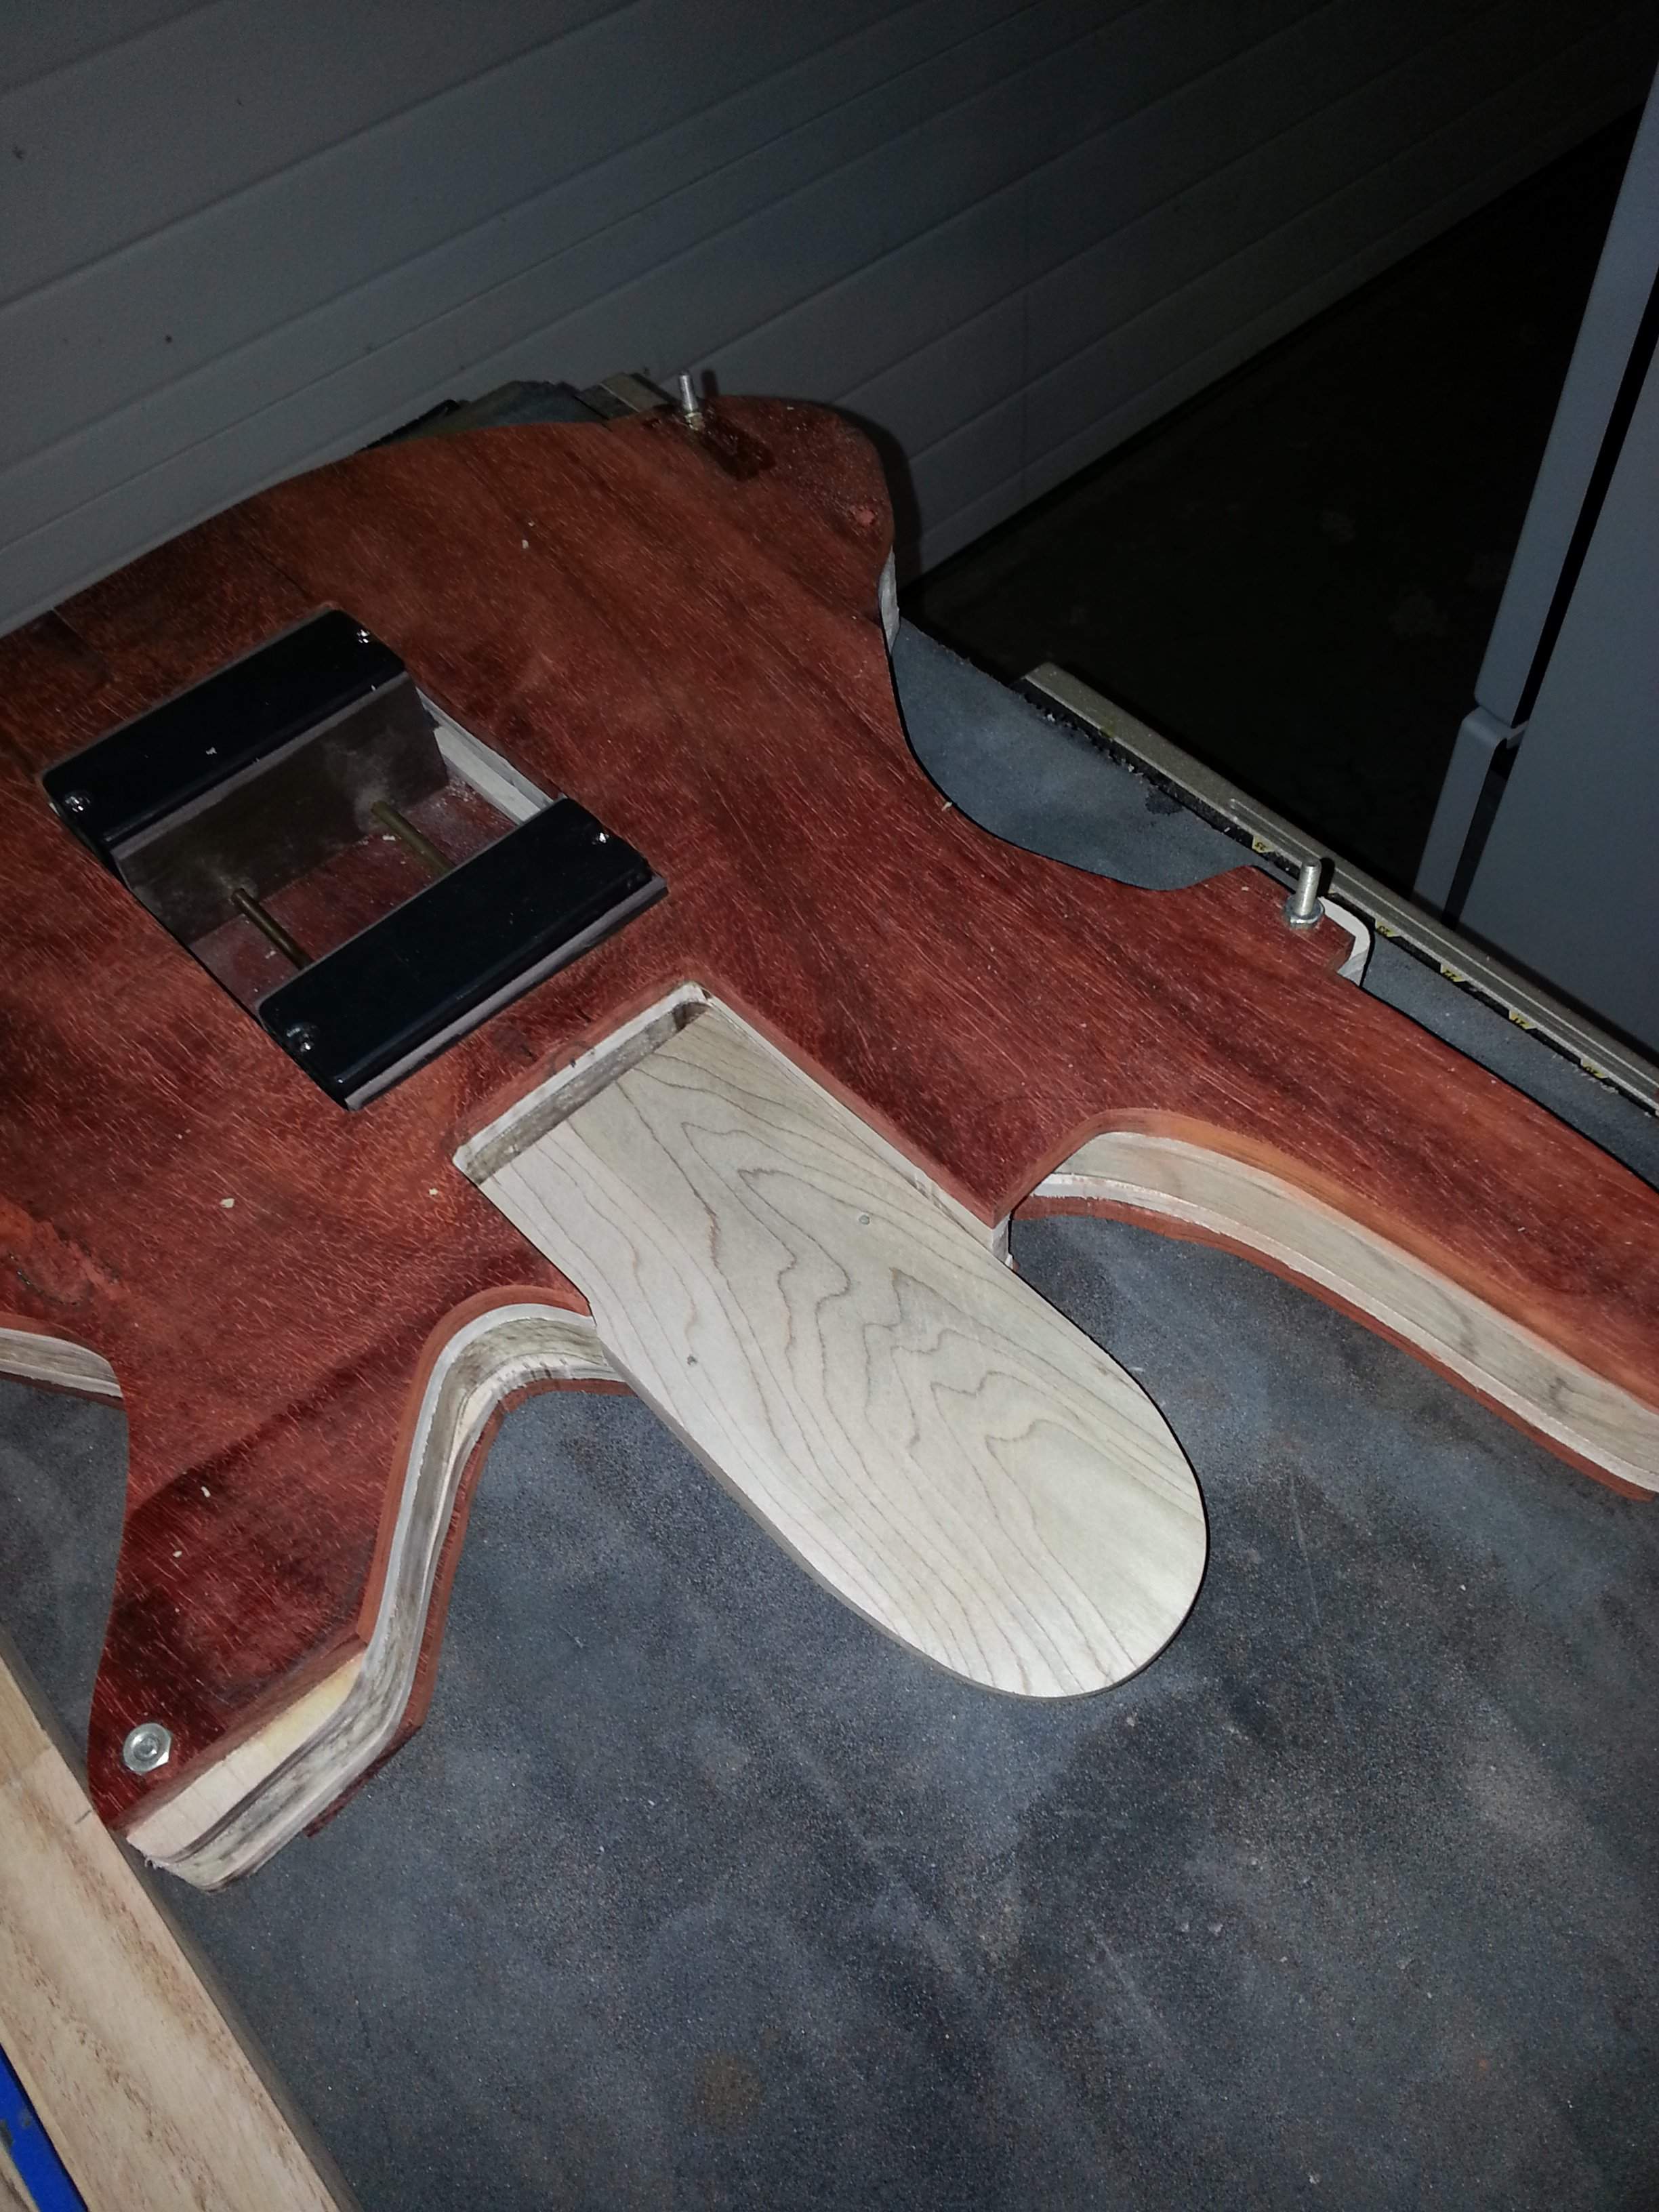
So here is the neck heel in position it will be final fit once it is glued to the neck.
20141108_142913.jpg


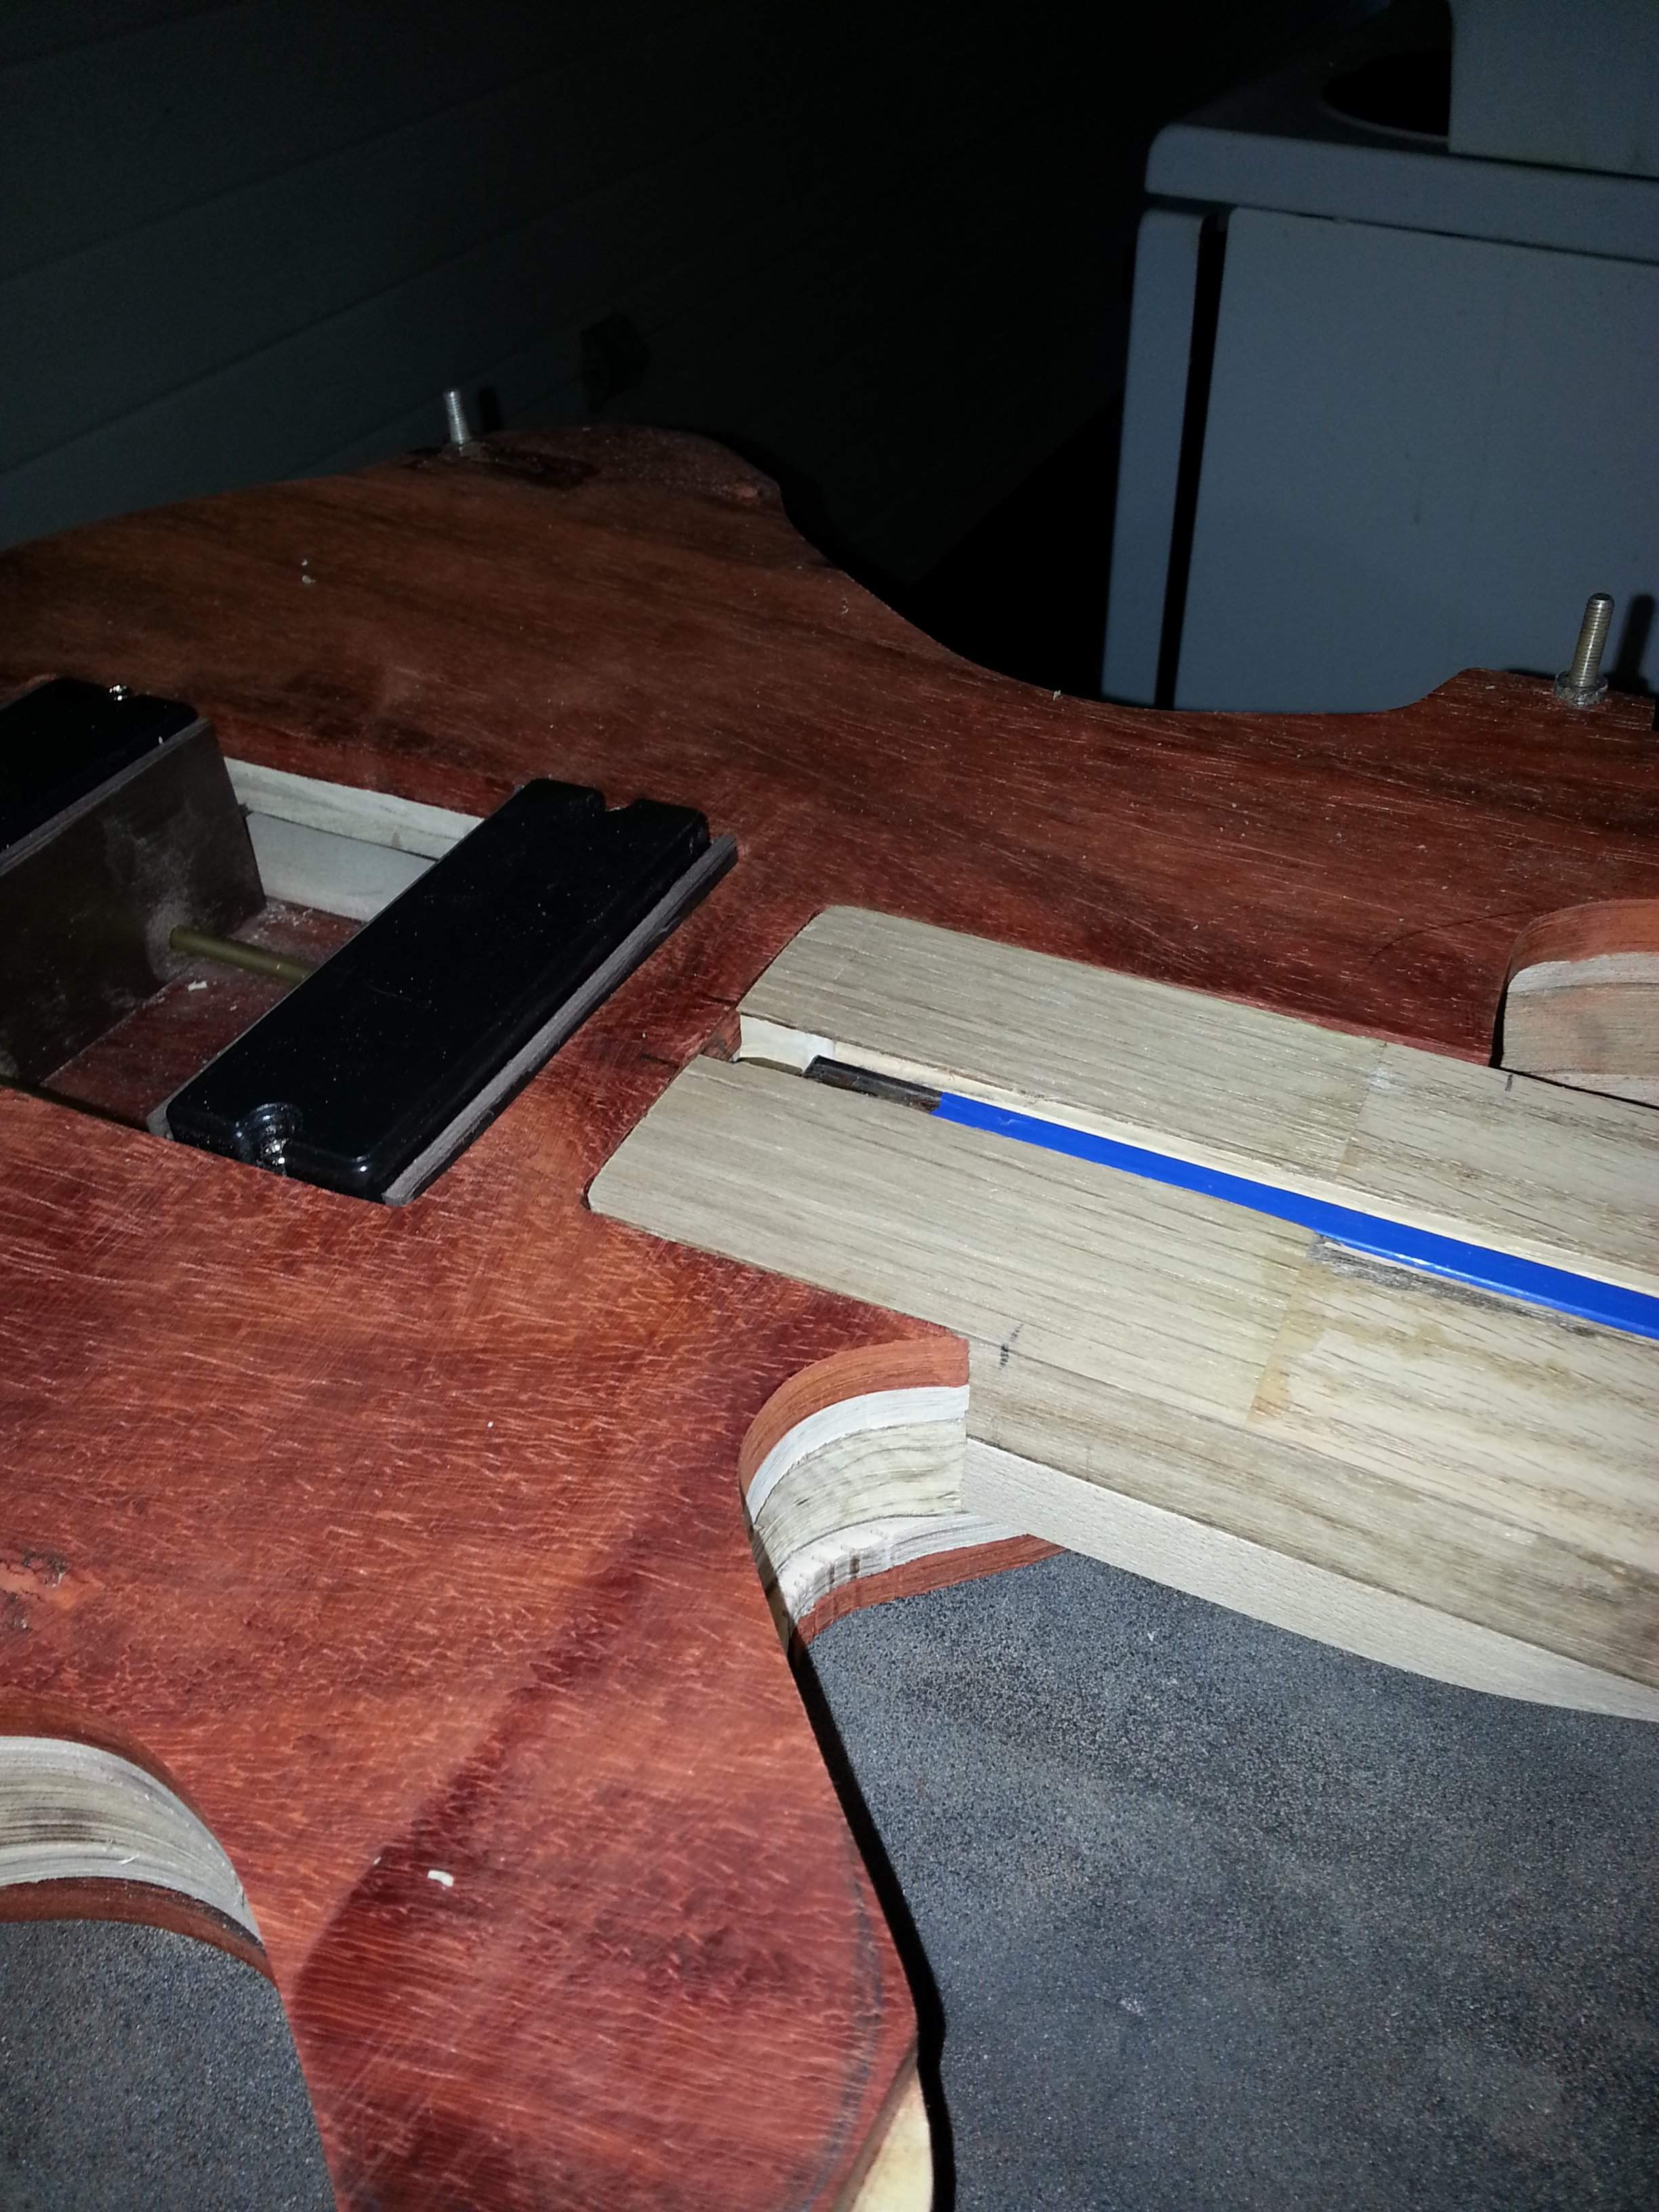
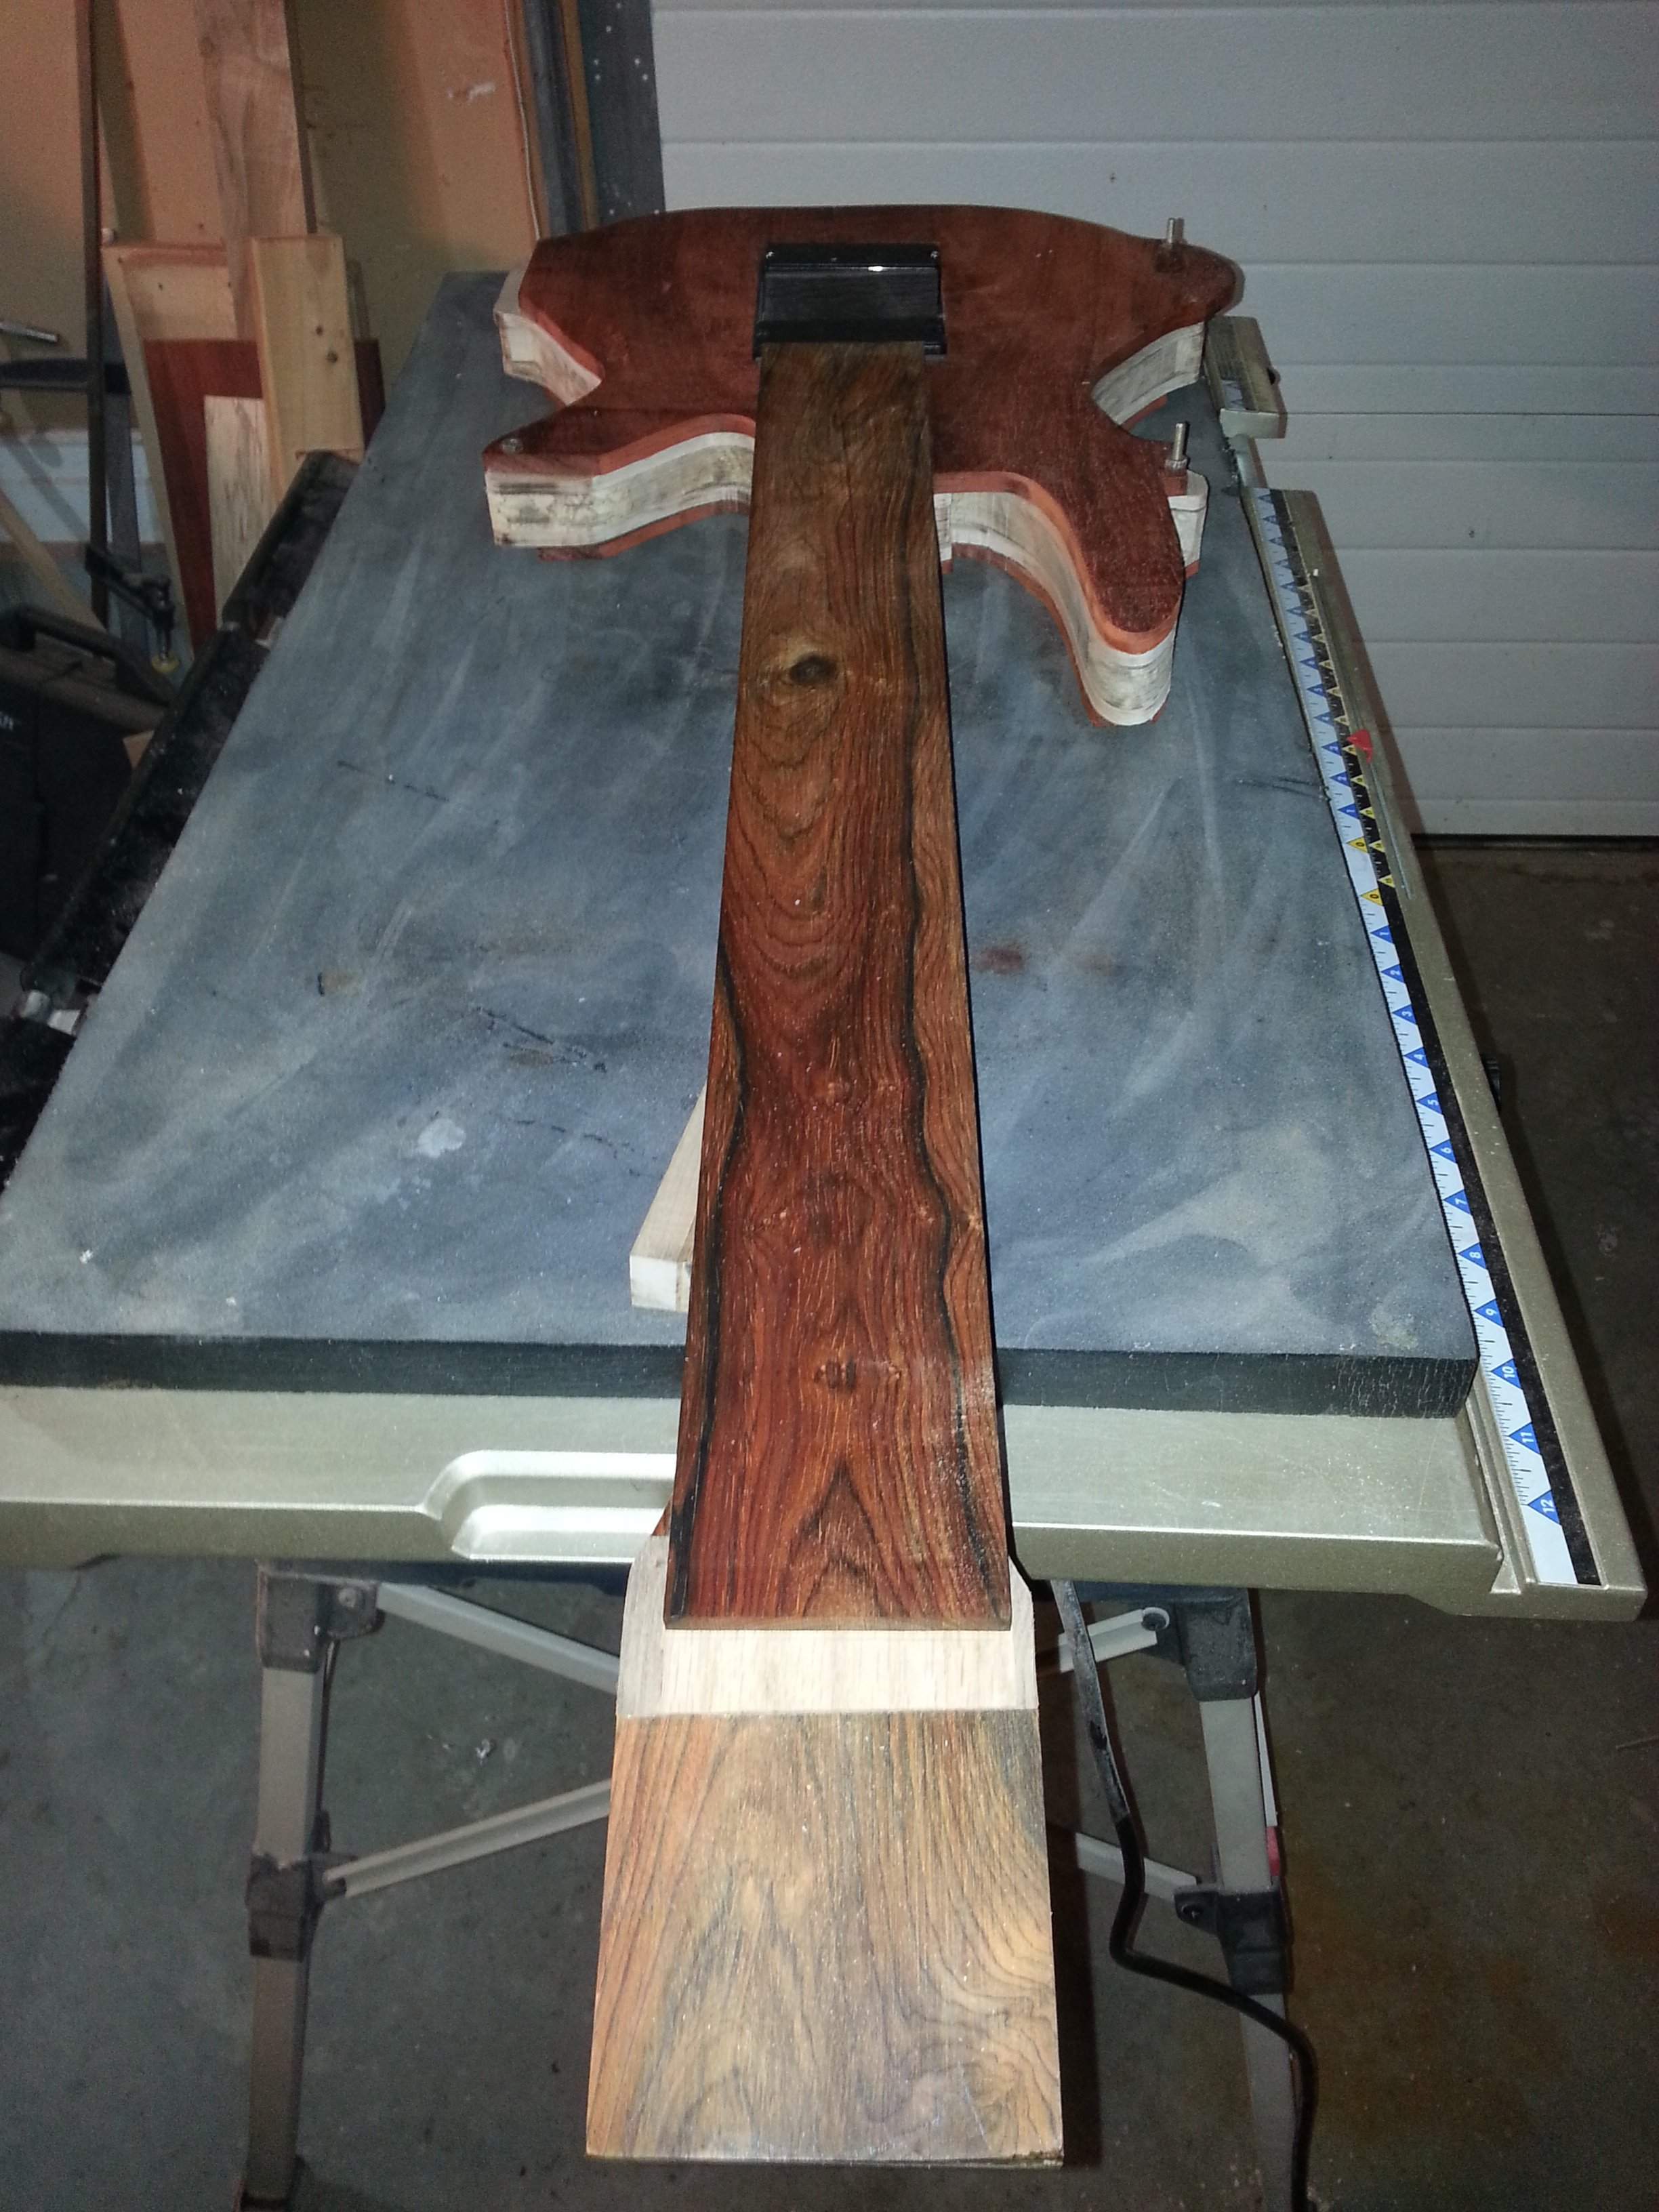
the neck sits nice and flush, so the fretboard will lay over the body as far as the pup, this should then cover the truss rod access if I mess up the drilling of the access hole which needs to take a 7mm socket.
20141108_142959.jpg


The next task is to cut the nut and fret slots and then get the fret board glued onto the neck.

 
No they are just pieces of window blind, they match the colours, and hide the foam bed that the pups sit on Ill polish them up with a little plastic polish before gluing it all together. I could have made wooden ones, but that would have been difficult taking them down to 1/16" So as this plastic was ok to the eye I used it instead.
 
So I have glued the fretboard, took the advice offered and wiped the Cocobolo down with acetone to de oil it as much as possible. Still the oil in the fretboard caused the squeeze out to go black in some areas. I didn't get a shot of the glue up but if you have seen one set of clamp ups you have seen them all.

This weekend I started to cut the taper, and carve the detail onto the end of the fretboard. I am pleased that the walnut and maple veneers are working as a reverse contrast stripe on the side of the neck, and form a good transition at the head of the fretboard.
20141206_220406.jpg
20141206_220415.jpg
20141206_220446.jpg


Also as the fretboard and the headstock top came from the same board the grain transitions perfectly.
 
Still recovering from having my first two builds stolen, but this week I decided to move forward with this build. So I have made the brass rails remove able via the neck pocket, just incase I want to change things later on. then yesterday I glued up the final layer i.e. the back.

20150101_115710.jpg


When it came out of the clamps today I removed the bolt extensions and sanded up the edges with my drill press. for the first time it is beginning to look a bit like a guitar.


20150101_141011.jpg


I signed the pickup cavity instead of the headstock

20150101_141027.jpg


20150101_141101.jpg


20150101_141124.jpg


I still have to fill in the small hole that I needed to insert the saw blade for my scroll saw, it was worth the effort though as I have a fully grain matched cover, just the magnets to add now.

20150101_143416.jpg


I still need to fully taper the neck, and install the threaded inserts that will hold the neck on.
 
Tonight I have mounted the neck inserts, and fitted the neck for the first time. It was my first time with inserts, they seem fairly easy and I am pleased with the results.

Just weighed it and the total comes to 8.6 Lbs. I am guessing that I have about 1Lb to come off yet with the neck taper and carve, as well as the body round over and carves. Then again the hardware is most likely going to add 1 Lb. Guess it will be a sit down bass. ;)

20150102_210211.jpg


Oh and that is my Christmas present its sat next to, my first bass amp in 30 ish years
 
  • Like
Reactions: reverendrally
No sooner said than done, so this weekend I started the roundoff of the front and back, I only have a 1/2" roundover bit so it hasn't come out as I wished it would, I want the white maple edge to show through on the front, so this weekend its a trip to Lee Valley to get a 3/4" roundover.

20150106_221210.jpg


Also I broke one of the edge strips off of the PU slide so I may go back to the drawing board and design a more esthetically pleasing pickup carriage.

20150106_221232.jpg


One area that I am pleased with is the control cavity cover. I took some white oak edging veneer (glue backed) and with a solder iron glued it into the saw kerf. It still needs some minor filling with Paduak dust and super glue. However the result is a cavity cover that stays in place with no magnets or screws and has to be released via a finger through the pickup cavity.

20150106_221331.jpg
20150106_221318.jpg


Once again my apologies for the poor photos, my decent camera was stolen at the same time as my guitars. As soon as the insurance pays up I will get a better camera. Oh and ive just ordered some EVO Gold fretwire, I love this fretboard to death and want to dress it really well.
 
Last edited:
So its been a while since a progress update, since the last post I have started the neck taper (still have 1/8 to remove). I have drilled the machine head and started to cut the headstock to shape. I have rough fitted the bridge, there may need to be some depth routing action is a little high. Yes I have put strings on to check the alignment looking good so far. My Evo Gold fretwire has arrived and is going to look stellar against the cocobolo.

Question is it ok to have a Zero fret on a bass? I played it with a fretwire in the nut slot (just cut as the leading edge of the nut at the moment) so it was a little like a fretless, I loved the way it felt (ive never played fretless before) so my second bass will be converted to a fretless once I figure out how to remove the fretboard.

Anyway would appreciate an answer to the Zero fret question.
 
Anyway would appreciate an answer to the Zero fret question.

It is perfectly acceptable to employ a zero fret on a bass - I have experience doing so with fretless instruments and have had great success. There is a debate in regards to the height of the zero fret in relation to the other frets on a fretted bass. Many say have the zero fret higher than the other frets, and others say keep them all the same height. Be prepared for a potentially lively discussion if you decide to proceed. ;)
 
It is perfectly acceptable to employ a zero fret on a bass - I have experience doing so with fretless instruments and have had great success. There is a debate in regards to the height of the zero fret in relation to the other frets on a fretted bass. Many say have the zero fret higher than the other frets, and others say keep them all the same height. Be prepared for a potentially lively discussion if you decide to proceed. ;)

He's wrong, he's wrong! hahaha

But seriously, I think a "zero nut" is just as easy and effective to make. It also dumps the action lower than a zero fret can... And I love a zero fret on a fretted bass.
 
I have a new camera thanks to insurance payout so I thought I would try a few shots, this is the headstock with the first trim carried out, tuners installed to get the string position sorted out. I will try the zero fret option. just need to get the Nut cut to position the strings correctly.
IMG_0034.JPG


I still have a lot of work on the headstock, the transition needs my Dremmel router to round off the curve and show the veneer stripes in a better perspective. I have saved the cut off pieces which I will reapply to the edges once another 2 veneers are applied.

The neck taper is almost complete it just needs sanding smooth.

IMG_0037.JPG


Do you think I need to cut a slot for the string guide nut? or could it be glued directly to the surface? also which would look best matching Coco Bolo or the Paduak in the photo.
 
Hi folks, its been a while since I posted any update, no photos today but I will put some up soon.
I am having a few issues with the finish and need your help/advice.
I am using Tung oil on the body, but I appear to be getting bleed through from the Paduak to the white maple layer. This is turning the pure white maple into orange, is there anyway to prevent this or reverse the process, maybe polyurethane coat on the maple until I've sealed the Paduak?
I will be grateful for any advice.
 
Full resized.JPG
So this weekend and tonight I carried out some more work on the neck. The headstock was trimmed with some cut offs to allow the pinstripe to go around the edge. I also installed the frets EVO Gold! love the colour contrast between the Gold frets and Cocobolo fretboard.

I also carried out the drill out of a half inch cut out for access to the truss rod through the pickup cavity.

I continue to experience bleed across from the Paduak into the white maple stripe, If no one has any better ideas I may need to sand it all down again and add a poly coat to the white maple to seal it, then carry out the Tung oil finish on the Paduak
 
Last edited:
So it looks like I have figured out the issue with the photos uploading so I will post some more.

So in this shot you can see the controls have been recessed, I used a spade bit on low speed the Paduak is an absolute delight to work with, it machines extremely well.

The pickup carriages have been re drilled and they now slide very smoothly.

The next time I make one like this I will leave the neck route area solid until all of the layers have been glued up. The reason that the neck heal is wider than the rest of the neck was to compensate for the fact that the bridge held the strings closer together than I had anticipated, so I made the neck blank too wide. So yes it looks weird, but this is for my use only, and I will learn from my mistake.


Full resized 4.JPG
 
So here is the back. I still have to do the neck carve and glue a veneer onto the rear of the machine head to hide the scarf joint. I still have to recess the neck screws. The control cavity is a very tight fit and most likely will just need a couple of magnets to ensure it stays in place, I am so glad that I took the effort to get my scroll saw into the small slot that I cut to enable just the kerf of the blade as the cut out, the difference was made up with some veneer edging.

Full resized 5.JPG