
I could imagine a heat gun would be tricky. I bend plastic binding using my acoustic side bending iron, which is nice because the temperature control prevents you from overheating the binding. My iron is just a length of pipe, a heating element, and a rheostat. Probably not worth it to build one just for binding, but heck, once you have one, you can go make an acoustic guitar too!

Enjoy the benefits of a premium membership!
Upgrade Account
-
TalkBass has been independent since 1998. Add your voice.
Create a free account to reply to discussions, view embedded media, and browse with fewer display ads.
Join free Log in
Want zero display ads or expanded classifieds tools? Compare plans.
You are using an out of date browser. It may not display this or other websites correctly.
You should upgrade or use an alternative browser.
You should upgrade or use an alternative browser.
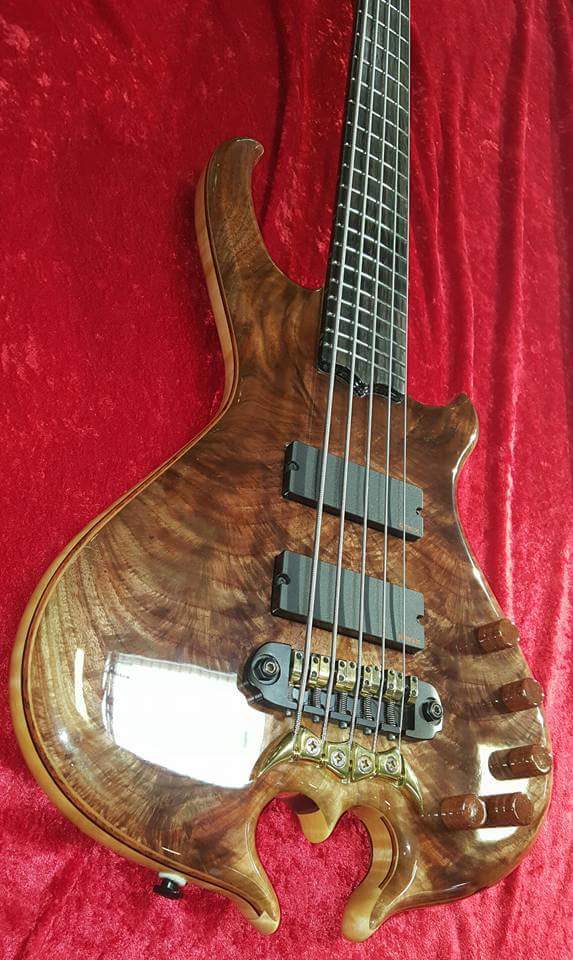
The Hossenfeffer III Build
- Thread starter Gilmourisgod
- Start date
More options
Who Replied?

Paging @Christopher DBG formerly known as smithcreek and knowing a thing or 17 about building mandolins...Just a Wagner heat gun on Low setting, held around 4" away from the binding. it's really hard to judge the timing on the heat, like I said, a couple extra seconds too much and it's toast. I've seen people do it with hot water too. Any binding technique suggestions appreciated. I've seen radii this tight on mandolins, so somebody must know how to do it better, nothing useful on YT that I found anyway.
And here's a use for my hot air rework soldering station! It purports to have 1 degree control, though I can't say I've checked it with an outside standard thermometer. But variable temperature variable air volume over a pretty wide range...could be useful?
As the person possibly to blame for option 2.22, I'm delighted to see you going for it, even though it's somewhat frustrating.
Last edited:

Rôckhewer
Commercial User
- Feb 28, 2015
- 2,922
- 9,029
- Disclosures
- Owner/Builder- RockHewer Custom Guitars LLC
Good golly that thing is gorgeous 
Here's what I came up with.
I ran an initial 5/8" radius around the whole body.
The only areas that stay that radius... AND... retain any "flat" edge?...are the horns, and the interior of the heart omega.
Everything else has various degrees of radii.
So I decided to buy one of these...

I ran that from about the middle of the "waist" all the way around the lower bout until right before the flair of the heart omega...then blended in and enlarged the initial top 5/8" radius with a Shinto... as needed.
The forearm bevel area is actually more than a full roundover... it's fairly egg shaped.
The control side of the lower bout... not so much

I've never held one in my hands.. but from all the pictures I studied when I built both my BalK copies.I think the original Balance K bodies are more like 5/8-3/4" roundover,
Here's what I came up with.
I ran an initial 5/8" radius around the whole body.
The only areas that stay that radius... AND... retain any "flat" edge?...are the horns, and the interior of the heart omega.
Everything else has various degrees of radii.
So I decided to buy one of these...
I ran that from about the middle of the "waist" all the way around the lower bout until right before the flair of the heart omega...then blended in and enlarged the initial top 5/8" radius with a Shinto... as needed.
The forearm bevel area is actually more than a full roundover... it's fairly egg shaped.
The control side of the lower bout... not so much
Last edited:

The binding is looking good. I feel your pain with heating too far, etc. It's a balancing act for sure.
One thing that I have found is that the rubber sleeves from my oscillating spindle sander make excellent clamping cauls for binding on inside curves.
One thing that I have found is that the rubber sleeves from my oscillating spindle sander make excellent clamping cauls for binding on inside curves.

Hey @Rôckhewer , did you get away with running the router bit around the inside of the heart omega? I keep picturing the pointy bit flying off into space. Lots of light passes and prayer?
Rôckhewer
Commercial User
- Feb 28, 2015
- 2,922
- 9,029
- Disclosures
- Owner/Builder- RockHewer Custom Guitars LLC
The pointy bit in the middle wasn't much of a worry.Hey @Rôckhewer , did you get away with running the router bit around the inside of the heart omega? I keep picturing the pointy bit flying off into space. Lots of light passes and prayer?
One pass... climbing cut.
The protruding bits however... I did not run a router around those. Too sketchy for me.

I shaped them by hand.
Yeah, that sounds about right, I should be able to blend those by hand if I take my time. Just ordered an MLSC 5/8" roundover bit with 1/2" shank, all the elbow relief and belly carve will be either by hand or maybe a disc sander. I had a thought on using the zip ties with less damage, maybe a piece of surgical tubing or heat shrink wrap? I tried making a slightly tapered dowel, but its really hard to get even pressure on the binding all around an inside radius. Just noticed the little figures indicating Go and No Go on the photo, nice demented little touchThe pointy bit in the middle wasn't much of a worry.
One pass... climbing cut.
The protruding bits however... I did not run a router around those. Too sketchy for me.
I shaped them by hand.
View attachment 4480713
 .
.
Rôckhewer
Commercial User
- Feb 28, 2015
- 2,922
- 9,029
- Disclosures
- Owner/Builder- RockHewer Custom Guitars LLC
I just zoomed in on your omega layout.
Your center pointy bit is way longer than mine.
Looks cool... but I would be scared of that too.

Your center pointy bit is way longer than mine.
Looks cool... but I would be scared of that too.

turindev
Commercial User
- Jul 1, 2005
- 514
- 1,594
- Disclosures
- Builder, m7bassworks.com
Please shoot me if I ever attempt to bind a radius this tight again. This was HOURS of work to get half of it done, and far from perfect.
I prefer .060" binding because it's a lot more forgiving, easier to miter, etc., but there was no way binding that thick would bend to these radii, so .040" it is. It's finicky stuff, the difference between "hot enough to bend" and "hot enough to irreparably distort" is about 1 degree, apparently. I got it close to my final radius by bending around a 5/8" dowel, which ended up being a hair TOO tight, it didn't spring back as much as I expected. 9/16" would have been perfect, but I couldn't find any dowel stock in that diameter. I drove a screw into the waste end to have something to work against.
View attachment 4480192
Heated and pre-bent the rest of it..
View attachment 4480193
And went to town on it. The outside edge was easy, the tight radius Heart Omega.... not so much
View attachment 4480194
I had used zip-ties before on the F-Hole, and it worked pretty well, but what I didn't reckon on was that getting them tight enough to hold was also tight enough to do a little damage. The zip ties kind of dented the binding, so I may have to do a little trowel-in with more binding dissolved to paste in acetone, we'll see how it looks after it's scraped and sanded flush.
View attachment 4480195
View attachment 4480196
I think on the other side, I'll pad the zip ties with a few layers of tape, hopefully that will minimize any denting.
I did the initial body edge roundovers with a 1/2" bit, but I think the original Balance K bodies are more like 5/8-3/4" roundover, guess I'll have to buy a bigger bit. I can't cut out the Heart Omega at the heel until the body wings are glued on, and I want to do the bulk of the neck carve before that, so it may be a couple weeks before I glue the body wings on.
View attachment 4480197
View attachment 4480198
Just had to stop by to say.... This thing is looking gorgeous!
I’ll give the long pointy bit a try, I can always cut it back a little shorter if it goes awry on me. Definitely doing that part by hand. Hope to get some build time in over the long weekend. Happy T-Day, All.
Binding Boy, Part 2:
The damage from the zip ties was limited to the part that got scraped away flush, so I dodged a bullet there. I had a couple tiny voids I had to spooge in with dissolved binding paste, but overall came out pretty clean. To play it safe on the other half, I used some shrink wrap around the ties to cushion it a little, seems to have worked. I much prefer just tape, but couldn't get enough force into it to hold these curves. I ran out of my Stewmac binding tape and just used fiberglass strapping tape, which seemed to work as well or better.
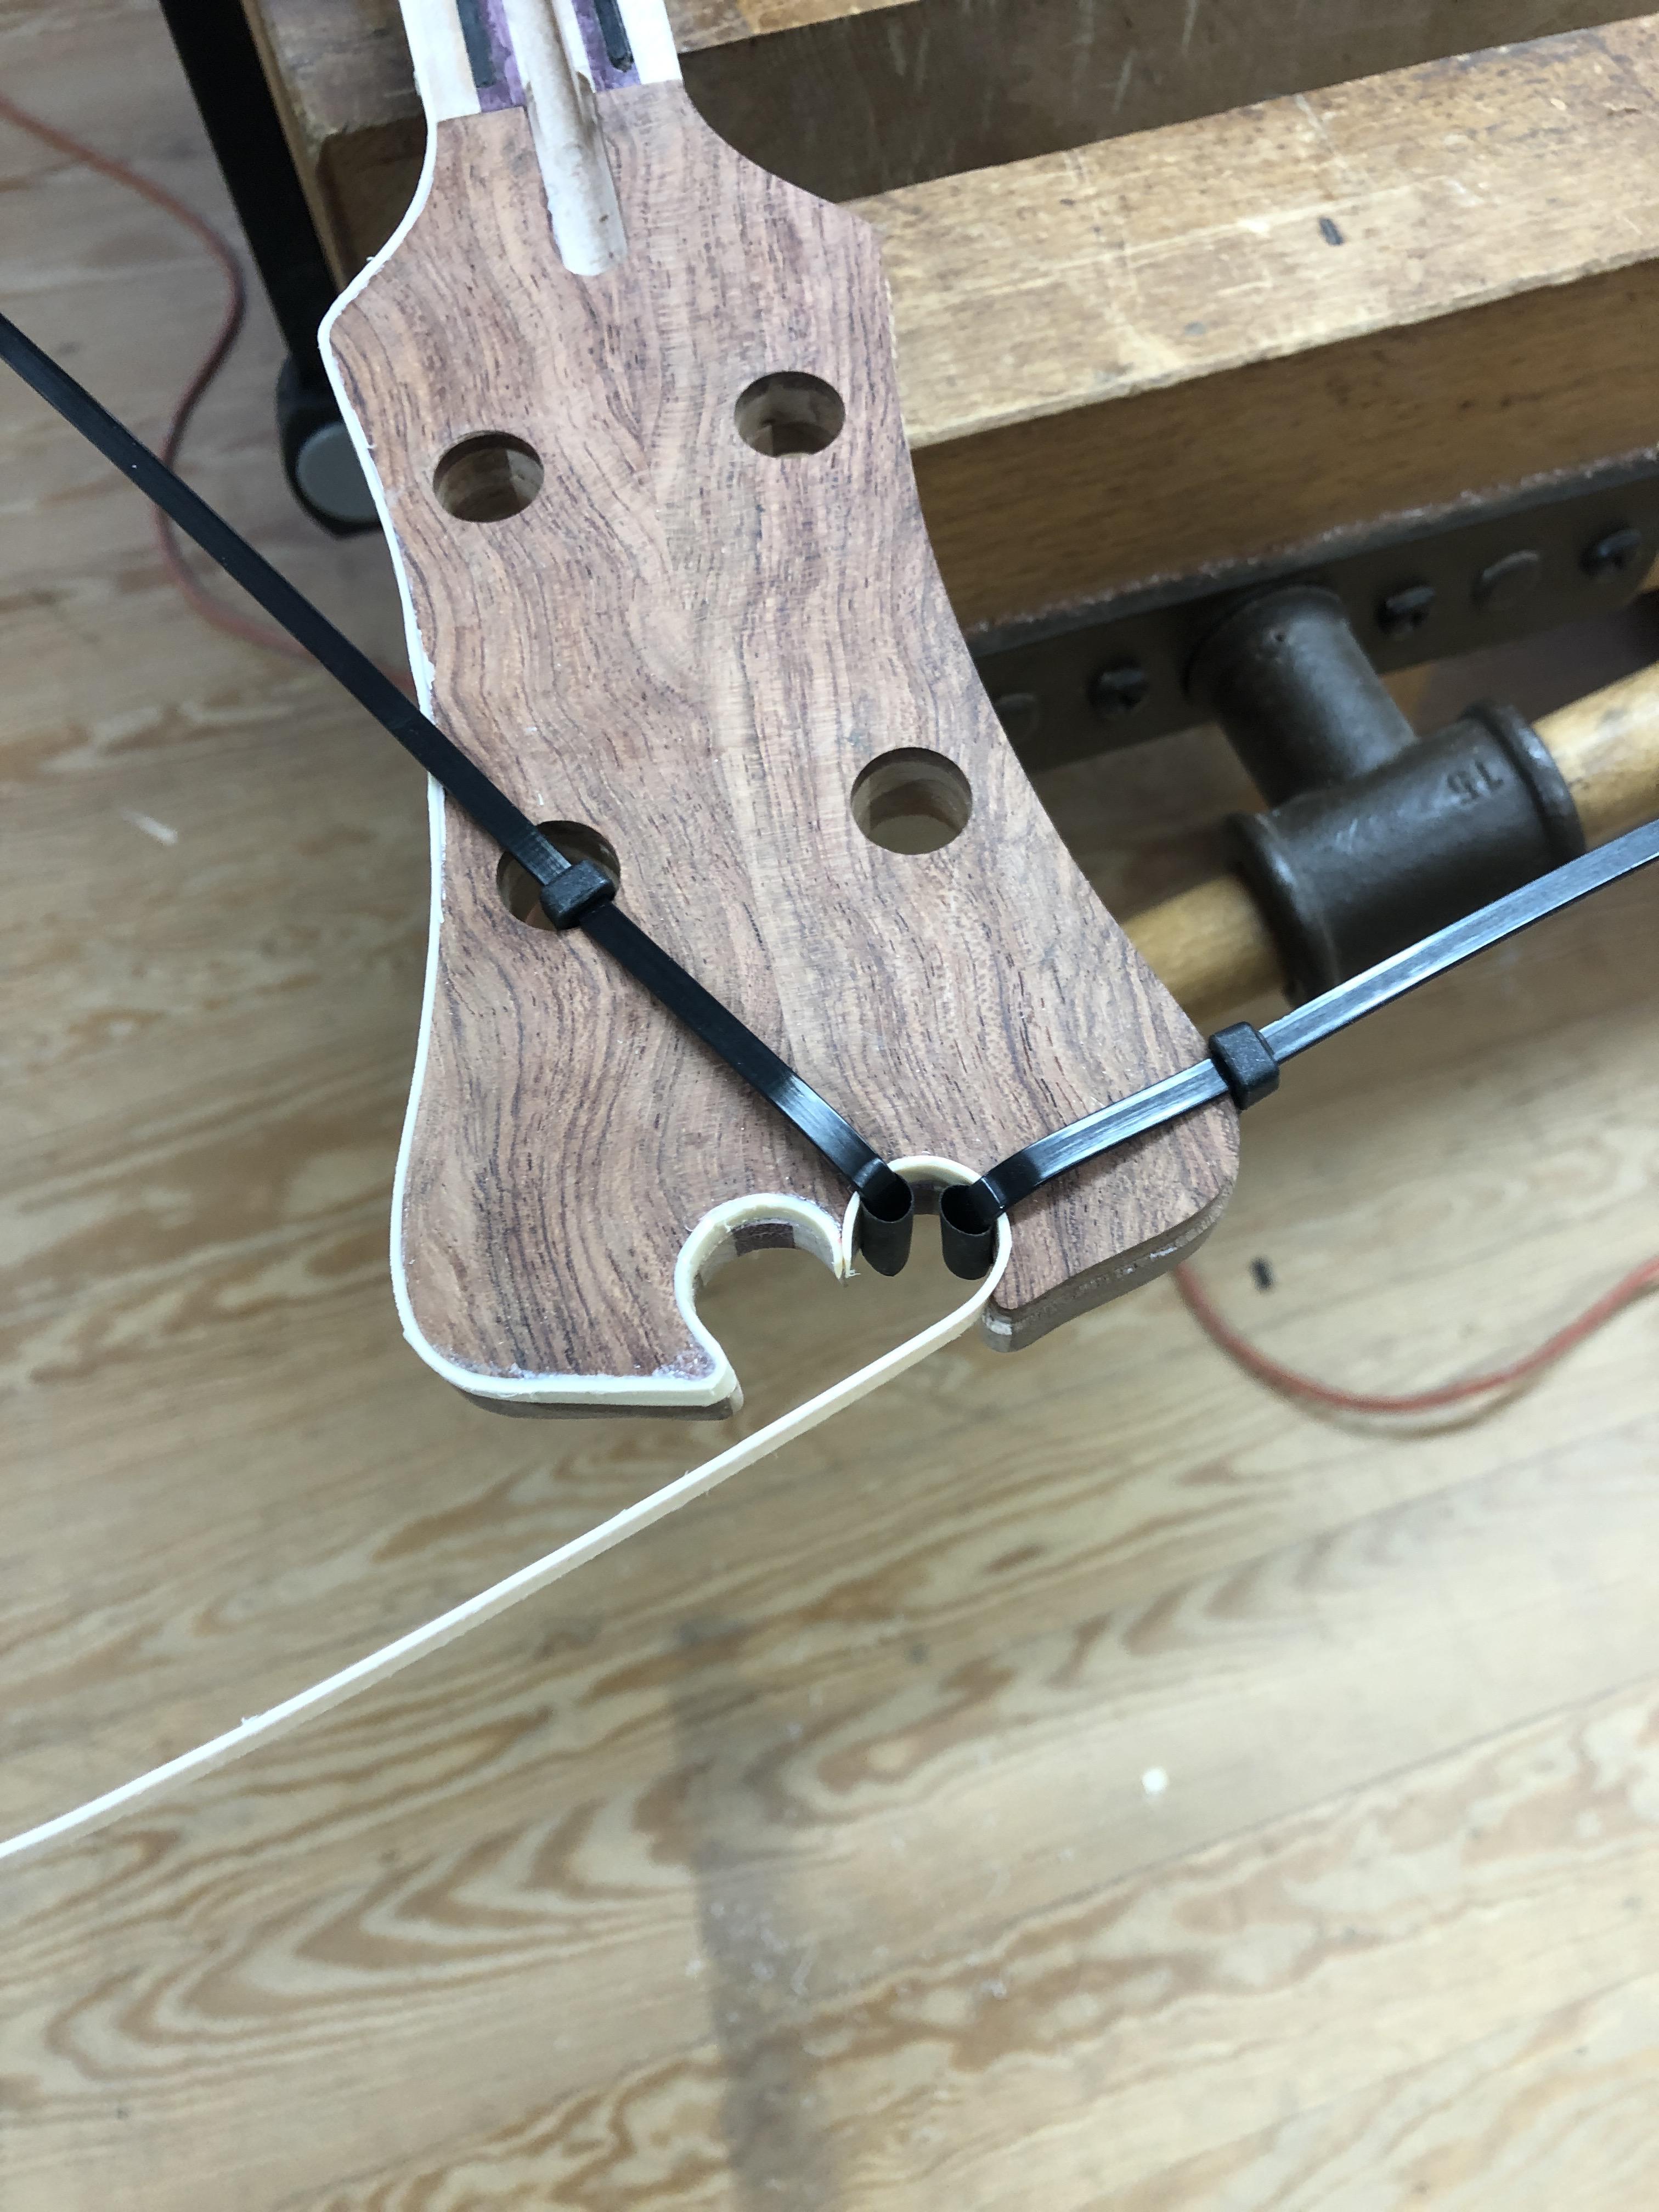

Another binding job...survived. I'll probably never bind something this tight again, that was pretty nerve wracking. Still a lot of scraping and sanding to clean it up, but the worst is done.
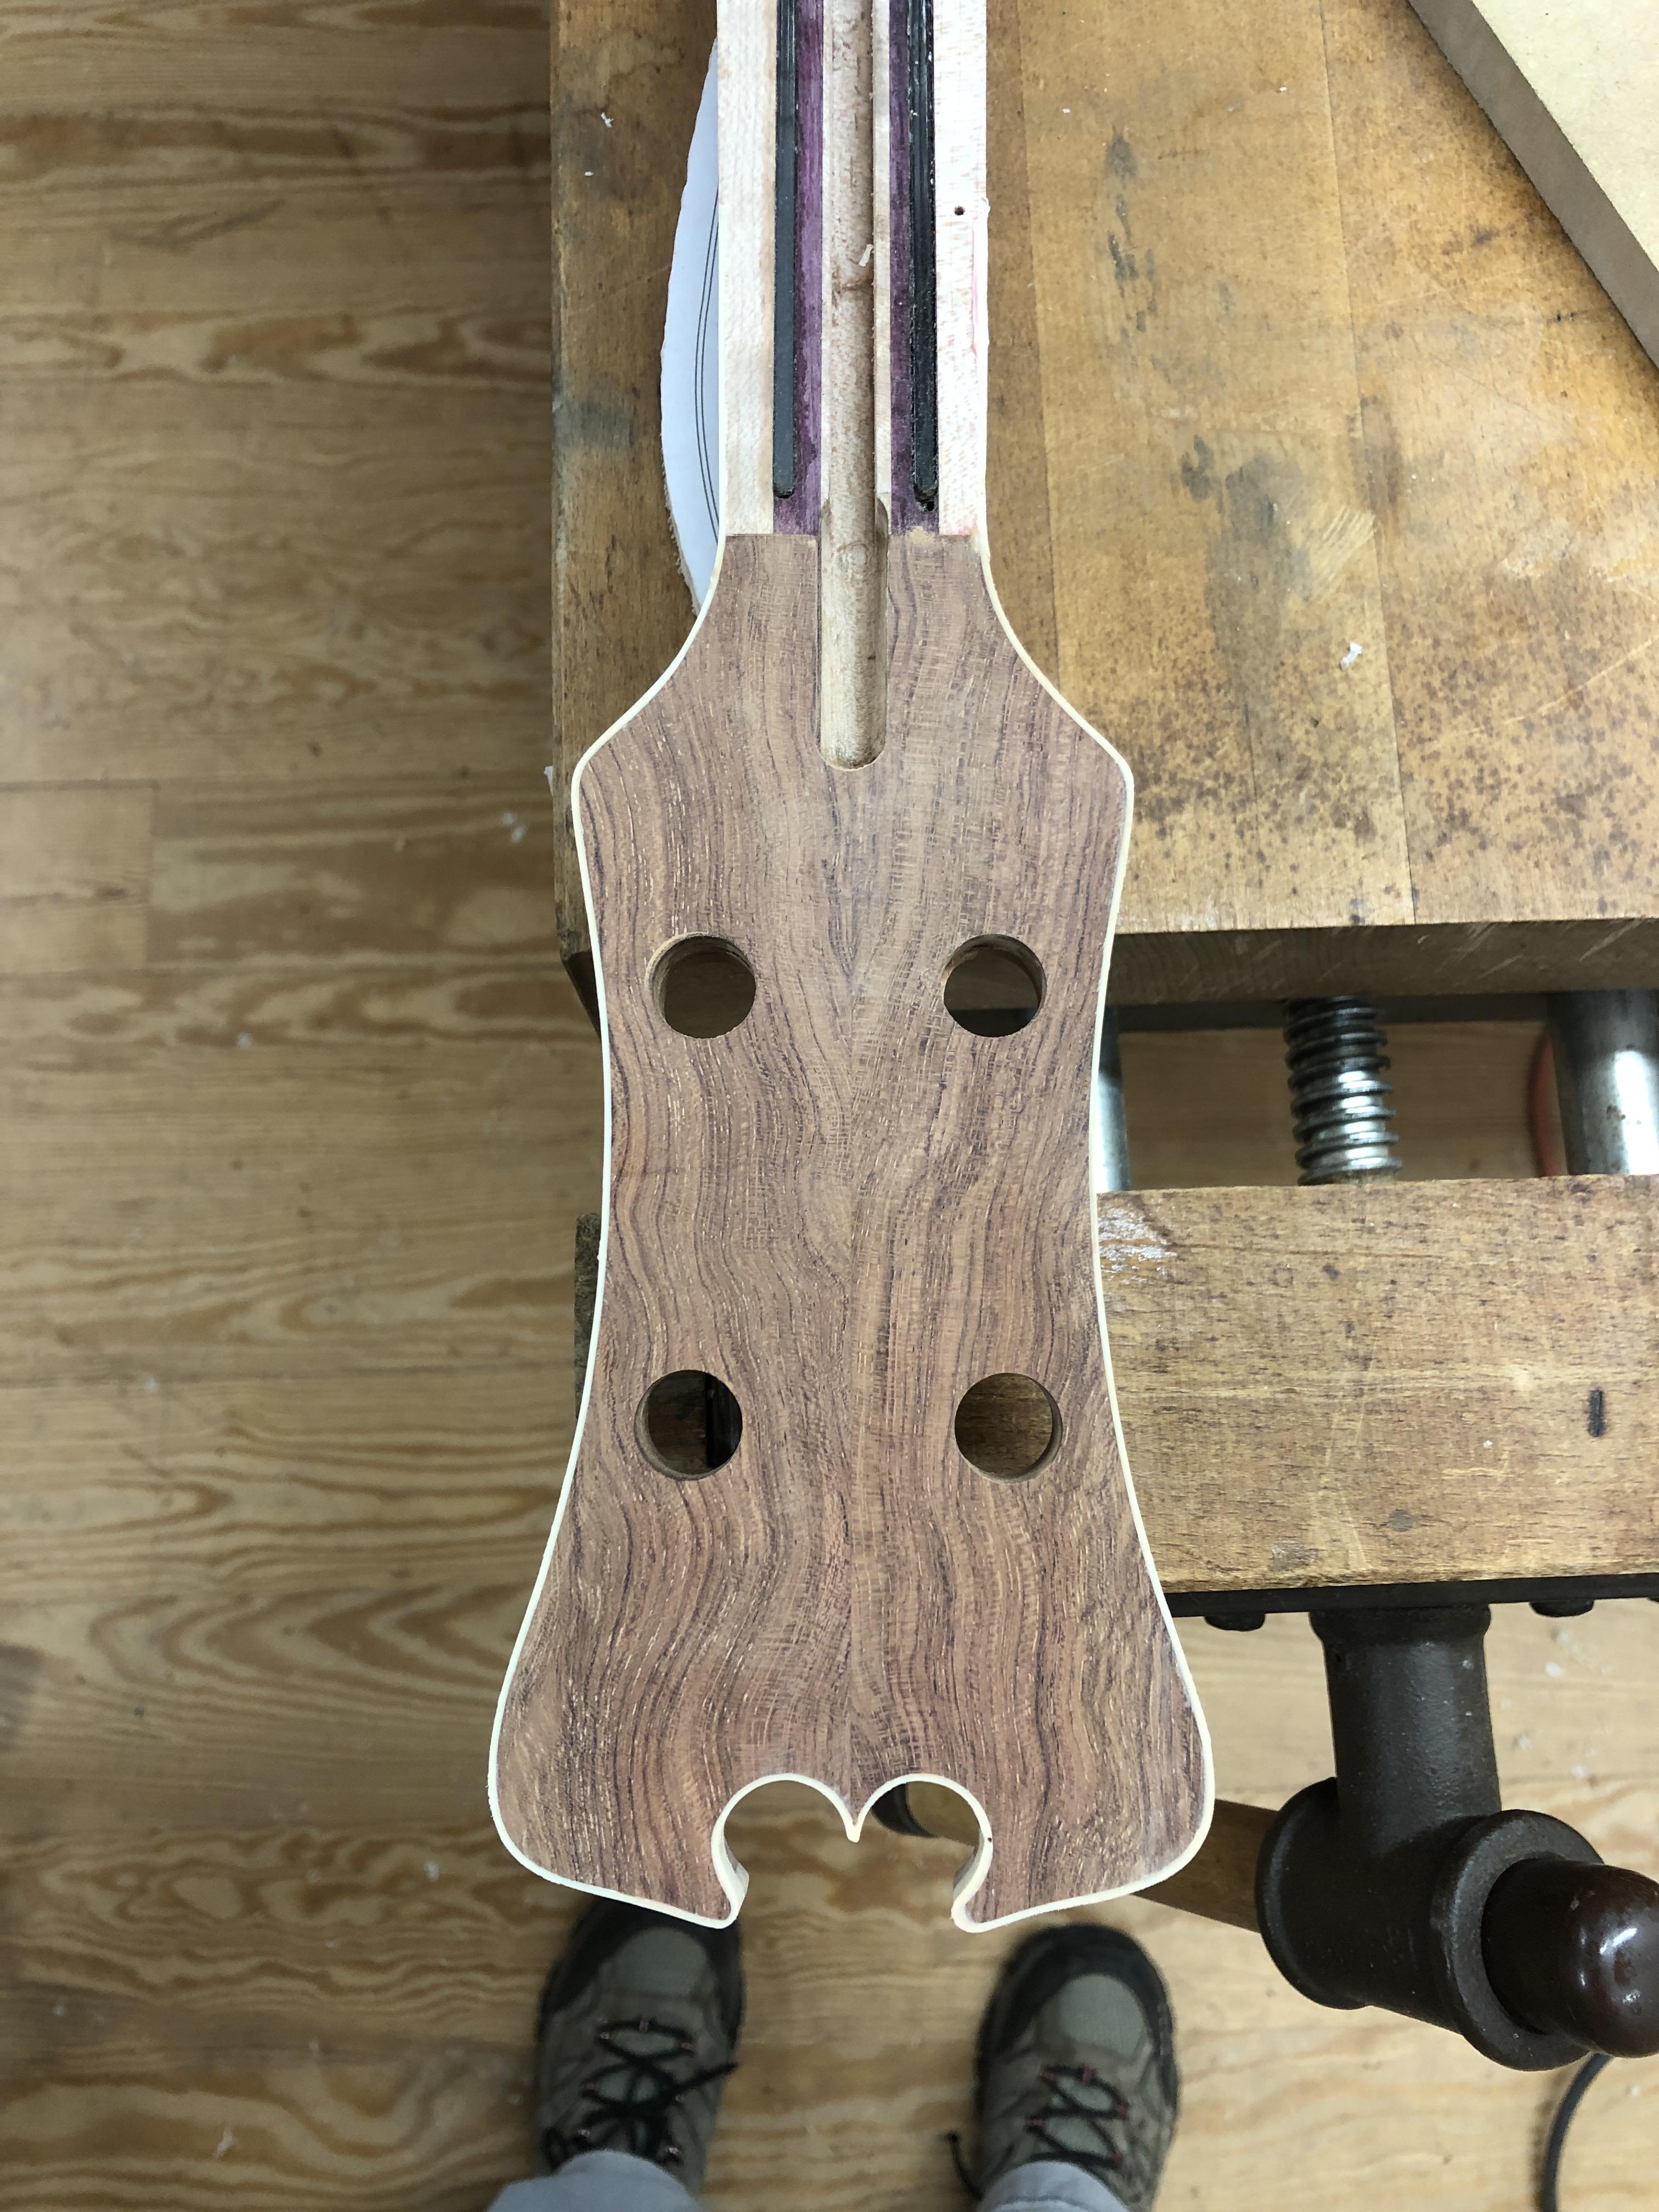
I got MLCS 5/8" roundover bit, did a nice job, and looks better than the 1/2" roundover. Couldn't resist a mockup with the fingerboard, which I guess it's time to glue on. When do other people glue on the board in your process, before any neck carve? Seems right, then I still have some flat surfaces to clamp to.
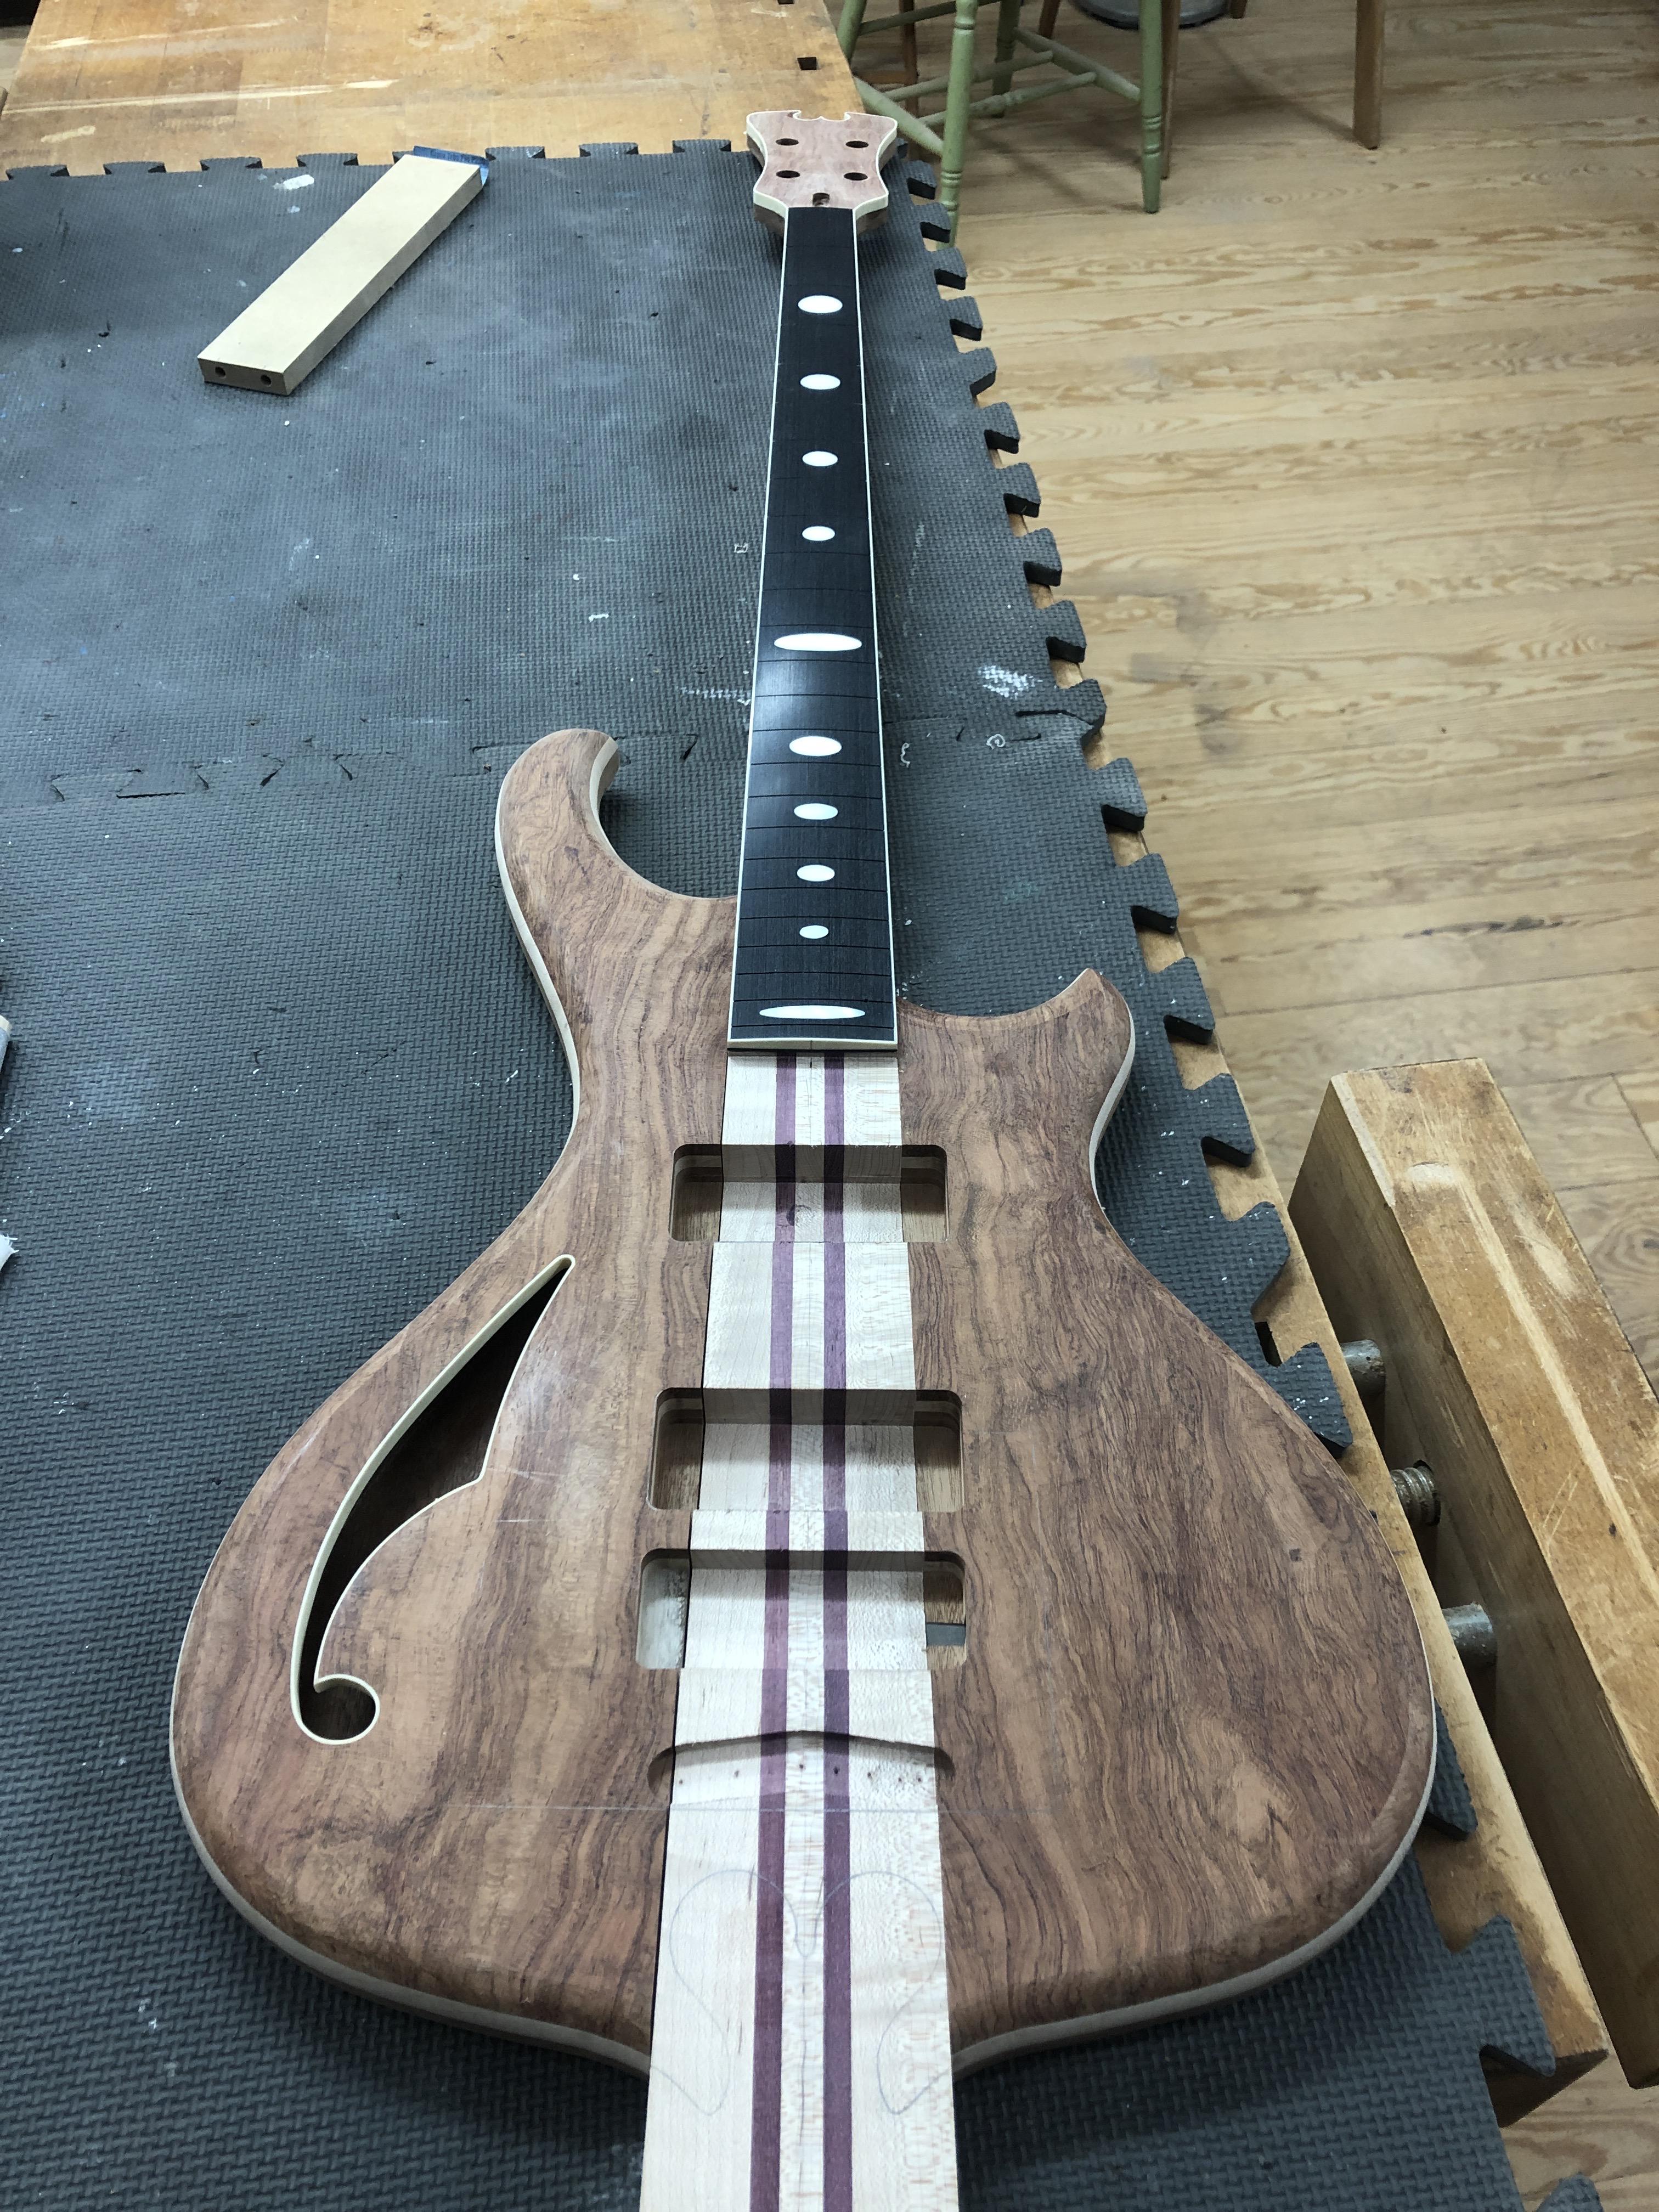
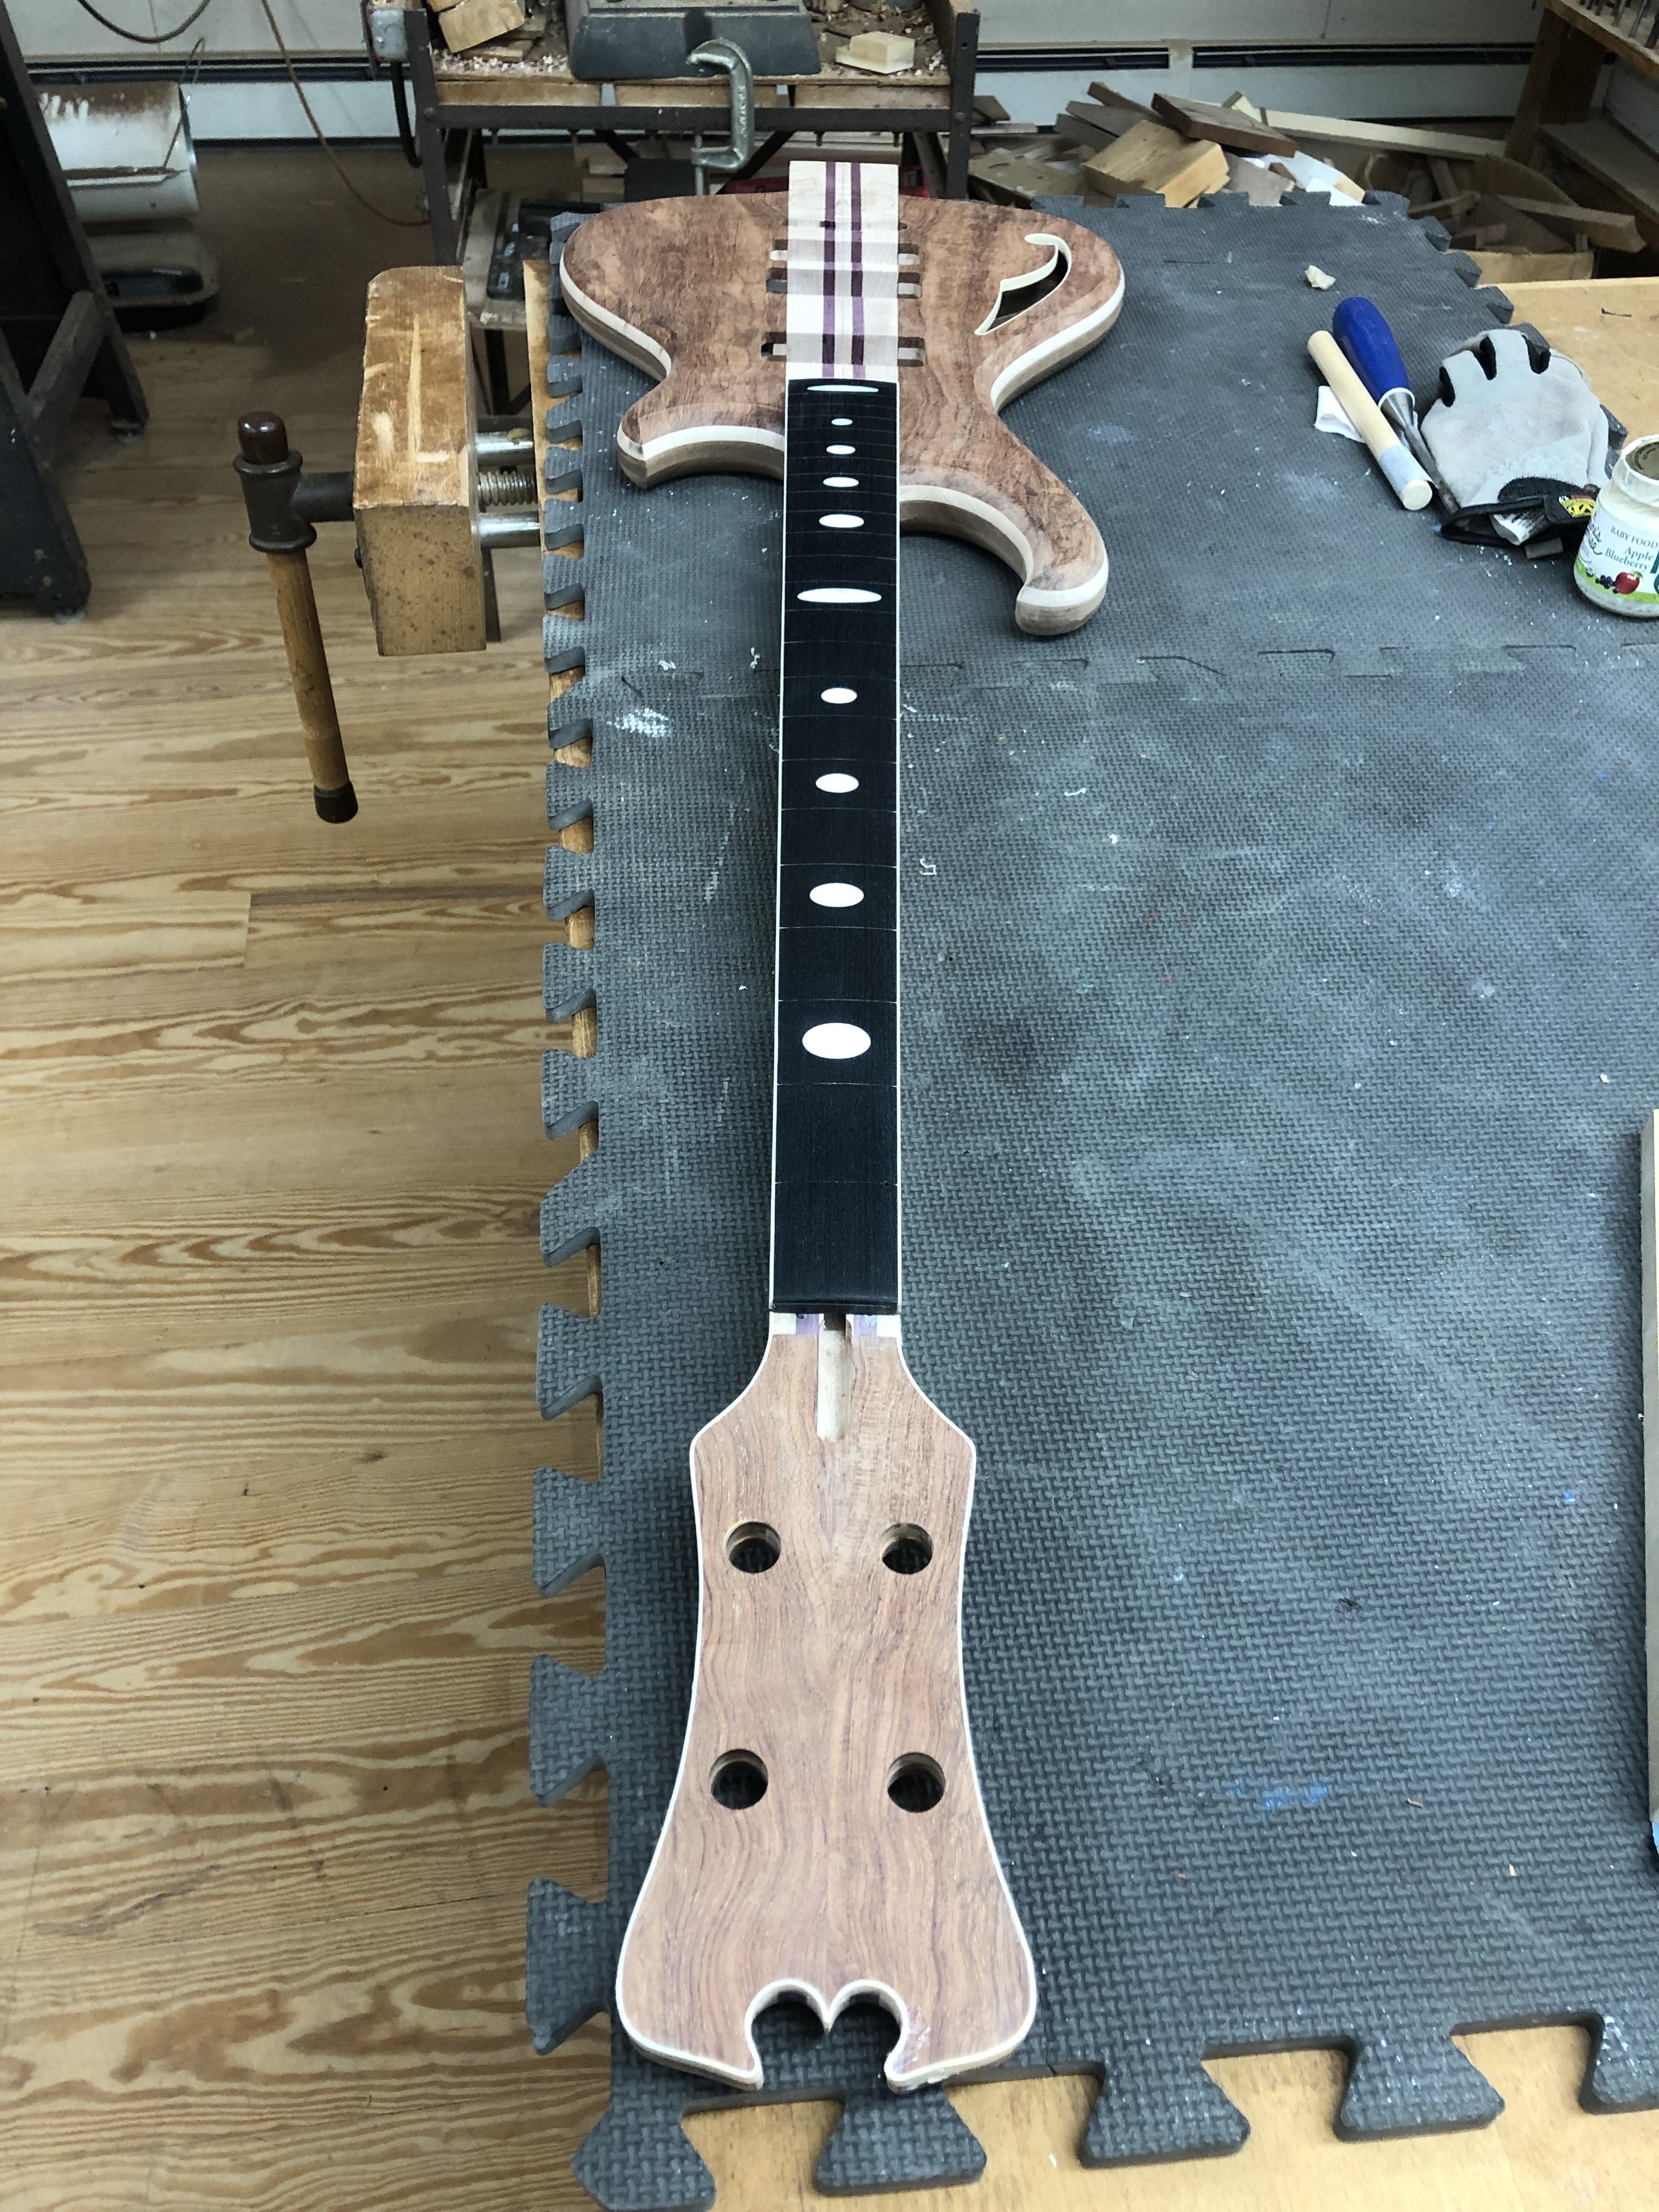
Thanks for looking, have a leftover turkey sandwich on me. I feel like a bloated tick, with gravy oozing out of my pores.
The damage from the zip ties was limited to the part that got scraped away flush, so I dodged a bullet there. I had a couple tiny voids I had to spooge in with dissolved binding paste, but overall came out pretty clean. To play it safe on the other half, I used some shrink wrap around the ties to cushion it a little, seems to have worked. I much prefer just tape, but couldn't get enough force into it to hold these curves. I ran out of my Stewmac binding tape and just used fiberglass strapping tape, which seemed to work as well or better.
Another binding job...survived. I'll probably never bind something this tight again, that was pretty nerve wracking. Still a lot of scraping and sanding to clean it up, but the worst is done.
I got MLCS 5/8" roundover bit, did a nice job, and looks better than the 1/2" roundover. Couldn't resist a mockup with the fingerboard, which I guess it's time to glue on. When do other people glue on the board in your process, before any neck carve? Seems right, then I still have some flat surfaces to clamp to.
Thanks for looking, have a leftover turkey sandwich on me. I feel like a bloated tick, with gravy oozing out of my pores.



Good work my man. I’m glad to see this build coming along.

I know you look at that omega as a ton of stress and effort, but I bet every person that you show that bass to is going to point it out. That week or so of work is going to pay off in compliments for ever.
Stunning work. You do that Ulmia bench proud!
Stunning work. You do that Ulmia bench proud!
I could use some advice here:
I'm making a brass nut for this one (first one from scratch) and I'm thinking I need to cut a little dado for it to socket down into. I had a little flat spot machined into the neck right at the nut, but kinda lost part of it sanding the headstock. I could probabaly re-file in a flat and rely on a dab of glue to hold it, but seems like a weak connection. I'm thinking I should cut a notch for this, maybe 1/16" deep, BEFORE gluing the board on, so I don't slip and trash the board. What are other pople doing, notch, or just let the nut sit on a flat? Also, how best to cut it? Router sled with a downcut sprial straight bit? Dremel on a router base? By hand with a file or chisel? I don't love the idea of interupting the clean binding line with a notch, but have seen it on plenty of other basses done that way. Bat signal up to @Rôckhewer, what did you do on your Balance K build?
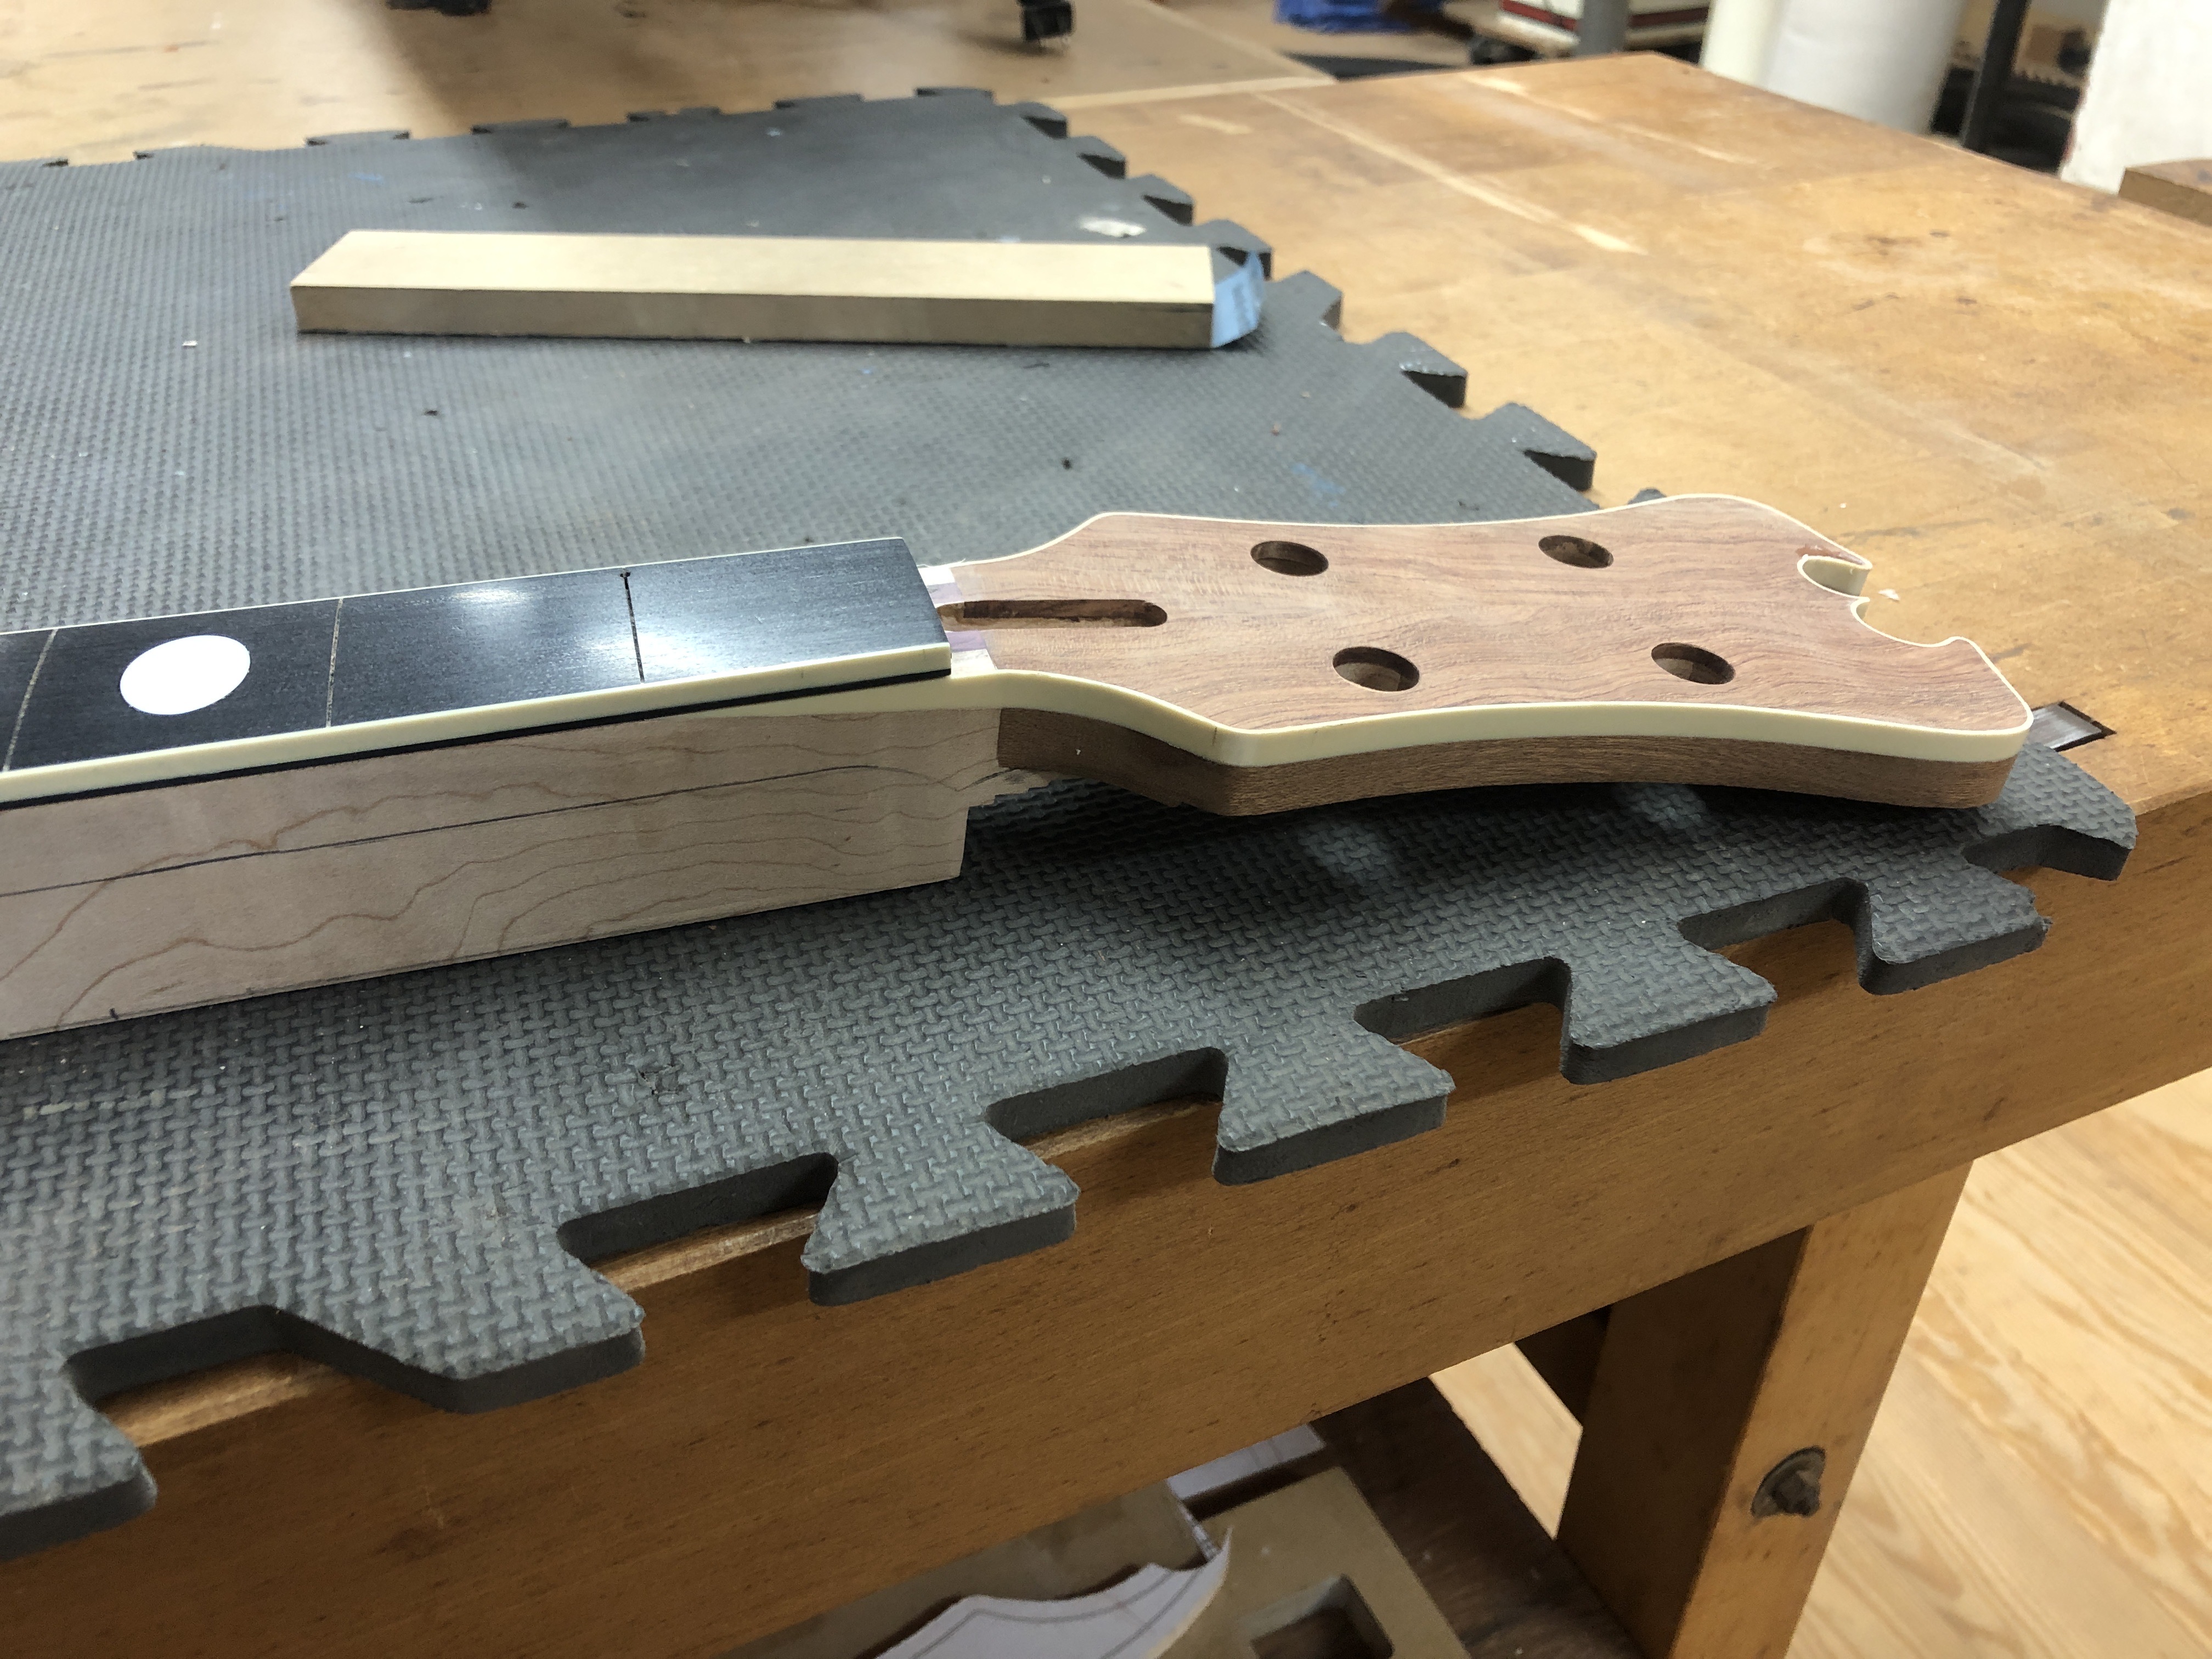
I'm making a brass nut for this one (first one from scratch) and I'm thinking I need to cut a little dado for it to socket down into. I had a little flat spot machined into the neck right at the nut, but kinda lost part of it sanding the headstock. I could probabaly re-file in a flat and rely on a dab of glue to hold it, but seems like a weak connection. I'm thinking I should cut a notch for this, maybe 1/16" deep, BEFORE gluing the board on, so I don't slip and trash the board. What are other pople doing, notch, or just let the nut sit on a flat? Also, how best to cut it? Router sled with a downcut sprial straight bit? Dremel on a router base? By hand with a file or chisel? I don't love the idea of interupting the clean binding line with a notch, but have seen it on plenty of other basses done that way. Bat signal up to @Rôckhewer, what did you do on your Balance K build?
I don't see why just sitting on the flat with a tiny dab of CA under each side wouldn't work just fine. I don't think a slot is necessary. It looks like your piece o' brass will have a pretty wide footprint, should be nice and stable.
I've done lots with just a flat. Probably 2/3rds of my necks. Tiny dot of weak glue (white elmers or normal wood glue) is plenty to hold it in place. CA would make me nervous that you'd take a chunk of wood with the nut if you ever had to remove it.
I've done a few with a slot, usually I just leave a very faint lip on the backside, like 1/16" or less, versus a legitimate slot (which looks weird to me on anything but a Fender style neck). Bottom of the slot is even with the top of the neck, the lip is cut into the headstock veneer with a file. Then I use masking tape to hold the nut in place while gluing the fretboard on (wax on the nut to be sure it releases) to help position the fretboard correctly.
If I were in your shoes, with the chance to cut a lip without cutting into the binding gone, I'd probably just leave it as a flat ledge. I agree that cutting into the binding would be a shame. Unless you were going to use a nut material that matched the white binding, but a brass nut would stand out notched into the white binding.
I've done a few with a slot, usually I just leave a very faint lip on the backside, like 1/16" or less, versus a legitimate slot (which looks weird to me on anything but a Fender style neck). Bottom of the slot is even with the top of the neck, the lip is cut into the headstock veneer with a file. Then I use masking tape to hold the nut in place while gluing the fretboard on (wax on the nut to be sure it releases) to help position the fretboard correctly.
If I were in your shoes, with the chance to cut a lip without cutting into the binding gone, I'd probably just leave it as a flat ledge. I agree that cutting into the binding would be a shame. Unless you were going to use a nut material that matched the white binding, but a brass nut would stand out notched into the white binding.

I can't imagine the nut's going to have a chance to move around in any direction once this is strung up.


