

Enjoy the benefits of a premium membership!
Upgrade Account
-
TalkBass has been independent since 1998. Add your voice.
Create a free account to reply to discussions, view embedded media, and browse with fewer display ads.
Join free Log in
Want zero display ads or expanded classifieds tools? Compare plans.
You are using an out of date browser. It may not display this or other websites correctly.
You should upgrade or use an alternative browser.
You should upgrade or use an alternative browser.
The Hossenfeffer III Build
- Thread starter Gilmourisgod
- Start date
More options
Who Replied?


Rôckhewer
Commercial User
- Feb 28, 2015
- 2,922
- 9,028
- Disclosures
- Owner/Builder- RockHewer Custom Guitars LLC
I think it's gonna look fine. And if you squintAin’t saved yet! A lot of painstaking work to go, and some compromise on missed opportunities, but it is what it is.
 ... you won't notice that the neck beam is inexplicably wider... and the grain orientation is different.
But that different orientation WILL make those tips stronger . I'm sure you planned it that way.

Yeah, all I had left of the original board was a couple cutoffs,so its a good color match, but the grain is different. Ill have to squint a little the rest of my life trying to unsee what I screwed up, live and learn....
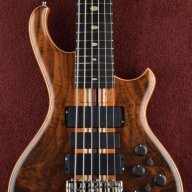
I haven’t done the round over yet, what you see is the result of cutting it back to remove the shattered wood, still have to re-carve it. I looked at a few options and settled on slightly less than 1/2” radius, which is about what it was before. I’ll do it by hand, router too risky in there.
Hm, I'm probably not using the right terminology. What I meant was that you have kind of an angled transition going from the round-over to the flat top. It kind of doubles the outline of the body. On an Alembic, that transition is much smoother.I haven’t done the round over yet, what you see is the result of cutting it back to remove the shattered wood, still have to re-carve it. I looked at a few options and settled on slightly less than 1/2” radius, which is about what it was before. I’ll do it by hand, router too risky in there.
(Pictures courtesy of Mica @ Alembic.)

I guess it might have been good to read the first post, especially this part -Hm, I'm probably not using the right terminology. What I meant was that you have kind of an angled transition going from the round-over to the flat top. It kind of doubles the outline of the body. On an Alembic, that transition is much smoother.
(Pictures courtesy of Mica @ Alembic.)
View attachment 4755130
View attachment 4755132
I don't think he was ever going for an exact perfect copy.

Well, he also asked about the edge clearances.I guess it might have been good to read the first post, especially this part -
I don't think he was ever going for an exact perfect copy.

Nice photo! I did make a conscious decision to keep the transition from the flat faces to the rounded sides a fairly crisp transition, just personal taste. Remember, this isn't an Alembic, it's a Hossenfeffer.
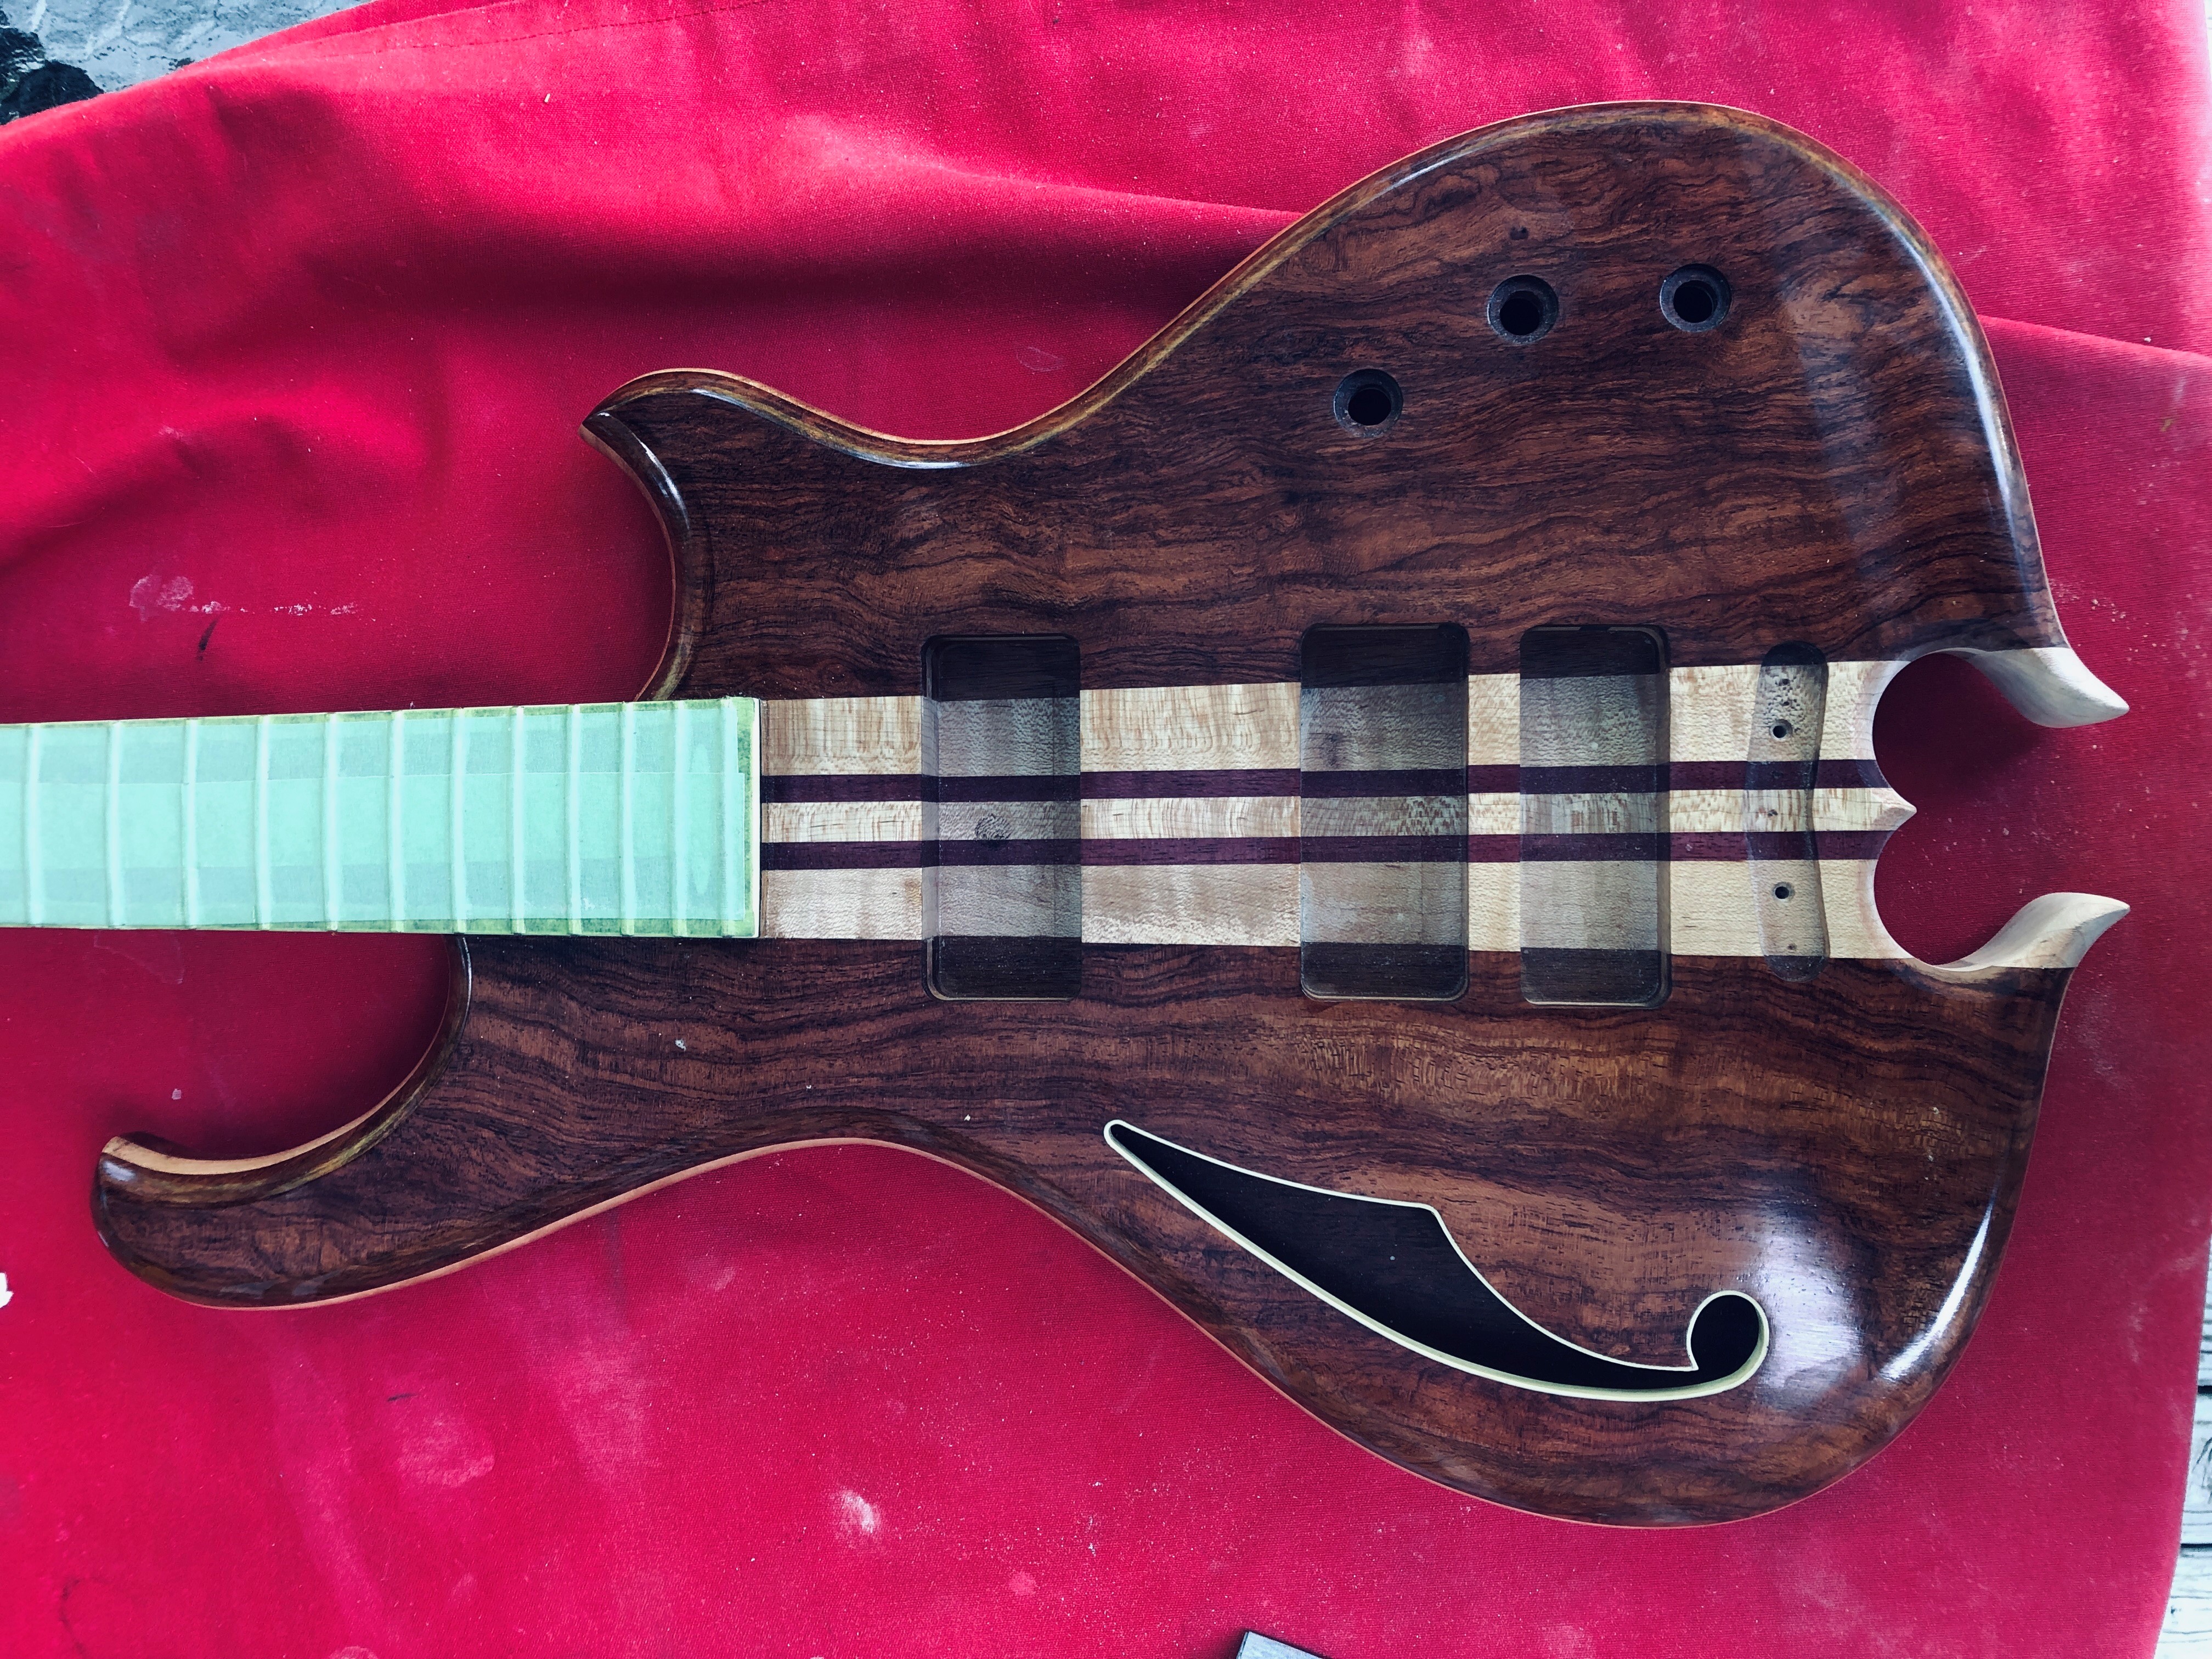
Ok, 37 steps backward, 1 step forward. I finished re-shaping the "horns", had to sand into my existing finish a good bit to fair the new parts in, but this is the best I am capable of, so I'm OK with it.
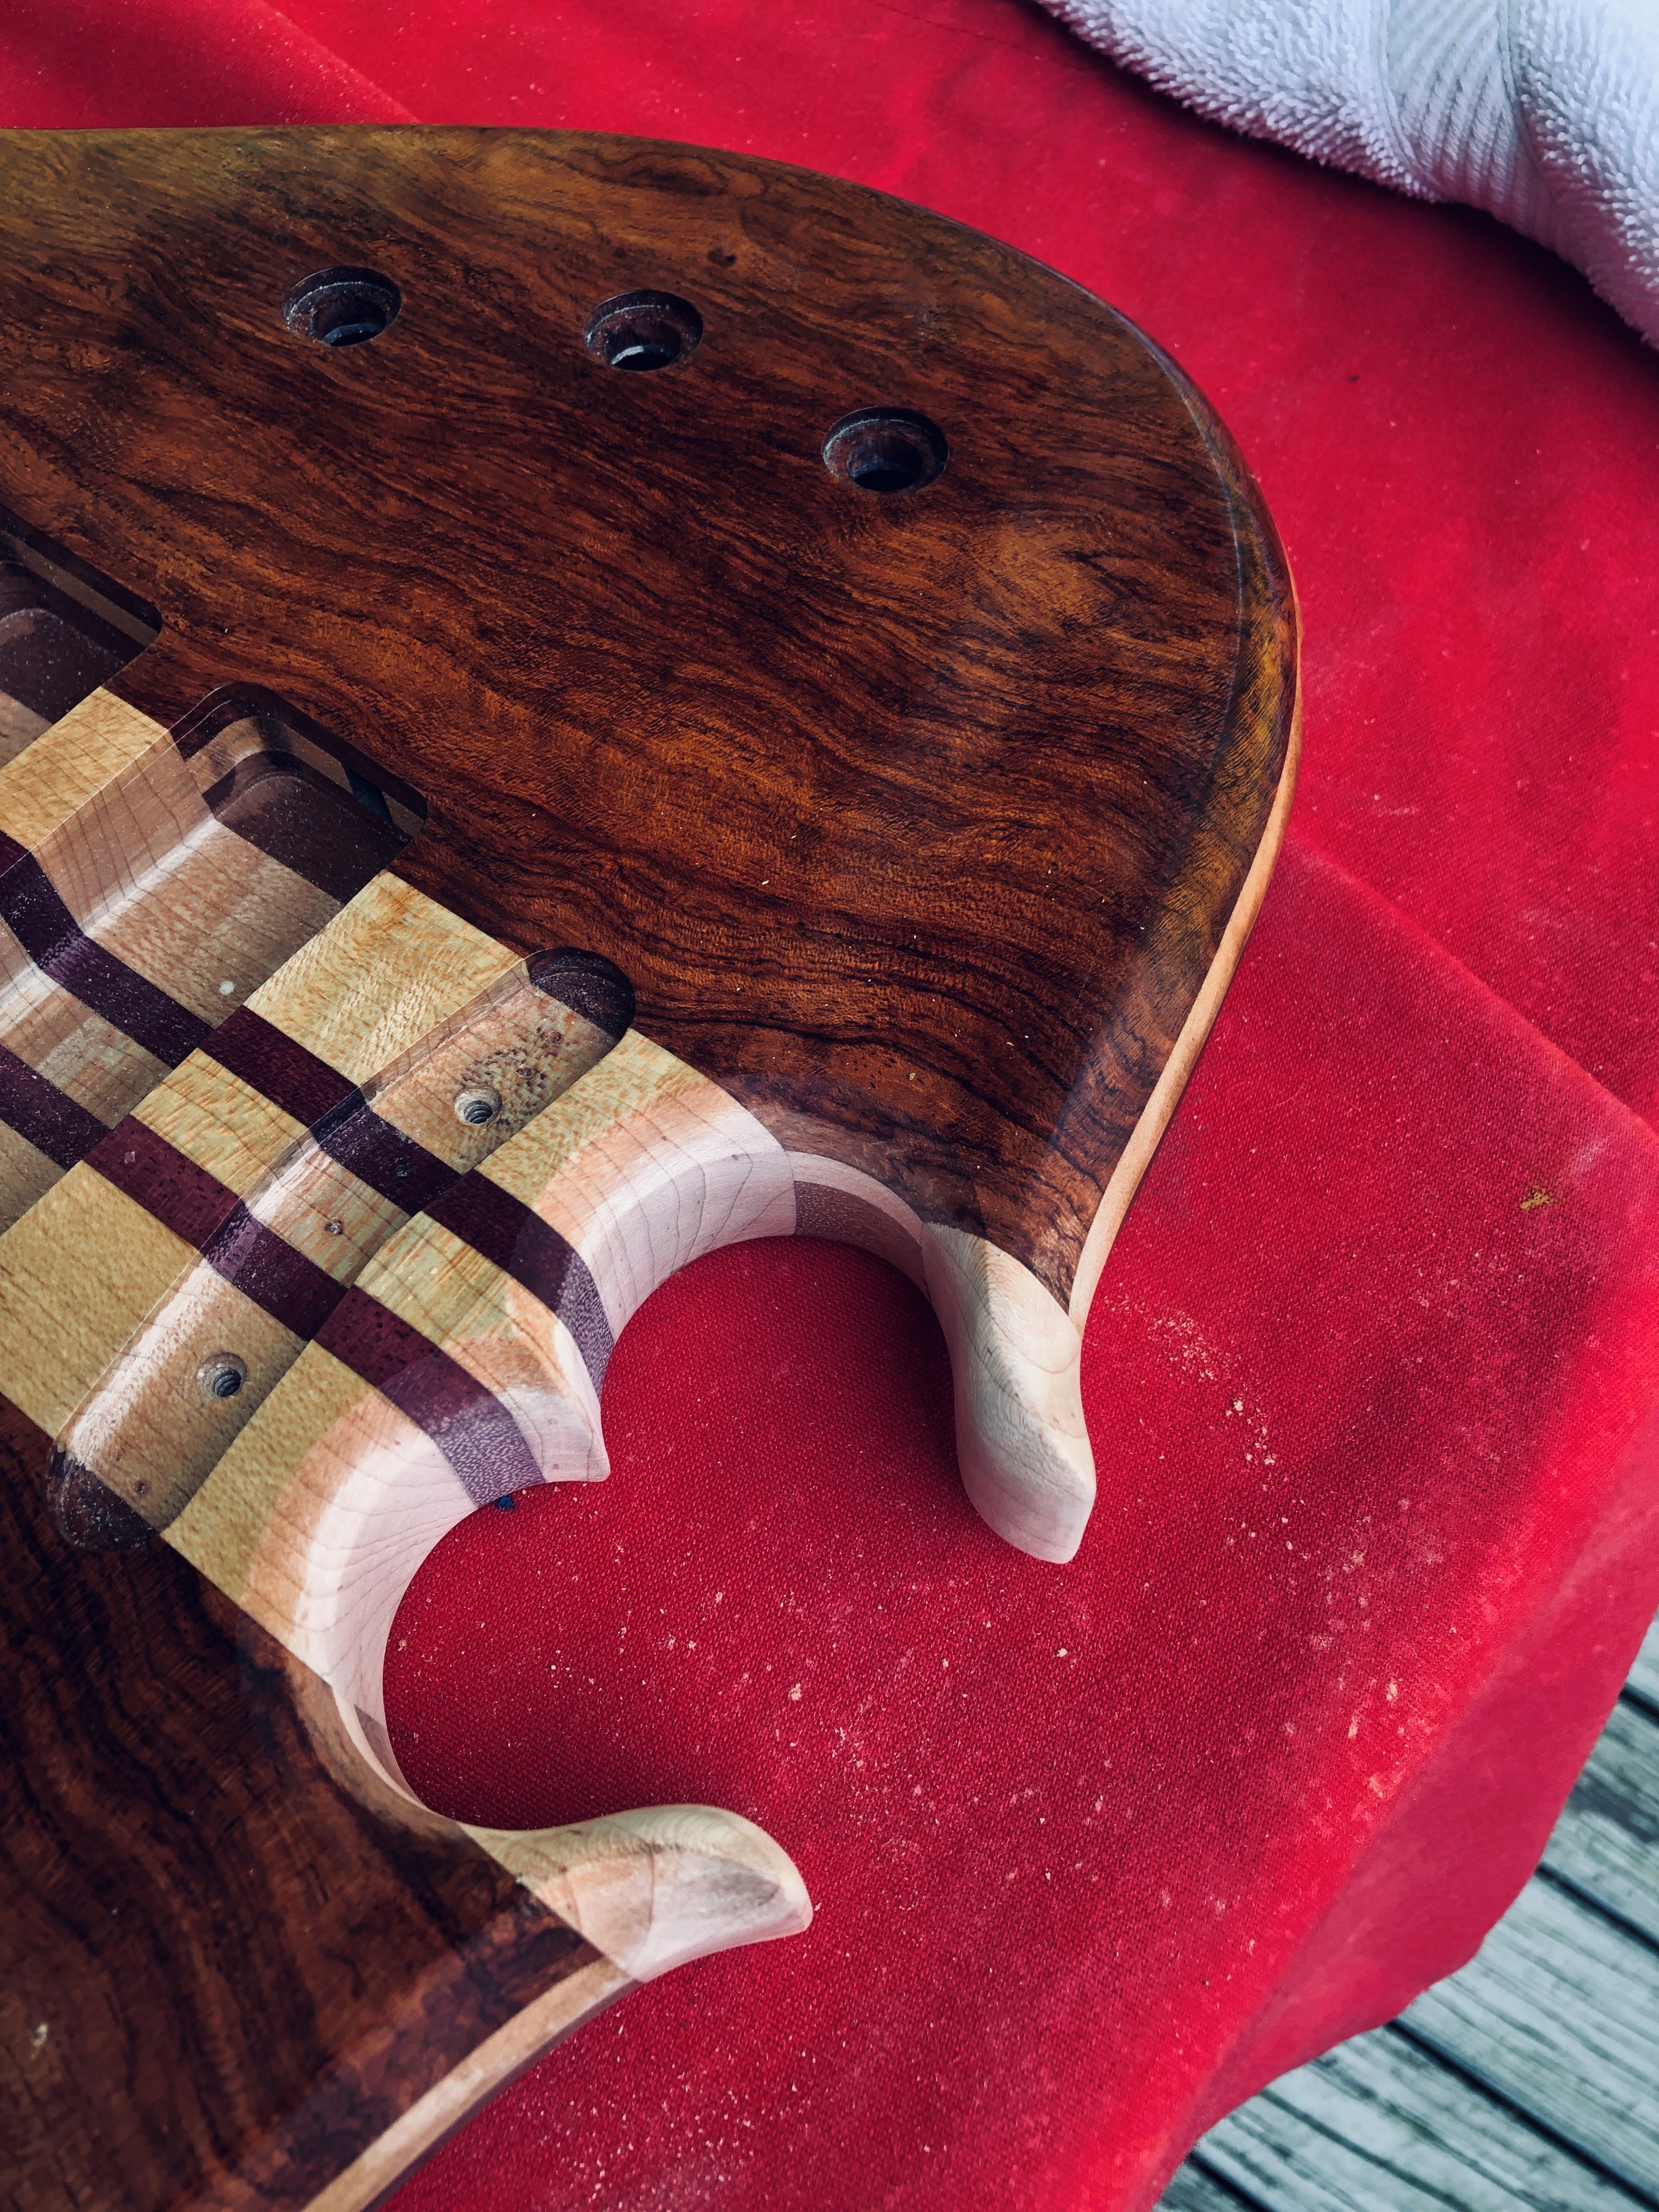
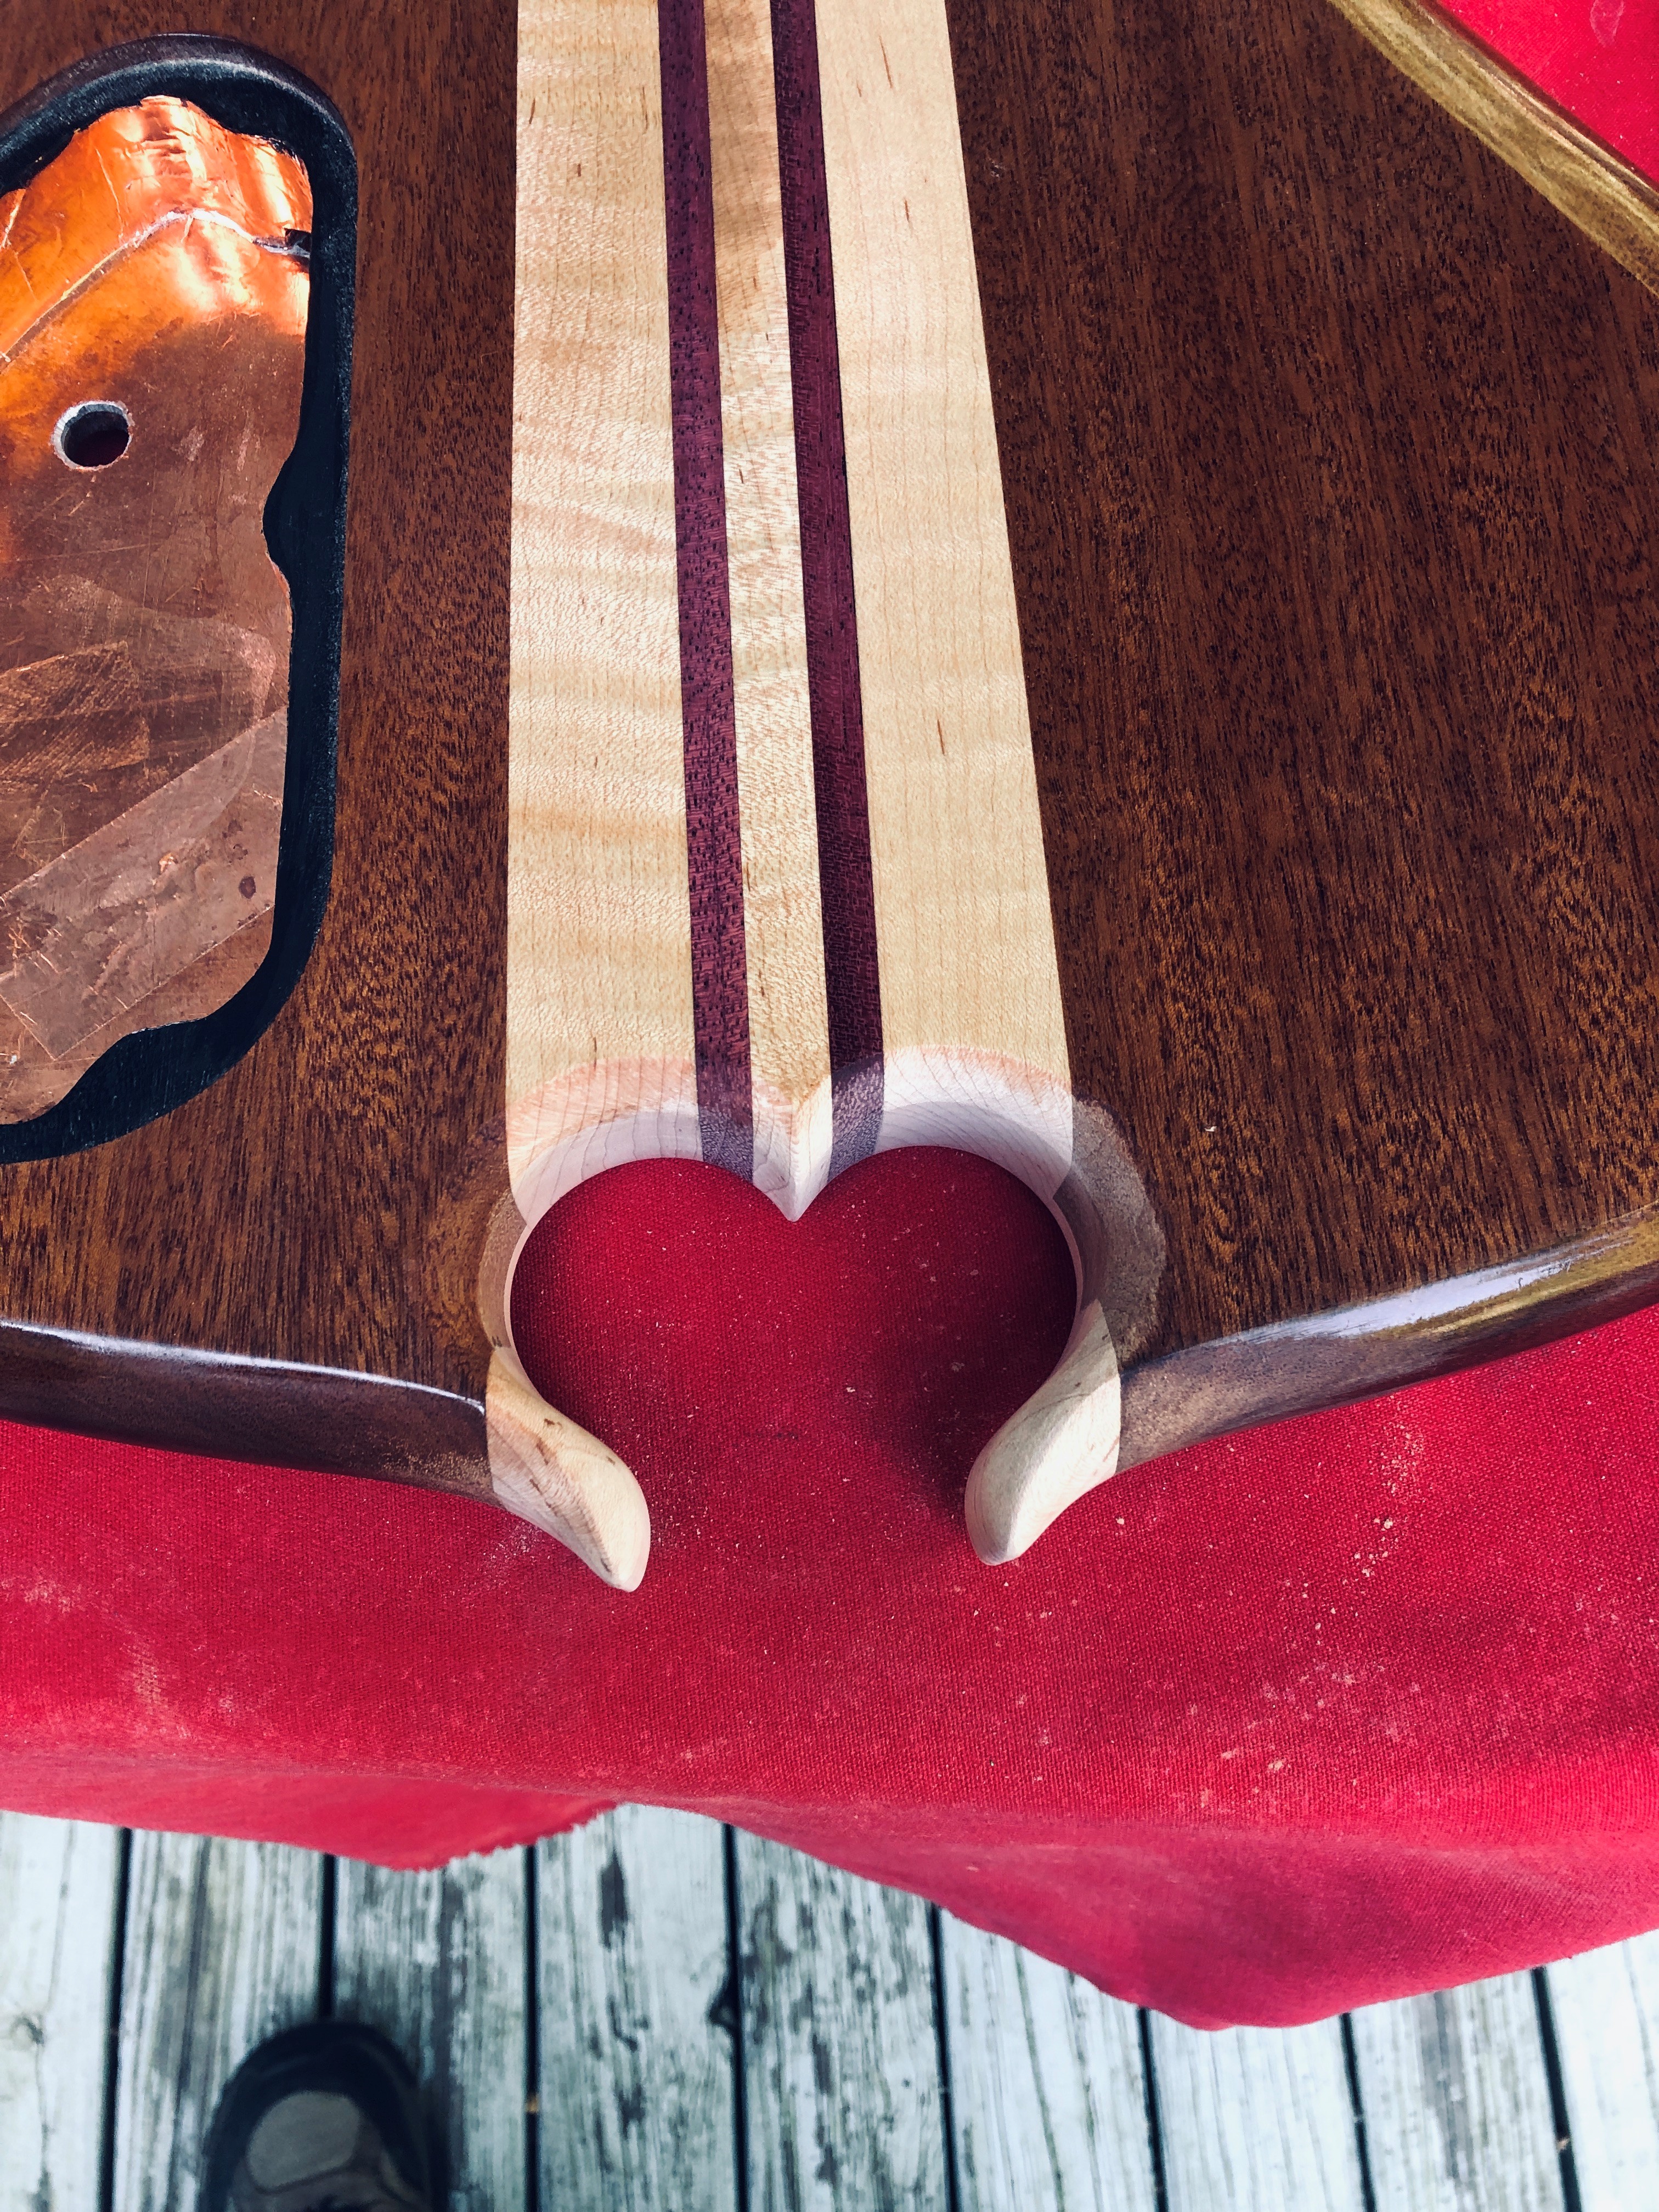
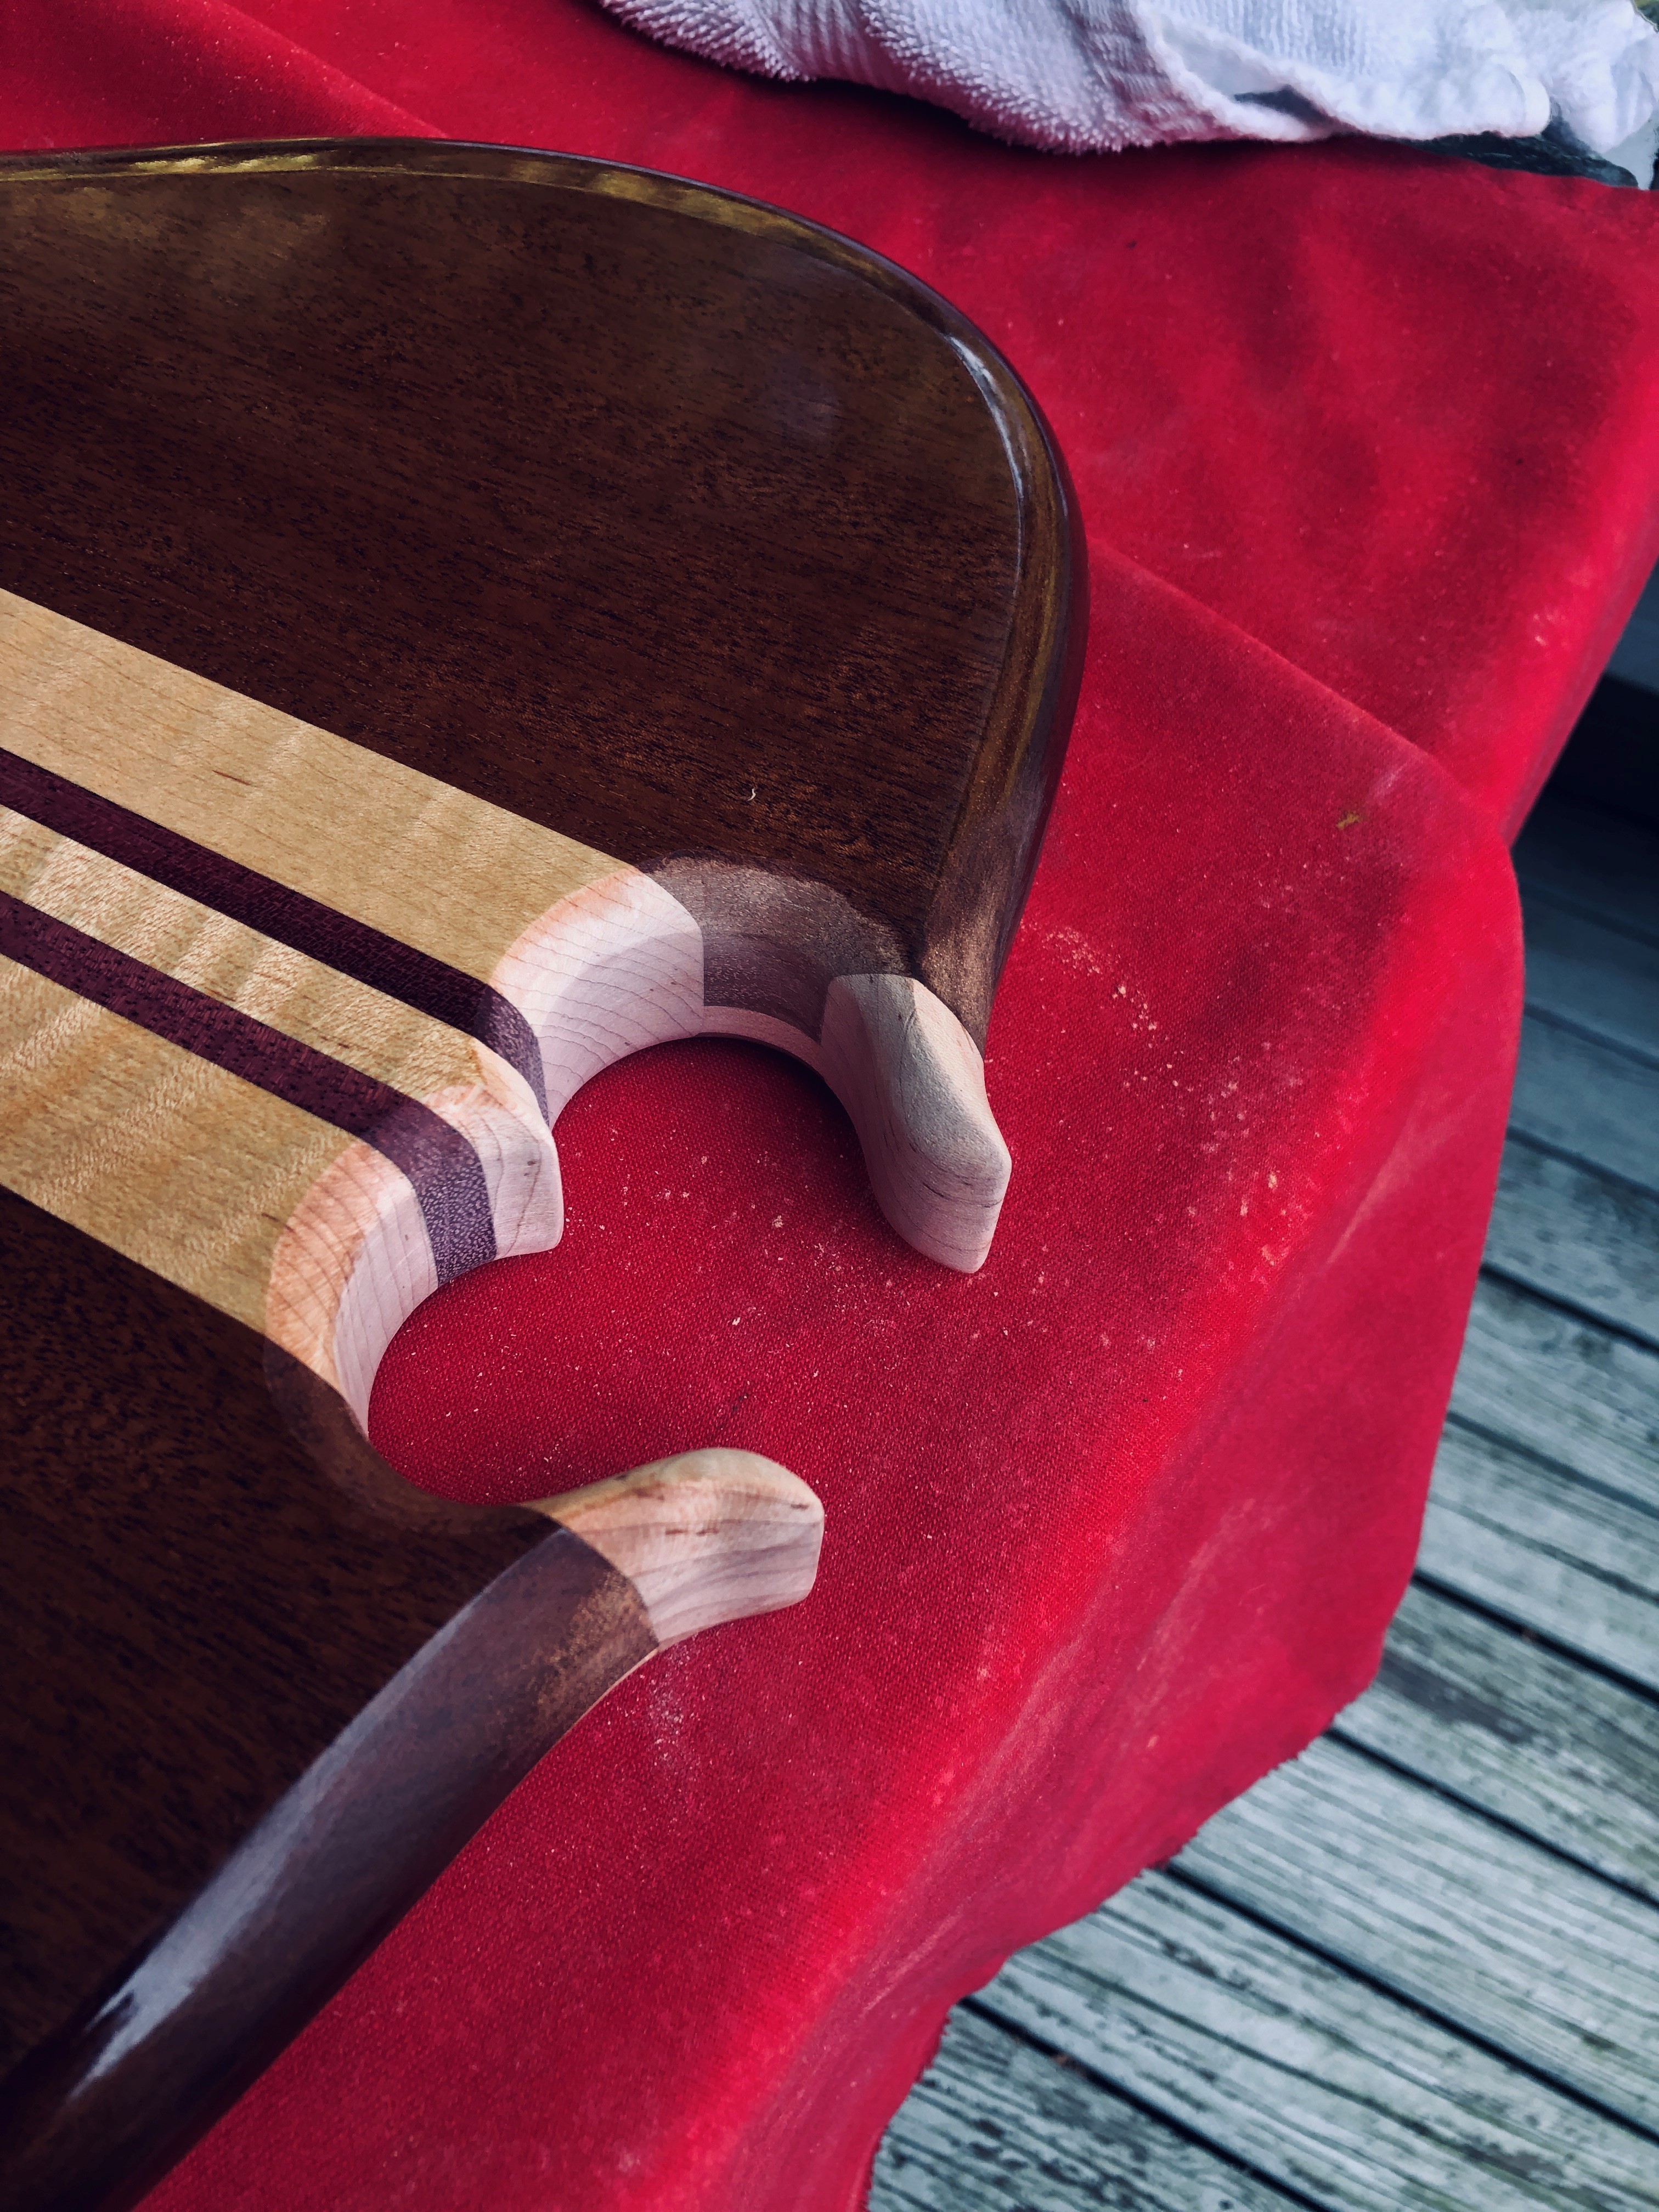
I had one little divot I thought would sand out during shaping, but.... didn't. You can see it near the top of the upper horn in the photo, at the seam between mahogany and maple. Waddya think, drop fill with poly, CA glue straight, or a little mahogany dust and CA? My experience with CA and dust is it always goes a little darker, which might make it more obvious.
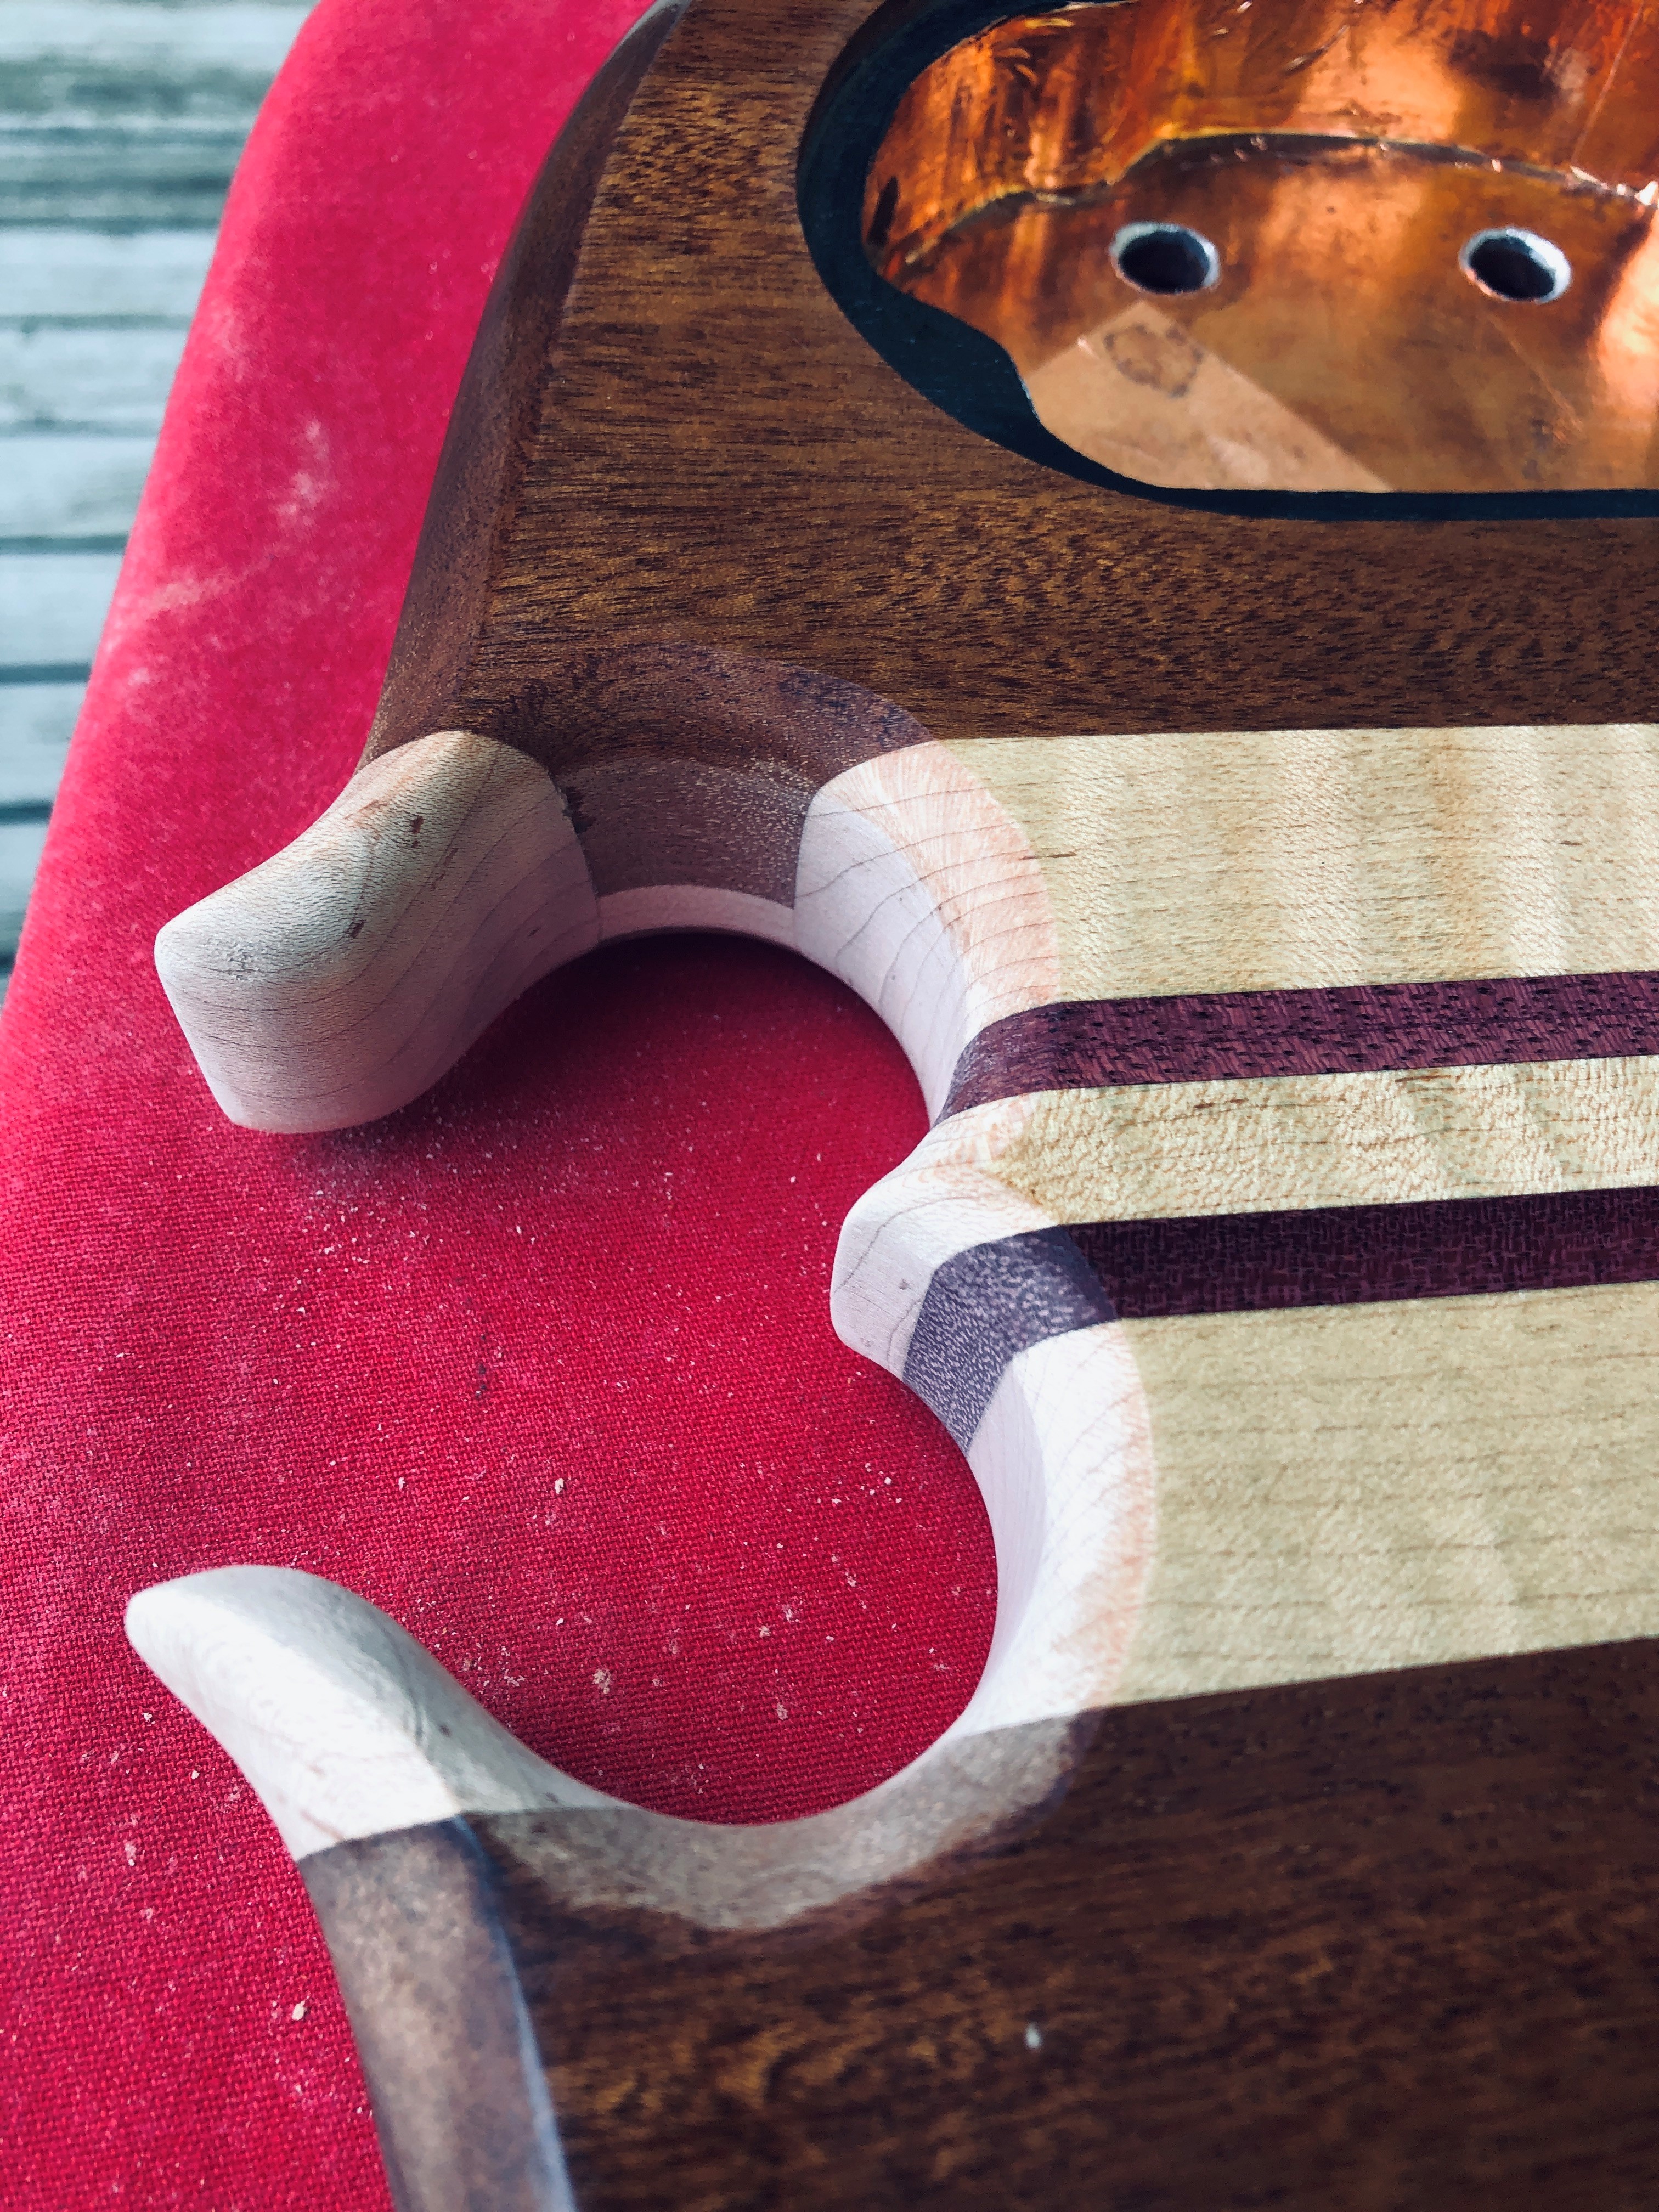
For better or worse, (after these photos) I put a thin coat of wipe-on poly on the new wood and existing sanded areas, kinda feathering it into existing finish, and it seems to bring the wood color right back to surrounding, which makes me hopeful about a good blend. I need to wet sand the whole bass with something like 800 grit to give it some "tooth" for more coats, it's been hardening for a couple months, and there were some dust nibs and minor blems that needed to get sanded out anyway.. Hopefully a couple coats of poly will keep any water from raising grain on the new maple horns. One nice thing about the wipe-on poly, it goes on so thin, it can be feathered to nearly zero finish thickness as you wipe a wet edge onto an existing dry one. I think this is gonna work!
I had one little divot I thought would sand out during shaping, but.... didn't. You can see it near the top of the upper horn in the photo, at the seam between mahogany and maple. Waddya think, drop fill with poly, CA glue straight, or a little mahogany dust and CA? My experience with CA and dust is it always goes a little darker, which might make it more obvious.
For better or worse, (after these photos) I put a thin coat of wipe-on poly on the new wood and existing sanded areas, kinda feathering it into existing finish, and it seems to bring the wood color right back to surrounding, which makes me hopeful about a good blend. I need to wet sand the whole bass with something like 800 grit to give it some "tooth" for more coats, it's been hardening for a couple months, and there were some dust nibs and minor blems that needed to get sanded out anyway.. Hopefully a couple coats of poly will keep any water from raising grain on the new maple horns. One nice thing about the wipe-on poly, it goes on so thin, it can be feathered to nearly zero finish thickness as you wipe a wet edge onto an existing dry one. I think this is gonna work!
Last edited:

Amazing save.
Re: the divot, I'd drop fill that with CA myself, no colouring. Betcha it will disappear under the gloss.
Re: the divot, I'd drop fill that with CA myself, no colouring. Betcha it will disappear under the gloss.

I've used Sally Hanson hard as nails nail polish in a pinch ..Amazing save.
Re: the divot, I'd drop fill that with CA myself, no colouring. Betcha it will disappear under the gloss.

Seriously, that wasn't even remotely simple to fix, let alone have it turn out looking that good.
Awesome recovery, I think you’ve done an amazing job. 

Wow, fantastic job and blending those back in! I agree with Beej. I'd try CA as it would build faster than a poly drop. But I think either way would work.
Rôckhewer
Commercial User
- Feb 28, 2015
- 2,922
- 9,028
- Disclosures
- Owner/Builder- RockHewer Custom Guitars LLC


