• TalkBass has been independent since 1998. Add your voice.
    Create a free account to reply to discussions, view embedded media, and browse with fewer display ads.
    Join freeLog in
    Want zero display ads or expanded classifieds tools? Compare plans.

The Hossenfeffer III Build

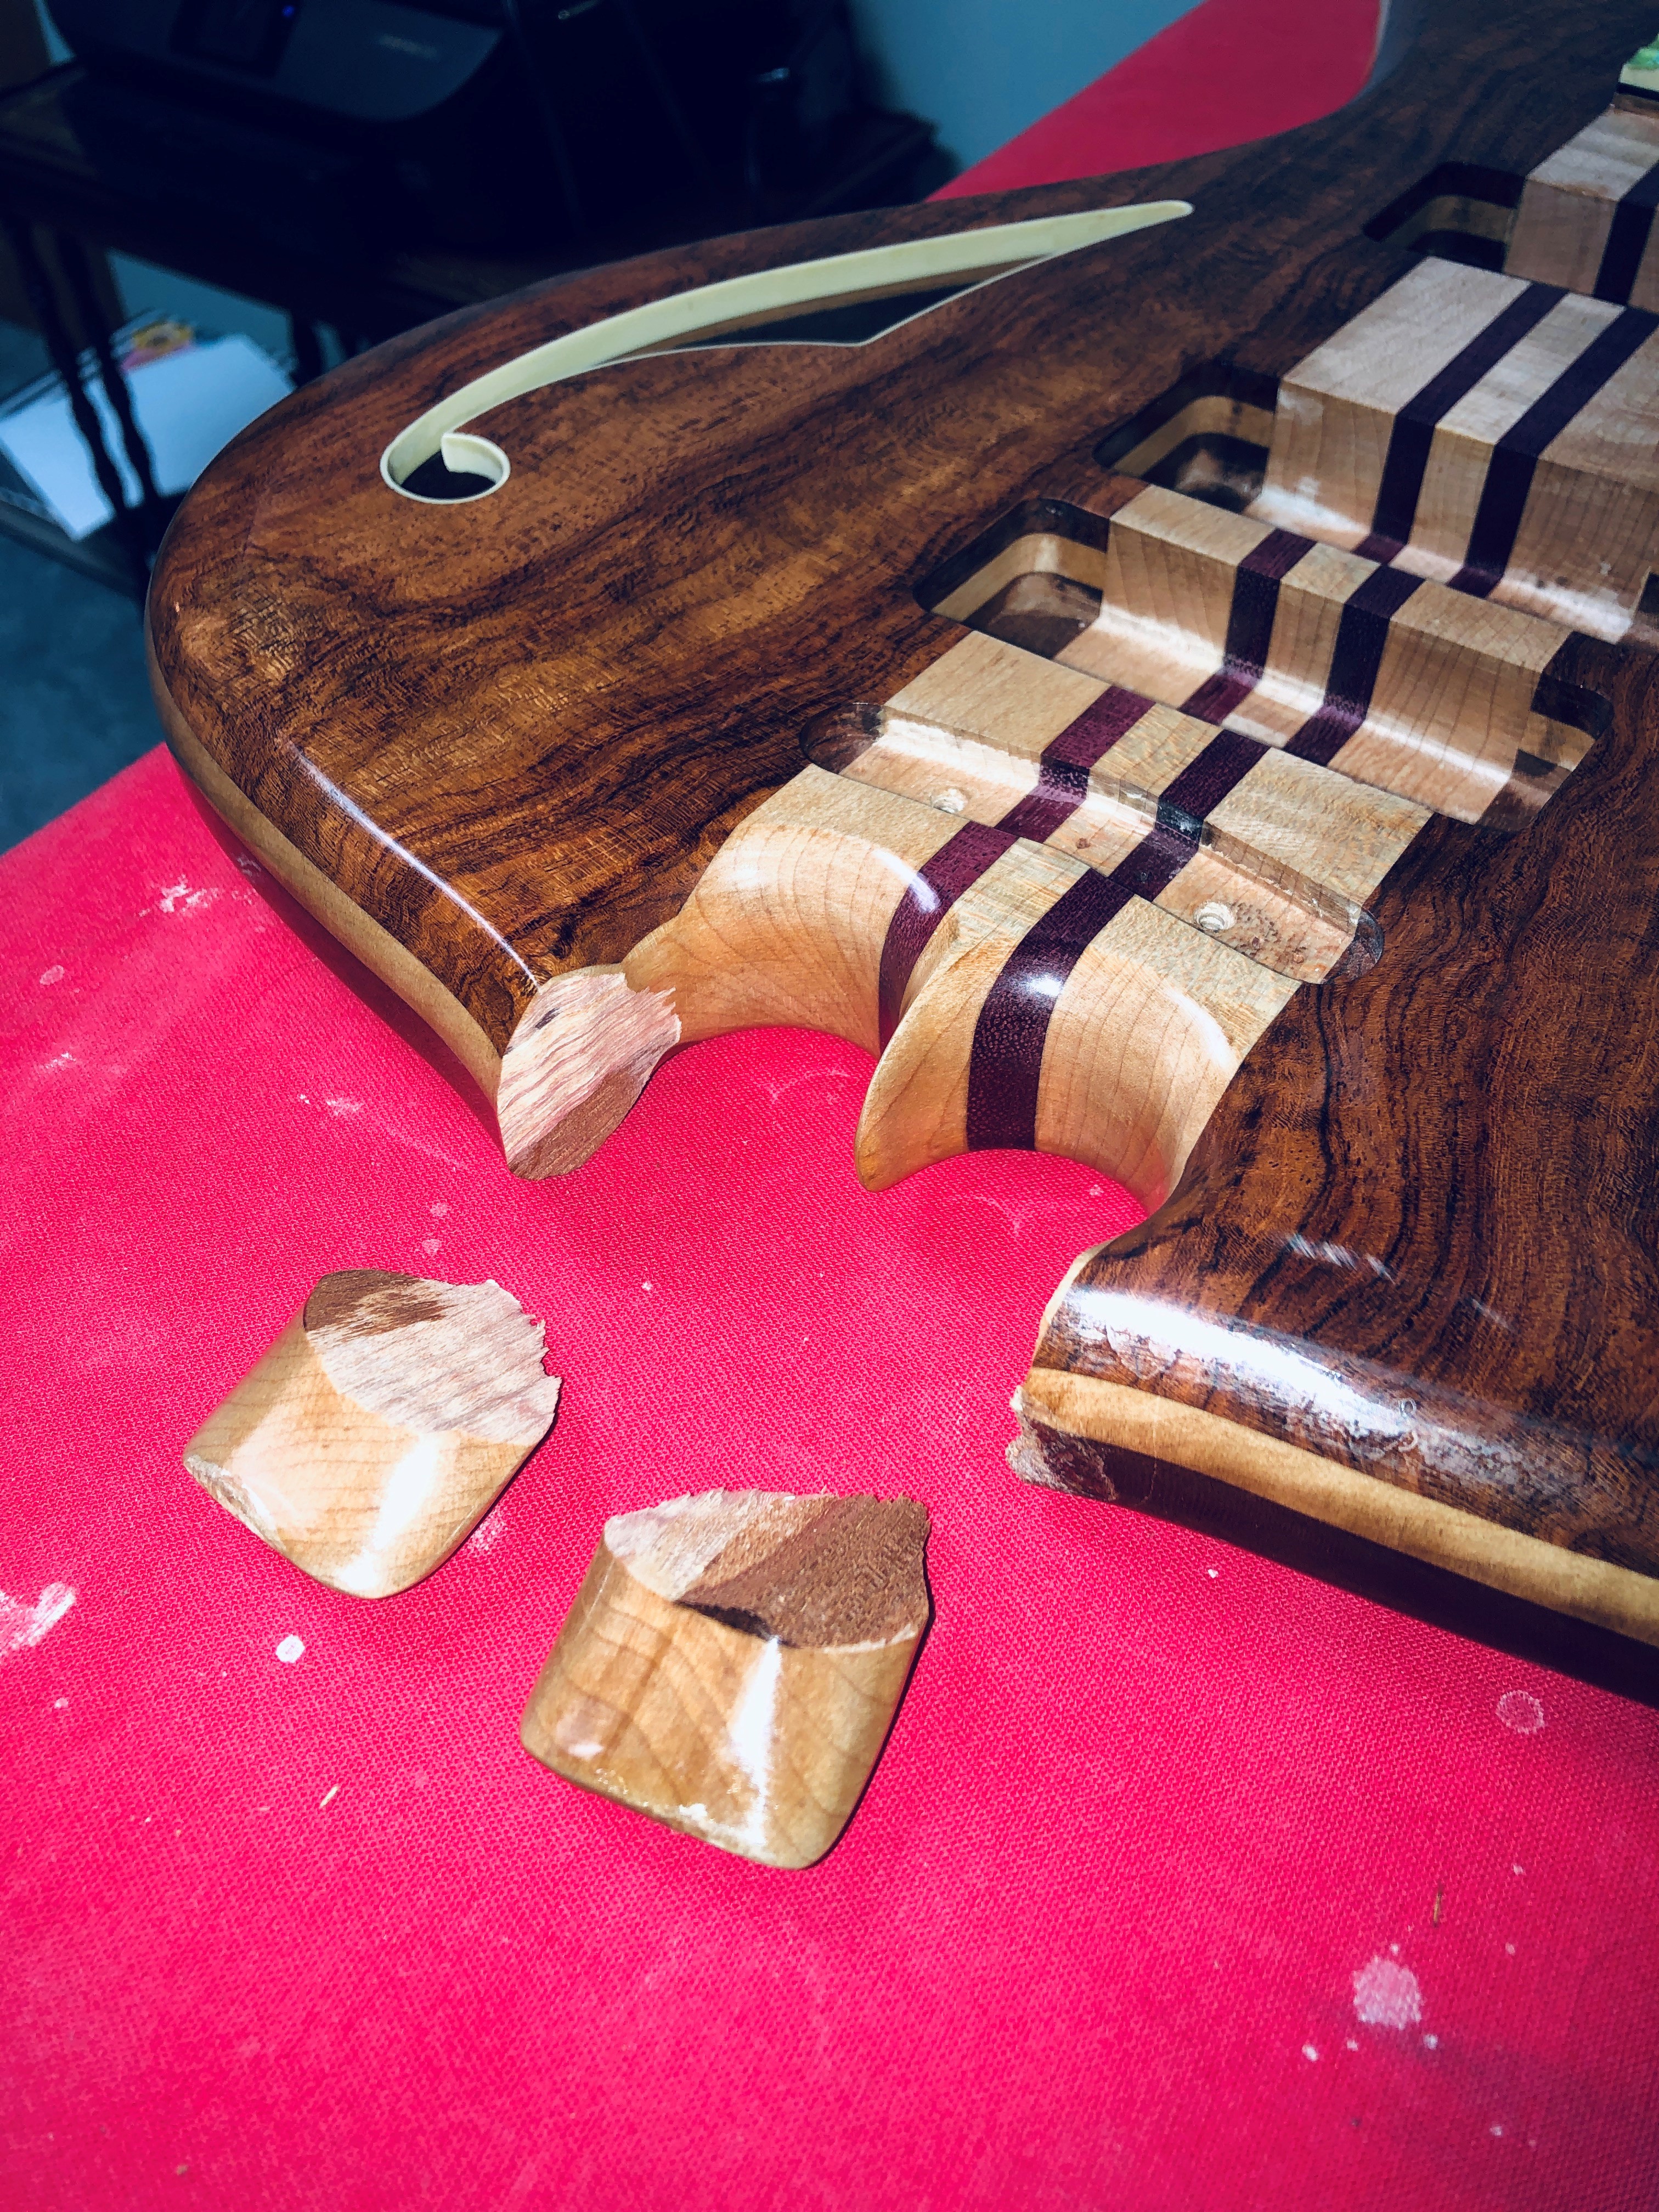
I think gluing the reamins of both ears back on is the first step, that at least would get me back to the mahogany line. If I can't live with it, I can keep cutting back by increasing the radius of the curved holes. I feel like a ballon that's been conclusively popped, every ounce of pride and enjoyment I've had building this wheezed out of it, but I know if I wait too long, it'll just become a failed project that never gets finished.
 
Whatever you end up with is still going to be awesome. It suck, but I think everyone here has the confidence in you that it will still end up great. I would do some microsurgery until you have the pieces fit back as perfect as you can get them. If there's any misalignment there's always Mohawk wax and resin repair and paint to make it look almost perfect.
 
  • Like
Reactions: Snert
Uhhh... that's a heavy hit, really sorry for that!

I don't have any suggestions for the repair apart from this: think it well through and draw different options before doing anything irreversible / losing more wood. Based on the skill you've demonstrated in this thread, I'm pretty sure you'll finda way to fix this that will be satisfactory to you if you don't rush into it before knowing exactly what it is you want to do.
 
Last edited:
  • Like
Reactions: Snert
I also gave a sympathy “like”. So sorry to see this. Agreed that you should first attempt the re-glue and touch up approach. If that doesn’t cut it, my first instinct would be to reshape the opening completely. Yes that would mean abandoning that omega shape, but if you open the curves outward in a pleasing symmetrical fashion, it could look pretty nice. Then you’d only have to deal with blending the finish and not any repair joints.
Best of luck with whatever approach you take!
 
  • Like
Reactions: VoodooJazz
Well, I'm a bit late to this party. But, that being said, I refuse to like your post in any way, even sympathetically. I hope you understand. I still totally support you and love your build, I just don't like that post at all.

I'm in the same camp as Rock stated, just try to glue them back on and see if it works. You may get lucky and the shredded grain goes right back together and it's "good enough". Yeah, sure, you're always gonna know it's there. But the average viewer won't. I'd give it a try before I did anything, just glue them back on and see how it turns out.

Super sorry man, I can't even imagine.
 
  • Like
Reactions: Beej
I've been waiting until it doesn't make my eyes burn to look at it, like a slowly healing wound. I realize there is a ticking clock on this, beyond which I may simply lose heart and interest, so I'll take a shot at it in a couple weeks after my annual boat-prep ordeal is over. I doubt I can fix it in a way that wont show, but it is what it is. Remember that old saw about a boat being a hole in the water into which money is poured? They forgot to mention the Oceans of Time poured in with it.... So im pretty occupied at the moment. Thanks for asking;
 
A suitable period of sulking/procrastination having expired, the attempt to repair this mess proceeds.....

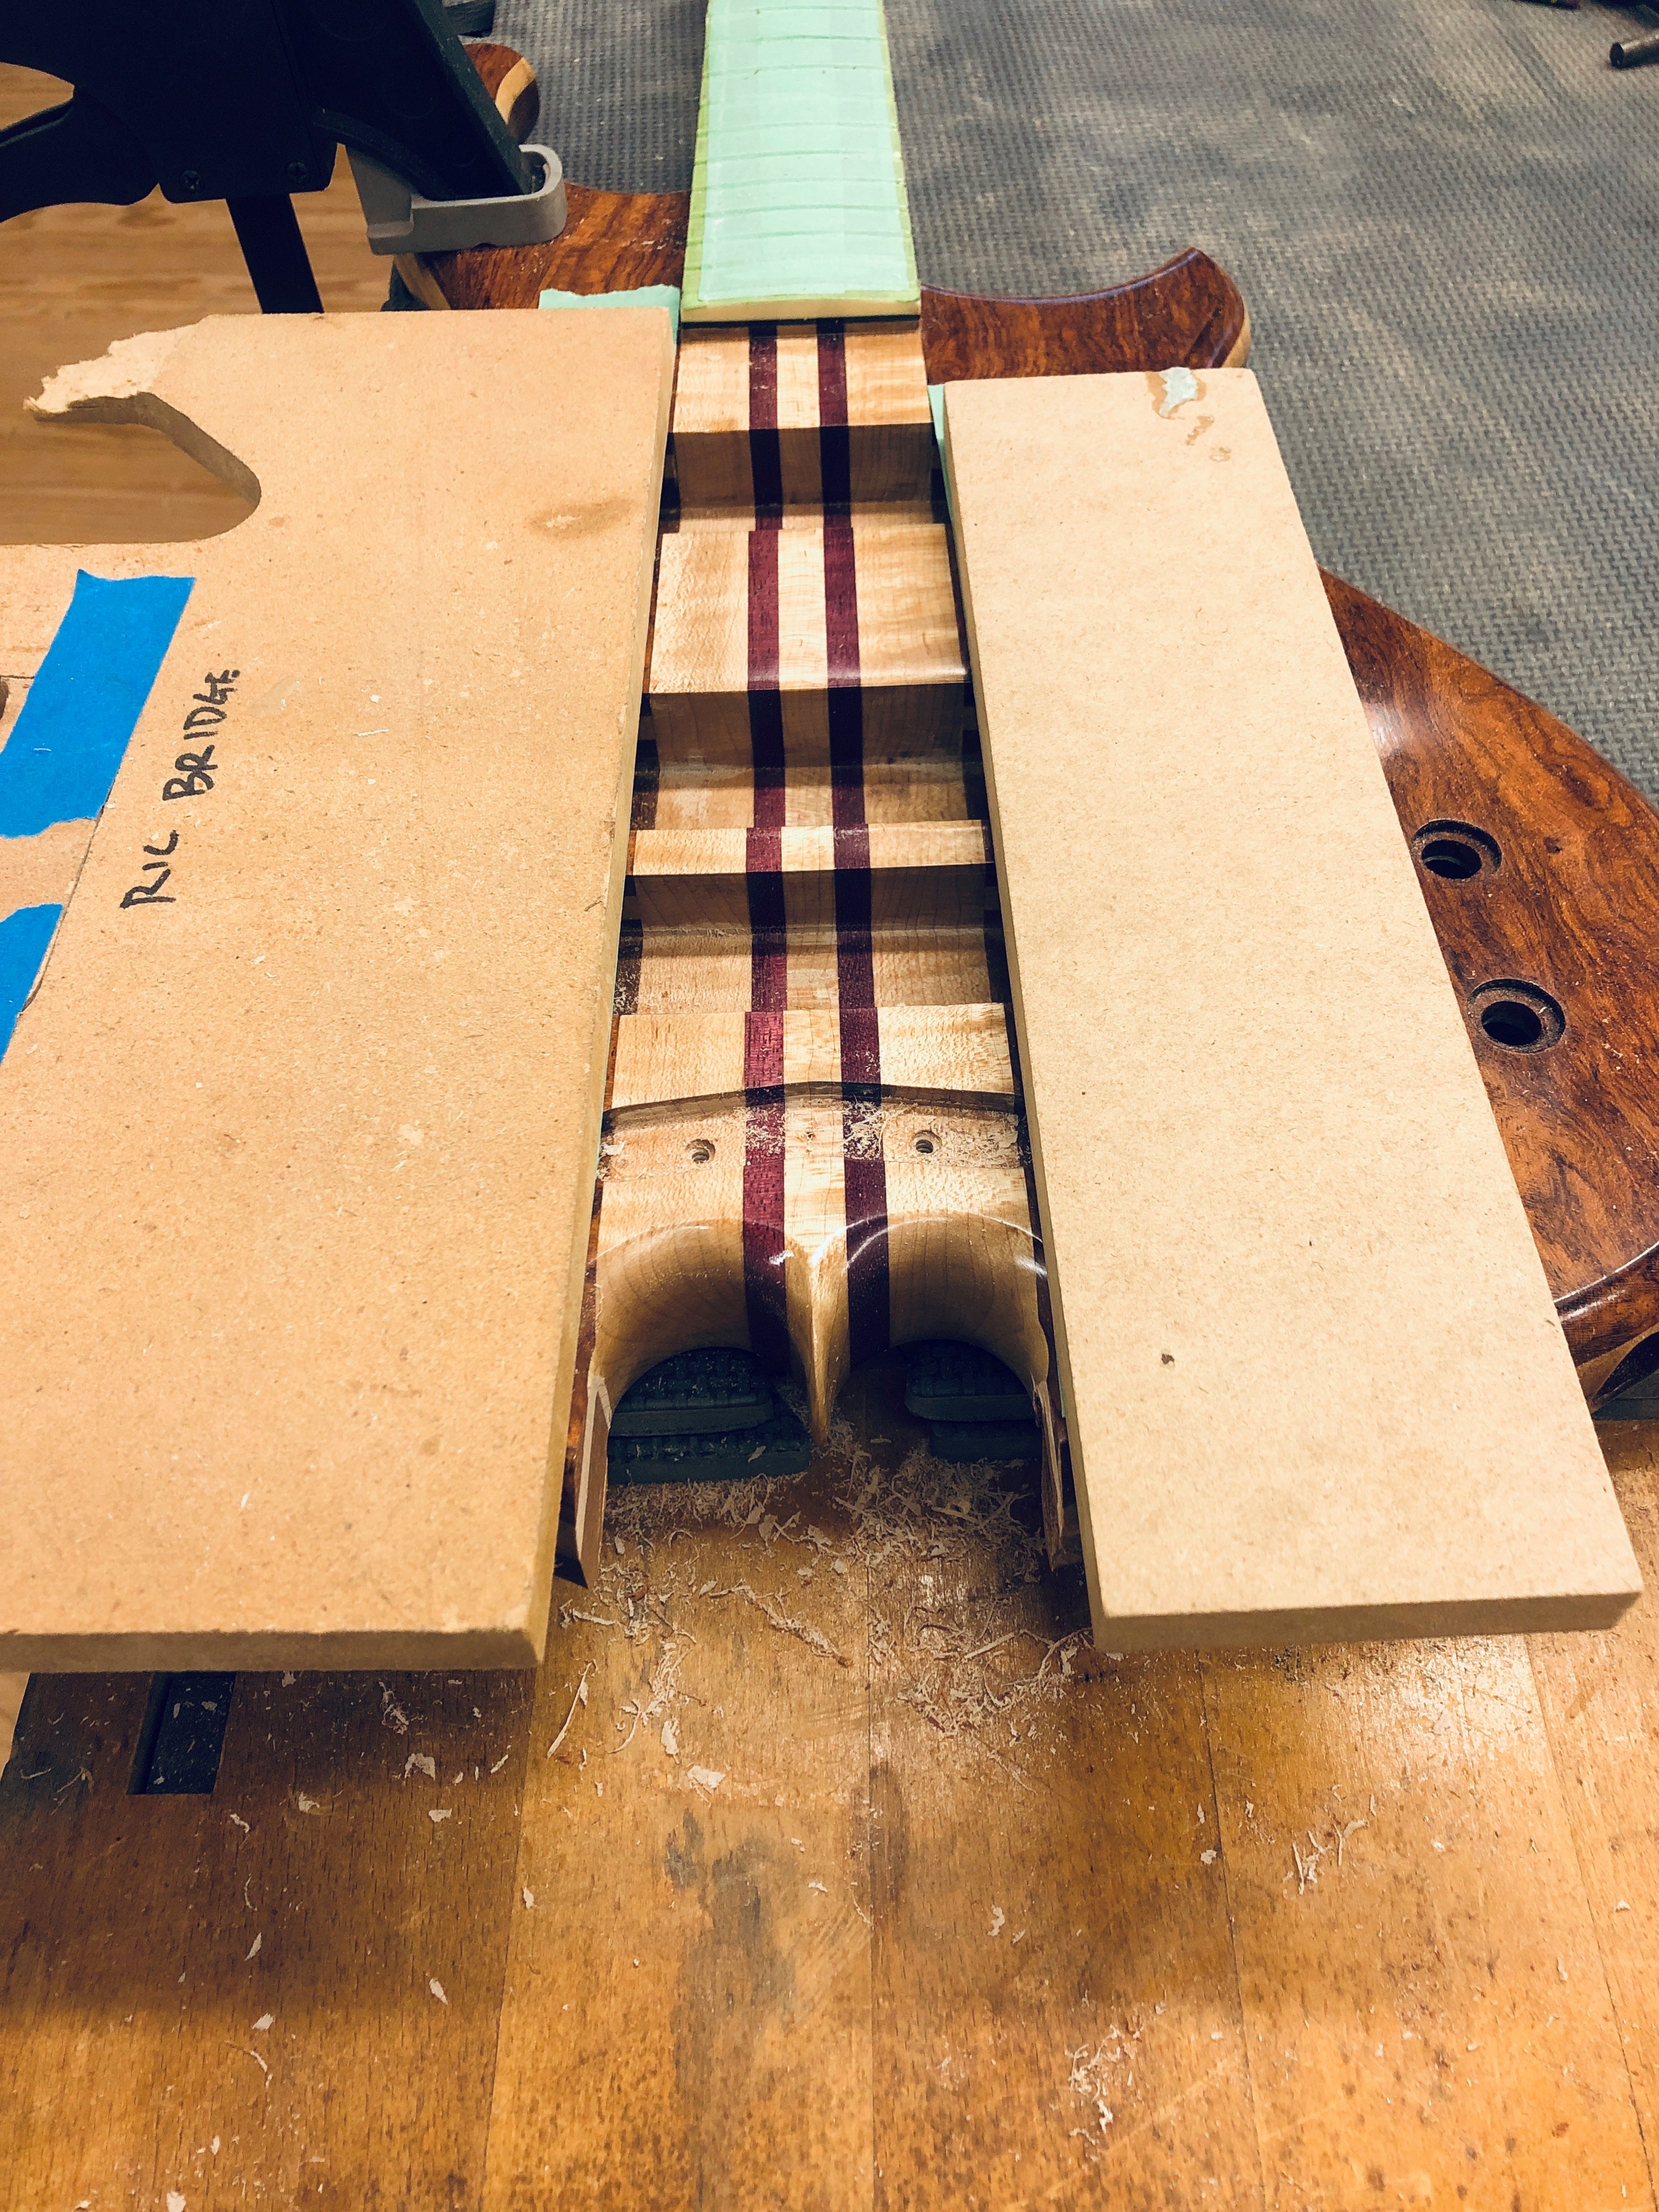
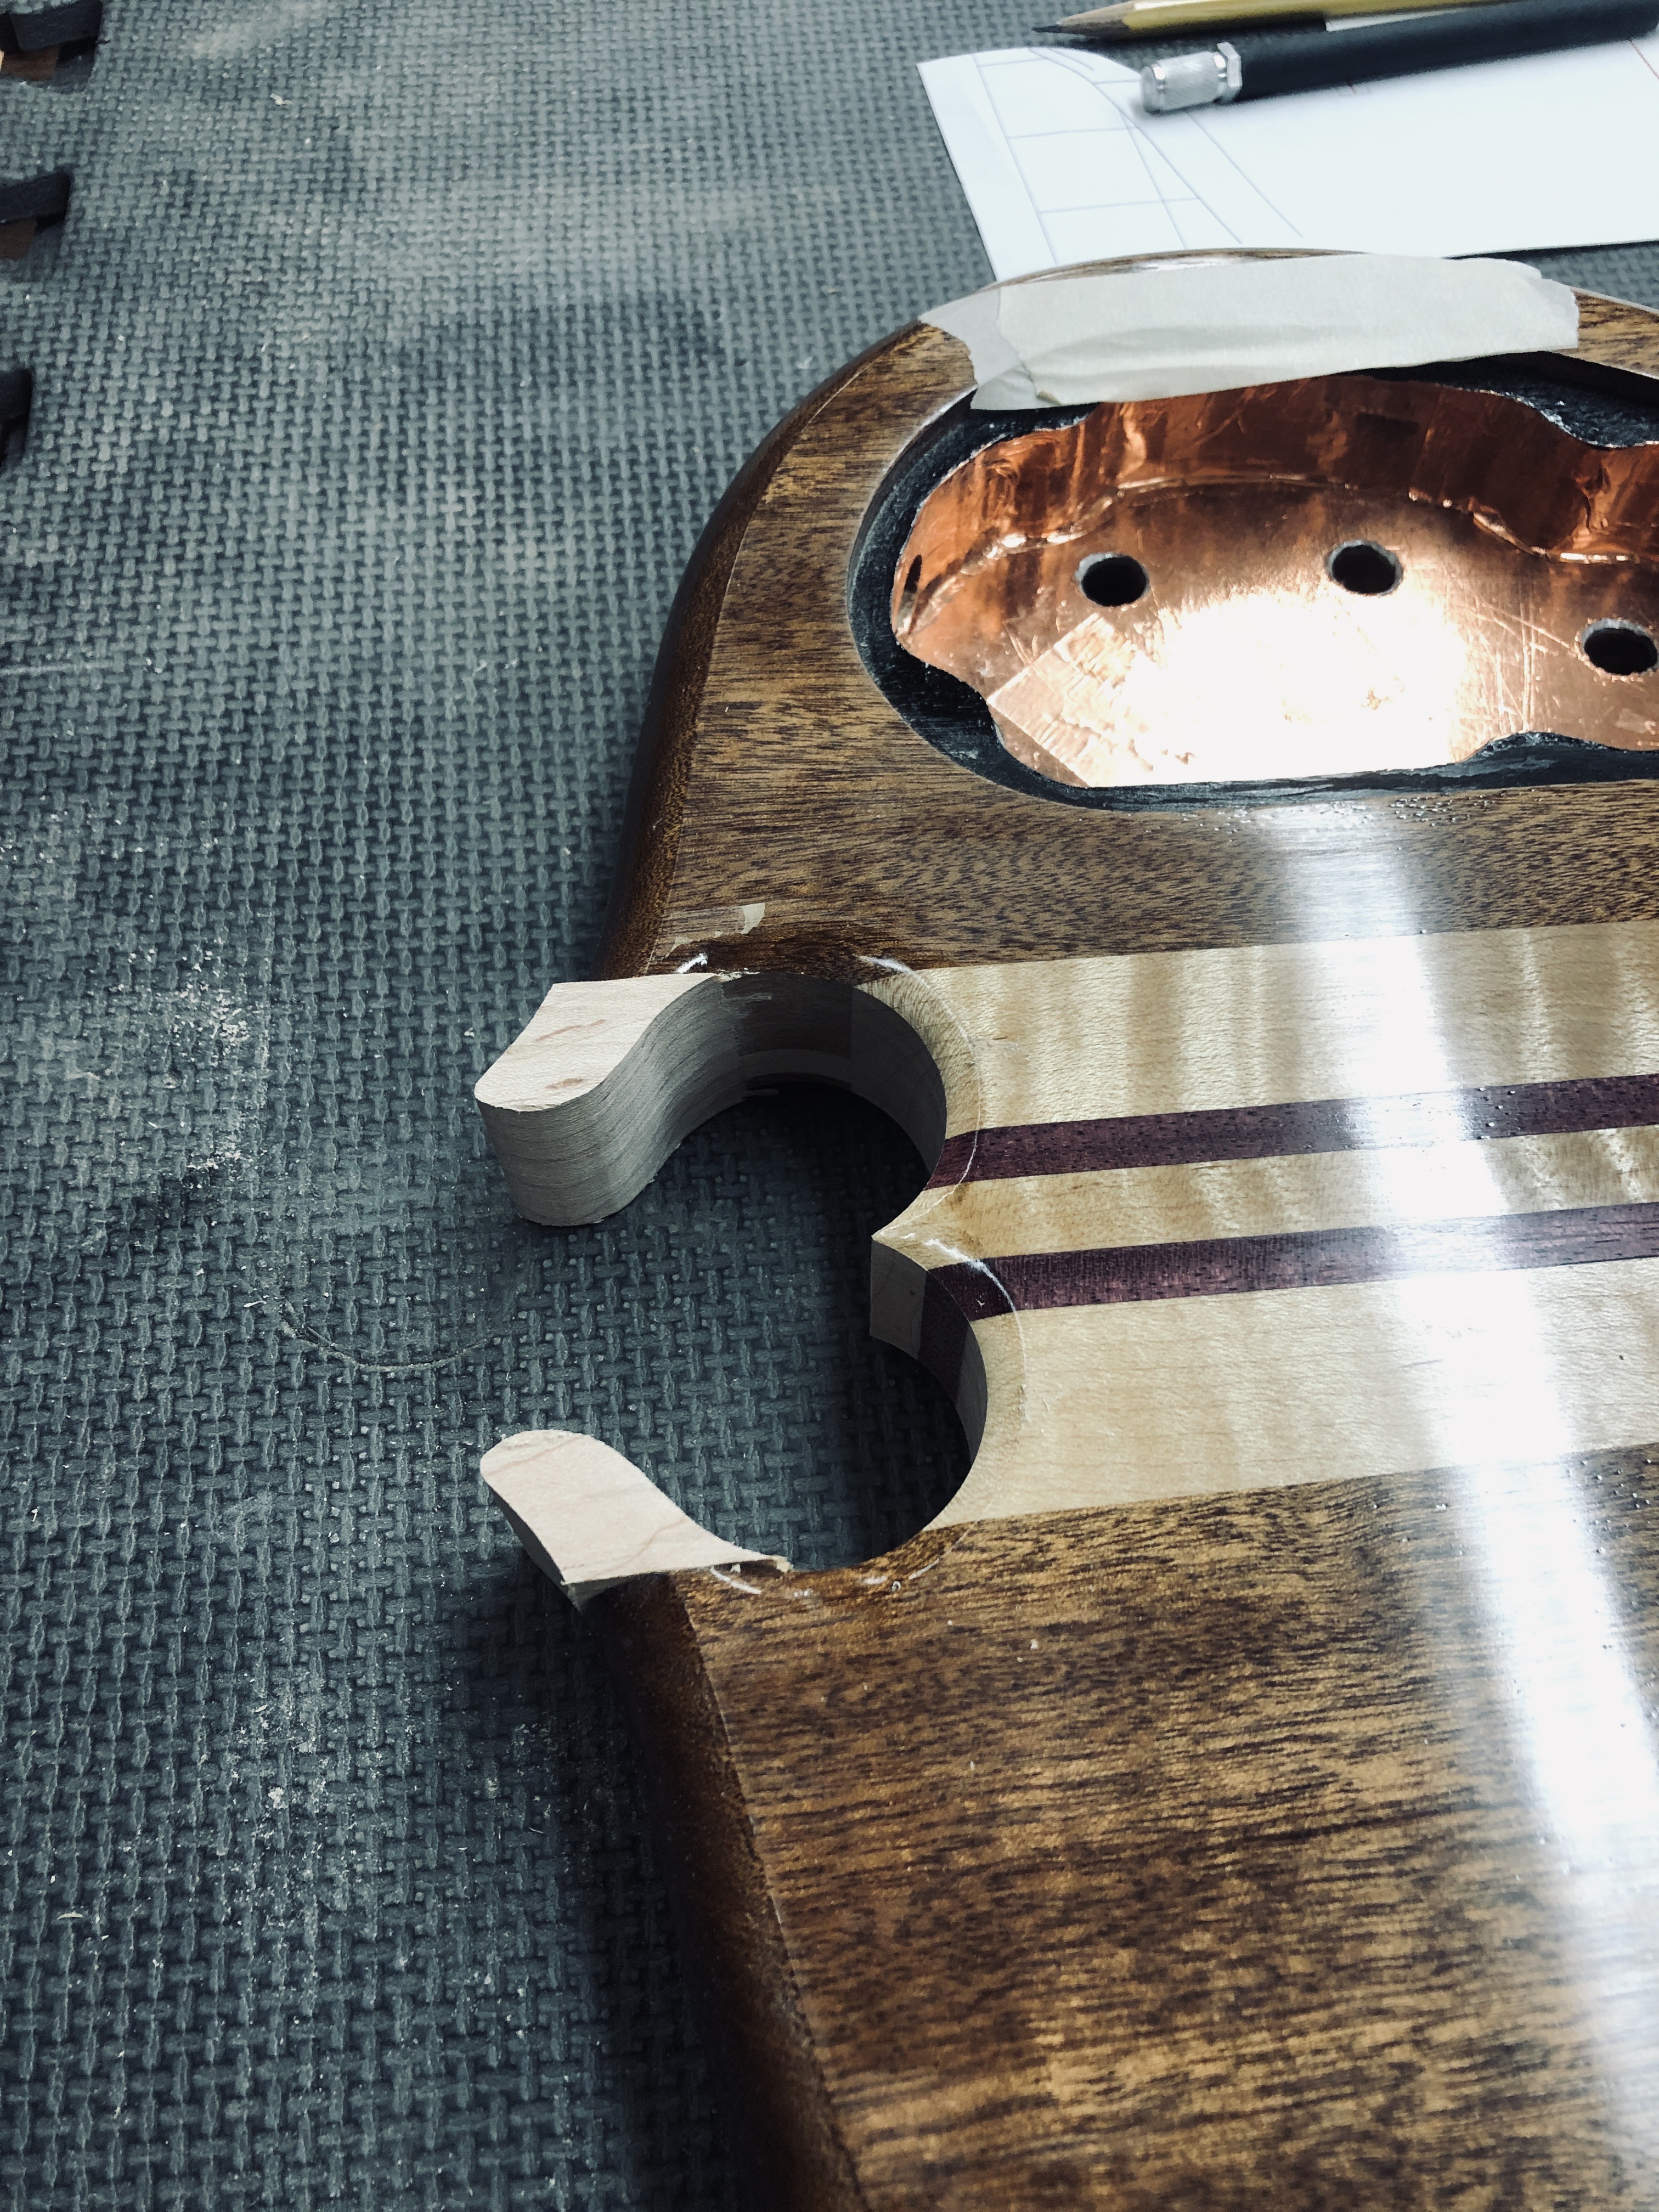
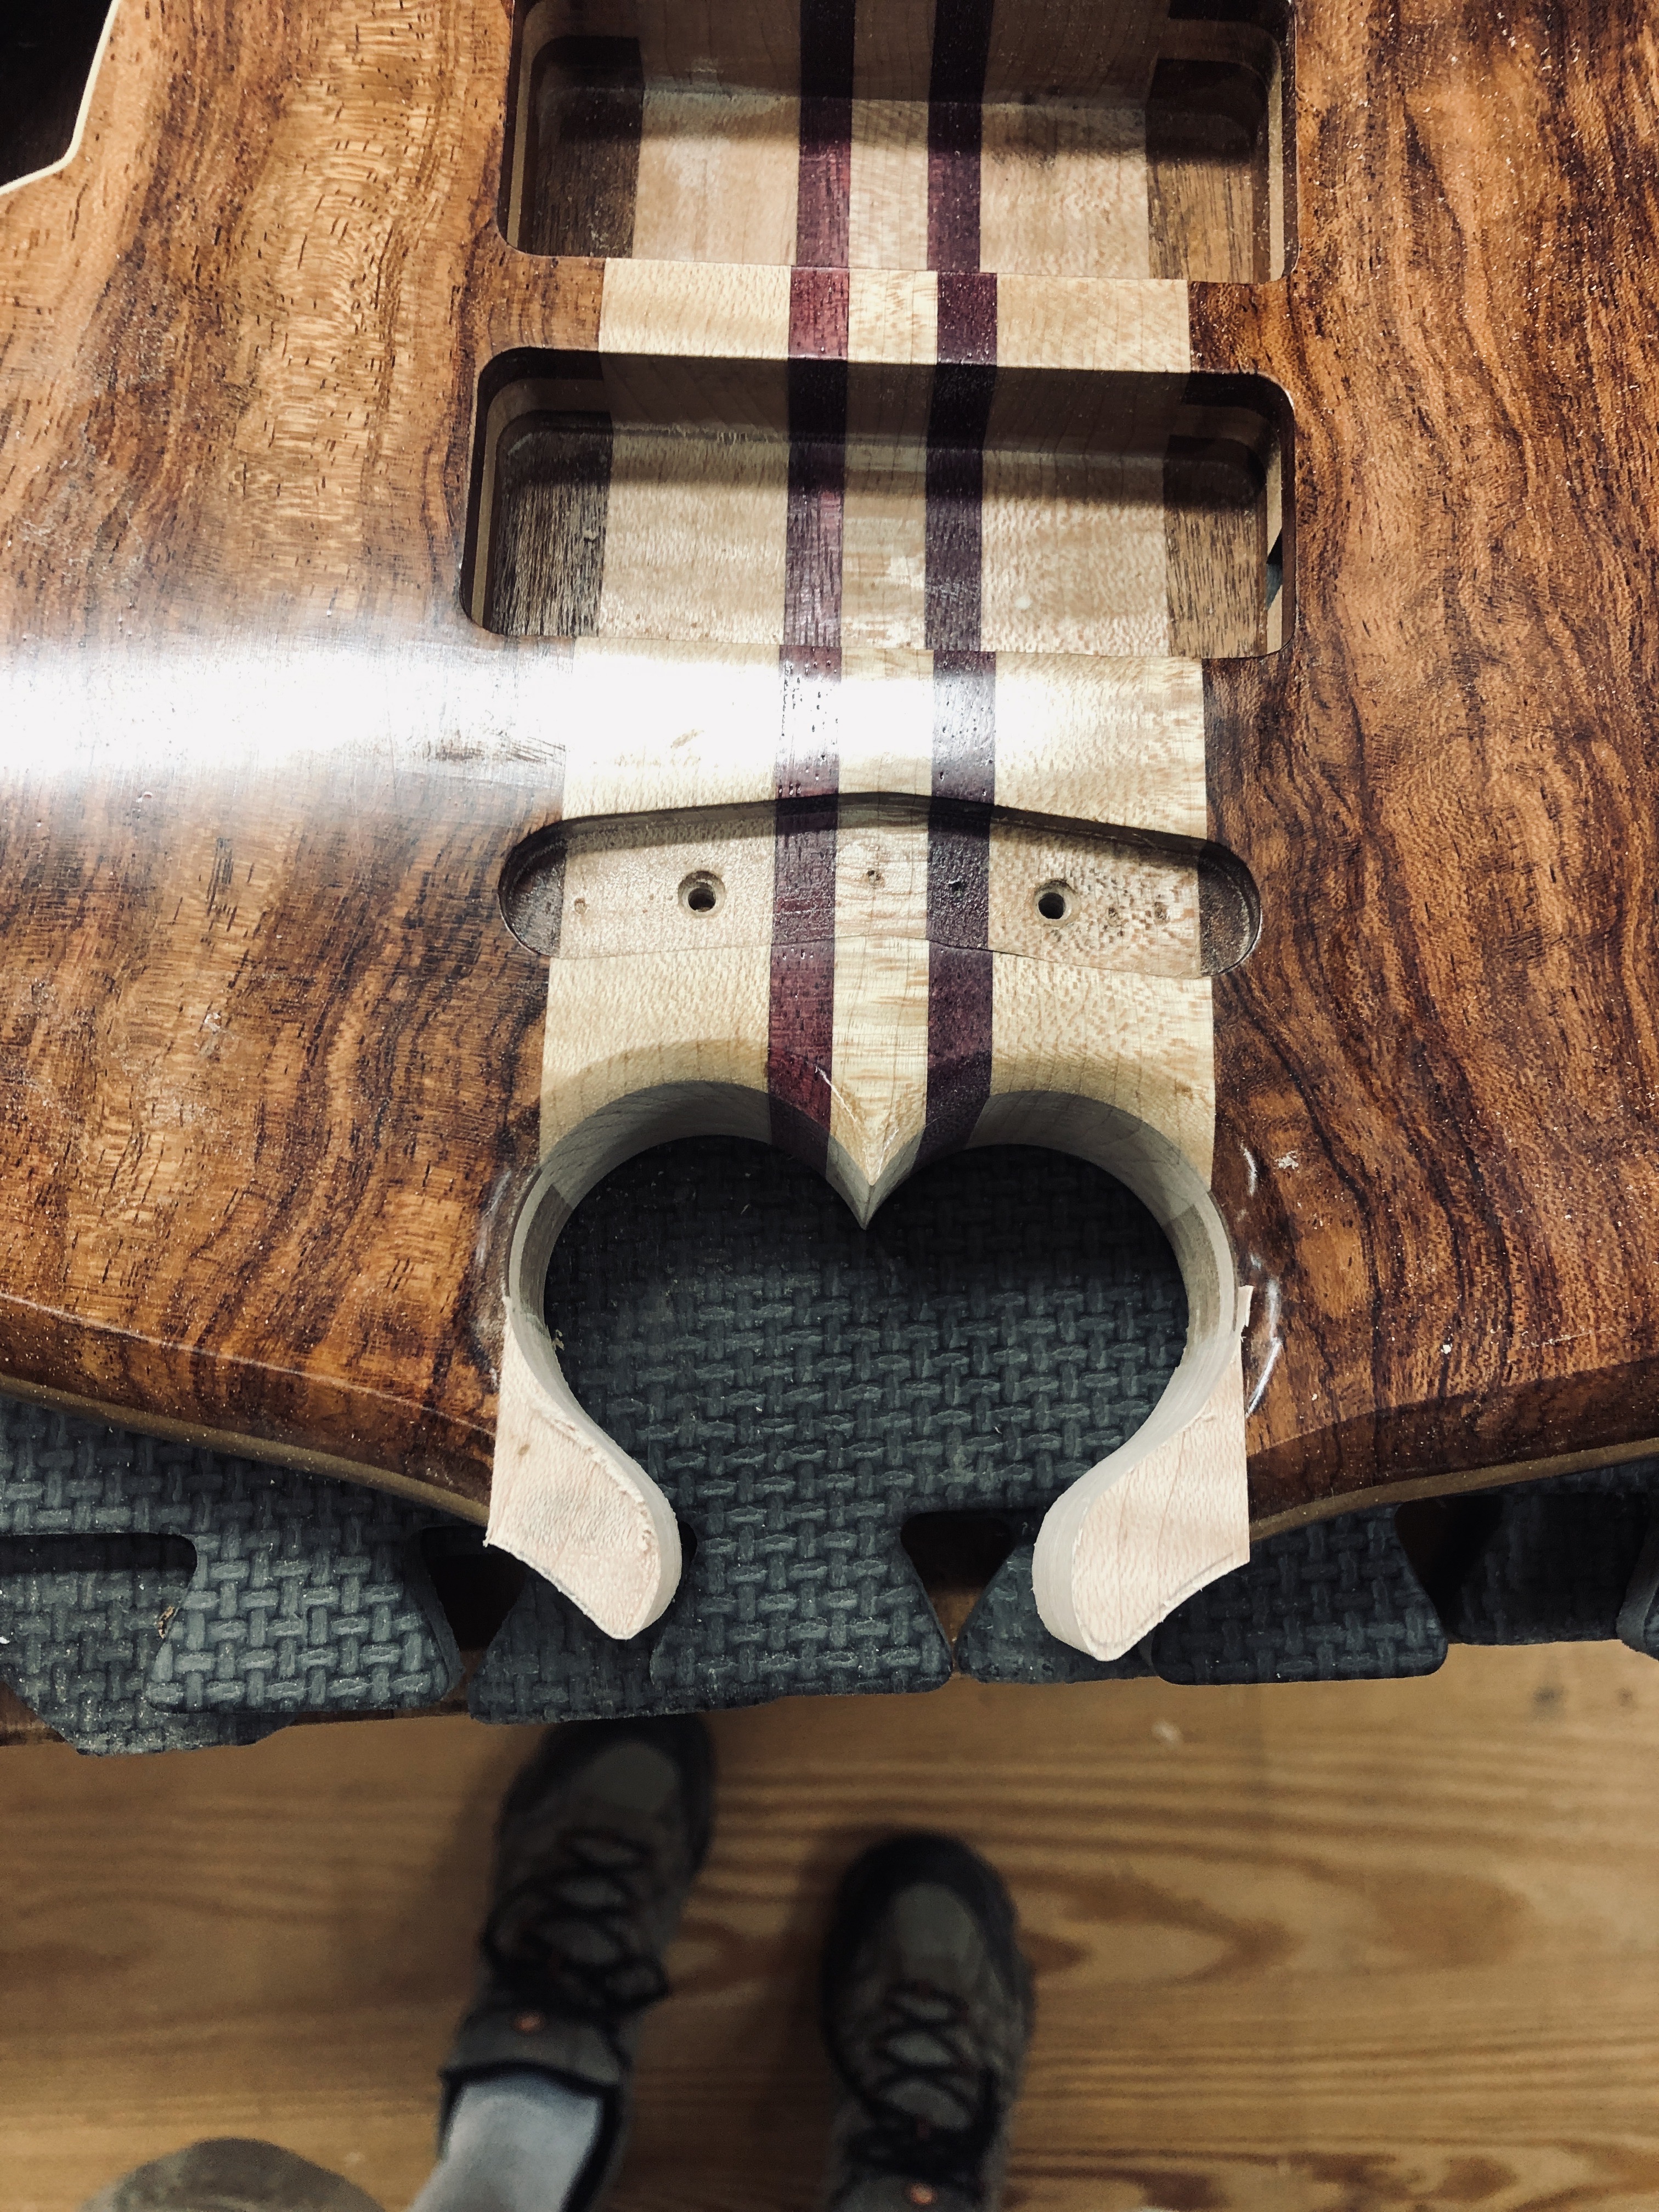
After some careful test fitting, I realized that while one side of the Heart Omega broke pretty cleanly, the other side didn't so much break as explode, with a fair amount of crushed wood and splinter loss. I couldn't see a way to make it look right just glueing it back together, so.... out comes the router.
3HC1xyT.jpg


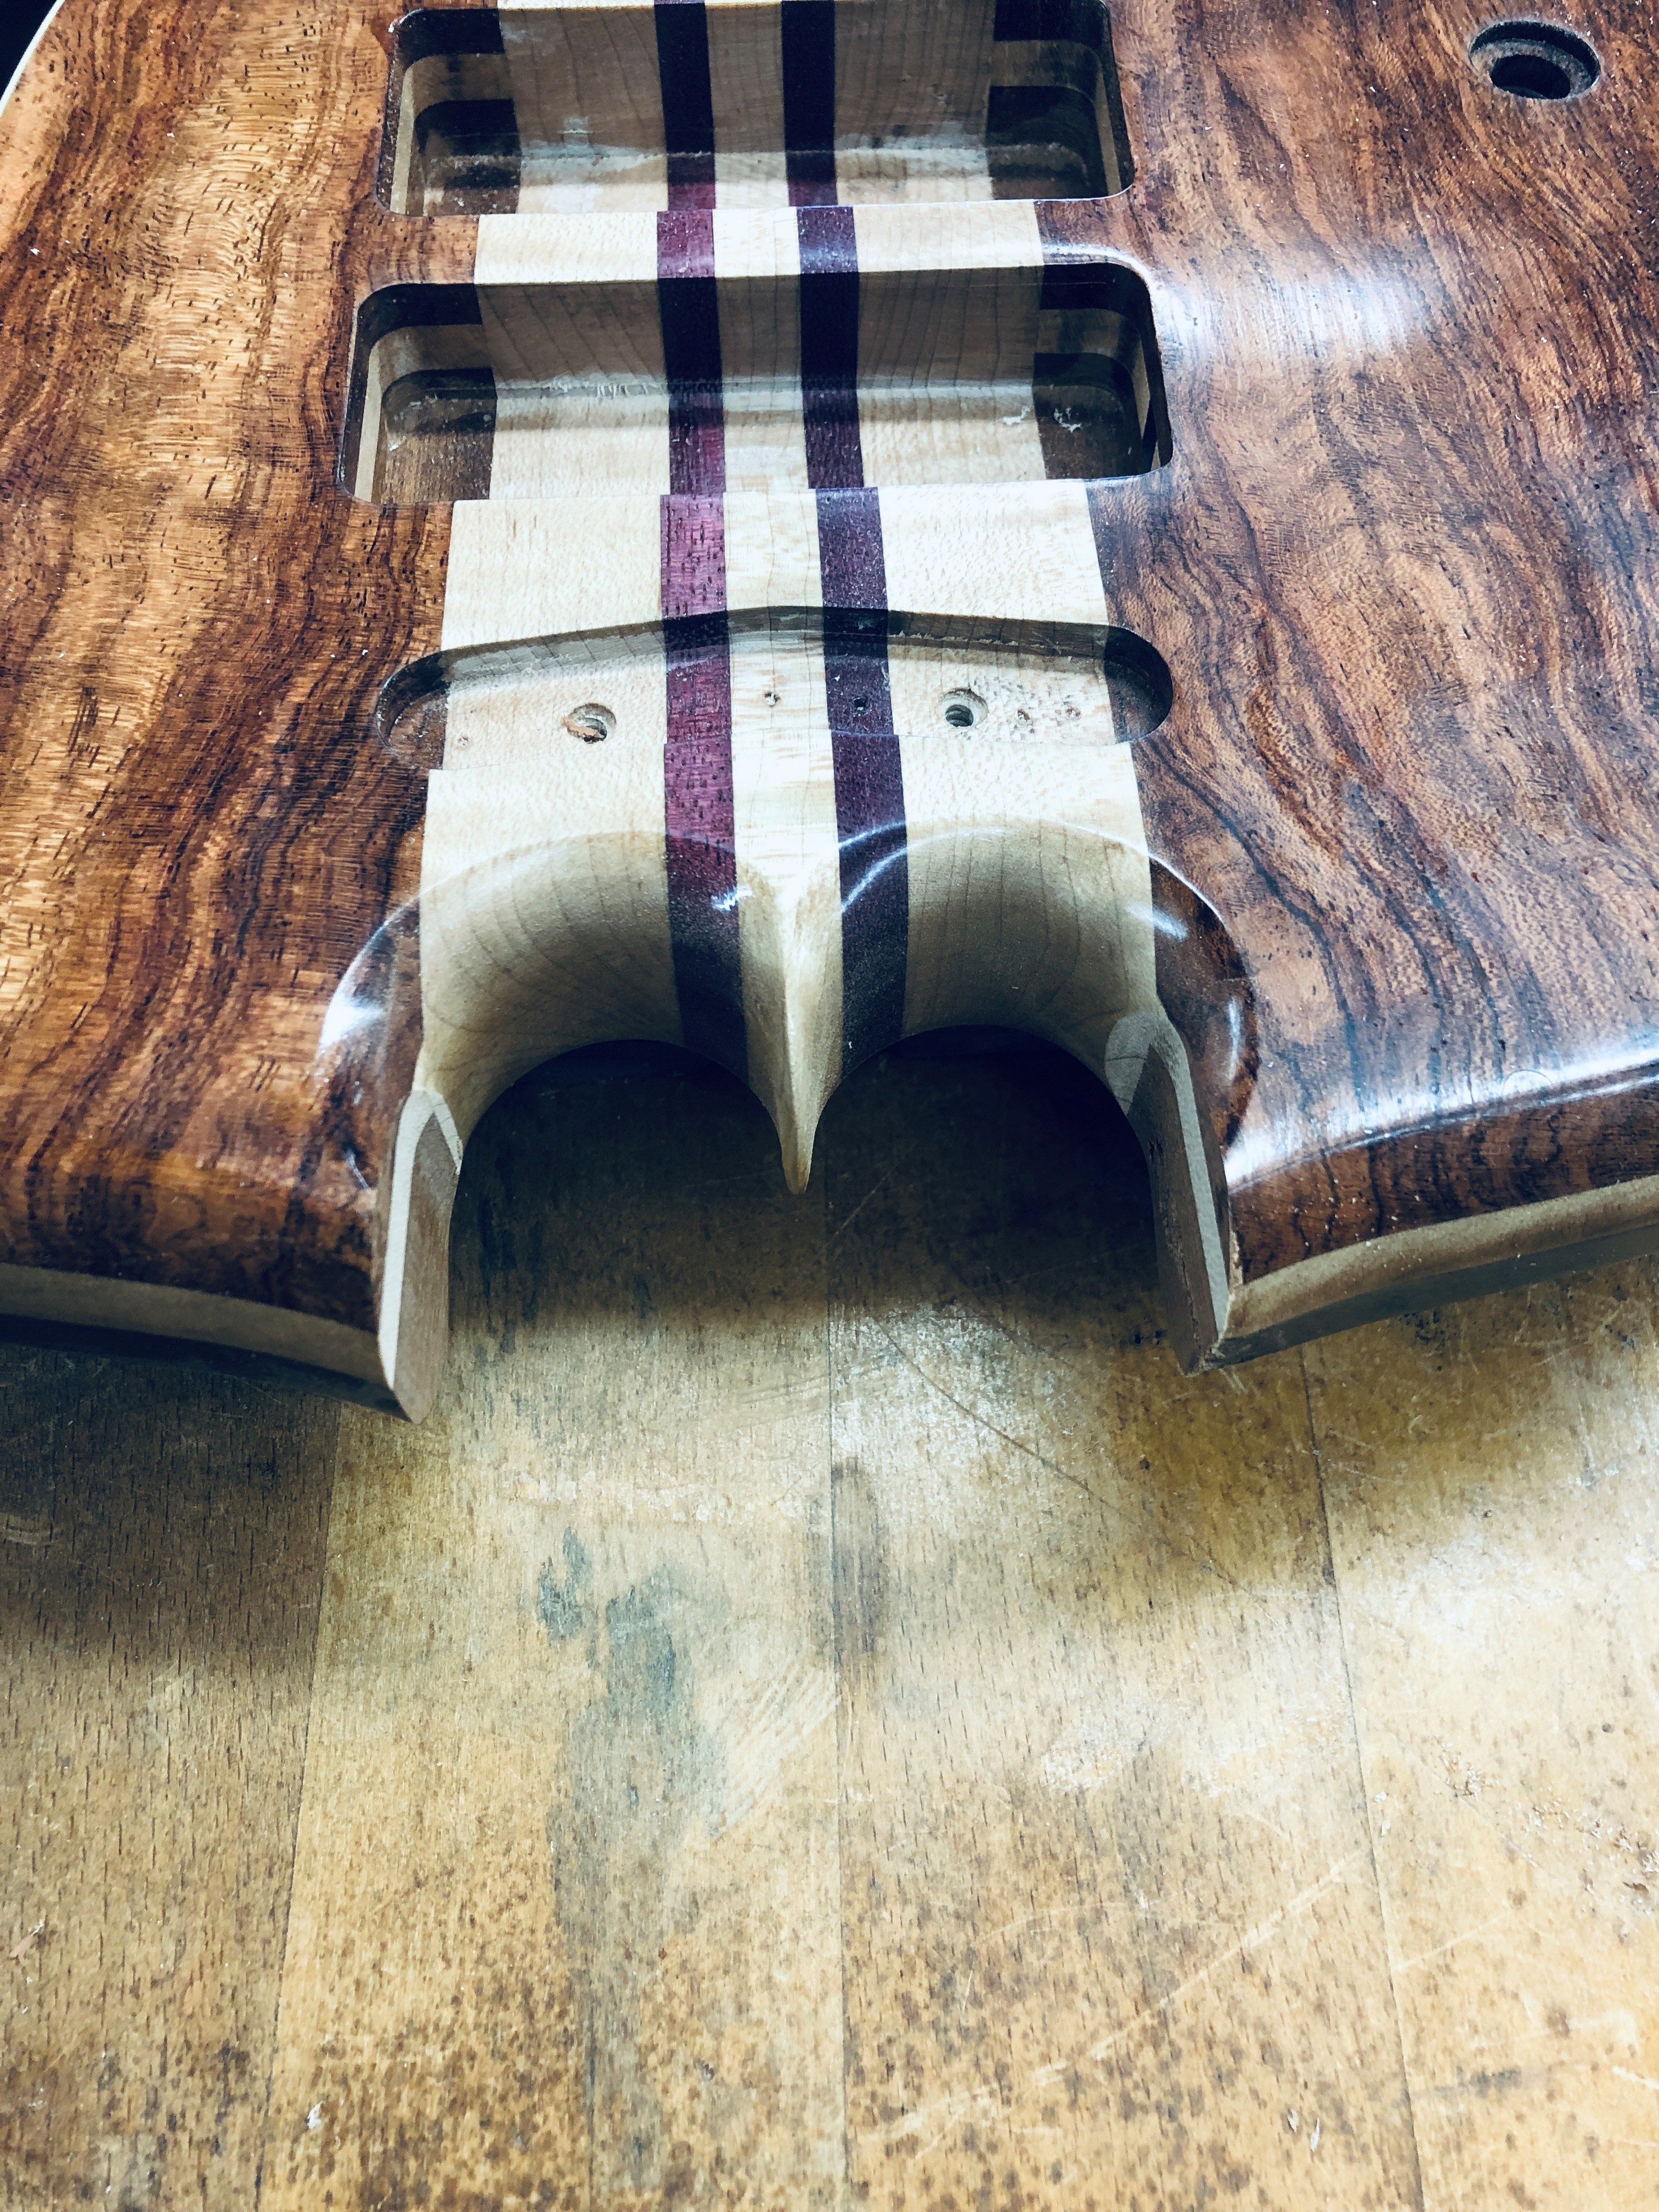
The badly damaged side was on the right side of the body, with shattered and partly missing wood extending a full 1/8" beyond the maple neck beam, and into the mahogy, so I'm shaving out a full 1/8" each side to get back to good wood. So much for the perfect continuation of the neck beam into the horns, but that ship sailed and sank in a single instant of inattention.
bPzyzzk.jpg

mHBTBUS.jpg


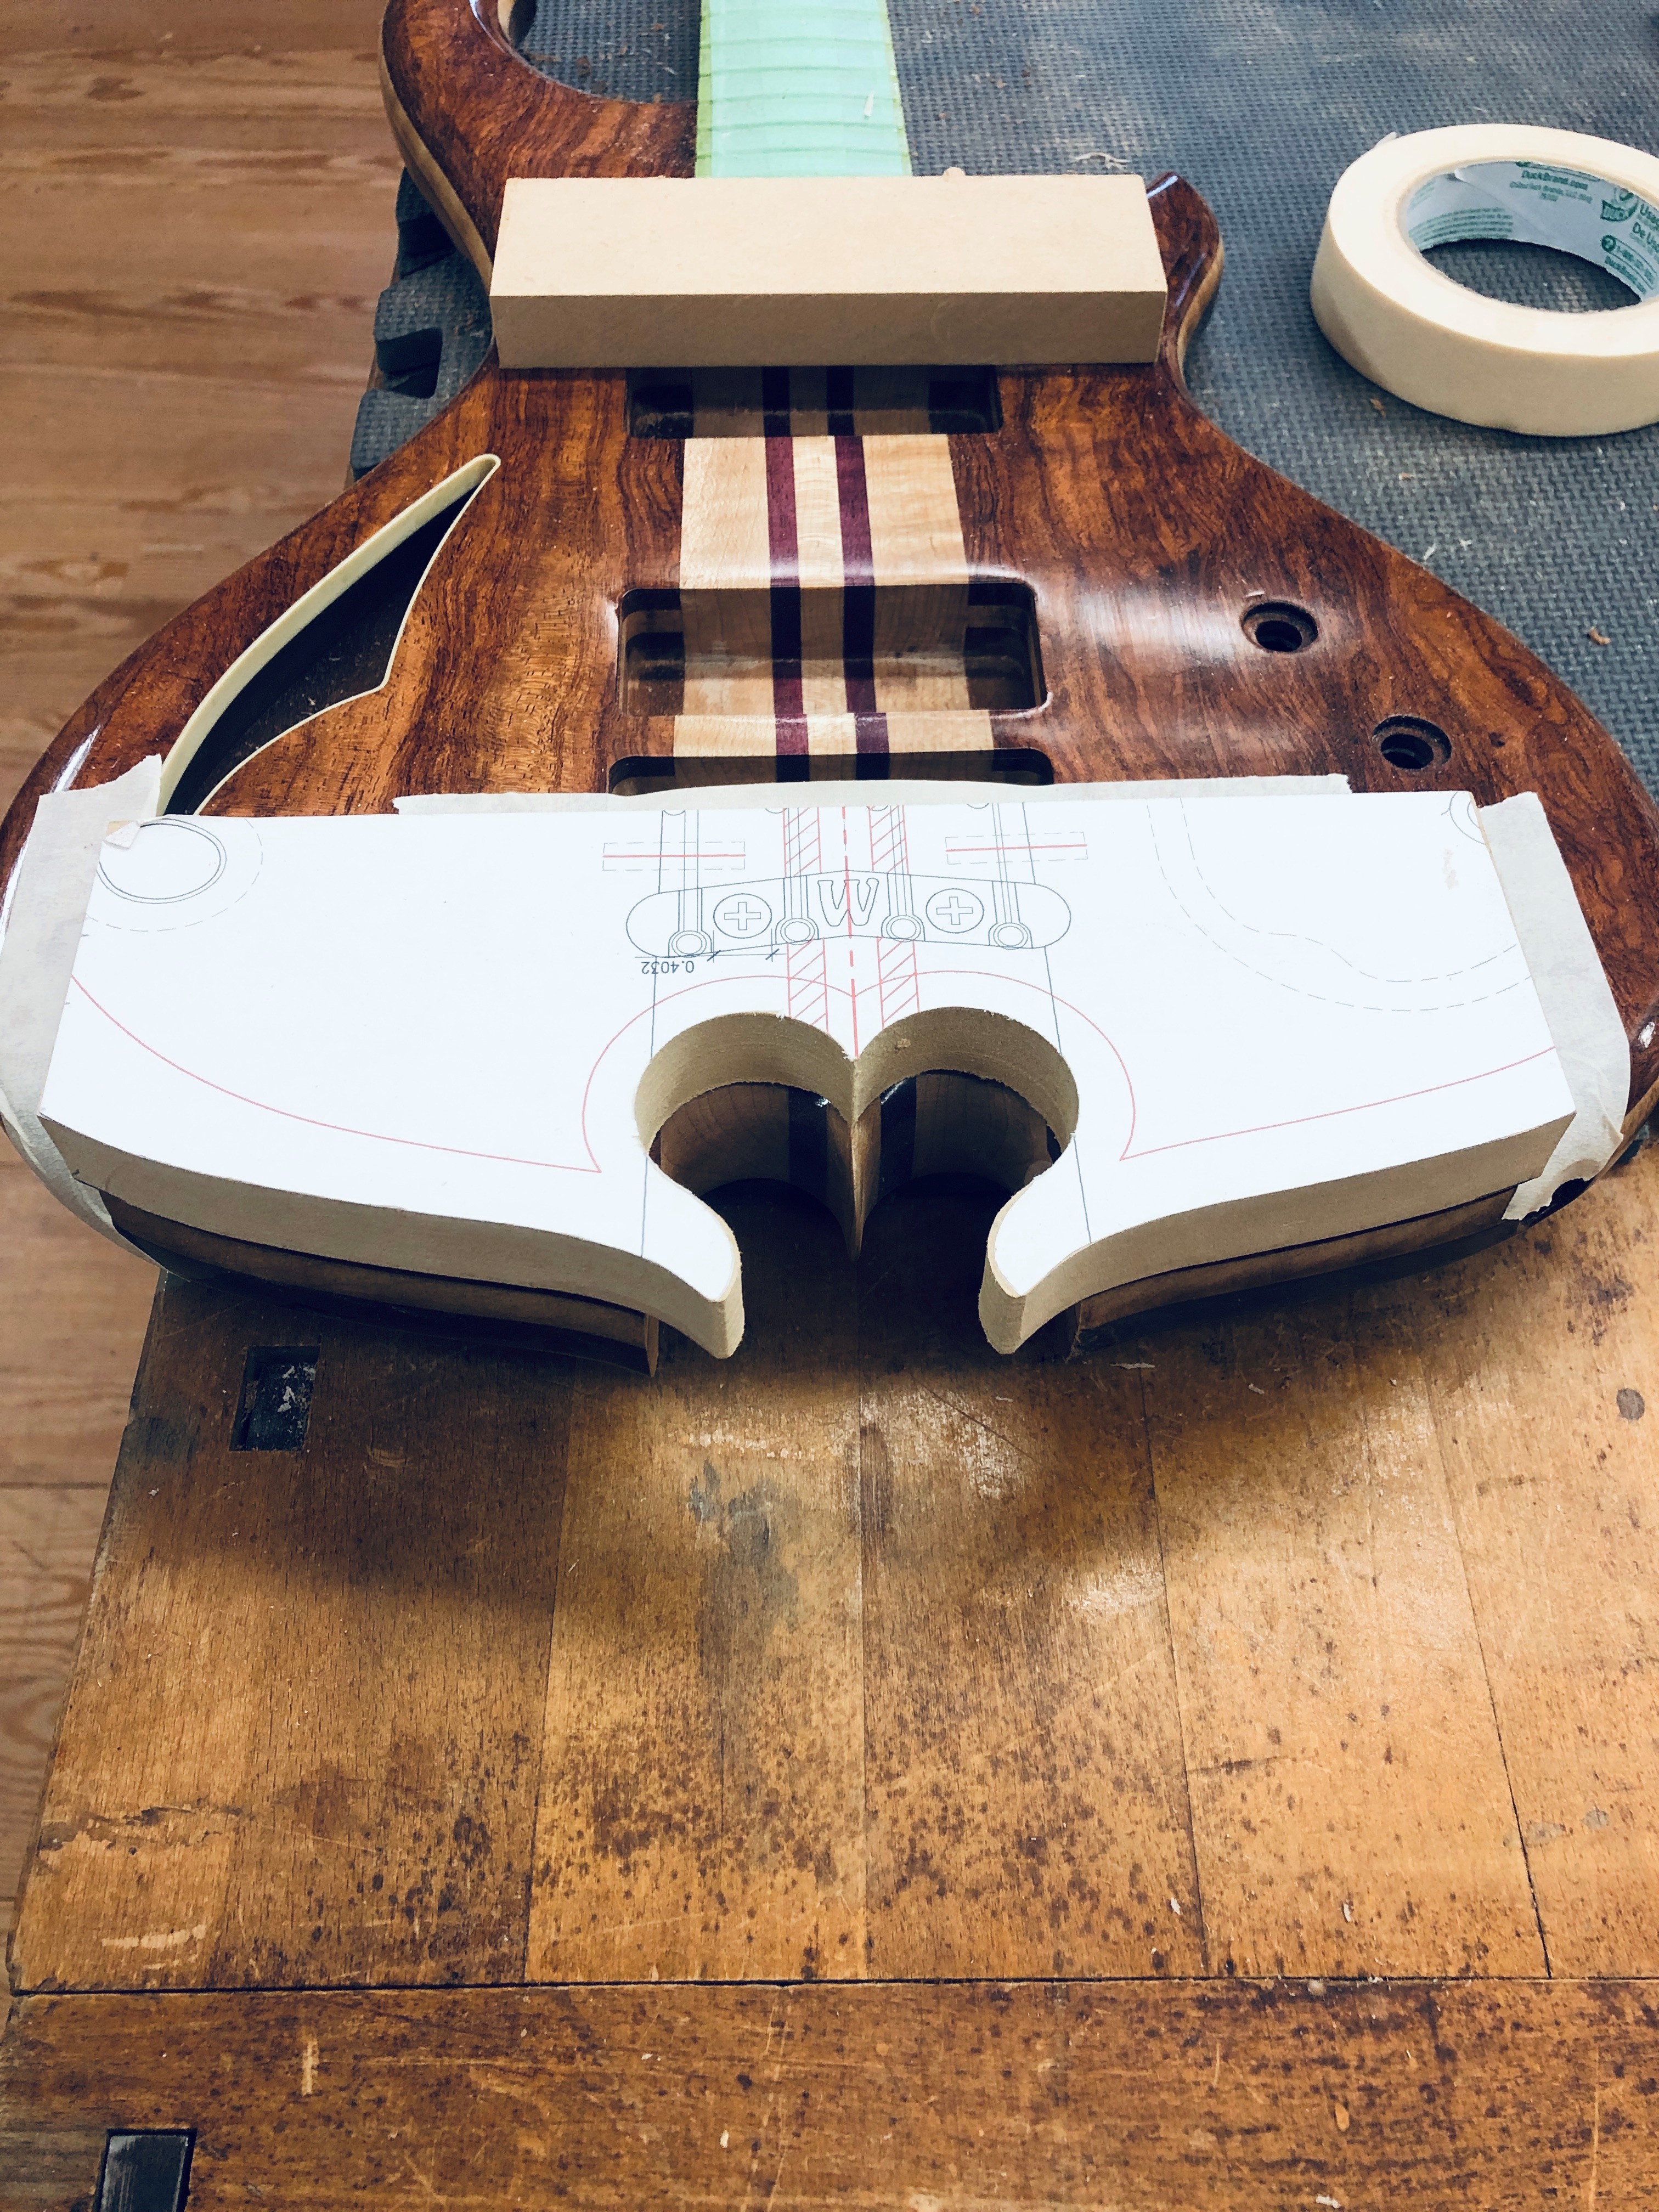
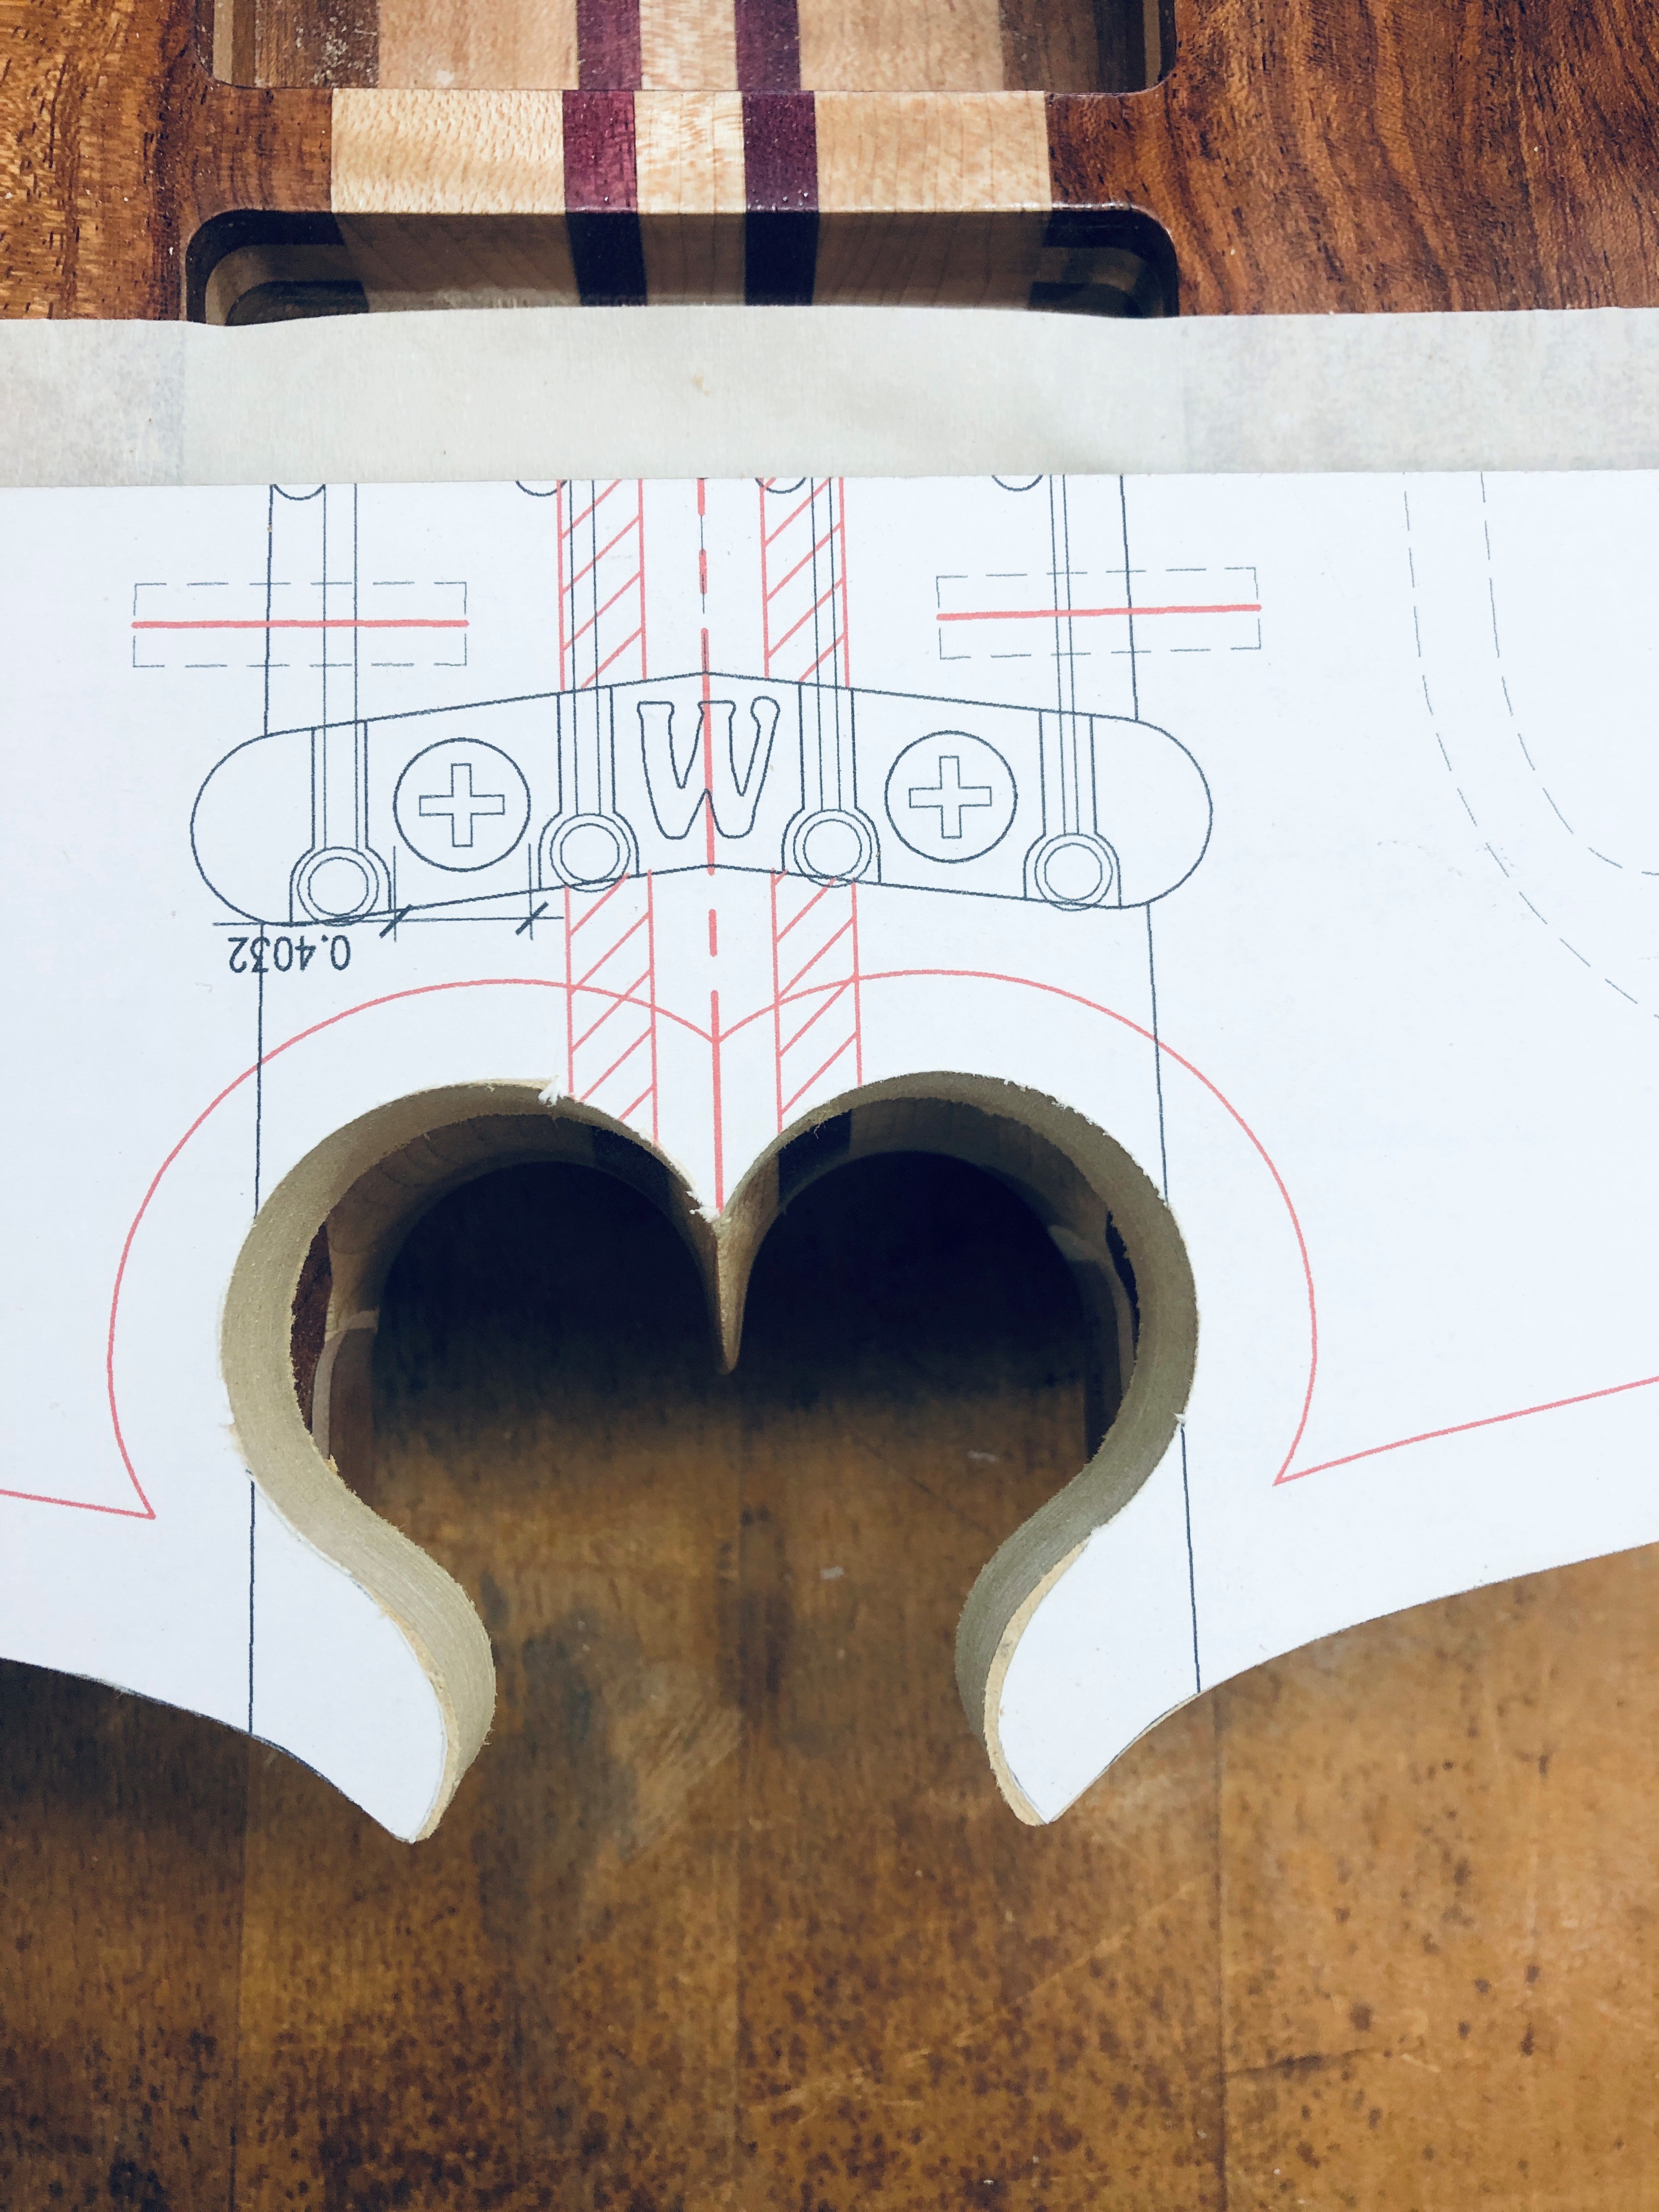
The original Omega cutouts were 1-1/4" diameter, so i re-cut my template to 1-1/2" diameter to fair into the 1/8" shaved off. I'll have to re-cut the roundovers all around. I did this with my Robosander, too risky squeezing a router in there.
03EpcuL.jpg

MfYhGjV.jpg

7Ehpo14.jpg

ZdcckTo.jpg


The "exploded" side has some finish cracking and wood crushing. Not sure what to do here but sand back to bare wood, try to steam it back out a little to flush, and then refinish the edges all around. I'm hoping to sand and refinish just the roundover edges, but it may not be possible. Sigh.... REALLY don't want to have to sand/scrape this whole bass back to bare wood.
XvWili3.jpg


The astute observer may notice I STILL have some little "horns, now even thinner, because I am a stubborn b#stard. I'm wondering idf it might look cool to introduce a 1/8" band of purpleheart to make up the removed material? maybe turn a compromose into a "feature"?
 
Last edited:
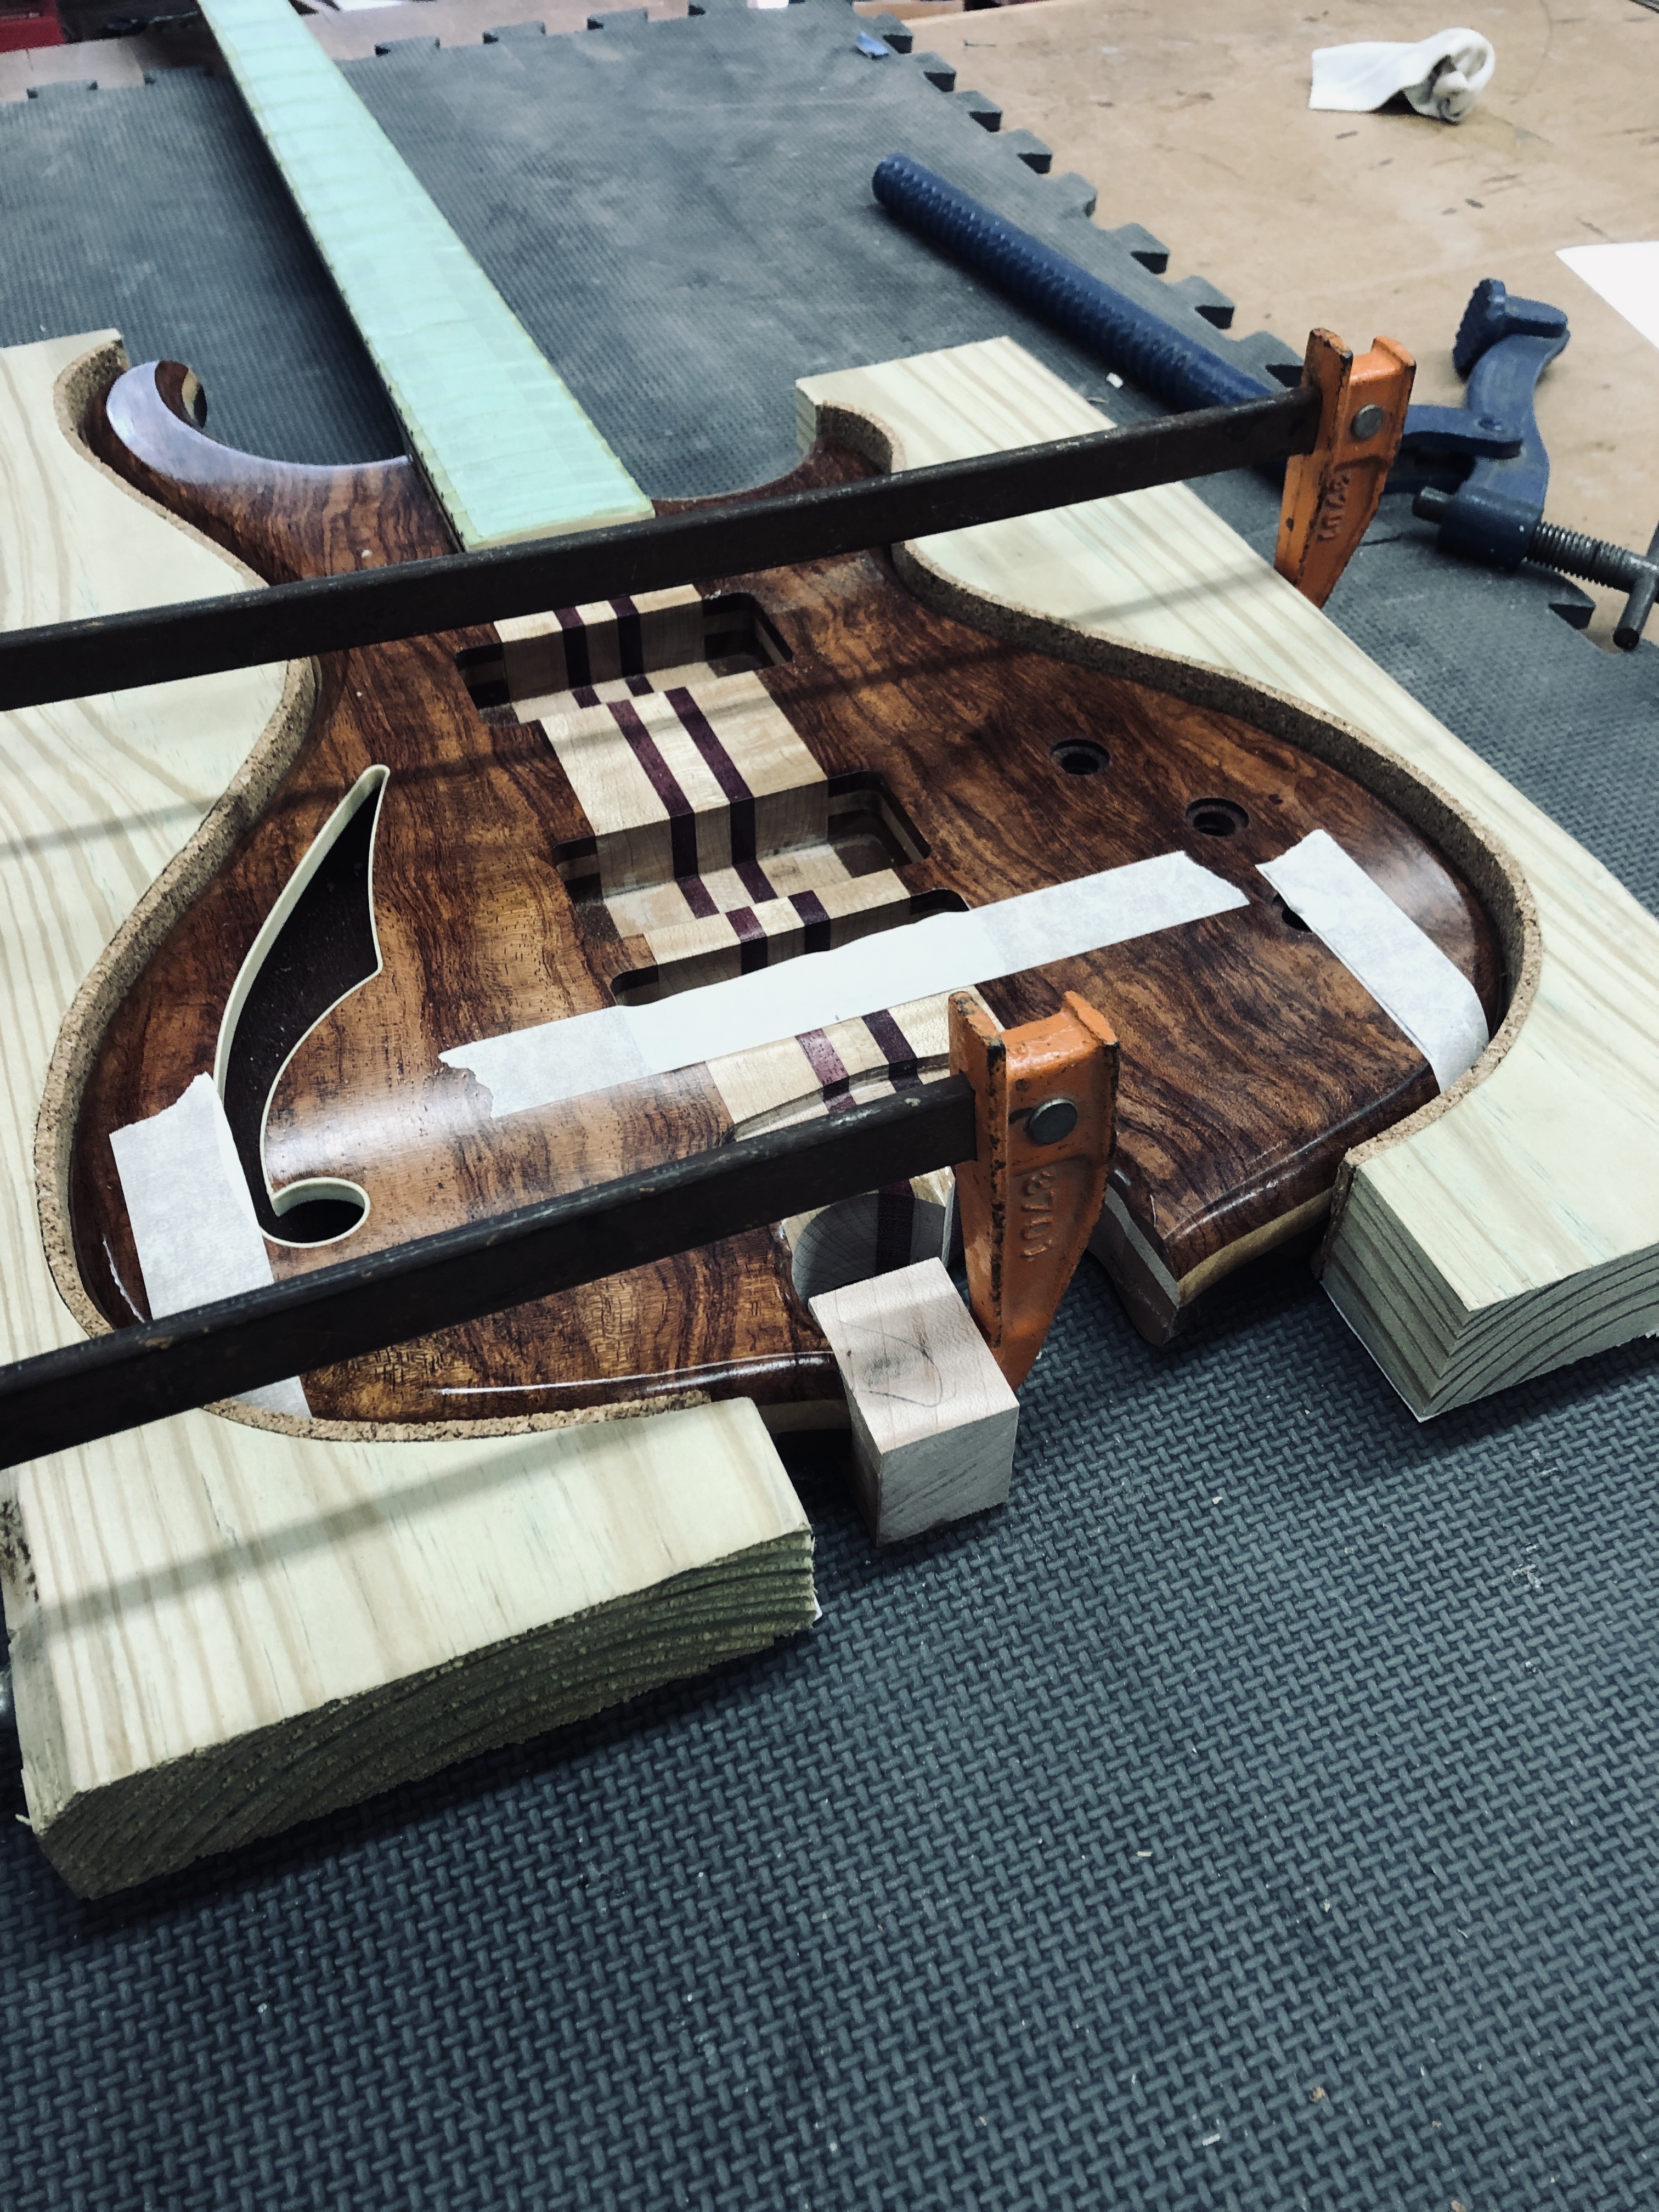
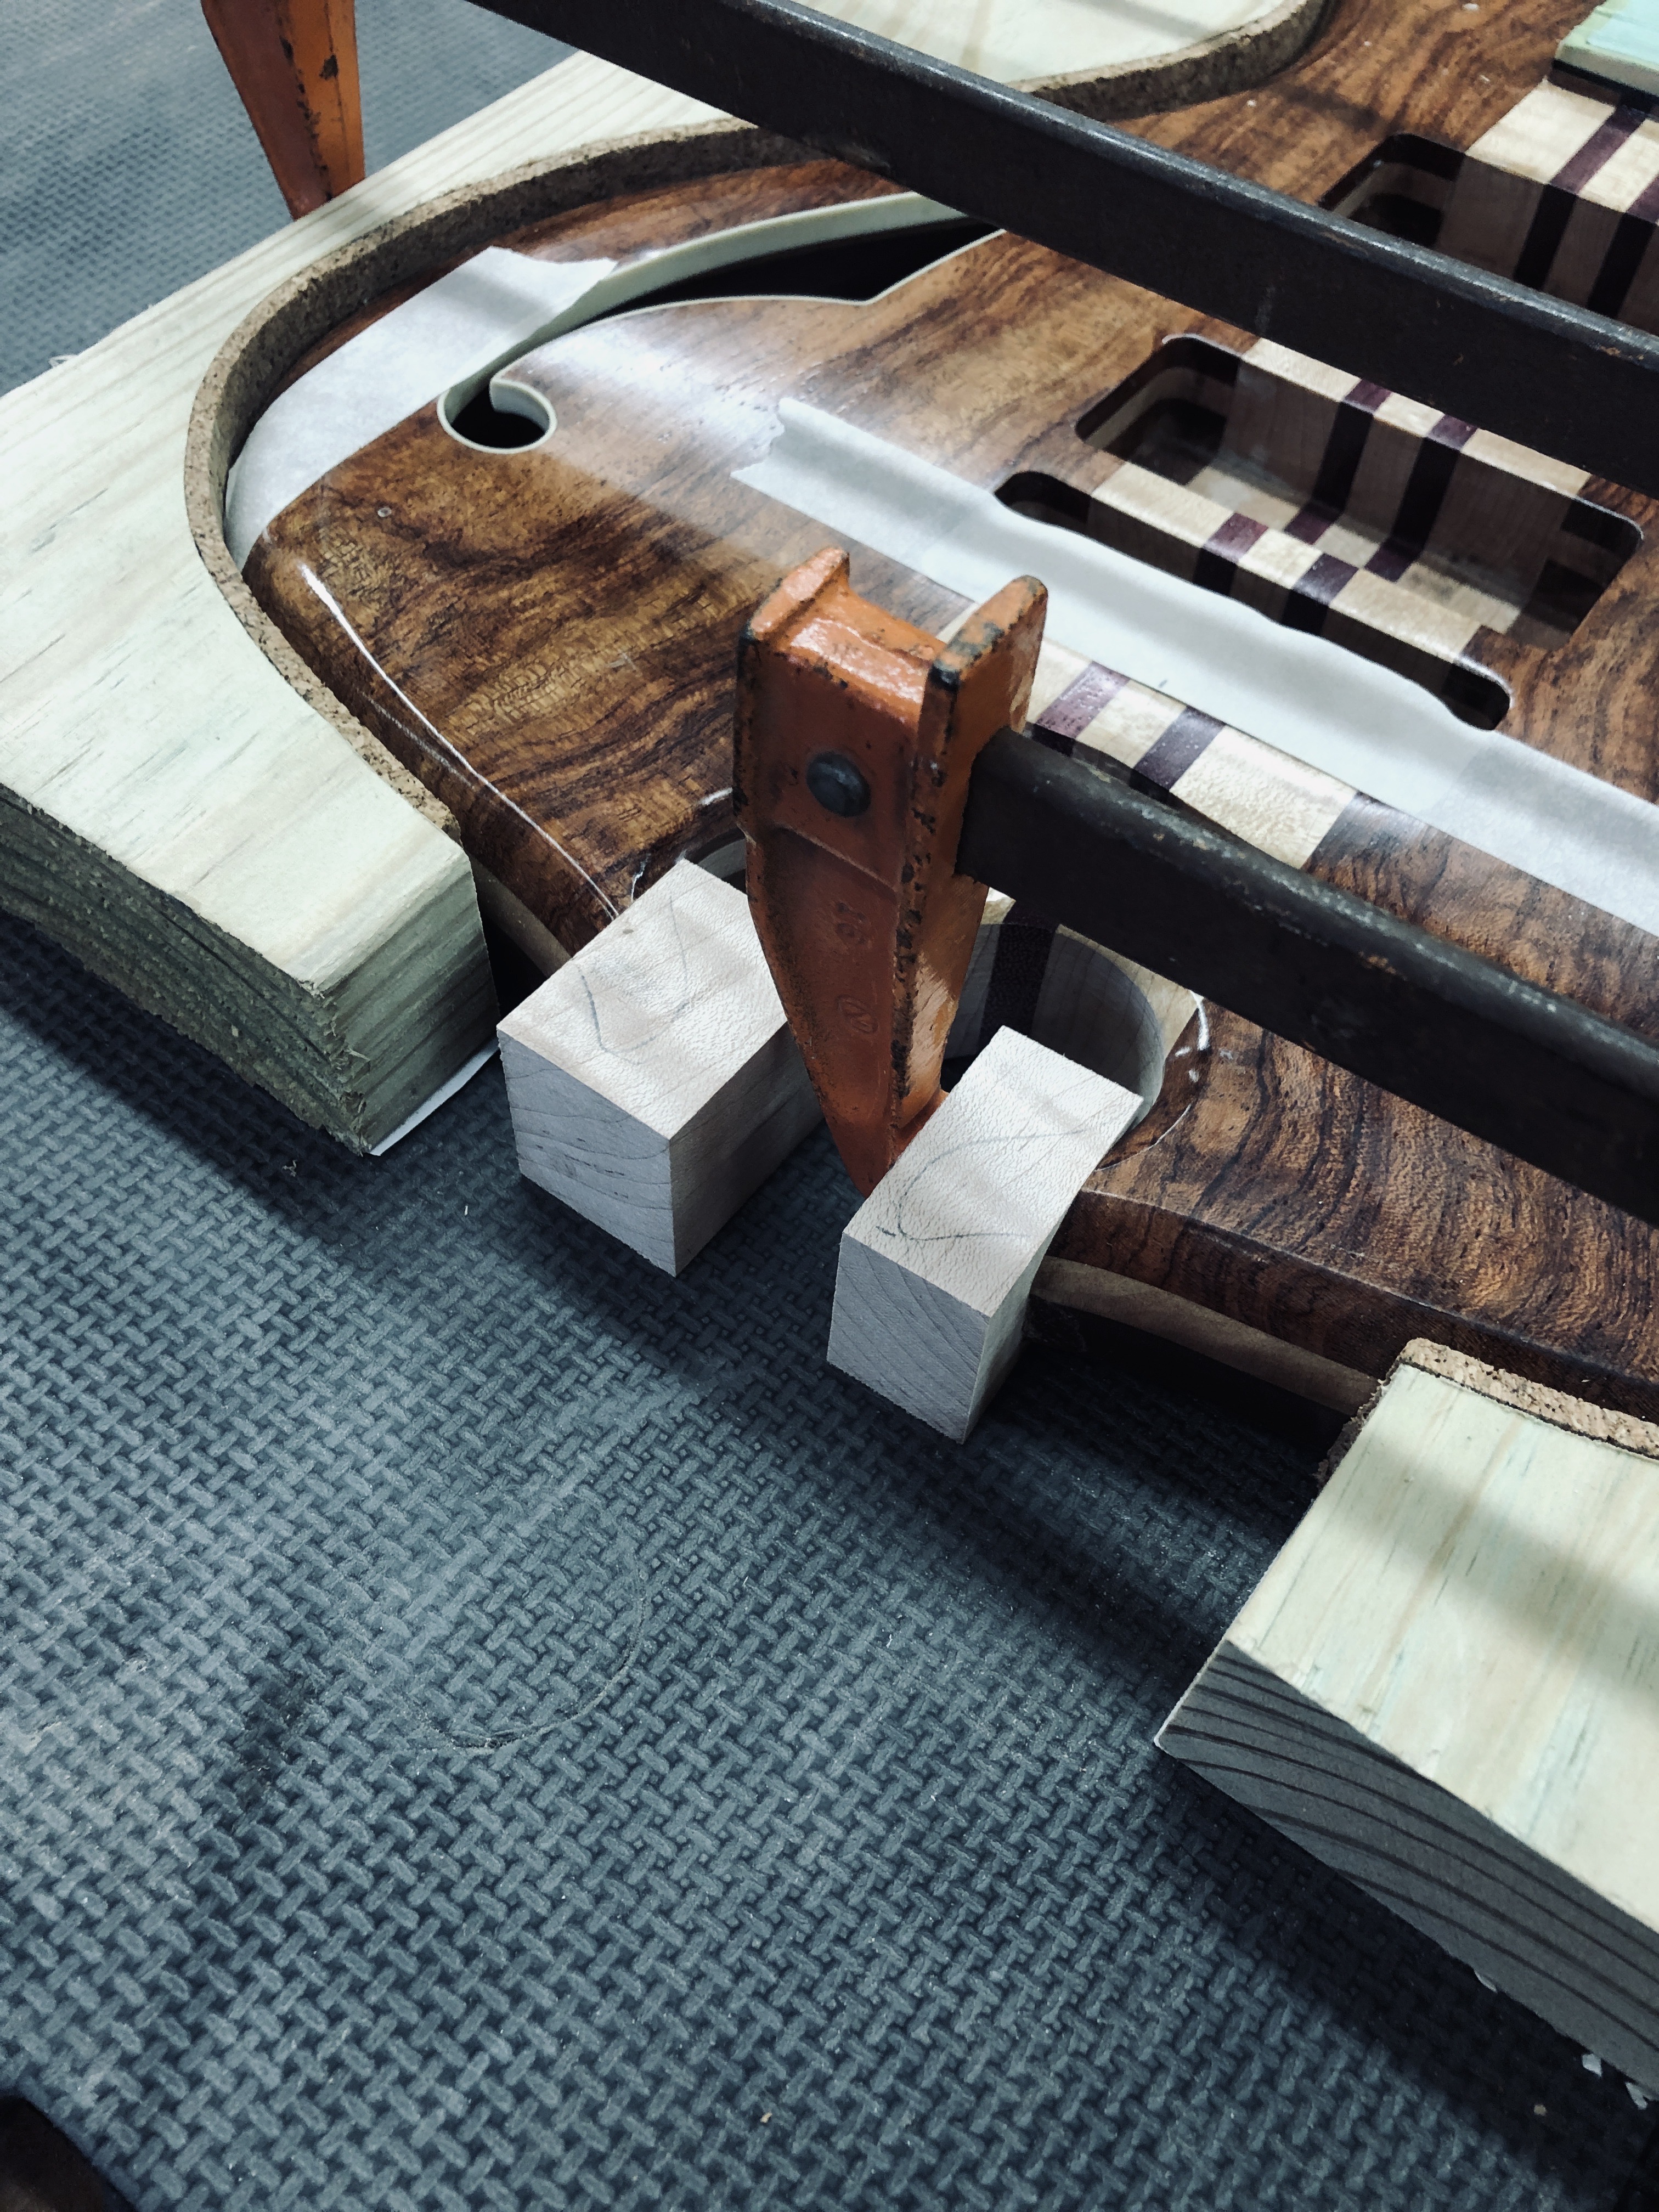
I knew these cauls would come in handy for something....
2jgDSR3.jpg

WD0qAOn.jpg


Yeah, I know, even MORE fragile since now I have less glue area, but I'm nothing if not a stubborn b$stard, and wanted to finish what I started. I looked at introducing a thin layer of purpleheart veneer, but decided to just go back to maple "ears".

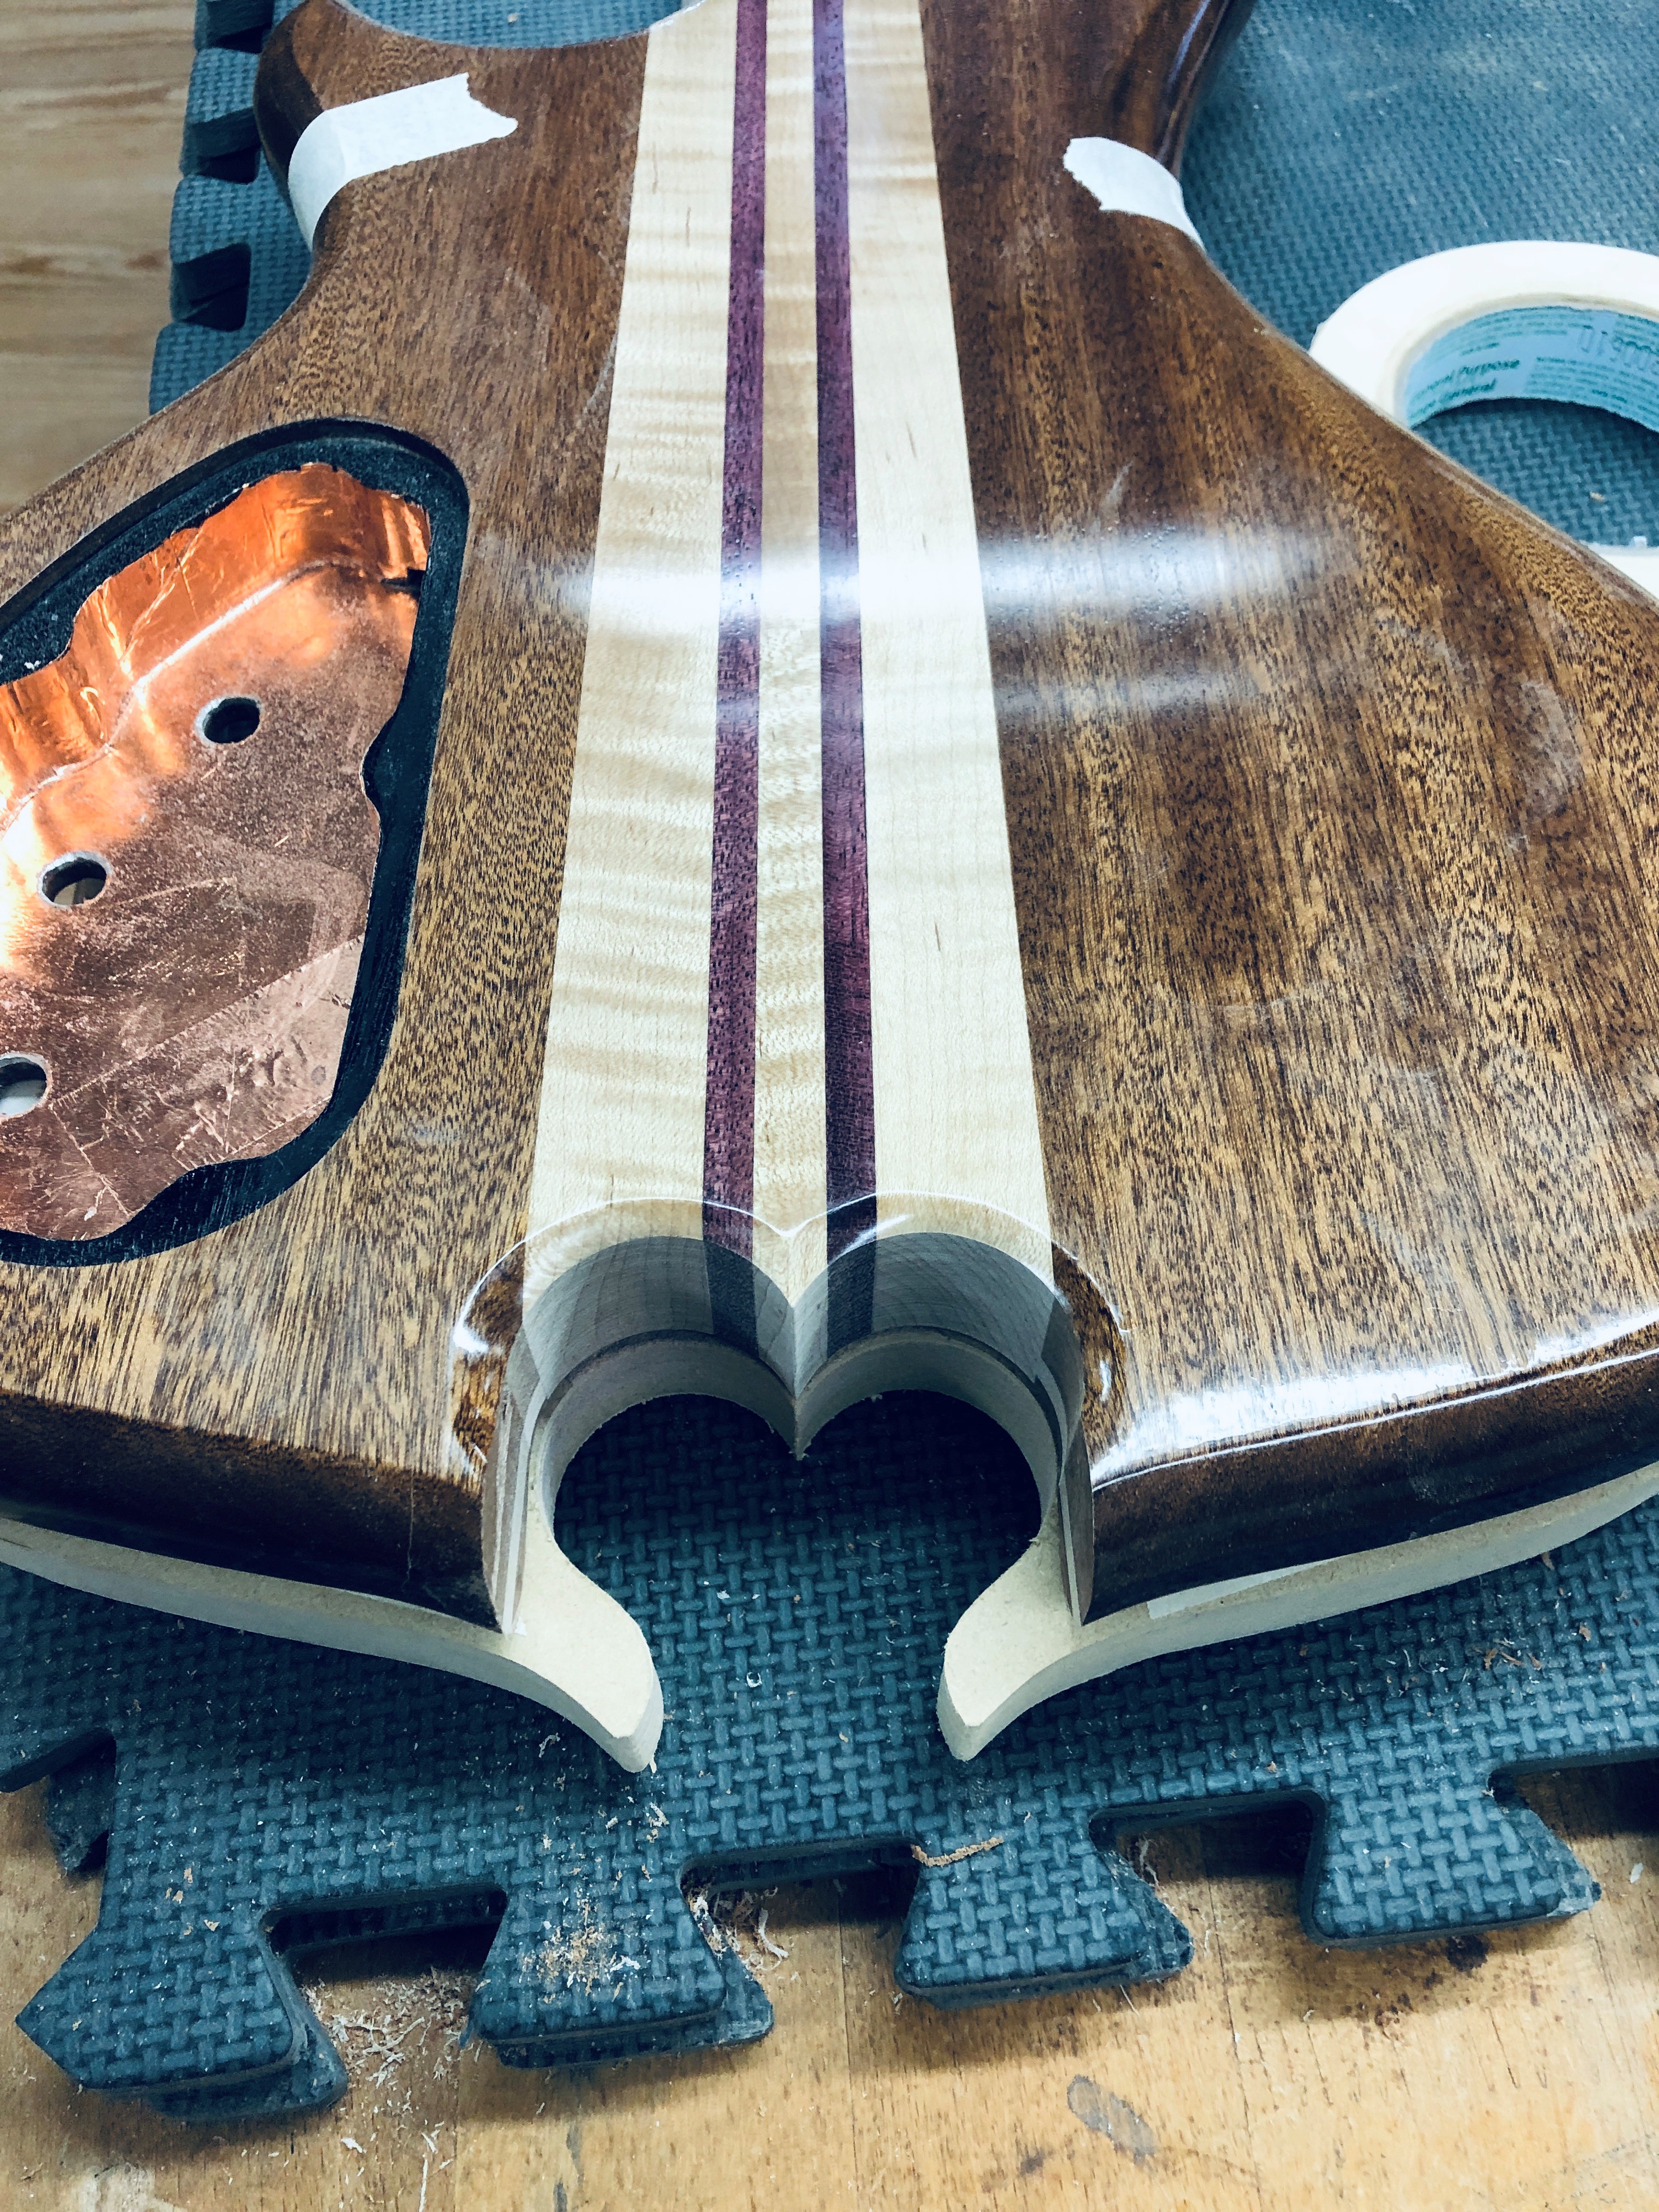
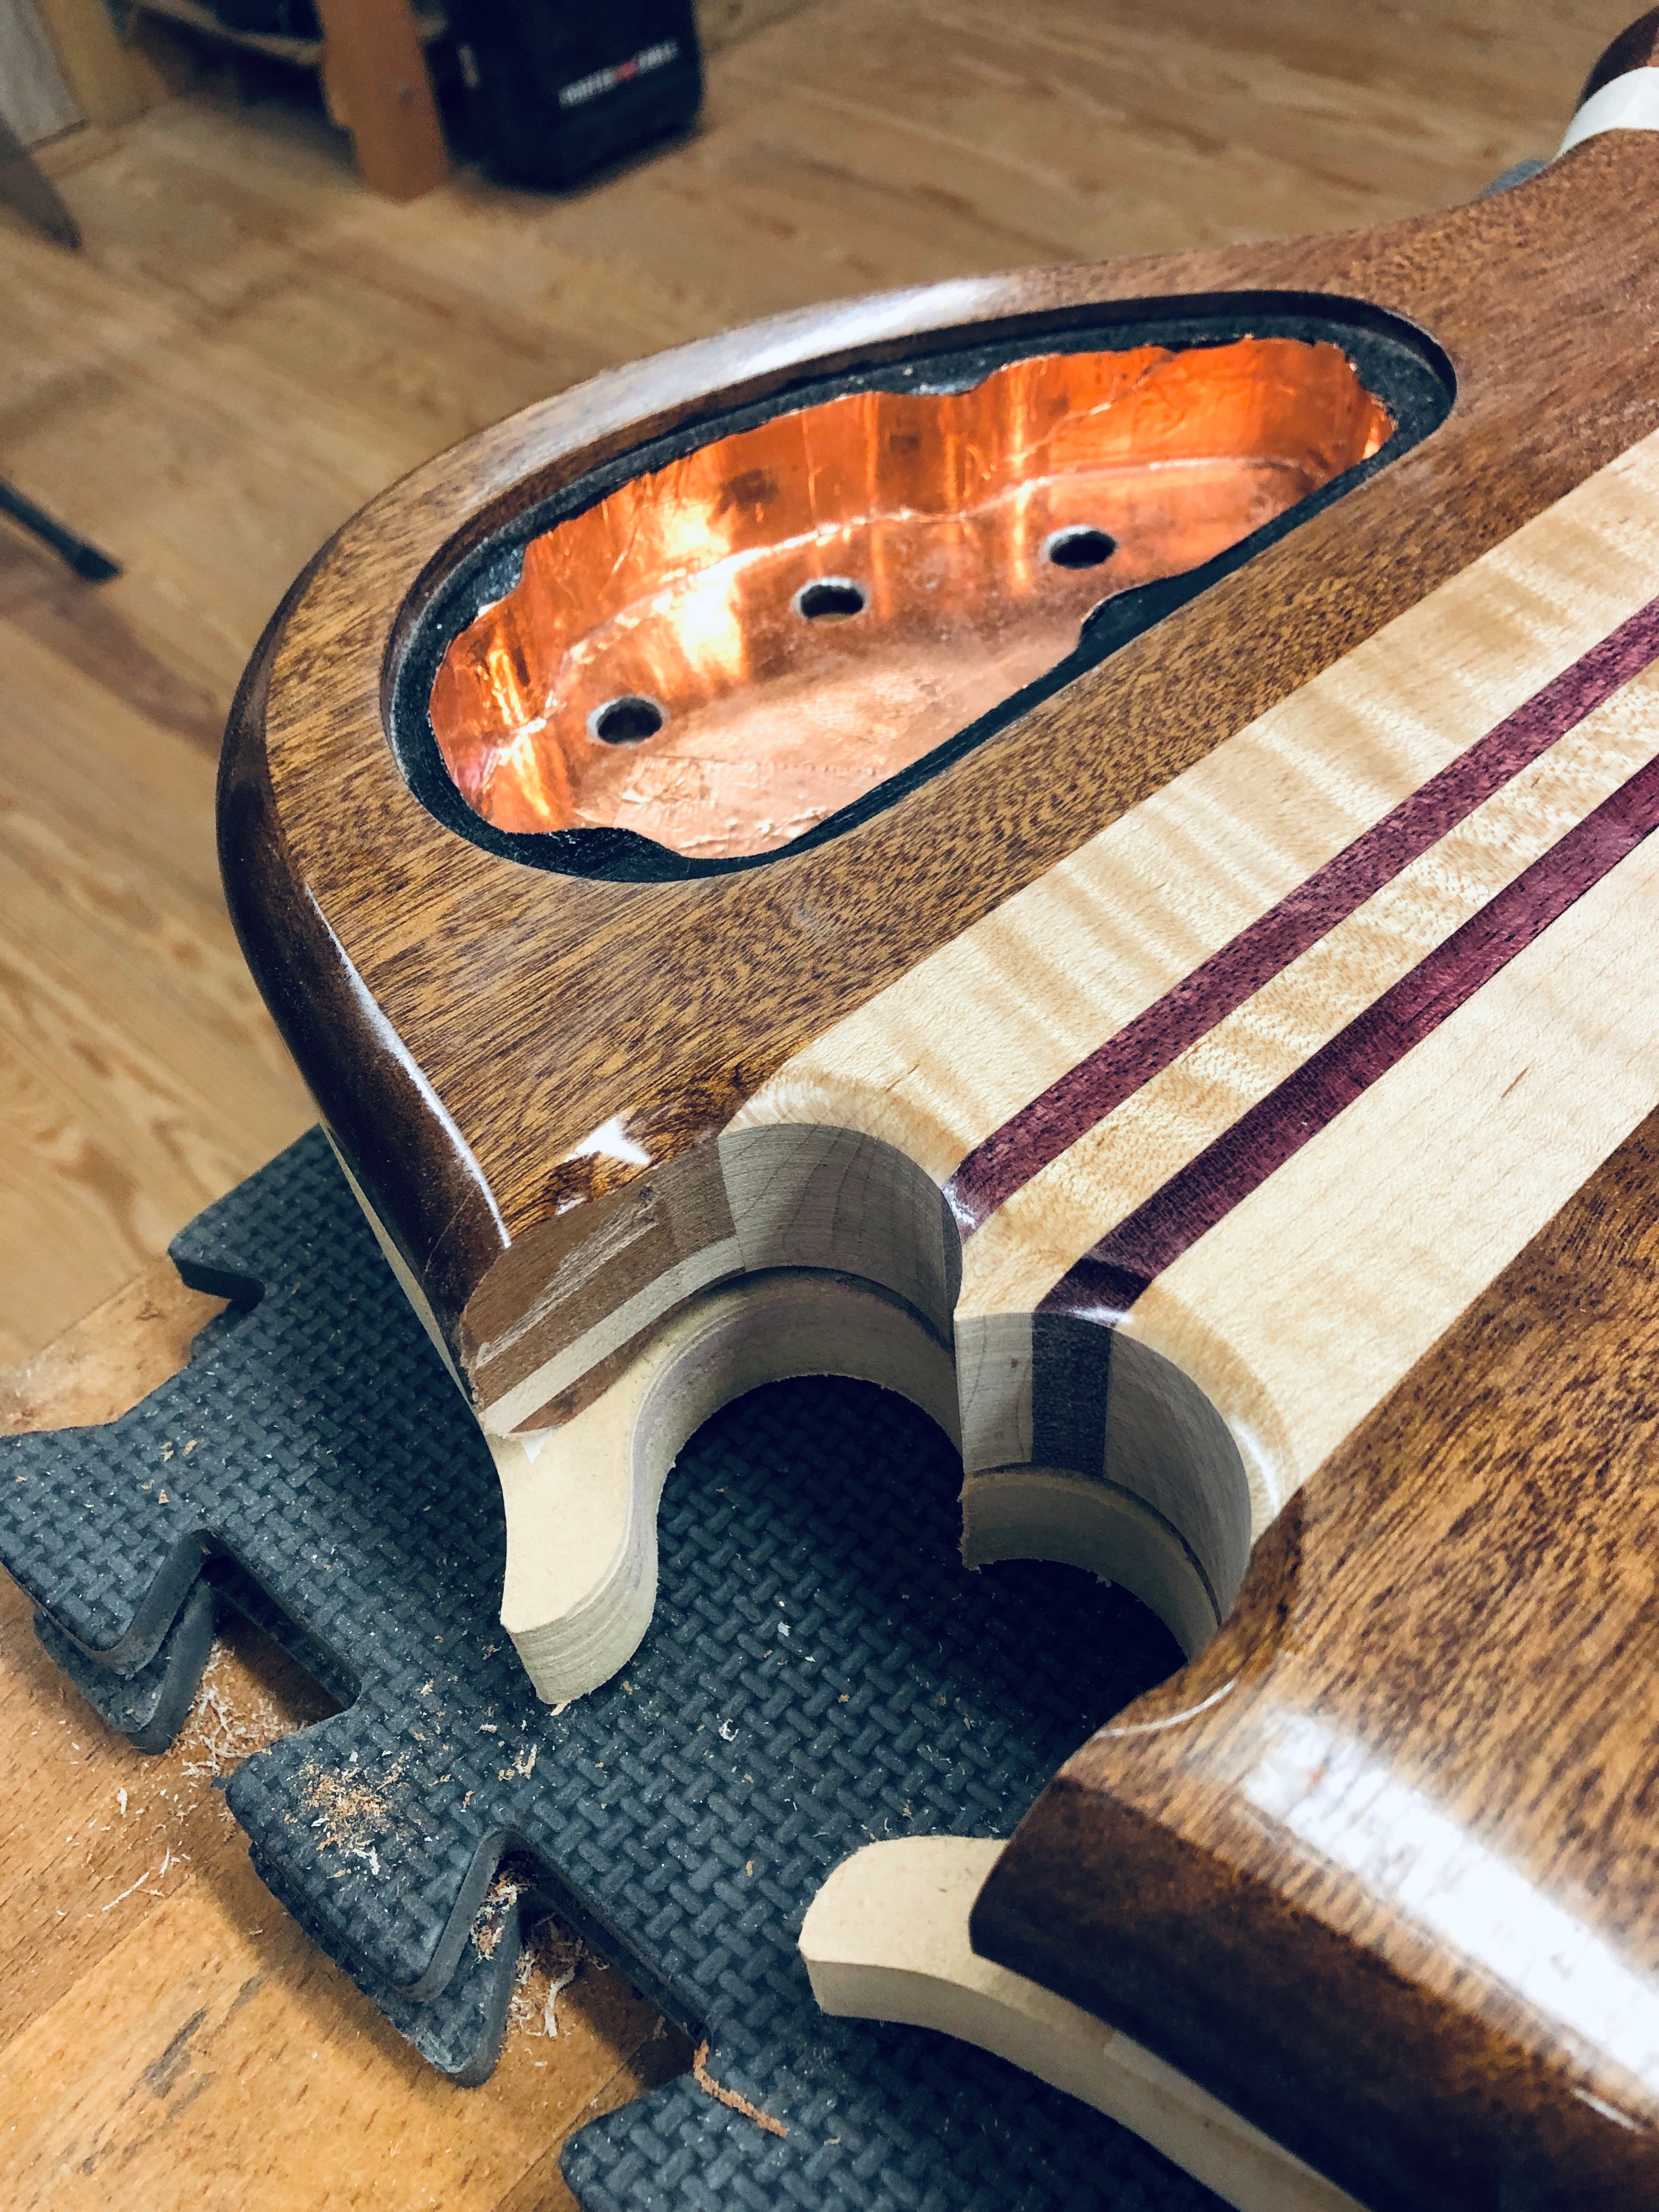
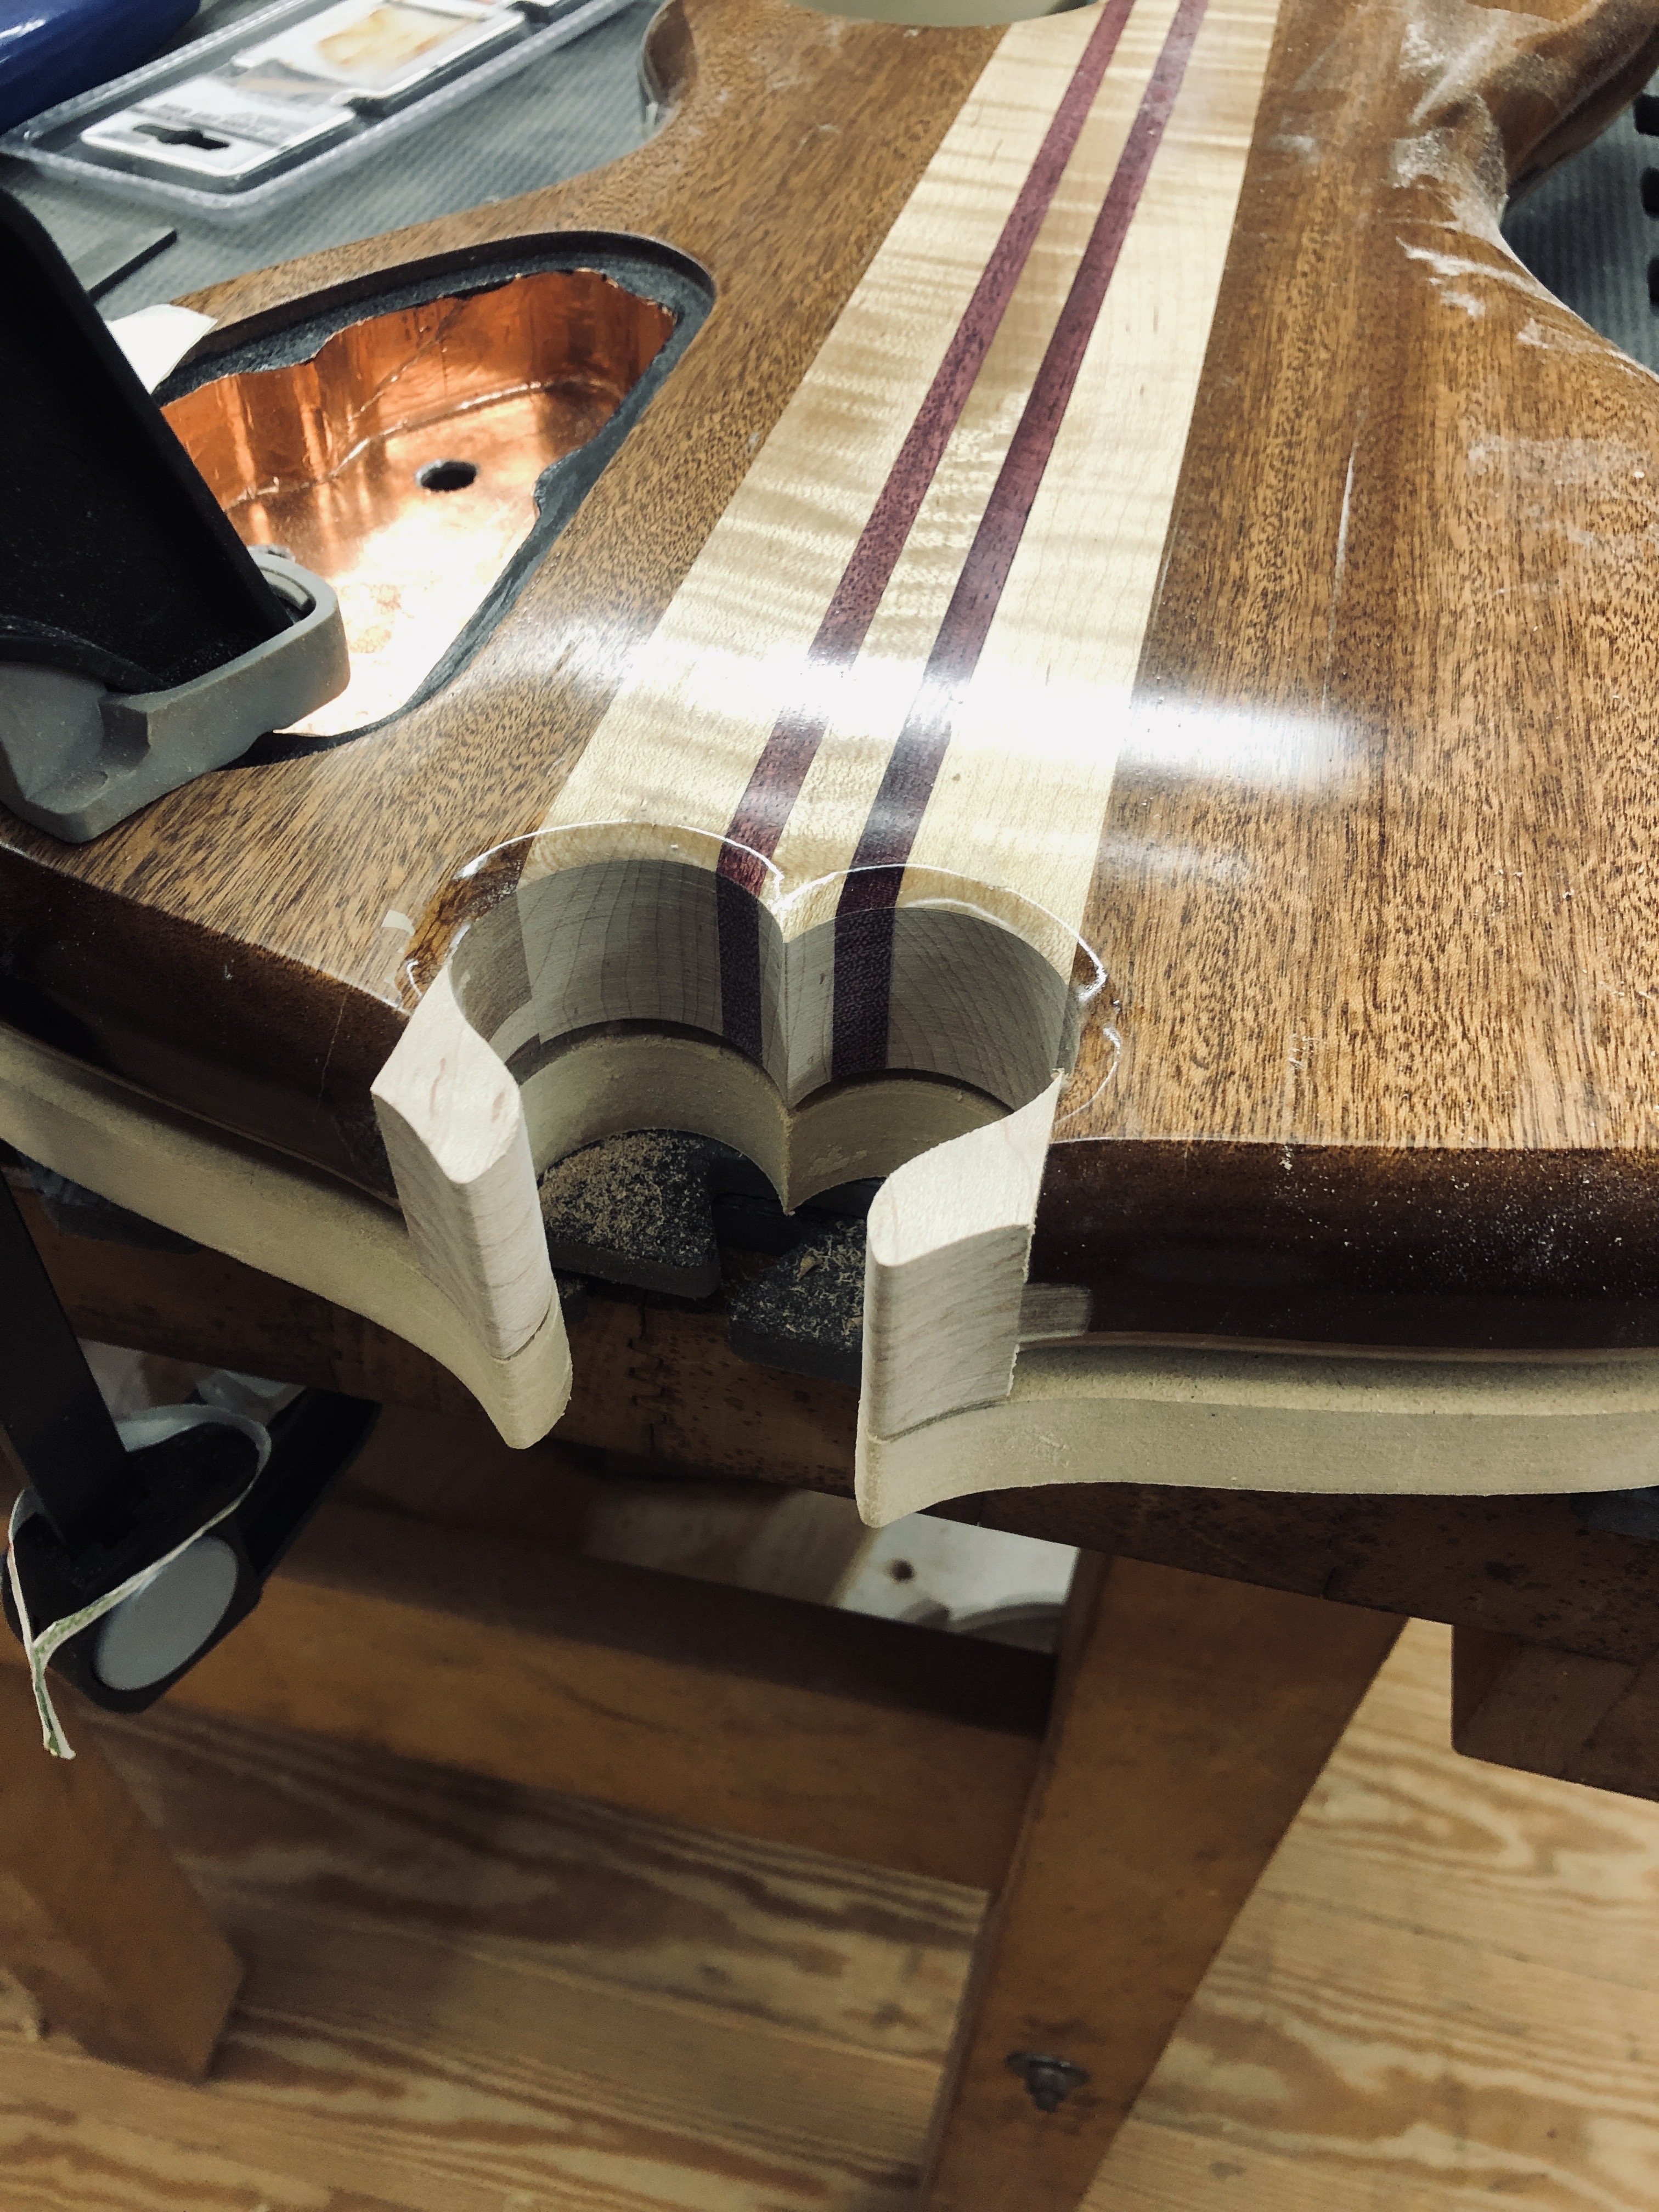
Robo-Sanded back to my template lines, still have to shape them and file the radius edges
wdzb6bl.jpg

8PIkHkR.jpg

Gw5Hk6b.jpg


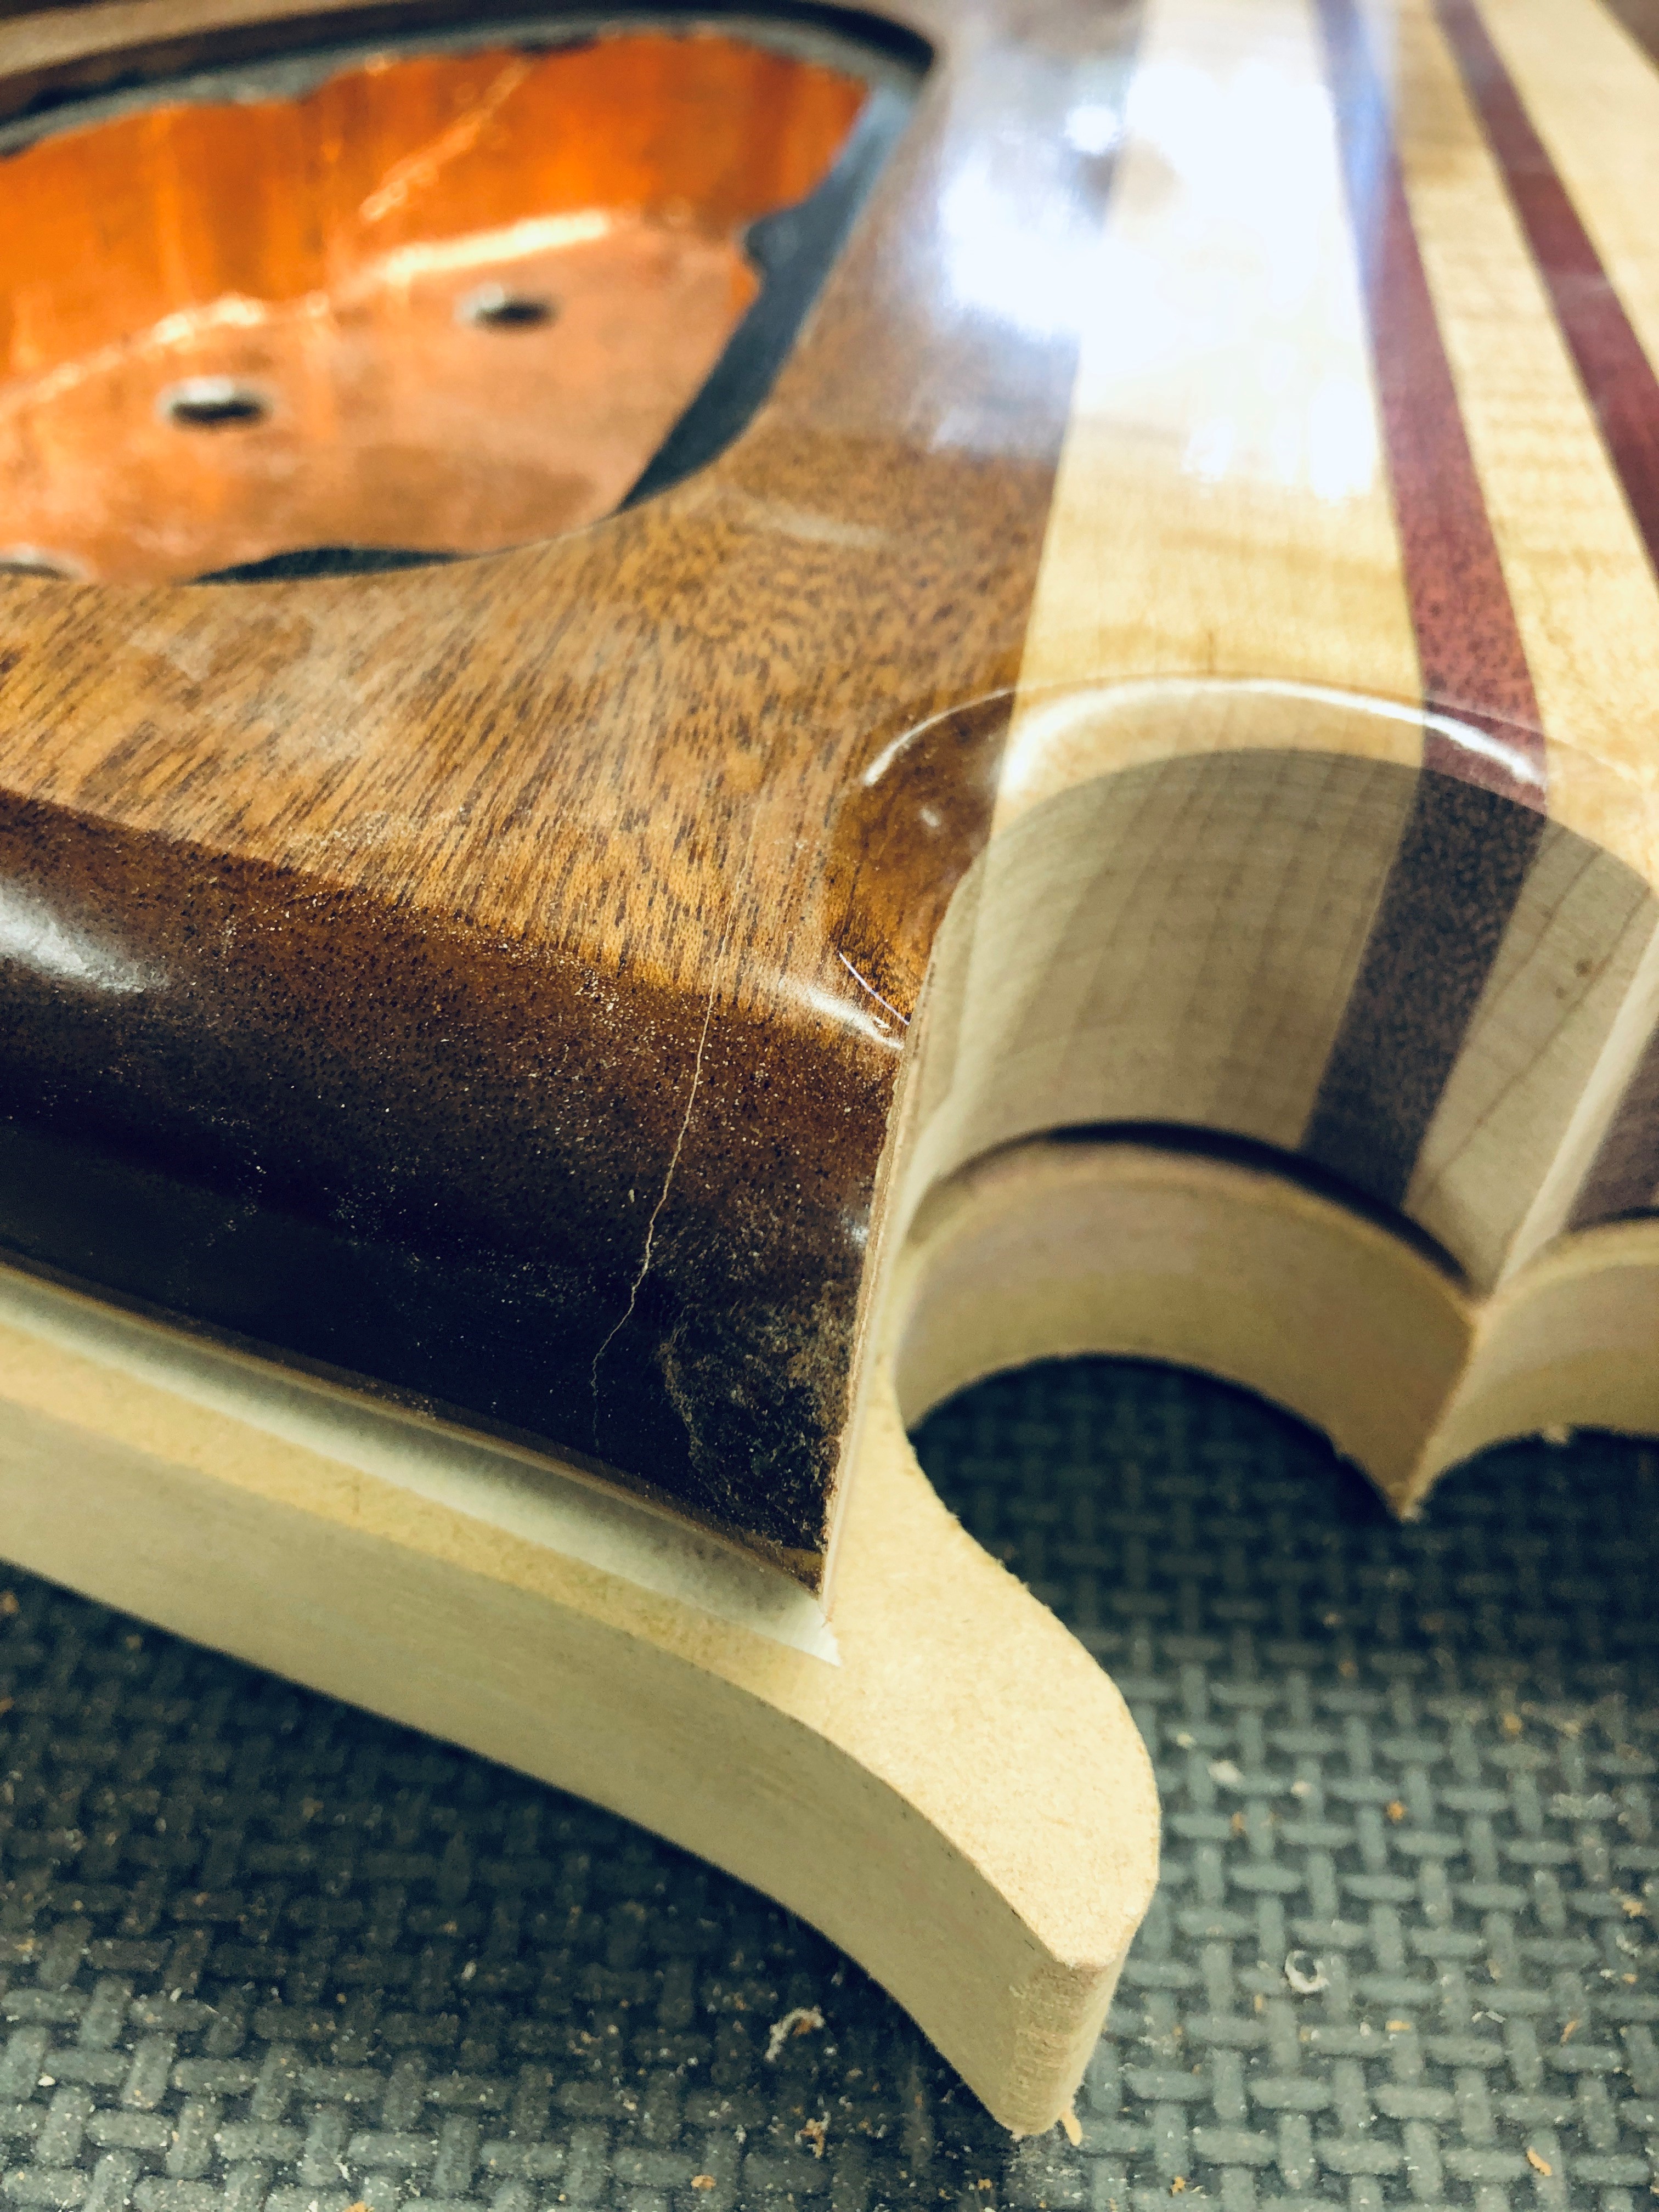
I'll have to sand some if the finish in the act of fairing these new ears in. What are my chances of being able to "blend" new wipe-on poly into the existing finish? I suppose I have nothing to lose, I can always (Painfully) sand the edges or the whole damn thing back to bare wood and start over. Maybe I'll just sand as needed and then try it out to see what happens. I don't know if I'll end up with some kind of witness lines, lighter areas, or what. Moral of the story: Don't drop your bass when you have one more coat of finish to go.....
 
I knew these cauls would come in handy for something....
2jgDSR3.jpg

WD0qAOn.jpg


Yeah, I know, even MORE fragile since now I have less glue area, but I'm nothing if not a stubborn b$stard, and wanted to finish what I started. I looked at introducing a thin layer of purpleheart veneer, but decided to just go back to maple "ears".

Robo-Sanded back to my template lines, still have to shape them and file the radius edges
wdzb6bl.jpg

8PIkHkR.jpg

Gw5Hk6b.jpg


I'll have to sand some if the finish in the act of fairing these new ears in. What are my chances of being able to "blend" new wipe-on poly into the existing finish? I suppose I have nothing to lose, I can always (Painfully) sand the edges or the whole damn thing back to bare wood and start over. Maybe I'll just sand as needed and then try it out to see what happens. I don't know if I'll end up with some kind of witness lines, lighter areas, or what. Moral of the story: Don't drop your bass when you have one more coat of finish to go.....
Looks great :thumbsup:

I think your chances of blending poly in are really good. I'd coat the raw wood alone as much as you have the rest of it, then several coats on the whole thing.
 
I knew these cauls would come in handy for something....
2jgDSR3.jpg

WD0qAOn.jpg


Yeah, I know, even MORE fragile since now I have less glue area, but I'm nothing if not a stubborn b$stard, and wanted to finish what I started. I looked at introducing a thin layer of purpleheart veneer, but decided to just go back to maple "ears".

Robo-Sanded back to my template lines, still have to shape them and file the radius edges
wdzb6bl.jpg

8PIkHkR.jpg

Gw5Hk6b.jpg


I'll have to sand some if the finish in the act of fairing these new ears in. What are my chances of being able to "blend" new wipe-on poly into the existing finish? I suppose I have nothing to lose, I can always (Painfully) sand the edges or the whole damn thing back to bare wood and start over. Maybe I'll just sand as needed and then try it out to see what happens. I don't know if I'll end up with some kind of witness lines, lighter areas, or what. Moral of the story: Don't drop your bass when you have one more coat of finish to go.....


Assuming you recoat the entire thing, you'll be able to blend it all together quite easily. Spot repairs are less likely to succeed, and will only take a lot more time. Just make sure the layers you're going to cover are smooth to the touch and don't have a difference in hard film depth that you can see or feel.
 
I knew these cauls would come in handy for something....
2jgDSR3.jpg

WD0qAOn.jpg


Yeah, I know, even MORE fragile since now I have less glue area, but I'm nothing if not a stubborn b$stard, and wanted to finish what I started. I looked at introducing a thin layer of purpleheart veneer, but decided to just go back to maple "ears".

Robo-Sanded back to my template lines, still have to shape them and file the radius edges
wdzb6bl.jpg

8PIkHkR.jpg

Gw5Hk6b.jpg


I'll have to sand some if the finish in the act of fairing these new ears in. What are my chances of being able to "blend" new wipe-on poly into the existing finish? I suppose I have nothing to lose, I can always (Painfully) sand the edges or the whole damn thing back to bare wood and start over. Maybe I'll just sand as needed and then try it out to see what happens. I don't know if I'll end up with some kind of witness lines, lighter areas, or what. Moral of the story: Don't drop your bass when you have one more coat of finish to go.....

454f812e0d724e5b733bd67d9e408865.jpeg


NICE! So glad to see this come back to life. I think you can start by coating the raw wood, then scuff sand the whole thing to a fairly high grit and apply additional coats over all of it without fear of witness lines.
 

Latest posts