• TalkBass has been independent since 1998. Add your voice.
    Create a free account to reply to discussions, view embedded media, and browse with fewer display ads.
    Join freeLog in
    Want zero display ads or expanded classifieds tools? Compare plans.

Vintage Modern Build

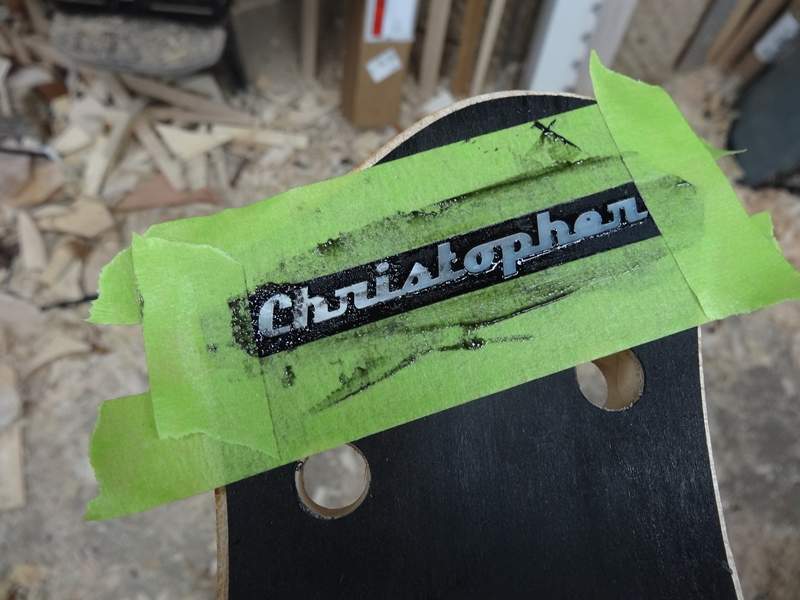
Finished cutting pearl, making and applying the headstock veneer, drilling the tuning machine holes, routing the heastock for inlay and binding the headstock.

I'm using my middle name on the headstock. I've had it all my life and never made much use of it, so I figured why not? Smith is my last name, so as far as bass guitars go, that was kind of taken already, and I didn't want to use my first name for some reason.
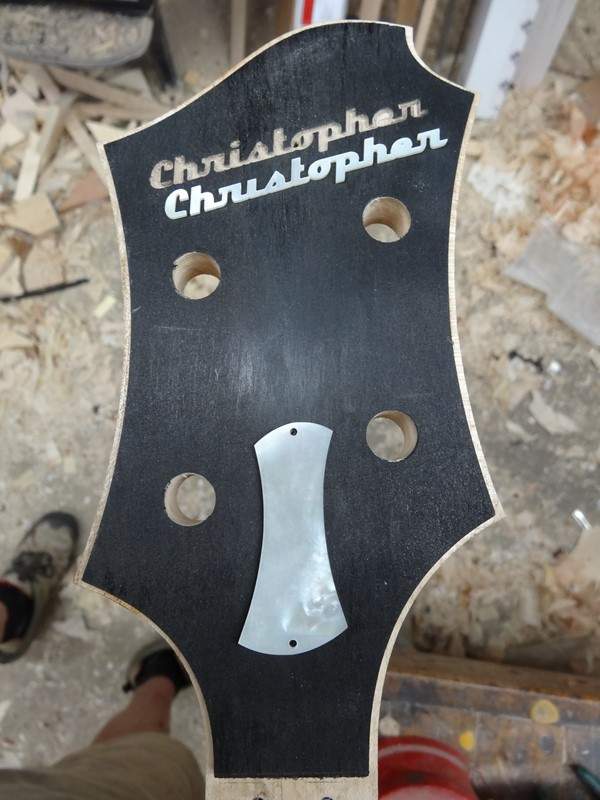
DSC02240.JPG


A bit of black epoxy:

DSC02241.JPG


Done until it sets up enough to sand tomorrow:
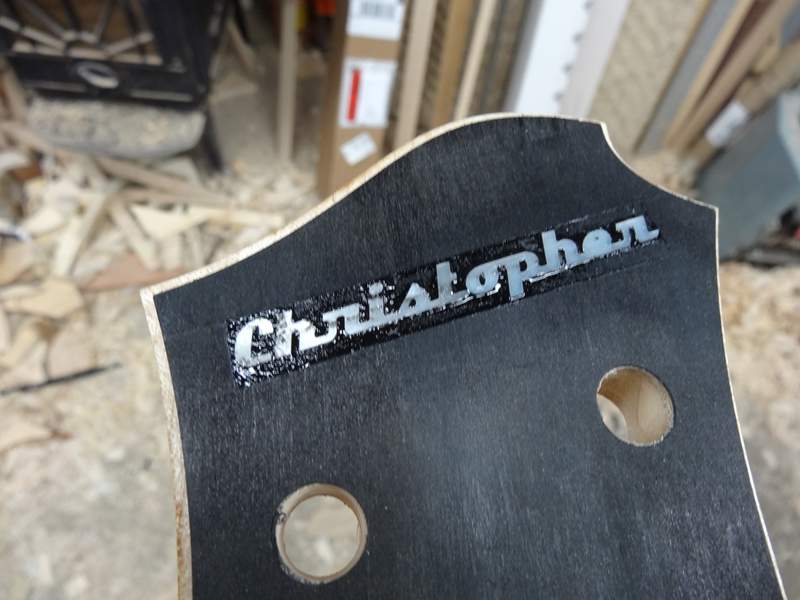
DSC02242.JPG


This is the pathetic state of my workbench at this point. I think I'll do a shop clean up this weekend:
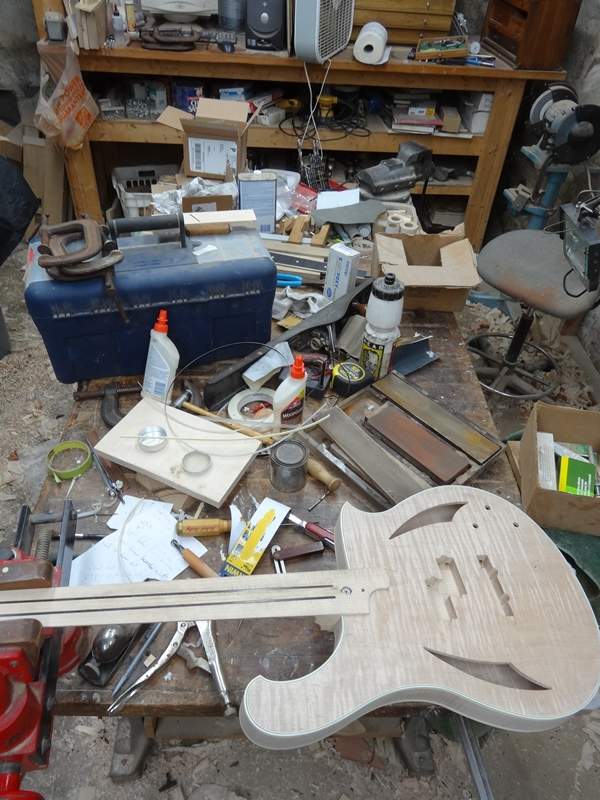
DSC02243.JPG


Time for binding. The supplies are Duco cement, MEK, a small brush, and binding. I have a product that stew mac used to sell, I can't find it on their website anymore. It's a "binding" that glue does not stick to. I use it so I can do the b/w inner binding first, miter it, then do the ivorid binding second.
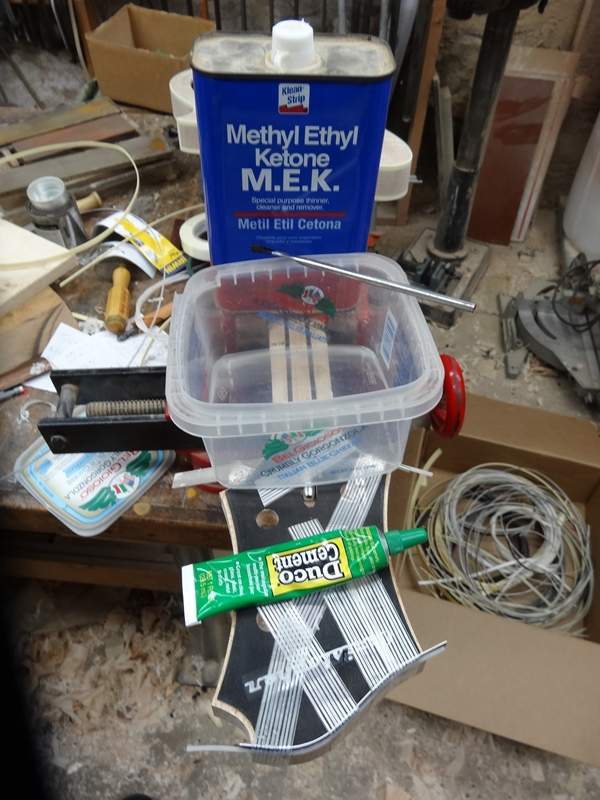
DSC02244.JPG


I put a bit of Duco cement in the binding channel. Just a little, then spread it out very thin with my finger, take off all the extra. That seals the wood so it doesn't soak up all the MEK. Hold the binding in place with one hand, brush some MEK between the binding and channel for an inch or two, then tape it. Do all the sides that don't touch each other, then once those are done go back to the first and it should be ready for mitering.
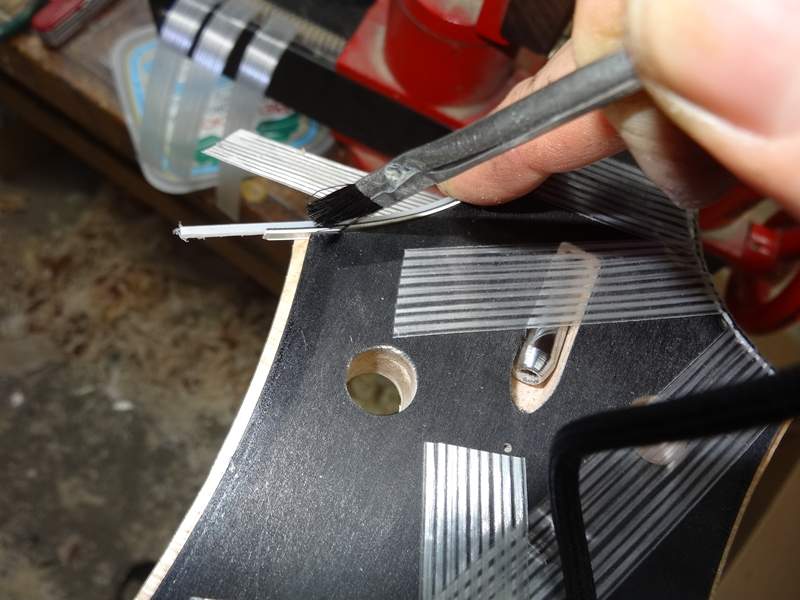
DSC02246.JPG


Use a sharp chisel and cut off razor thin pieces at a time. To get the miter correct all you need to do is line up the chisel so it crosses the point on the headstock veneer and the point on the edge of the headstock.
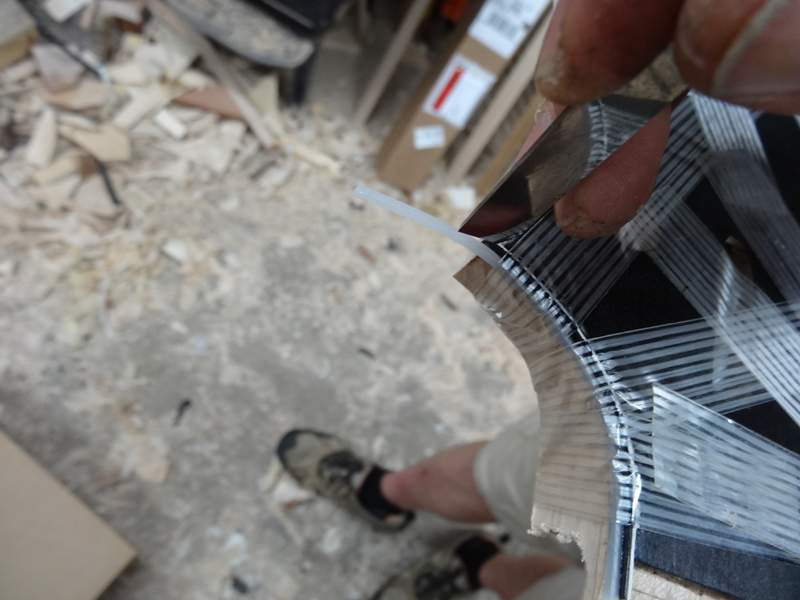
DSC02247.JPG


Cut the miter on one end of the next piece and glue it in nice and tight. Work your way to the other end, then miter that end. I have the bass in a vice with the headstock over the workbench. I stack up pieces of wood so I have a surface at the same level as the binding so I can use a chisel to cut the binding.
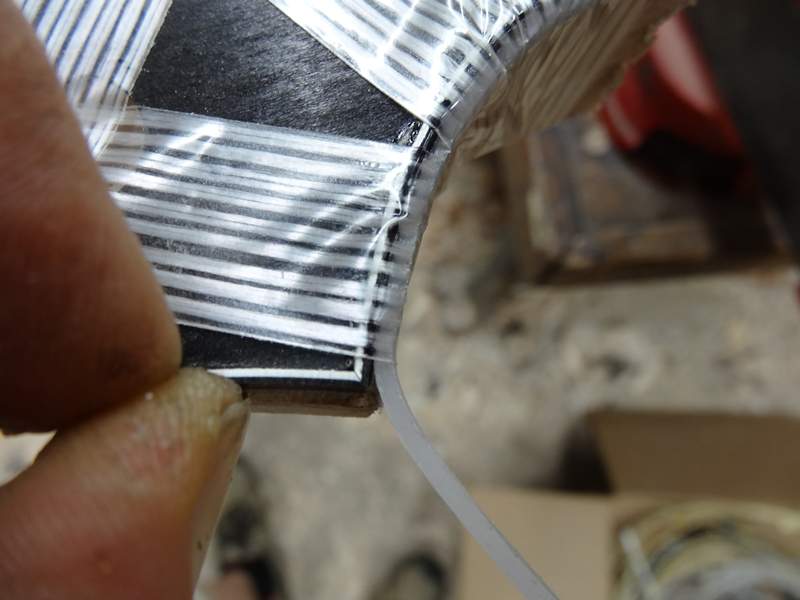

DSC02249.JPG


Drink good beer, it makes your miters better:
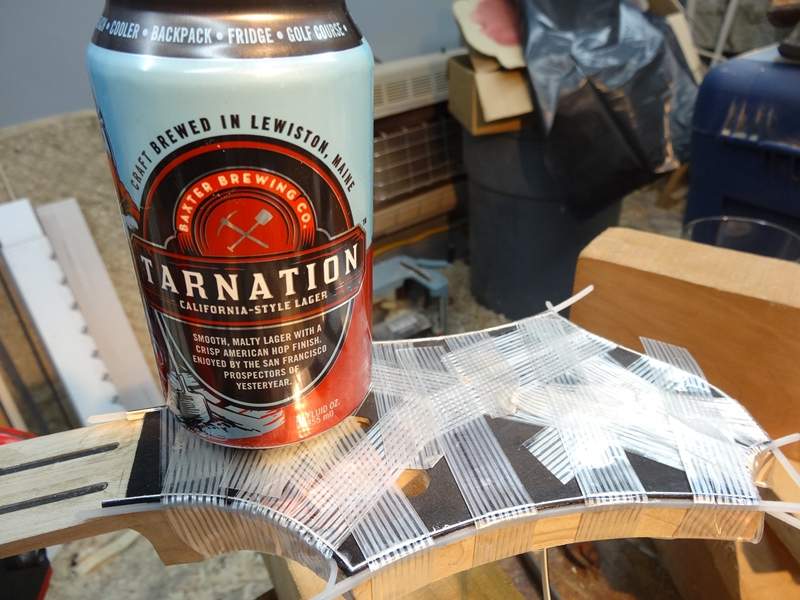
DSC02251.JPG


The nice part about doing the b/w first and ivroid second is you don't have to miter the ivoroid. You put one piece in, cut it flush they lay the next piece over where they meet. Since it's the outside layer it's the one that would show gaps if they were not mitered perfectly.

I'll take the tape off in the morning and by the time I get home later in the day the inlay and the binding should all be ready for clean up, then I can put the fingerboard on and do some fretting. Does anyone else use the epoxy fretting method?
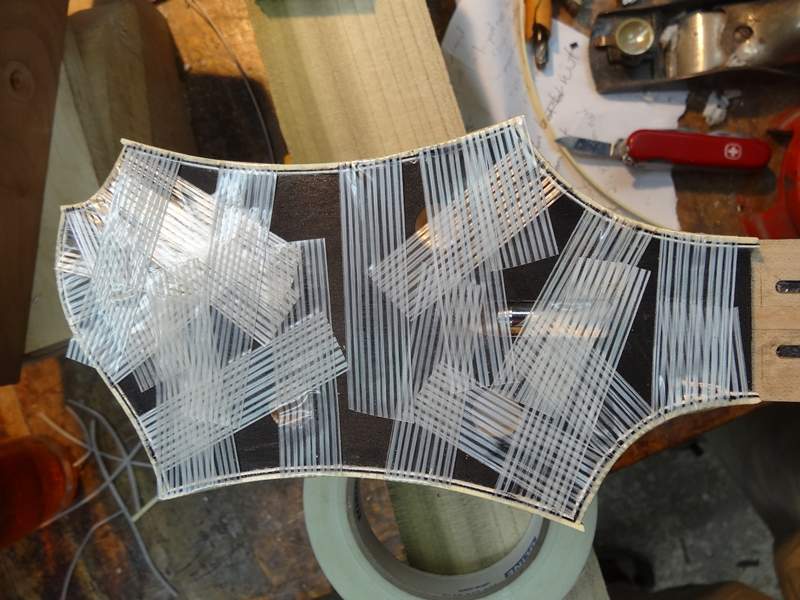
DSC02252.JPG
 
Last edited:
Cleaned up the binding, sanded the headstock veneer and inlay. Installed the fingerboard:

DSC02254.JPG


Close up:

DSC02256.JPG


Next up is carving the heel and neck/headstock transition. I had already cnc'd the shape of the heel in the first 1/4", so that saved a step and I had that shape to work off.

DSC02258.JPG


First thing was to extend the flat down another 1/2" or so. A pattern makers chisel which excels at cutting endgrain is the best tool:

DSC02261.JPG


The flat basically done:

DSC02262.JPG


Two violin knives. One is sharpened on the left side, the other sharpened right. In other words, there is only a bevel on one side, the other side is flat. This lets you get in a make nice clean tight curve cuts, like you need on the heel:

DSC02280.JPG


It's a both hands operation. The left hand guides, the right powers:

DSC02263.JPG


Right arm braced against your body. Power for the cut comes from your whole body and your wrist, your arm does nothing but transfer the power. The left hand guides the cut and clears the blade when it slips or exits the wood. When using this technique, slipping or exiting the cut is not an issue. Using your whole body and wrist lets you put a lot of power into the cut, more than your arm could ever do, but when the blade slips it goes virtually nowhere. If you were using your arm muscles to push or pull the blade and it slipped, your hand and the blade would go flying and most likely damage you or the instrument.

DSC02264.JPG


The tough stuff is done, now some light shaving with the knife. Technique here is twisting the wrist, lightly pushing with braced arm, and guiding and pulling with left hand thumb:

DSC02271.JPG


By the end, this is the size of the shavings you are making with the knife, and the heel is nearly done:

DSC02265.JPG


Another angle:

DSC02266.JPG
 
Last edited:
Scraper time! If there's one simple tool lots of people would benefit from is flexible scrapers. Not the ones sold by Stew Mac or cabinet shops, but ones you make yourself. All you need is a piece of spring temper steel sheet, a pair of sheet metal cutters and sharpening stones. If anyone is interested I can make a more detailed post on making them, let me know. This is the one I use 75% of the time:

DSC02267.JPG

Flexible:
DSC02268.JPG


Flex it a bit and hold it at different angles and you can shape a neck far more accurately and far more quickly that with sandpaper. The more parallel you hold it to the neck the larger area it scrapes. The more perpendicular, the deeper and faster you can cut. I'm just using it to clean up the machine marks from the cnc and tool marks I left on the heel, but even for that it saves a lot of time.

More perpendicular cut:

DSC02269.JPG


Slightly more parallel cut:

DSC02275.JPG


This is the shavings that come off. Lets you have a lot more control over your work compared to 80 or 100 grit sandpaper.

DSC02272.JPG


Done scraping the heel. Now the only thing to do with sandpaper is smooth a bit, no actual shaping needs to be done:
DSC02276.JPG
 

Attachments

  • DSC02275.JPG
    DSC02275.JPG
    110.5 KB · Views: 108
  • DSC02276.JPG
    DSC02276.JPG
    91.5 KB · Views: 103
  • DSC02282.JPG
    DSC02282.JPG
    98.8 KB · Views: 109
  • DSC02283.JPG
    DSC02283.JPG
    143.6 KB · Views: 107
On to the neck/headstock transition. Same basic procedures, chisel, knife, scrape, but with a small violin plane also.

DSC02259.JPG


Chisel:

DSC02279.JPG


Knife:

DSC02281.JPG


I used a violin plane to help remove most of the wood for the transition. The blade you use in a violin plane when planing maple is "toothed". This lets you cut across the grain without tear out. Especially useful for figured woods like curly maple. After using the violin plane the surface then needs to be scraped since it is rough like a rasp was used on it. It's a lot easier to clean up though that after a rasp. Not sure why, but I think it's because the point on a rasp dig down deep into the wood and you have to remove a lot of wood to get to the bottom of the point, whereas after a toothed plane you just have to remove the bits left by the teeth:

DSC02282.JPG


A bit of scraping and done:

DSC02283.JPG
 
This is simply brilliant. If you are posting here on TB for the first time because you want to sell custom basses, I cannot tell you how much I wish I had the scratch to buy one.
Thanks! Ok, so here's a little of background info on me. I started playing bass as a sophomore in high school. Still have my '71 P-bass which I bought in '82 and had Zon Guitars in Buffalo put a Jazz pickup in some time around '85. Hey, I was young and dumb and it wasn't exactly vintage at that point!

DSC02284.JPG

I started building instruments in my early 20's, mainly because I could not afford to buy them. I worked my way into being a full time luthier, and for a number or years I built F-5 mandolins. Here are a couple pictures of one of the H-5 mandolas I built, the F-5 mandolin's slightly larger brother. You might recognize where I got some of the design cues for the electric bass. :)

angled front 1 small.jpg


angled back 1.jpg


angled headstock 1.jpg

I built a lot of those before getting completely burned out. Mandolins and mandolas are beautiful instruments, but as a builder your job is to build it "right", as in exactly like a Lloyd Loar signed 1920's Gibson instrument. Zero deviation and zero creativity allowed if you want to sell them.

Along with building I did a couple things. First, I started harvesting Red Spruce trees in Maine for the top of the instruments. Red Spruce was the species used on all the Gibson mandolins and all the Martin Guitars built through the mid-1940's. Simply put, red spruce MADE the sound those instruments had. Not that other woods were not good, but if you want the sound of a 1920's Gibson mandolin or 1930's Martin guitar, the only way to get it is red spruce. Martin and Gibson both switched over to Sitka spruce when the supply of large red spruce trees became too difficult to find, and for decades, until the mid 1980's red spruce was all but forgotten. Then Ted Davis, who later became a friend and mentor of mine, started trekking through the woods, searching for large old red spruce trees, which by this point were extremely rare. When I got to be friends with Ted, he taught me about cutting red spruce.

Second, I tracked down, measured, studied and drew 10 1920's Lloyd Loar signed instruments. They are the "Stradivarius" of mandolins and most mandollin players never get a chance to even hold one.

Third, I bought a cnc, turned the hand drawings in CAD drawings and started cutting tops to use on my own instruments. Cutting the top and back on the cnc saved roughly 25 hours per top or back.

So, like 99% of all luthiers, I'm a wood-a-holic. After a couple years of cutting 2-3 red spruce trees a year and re-sawing it for instrument tops, my shop was overflowing with spruce. So, I cnc'd some extra tops and sold them to other builders. At the time, they were the only cnc carved red spruce top available, along with more accurately reproducing the vintage mandolin. Word got out that I was selling them and over the course of a few years the percentage of my business that was building mandolins decreased, and the percentage that was making and selling parts increased, which was fine with me, because that was about the same time that I was getting burned out on building mandolins.

The last couple years I've kept busy just selling raw wood and parts to other professional builders and helping first time builders with their instruments. Over this past winter I guess I had just had enough a break from building that the luthier in me said it's time. But now that I have the parts business to keep the cash flow going, I decided it was time to build instruments that I wanted to build, from design through finishing. Selling would be a secondary consideration.

First thing I did was resurrect a project that I have been thinking about for over a decade, the Archtop Acoustic Bass Guitar that I posted a picture of earlier in the thread. If there is an instrument that I feel has something to "contribute" that other builders are not doing already, that's the one. Once that was done I needed a few weeks to play it, see how I liked it, decide what needed to be improved and how to do it. During that time I decided to build the electric bass. That pretty much brings us up to today!

I'm doing this thread for a bunch of reasons. Because it's fun to get out of the shop and hang out with folks, even if it's not face to face. Maybe I can show people some ways of doing things that they might not already be doing. One of the best parts of my current work situation is spending time with new builders on the phone or by email helping them learn to build. If I could convince one or two builders on TB to get on ebay, buy a Stanley #7 or #8 hand plane and learn to use it, or make some flexible scrapers, that would make my day. For me, I'm sure I'll be looking for help once I get to the electronics part of the build.

Finally, there are a lot of great electric bass builder out there already, so I'm not sure what this bass could offer to potential customers or what I would have to be able to sell it for to make it worth the money for the buyer and the time for me. Best thing to say right now is I am a luthier, and building instrument is what I do, so I'll cross that bridge when I get to it (and do whatever I need to do so as not to tick off the TB forum owners). If you made it all the way to the end, hope that wasn't too boring!
 
Last edited:
Thanks for sharing your history, it's pretty interesting. To my untutored eyes arch top mandolin making seems light years more sophisticated than solid-body blot-on neck electric bass making, especially at your very high level. A solid body bolt on neck bass would seem like kid stuff to you.

I'm just happy some people took the time to read it! Thanks. Whether the instrument is complicated or simple it's all about doing what is needed and doing it well. If you are trying to make money, you also need to do it fast. I have a lot of respect for the guys that make beautiful slab body instruments, especially the ones who have a unique take on things. There are some great looking builds on TB that's for sure.
 
  • Like
Reactions: JIO
Have you made an F-Style with U-Bass scale and strings? drool

Wow. Much respect. Glad to have you join the LC, there is always room for the well hung. :)

This may sound pretty sad, but for the last 15 years I've just been playing my bass, jamming with friends and completely not keeping tabs on what's happening in the bass world. I let my subscription to Bass Player Magazine lapse some time in the early 90's. :woot: It wasn't until a few weeks ago when I signed up here that I even heard of the U-Bass. So, is it like the Guild Ashbory? That was back when I used to play out 2-4 times a week. I tried one in a music store and thought it was awesome, but you needed to keep talcum powder on your fingers to play them, and there was no way that was going to work when my hands were all sweaty out on a gig.

 
Last edited:
BTW, Joe Zon left town in the late 80's.

Top Shelf is closed/up for sale right now, too.

Top Shelf Music, that rings a bell. I remember they had a Giant ZON banner behind the counter I think, maybe even a Zon bass or two. I bought a refurbished Gibson Firebird six string which I ended up taking to Rochester and trading for a Rickenbacker 4003 at the House of Guitars. I wish I had kept that Rickenbacker, it was pretty sweet.

I bought my P-Bass from a music store in a shopping plaza on the corner of Main St. and Kenmore Ave. Any idea of the name and if it's still there? Just wondering.
 
Last edited:
Nothing there now. I came out here in 1991, but I can't say I have ever really been on the prowl for gear in Buffalo. I had too much stuff when I got here, now it's worse. 90% of the stuff I have bought in the last bunch of years has been from right here on TB.
 
EPOXY FRETTING METHOD:
Time for the frets. I don't think a lot of people have ever even heard of the epoxy fretting method. I know I was building for over 10 years before I stumbled on it in an acoustic guitar repair book from the 70's. What is it, and why use it? Basic idea is the fret slots on the fingerboard are cut wide enough that the fret tang fits in it without any (or at the most, very little) force. Epoxy is put in the fret slot, then the fret is pushed into place, and the excess epoxy is cleaned up.

The explanation I'll give below assumes there may be non-builders checking in, so if I go over some of the basics please bear with me.

The more interesting question is "why use it?" To answer that go way way back to the beginning of the build when you make the neck blank, whether it through body or bolted on or glued in. The top surface is planed or cut perfectly flat. During the rest of the build, the goal is to keep it that way. Different things can happen along the way that put a warp, bow or twist in it. The wood might have natural stresses or stresses from kiln drying that cause it to bow when you remove wood from the back of the neck. Maybe it was flattened the board on a particularly humid day and the moisture content was not consistent throughout the board.

The most common problem is fretting. A fret is typically held in by the tangs, which are wider than the the slot, and by hammering them in, you "wedge" them into place. So, a fret is a wedge. Just like any wedge the fret pushes the wood apart, and if you are pushing the wood apart on the top of the fretboard, it puts a backbow in the neck. One fret by itself does not do much, but over the length of the whole neck, 20+ frets wedging the wood can put a serious backbow in the neck. I know because I've done it.

So, when hammering frets in you have a few choices. One, hope the strings will pull the back bow out and give you a flat neck with enough relief for good action. Two, take the back bow out when you dress the frets. You are going to take a lot more off the center frets than the ends, and down the road you will get a couple less fret re-dresses out of them. Third is to use a dual action truss rod. There are advantages and disadvantages to dual action rods. As far as truss rods go they are heavy, complicated, have been know to break a lot more frequently than a well made simple truss rod, and remove a lot more wood from the neck than a standard truss rod.

All three of those solutions are perfectly good solutions to the problem, but the beauty of the epoxy fretting method is it removes the problem in the first place. The frets are pushed into place and exert no wedging force on the fingerboard. The neck is just as straight after you are done fretting as it was before. With no chance of back bow, at least from the frets, it lets you use a simple traditional truss rod. I just like the way a simple truss rod works. The strings cause the wood on the top of the neck to compress and bow, tightening the truss rod causes the wood on the back of the neck to compress, straightening it out. That's why a properly installed truss rod does not need any kind of curve in the channel. Just put it in a flat channel leaving about 3/16" of wood under it and you are good to go.

The neck/fingerboard in the pictures turned out about as flat as I could hope for. Using the epoxy fretting method I would say there is about a 75% chance I will not have to dress the top of the frets at all. I've got my fingers crossed, but I'd say on about 90% of the mandolins I built after I started using this method, I installed the frets, cleaned up the ends and went straight to polishing them. It's more work up front than hammering them in, but there's a good chance I'll more than make up for that by not needing to dress, then crown that start from there to get a polished fret. In the long run the customer will also be able to get the frets dressed a couple more times because they are starting out with a lot more fret. If you get the frets dressed every 8-10 years that's a long time!

The last nice thing about the epoxy method is re-fretting. You rub a hot soldering iron across the fret a couple times and pull gently with a fret nipper and the fret comes out with zero chip-out. Put a small end mill in your dremel router and base, drop it into the slot and push it across the fretboard. The bit follows the slot cutting out the epoxy. The first time I did that was scary. I thought "no way this bit is going to follow the slot." I pictured it scooting across the fretboard going where ever it pleased, but it didn't. It worked just like the repair book said it would.

Ok, enough rambing, some pics:

Checking the fretboard/neck for straightness after the glue fully dried:

DSC02286.JPG


Final inspection of the fingerboard done in the dark with one light source. I found a few spots that needed a little work.
DSC02287.JPG


Fret prepping set up: router turned upside down, clamped in a woodworking vice. The rust steel piece of metal has a couple slots cut in it for the fret to sit in and the aluminum piece is a fence/depth stop so I can push the fret in a get a consistent amount of tang removed. I own a couple Stew Mac fret nippers and don't use them. They always bent the fret and did not cut the tang off cleanly. I spent more time straightening and filing the frets than cutting when I used them. With this method you can't make micro adjustments to the height and get a perfect cut, no need to clean up before installing.
DSC02288.JPG


In action. I use a 1/2" 4 flute metal cutting bit, but I'm pretty sure the fret material is soft enough that any carbide bit would do the trick.
DSC02289.JPG


I made a set of fret cauls for installing the frets. I used a compound radius on the fretboard which is around 11" at the nut going to 26.5" at the 23rd fret.
DSC02290.JPG


Using a thin piece of aluminum to mask off the slots, apply wax to the fingerboard. I happen to use Mother's Carnuba car wax. The repair book I got this method from specifically stated "carnuba wax". Not sure why, but that's what I used and it works. Go back from the other side and do it again, getting right up to the slot. Just don't get it in the slot or the epoxy won't hold.
DSC02291.JPG


Let the wax dry, then mask off the side of the fretboard and the whole top leaving only the slots exposed.
DSC02293.JPG


Can't stress this one enough: Get EVERYTHING ready to go. The second you put the epoxy in the first fret slot the clock starts ticking. Use 90 minute epoxy at a minimum. You do not want to be in the middle of putting the frets in and start to feel the epoxy kicking. Again, been there, done that. The epoxy claimed to be 90 minute but after 15 it started to harden. I ended up getting the frets in with no more than a minute extra before the epoxy got too hard. I was freaking out and it was very stressful. I immediately switched brands of epoxy. Test a batch of epoxy before using it and time how long it is workable.
DSC02294.JPG


I make a stick to apply the epoxy. Use the flat end of the stick to put epoxy in all the slots, make sure you fill the slot completely, then use the pointy end to remove a little bit from the top of the slot. It will help with excess squeeze out when you fret.

DSC02298.JPG


The actual fretting goes pretty much the same as hammering them in. Tap it across the width to start it, then drive it in. I use the cauls and my heavier fretting hammer to make sure they are in good. The frets themselves go in easy, but you do need some force to make sure the excess epoxy squeezes out.

Done for now. I'll let the epoxy set up to a hard-rubber consistency. At that point I will use a not-too-sharp chisel to remove the excess that squeezed out.

DSC02297.JPG


Time to go check on the epoxy. I'll post more pictures once it's all cleaned up.
 
Last edited: