
Enjoy the benefits of a premium membership!
Upgrade Account
-
TalkBass has been independent since 1998. Add your voice.
Create a free account to reply to discussions, view embedded media, and browse with fewer display ads.
Join free Log in
Want zero display ads or expanded classifieds tools? Compare plans.
You are using an out of date browser. It may not display this or other websites correctly.
You should upgrade or use an alternative browser.
You should upgrade or use an alternative browser.
Vintage Modern Build
- Thread starter D-Smith
- Start date
More options
Who Replied?
Not difficult at all when you let the cnc do the work! The pearl and the inlay pocket were done on the cnc. For just a standard logo inlay I don't cut by hand anymore. Back ten or twelve years ago I did a lot of inlay work by hand. The pictures below are about as complicated as I got. I like the fancy pearl work, but lucky for me I don't really see using it much anymore, the look I'm going for doesn't include it. although I've been thinking about doing an abalone border on a bass like the mandolin below. That might look pretty cool.That inlay looks great. I cant imagine how tedious that was to cut.

Yes, router. You could do a lot of stuff with a 2 ft. x 2 ft. table. Even then you are not limited to 2ft. You could do a neck through instrument by making a jig that lets you work on the body, then flip it around and work on the neck/headstock.I need me one of them CNC!Router? Even a small one would be nice to have just for stuff like that.

Thanks! I really appreciate the kind words. I'm thinking maybe I should end this build after I do the sunburst stain and go out on a high note.
Sorry, chief. You gotta expose yourself. Do it for the children!!! That's really what this vibe is all about. These folks will help you along the way.

btw. thank you for this thread. Thank you for the tutorials within. Thank you, seriously.
Sorry, chief. You gotta expose yourself. Do it for the children!!! That's really what this vibe is all about. These folks will help you along the way.
btw. thank you for this thread. Thank you for the tutorials within. Thank you, seriously.
Expose myself to the children?!!?! What kind of forum is this?!
 Don't worry, you'll see everything, the good, the bad and the ugly. I used lacquer for a few years a long time ago, and I've been using the spray gun to paint other things here and there over the years so that should go ok. It's the buffing I haven't done in ages that might be interesting.

Hopefully you will chronicle your next build on TB as well. I've had a great time following this one.

Hopkins
Commercial User
Are your CNC services for hire? Because I totally suck at inlay to the point that I just don't do them unless its on ebony or some other very dark wood.
Are your CNC services for hire? Because I totally suck at inlay to the point that I just don't do them unless its on ebony or some other very dark wood.
I don't, I'm just not set up for turning out inlay but these guys have been around forever and I know people that have used them and have excellent things to say about them:
Invalid Link Removed
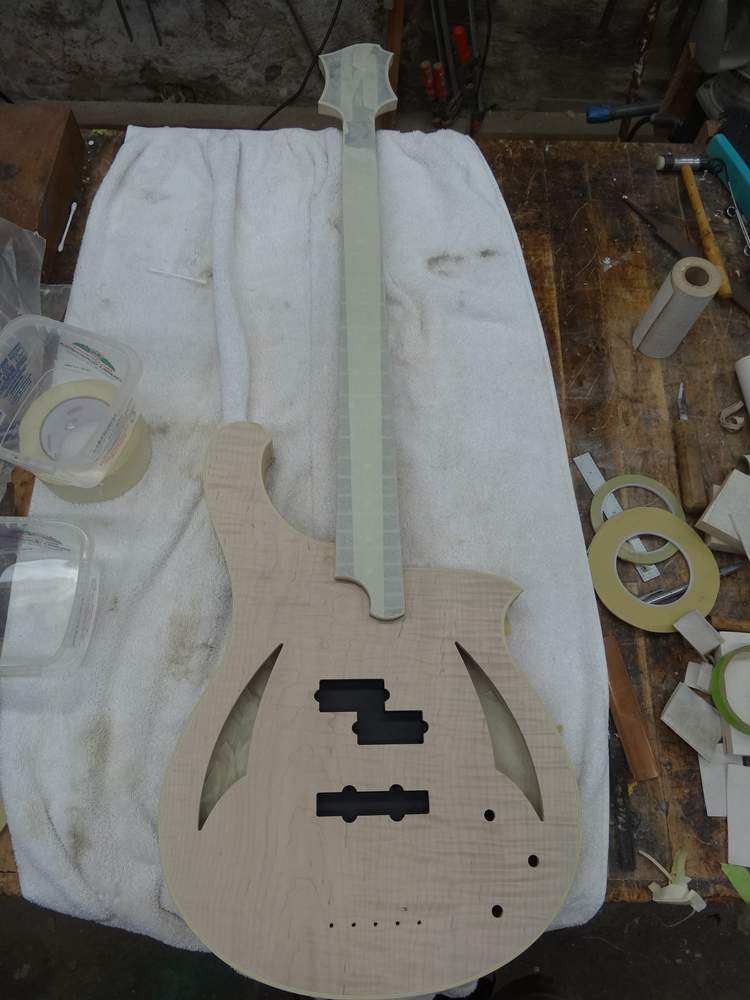
Masked and ready for stain:
Done. You like?
Just kidding. Done.
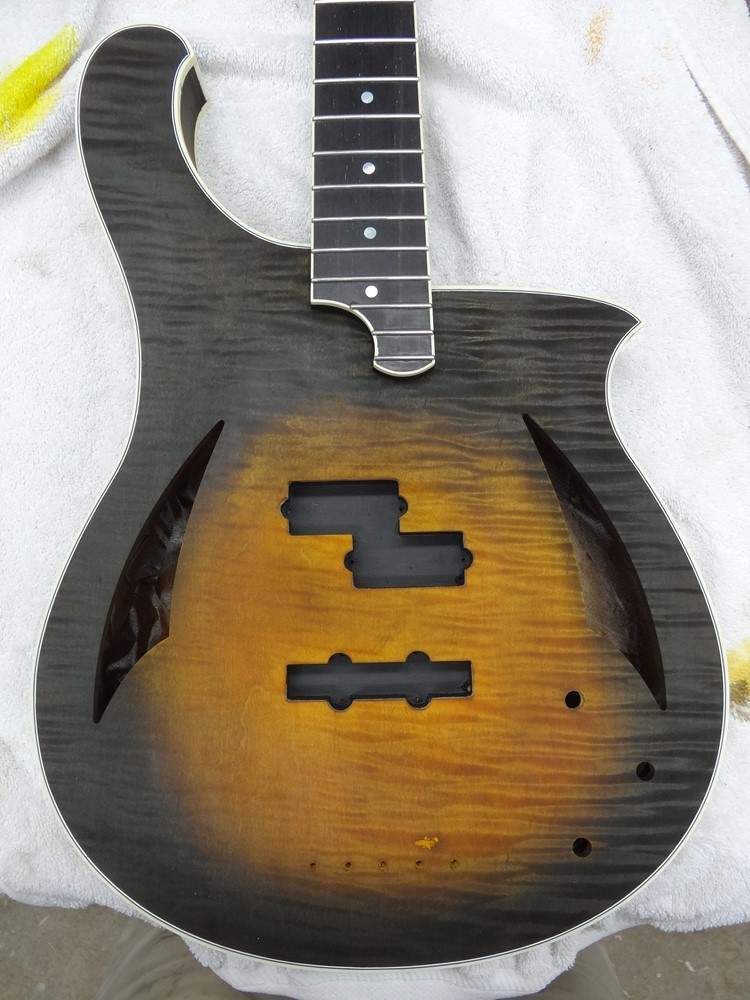
If you do a sunburst, always go darker than you think you want. When you put your clearcoat on it will lighten up and if you stained it so it looks good without clearcoat it will usually looked washed out after clear.
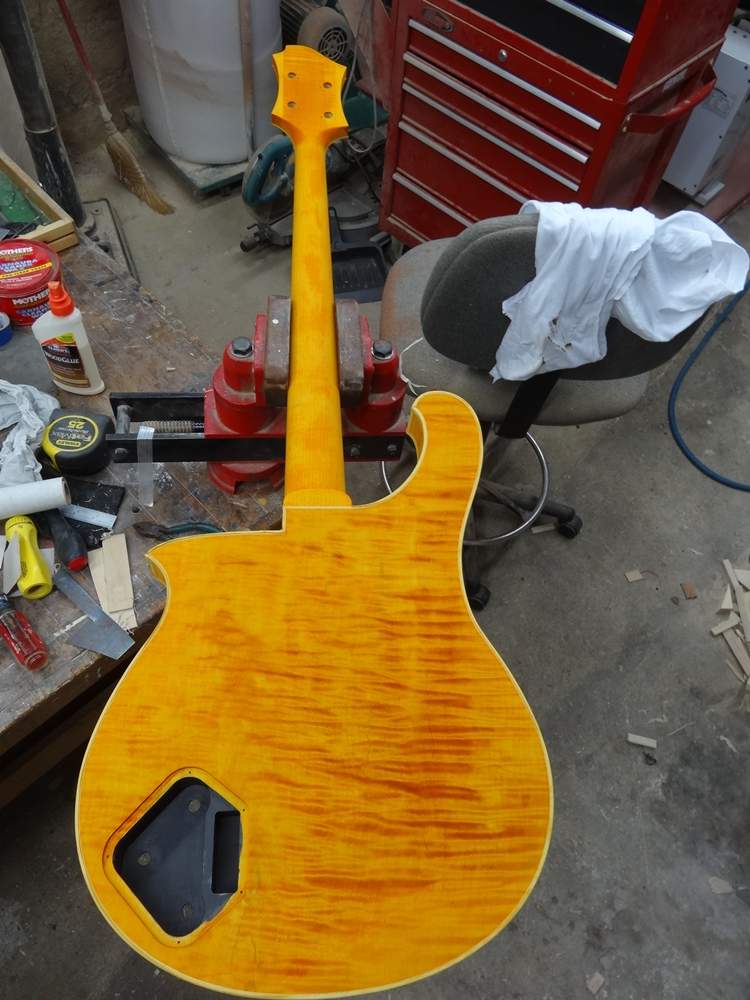
I've got a couple hours of cleaning the binding then I can start shooting lacquer. This is the first time I've used the Stew-Mac stains. They seem fine. Over the top expensive though. You can thin them with water or alcohol. I've always used alcohol but I thought I would give water a try. Only problem I've ever had with alcohol is the stain wicks under the masking tape, so I thought using water might help with that. It did, but it also made it much more difficult to use. I figured the drying time would increased substantially, which it did, but it also made spraying much more difficult.
After applying the yellow/orange base color I use a combination of spraying and hand blending to put the brown on and blend it into the orange. Using alcohol lets you build up the brown color fast. You can do the back, go to the front and before you are half way done with the front the back is ready to be sprayed again, and you can put it on heavy and it doesn't run. Alchohol also sprays very well. No spitting and the spray at the edge of the pattern is very fine. Water is the opposite on all of the above. Can't put it on heavy, dries slow, spits and the spray at the edge of the pattern is bad.
Done. You like?
Just kidding. Done.
If you do a sunburst, always go darker than you think you want. When you put your clearcoat on it will lighten up and if you stained it so it looks good without clearcoat it will usually looked washed out after clear.
I've got a couple hours of cleaning the binding then I can start shooting lacquer. This is the first time I've used the Stew-Mac stains. They seem fine. Over the top expensive though. You can thin them with water or alcohol. I've always used alcohol but I thought I would give water a try. Only problem I've ever had with alcohol is the stain wicks under the masking tape, so I thought using water might help with that. It did, but it also made it much more difficult to use. I figured the drying time would increased substantially, which it did, but it also made spraying much more difficult.
After applying the yellow/orange base color I use a combination of spraying and hand blending to put the brown on and blend it into the orange. Using alcohol lets you build up the brown color fast. You can do the back, go to the front and before you are half way done with the front the back is ready to be sprayed again, and you can put it on heavy and it doesn't run. Alchohol also sprays very well. No spitting and the spray at the edge of the pattern is very fine. Water is the opposite on all of the above. Can't put it on heavy, dries slow, spits and the spray at the edge of the pattern is bad.


Mother of God that's beautiful. An incredible instrument in progress here.
I just now noticed the background. Anyone that says they don't have clamp envy is full of poopie.
I see various different hand planes that you have used for various tasks, but you only mentioned the big guy, which you say is a #8. What do you suggest for a good small set of hand planes to get some common things done?
I just now noticed the background. Anyone that says they don't have clamp envy is full of poopie.
I see various different hand planes that you have used for various tasks, but you only mentioned the big guy, which you say is a #8. What do you suggest for a good small set of hand planes to get some common things done?
You really don't need much at all. If you have more planes you will find a use for them, but really only need three:
- Jointer Plane: Stanley #8 or #7. I like the #8 better, it's a little bigger and heavier, but the #7 is easier to find.
- Block Plane: Stanley #9-1/2 or #18
- Spokeshave: Stanley #54, it has an adjustable mouth that lets you adjust the depth of cut without messing with the blade.
All three of those were very popular planes and are easy to find on ebay. I like the old tools, like 1930's and earlier, better. The castings and blades are just a better quality. If it's sold as a "sweetheart" vintage (there was a small heart in the logo stamped on the blade), that's and easy way to identify a tool made during a good time period for Stanley.
This is a good page if you are looking to buy a plane on ebay. He tells you all the parts of a particular model, all the usual problems an 80 year old example of that plane may have and what to look out for when deciding to buy. Plus, if you are just interested in planes you can spend hours looking at all of them: The Superior Works - Patrick's Blood & Gore: Preface
Last edited:
I forgot to order retarder when I ordered the lacquer, so I had to wait a week for that to arrive. Then as soon as I had the retarder the humidity went from bad to ridiculous, so I had to wait a few more days. Finally got the sealer and first 5 coats on. I'll wet sand in a couple days and shoot the final coat.
The back actually has 6 coats. On coat number 5 I thought I was about to wrap it up when a fly landed on the back. Arghh! I had to sand it down, put a couple touch up coats on that spot then shoot the whole back again. Nice thing about lacquer is all that only takes an hour. 12 years ago when I routinely used lacquer I had a small spray booth set up. When I switched to oil based varnish I took it down. After a year I realized what a huge problem dust is when using varnish, so I built a free standing finishing room in the middle of my shop. At some point I'll convert that into a spray booth, but I'll need to figure out how to vent it to a window.
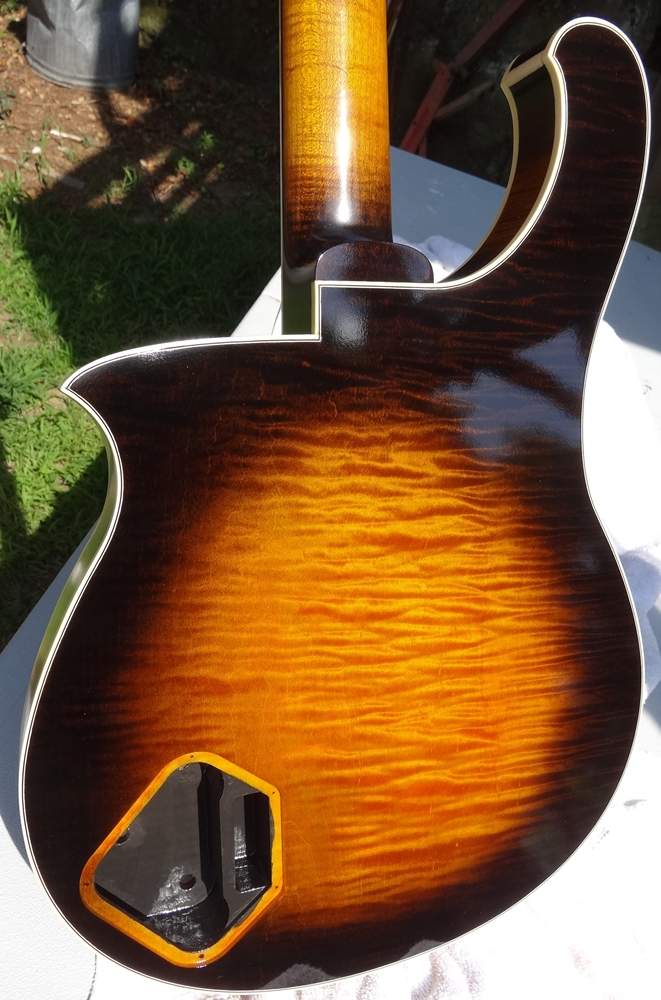
There's a little dust on the headstock, but the lacquer is too soft to wipe it off.
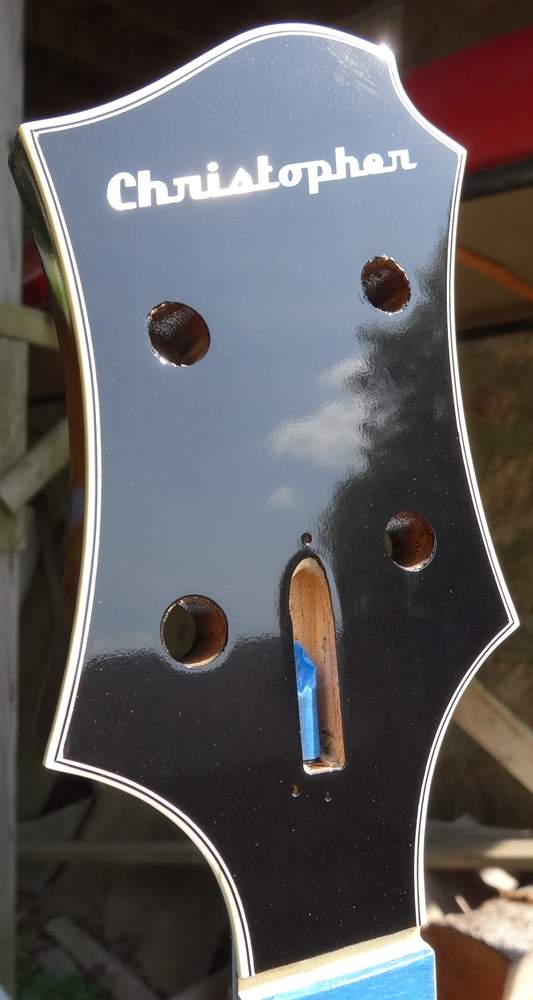
The back actually has 6 coats. On coat number 5 I thought I was about to wrap it up when a fly landed on the back. Arghh! I had to sand it down, put a couple touch up coats on that spot then shoot the whole back again. Nice thing about lacquer is all that only takes an hour. 12 years ago when I routinely used lacquer I had a small spray booth set up. When I switched to oil based varnish I took it down. After a year I realized what a huge problem dust is when using varnish, so I built a free standing finishing room in the middle of my shop. At some point I'll convert that into a spray booth, but I'll need to figure out how to vent it to a window.
There's a little dust on the headstock, but the lacquer is too soft to wipe it off.

I have to admit, I was on the fence about the burst until seeing it under the top coats and now it just fits! Overall classic look with a classic burst.. It really is a beautiful bass, very commendable work.
And that Inlay has given me the CNC bug... Put it this way, I have lots of linear bearings, stepper motors and controllers on the way to me.
Put it this way, I have lots of linear bearings, stepper motors and controllers on the way to me.
You continue to knock this out of the park, @smithcreek, outstanding.
If your inbox isn't stuffed with commissioned build requests, I'd be surprised.
One thing that is blowing me away is that you started posting on June 12th, then lost 2 weeks to weather and material delivery. Today is July 10th. That baby is almost ready for a rub out and hardware. Beautiful.
If your inbox isn't stuffed with commissioned build requests, I'd be surprised.
One thing that is blowing me away is that you started posting on June 12th, then lost 2 weeks to weather and material delivery. Today is July 10th. That baby is almost ready for a rub out and hardware. Beautiful.
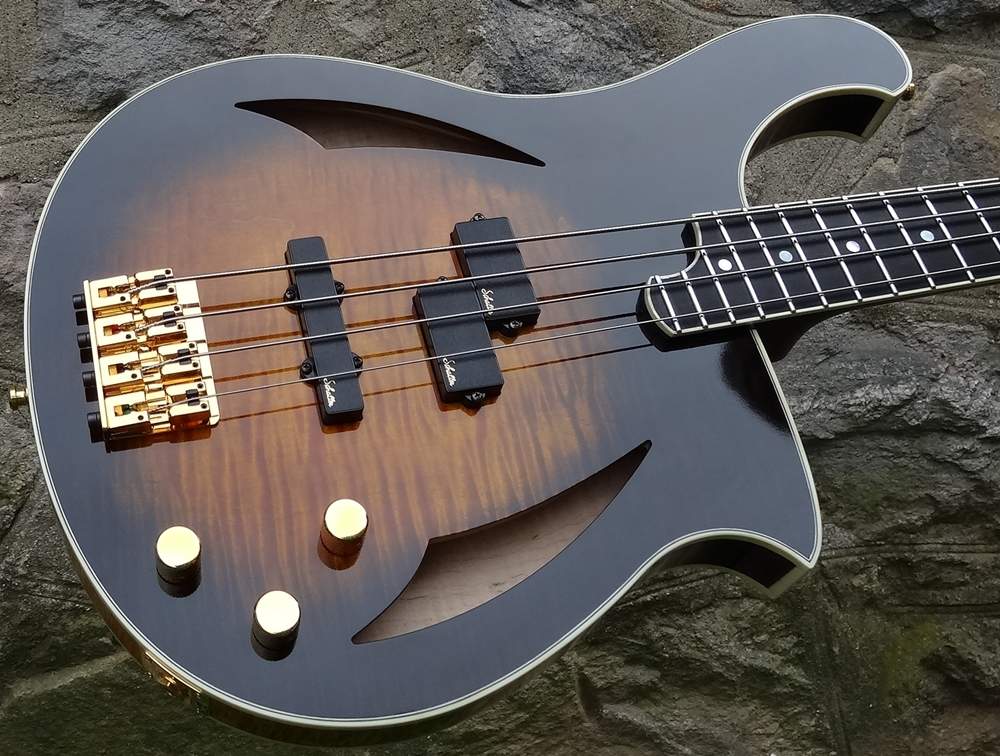
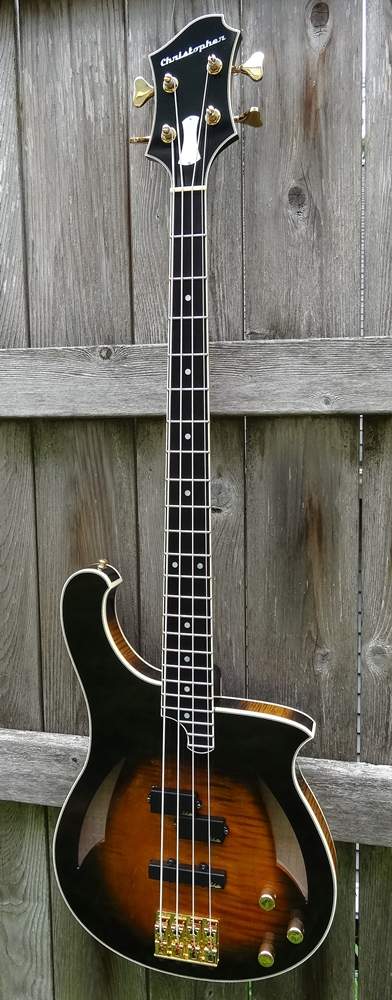
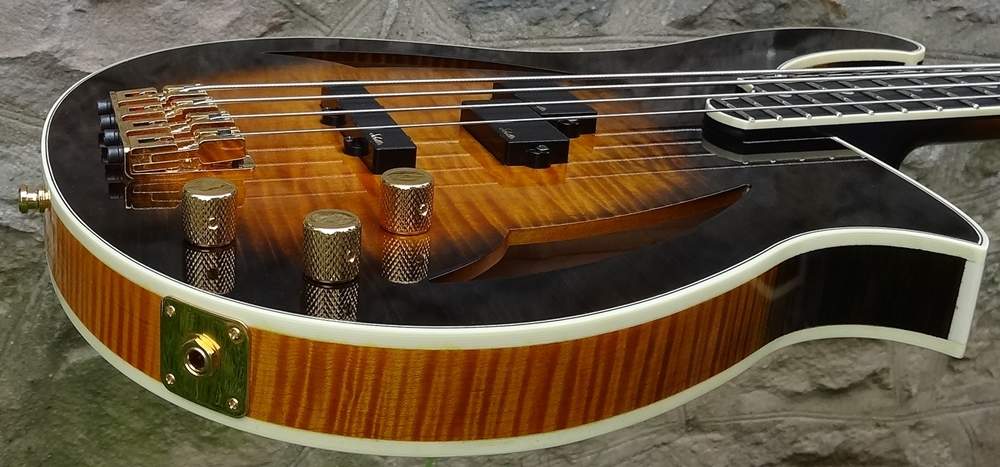
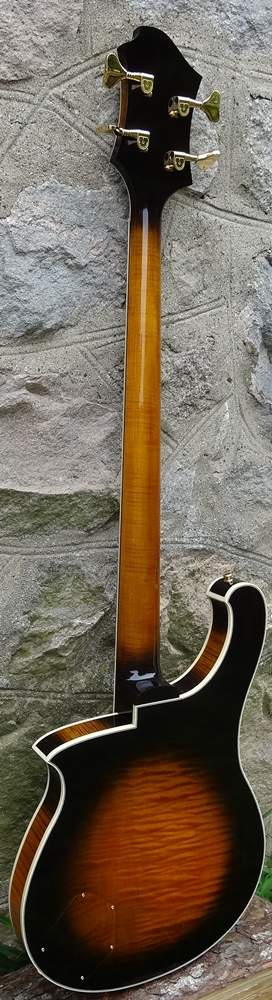
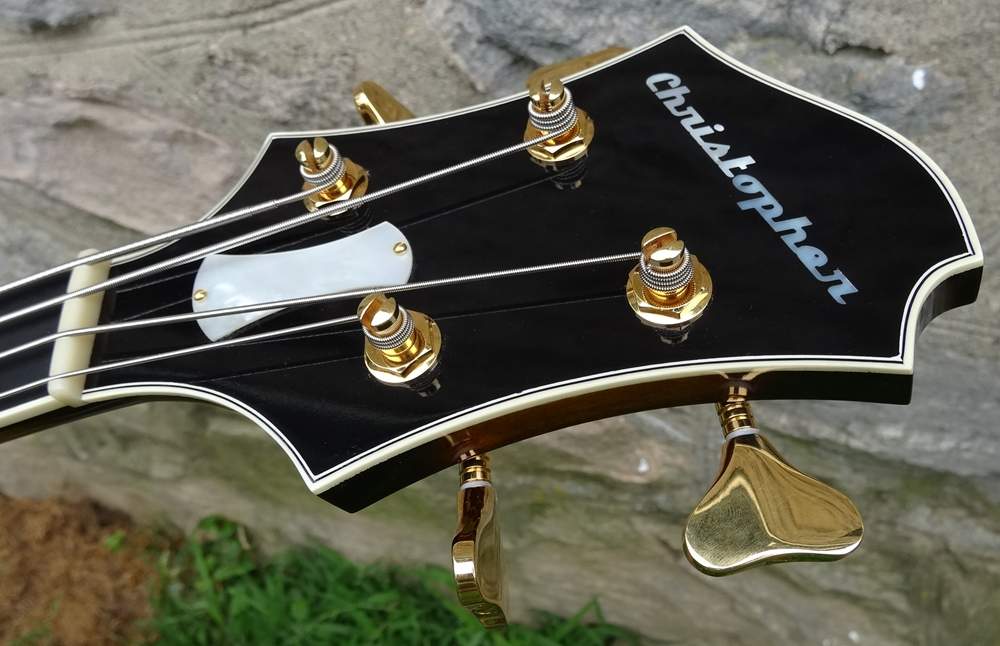
I finished the bass up yesterday and took a couple photos this morning. I like the sound, I'll try to figure out a way to record a clip soon.
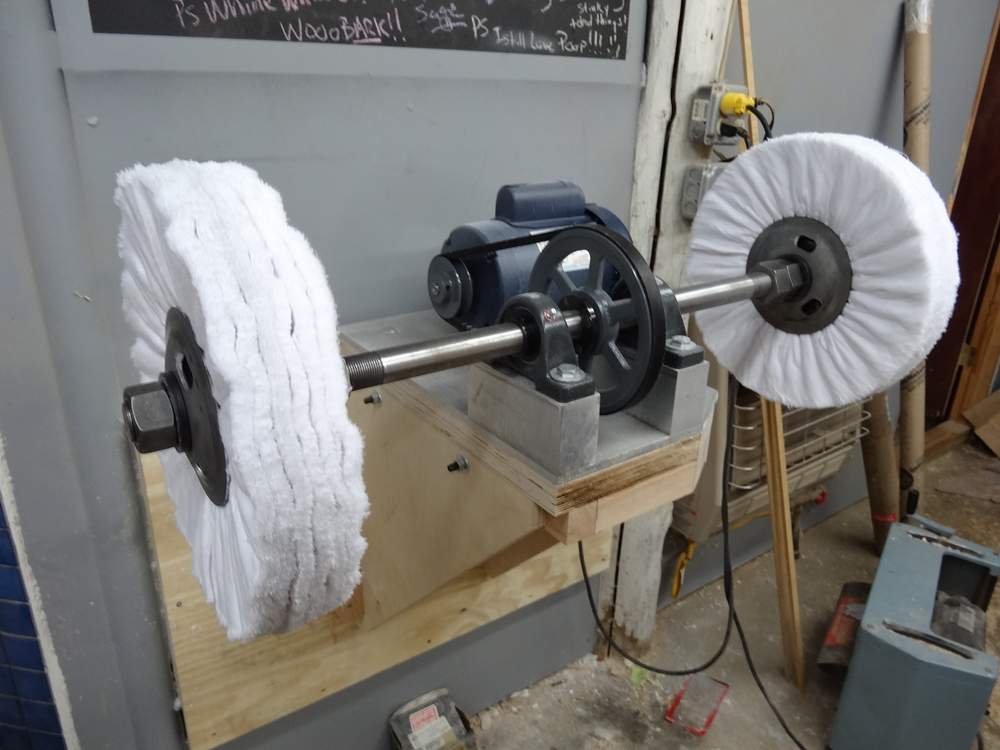
I put together a buffing machine. Bought the shaft from a guy on ebay that was selling smaller shafts. I contacted him and gave him the specs, 1-1/4" x 36", 8" of threads (right on one end, left on the other) with a 5" keyway in the middle. He even threw in the nuts and keyway for $100 which I thought was a good deal.
Finished pics. The dark part of the sunburst is lighter than the picture shows. The flame of the maple shows fairly well, especially up close:
I put together a buffing machine. Bought the shaft from a guy on ebay that was selling smaller shafts. I contacted him and gave him the specs, 1-1/4" x 36", 8" of threads (right on one end, left on the other) with a 5" keyway in the middle. He even threw in the nuts and keyway for $100 which I thought was a good deal.
Finished pics. The dark part of the sunburst is lighter than the picture shows. The flame of the maple shows fairly well, especially up close:
Last edited:


