• TalkBass has been independent since 1998. Add your voice.
    Create a free account to reply to discussions, view embedded media, and browse with fewer display ads.
    Join freeLog in
    Want zero display ads or expanded classifieds tools? Compare plans.

What's On Your Workbench?

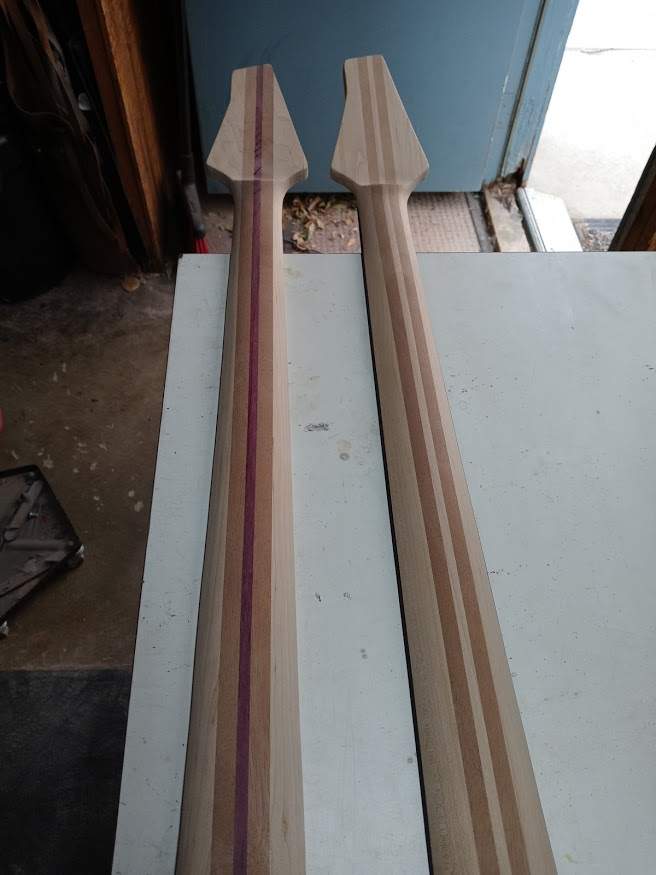
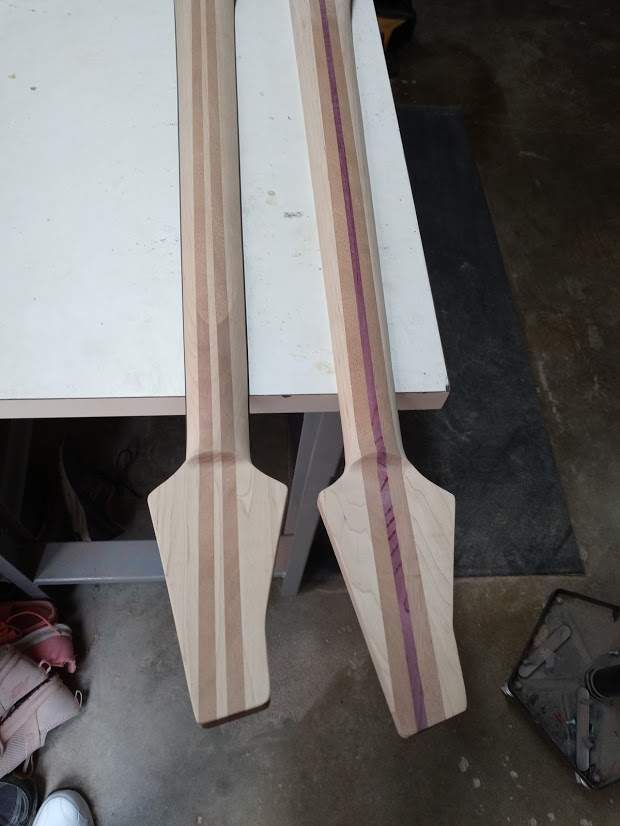
Building a couple of necks for 5 string basses
necks1.jpg

necks2.jpg

One's scarf-jointed and the other is just tilted back.
Didn't do build threads, since these are pretty much the same as a build I did a thread for previously and there's really nothing new to share. I'll post up when they are done or if anything interesting comes up during the builds.
 
Okay, so here's what's on my workbench -
We took a bunch of scrap leftovers from my build, ripped them into strips, the wife even purchased some small pieces of other woods, we ripped those as well, then glued up some cutting boards -
20200905_162044.jpg

20200905_162049.jpg

After some sawing of the ends, planing each face and then a trip through the router with a 45 degree bit, we had 7 roughly 12x9 cutting boards -
20200906_092458.jpg

These will be Christmas presents, packaged with some of my infamous smoked cheese and sausage. :cool:
Oh, there was some bass building too, but that's in other threads. ;)
 
A while back I built myself a dust collector inspired by this video:


It works well, and has already paid for itself from saving those expensive shop vac bags:
20200907_173043.jpg


That project was the prerequisite to a router sled that I finished today. This is my own design based on bits of ideas from various examples on the internet. Part of the reason for creating my own is that, other than an 8' piece of 2"x2" 1/8" aluminum angle that I had to buy, everything else was on-hand so it all ended up fairly inexpensive. It can hold a piece of wood up to about 18x48"x2.25" so should work for pretty much any bass project, plus most other wood working projects I can think of:
20200907_151803.jpg


The cheap bottom clearing bit I bought worked extremely well. I may not end up buying a more expensive one until this one gets too dull:
20200907_153303.jpg


This neck blank (for another build I am starting :rolleyes:) had a slight warp so needed to be fixed before I started shaping. I was pretty shocked how nice a finish the sled gave. You can see the original surface planing marks in the bottom left corner of this shot, plus a some sharpee line right next to it, and the bit took off the surface in the top and right of the picture:
20200907_162417.jpg


The router bit left a much cleaner finish than the thickness planer, with no significant overlap marks. I almost can't believe it worked that well.

Unfortunately the dust port on the router did not surpass my expectations. It basically did not work at all, since the bottom is wide open, so I need to come up with some better dust extraction system. Maybe just add a wall on each end with a slot in the bottom connected to a vacuum hose. Until then I guess I will just vacuum the whole garage after using it!

The other issue is had was how to hold small pieces while flattening them. For pieces with offcut parts, like neck blanks, I can screw the piece down, from the bottom of the sled, in a spot that will eventually be cut off. But for thin things with minimal offcut, like fretboard blanks, they can't really be screwed down. I tried using a couple of small squares of double-sided carpet tape, and that worked well until it didn't. One piece I was flattening had a slight curve to it and the tape eventually let go while I was in the middle of thicknessing. This resulted in the router taking off a big gouge, and might have made an otherwise beautiful walnut blank too thin :( Any suggestions from someone who has a sled on better ways to hold things down? I guess pros use a vacuum table but I'm not ready to make one of those -- yet. Maybe I just need more tape for now.

Anyway, here is the finished black walnut neck blank, a couple of possible walnut blanks for my 6 string "one piece" build plus a couple of figured maple fretboard blanks for the pickup mule build:
20200907_170639.jpg
 
So, oddly enough, that bald headed guy with the skull tats and fancy accent (Ben, Crimson Guitars) showed in one of his videos how he used the super glue and masking tape trick to hold down stuff while routering it. Maybe try that?

Thanks for the tip!

DuckDuckGo took me here in case anyone is interested:


I will definitely give that a try.
 
Any suggestions from someone who has a sled on better ways to hold things down?

At @Beej's suggestion a year or so ago, I started using blobs of hot glue for tricky parts. It works great and is fairly easy to undo afterwards since you can just pop the glue off with a utility knife.

Another option is to have one of the side rails floating. Or use a third rail purely as a clamp. Then you can clamp the workpiece from the sides, if that makes sense. If you put little steps in the rails you can arrange it so the surface you're planing is above the part of the rail that's doing the clamping. That works well on larger stuff like neck blanks and also smaller stuff like fretboards. I have a couple long scraps of MDF I use to accomodate different height/width parts to let me clamp the rails right to the part to hold it still.

And yeah vacuum tables are great too!
 
Oh the horror:eek:! Me too:(! Just finished this routing template for a Kahler tremolo for the 8 string guitar. Maybe as it's a 27.5" scale with strings below E you'll forgive me?
If you are, henceforth, willing to refer to this abomination as an "8-String Short Scale Piccolo Bass", I might, after a suitable period of placing you on my Dreaded Ignore List, find the commendable good grace to forgive you. Go sit in the corner with @ctmullins. I guess having a couple beers while you sit would be acceptable, but only a couple, and forget having any pretzels.