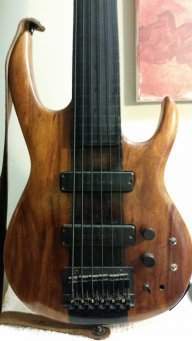
Started my first bass build with wood I have on hand. maybe making firewood, but maybe something cool.


TalkBass has been independent since 1998. Add your voice.
Create a free account to reply to discussions, view embedded media, and browse with fewer display ads.
Join free Log in
Want zero display ads or expanded classifieds tools? Compare plans.


You just beat me in the "smallest workbench" category. Yours looks to be about a square foot. Mine's nearly twice that.Started my first bass build


A bigger bench might be nice, but I can move this around to get light, or stay in the shade as needed. It’s also easy to clean up wood chips and dust outside. The top is almost carved out on the inside and it’s developing a nice tap tone, if that means anything.You just beat me in the "smallest workbench" category. Yours looks to be about a square foot. Mine's nearly twice that.

A bigger bench might be nice, but I can move this around to get light, or stay in the shade as needed. It’s also easy to clean up wood chips and dust outside. The top is almost carved out on the inside and it’s developing a nice tap tone, if that means anything.
View attachment 4487344
They are both beautiful. too good too eat.I finished the guitars I've been posting about.
Walnut body:
View attachment 4487475
View attachment 4487476
View attachment 4487479
And cherry body:
View attachment 4487480
View attachment 4487482
Really pleased with how they turned out. The walnut body on the first one looks good enough to eat.

Those are really beautiful. I like the way you’ve carried the curve of the cutaway into the upper horn. And yes, that walnut is something else!I finished the guitars I've been posting about.
Walnut body:
View attachment 4487475
View attachment 4487476
View attachment 4487479
And cherry body:
View attachment 4487480
View attachment 4487482
Really pleased with how they turned out. The walnut body on the first one looks good enough to eat.

I like the way you’ve carried the curve of the cutaway into the upper horn
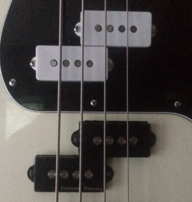
Questions:
1. Do you wear protection glasses when working with a router? I did, and it didn't seem necessary.
2. Do you use a router as a surrogate drill press?
3. What is this bit for?
And one of the most dangerous. Use protection and caution using all power tools and you'll won't create any of those cautionary tales.1. Hell yes, I always wear safety glasses when I am working with power tools.
2. No.
3. It is a roundover bit to put a rounded edge on a board.
Good luck. The router is one of the most fun tools to use!
A router is an extremely versatile and potentially dangerous tool. When accidents happen with a router, they typically happen very quickly and with little or no warning. Always err on the side of caution.Questions:
1. Do you wear protection glasses when working with a router? I did, and it didn't seem necessary.
2. Do you use a router as a surrogate drill press?
3. What is this bit for?
View attachment 4487960
3. It is a roundover bit to put a rounded edge on a board.
I thought that's what it was, from the way it looks. I tried to use it to radius an edge, but achieved a mess. A matter of experience I guess. Maybe it's also the cheap wood.3. A round over bit for radiusing corners. The ball bearing guide rides along the outer edge of the piece being radiused.

Some things to try:Thanks for the responses, all.
I thought that's what it was, from the way it looks. I tried to use it to radius an edge, but achieved a mess. A matter of experience I guess. Maybe it's also the cheap wood.