• TalkBass has been independent since 1998. Add your voice.
    Create a free account to reply to discussions, view embedded media, and browse with fewer display ads.
    Join freeLog in
    Want zero display ads or expanded classifieds tools? Compare plans.

What's On Your Workbench?

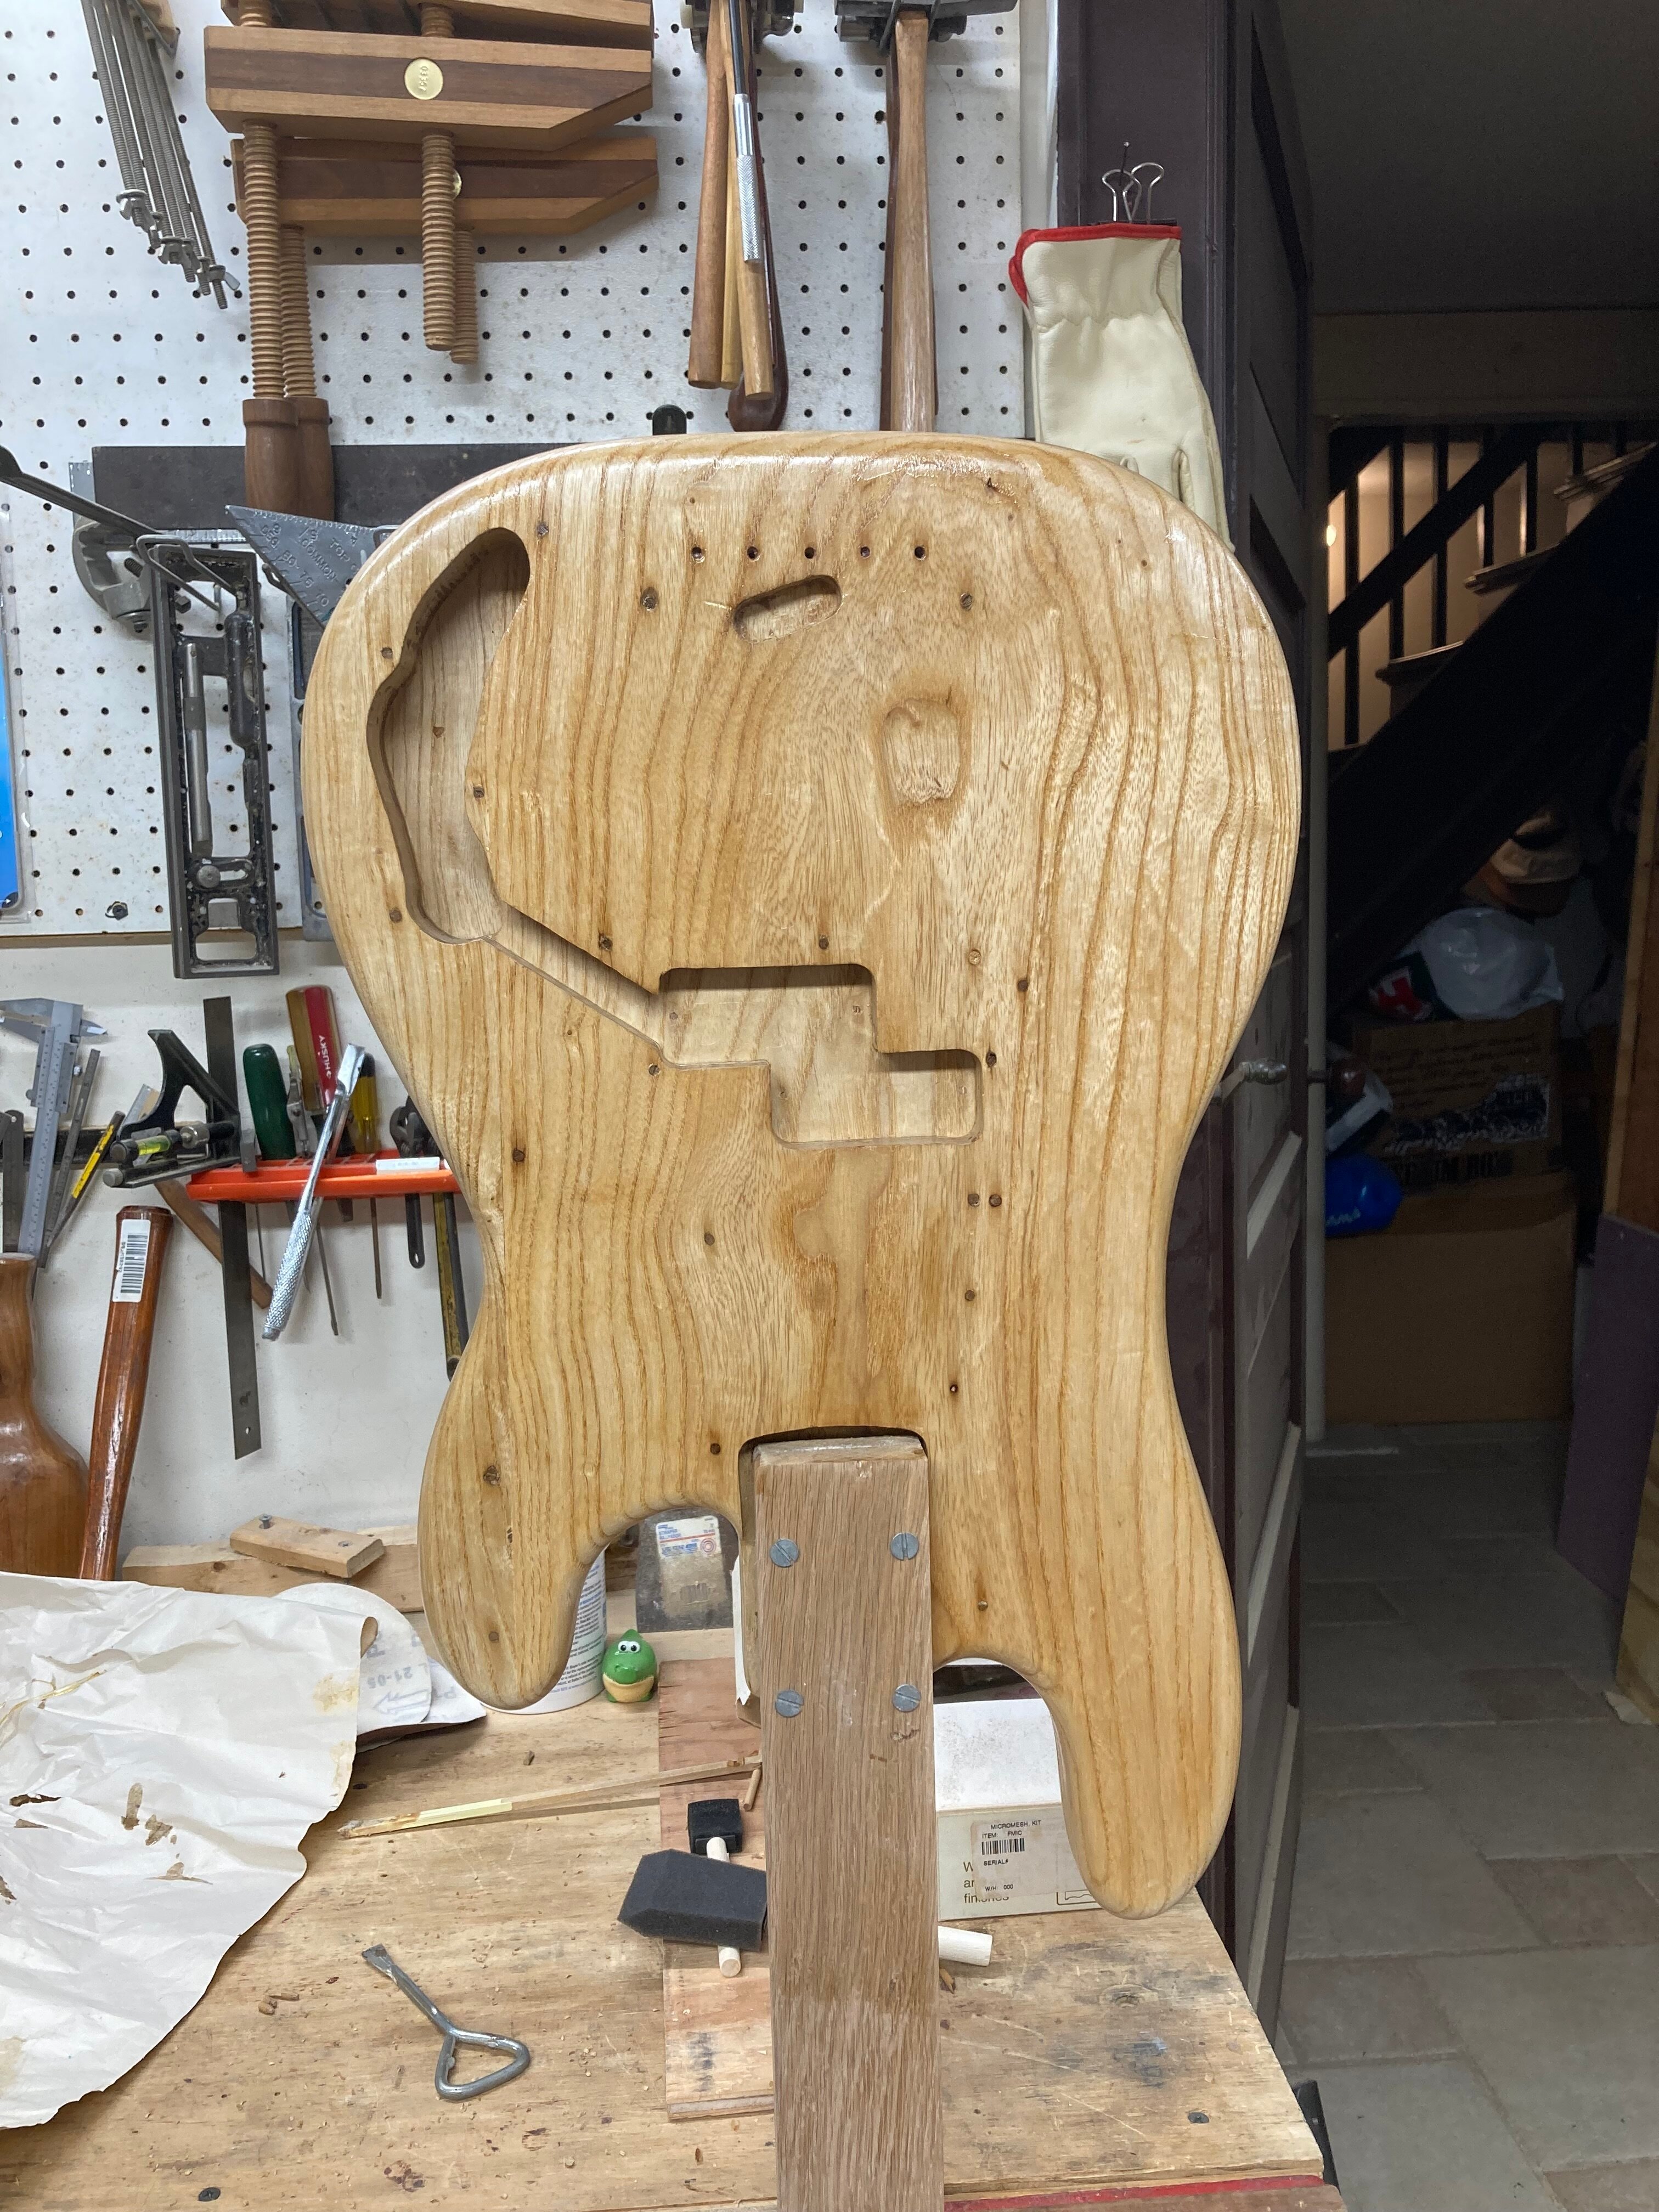
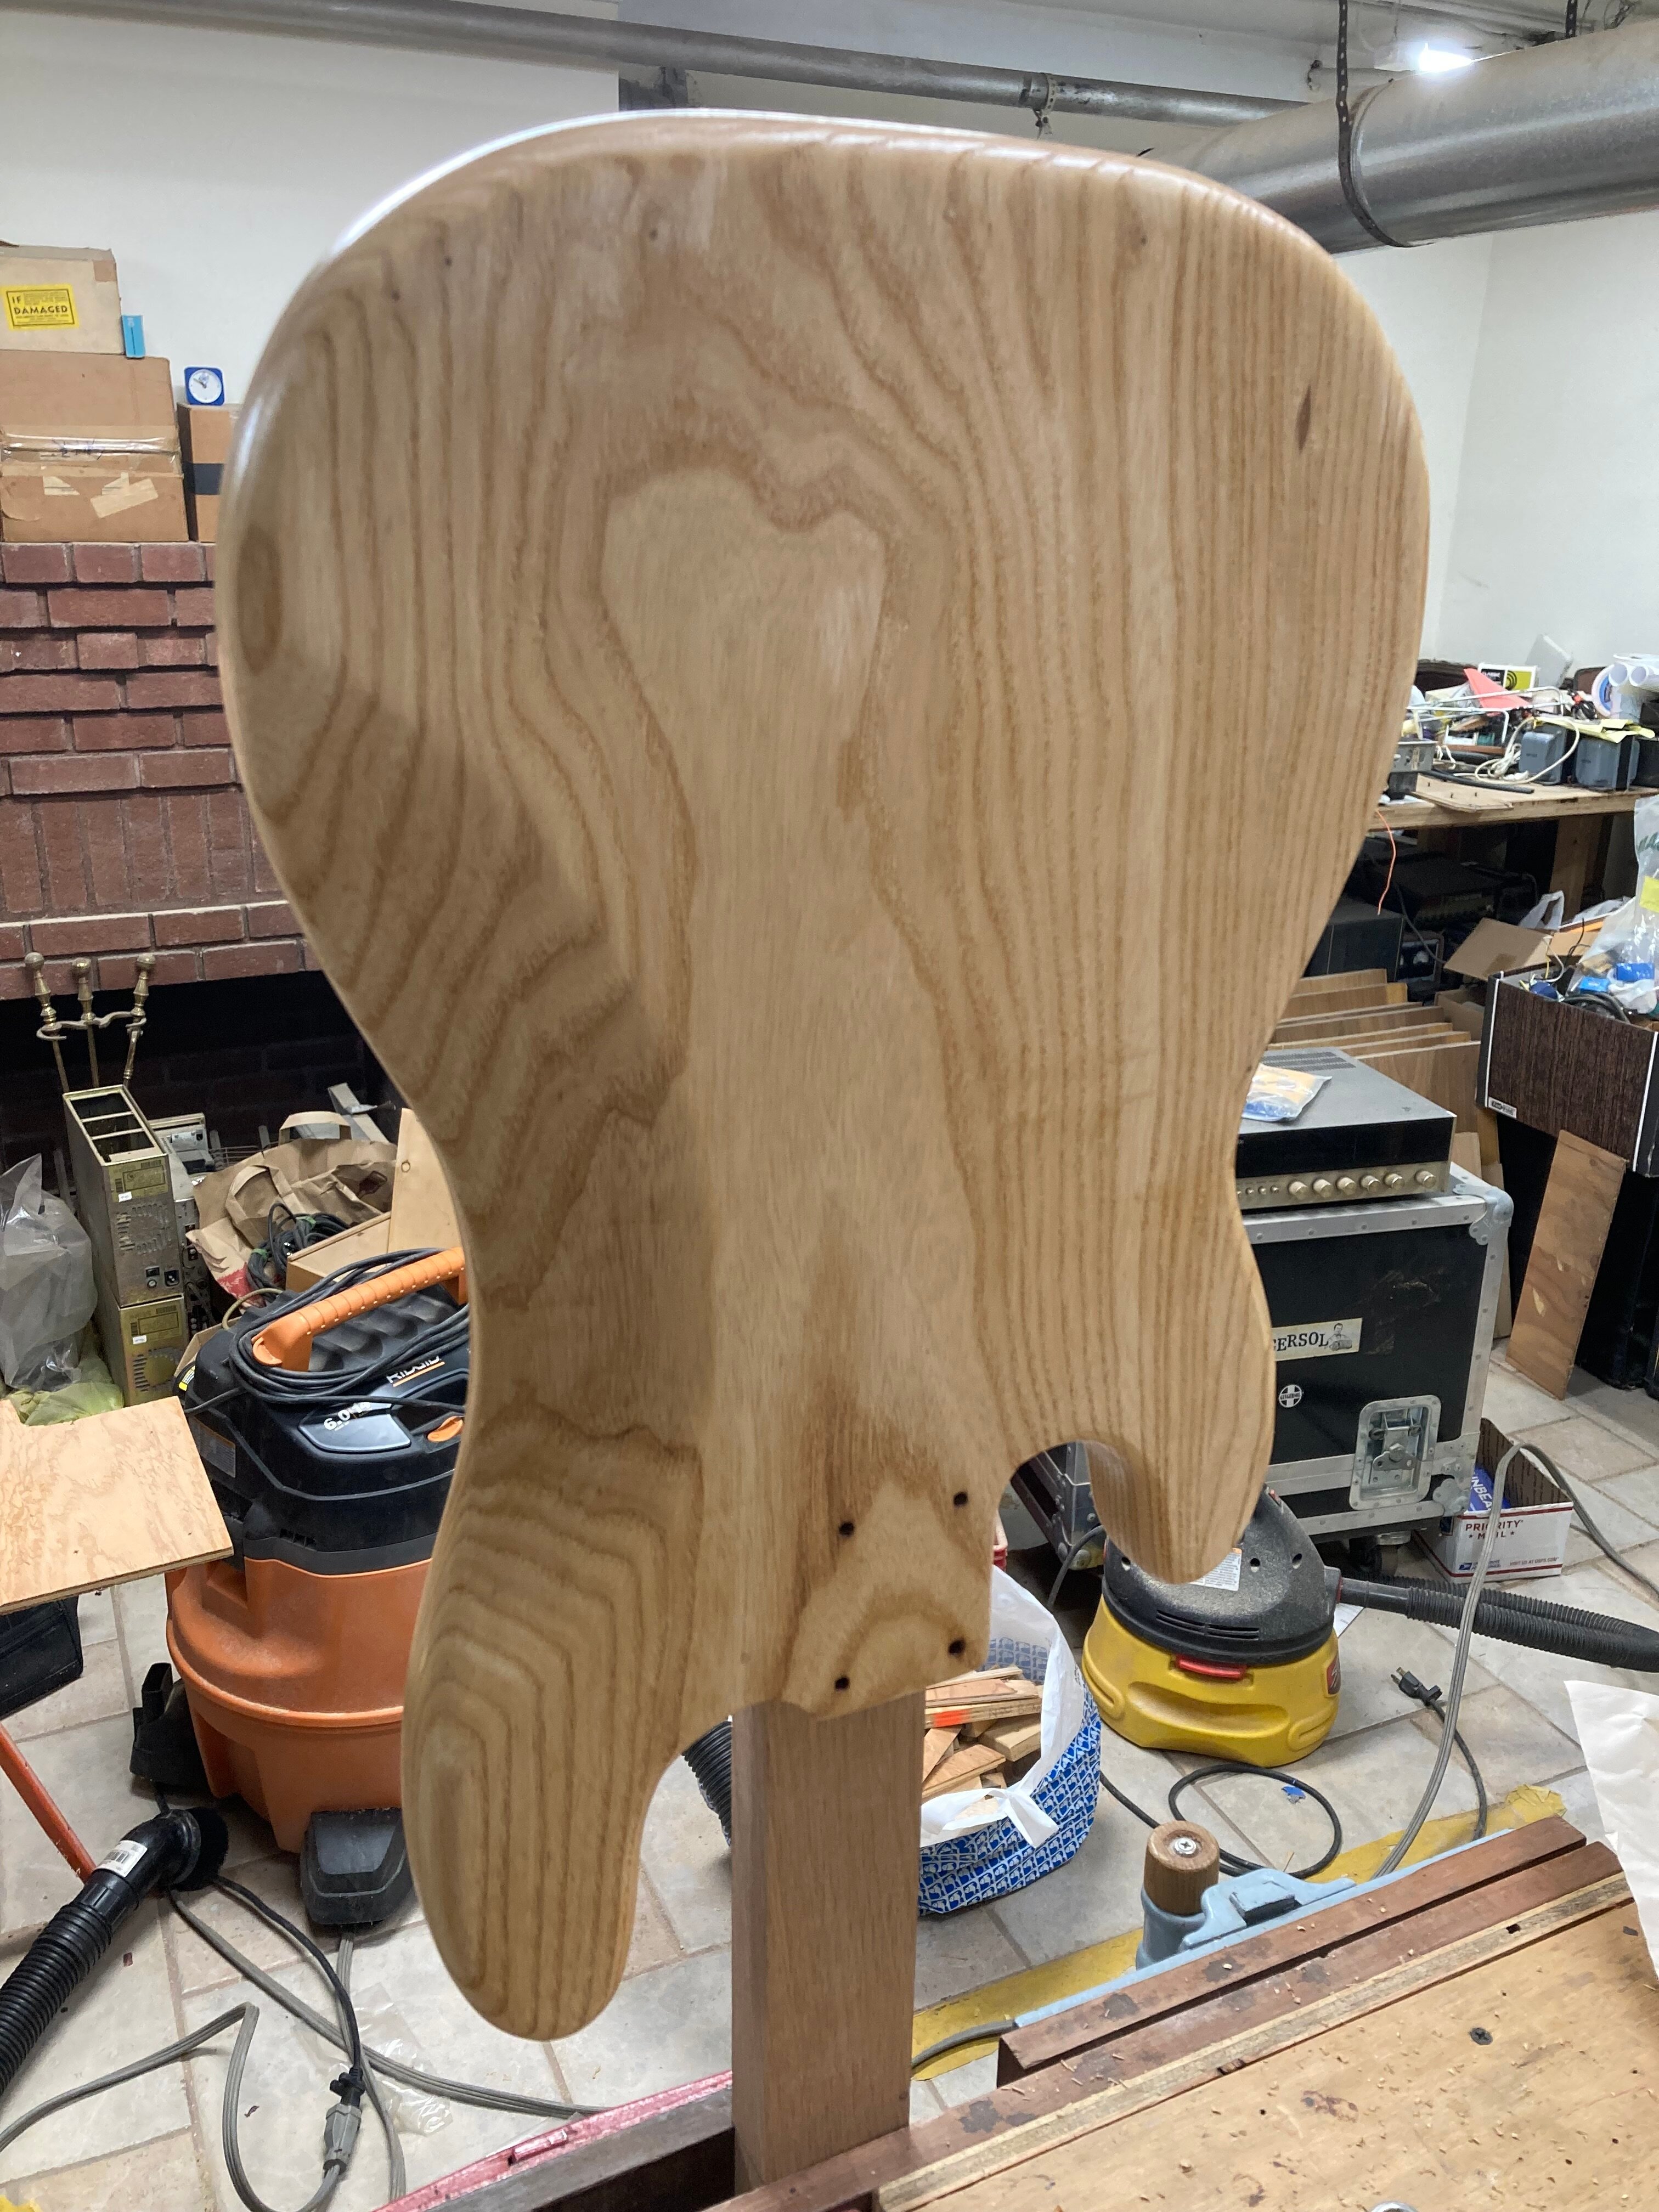
Two coats on the P-bass body today:
IMG_8266.jpeg

IMG_8267.jpeg

I laid it on a little heavy so there are some runs but it's just going to get sanded completely back anyway. These first few coats are just filling grain. As per @Bruce Johnson 's suggestion, I'm using Minwax Oil-Modified wipe on poly for this. It was a little heartbreaking to sand that first coat all the way back to wood but that's just how this'll go until the grain is filled up. I'm sanding back with 220 now but I'll use smaller grits and thinner applications when I start the surface coats. I expect it to take 5 or six coats to fill the grain before I can start building coats on the surface. Luckily it dries really fast but I won't have much free time for a while anyway so this will be 2 coats at a time for weeks.

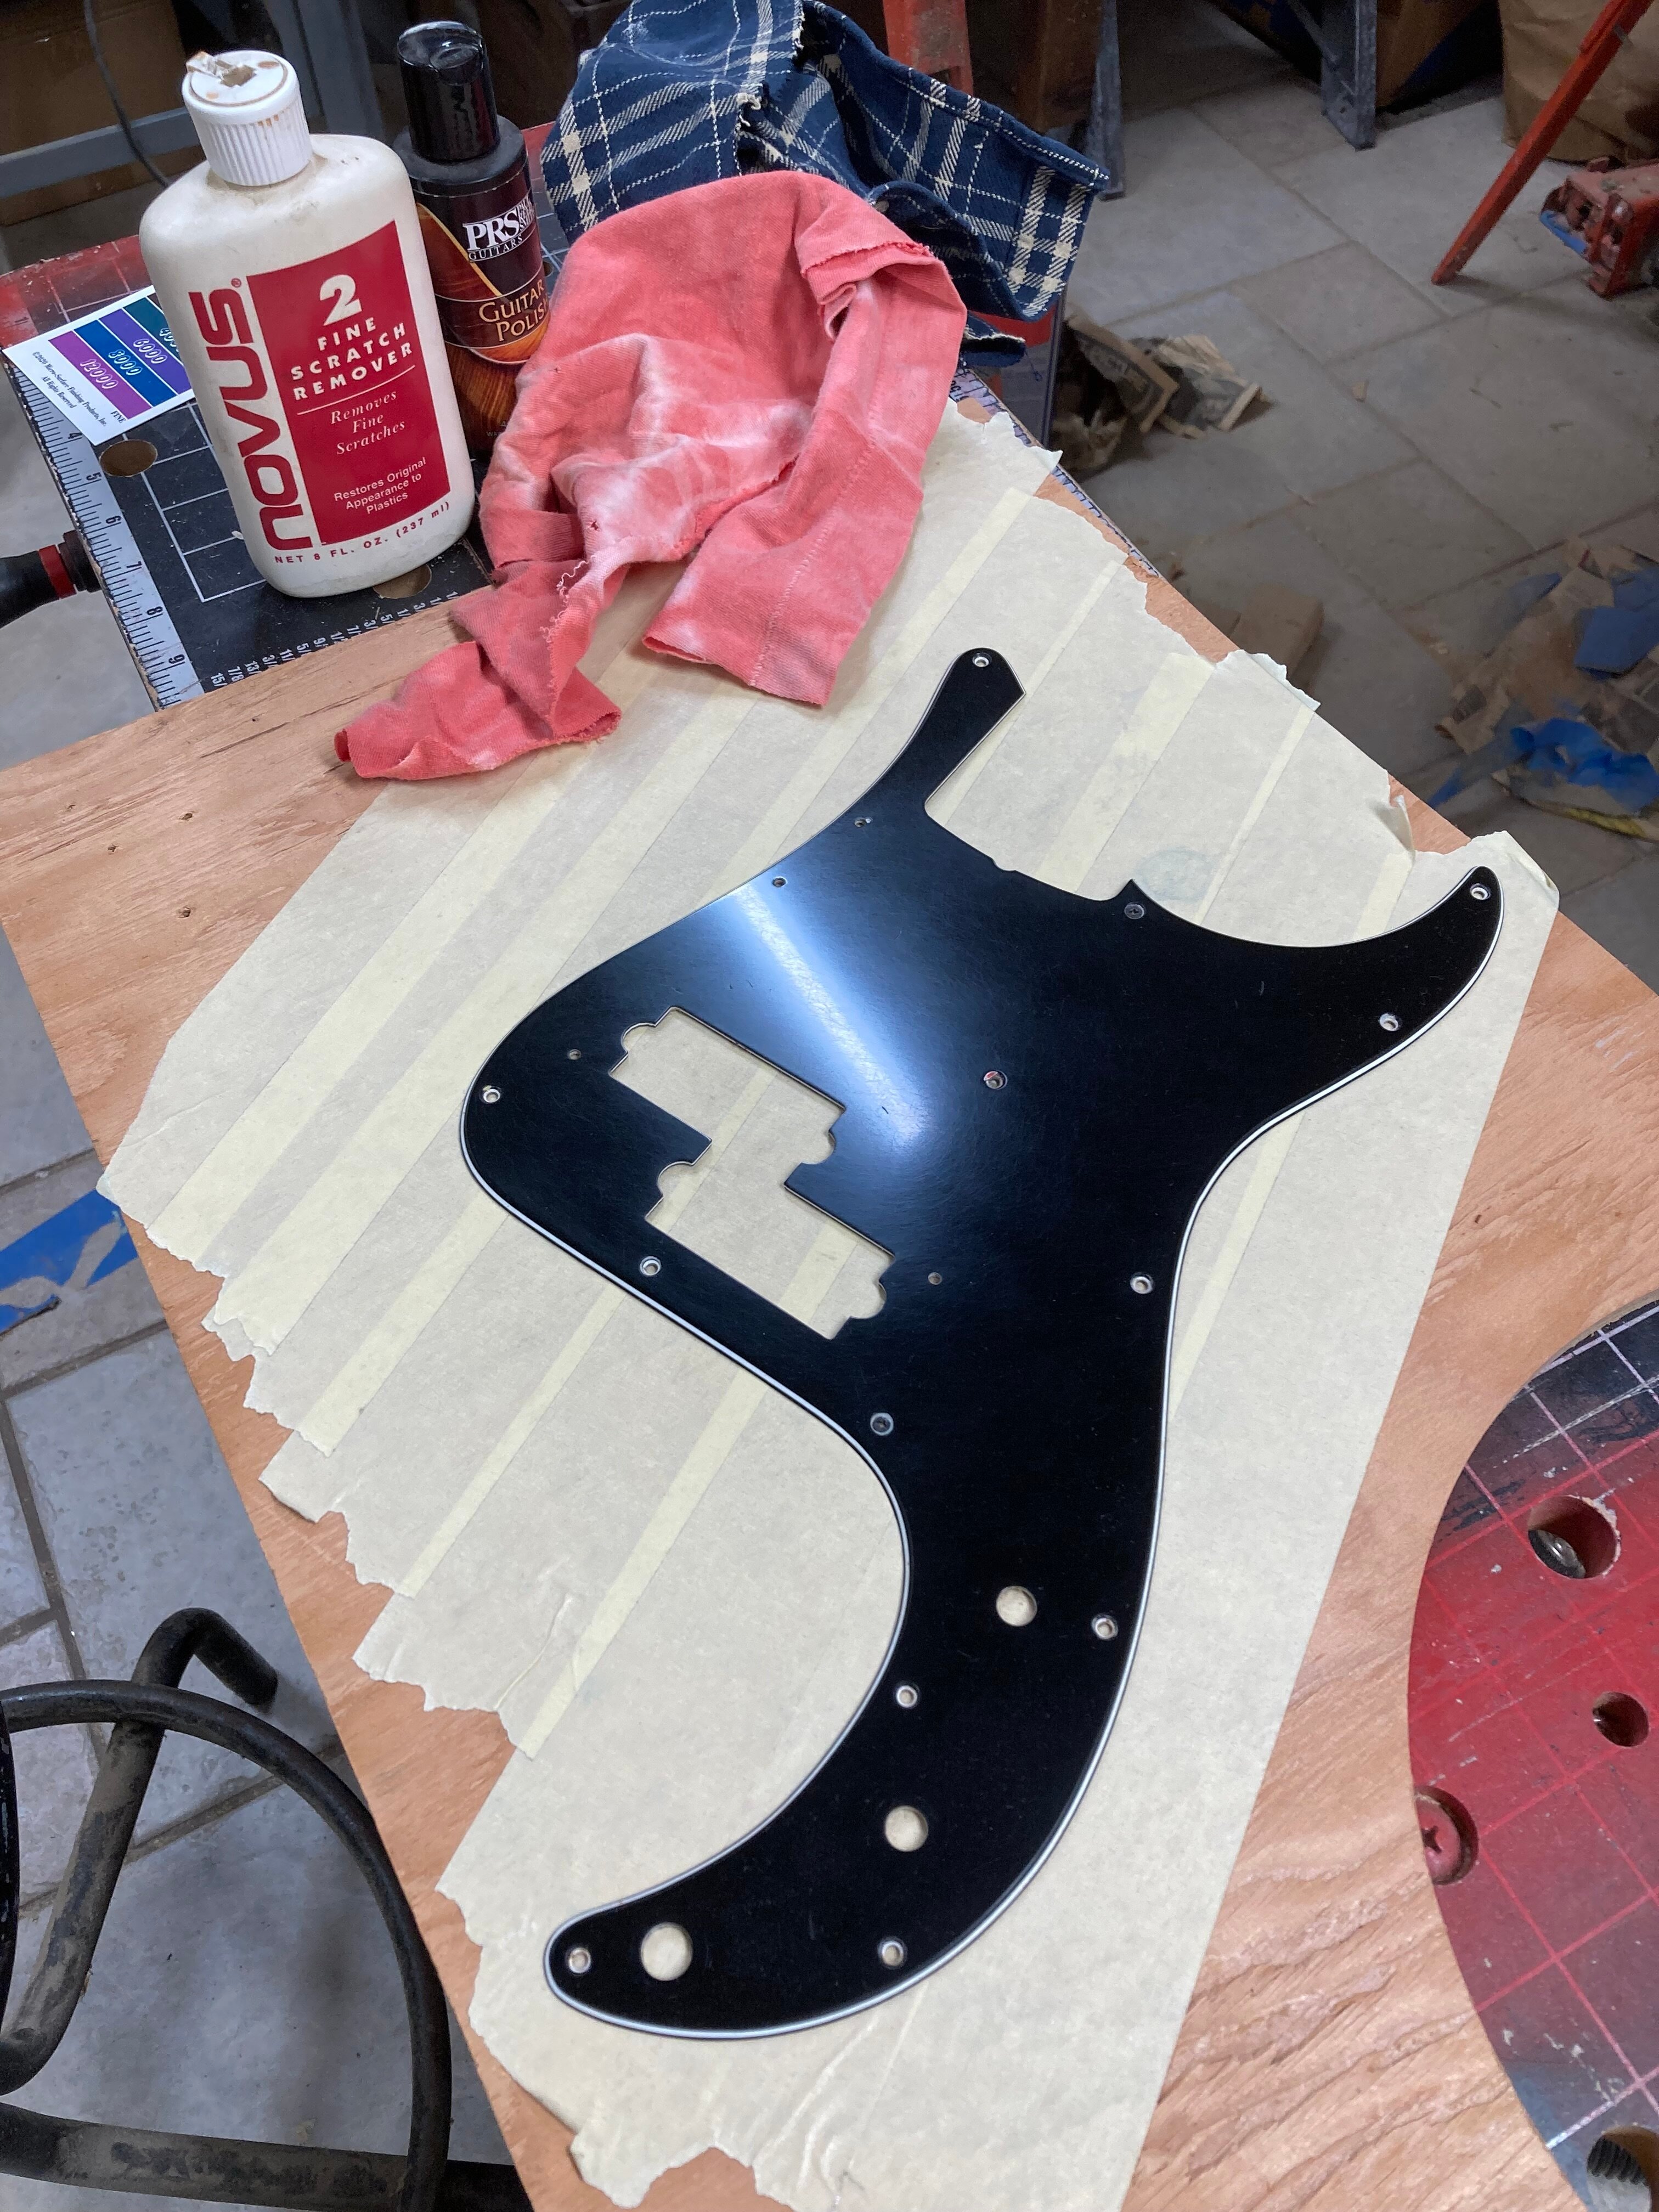
I also found a pickguard with the right hole pattern:
IMG_8265.jpeg

A gift from a friend at a local music store, it was glumped with dirt and heavily scratched up. I wet sanded it back through all the grits of Micro-Mesh, then Novus, then regular guitar polish. There are still micro scratches but it's shiny and that seems about right to me for a '75 P-bass. I already put about two hours of sanding into this "free" pickguard and I decided that good enough really is good enough sometimes.
 
Two coats on the P-bass body today:
View attachment 7195521
View attachment 7195522
I laid it on a little heavy so there are some runs but it's just going to get sanded completely back anyway. These first few coats are just filling grain. As per @Bruce Johnson 's suggestion, I'm using Minwax Oil-Modified wipe on poly for this. It was a little heartbreaking to sand that first coat all the way back to wood but that's just how this'll go until the grain is filled up. I'm sanding back with 220 now but I'll use smaller grits and thinner applications when I start the surface coats. I expect it to take 5 or six coats to fill the grain before I can start building coats on the surface. Luckily it dries really fast but I won't have much free time for a while anyway so this will be 2 coats at a time for weeks.

I also found a pickguard with the right hole pattern:
View attachment 7195525
A gift from a friend at a local music store, it was glumped with dirt and heavily scratched up. I wet sanded it back through all the grits of Micro-Mesh, then Novus, then regular guitar polish. There are still micro scratches but it's shiny and that seems about right to me for a '75 P-bass. I already put about two hours of sanding into this "free" pickguard and I decided that good enough really is good enough sometimes.
That’s a lovely wood grain………..

Maybe it’s been mentioned before but if I may ask, what kind of wood is this ?
 
Maybe it's been mentioned before but if I may ask, what kind of wood is this ?
This body is made of ash.

During the mid 1970s a lot of Fender guitars and basses made of ash were unbelievably heavy.* I don't really know the whole back story; whether lightweight "swamp" ash was particularly hard to find during that period or whether Fender simply didn't want to be bothered culling lighter wood or didn't want to pay a premium for it. Either way, many ash-bodied Fenders from the mid to late '70s weigh a ton. This bass is no exception! Without hardware or finish it weighs over six pounds so I expect the completed instrument to weigh at least 10 1/2 pounds.

That's a bit of a bummer but, as you pointed out, it is nice grain so, if it's going to destroy my back, at least it will look good doing it! I believe it was a sunburst finish originally (I have no way of knowing for sure) but I'm sticking with natural finish even though the lower bout is an unmatched piece.

*There are exceptions to the heavy '70s Fender rule; I have a 1978 fretless P-bass that's made of ash (factory original "walnut" brown) that isn't very heavy at all. It was pretty random but the heavy ones were really heavy.
 
Good looking stuff! That redwood is sharp! Do you have a local source or do you use a mail-order supplier?

Yeah, should make for some great future projects. :) I picked those up online at Gilmer, but I do but quite a lot locally. I have a few hardwood dealers near me where I buy most of my maple, genuine mahogany, padauk, etc.
 
Yes, the deep grain is an inherent feature of ash. If you use the Minwax to fill the grain, it will take about 5 coats, sanding back between each coat.
Just out of curiosity, what do you use to apply the Minwax and how heavy a coat do you lay down when you’re still in the grain filling stages?

I’m applying with a foam “brush” and I’m beginning to think it’s not the right tool for the job. Curious to know what you use. I’m a complete hack when it comes to finishing.
 
Hello all, i'm in need of some guidance/help. Long story short, some years ago, i had built a flat top/back semi hollow 32" scale bass. At the time, i was using a schaller 3d bridge because my neck/fretboard heel width is 55mm (nut is 42mm). Anyway, it's a set neck bass, & my mentor had said i can just glue it in flat since there's no floating bridge/archtop angle to consider. & i had, however the string action/height from the 14th fret onwards was considerably higher than the rest.

I've just recently removed the neck (with a little steam convincing over a pot of boiling water, & patient brute force). Now i've decided to use a hipshot kick4$$ bridge for more intonation range, & overall looks better than the schaller 3d. My question is: how do i go about determining the angle needed in the pocket for proper string height action at the higher frets? How low/high should the bridge saddles be set for adequate motion once strung up. I do have a digital angle finder for knowing how much of an angle is needed, i just need to know what are my steps prior to placing the neck in the pocket to come to its final angle conclusion..

Many thanks, all help is very much appreciated! I'll try my best to answer further questions on the matter if should arise
 
  • Like
Reactions: Matt Liebenau
Hello all, i'm in need of some guidance/help. Long story short, some years ago, i had built a flat top/back semi hollow 32" scale bass. At the time, i was using a schaller 3d bridge because my neck/fretboard heel width is 55mm (nut is 42mm). Anyway, it's a set neck bass, & my mentor had said i can just glue it in flat since there's no floating bridge/archtop angle to consider. & i had, however the string action/height from the 14th fret onwards was considerably higher than the rest.

I've just recently removed the neck (with a little steam convincing over a pot of boiling water, & patient brute force). Now i've decided to use a hipshot kick4$$ bridge for more intonation range, & overall looks better than the schaller 3d. My question is: how do i go about determining the angle needed in the pocket for proper string height action at the higher frets? How low/high should the bridge saddles be set for adequate motion once strung up. I do have a digital angle finder for knowing how much of an angle is needed, i just need to know what are my steps prior to placing the neck in the pocket to come to its final angle conclusion..

Many thanks, all help is very much appreciated! I'll try my best to answer further questions on the matter if should arise

I haven’t specifically done what you’re doing but as a rule I like a straight edge going along the tops of the frets to just touch a bridge saddle with the saddle all the way down.
 
I haven’t specifically done what you’re doing but as a rule I like a straight edge going along the tops of the frets to just touch a bridge saddle with the saddle all the way down.
Currently my fretboard has no frets til i radius the board again (from 12 to 10) & get new frets, so I'll just lay my straight edge on the board itself for now. But if the saddle has to be at its lowest, at least that gives me a guideline to follow. thanks!
 
Currently my fretboard has no frets til i radius the board again (from 12 to 10) & get new frets, so I'll just lay my straight edge on the board itself for now. But if the saddle has to be at its lowest, at least that gives me a guideline to follow. thanks!


Frets are usually in the 0.040”-0.050” range. Maybe a feeler gauge or some brass shim stock under the straight edge? I know there’s a formula. I don’t recall what video(s) but I know Ted at the twoodfrd channel on YouTube has gone over it a couple of times when resetting an acoustic neck.
 
  • Like
Reactions: ThaCoast
Now that the Hellcaster is finished, what's next? Back to building basses, this one for me. 😎
20250416_143217.jpg
I have a Warlock and a Mockingbird. I need the Ironbird for the collection. 😉
For sure going reverse pointy headstock on this one, even tho they didn't come like that. I may do a bass tremolo on it since I don't have a bass with a tremolo. For sure doing Graphtech Ratio tuners, I really like them.
Still very undecided on pickups/electronics. On the one hand I want to go double reverse Ps, but I also don't own a bass with a MM pickup either. 🤷‍♂️
I'm also debating with myself over whether to go 35" scale or just stay with the standard 34" scale. I really like the way the 35" scale sounds/feels. But Ironbirds didn't come in 35" scale, so there's that.

I am gonna take a breath first before I start this one tho.
 
Now that the Hellcaster is finished, what's next? Back to building basses, this one for me. 😎
View attachment 7204109
I have a Warlock and a Mockingbird. I need the Ironbird for the collection. 😉
For sure going reverse pointy headstock on this one, even tho they didn't come like that. I may do a bass tremolo on it since I don't have a bass with a tremolo. For sure doing Graphtech Ratio tuners, I really like them.
Still very undecided on pickups/electronics. On the one hand I want to go double reverse Ps, but I also don't own a bass with a MM pickup either. 🤷‍♂️
I'm also debating with myself over whether to go 35" scale or just stay with the standard 34" scale. I really like the way the 35" scale sounds/feels. But Ironbirds didn't come in 35" scale, so there's that.

I am gonna take a breath first before I start this one tho.
I'm not big on Ironbirds, but this i'm following! Curious to see your Warlock & Mockingbird, are they both Builds of yours?
 
  • Like
Reactions: TerribleTim68
I'm not big on Ironbirds, but this i'm following! Curious to see your Warlock & Mockingbird, are they both Builds of yours?
Nope, I bought both of them.
Well, the wife bought the Warlock for our 5th anniversary. It's bone stock still. It was the display model and has a small chip right below the bridge, so I got it for a pretty sweet deal. But that was also 23 years ago when prices weren't as stupid as they are now...
1000013880.jpg
Small chip visible here, and yes it is a trans-blue finish, not black -
1000013881.jpg
The Mockingbird is just a bone stock MK3 in the "quilted maple" top...
1000013882.jpg
Nothing fancy, but they look the part. :cool:

As you can see, the Warlock has the widow headstock and the Mockingbird has the tombstone headstock. So I'm for sure going reverse pointy headstock on the Ironbird for the extra pointy factor and just to stay with the different headstocks on each model situation. 😁
 
Nope, I bought both of them.
Well, the wife bought the Warlock for our 5th anniversary. It's bone stock still. It was the display model and has a small chip right below the bridge, so I got it for a pretty sweet deal. But that was also 23 years ago when prices weren't as stupid as they are now...
View attachment 7204181
Small chip visible here, and yes it is a trans-blue finish, not black -
View attachment 7204182
The Mockingbird is just a bone stock MK3 in the "quilted maple" top...
View attachment 7204183
Nothing fancy, but they look the part. :cool:

As you can see, the Warlock has the widow headstock and the Mockingbird has the tombstone headstock. So I'm for sure going reverse pointy headstock on the Ironbird for the extra pointy factor and just to stay with the different headstocks on each model situation. 😁

Those are pretty sweet! Kuddos to your wife gifting you that warlock, it's a nice blue. The body does seem small, & given 24 frets, the J pickup is close as all hell to the split P xD.

That Mockingbird though, i'd rock that every day 100%. Always tempted to build one, for kicks, but same time, i'd dig having the Wave guitar they did in early 2000's?

& well, you may need a 4th contender, for this style of in line headstock. I had built an "oversized" thunderbird long ago, since gifted to a friend of mine.

How it started:
Tiger Chrome.jpg

^^^Back in April 2022.

How It ended;
Tiger Black.jpg

^^^June 2022
 
  • Like
Reactions: TerribleTim68
I made Roman numbers fretboard inlay with laser for a guitar builder nearby and got thermally aged ( heat treated below 180deg C, no color change) maple and Finnish Black alder in exchange. So, is there anything else than a bass that can be built out of those. No.
I’m keeping this one simple, exept it will have all the goods I’ve learned from Bruce. DASR truss rod with carbon back strap and blocks for neck machine screws and bridge. Both alder and maple have mild flame figure so this one will have natural finish.
I thought about making a 90/10 (maple/carbon fiber) neck like on Vigier basses but after reading that the goal was to have a solid neck with no loose truss rod in it I thought that epoxy cast DASR rod makes neck exactly like that plus an adjustable relief.
I have all parts ordered, more when they arrive.
 

Attachments

  • IMG_5562.jpeg
    IMG_5562.jpeg
    1.2 MB · Views: 14
I had an interesting one that I figured might be worth sharing...

Working on a bass build for @rogerbmiller and it is getting the older model of LusitHand NFP preamp (because it was purchased when that was new). It's also getting the LusitHand knobs, which were designed after that first iteration was made.

Lo and behold, the pan pot was too short to actually attach this type of knob. And there is no way that we're switching knob spec at this point. Also, the pot itself is mounted to a board, is a B10K with a center detent and none of this makes it simple to do anything...

After a lot of thought, I felt I may have been channeling my inner @Bruce Johnson when I came up with this plan:

Extend the shaft of the pot, using a screw and weird washer I had.

The first part was to start a hole in the split shaft pot using this 1/4" drilled piece of wood that had the brass pot sleeve pressed in, to get it as close and tight as possible. I also mounted the pot in some scrap wood, then clamped into a vise to keep it more sturdy.

IMG_0767.jpg


Using my self centering bit, I started the hole. I then went to the drill press and drilled it out for the threading process.

IMG_0768.jpg


Tapped the shaft for 4-40 threads, cut the screw shorter and cleaned up the end, then laid it out.

IMG_0769.jpg


Added loctite red to the screw, put on the pot sleeve, put the screw through the washer, assembled, then dripped in CA and let it dry upside down.
VOILA!

IMG_0770.jpg


This should do the trick and there is room to shorten it if needed, too. Don't think I will, but it's good to know I can.
Now this project can move forward.
 
I had an interesting one that I figured might be worth sharing...

Working on a bass build for @rogerbmiller and it is getting the older model of LusitHand NFP preamp (because it was purchased when that was new). It's also getting the LusitHand knobs, which were designed after that first iteration was made.

Lo and behold, the pan pot was too short to actually attach this type of knob. And there is no way that we're switching knob spec at this point. Also, the pot itself is mounted to a board, is a B10K with a center detent and none of this makes it simple to do anything...

After a lot of thought, I felt I may have been channeling my inner @Bruce Johnson when I came up with this plan:

Extend the shaft of the pot, using a screw and weird washer I had.

The first part was to start a hole in the split shaft pot using this 1/4" drilled piece of wood that had the brass pot sleeve pressed in, to get it as close and tight as possible. I also mounted the pot in some scrap wood, then clamped into a vise to keep it more sturdy.

View attachment 7214564

Using my self centering bit, I started the hole. I then went to the drill press and drilled it out for the threading process.

View attachment 7214565

Tapped the shaft for 4-40 threads, cut the screw shorter and cleaned up the end, then laid it out.

View attachment 7214567

Added loctite red to the screw, put on the pot sleeve, put the screw through the washer, assembled, then dripped in CA and let it dry upside down.
VOILA!

View attachment 7214568

This should do the trick and there is room to shorten it if needed, too. Don't think I will, but it's good to know I can.
Now this project can move forward.
I’m very impressed by how well you pulled this off!
 
  • Like
Reactions: rojo412
Don't know if it’s the right place for this but just wanted to share my new discovery of the day : the Frtlzr fret shaper.

(No affiliation of any sort here but just order this tool on line and used it today with great success so I thought I should share.)

In my over stock, I have a jazz bass neck that had a few frets a bit too high when inspected with a fret rocker so this was the perfect candidate to test this new little tool.

I just marked the two frets that were higher with a red marker, put some green masking tape around and gave it a shot with various sanding papers. This tool is so easy to use and doesn’t allow for major mistakes that I would recommend it to anyone having one or two frets on the high side and want to get the problem solved quickly.

It’s a simple fret rocker made of reinforced plastic with a groove on each face with a depth equivalent to the thickness of the sanding paper. You just have to cut a small band of the paper, put it in the groove, make sure both ends rest on frets on both sides of the fret you want to sand down and scrape it until frets are even.

Anyway, below are a few pictures that speaks for themselves, worst case, you can get more detail on the website.

1747523668019.jpeg