
Remember that the original 1957 P pickup position was derived empirically, by trial and error, with the technology of the day. My comments are the same way: after trying many, many 5-string basses over the decades before purchasing one, and looking at some of the major progressive exponents of 5-string basses and their pickup positioning and listening carefully to their tone.By this logic, wouldn't 5-sting p-bass makers swap positions fore and aft for the bea/dg pickup sections?

Enjoy the benefits of a premium membership!
Upgrade Account
-
TalkBass has been independent since 1998. Add your voice.
Create a free account to reply to discussions, view embedded media, and browse with fewer display ads.
Join free Log in
Want zero display ads or expanded classifieds tools? Compare plans.
You are using an out of date browser. It may not display this or other websites correctly.
You should upgrade or use an alternative browser.
You should upgrade or use an alternative browser.
Wide 5 Jazz Build
- Thread starter thiessen3.14
- Start date
More options
Who Replied?
iiipopes, I don't doubt your logic or reasoning. I'm just curious if others have found similar results. As a devil's advocate, wouldn't relocating the neck pickup position purely for the tone of the B string be at the expense of altering the pickup tones of the EADG strings? Is this worth it?
Some progress to date: Contours cut/shaped and neck mounting holes drilled. Here are some pics of the contouring phase:
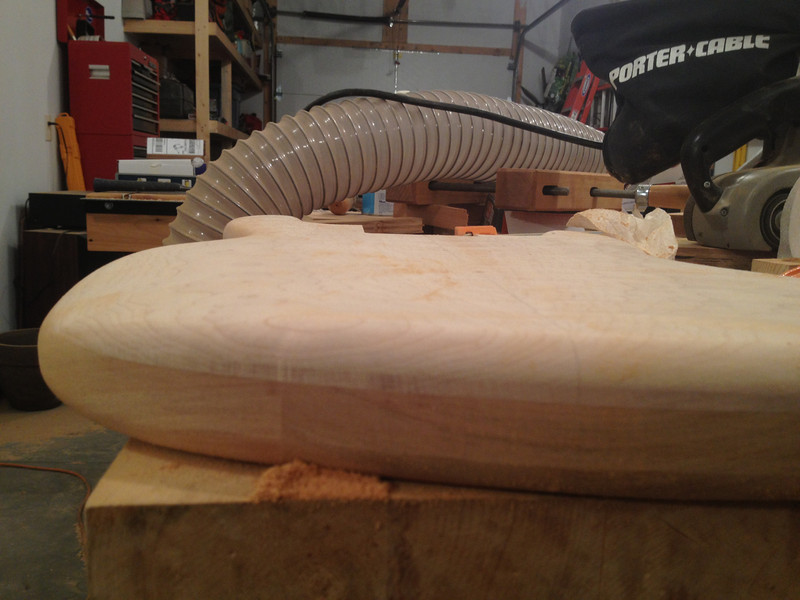
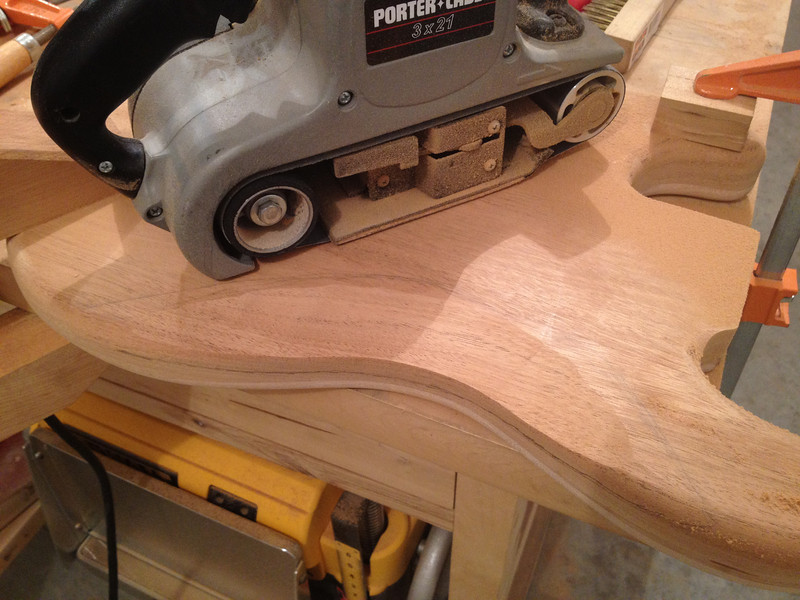
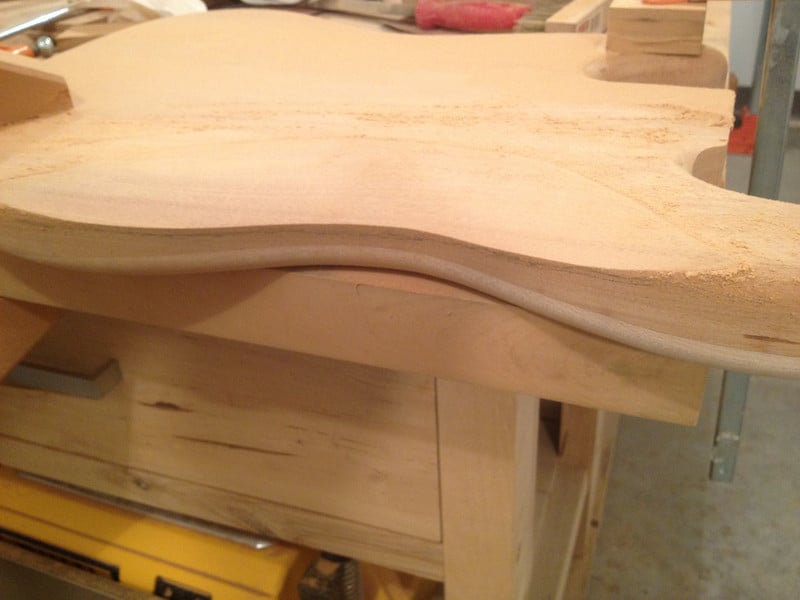
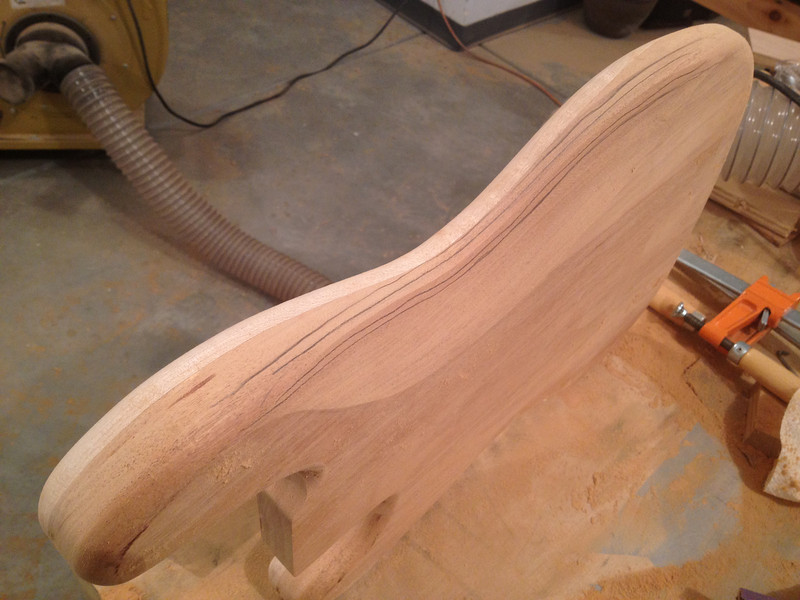
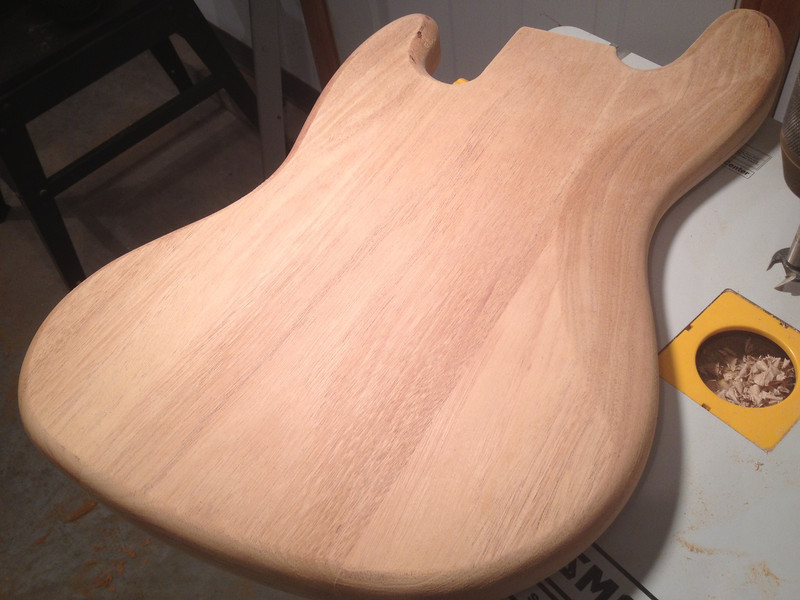
Whew! That was slow and dusty. I used my belt sander and sanding blocks. I left it a little chunky--it's just kinda got a bit of a chunky vibe to the whole thing. I can take it down a bit more later if I feel it fits the instrument.
Whew! That was slow and dusty. I used my belt sander and sanding blocks. I left it a little chunky--it's just kinda got a bit of a chunky vibe to the whole thing. I can take it down a bit more later if I feel it fits the instrument.
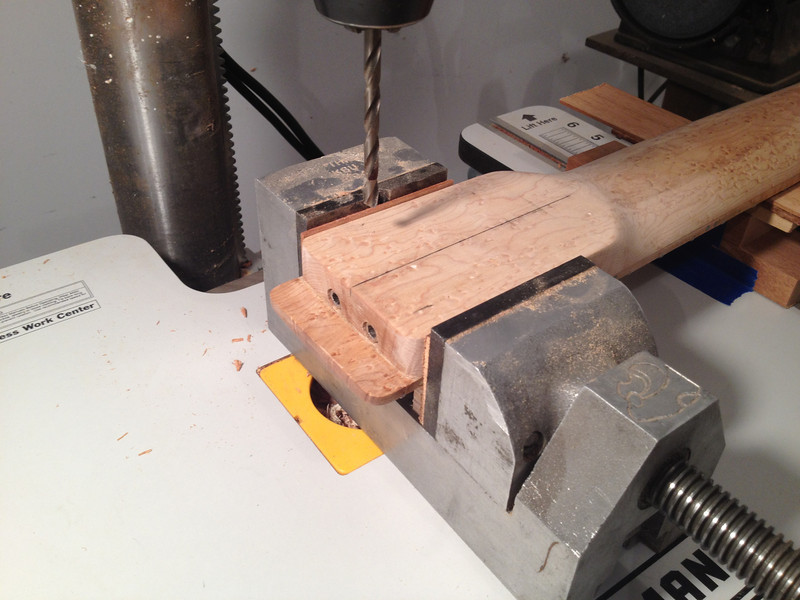
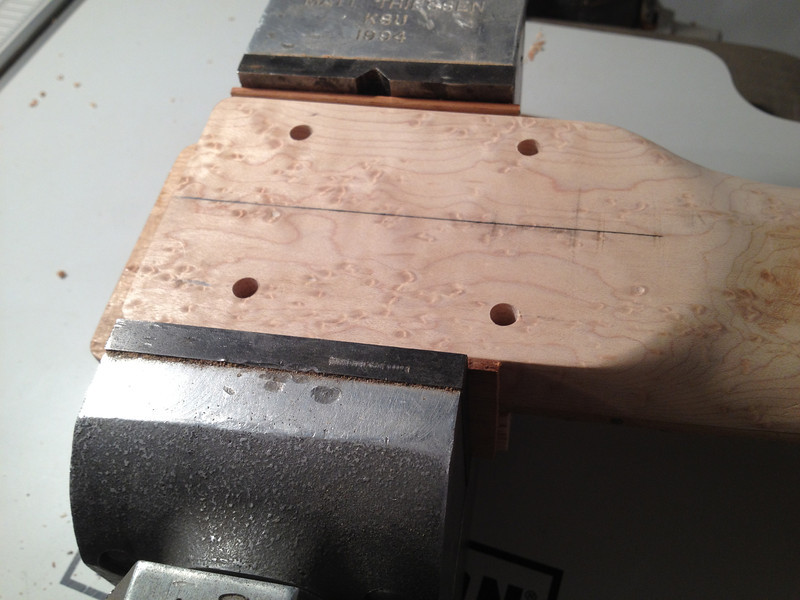
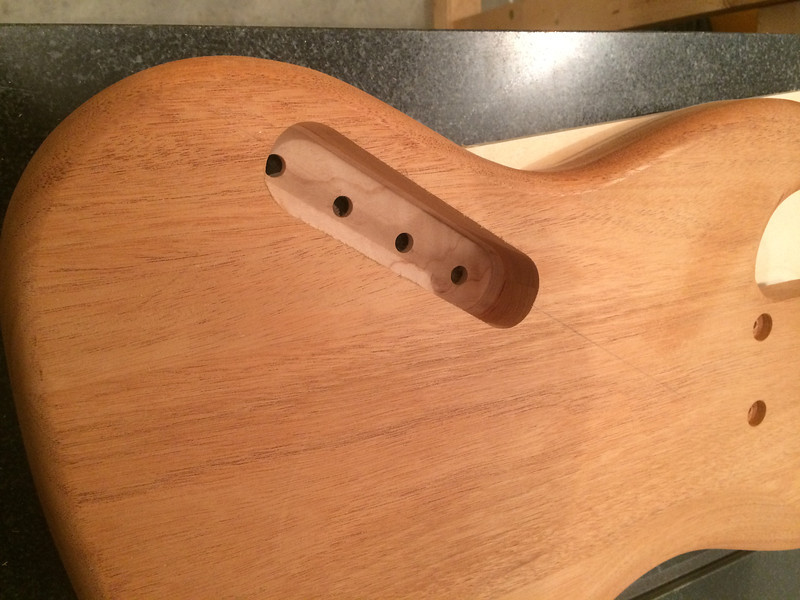
Ok, so on to the neck mounting holes. I'll be using ferrules as I think they make a little cleaner install and I can't get a plate big enough. I started by laying out and drilling holes from the top side for two reasons: 1) they're easier to line up with the neck pocket and 2) my method for centering the ferrule over-size drill (see below). The neck will use machine screw inserts for 10-24 screws. Thus, the holes are a snug fit for the 10-24 screws--so tight, in fact, that I can barely push them through by hand.
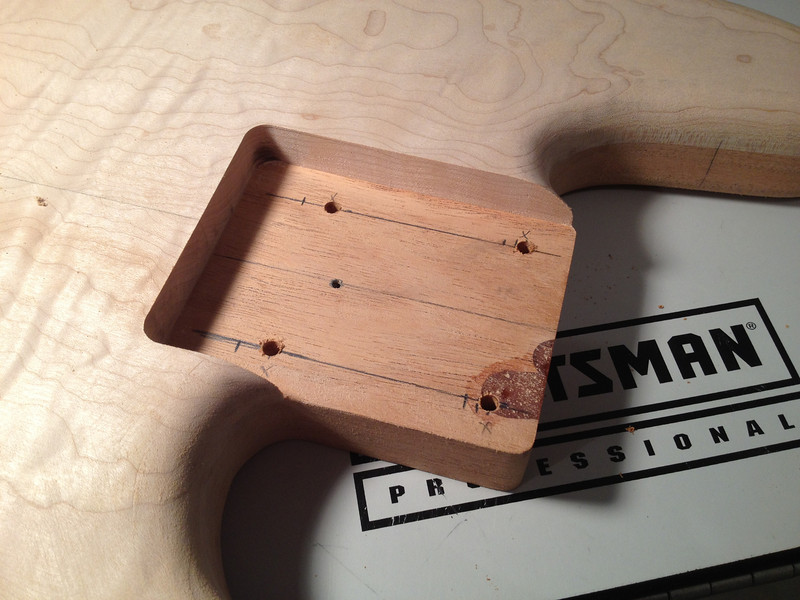
The holes, however, are kept from going completely through the body by about 1/8".
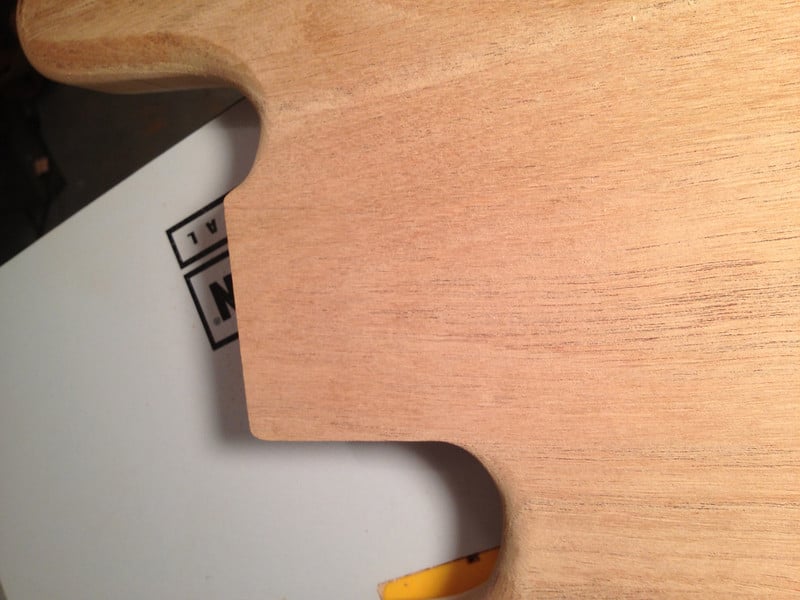
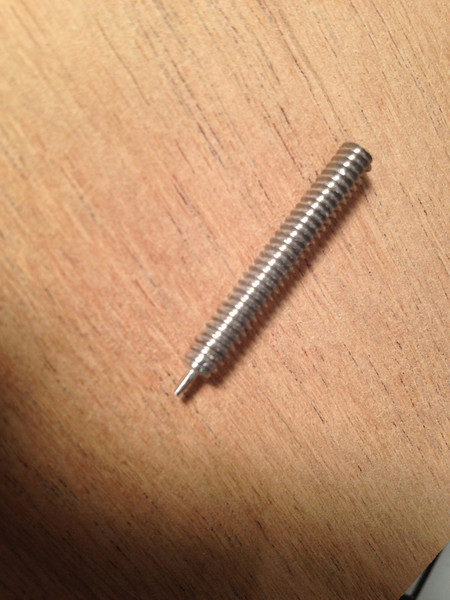
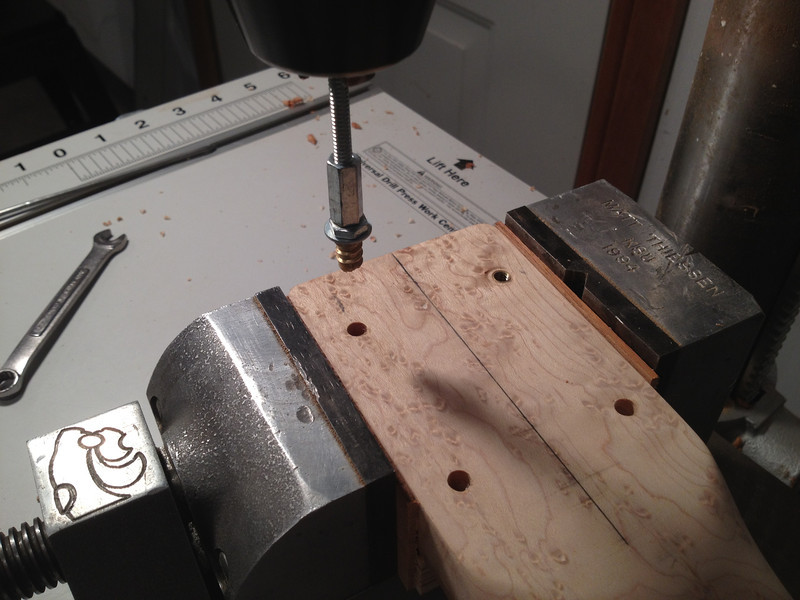
This is a piece of 10-24 of which I machined the end into a centered point/punch.
Since I drilled the holes to an exact fit, I can use this to punch through and mark centers for the ferrule holes I'll be drilling with a forstner bit.
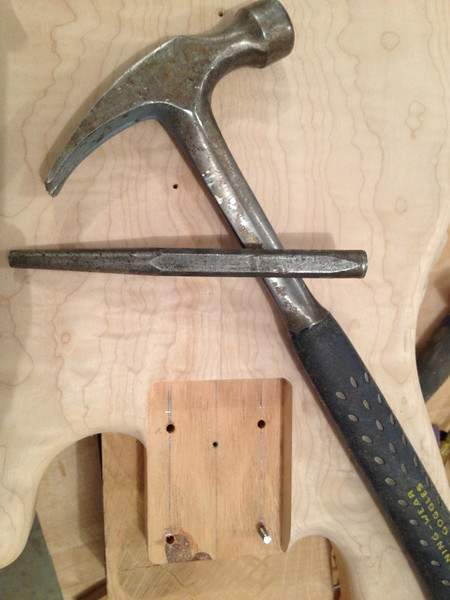
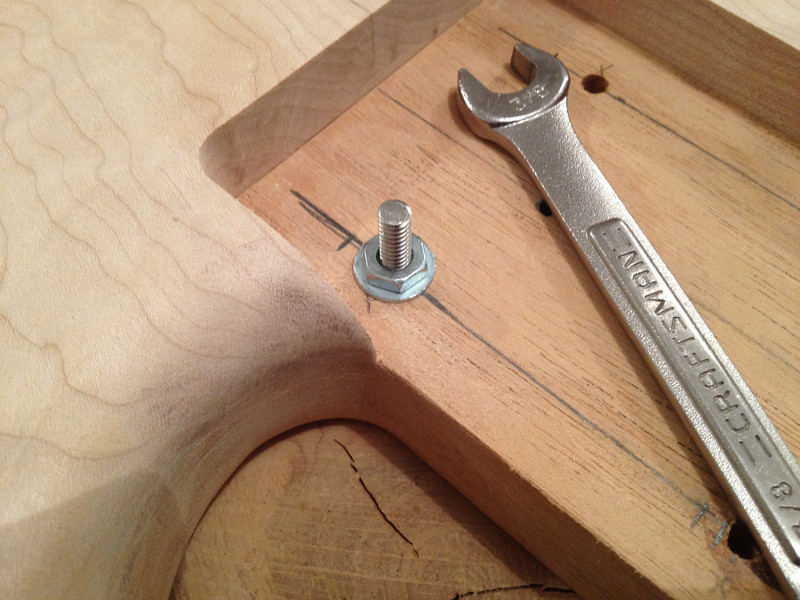
I put a nut and washer on so I can back out the punch--the holes are too tight to simply pull it out.
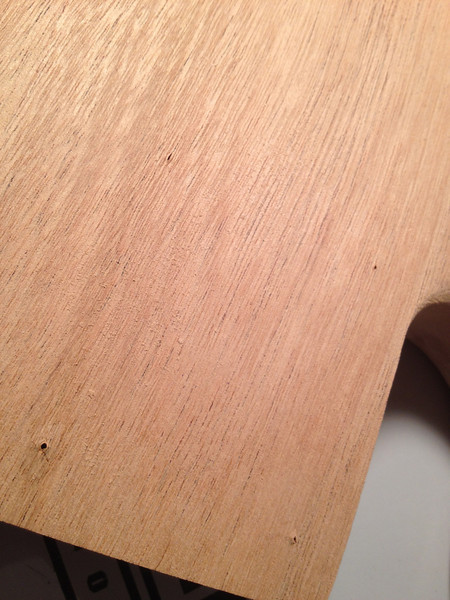
It makes teeny-tiny holes:
...that I use with my center punch to get this:
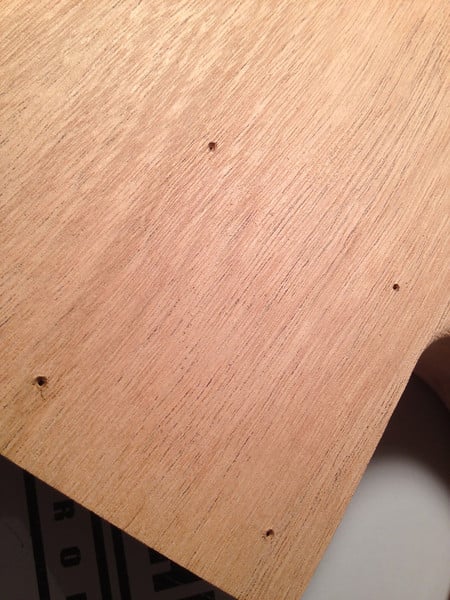
I sharpie the forstner bit for the proper depth and drill.

[Invalid or Expired Link Removed]
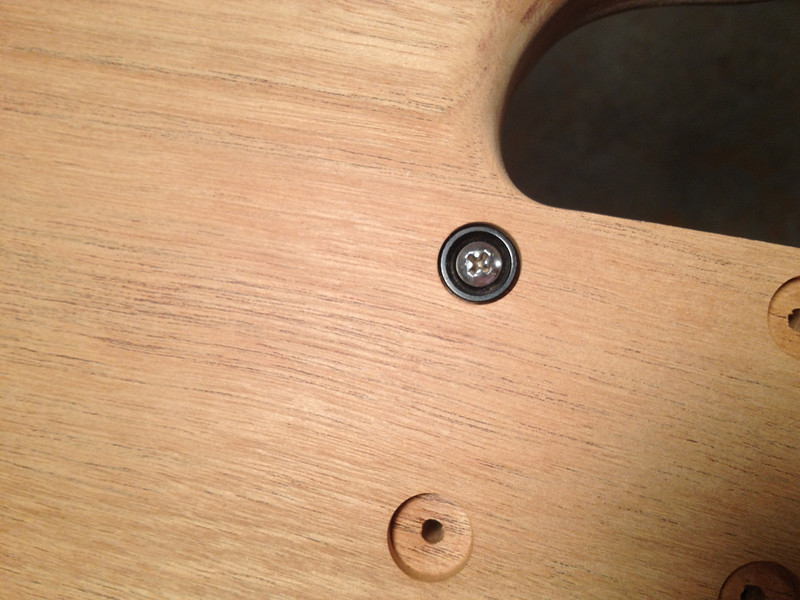
I'll also use this threaded punch to mark the holes for the neck inserts. I need to make some pickup templates, too. One step at a time.
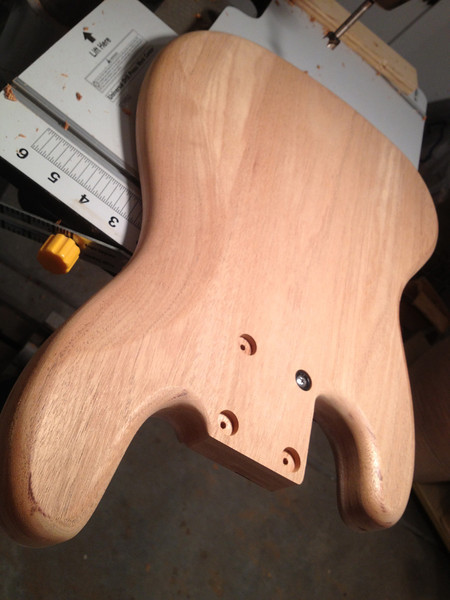
The holes, however, are kept from going completely through the body by about 1/8".
This is a piece of 10-24 of which I machined the end into a centered point/punch.
Since I drilled the holes to an exact fit, I can use this to punch through and mark centers for the ferrule holes I'll be drilling with a forstner bit.
I put a nut and washer on so I can back out the punch--the holes are too tight to simply pull it out.
It makes teeny-tiny holes:
...that I use with my center punch to get this:
I sharpie the forstner bit for the proper depth and drill.
[Invalid or Expired Link Removed]
I'll also use this threaded punch to mark the holes for the neck inserts. I need to make some pickup templates, too. One step at a time.
Neck holes marked, drilled, inserts inserted. Yeah, that's about it.
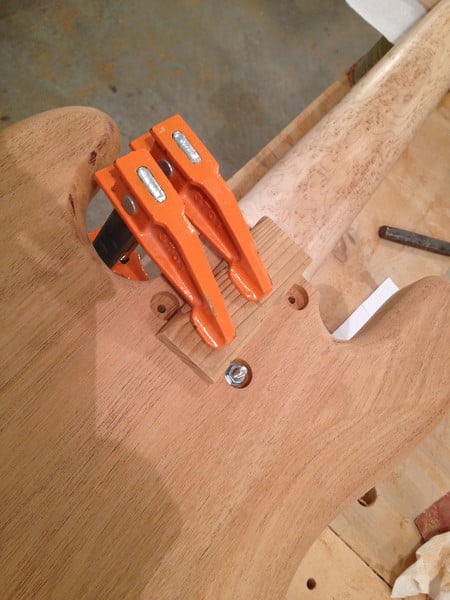
http://mimas.smugmug.com/Other/Bass-Pics/i-pDvwx2h/0/L/IMG_1242-L.jpg
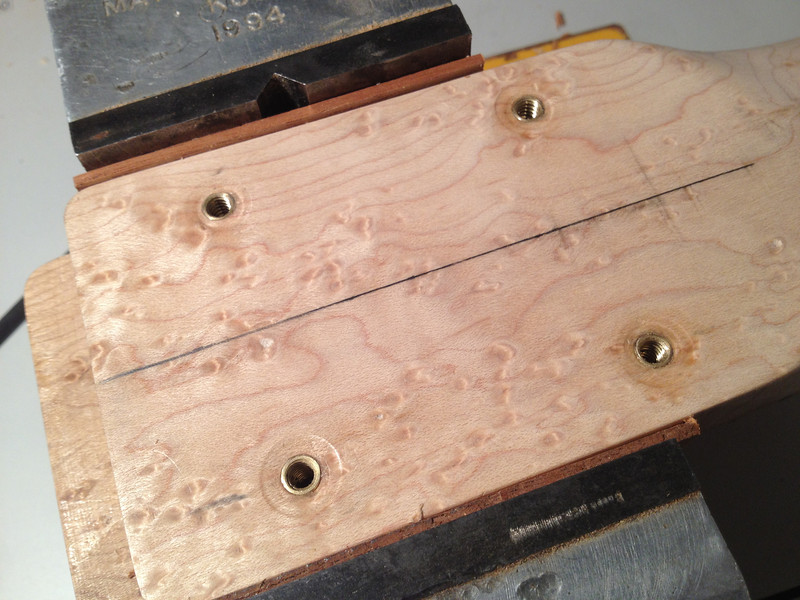
http://mimas.smugmug.com/Other/Bass-Pics/i-pDvwx2h/0/L/IMG_1242-L.jpg

Sorry for the extremely long delay in updates. I've run into a problem. The neck I had custom made, upon closer inspection is just not up to spec. In December I sent it to a *very* reputable luthier to fix and just got word that it's too far gone. Radius is wonky, fret slots are not even in the right spots. So, this project has been shelved until I figure out what to do.

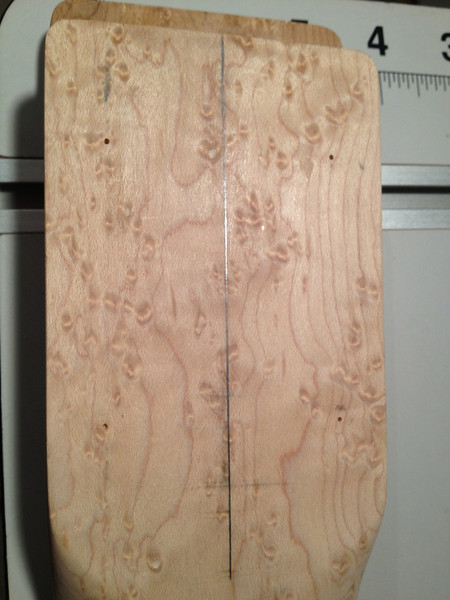
The birdseye on the neck is fantastic, very uniformed. Question tho why the metal inserts? I completed a neck-thru and would like to try my hands at a bolt on. My worry is with the truss rod routing and bolt holes it will affect the structural integrity of the heel - not saying that about yours but I worry about that on my planned build.

SaintMez
Commercial User
- Jan 3, 2010
- 428
- 59
- Disclosures
- Blood Brothers Guitars - Luthier, Porter Guitars - Contractor
Nicely done! What happened to the neck? Did I understand correctly that you had someone copy a warmoth neck (that you had already) and he screwed it up? That's a real bummer. Sorry to see this put on hold...looks like a fun build.
Yes, I had someone copy a Warmoth wide-5 neck. The original is still fine, but it's on another bass. I'm thinking I'll either man up and just start making necks. Or, more likely, I'll make a template and see if I can get a more reputable luthier to make it for me. It's a shame as this piece of birdseye was really nice.
SaintMez
Commercial User
- Jan 3, 2010
- 428
- 59
- Disclosures
- Blood Brothers Guitars - Luthier, Porter Guitars - Contractor
IMO making the neck is one of the most rewarding parts of the build. LMI offers fingerboard radius and slotting if you don't want to buy the tools required to do that yourself. It's really not as daunting a task as it might seem. Good luck with whichever route you decide to take. Looking forward to seeing this bass finished.
Well, it's been 10 months--so time to resume! The neck I commissioned is a no-go. So, I thought, "it's a nice piece of birdseye; I'll just take off the fingerboard, order a new one from LMI, have them radius and slot it, put it back on and be in business. Well, I learned how to remove a fingerboard--lots of heat and patience:
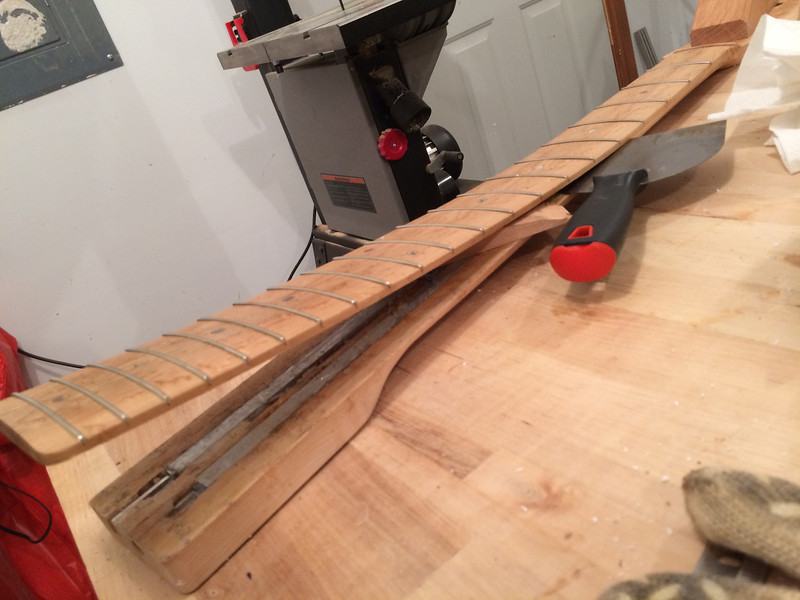
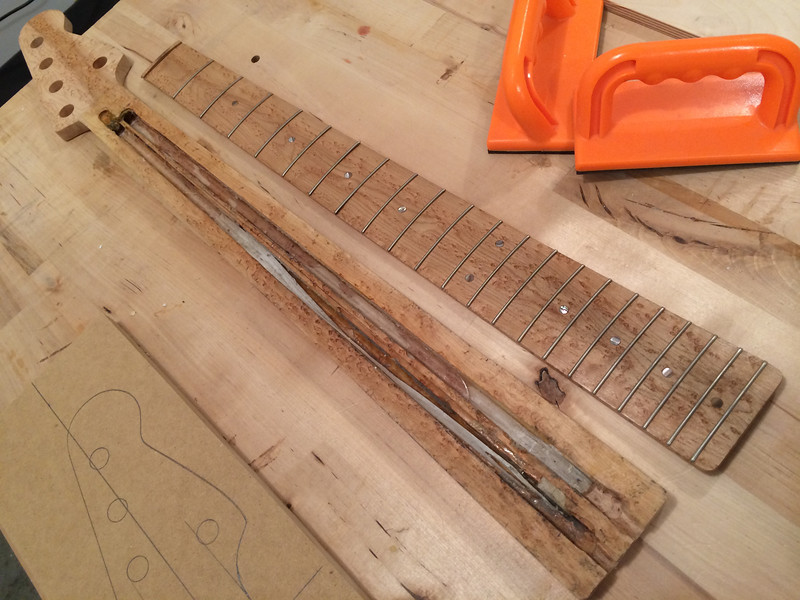
Hmmm. Not so pretty underneath. I guess this neck is a no go. Pity such a nice piece of scrap.
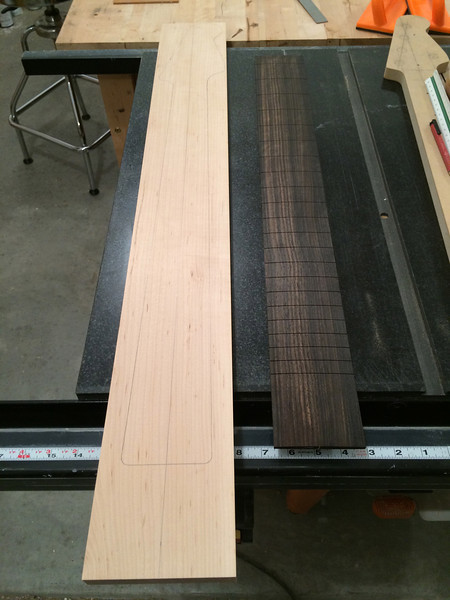
I'm now in the neck building business. I finished the template last night and my neck blank and slotted/radiused fingerboard from LMI just came today! I decided this is going to be lined fretless with a macassar ebony fingerboard. The neck blank is "just" plain old quartersawn maple. But it's stable. Glad to be going on this.
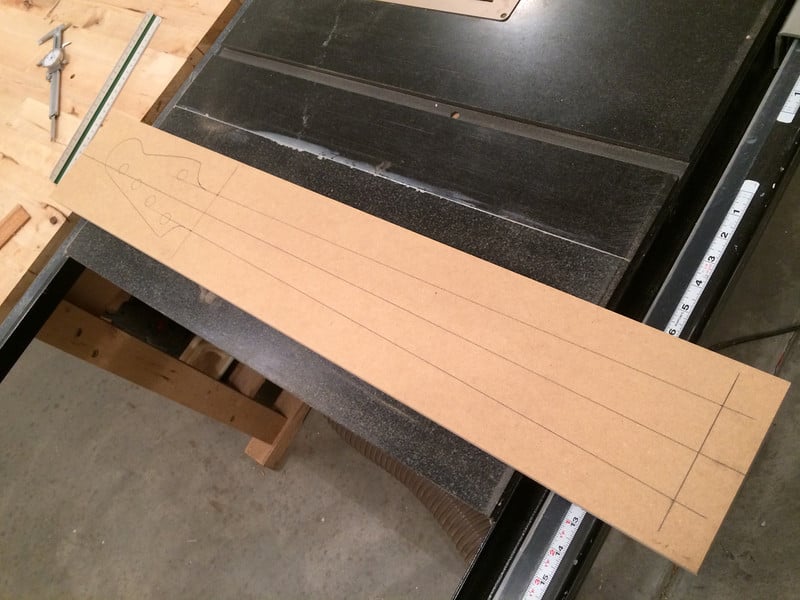
Hmmm. Not so pretty underneath. I guess this neck is a no go. Pity such a nice piece of scrap.
I'm now in the neck building business. I finished the template last night and my neck blank and slotted/radiused fingerboard from LMI just came today! I decided this is going to be lined fretless with a macassar ebony fingerboard. The neck blank is "just" plain old quartersawn maple. But it's stable. Glad to be going on this.

Partly. Because the not nice translates into lots of voids. I don't know if this neck would have held up. The edges are transitionless... So, it's more than cosmetics. I don't know that it would sound right either. There's seriously barely any wood left.
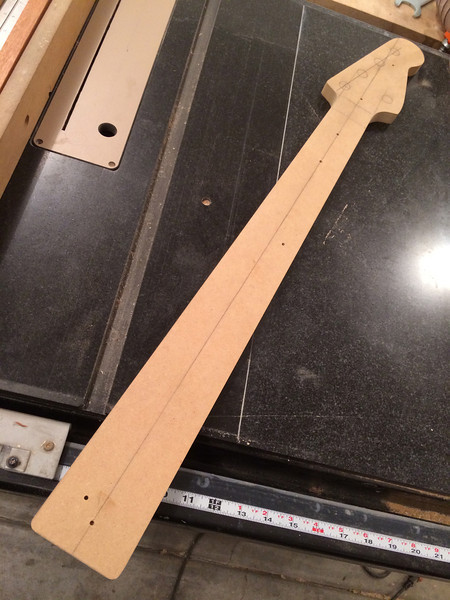
Well, progress is slow but happening. I finished the template, which ended up being much less difficult than I thought it would be. Once a centerline is laid out, it's just measurements and straight lines except for the headstock. I used a jointed, straight piece of oak for a router bearing edge about the centerline, then flipped it over for the other side to maintain symmetry.
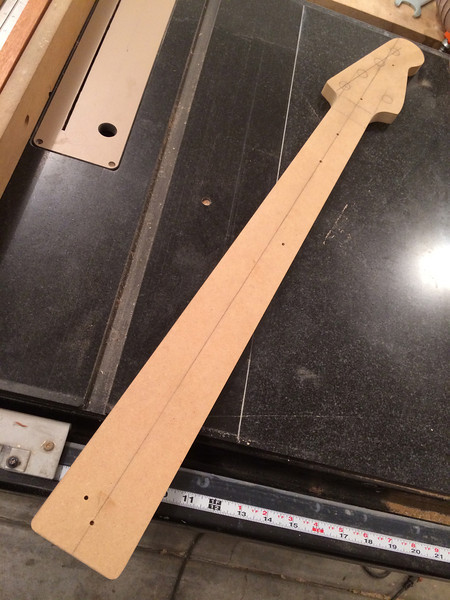
Here's the layout on the neck blank:
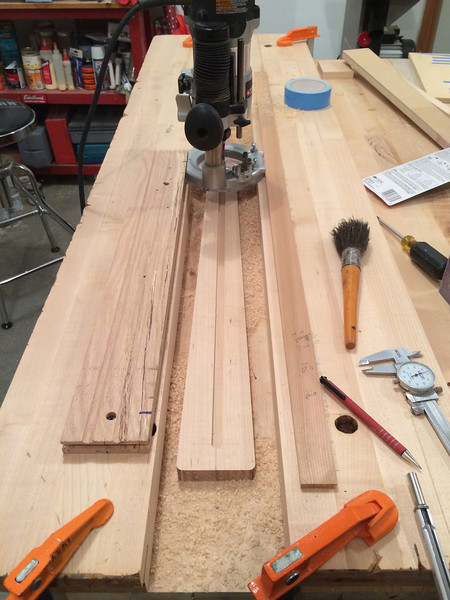
I got ahead of myself and cut out/edge routed the neck--then realized that I had to come up with a new method of routing the truss rod channel. I was originally going to use the edge of the blank against my router fence (which will be the way I do it next time. Since I lost my parallel edge, I made up a "jig" on my work table to accomplish the task:
This worked, but it took more steps and I had to be much more in control to prevent wandering of the cutter. Anyway, I guess I forgot to take a picture of the truss rod--it's a Martin-style U channel that fit the 7/16" slot just right; epoxied in; flush with the top of the neck blank. Then I did a very rough cut of the fingerboard shape just to get rid of some excess material for gluing. Match up centerlines, glue, and clamp:
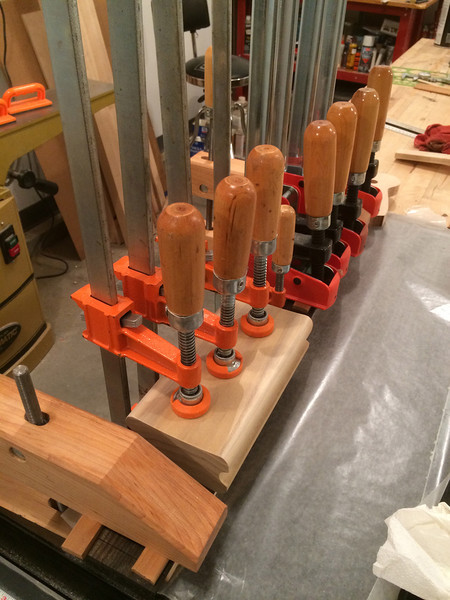
And, this morning before work I took the clamps off and flush-trimmed the edges. Ebony is scary to trim as it tears a lot. But, lots of little passes and it machines beautifully:
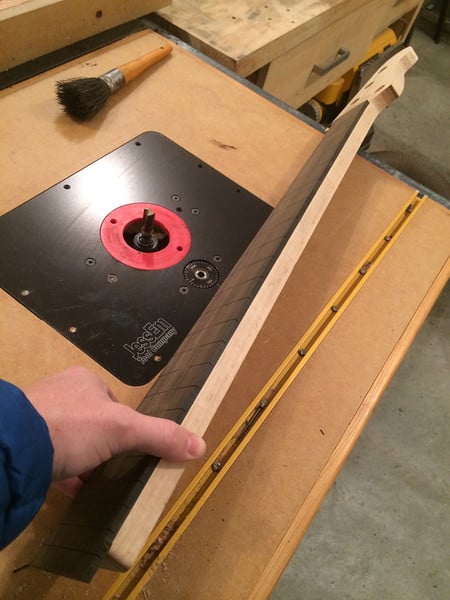
Next I'll glue in the fret(less) lines, side dots, cut the slot for the nut, and eventually thin the headstock. All new territory, but it's fun.
Here's the layout on the neck blank:
I got ahead of myself and cut out/edge routed the neck--then realized that I had to come up with a new method of routing the truss rod channel. I was originally going to use the edge of the blank against my router fence (which will be the way I do it next time. Since I lost my parallel edge, I made up a "jig" on my work table to accomplish the task:
This worked, but it took more steps and I had to be much more in control to prevent wandering of the cutter. Anyway, I guess I forgot to take a picture of the truss rod--it's a Martin-style U channel that fit the 7/16" slot just right; epoxied in; flush with the top of the neck blank. Then I did a very rough cut of the fingerboard shape just to get rid of some excess material for gluing. Match up centerlines, glue, and clamp:
And, this morning before work I took the clamps off and flush-trimmed the edges. Ebony is scary to trim as it tears a lot. But, lots of little passes and it machines beautifully:
Next I'll glue in the fret(less) lines, side dots, cut the slot for the nut, and eventually thin the headstock. All new territory, but it's fun.
Nut slot is cut. BTW, if you use the pre-slotted boards from LMI, you still have to cut the nut slot (if doing a non-angled headstock). I didn't take a picture of it, but for $5 I bought an xacto 46tpi pull saw that worked fantastic for this. If you're cutting all the fretslots I think springing for the Japanese pull saw is fully justified, but for little jobs the xacto saw works great--although it's kerf is thinner than .023".
Cut, glued, and trimmed half of the fret-line markers. Slow going with the radiused fret slots. But kind of fun, too. No machines whirring.
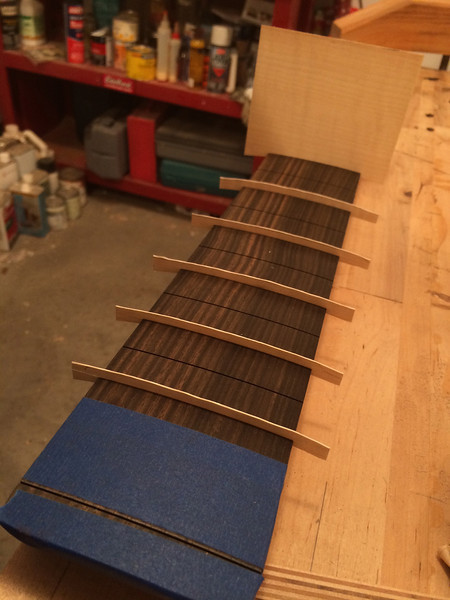
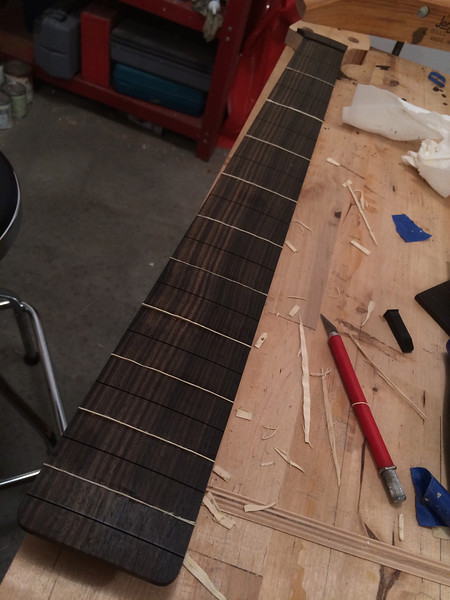
Cut, glued, and trimmed half of the fret-line markers. Slow going with the radiused fret slots. But kind of fun, too. No machines whirring.
Skipped lunch so I could put in the rest of the markers. I thought I'd give just a little more detail in case someone reading this is pondering doing this for the first time--cause I learned some things along the way.
To save time, when you cut the top of the current, fitted marker, use a pencil to trace an offset of the radius for the bottom of the next piece.
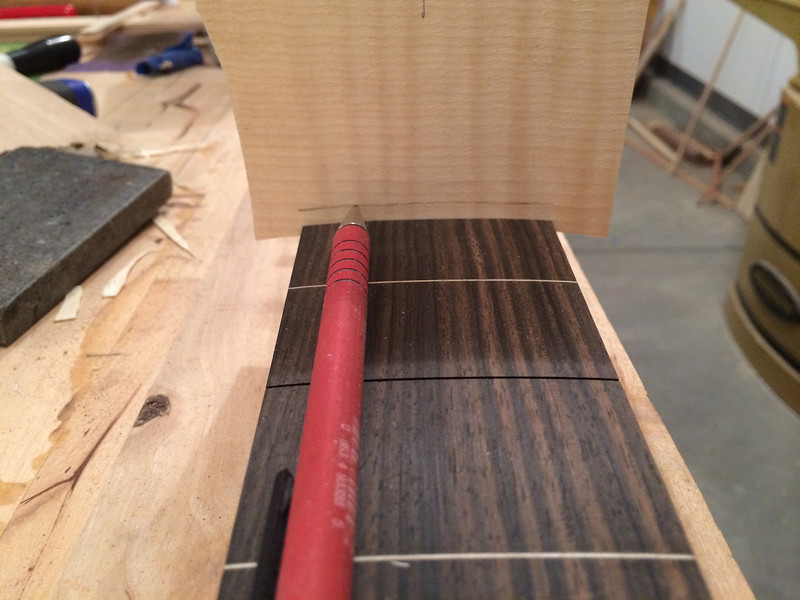
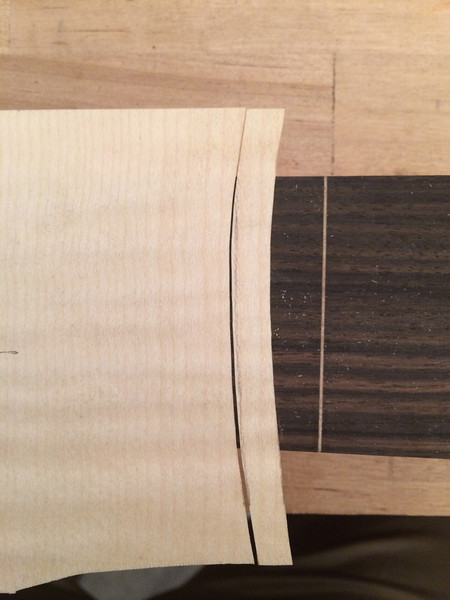
If you look closely at the next picture you can see that I cut just a bit tighter radius than the pencil line. At first I was cutting on the line; then I'd have to sand with a convex block to allow the ends of the markers to seat all the way in the slot. By cutting about 1/32" "high" at the apex, the marker slides all the way down into the fret slot at the ends--no rocking, no extra sanding.
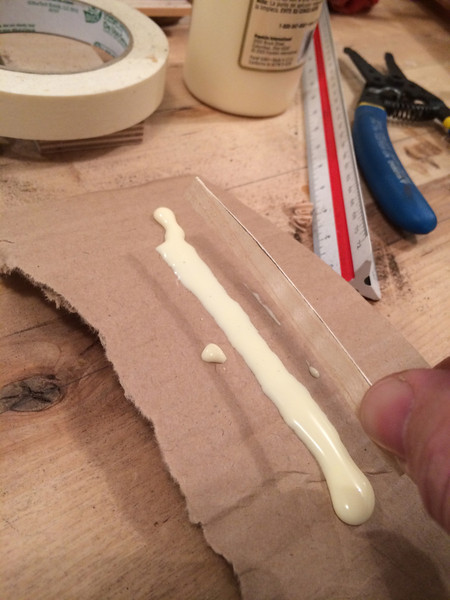
Here's my special-purpose radiused gluing jig:
Go slow cutting the markers down:
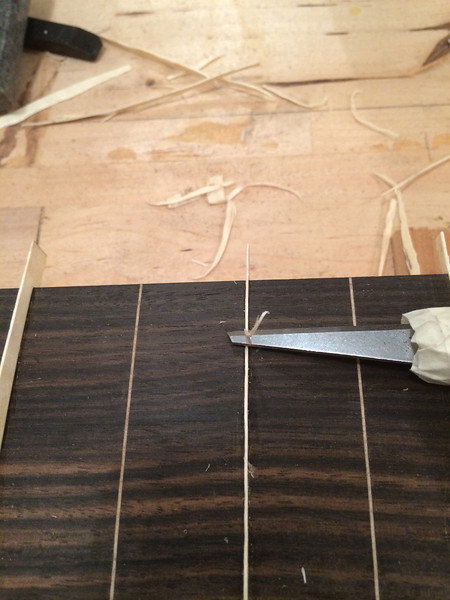
And viola!
To save time, when you cut the top of the current, fitted marker, use a pencil to trace an offset of the radius for the bottom of the next piece.
If you look closely at the next picture you can see that I cut just a bit tighter radius than the pencil line. At first I was cutting on the line; then I'd have to sand with a convex block to allow the ends of the markers to seat all the way in the slot. By cutting about 1/32" "high" at the apex, the marker slides all the way down into the fret slot at the ends--no rocking, no extra sanding.
Here's my special-purpose radiused gluing jig:
Go slow cutting the markers down:
And viola!
I think next time I will use the fiber/plastic stuff rather than wood veneer. I think it's cool that it's actually wood, but plastic would be easier and I'm also not 100% satisfied with the "fret" ends. The endgrain sands inconsistently and the ebony dust gets in and... well, it's still pretty good but some of the ends don't show up as well.
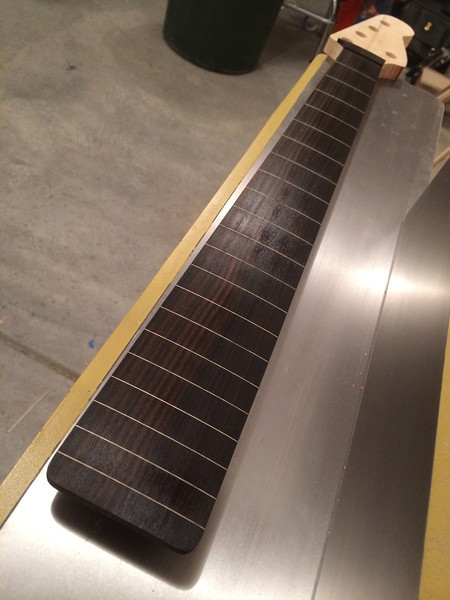
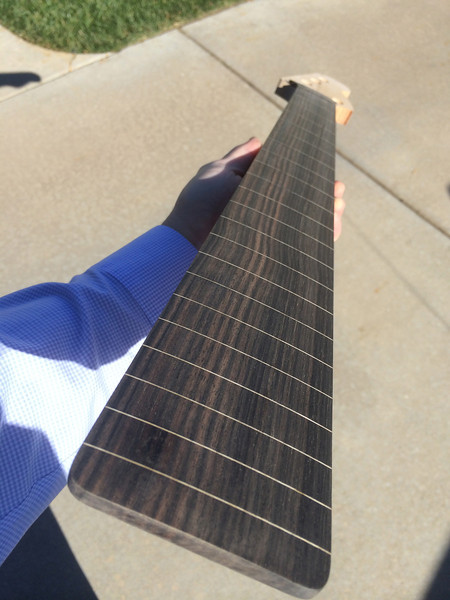
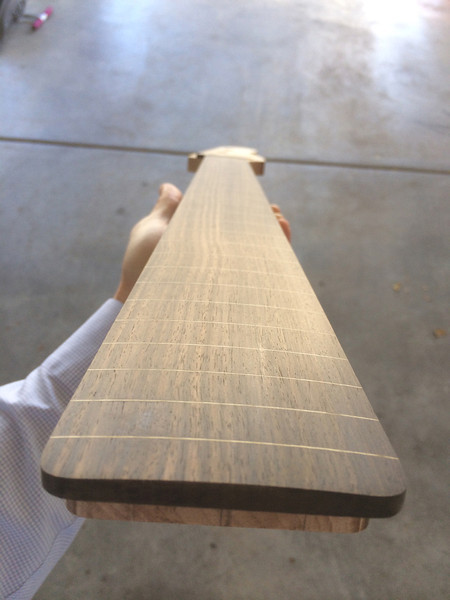
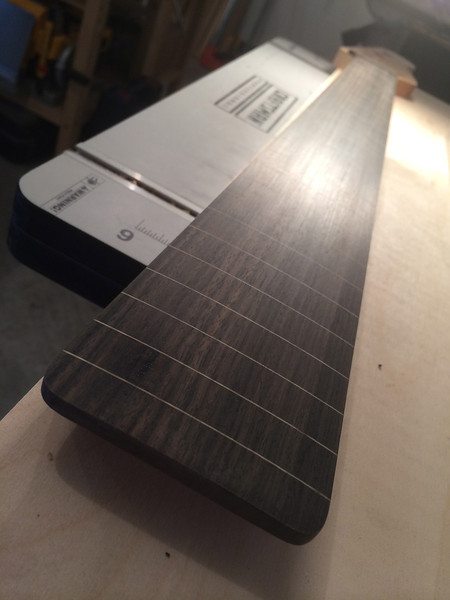
So, someone posted about using CA glue to stiffen up the markers and keep them from getting grungy and worn. Ok. Well, as the CA was creeping into the ebony I freaked out and ended up wiping a coat on the whole fingerboard. Then I saw some low spots on the fret markers and globbed it on each fret line--unsure of how it would sand. It looked terrible! But my worry was for naught, and after sanding to 320 it turned out pretty nice. Can't feel the lines at all. I also drilled, glued and trimmed/sanded the side dot markers. Does anyone else get really nervous doing the side dots? I quintuple checked thinking I didn't mark 'em right. Hope they are right.
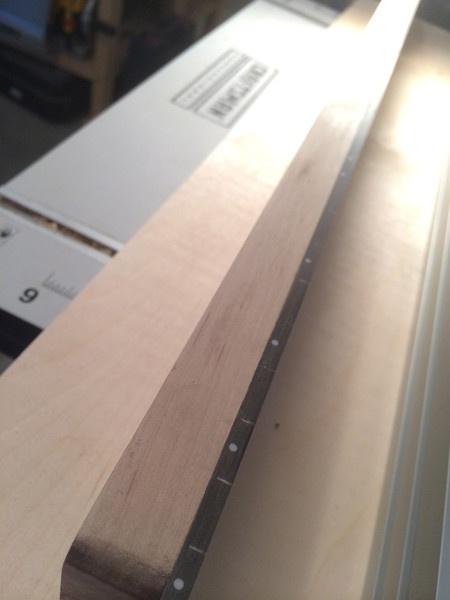
Ok. One last thing. I've used CA before and my biggest problem was the eye-burn thing that happens. However, last night in bed it felt like I got hit all at once with a major head cold. Congestion, sneezing, coughing, etc. So I read up on CA glue and it looks like I've hit my saturation point of CA. Feeling a bit better now, more like allergies; but I will take precautionary measures much more seriously in the future.
So, someone posted about using CA glue to stiffen up the markers and keep them from getting grungy and worn. Ok. Well, as the CA was creeping into the ebony I freaked out and ended up wiping a coat on the whole fingerboard. Then I saw some low spots on the fret markers and globbed it on each fret line--unsure of how it would sand. It looked terrible! But my worry was for naught, and after sanding to 320 it turned out pretty nice. Can't feel the lines at all. I also drilled, glued and trimmed/sanded the side dot markers. Does anyone else get really nervous doing the side dots? I quintuple checked thinking I didn't mark 'em right. Hope they are right.
Ok. One last thing. I've used CA before and my biggest problem was the eye-burn thing that happens. However, last night in bed it felt like I got hit all at once with a major head cold. Congestion, sneezing, coughing, etc. So I read up on CA glue and it looks like I've hit my saturation point of CA. Feeling a bit better now, more like allergies; but I will take precautionary measures much more seriously in the future.
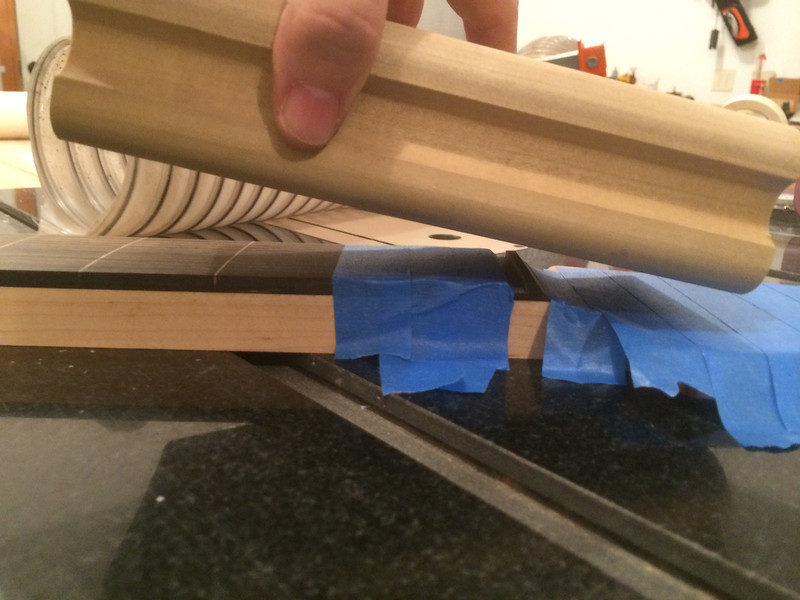
I forgot to document something that might help someone else. When sanding the CA down on the fretboard I started with 80 grit and worked up to 320. I used a radius block and had the neck secured on my table saw top. Working this way I could use the depth gauge on my calipers to check both sides of the fingerboard at different places on the neck to keep material removal even. That and a precision straightedge to keep the front to back in check. Not so hard, but it is important.
Headstock is thinned and transitioned:

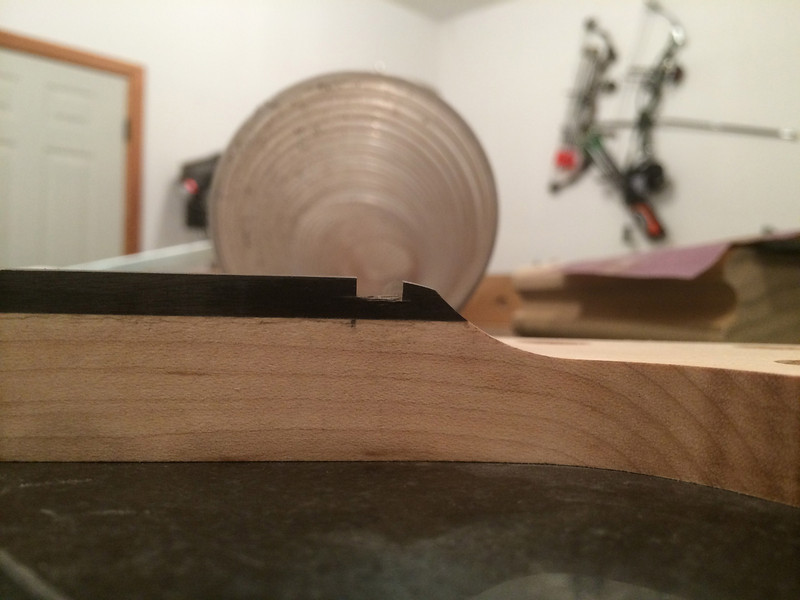
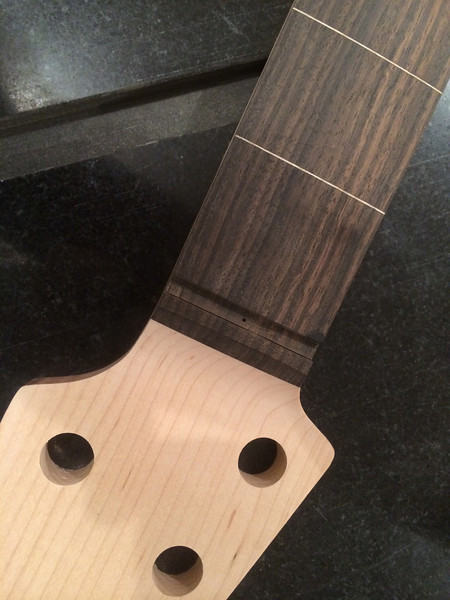
I was thinking: since the nut slots of a fretless are almost all the way to the fingerboard, how does one cut a proper angle down to the tuner post with the little bit of fingerboard behind the nut on a F-type headstock? I've never had a Fender fretless and don't know how they do it. I assume one wouldn't want the string resting on the fingerboard between the nut and tuner--sitar effect and all. Or maybe on fretless it doesn't matter? What do you all do (besides use an angled headstock)? Anyway, this is my workaround: I angled the radius block and sanded down the little piece of fingerboard behind the nut slot. From the front it is not really noticeably different, but in profile you can see it should allow the strings to naturally bend unimpeded toward the tuning posts.
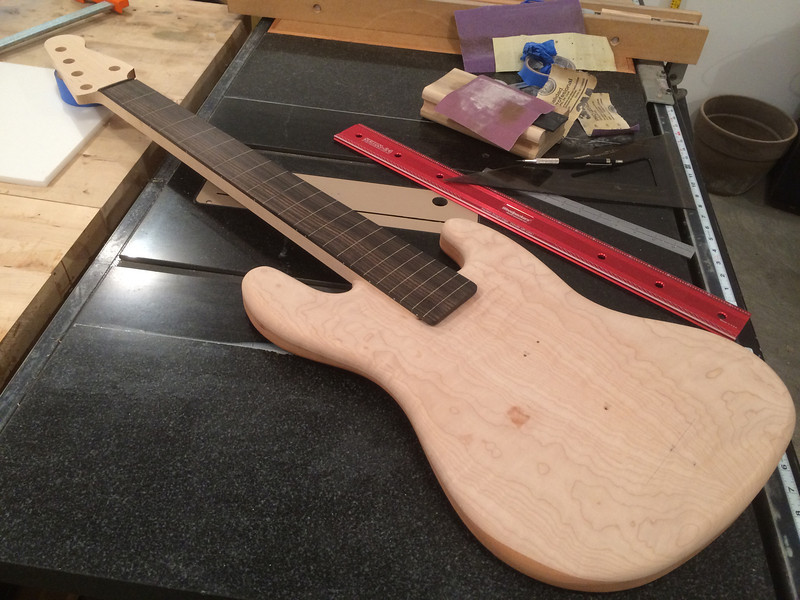
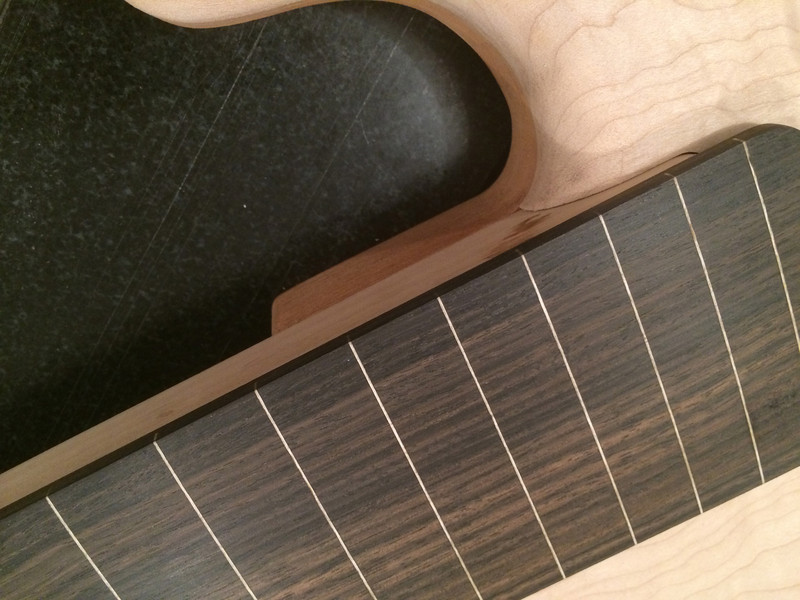
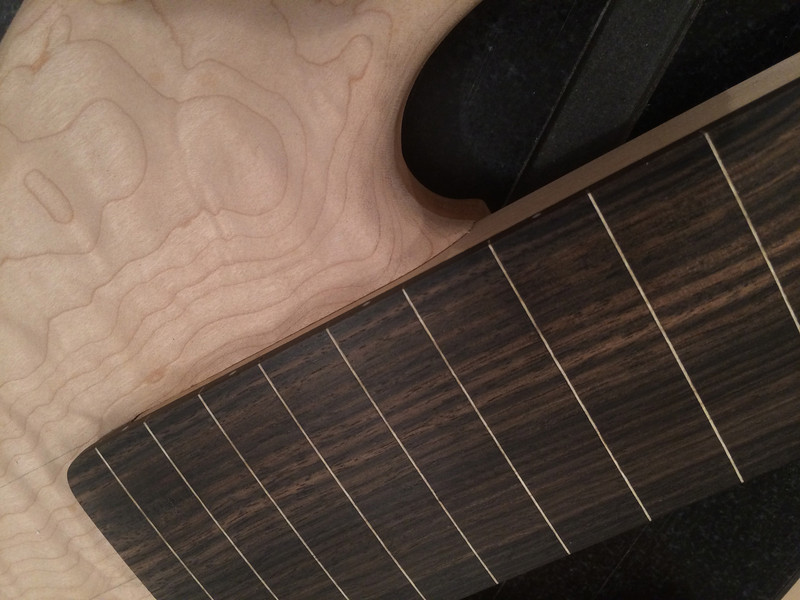
Here are some pics of seeing it start to come together. I installed the neck inserts, too. (See post #25 if interested in how I did this--the same as the neck that was not to be.) The neck joint is a good non-binding fit, but will require some hand sanding after finishing material build-up. I think that's normal, though.
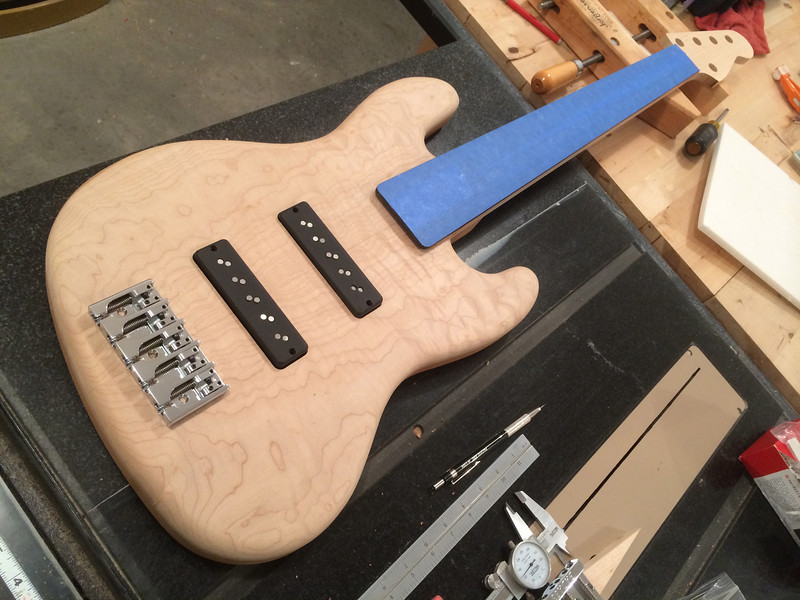
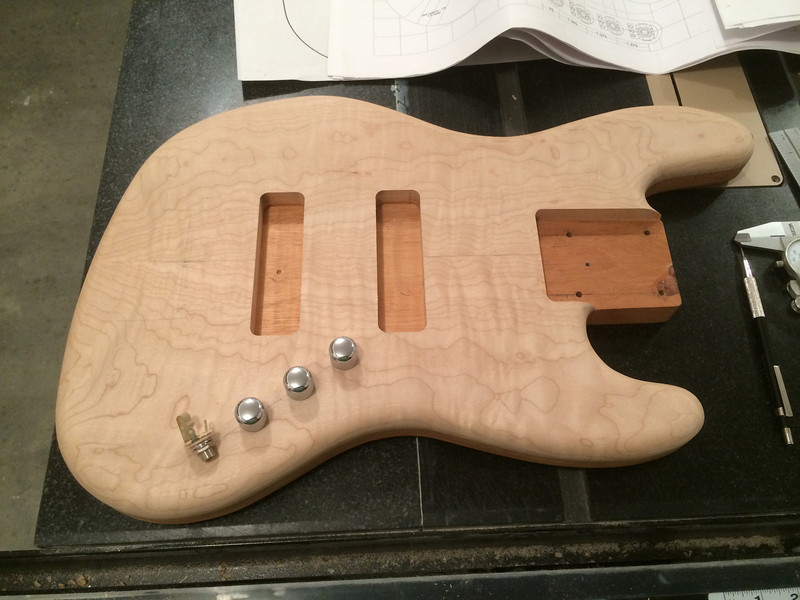
Also got the pu cavities routed for Nordstrand Big Splits (20mm spacing). I decided to go traditional knob/jack layout with a simple rear rout. I'm making the templates for the cover recess and cover. Getting nervous/excited for the neck carve.
I was thinking: since the nut slots of a fretless are almost all the way to the fingerboard, how does one cut a proper angle down to the tuner post with the little bit of fingerboard behind the nut on a F-type headstock? I've never had a Fender fretless and don't know how they do it. I assume one wouldn't want the string resting on the fingerboard between the nut and tuner--sitar effect and all. Or maybe on fretless it doesn't matter? What do you all do (besides use an angled headstock)? Anyway, this is my workaround: I angled the radius block and sanded down the little piece of fingerboard behind the nut slot. From the front it is not really noticeably different, but in profile you can see it should allow the strings to naturally bend unimpeded toward the tuning posts.
Here are some pics of seeing it start to come together. I installed the neck inserts, too. (See post #25 if interested in how I did this--the same as the neck that was not to be.) The neck joint is a good non-binding fit, but will require some hand sanding after finishing material build-up. I think that's normal, though.
Also got the pu cavities routed for Nordstrand Big Splits (20mm spacing). I decided to go traditional knob/jack layout with a simple rear rout. I'm making the templates for the cover recess and cover. Getting nervous/excited for the neck carve.


