• TalkBass has been independent since 1998. Add your voice.
    Create a free account to reply to discussions, view embedded media, and browse with fewer display ads.
    Join freeLog in
    Want zero display ads or expanded classifieds tools? Compare plans.

Winter Build Off 2023 - Supersymmetry

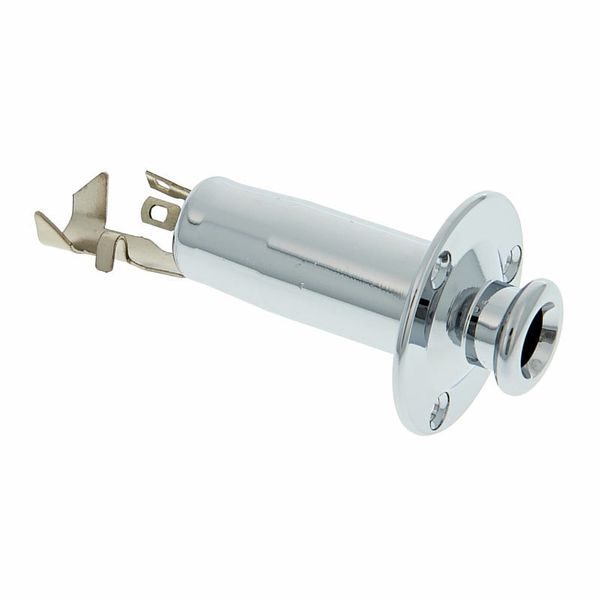
The bevels are routed. Now that the actual body sides are quite narrow I realize that I won't be able to use a normal side jack as as I planned :banghead:. I'm not the biggest fan of front jacks, so perhaps a barrel-style jack would be an option. Let's see.
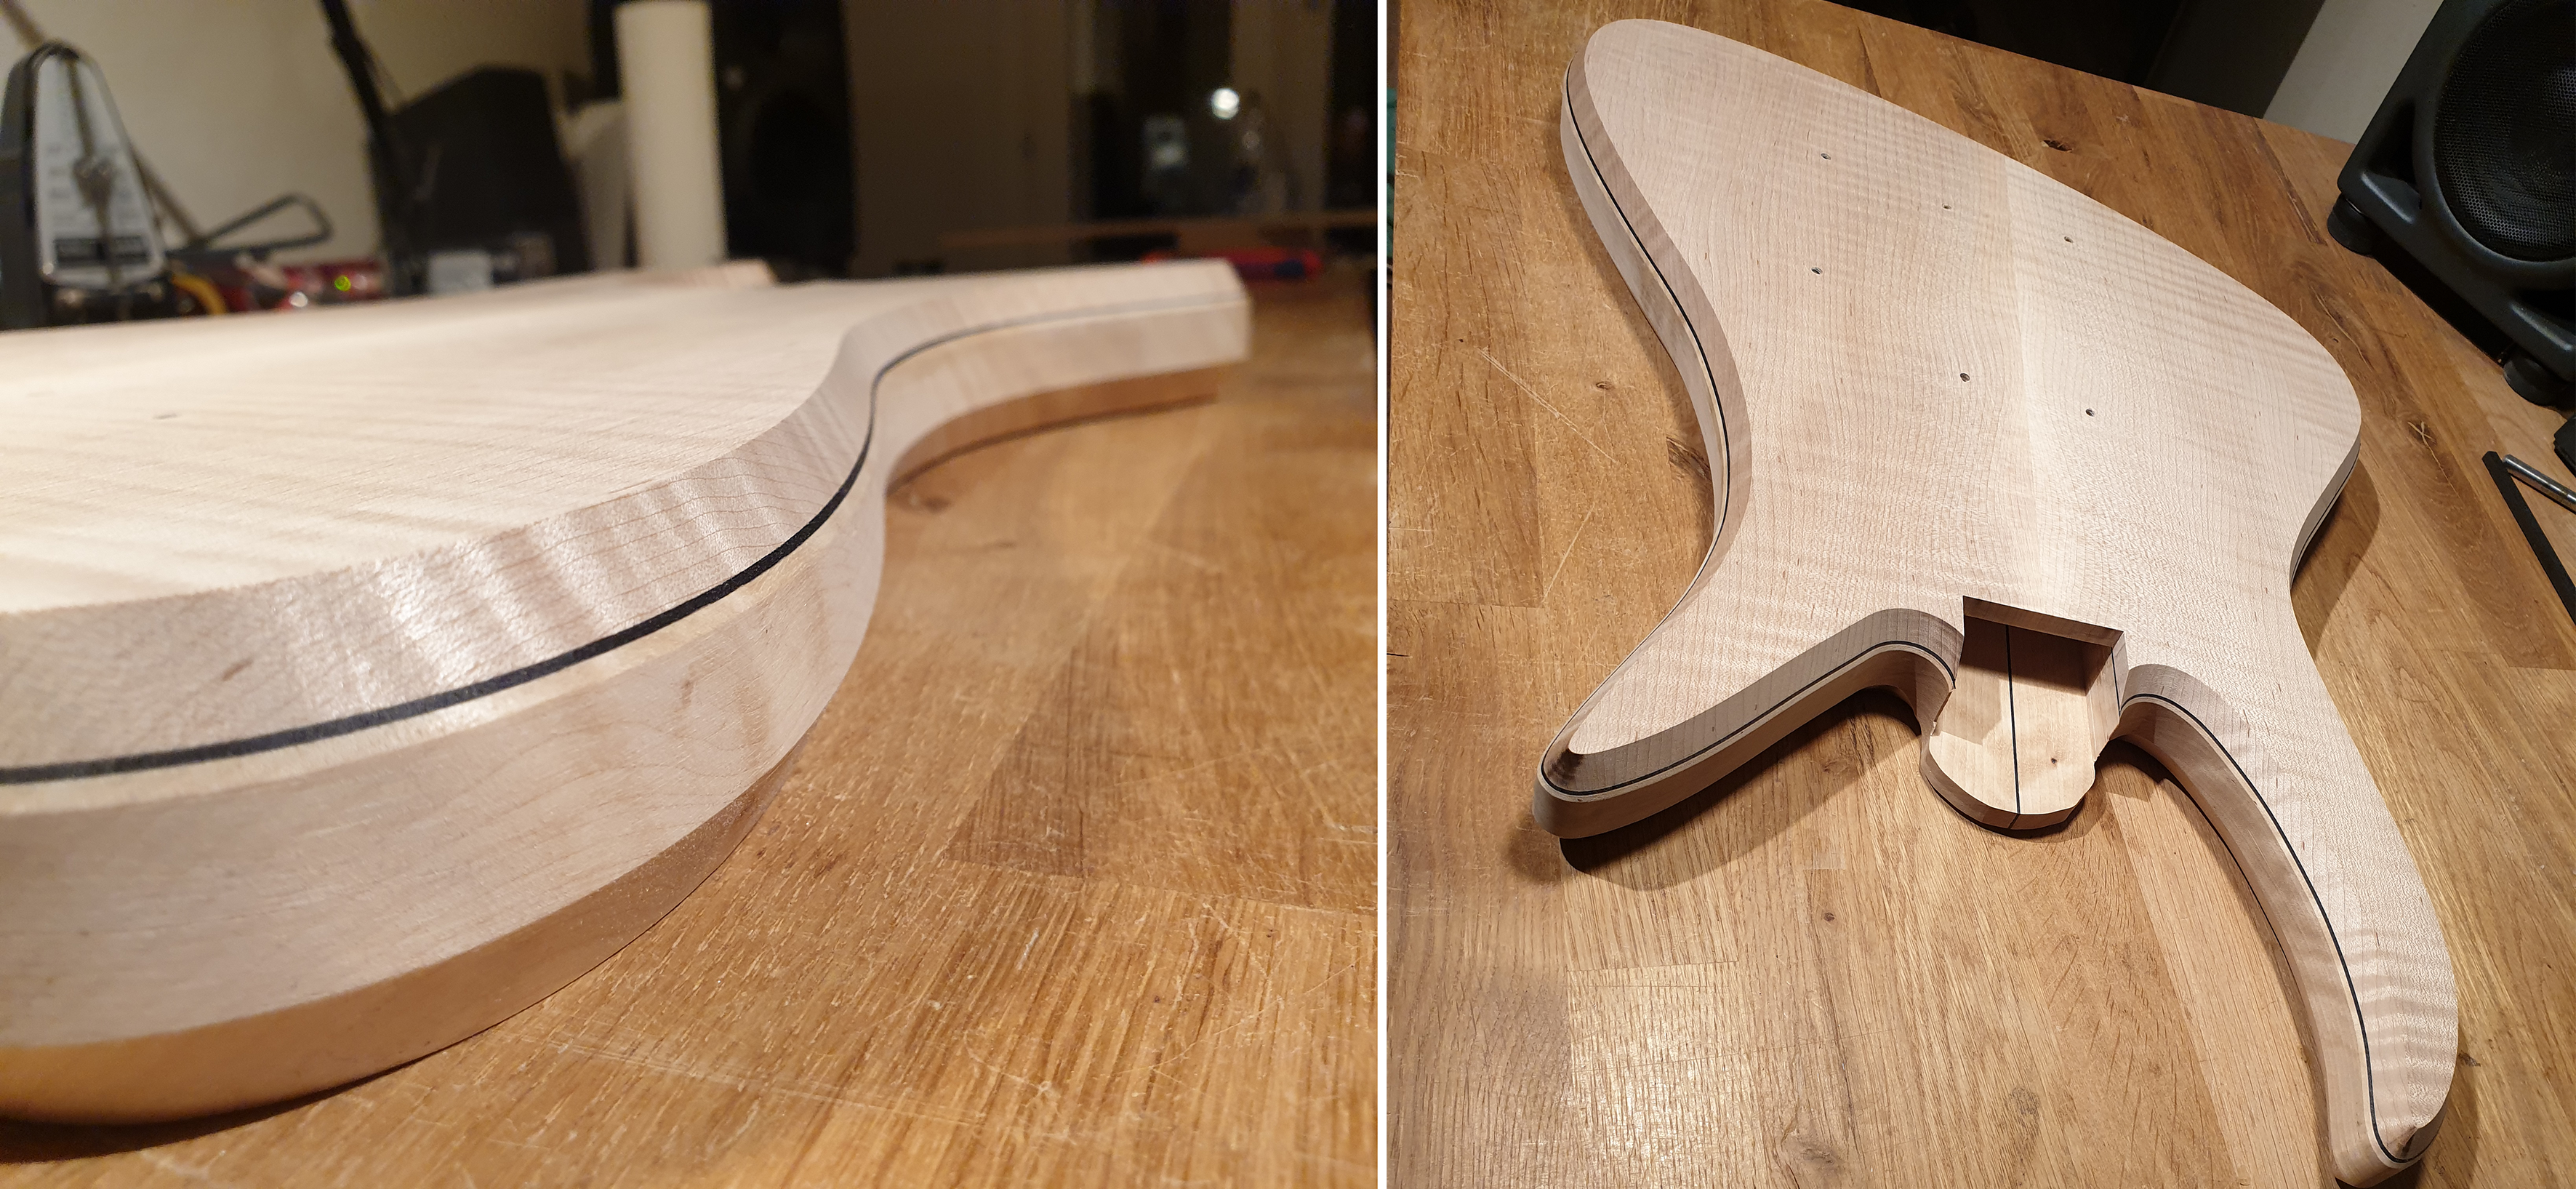
edges.png

There's some progress on the neck as well. I have recently seen quite a few posts here in the LC where neck shaping was described as a daunting and difficult task. That's why I wanted to share my neck shaping method. It's probably nothing new and I don't claim it to be the best, but it works for me.

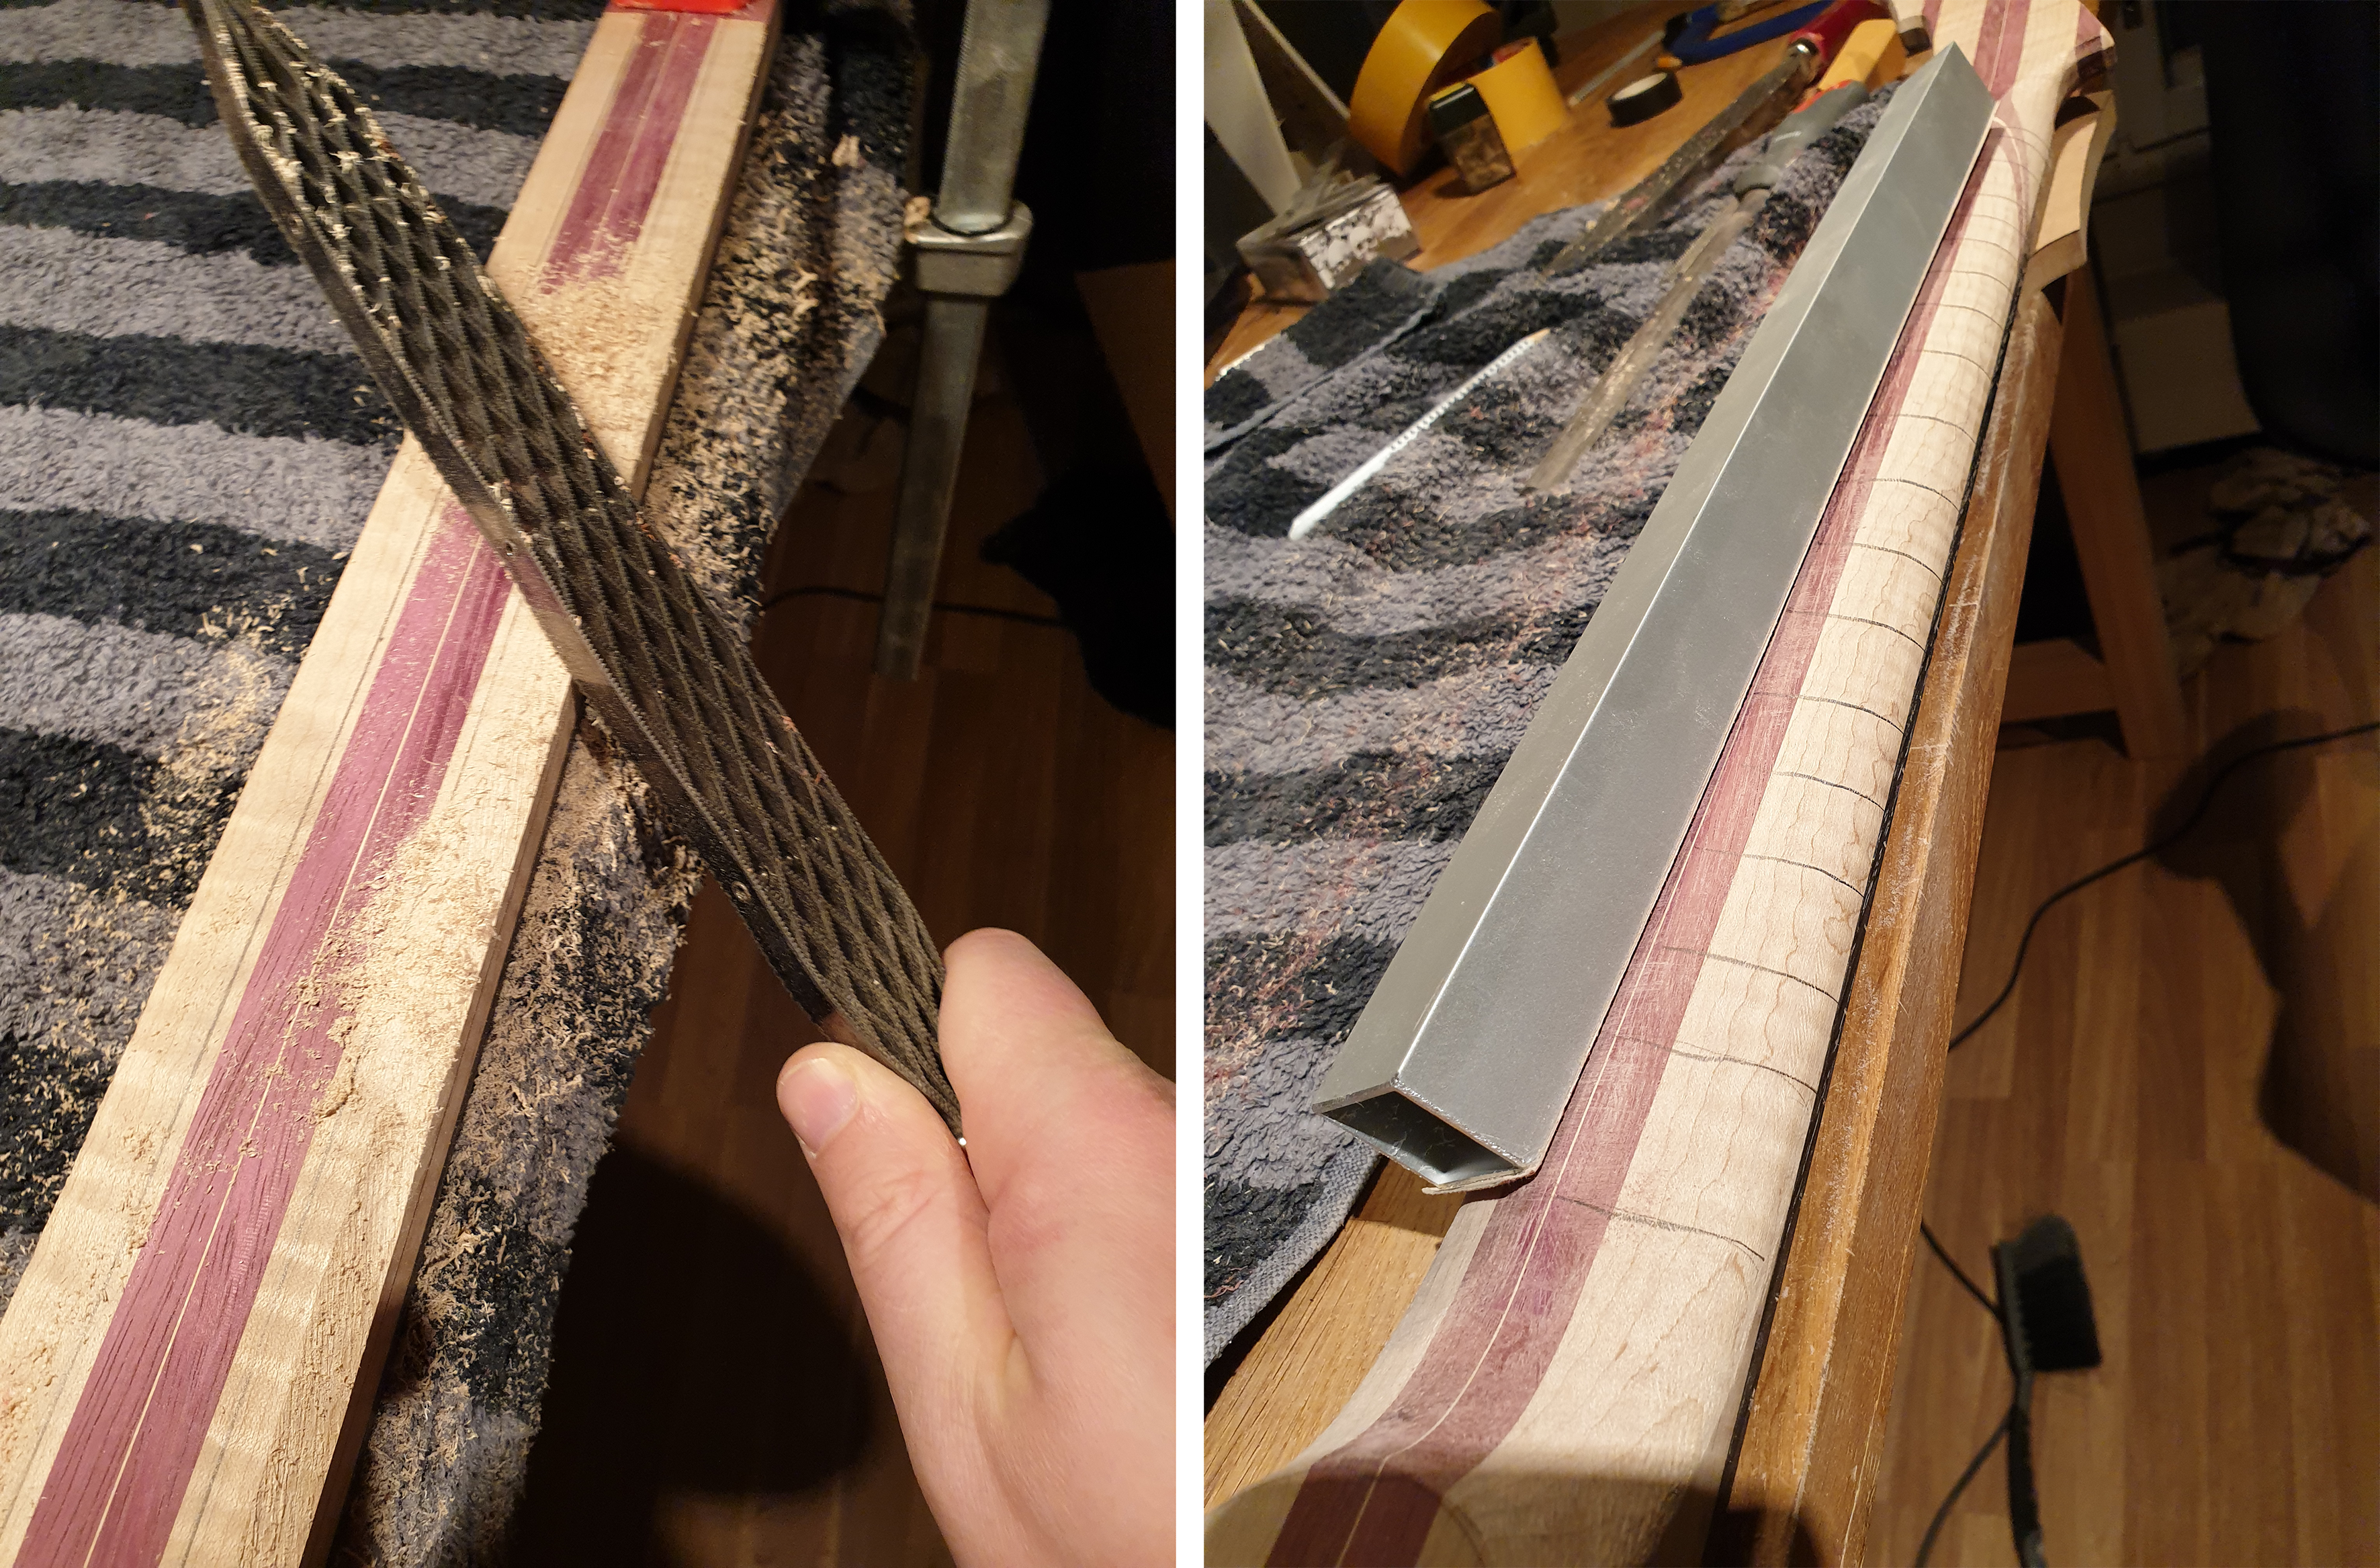
The first step is faceting. There's a lot to read about this already, so I won't go into much detail. Starting with the square neck, you mark the center of each facet (side and back) and establish a new facet up to these two lines. Then rinse and repeat until there are ca. 6-8 facets on each half of the neck. Actually, don't rinse the neck, just repeat. At that point it is difficult to get more surfaces with a rasp, that's when I start rounding the profile with a file, just to knock down any ridges that came from the previous step.

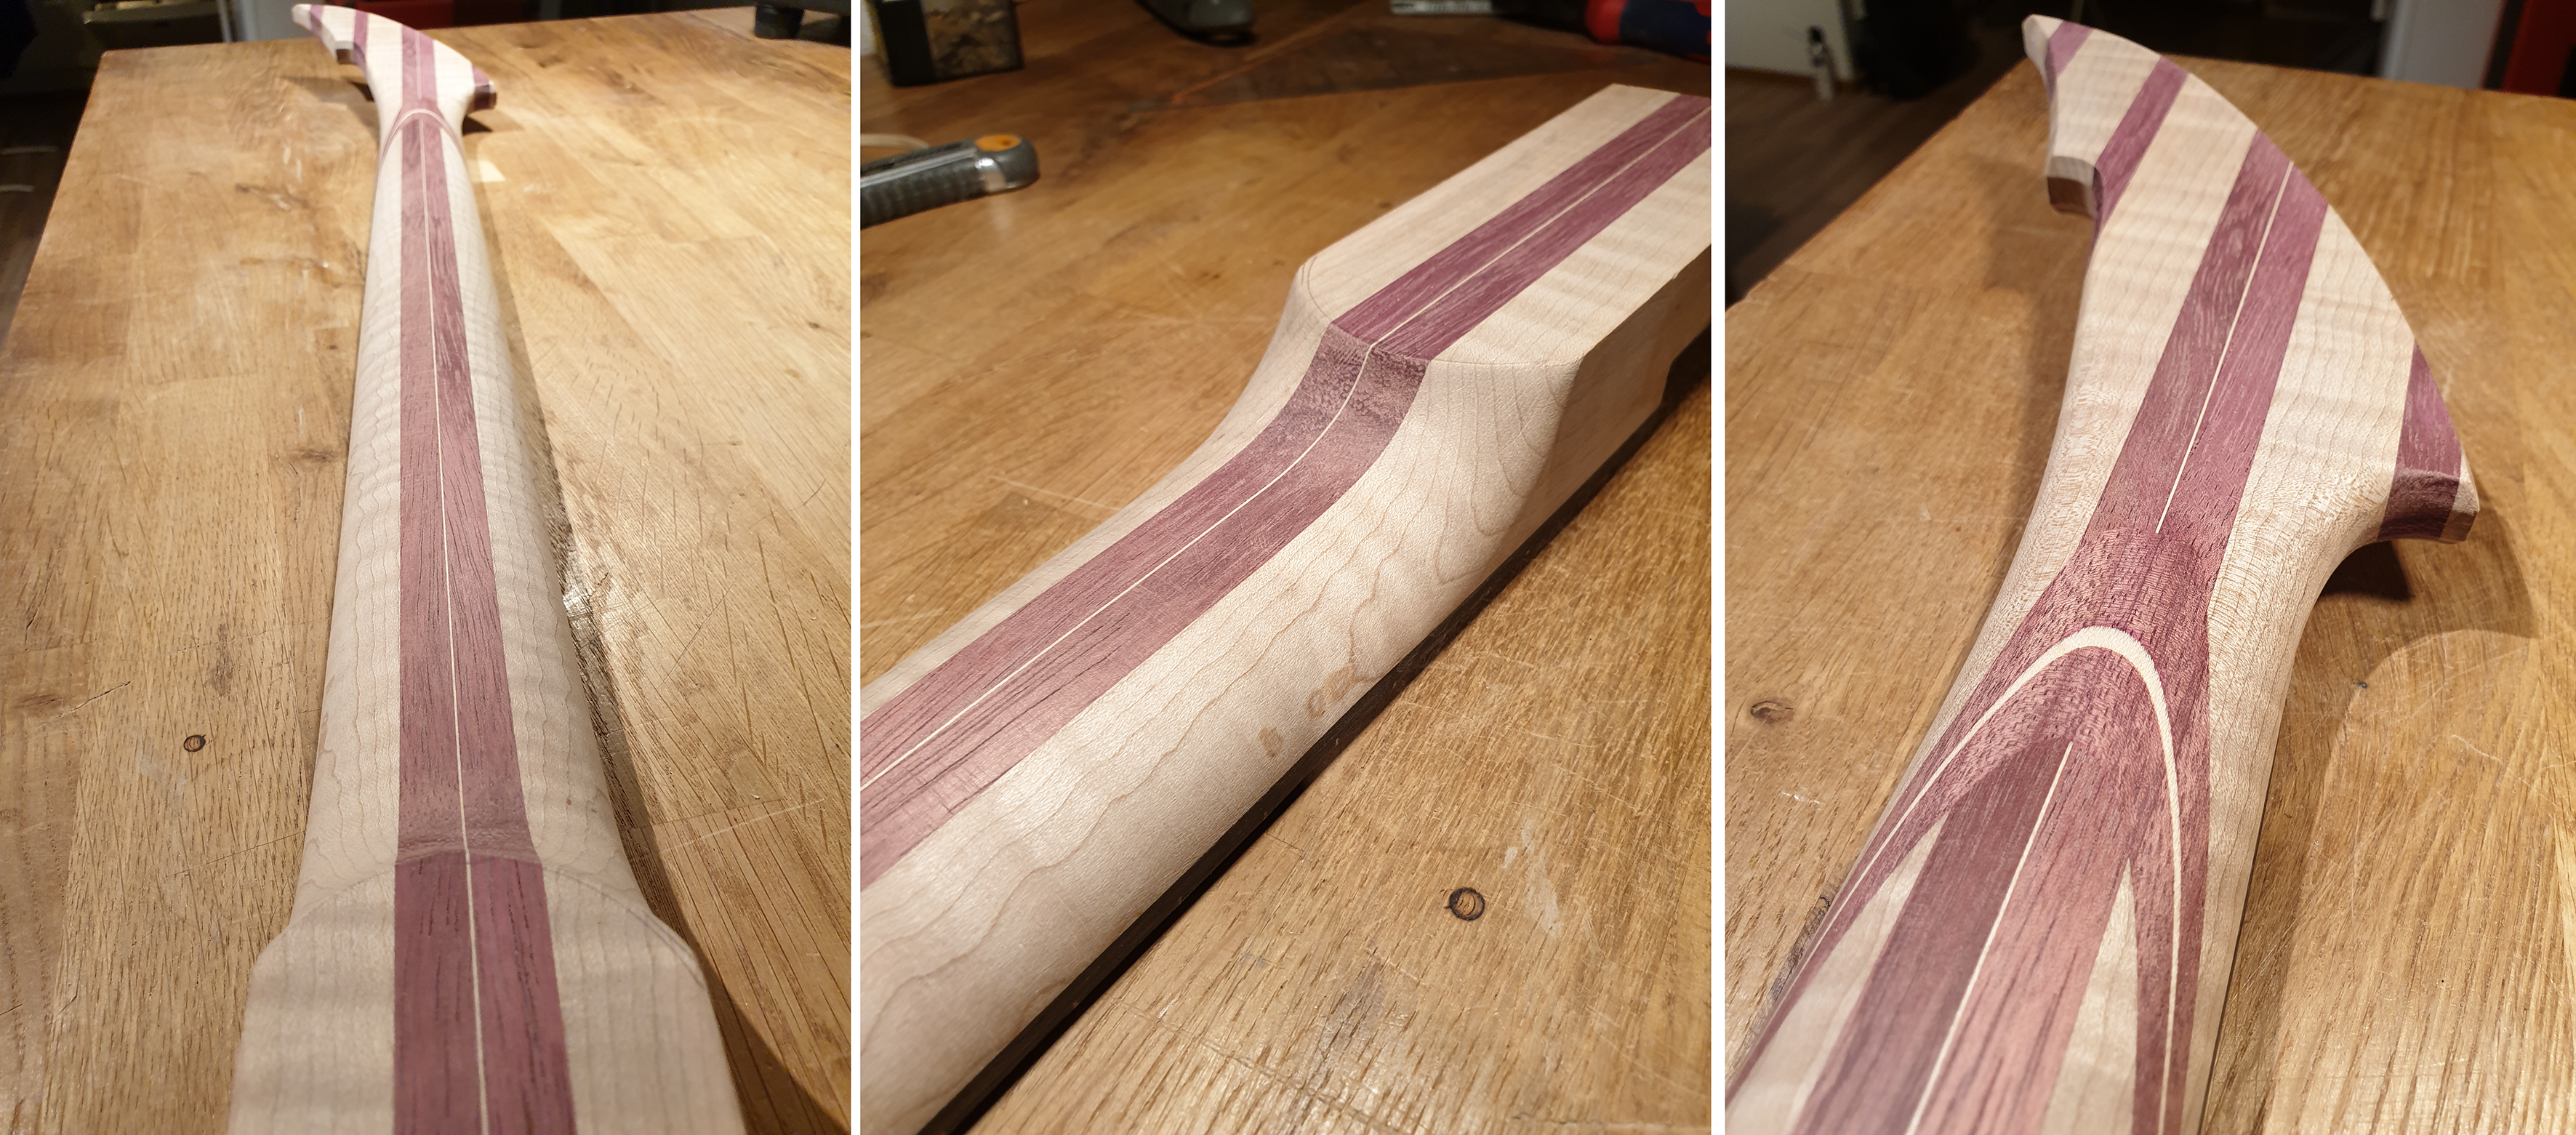
Now the neck has a rough profile, but the surface is rough and the profile is about as consistent as it gets by using the centerlines of the facets (by eye). To make sure that the neck profile is a true interpolation between the profiles at the nut and at the bridge, I use a sanding beam that is exactly the same length between heel and nut (or volute). Then I use strokes across the neck, not along the neck to even out the neck profile and repeatedly check if it's symmetric. Pencil lines help to keep track of any low spots. Once this is finished and I like the profile, I start hand sanding with 120grit along the neck to get rid of scratches from the previous steps. If I don't like it, I go back to the sanding beam for a small adjustment or back to the shinto rasp for radical reshaping. I usually end up removing some extra material from the shoulder, but that's just a personal preference.
neckshaping.png

neckshaping2.png

After the profile is done, I shape and blend the heel and headstock transitions. Those depend on the instrument, heel shape and volute/no volute. Done!
 
Fortunately, you’re much smarter then me and way ahead. :smug::thumbsup:
I'm not so sure about that. I made a boo-boo.

Today I routed the recess behind the headless tuners. I have fairly large hands, so it's important to have some space to get to the tuners easily. The tuners themselves just sit on the flat top.

Because I want a fairly deep recess, but also enough thickness at the outer edge to mount a strap button at the center line, I decided to shim the template and rout at an angle.

Routing with a "roundunder" bit went well, but when I reached the desired depth I discovered a blast from the past: I used a 2mm screw to fasten the mdf template onto the body to rout the outline, and that little hole happens to show in the recess area.:banghead: I forgot all about it. It's totally avoidable, but too late now.

I think I have four options here:
1. Leave it as it is. Not my preferred way to go, but maybe I can fill it or disguise it as a knot?
2. Rout the whole recess area deeper. I think it would take at least 3mm more depth to remove the hole, possibly more. I don't want to rout it too thin, of course. I want to keep the side thick enough to mount the strap button at the center line.
3. Rout the recess flat/parallel with the top. Then the recess would have constant depth. It would certainly remove the hole, but I think the current angle makes it look more interesting. Also the edge would be very thin then and I'd have to put the strap button someplace else.
4. Rout the recess with straight template bit to create a hard edge at the bottom of the cavity and then fit a CF sheet into the bottom of the cavity. It would be consistent with the CF pickguard and backplate, but I'd loose the nice veneer pattern.

Thoughts?

20230222_110046.jpg


20230222_121141.jpg


20230222_121133.jpg
 
Is there a chance that hole will be directly below a tuner and completely hidden?
Have you tried putting a drop of water onto /into it? It may be small enough that the swelling of the fibers can make it even less visible?
This is the recess behind the tuners. The tuners themselves will not be recessed. Their position is indicated by the pencil marks in the last photo, so they are quite far away from the hole.

I'm afraid the hole is too large to swell up with water, but I haven't tried it. Also some glue went in there during the veneer glue-up.

Another idea I had was to use a maple veneer similar to the top in the recess area.
 
Oh my, so many good ideas here!

Now it's almost disappointing that I just routed 2mm deeper and the hole disappeared;).

Make it a design feature, fill it with glow in the dark and do the same at the other side of the line for some symmetry.
View attachment 4977129
I was entertaining this idea for a while, but inlay routing is hard enough on a flat suface, not to mention an inclined recess. However, I think on a true headless instrument this would be a great place to put an inlay/logo and I might do that on a future build. Thanks for the tip!

Here it is now:
recess2.png

I also routed the control cavity. It's larger than it needs to be, mostly for weight relief. I left a support beam through the cavity with an extra 1/4" thickness to avoid having a large unsupported area of thin maple. It seems rigid enough. Controls will only be vol, tone and a coil split switch.
cavities2.png
 
Oh my, so many good ideas here!

Now it's almost disappointing that I just routed 2mm deeper and the hole disappeared;).


I was entertaining this idea for a while, but inlay routing is hard enough on a flat suface, not to mention an inclined recess. However, I think on a true headless instrument this would be a great place to put an inlay/logo and I might do that on a future build. Thanks for the tip!

Here it is now:
View attachment 4977310
I also routed the control cavity. It's larger than it needs to be, mostly for weight relief. I left a support beam through the cavity with an extra 1/4" thickness to avoid having a large unsupported area of thin maple. It seems rigid enough. Controls will only be vol, tone and a coil split switch.
View attachment 4977309

That looks great. I really like your body shape, very cool. :thumbsup:
 
  • Like
Reactions: Reedt2000 and TFM94
That looks great. I really like your body shape, very cool. :thumbsup:
Thanks, mate!

All of the body shaping/routing is now done. Today I carved the belly coutour and routed the pickup cavity. During the coming weekend I'll make the CF pickguard, control cover and trussrod access cover. After that comes sanding the body (ugh) and staining the top. I also have to do the epoxy/pigment for the side dots and headstock logo soon, afterall it needs a week to cure. After that I can glue in the neck and do the final heel carve.

Here's the belly carve. I extended the contour quite far up the upper horn. This is something I wanted to try for a while. When I play I like to position the guitar or bass quite steep, so if something gets in the way it's usually the upper horn. I manually extended the bevel along the belly carve.
contour.png


Pickup cavity routed and a hole drilled to the control cavity. Bullseye! I soon have to come up with some clever way to ground all of the individual bridges.
hole.png


And two more glamour shots of the whole thing as it is now. The neck is just temporarily attached.
shapingdone.png
 
Thanks, mate!

All of the body shaping/routing is now done. Today I carved the belly coutour and routed the pickup cavity. During the coming weekend I'll make the CF pickguard, control cover and trussrod access cover. After that comes sanding the body (ugh) and staining the top. I also have to do the epoxy/pigment for the side dots and headstock logo soon, afterall it needs a week to cure. After that I can glue in the neck and do the final heel carve.

Here's the belly carve. I extended the contour quite far up the upper horn. This is something I wanted to try for a while. When I play I like to position the guitar or bass quite steep, so if something gets in the way it's usually the upper horn. I manually extended the bevel along the belly carve.
View attachment 4978747

Pickup cavity routed and a hole drilled to the control cavity. Bullseye! I soon have to come up with some clever way to ground all of the individual bridges.
View attachment 4978748

And two more glamour shots of the whole thing as it is now. The neck is just temporarily attached.
View attachment 4978750

Yeah, that looks really good. :thumbsup: I think putting in body contours is one of the best parts of a build, aside from attaching the neck. :)
 
  • Like
Reactions: BishopJP and TFM94
After a frustrating day at work last friday I decided that I need some quiet time in the workshop to get creative with the headstock logo.

My headstock logo situation has been a bit unsatisfactory for quite some time. I use wood inlays, mostly maple and bog oak or maple and ebony for the logo. For my first builds I cut them by hand, which is a good exercise in finicky inlay work, but takes 2-3 full days all by itself. The design was my initials, and the circular shape allows me to assemble the inlay separately and then drill into the headstock with a 1" forstner bit to glue it in:
20200812_110945.jpg


Later, a friend of mine cut a few of them with his laser, but the fit was generally worse than the handmade ones. There were burn mark and laser kerf issues. I used a few of them, but I was never really happy with the results. Unfortuantely, the sharp inside corners disqualify this design for cnc (and also I don't have a cnc;)). My frustration with the laser stuff was also the reason why my Ziricote Dream build never got a headstock logo.

So last friday I decided to simplify the design a bit so that I can do it by hand with a dremel router. I started with an ebony cutoff and recessed it in some mdf. The outside circle is cut with my dremel circle cutting jig and a temporarily attached piece of MDF for the center pin. An aluminum profile guides the router for the straight sections of the letters.

logo1.png


The guide works well to keep lines straight, but the jig does not determine start and end points of each line. Maybe something to consider as a future upgrade of this jig.

And here is the finished rout with the paper template removed:
logo2.png


I'm very happy with the result. Both logos turned out well, but as you can see, they are not identical. I drew up the paper templates by hand and with the hand-guided dremel there is a bit of varation in letter size and placement. It doesn't bother me, I actually like it this way because each logo will be unique. Btw, should I get this logo trademarked or is that redundant?;)

I have now applied one coat of sealer on the logos. I forgot to order more luminescent pigment, so I'll have to wait a little bit until it gets filled with pigment and epoxy.

My original plan was to use epoxy/pigment for the side dots as well, but I want to move forward with the build, so I cheated and used a luminlay stick for the side dots. It's actually a really good color match with the fretboard inlay. You guys already know I use any excuse to post glow in the dark pictures, so here it is:

dots2.png
 
After a frustrating day at work last friday I decided that I need some quiet time in the workshop to get creative with the headstock logo.

My headstock logo situation has been a bit unsatisfactory for quite some time. I use wood inlays, mostly maple and bog oak or maple and ebony for the logo. For my first builds I cut them by hand, which is a good exercise in finicky inlay work, but takes 2-3 full days all by itself. The design was my initials, and the circular shape allows me to assemble the inlay separately and then drill into the headstock with a 1" forstner bit to glue it in:
View attachment 4982533

Later, a friend of mine cut a few of them with his laser, but the fit was generally worse than the handmade ones. There were burn mark and laser kerf issues. I used a few of them, but I was never really happy with the results. Unfortuantely, the sharp inside corners disqualify this design for cnc (and also I don't have a cnc;)). My frustration with the laser stuff was also the reason why my Ziricote Dream build never got a headstock logo.

So last friday I decided to simplify the design a bit so that I can do it by hand with a dremel router. I started with an ebony cutoff and recessed it in some mdf. The outside circle is cut with my dremel circle cutting jig and a temporarily attached piece of MDF for the center pin. An aluminum profile guides the router for the straight sections of the letters.

View attachment 4982535

The guide works well to keep lines straight, but the jig does not determine start and end points of each line. Maybe something to consider as a future upgrade of this jig.

And here is the finished rout with the paper template removed:View attachment 4982534

I'm very happy with the result. Both logos turned out well, but as you can see, they are not identical. I drew up the paper templates by hand and with the hand-guided dremel there is a bit of varation in letter size and placement. It doesn't bother me, I actually like it this way because each logo will be unique. Btw, should I get this logo trademarked or is that redundant?;)

I have now applied one coat of sealer on the logos. I forgot to order more luminescent pigment, so I'll have to wait a little bit until it gets filled with pigment and epoxy.

My original plan was to use epoxy/pigment for the side dots as well, but I want to move forward with the build, so I cheated and used a luminlay stick for the side dots. It's actually a really good color match with the fretboard inlay. You guys already know I use any excuse to post glow in the dark pictures, so here it is:

View attachment 4982536
Just to plant a seed in your mind:
This should be possible with wood.... and then you just need to cut off slices in the desired thickness.
Letter "A" Polymer Clay Alphabet Cane Tutorial > Polymer Kay