
Enjoy the benefits of a premium membership!
Upgrade Account
-
TalkBass has been independent since 1998. Add your voice.
Create a free account to reply to discussions, view embedded media, and browse with fewer display ads.
Join free Log in
Want zero display ads or expanded classifieds tools? Compare plans.
You are using an out of date browser. It may not display this or other websites correctly.
You should upgrade or use an alternative browser.
You should upgrade or use an alternative browser.
Winter Build Off 2023 - Supersymmetry
- Thread starter TFM94
- Start date
More options
Who Replied?



I did my calculation consistently in SI units (kilograms, meters, seconds).
My bad. Your calculation is correct.

Boy howdy was this ever the right theme this year. 

In hindsight we will say: we needed to get it out of our system.Boy howdy was this ever the right theme this year.
Either that, or it just never stops.
Enough out of you, Heisenberg!
(you had to wait two weeks for someone to get the joke, although maybe Cal03 and TFM94 did).

It's been a few days and there's some progress to share, mostly on the body. I forgot to take photos of the progress, but at least I'd like to show the result. Sorry!
I went to the workshop and jointed/planed the birch body blanks. I glued them up with a 1mm black veneer as a centerline. This is the same kind of veneer that will also go in between the body and top, as well as the headstock. After thicknessing I cut out the shape at the bandsaw and routed the outline. Standard procedure.
The body blanks were rough sawn, so it was hard to imagine what the flamed birch might look like after it's planed. Now that I can see it, I'm not complaining
The front of the body and the top on the left, the back of the body on the right.
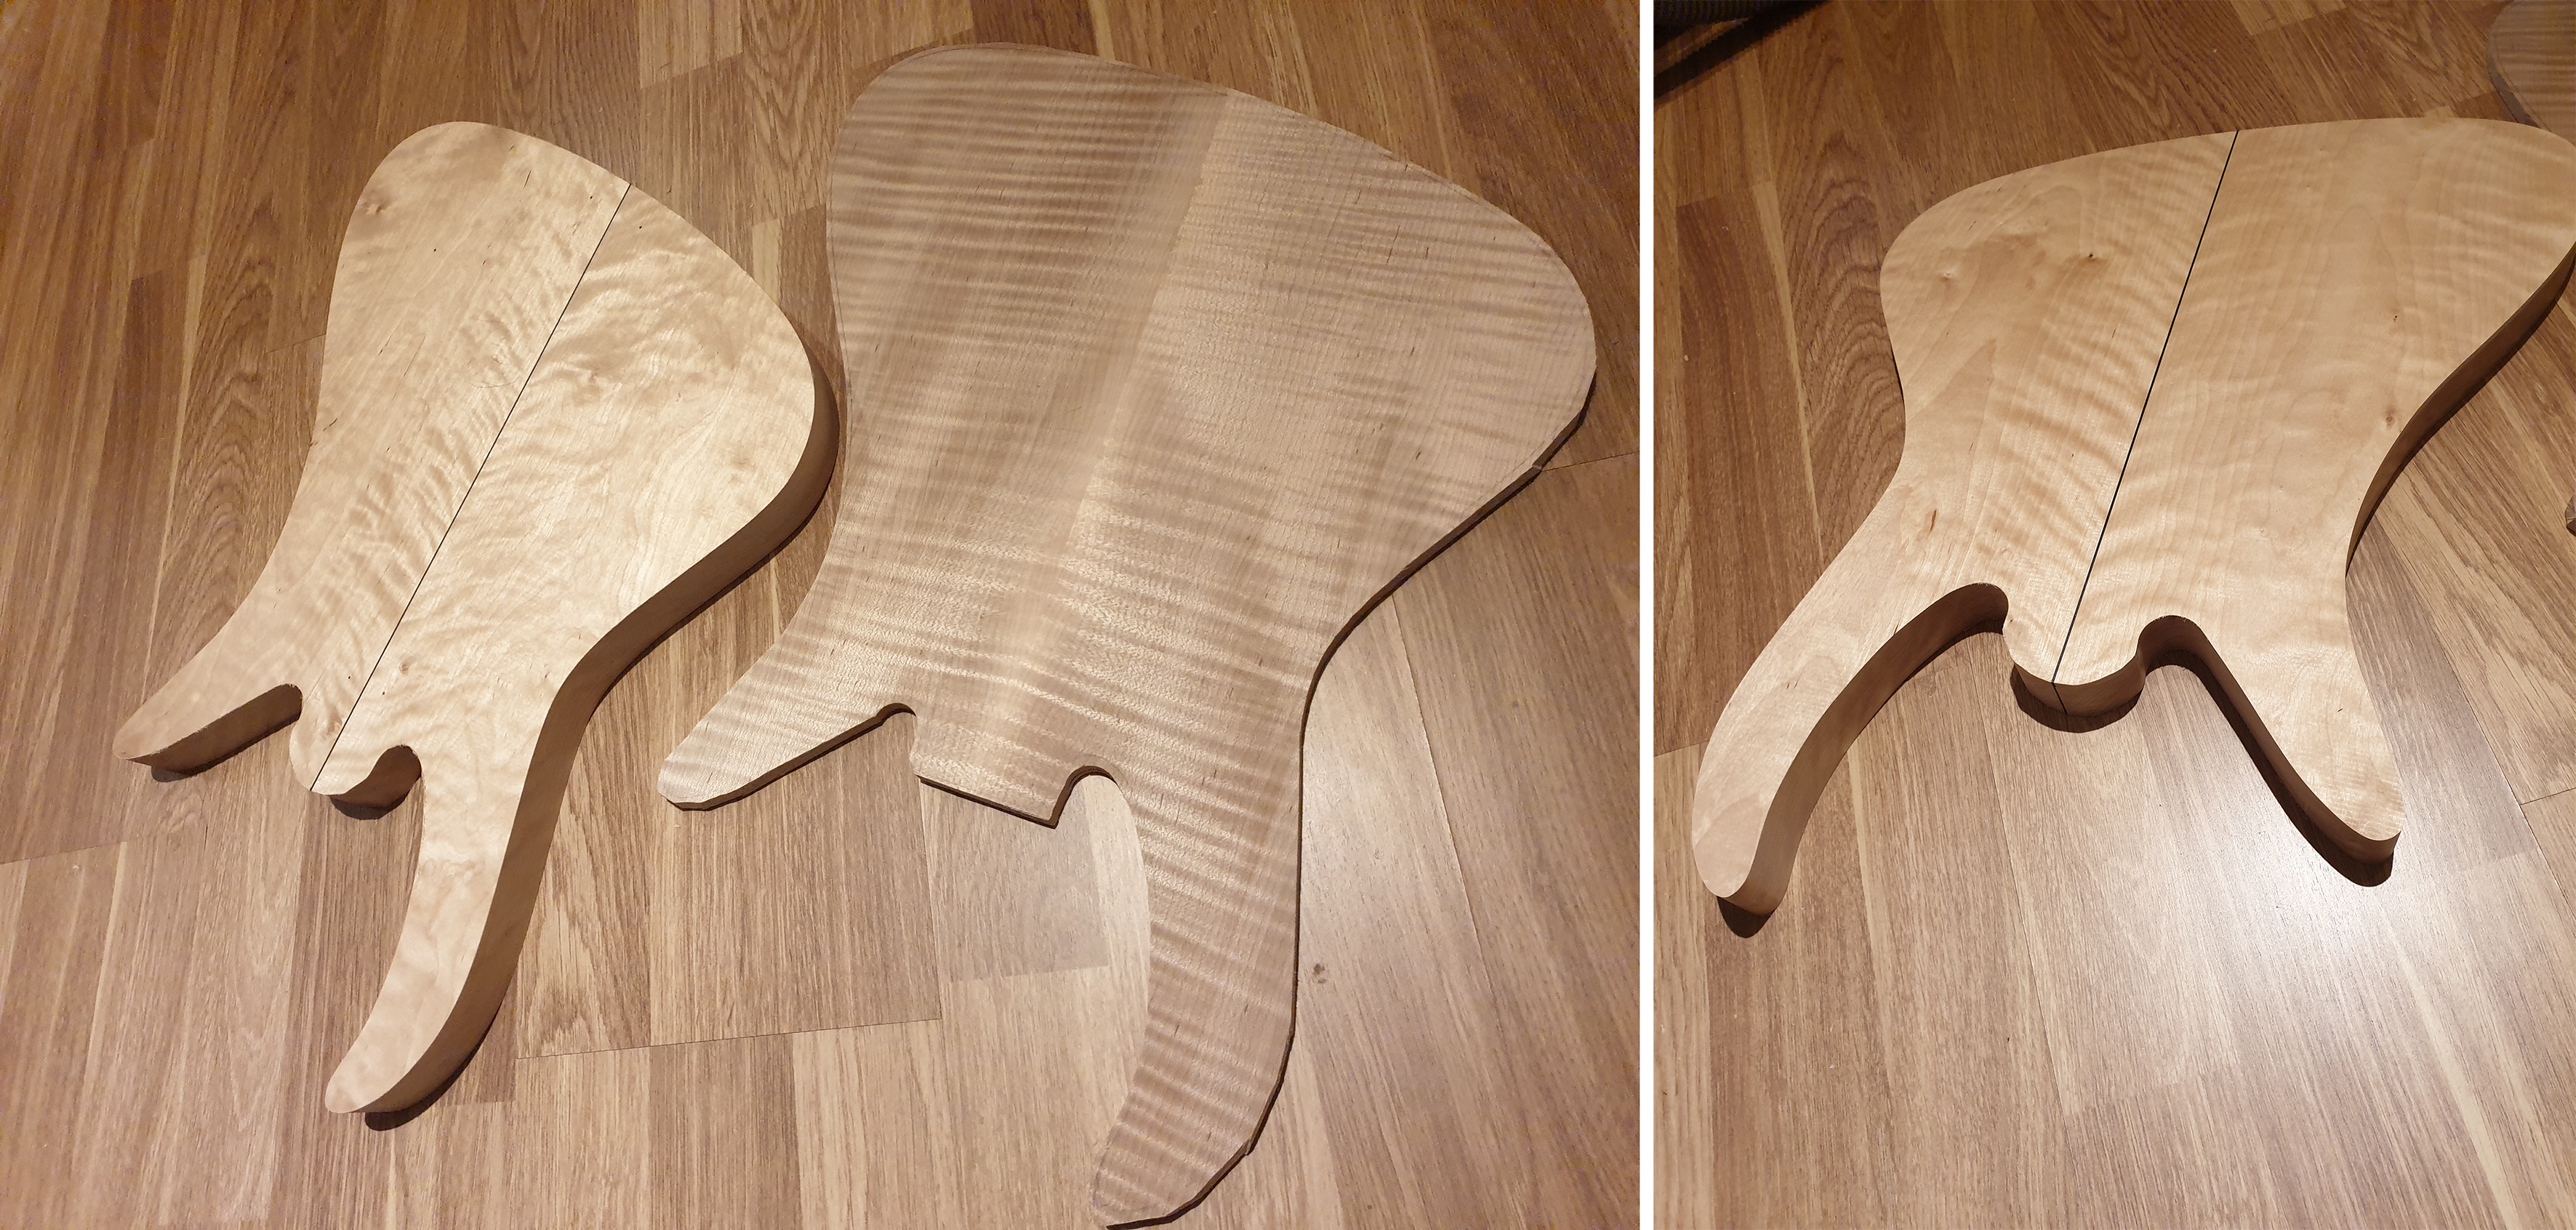
One more pic of the back with a wet surface to highlight the grain. The little brown patch on the edge will disappear with a bevel or roundover, not sure which one I'll choose. Oh yeah, I also cut fret slots.
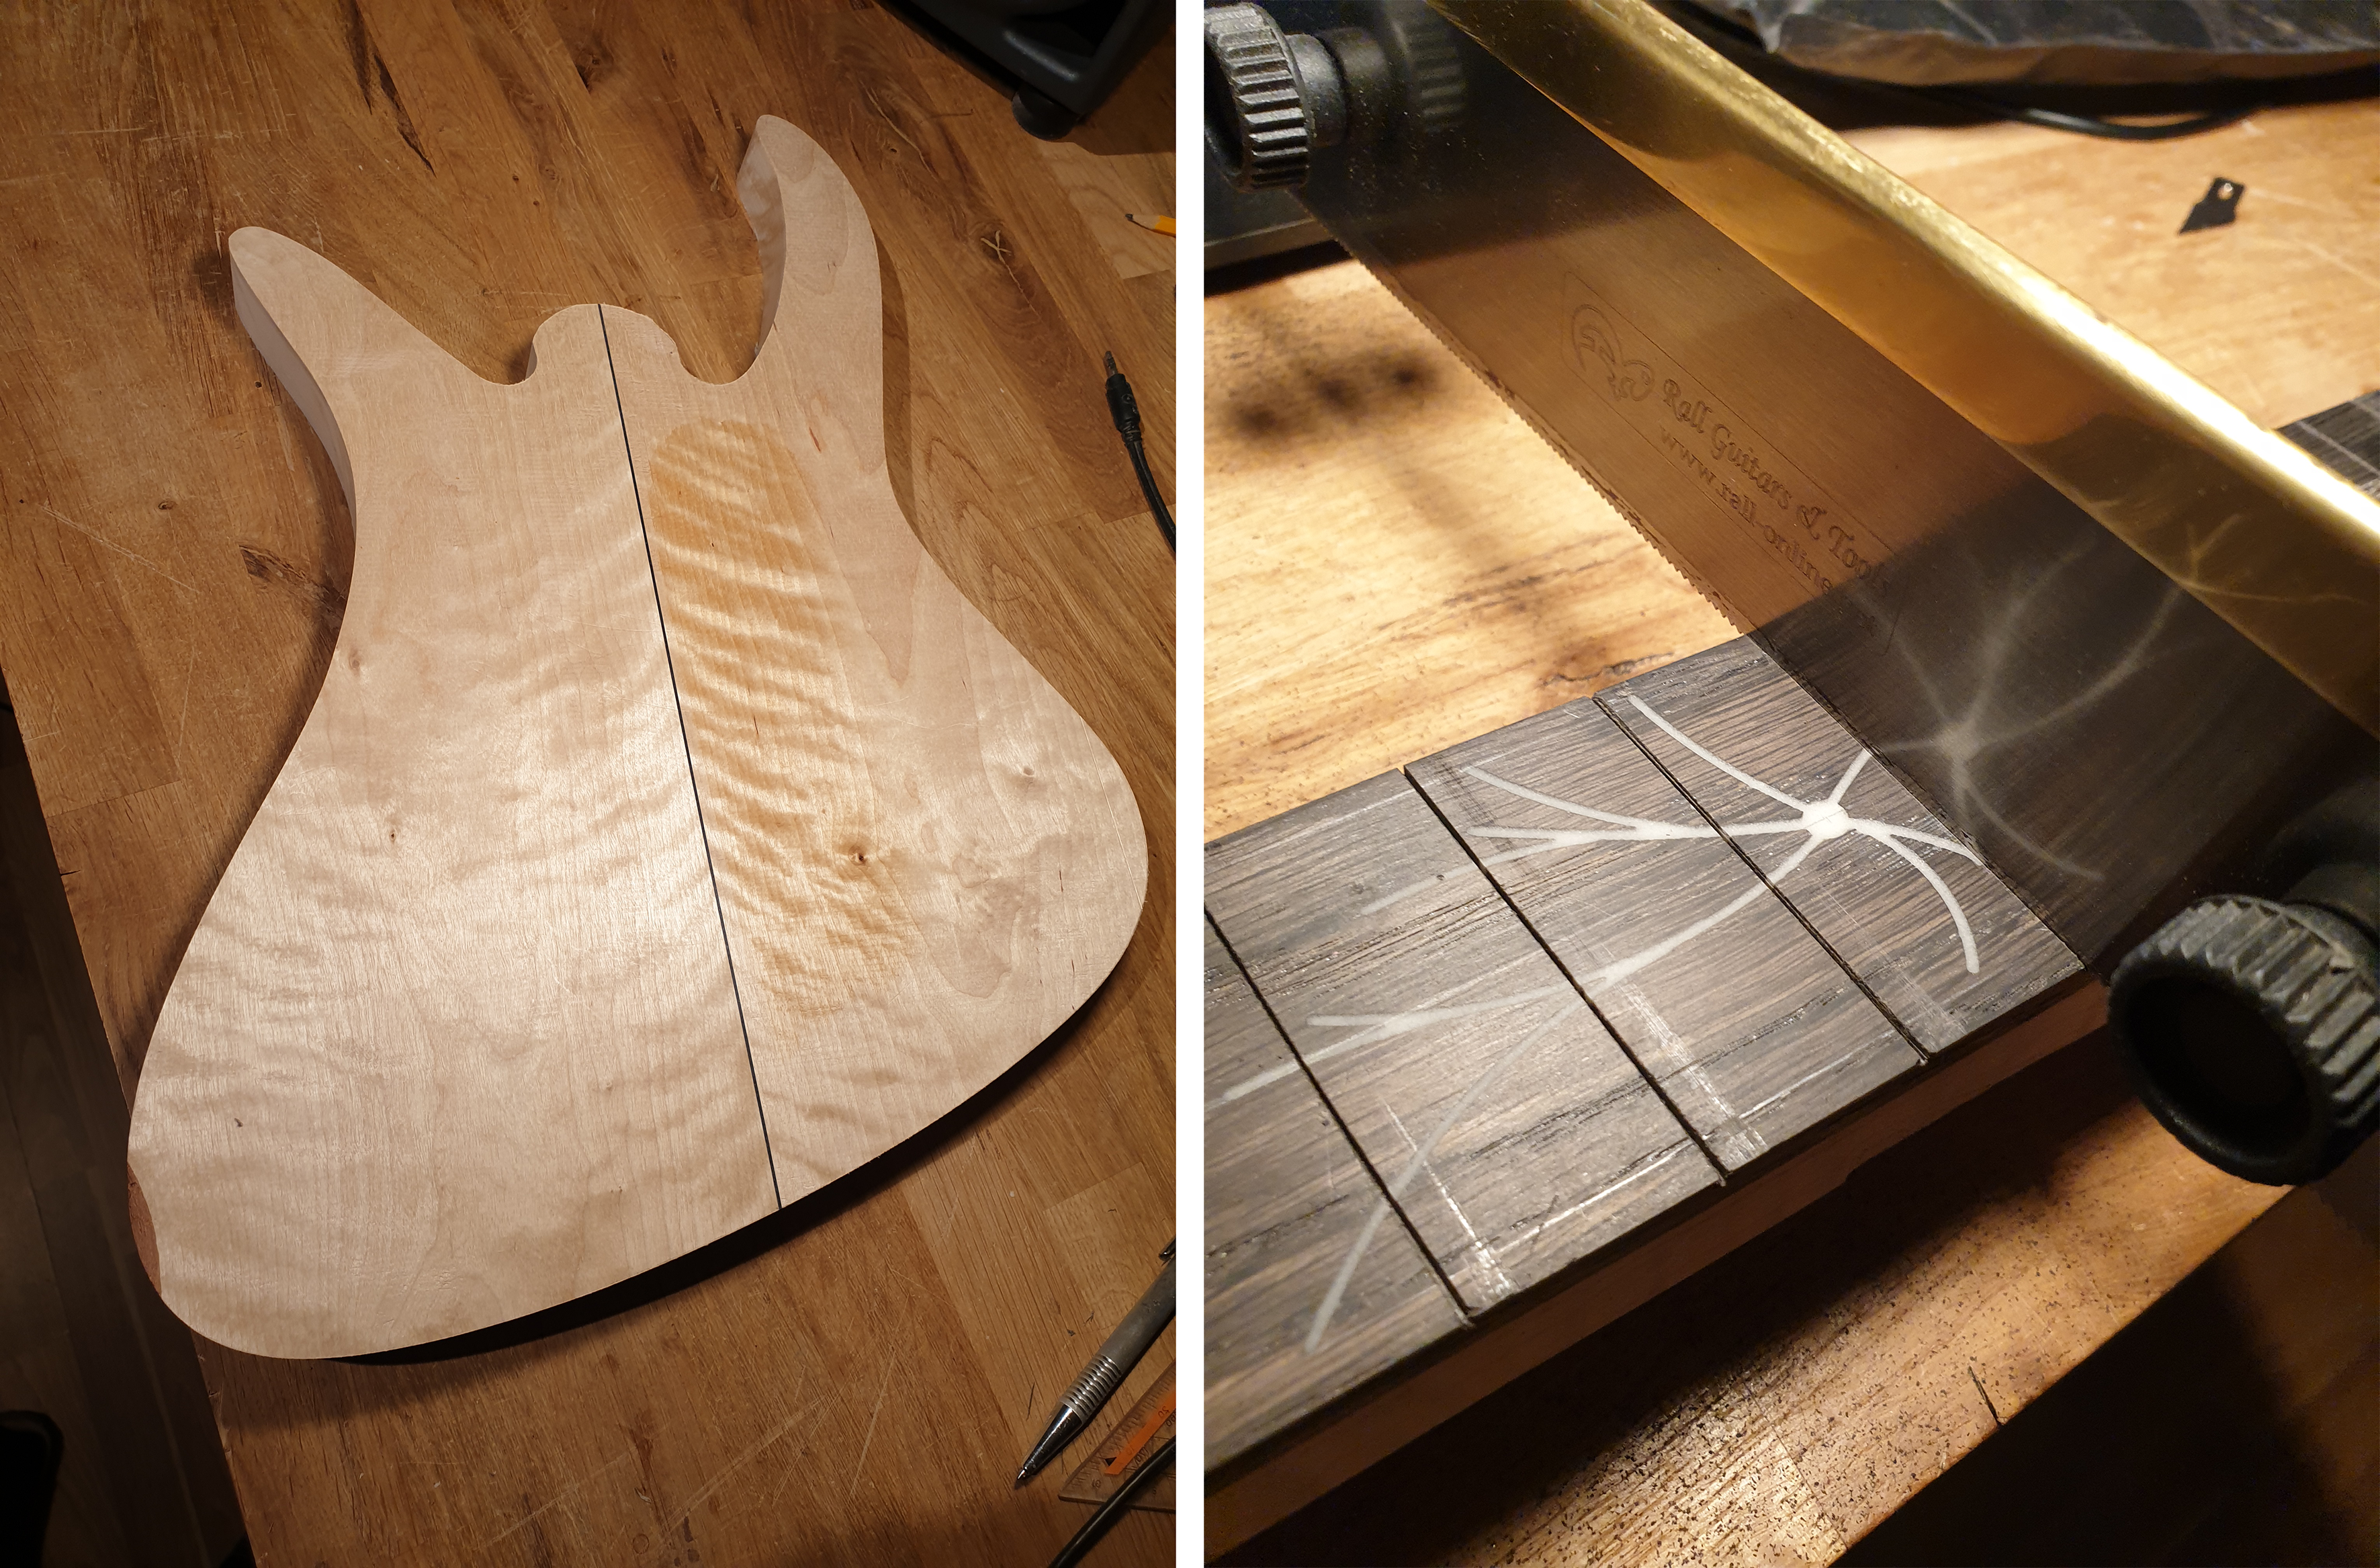
Next up on the list is the neck pocket and tenon. Stay tuned!
I went to the workshop and jointed/planed the birch body blanks. I glued them up with a 1mm black veneer as a centerline. This is the same kind of veneer that will also go in between the body and top, as well as the headstock. After thicknessing I cut out the shape at the bandsaw and routed the outline. Standard procedure.
The body blanks were rough sawn, so it was hard to imagine what the flamed birch might look like after it's planed. Now that I can see it, I'm not complaining
The front of the body and the top on the left, the back of the body on the right.
One more pic of the back with a wet surface to highlight the grain. The little brown patch on the edge will disappear with a bevel or roundover, not sure which one I'll choose. Oh yeah, I also cut fret slots.
Next up on the list is the neck pocket and tenon. Stay tuned!
'nother update.
Neck pocket time! The tenon was already routed earlier, so I made a tight-fitting template and routed the pocket. Again, the most important thing was the alignement of the center veneers in the neck and body, I think we're good here .
.
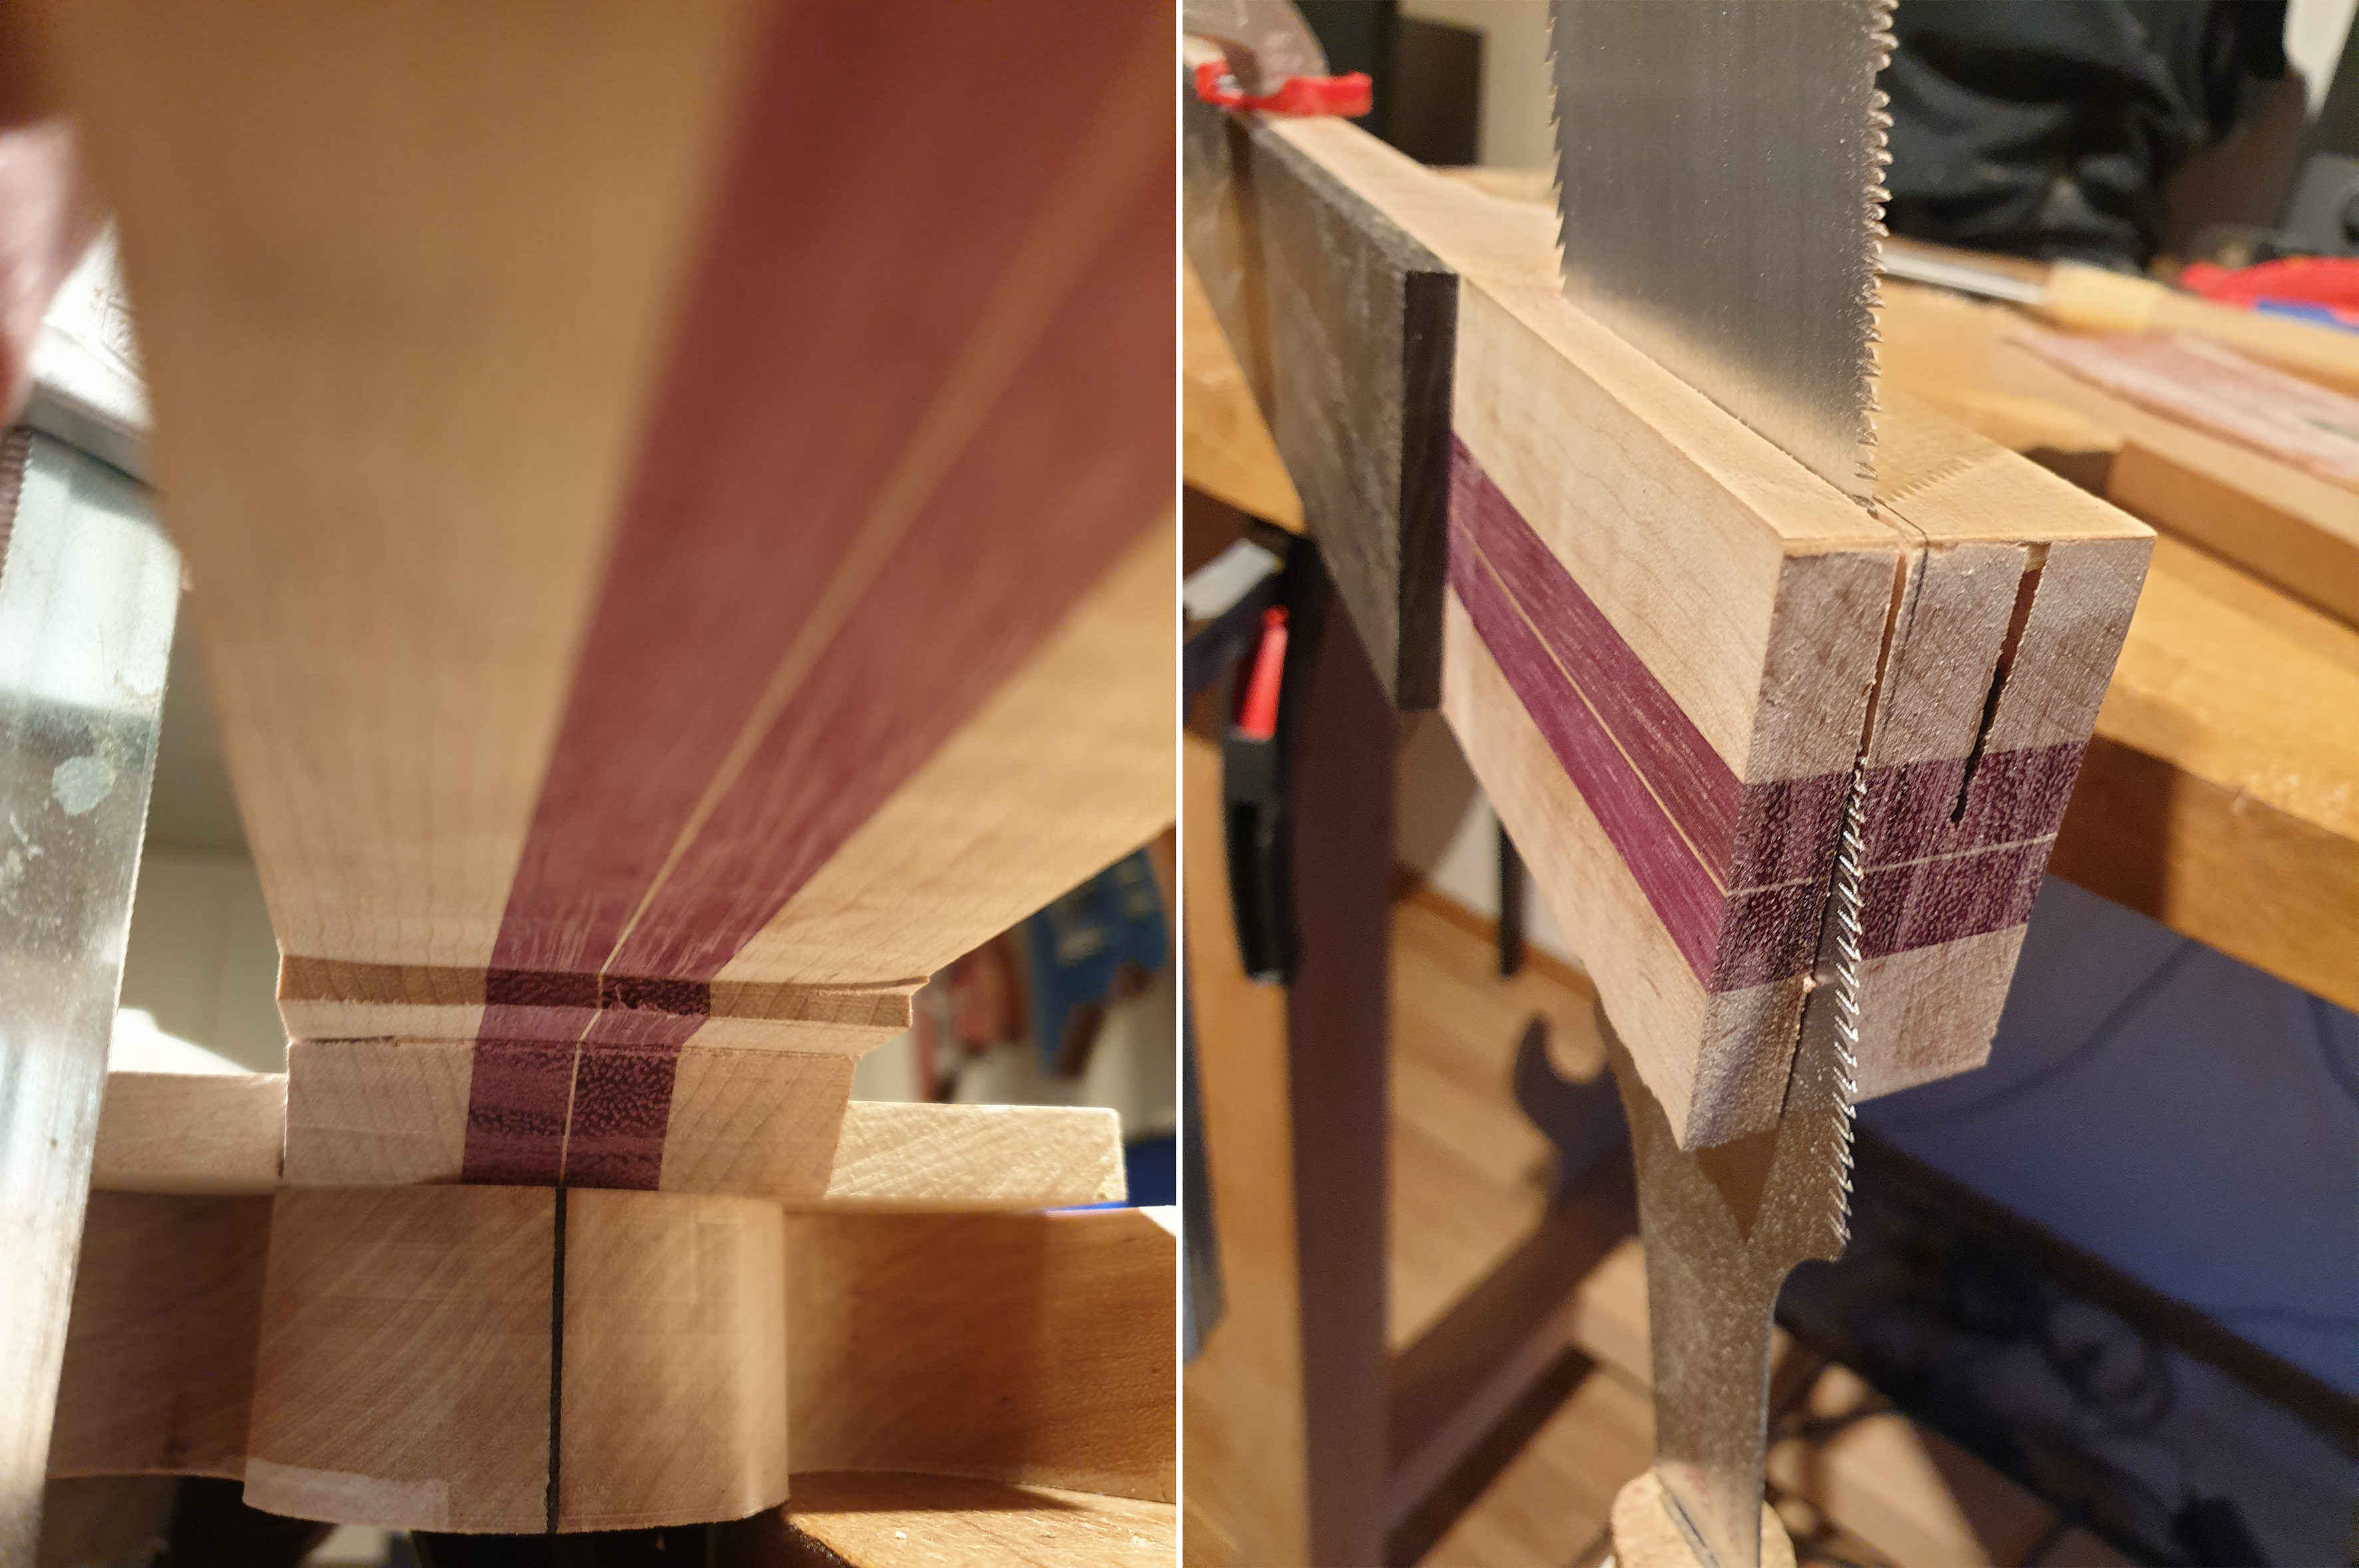
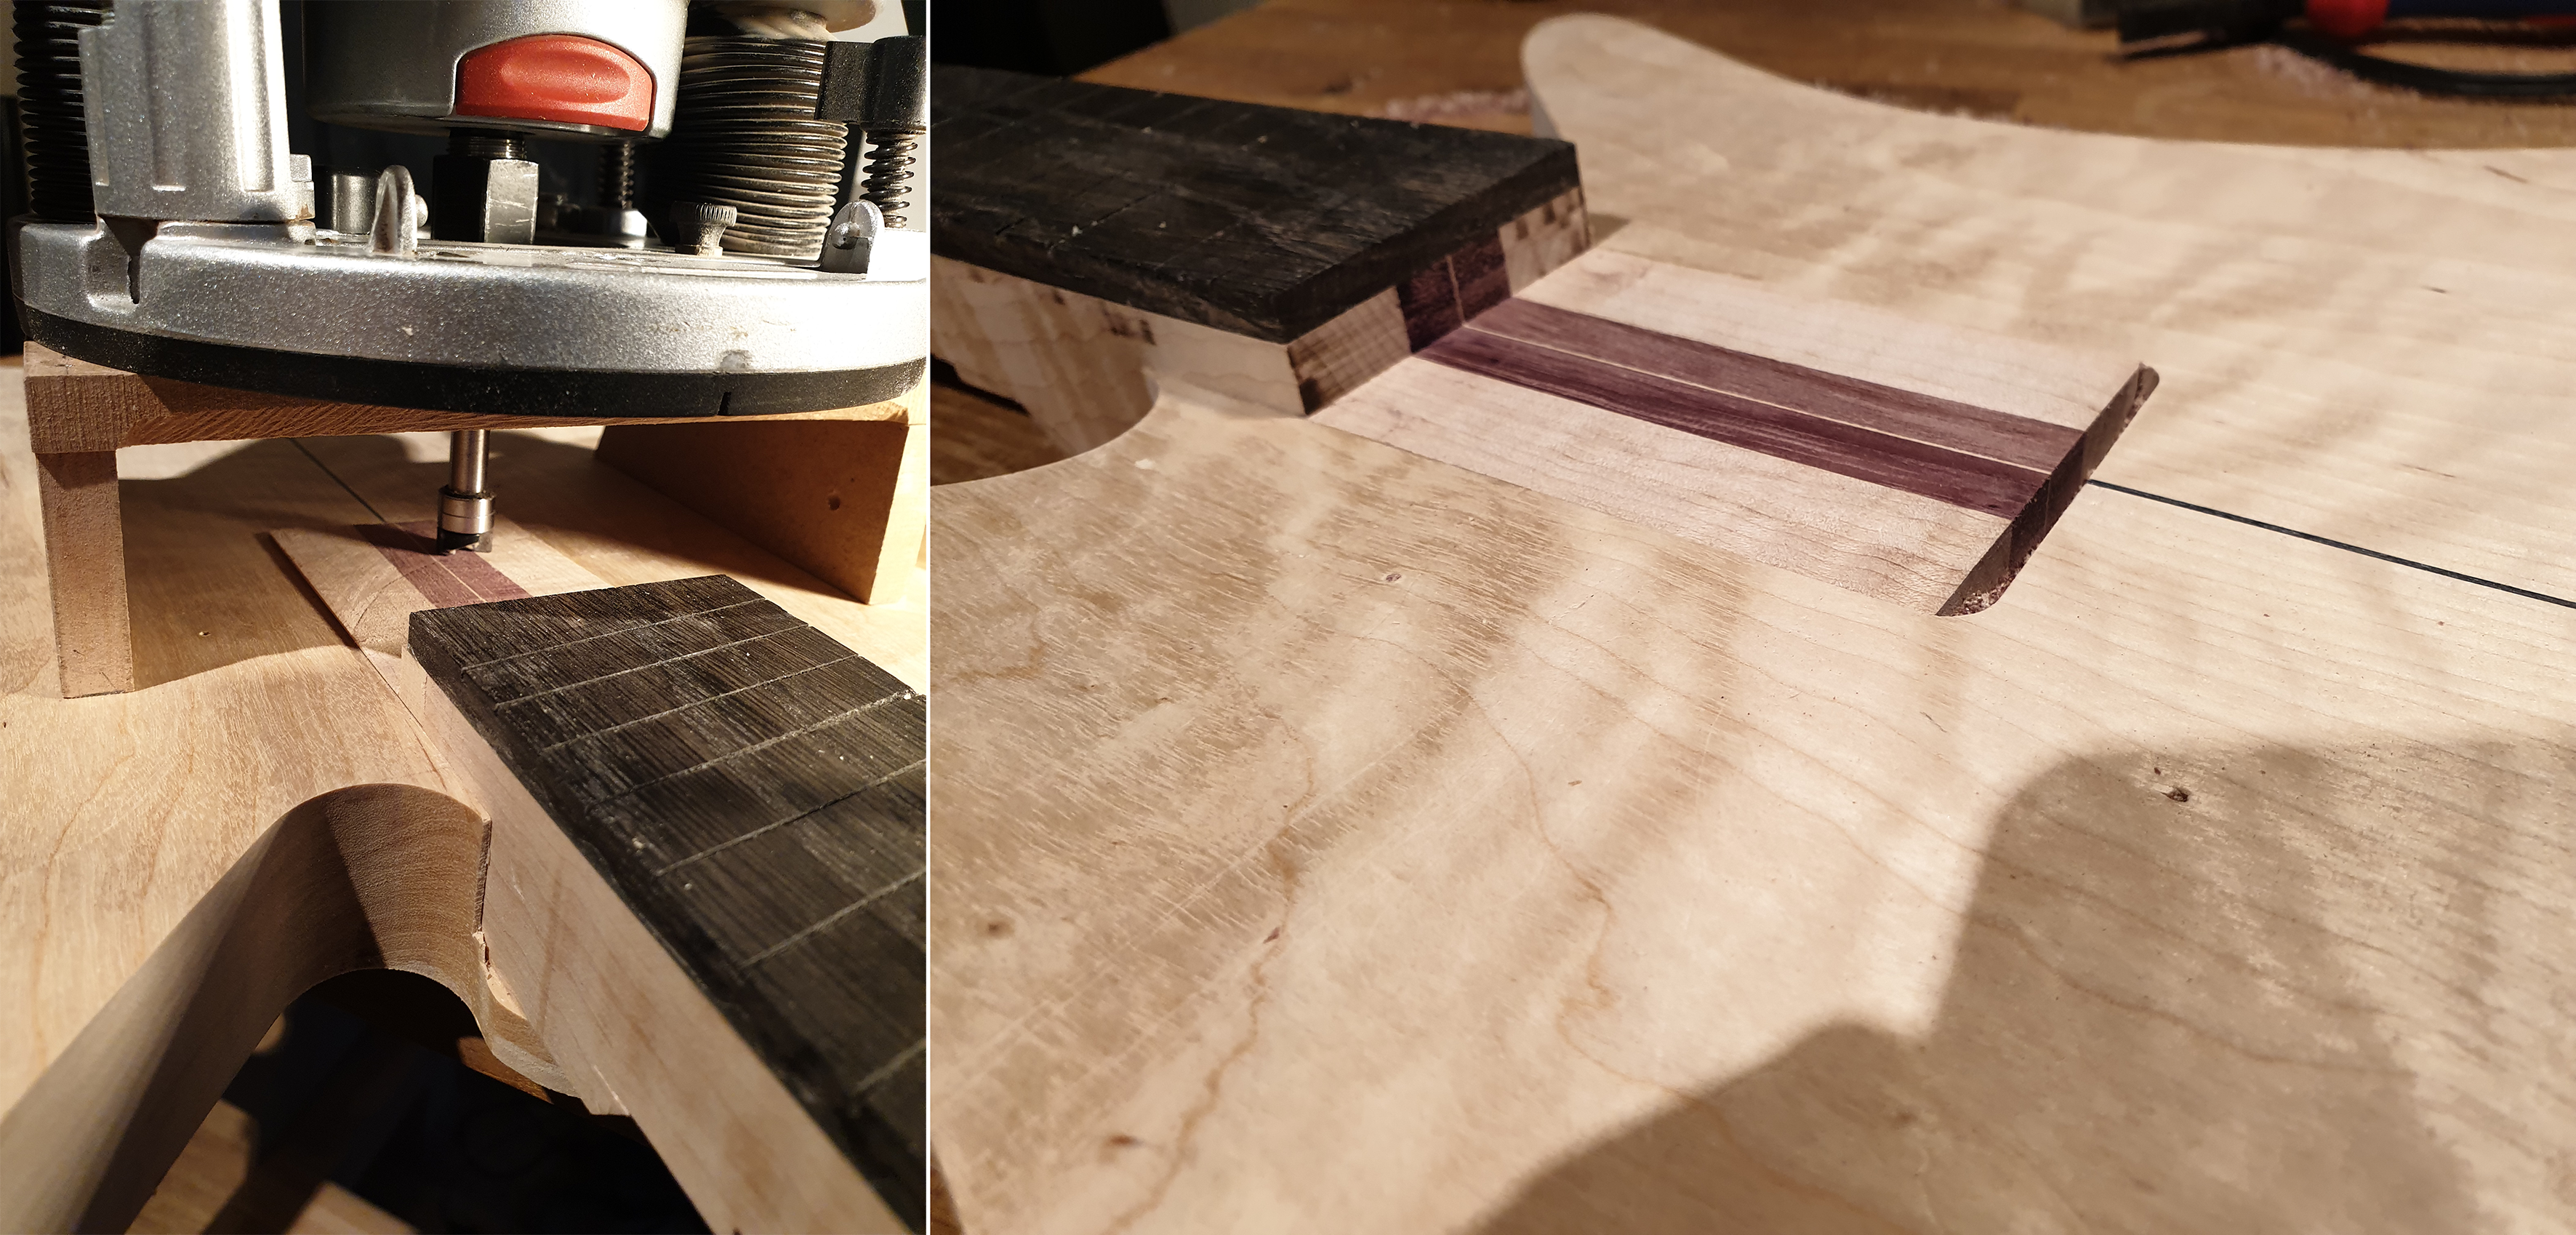
The neck tenon extends about four inches past the fretboard end, and that part will be sitting underneath the top. I removed the excess tenon thickness and used a router sled and the ultra short bearing bit to rout it flush with the top of the body. This way I can run the router right up against the fretboard and get a straight, square edge in the process. I routed a bit slow and there are some burnmarks, but overall it's good.
Now that the neck fits into the pocket and everything is trimmed flush, I can make a first mockup, just for fun!
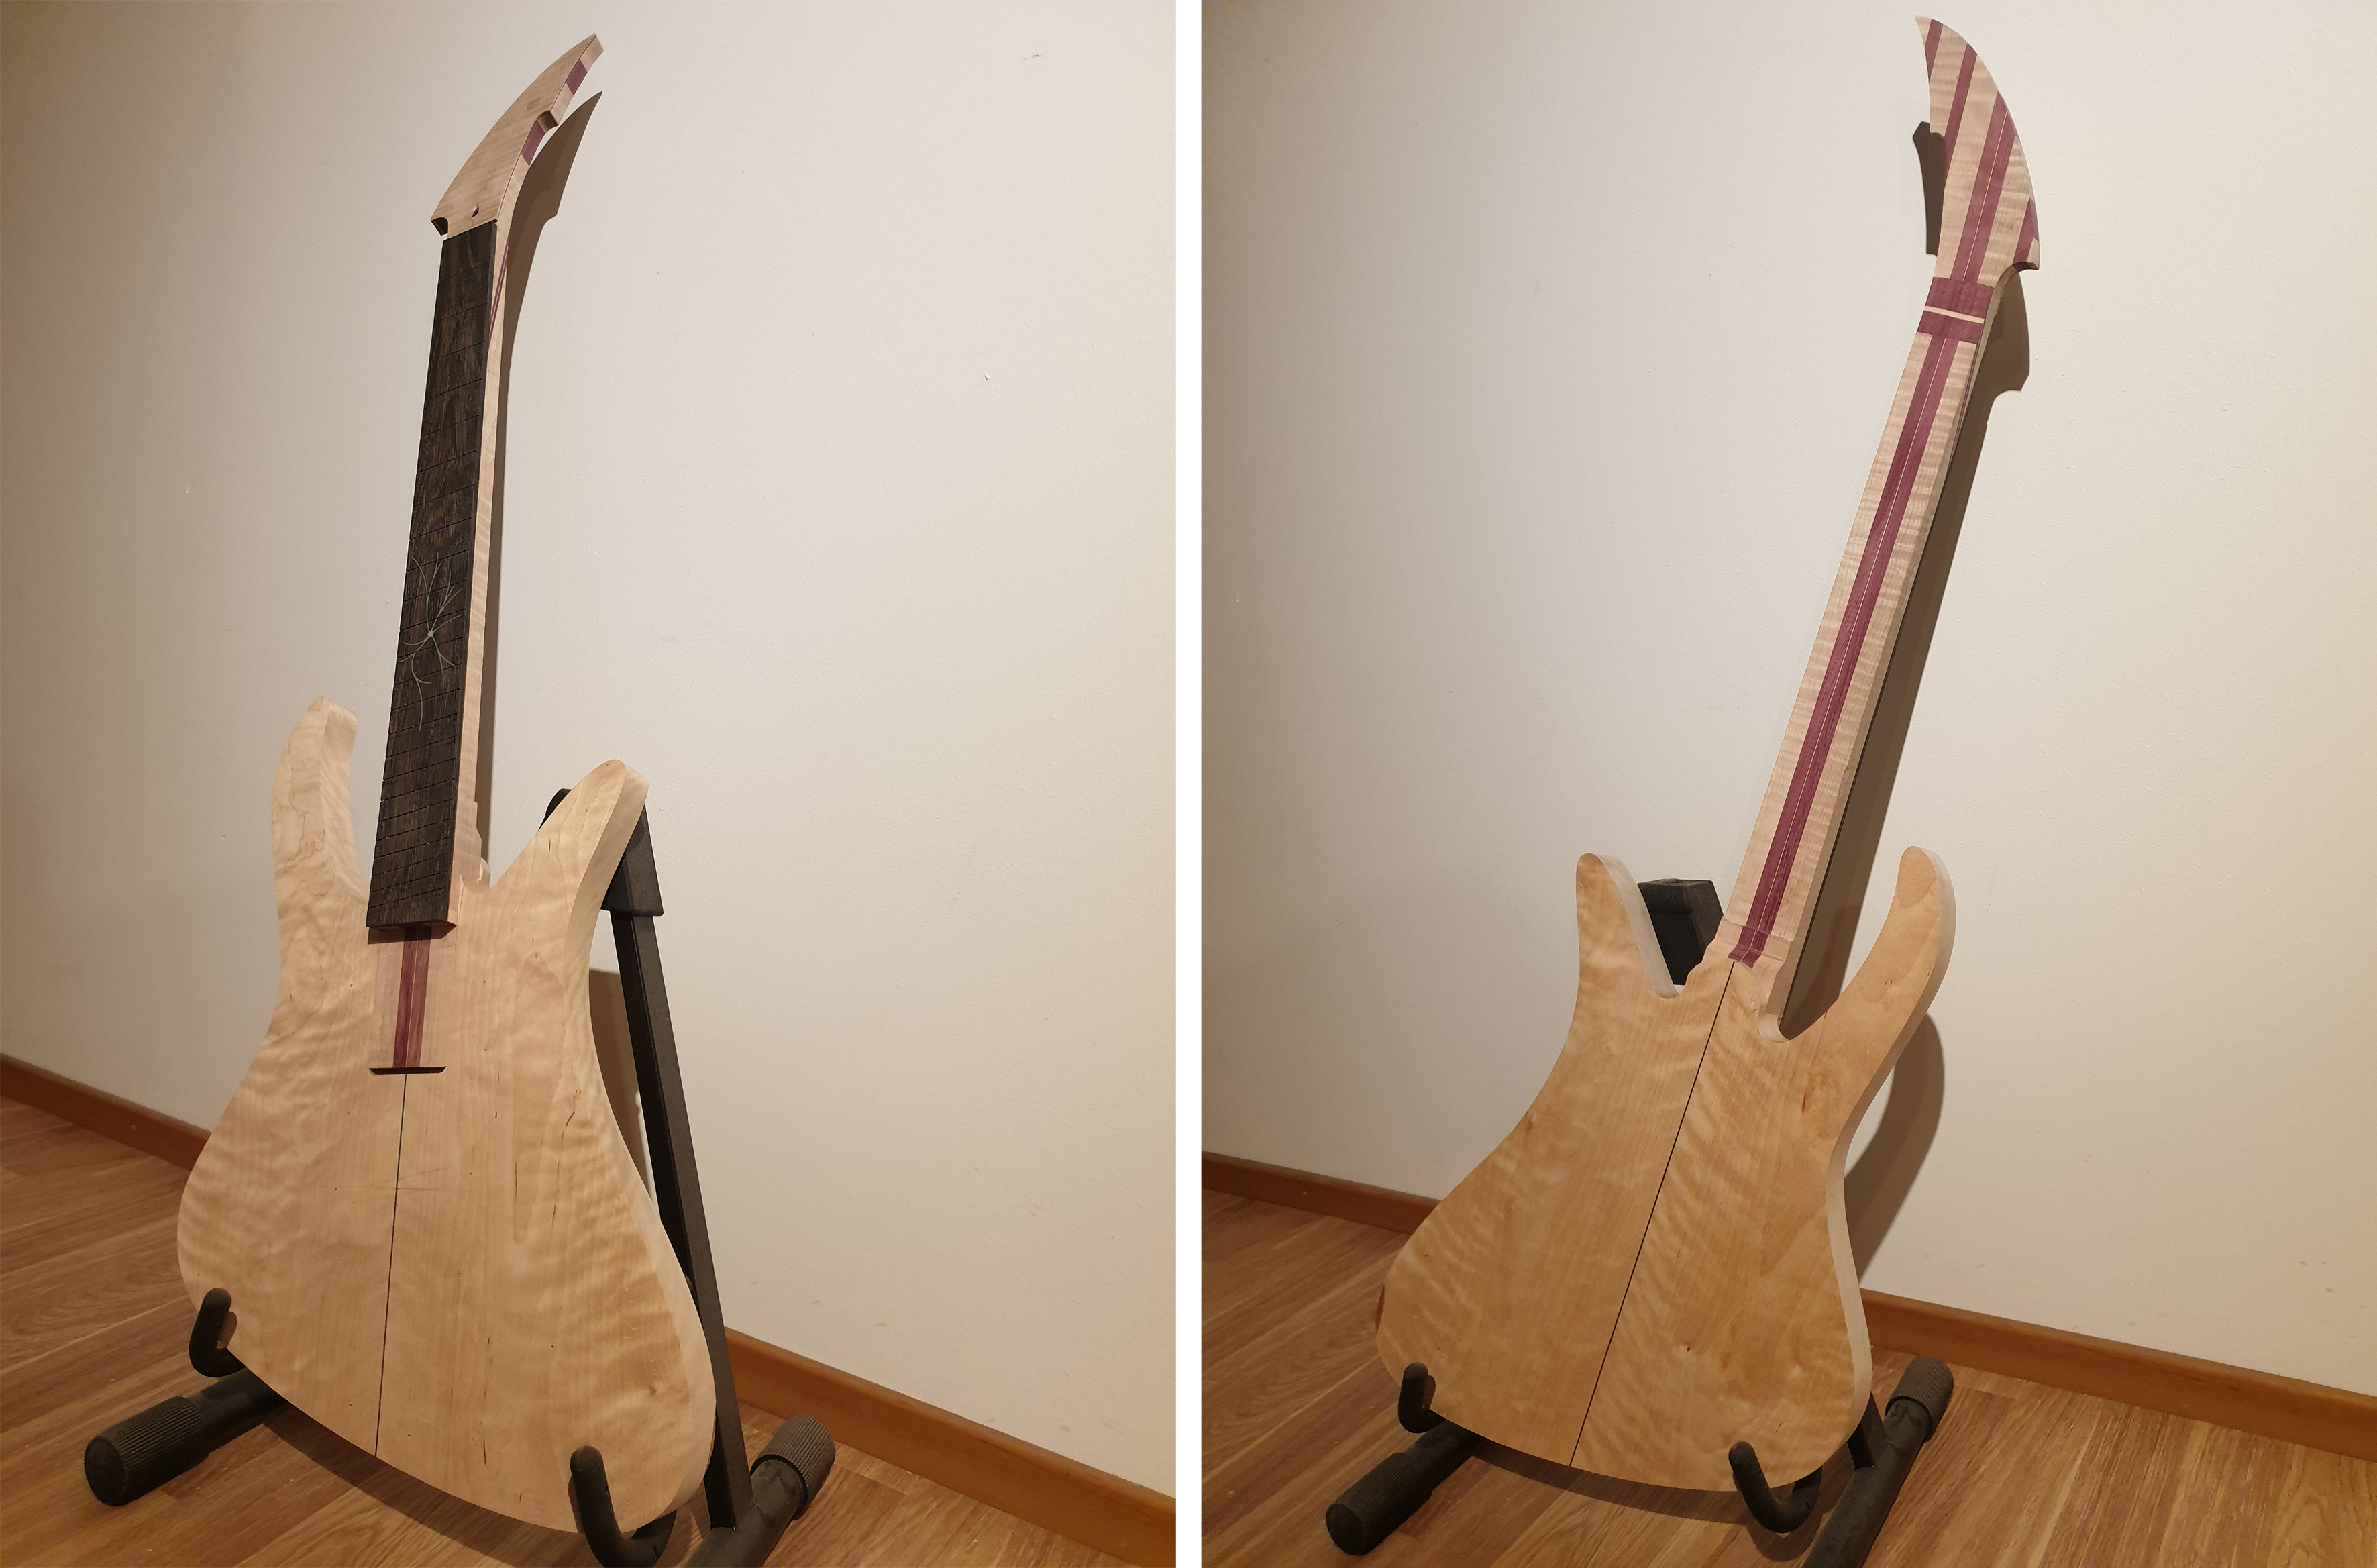
Well, not only for fun, but also to see how the instrument balances from the top horn. Considering that the maple top is still missing (a bit more than 1 lbs) and the neck is not shaped yet, it is already balancing much steeper than I expected. I think I can chamber the heck out of this, considering that I'll use headless hardware.
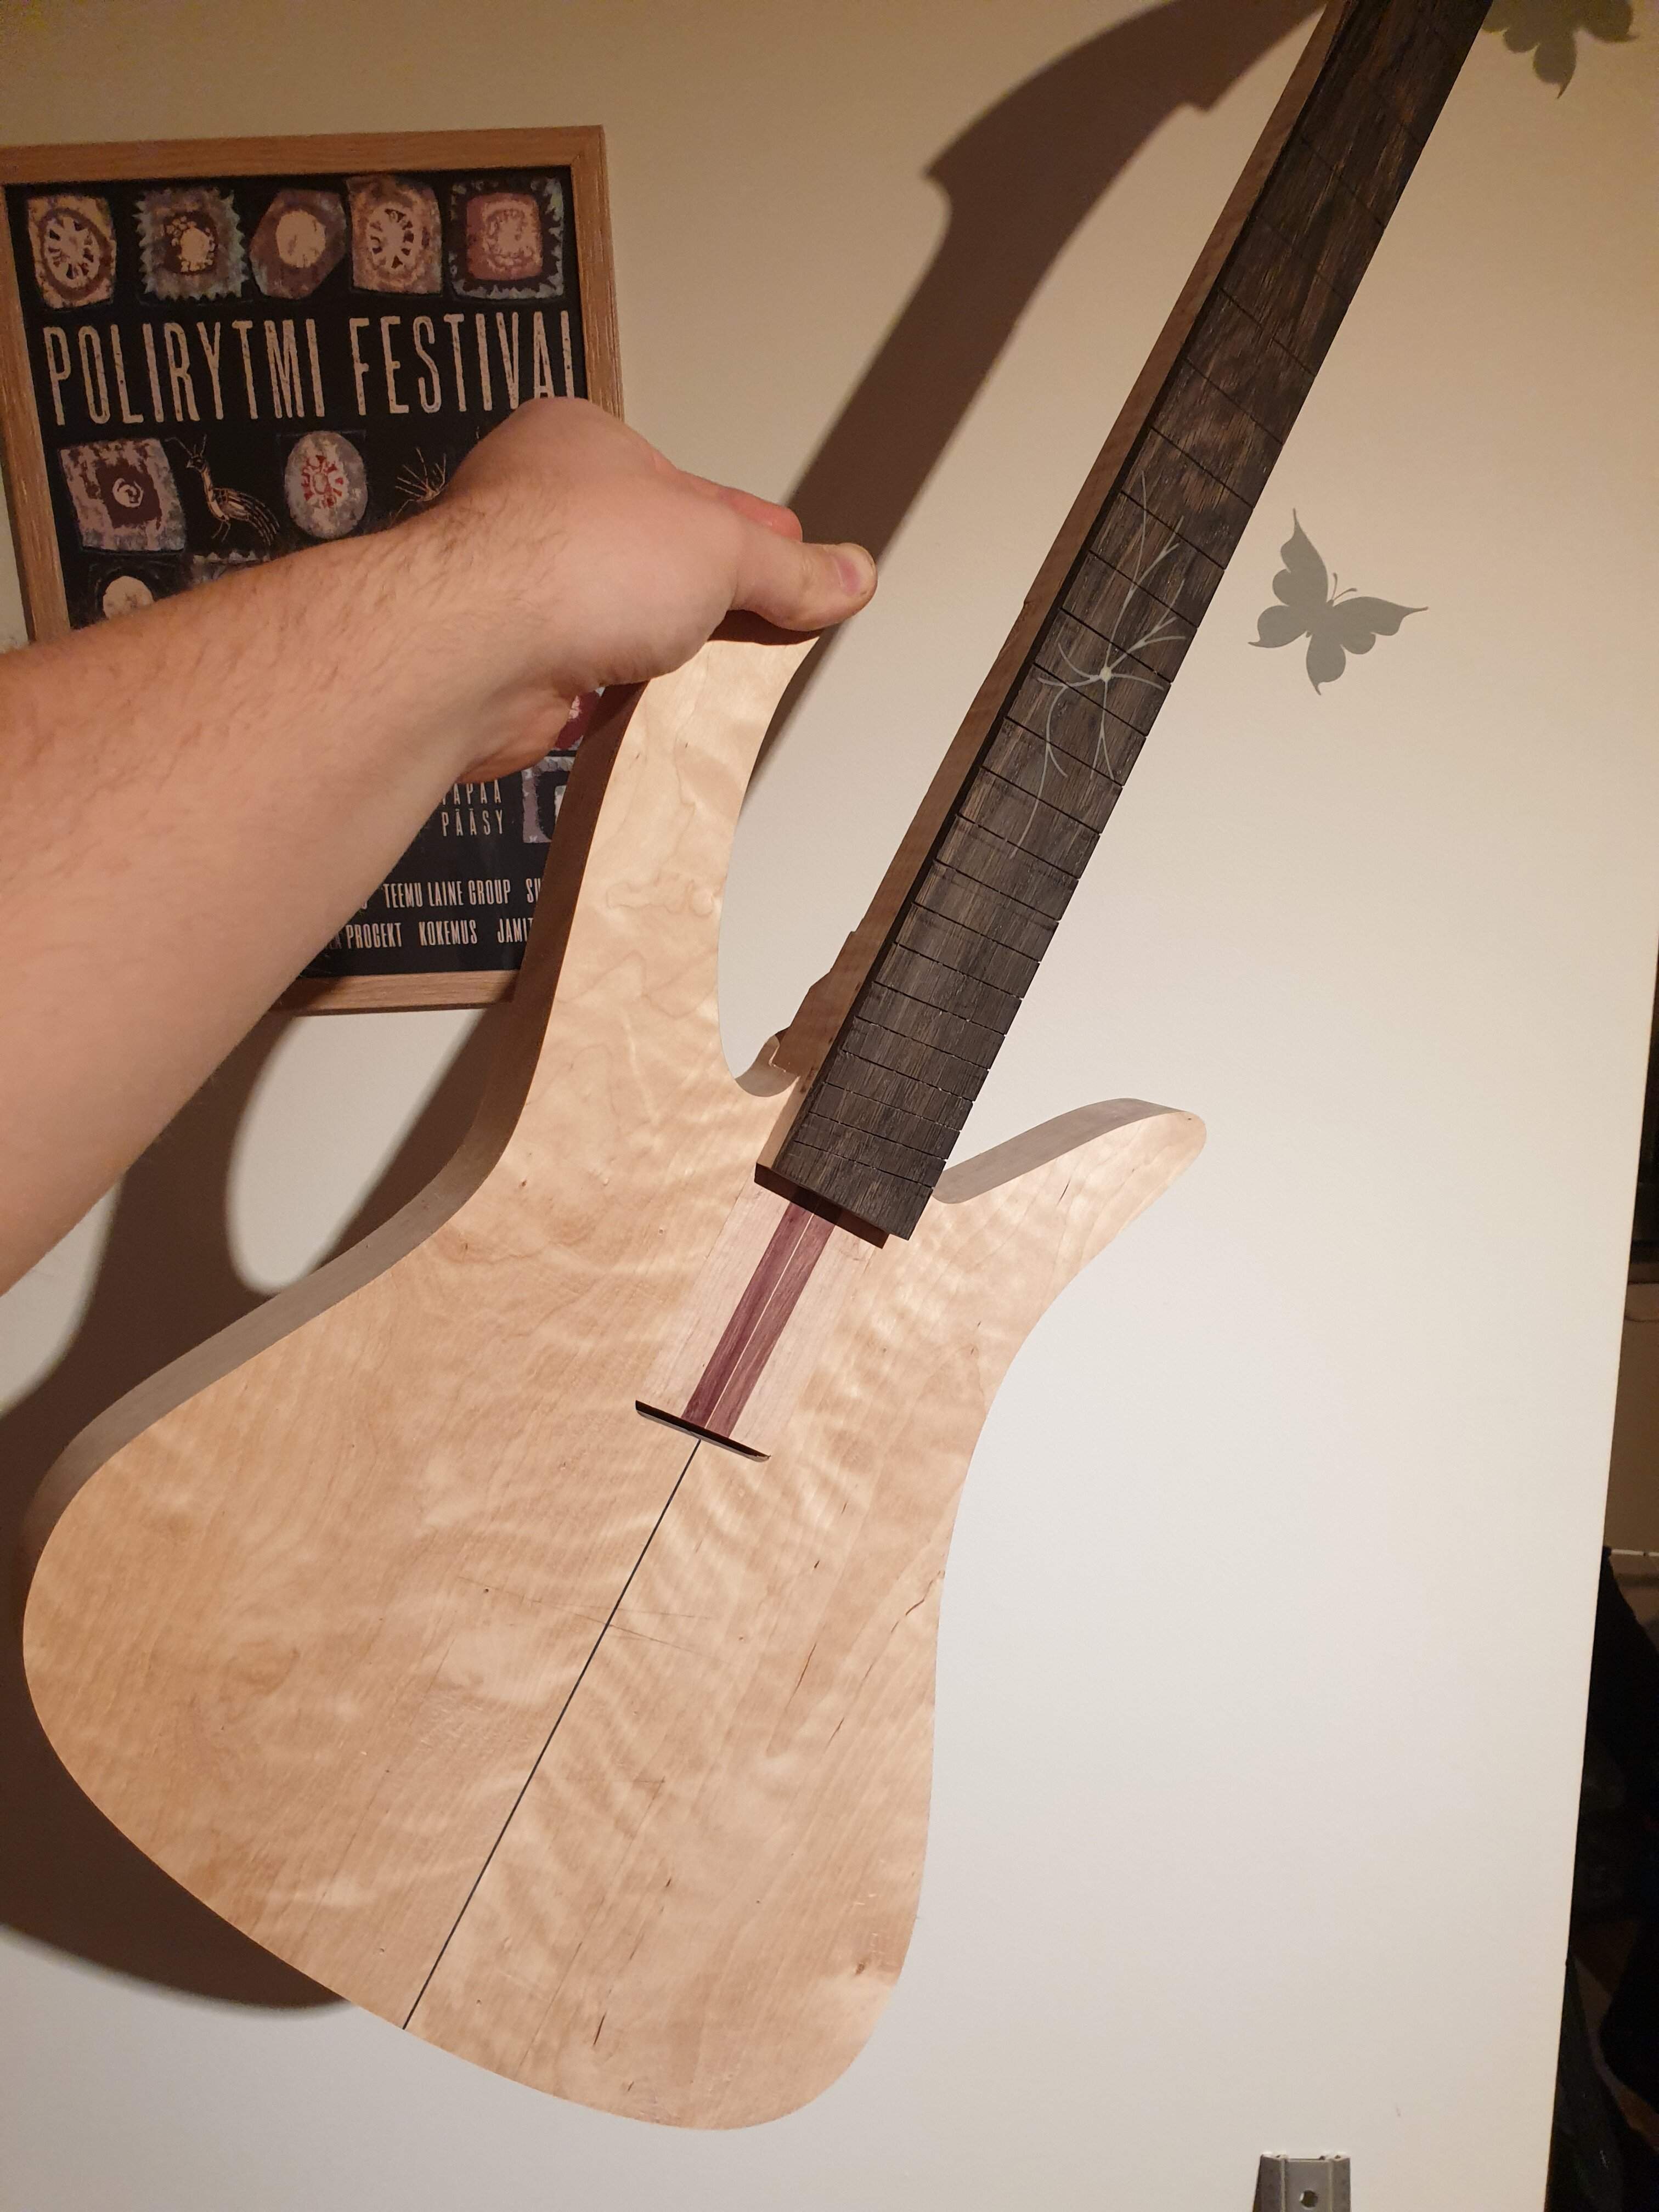
The weight of the wood structure is 3.1 kg /6.8 lbs including the top. I might be able to get this one below 3 kg when it's finished. The control cavity and the headless tuner recess are yet to be cut, that will remove some weight.
Neck pocket time! The tenon was already routed earlier, so I made a tight-fitting template and routed the pocket. Again, the most important thing was the alignement of the center veneers in the neck and body, I think we're good here
.The neck tenon extends about four inches past the fretboard end, and that part will be sitting underneath the top. I removed the excess tenon thickness and used a router sled and the ultra short bearing bit to rout it flush with the top of the body. This way I can run the router right up against the fretboard and get a straight, square edge in the process. I routed a bit slow and there are some burnmarks, but overall it's good.
Now that the neck fits into the pocket and everything is trimmed flush, I can make a first mockup, just for fun!
Well, not only for fun, but also to see how the instrument balances from the top horn. Considering that the maple top is still missing (a bit more than 1 lbs) and the neck is not shaped yet, it is already balancing much steeper than I expected. I think I can chamber the heck out of this, considering that I'll use headless hardware.
The weight of the wood structure is 3.1 kg /6.8 lbs including the top. I might be able to get this one below 3 kg when it's finished. The control cavity and the headless tuner recess are yet to be cut, that will remove some weight.
I spent the last two weeks recording a few songs with my band, so I had very little lutherie going on. This weekend I finally get a chance to catch up.
Here's where I'm at:
1. Neck: Fret slots are cut and the board is radiused. The small bubble in the inlay did not completely disappear after radius sanding, so I'll do a little touchup when I'm filling the side dots with the same resin/pigment mix, probably after installing frets. The back of the neck is still square.
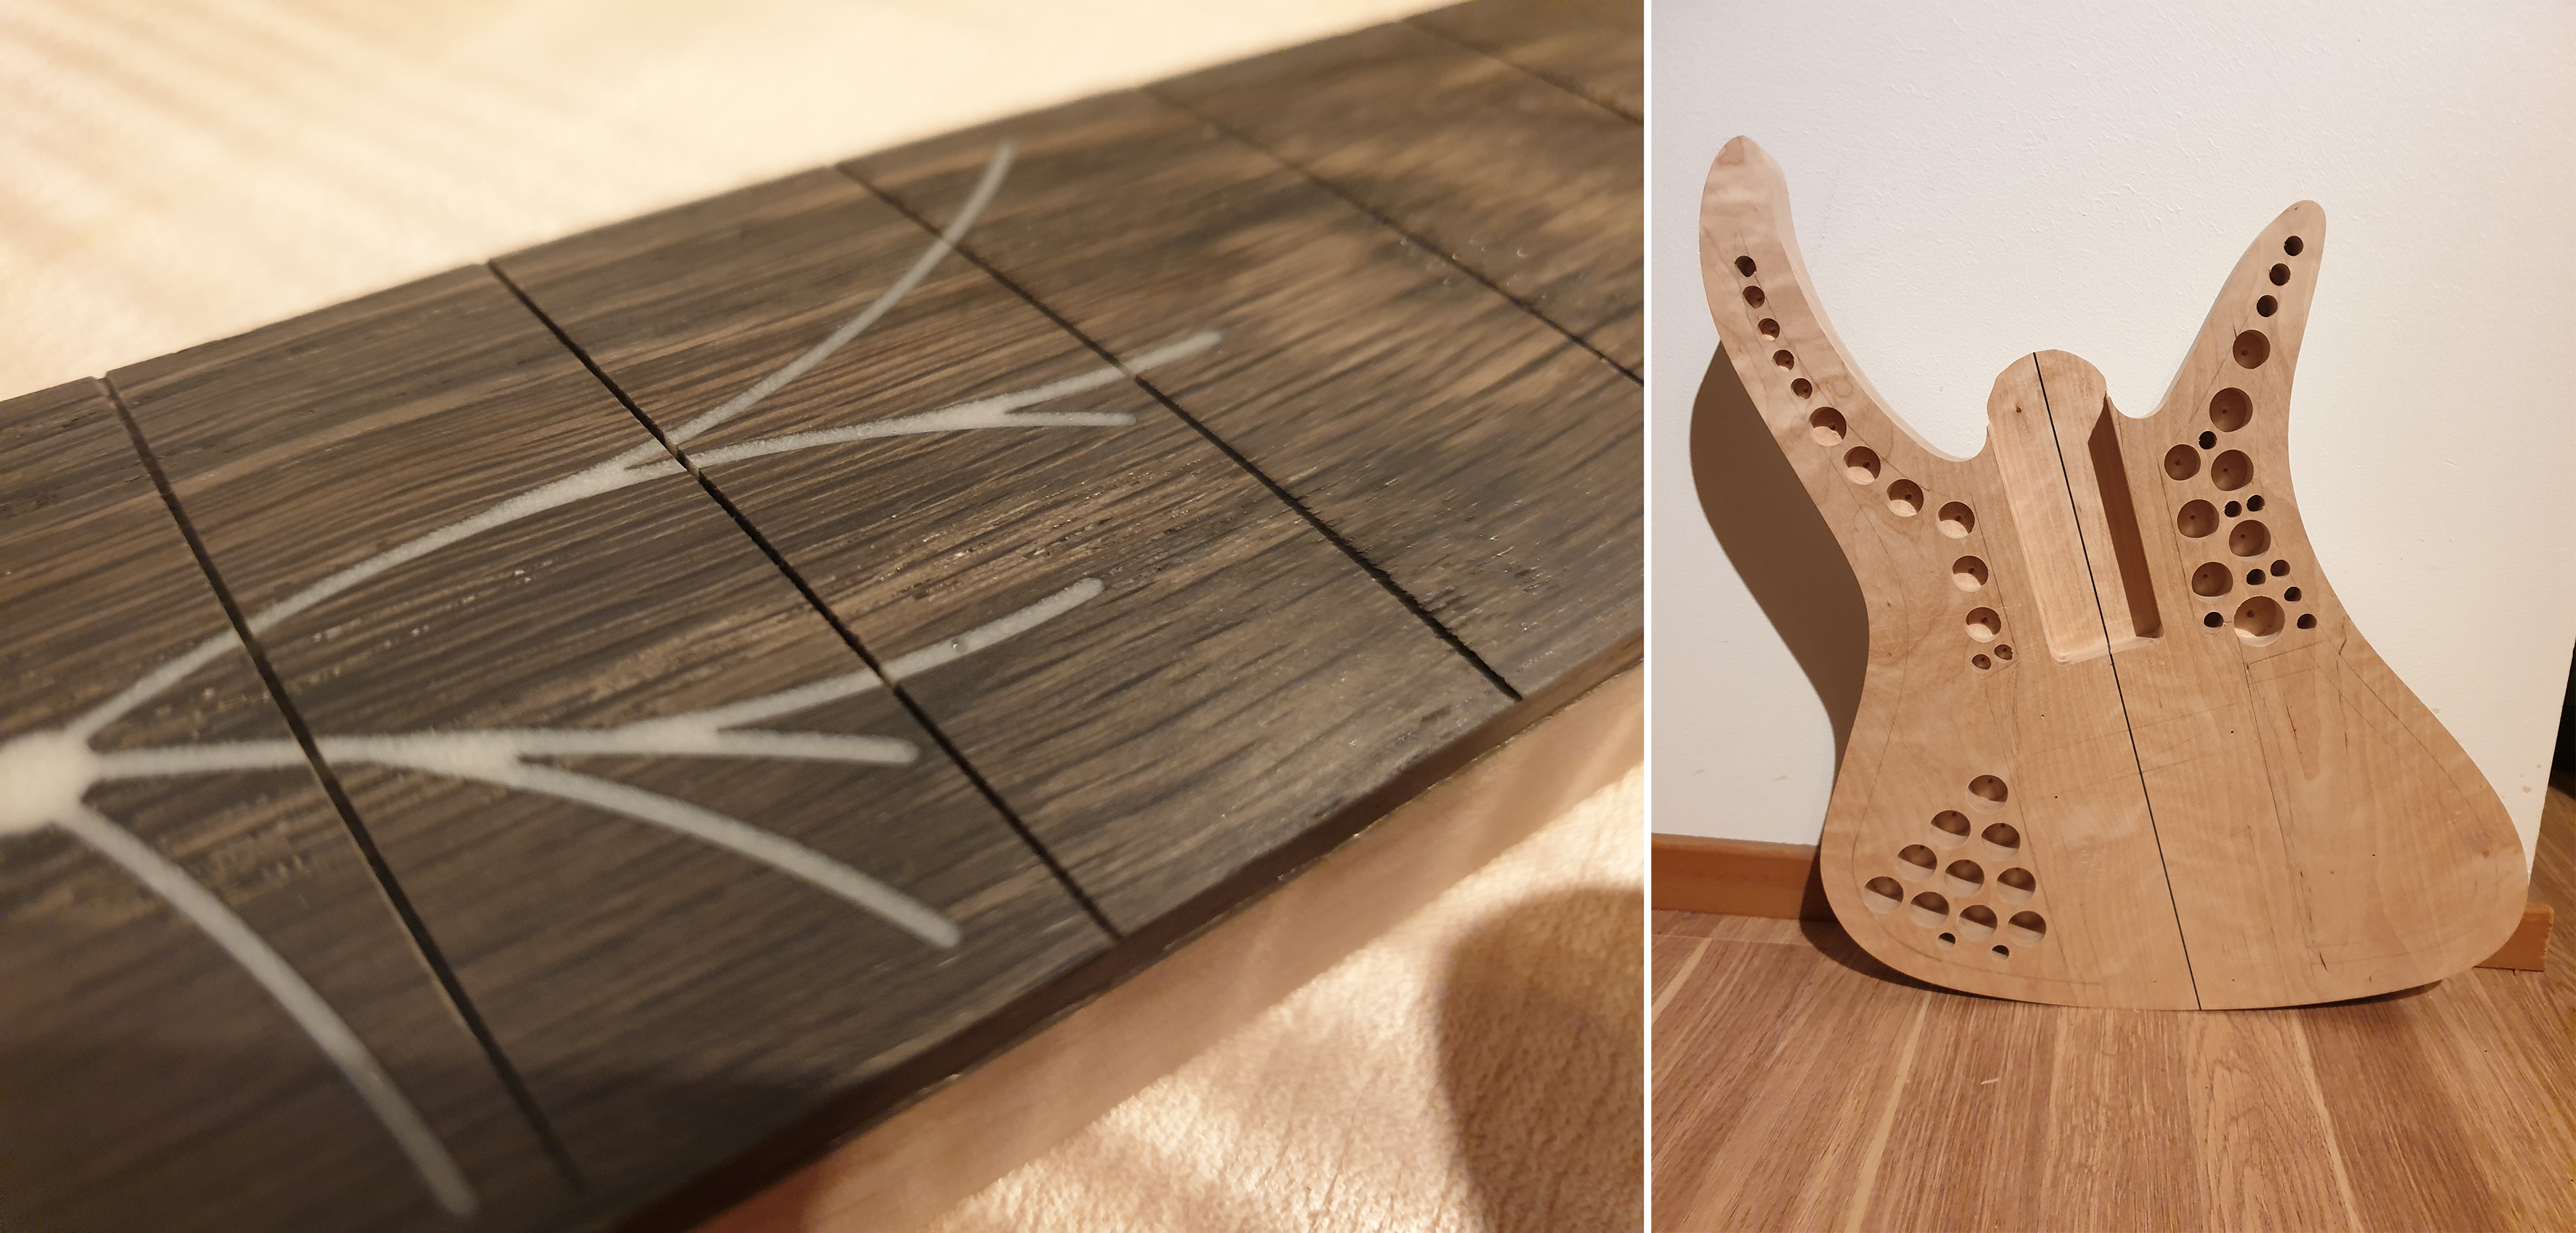
2. Body: The shape is routed and the neck pocket is done. Today I cut the fretboard cutout into the top. Since I'm using a full-width tenon, I modified the neck pocket template for the top cutout. @MPU mentioned in another thread that the little dremel router bits can be used as template bits running the shaft along the template, so I tried it for the corners. It worked really well and reduced the amount of chisel work significantly, but of course the sharp corners are done by hand. I'm happy with the fit. I also drilled quite a few weight relief holes in the body.
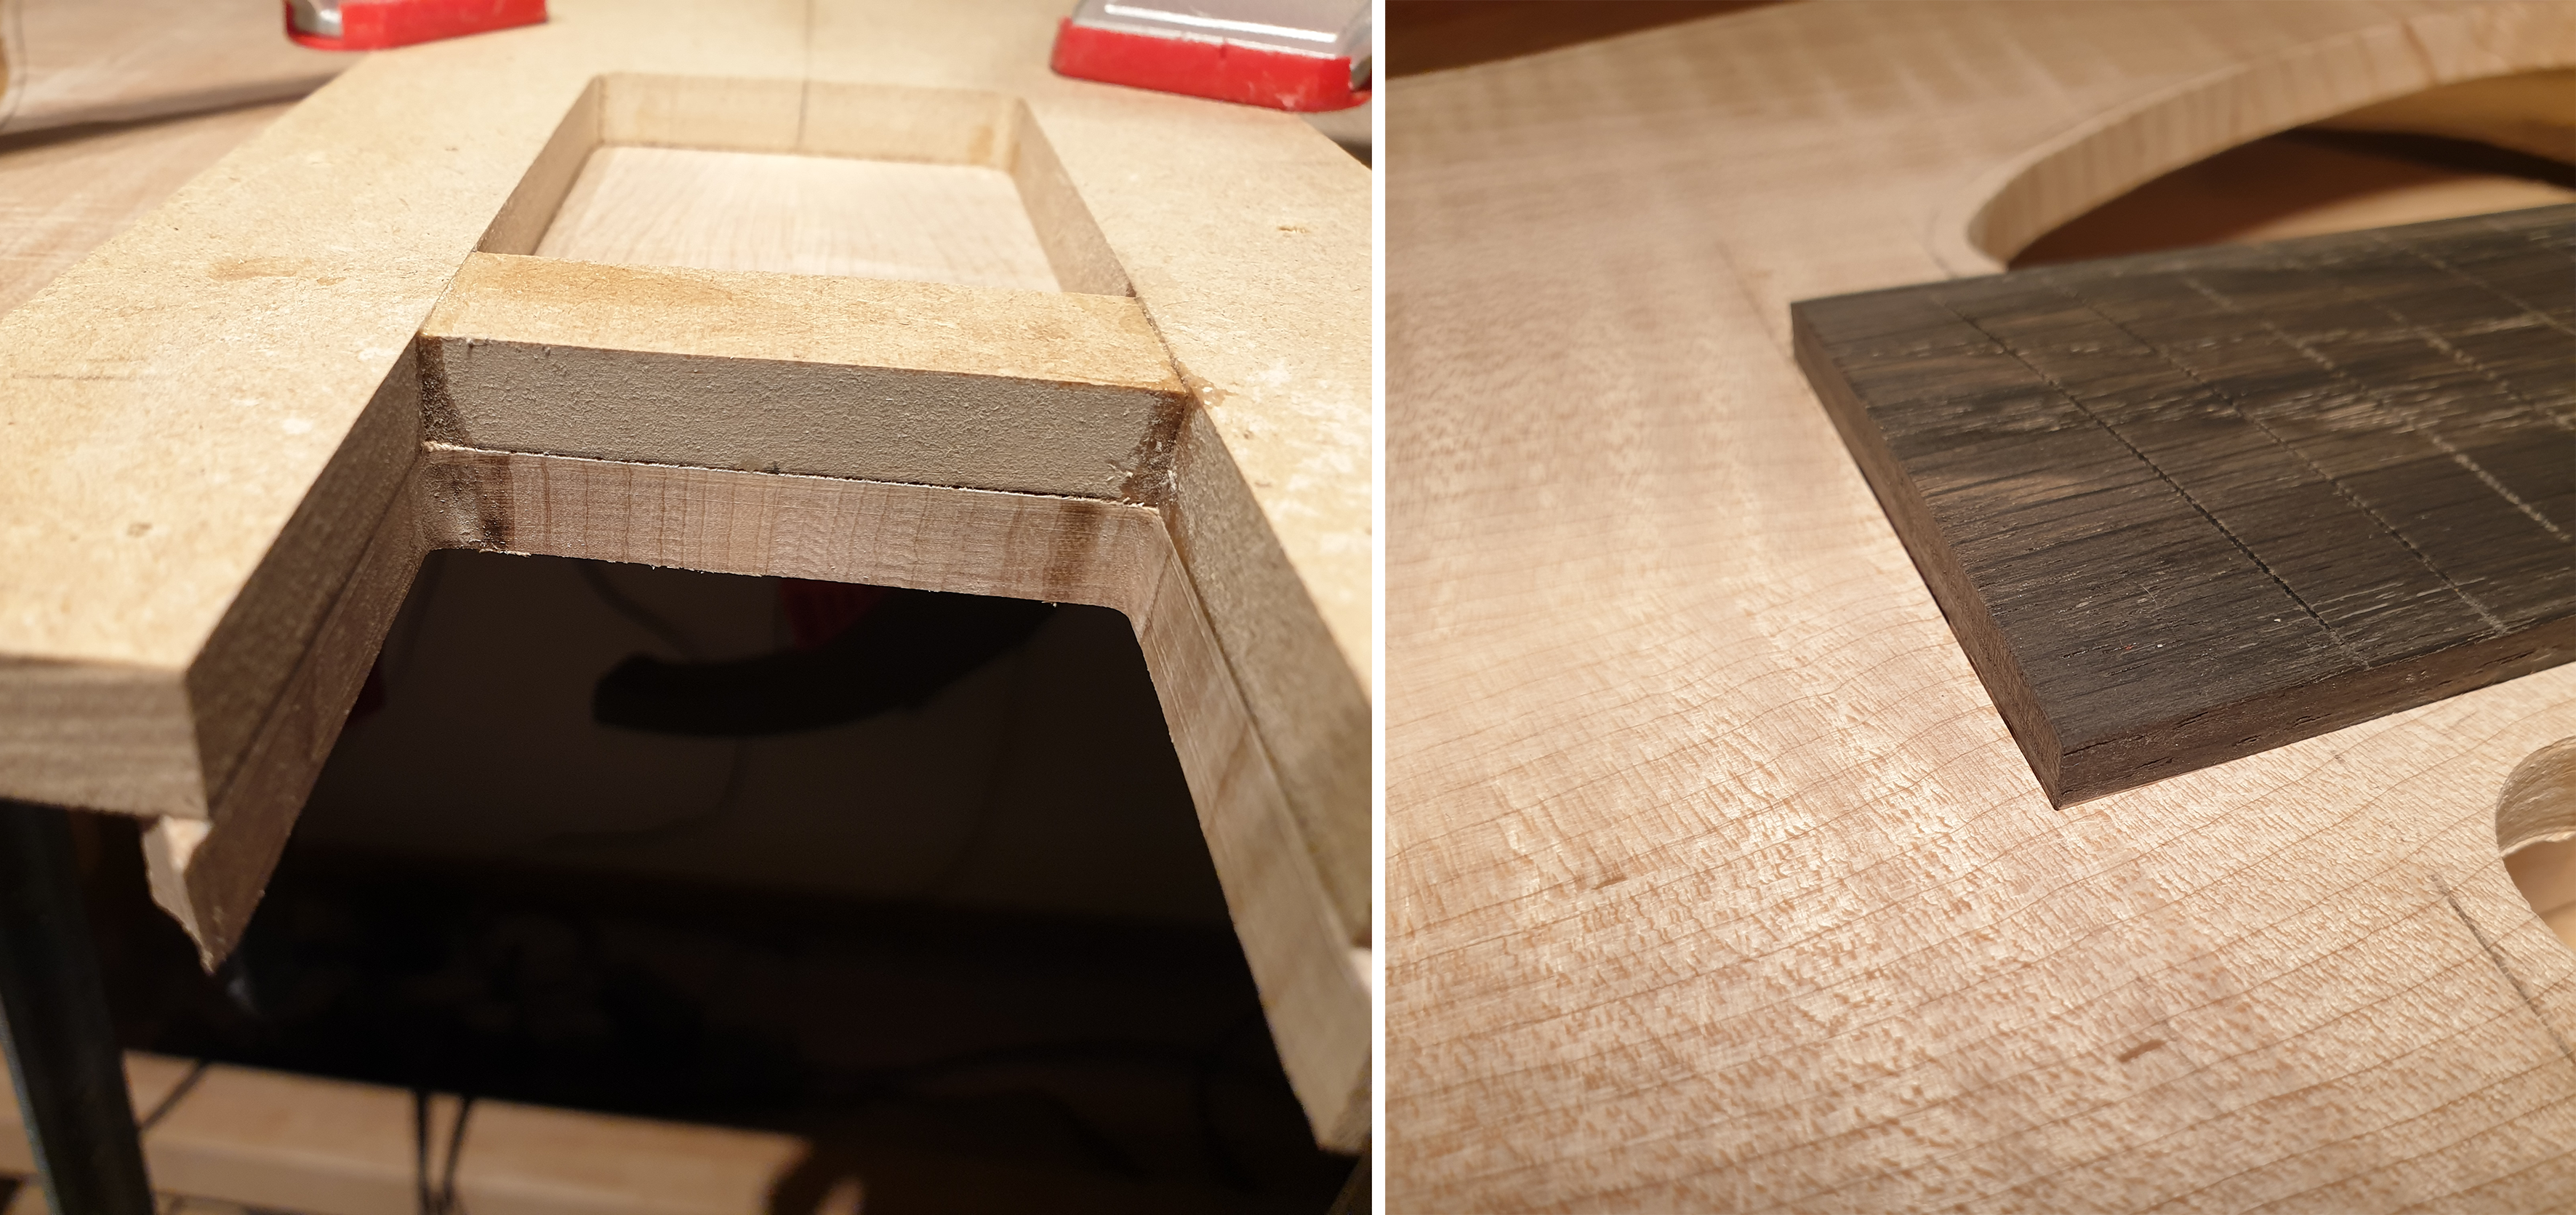
During this weekend I want to glue the top on. There will be a 1mm black poplar veneer between the top and body. I'm currently contemplating how I want to deal with the neck pocket. The tenon will sit underneath the top (and underneath the veneer) and can slide in from the heel, but I have to make sure that the veneer is properly pressed to the top. I could use the neck tenon itself to support the veneer from the back, hoping that I can get it back out afterwards, or I could use a dummy tenon just for the gluing step. Thoughts?
Here's where I'm at:
1. Neck: Fret slots are cut and the board is radiused. The small bubble in the inlay did not completely disappear after radius sanding, so I'll do a little touchup when I'm filling the side dots with the same resin/pigment mix, probably after installing frets. The back of the neck is still square.
2. Body: The shape is routed and the neck pocket is done. Today I cut the fretboard cutout into the top. Since I'm using a full-width tenon, I modified the neck pocket template for the top cutout. @MPU mentioned in another thread that the little dremel router bits can be used as template bits running the shaft along the template, so I tried it for the corners. It worked really well and reduced the amount of chisel work significantly, but of course the sharp corners are done by hand. I'm happy with the fit. I also drilled quite a few weight relief holes in the body.
During this weekend I want to glue the top on. There will be a 1mm black poplar veneer between the top and body. I'm currently contemplating how I want to deal with the neck pocket. The tenon will sit underneath the top (and underneath the veneer) and can slide in from the heel, but I have to make sure that the veneer is properly pressed to the top. I could use the neck tenon itself to support the veneer from the back, hoping that I can get it back out afterwards, or I could use a dummy tenon just for the gluing step. Thoughts?

Two more options:
1. Glue the veneer to the underside of the top first, then glue the assembly to the body.
2. Glue the veneer to the body, trim it to the edges of the neck pocket, then glue the top on. Then glue another piece of veneer to the neck tenon to bring it back to the correct thickness.
1. Glue the veneer to the underside of the top first, then glue the assembly to the body.
2. Glue the veneer to the body, trim it to the edges of the neck pocket, then glue the top on. Then glue another piece of veneer to the neck tenon to bring it back to the correct thickness.
Yes, I've been thinking about these options as well. I used option 1 for supersymmetry [EDIT: of course I mean for Ziricote Dream], where the top was rather thin and gluing the veneer to the top introduced a lot of tension to the point that it split in half.Two more options:
1. Glue the veneer to the underside of the top first, then glue the assembly to the body.
2. Glue the veneer to the body, trim it to the edges of the neck pocket, then glue the top on. Then glue another piece of veneer to the neck tenon to bring it back to the correct thickness.
However, I feel pretty good about option 2. The body is thick enough so that it won't move due to the veneer. I can use the body template or the top to clamp it down. This also fixes any alignment issues with the fretboard cutout. Thanks for the suggestion, I think I'm gonna do it this way!
Last edited:

Weekend update:
The top is on! I used the method that @Max Bogosity suggested, gluing the veneer onto the body first, routing out the neck pocket after it's dry and then gluing on the maple top in a second step. I think it worked quite well.
I stayed away from epoxy for this one, because I want to stain the top later. Clumsy me would probably get a drop of epoxy on the top somewhere, and then it's really hard to sand out...
Obligatory clamp shot on the left, the trimmed veneer on the right. The left picture also tells a story: How to quickly fix a broken clamp in mid-glue-up
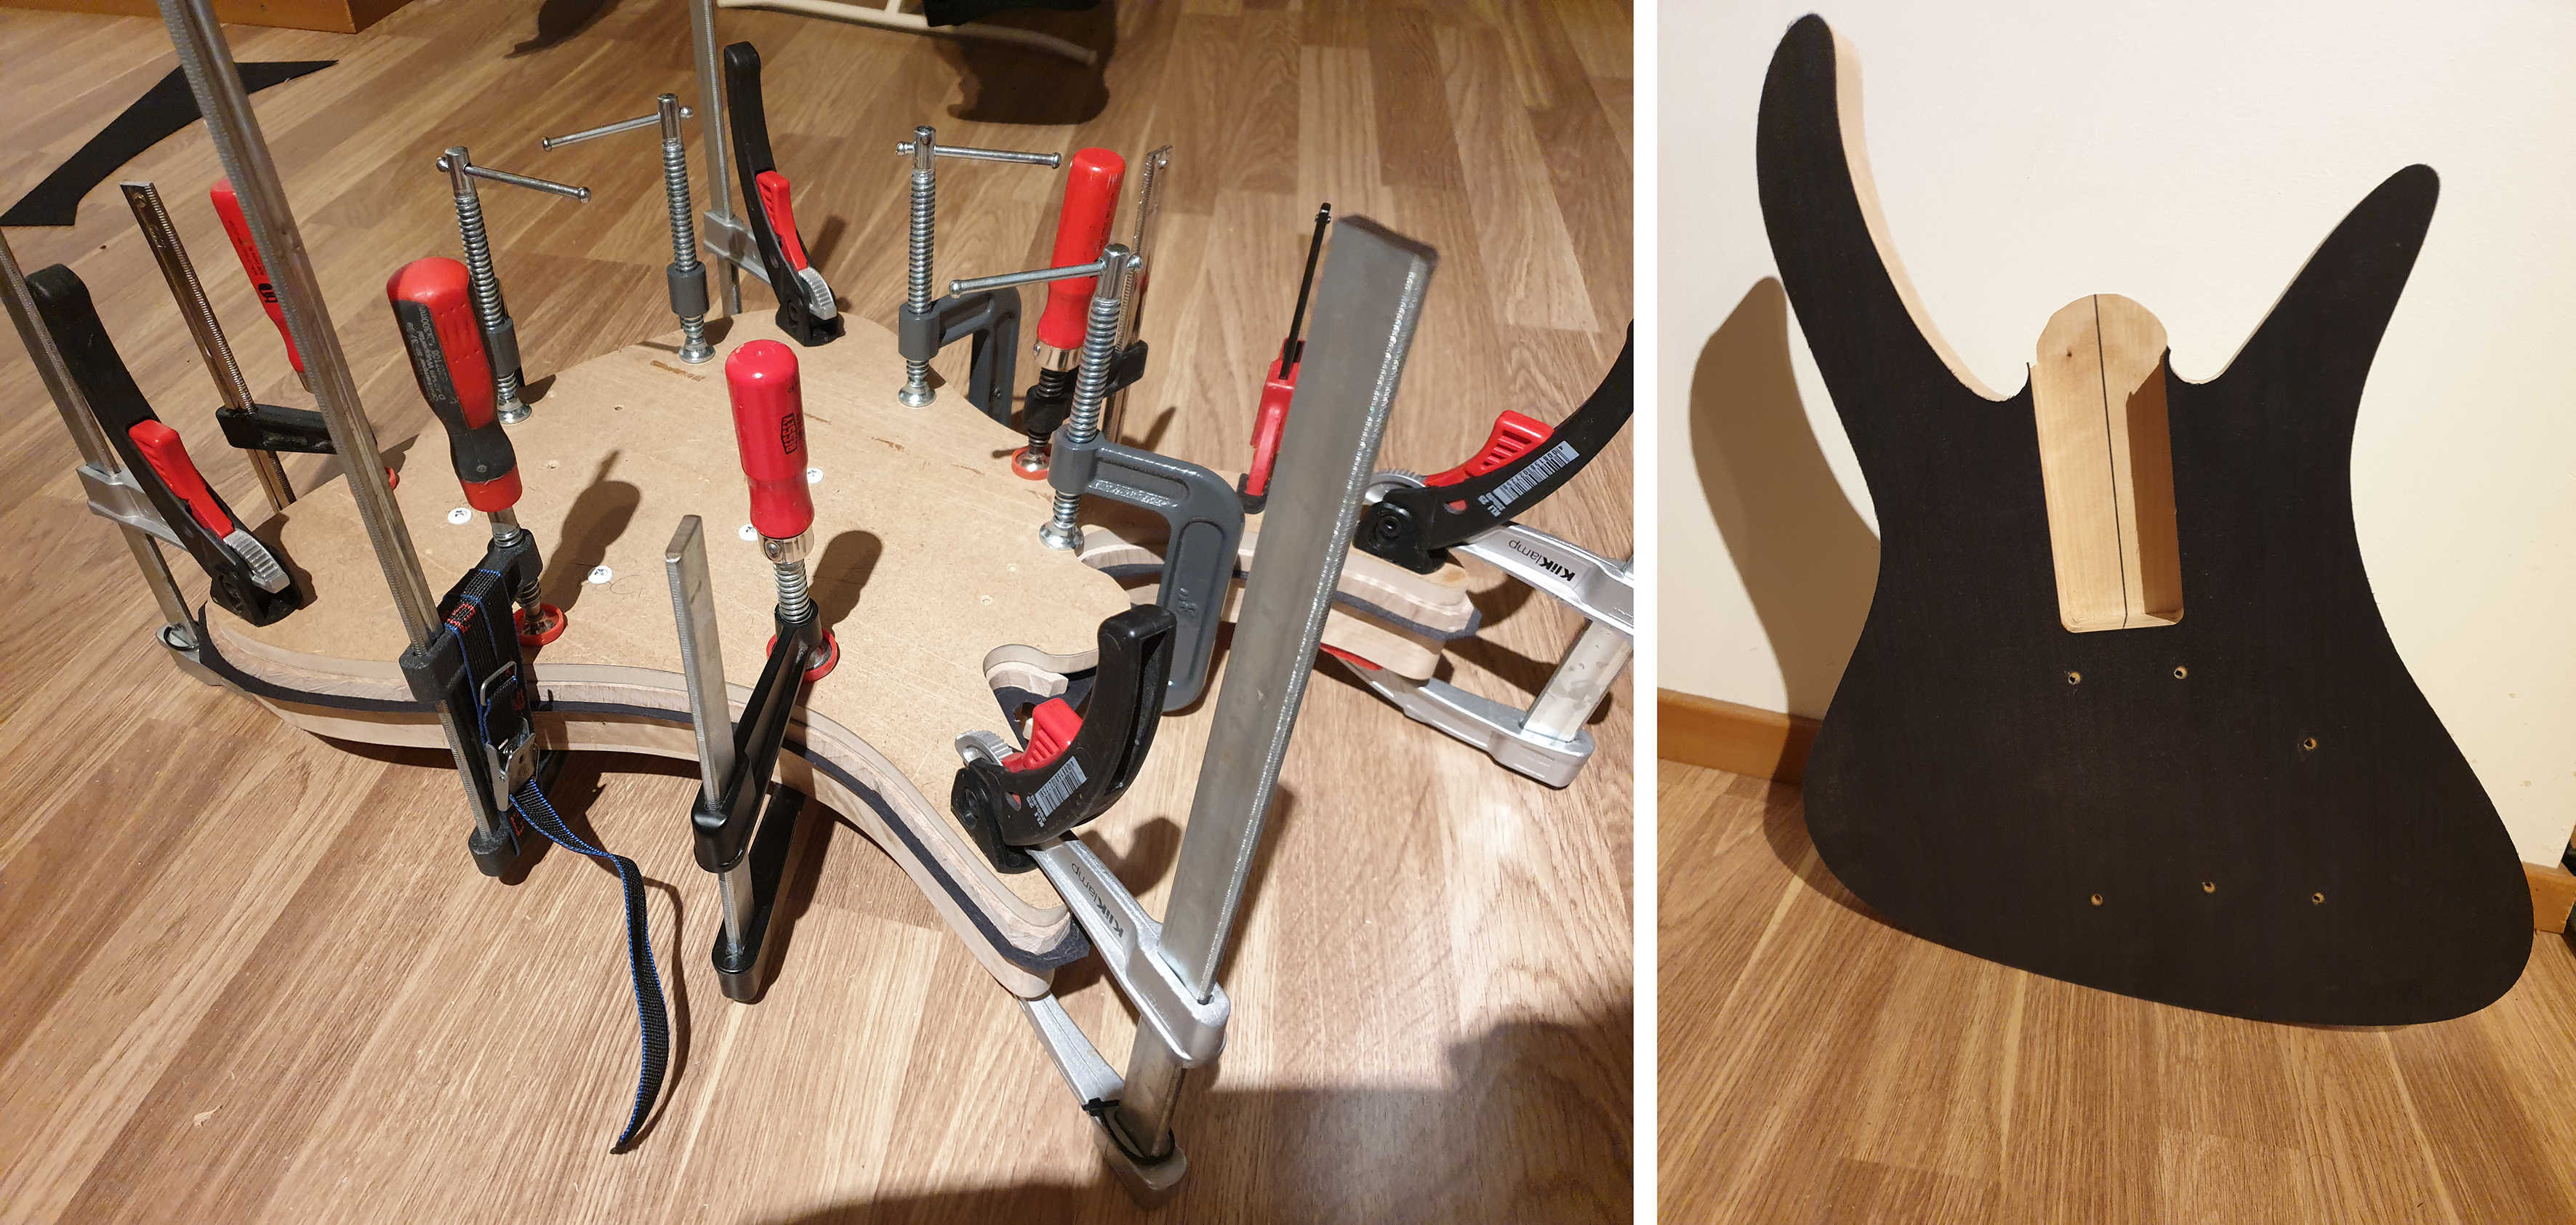
I used screws in the pickup and control locations for alignment and clamping pressure. The two other holes at the bridge end should disappear with the tuner access recess. To make sure the alignment of the fretboard cutout and neck pocket is good, I placed a piece of MDF in there as a dummy fretboard.
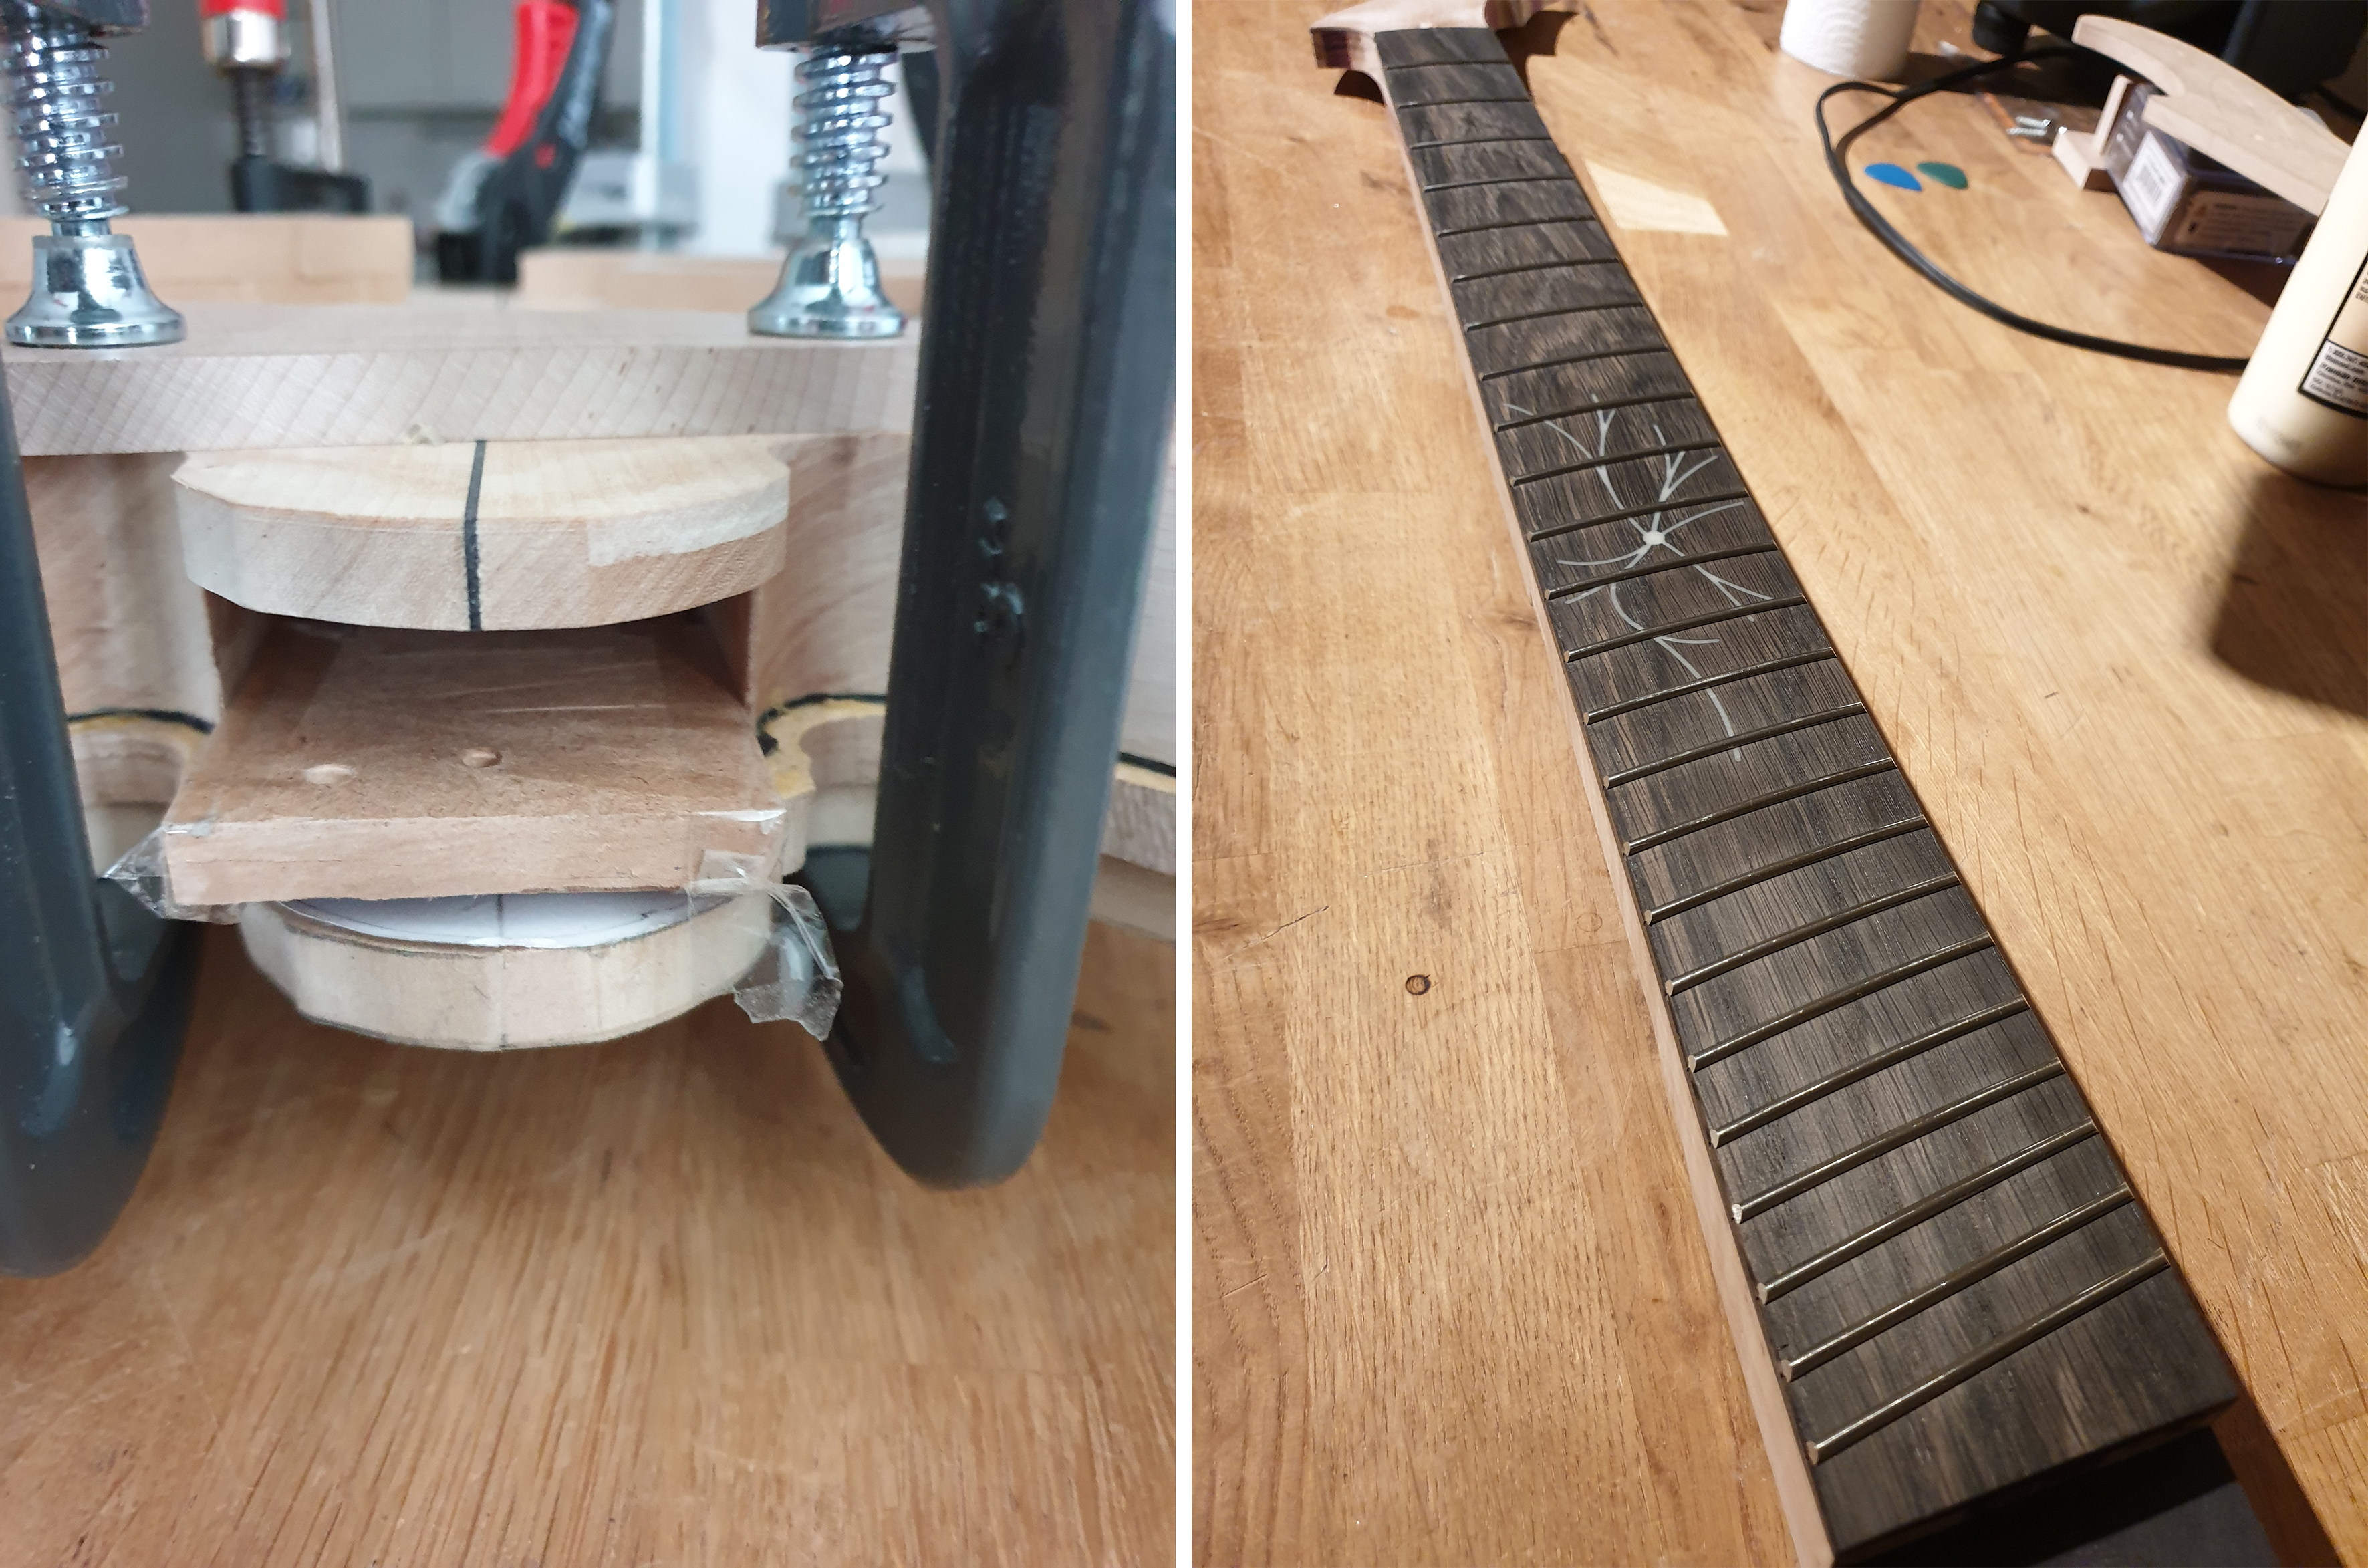
Also, the frets are in. The body is still in the clamps and will stay there for a few more days. With all the moisture introduced by the two glue-ups I want to make sure everything is properly dry before I proceed.
More soon!
The top is on! I used the method that @Max Bogosity suggested, gluing the veneer onto the body first, routing out the neck pocket after it's dry and then gluing on the maple top in a second step. I think it worked quite well.
I stayed away from epoxy for this one, because I want to stain the top later. Clumsy me would probably get a drop of epoxy on the top somewhere, and then it's really hard to sand out...
Obligatory clamp shot on the left, the trimmed veneer on the right. The left picture also tells a story: How to quickly fix a broken clamp in mid-glue-up
I used screws in the pickup and control locations for alignment and clamping pressure. The two other holes at the bridge end should disappear with the tuner access recess. To make sure the alignment of the fretboard cutout and neck pocket is good, I placed a piece of MDF in there as a dummy fretboard.
Also, the frets are in. The body is still in the clamps and will stay there for a few more days. With all the moisture introduced by the two glue-ups I want to make sure everything is properly dry before I proceed.
More soon!
Just a little update.
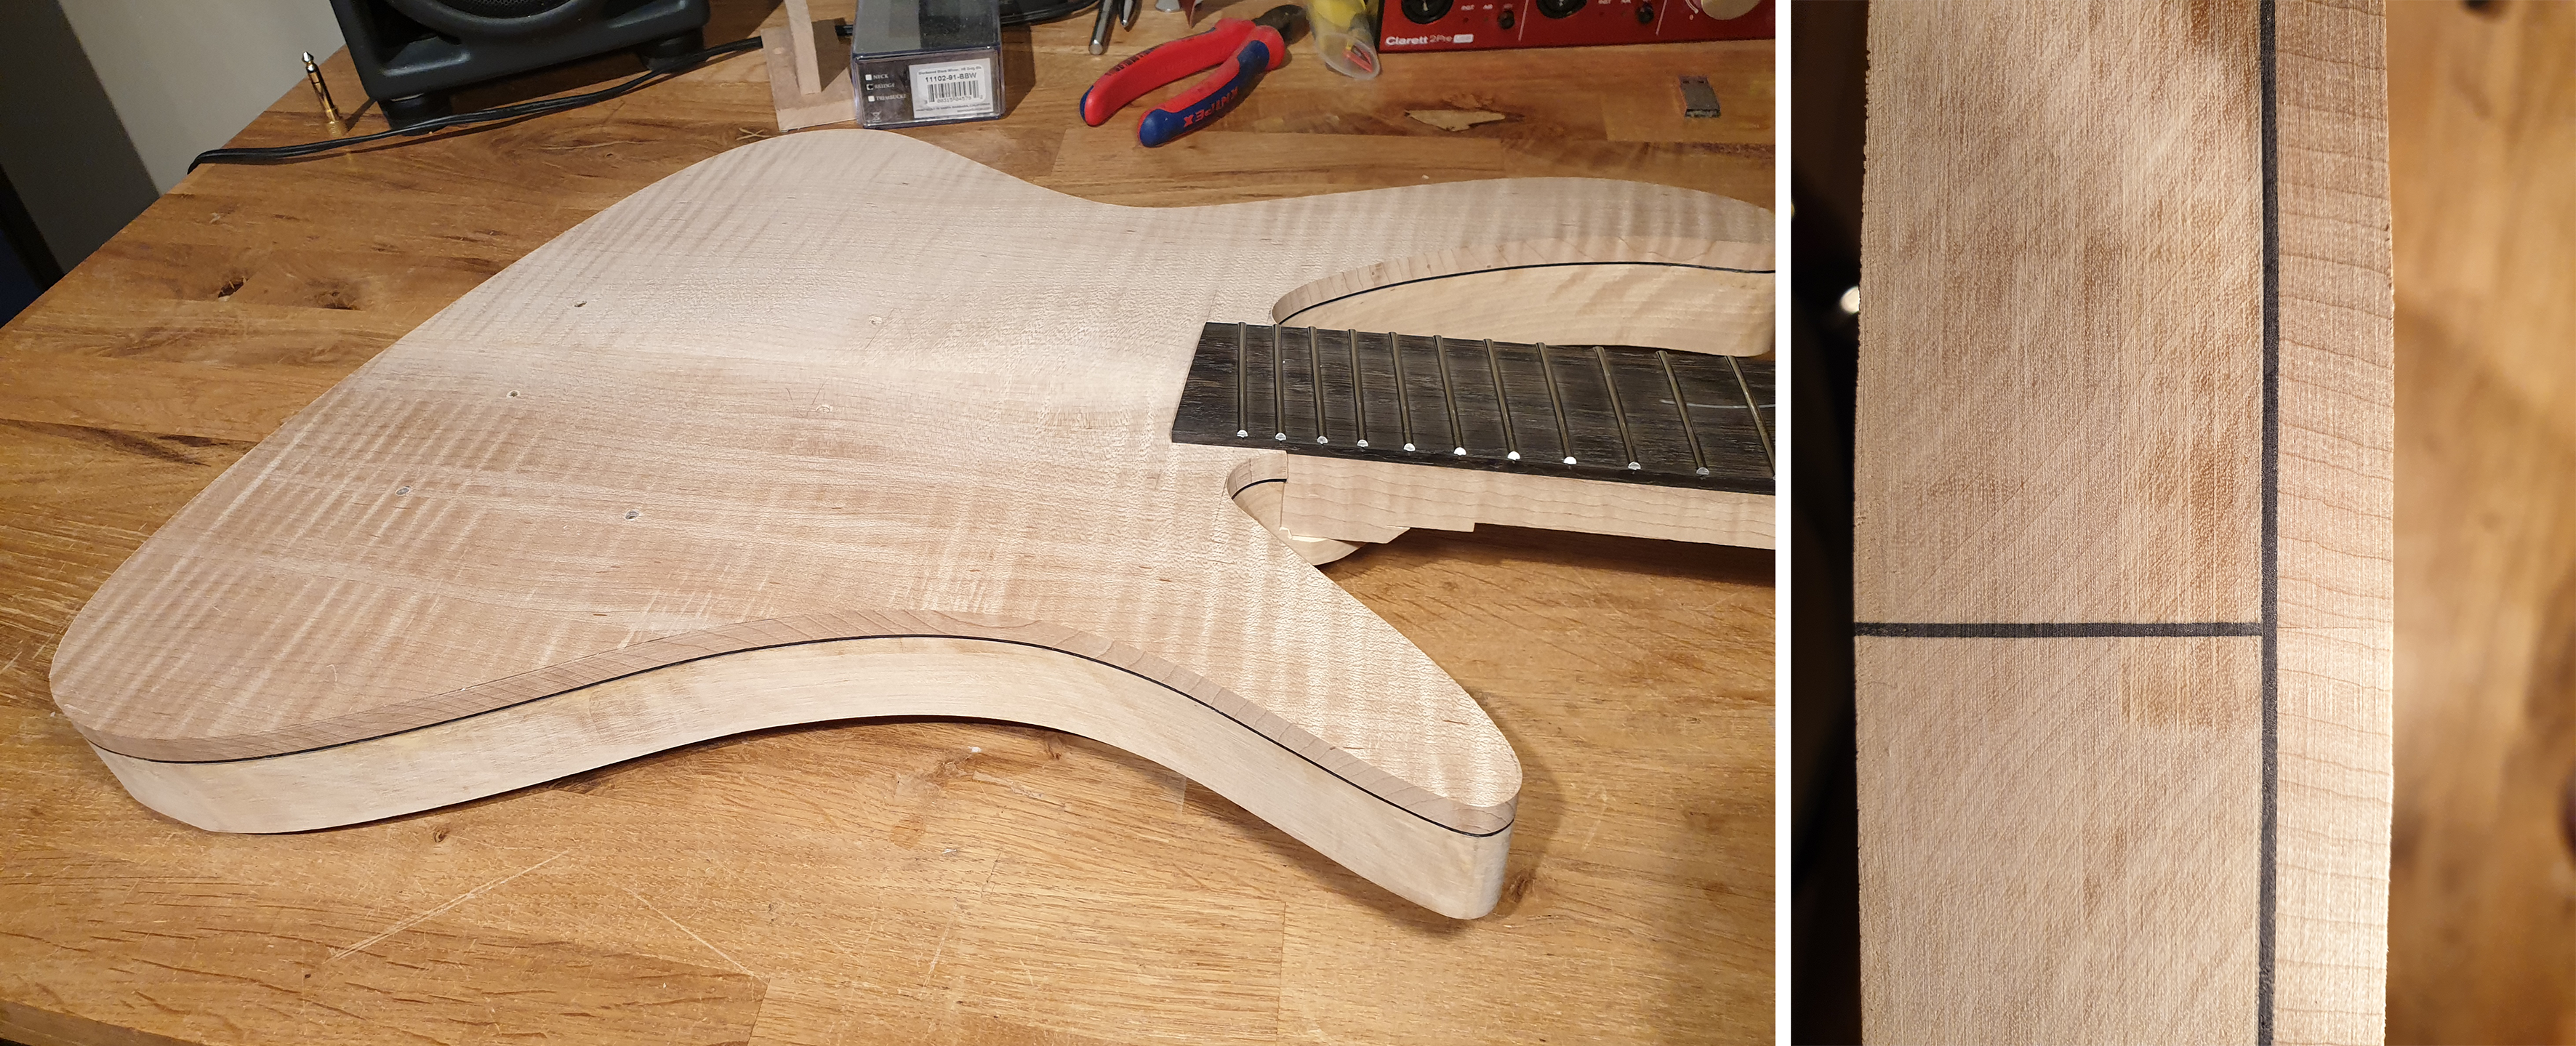
Today I took the body out of the clamps and routed the top flush. I'm happy with the result, it's a tight joint and the alignment looks good. To my surprise the neck fits into the pocket and fb cutout without any further trimming.
Let's have a small intermission from a whole different area of nerddom (with a slight adaptation):
KRAMER: I'm completely changing the configuration of the instrument. You're not gonna believe it when you see it. A whole new lifestyle.
JERRY: What are you doing?
KRAMER: Bevels.
JERRY: Bevels?
KRAMER: Yeah, I'm getting rid of all right angles. All of it. And I'm going to build these different bevels. You know, like ancient Egypt.
JERRY: You drew up plans for this?
KRAMER: No, no. It's all in my head.
MORTY: I don't know how you're going to be comfortable like that.
KRAMER: Oh, I'll be comfortable.
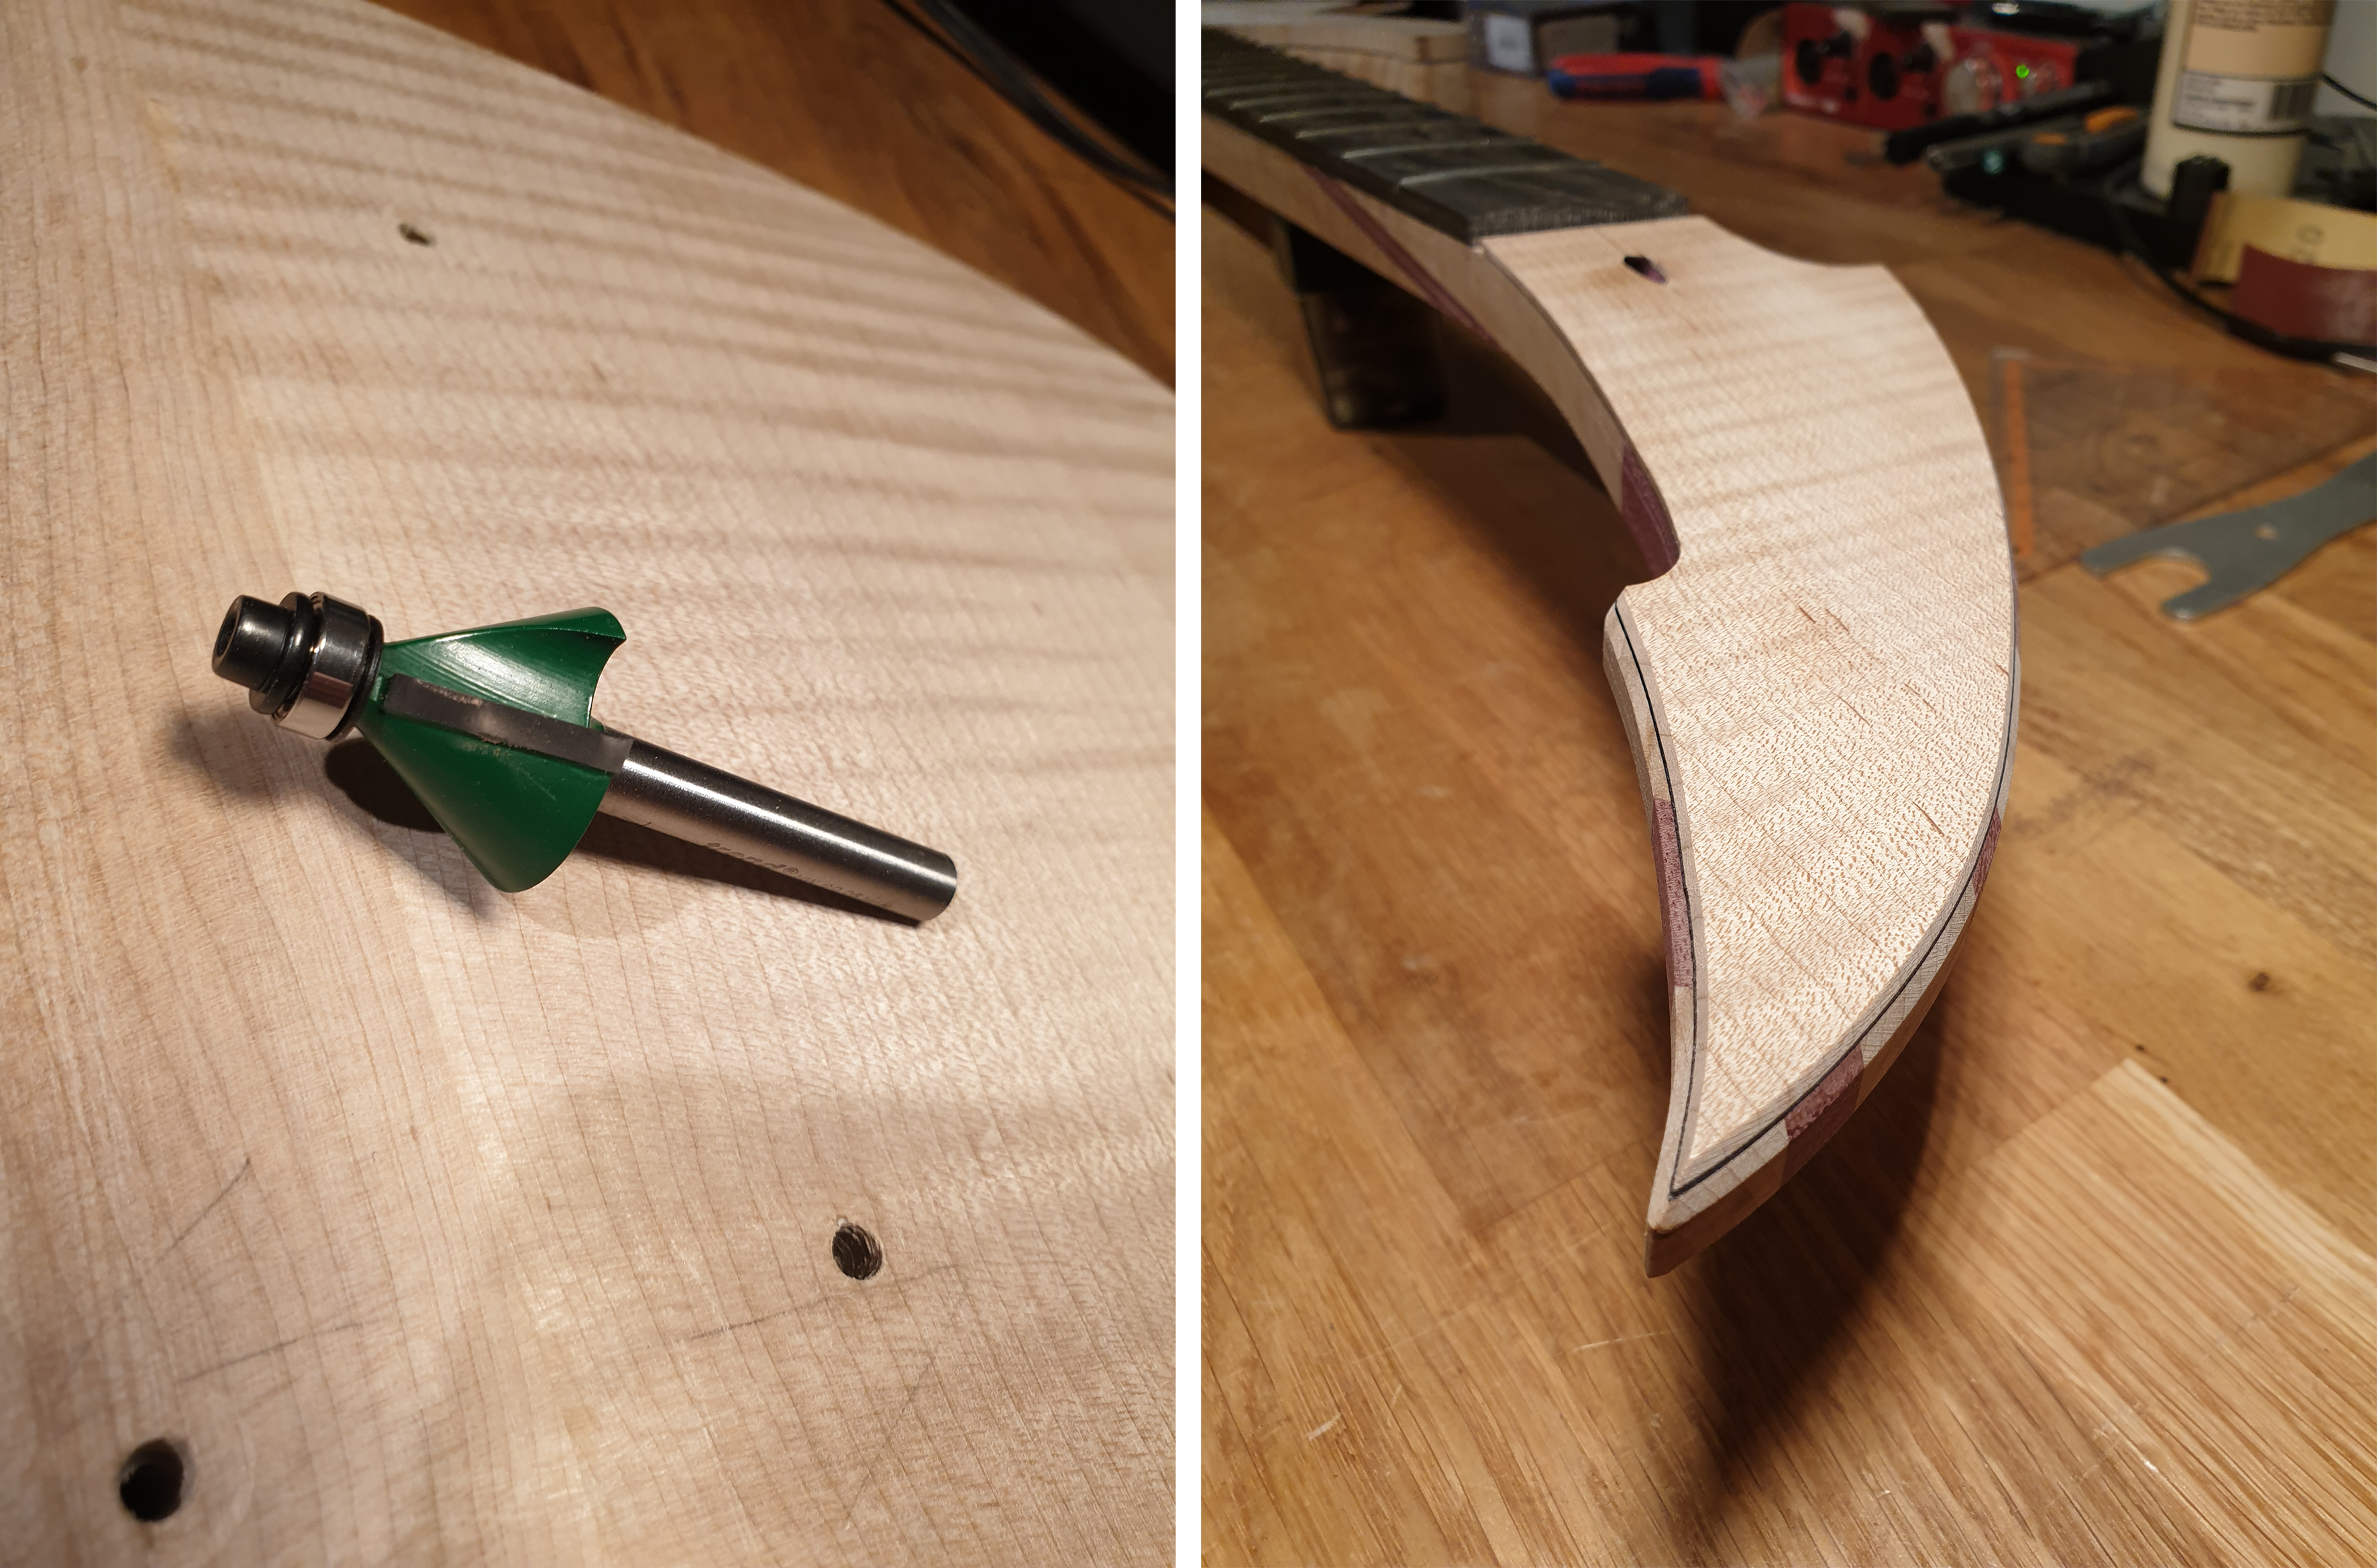
So yeah, bevels. Well chamfers, technically. I got myself a new router bit for a 60 degree chamfer. I'll use it for the body front and back, and the bevel should be deep enough to expose the black veneer layer. Then I'll stain the top black, but leave the bevel natural, like a faux binding. Before I start on the body, though, I gave it a try it on the headstock. It's the same idea, just smaller.
Today I took the body out of the clamps and routed the top flush. I'm happy with the result, it's a tight joint and the alignment looks good. To my surprise the neck fits into the pocket and fb cutout without any further trimming.
Let's have a small intermission from a whole different area of nerddom (with a slight adaptation):
KRAMER: I'm completely changing the configuration of the instrument. You're not gonna believe it when you see it. A whole new lifestyle.
JERRY: What are you doing?
KRAMER: Bevels.
JERRY: Bevels?
KRAMER: Yeah, I'm getting rid of all right angles. All of it. And I'm going to build these different bevels. You know, like ancient Egypt.
JERRY: You drew up plans for this?
KRAMER: No, no. It's all in my head.
MORTY: I don't know how you're going to be comfortable like that.
KRAMER: Oh, I'll be comfortable.
So yeah, bevels. Well chamfers, technically. I got myself a new router bit for a 60 degree chamfer. I'll use it for the body front and back, and the bevel should be deep enough to expose the black veneer layer. Then I'll stain the top black, but leave the bevel natural, like a faux binding. Before I start on the body, though, I gave it a try it on the headstock. It's the same idea, just smaller.

Just a little update.
Today I took the body out of the clamps and routed the top flush. I'm happy with the result, it's a tight joint and the alignment looks good. To my surprise the neck fits into the pocket and fb cutout without any further trimming.
View attachment 4970037
Let's have a small intermission from a whole different area of nerddom (with a slight adaptation):
KRAMER: I'm completely changing the configuration of the instrument. You're not gonna believe it when you see it. A whole new lifestyle.
JERRY: What are you doing?
KRAMER: Bevels.
JERRY: Bevels?
KRAMER: Yeah, I'm getting rid of all right angles. All of it. And I'm going to build these different bevels. You know, like ancient Egypt.
JERRY: You drew up plans for this?
KRAMER: No, no. It's all in my head.
MORTY: I don't know how you're going to be comfortable like that.
KRAMER: Oh, I'll be comfortable.
View attachment 4970035
So yeah, bevels. Well chamfers, technically. I got myself a new router bit for a 60 degree chamfer. I'll use it for the body front and back, and the bevel should be deep enough to expose the black veneer layer. Then I'll stain the top black, but leave the bevel natural, like a faux binding. Before I start on the body, though, I gave it a try it on the headstock. It's the same idea, just smaller.
View attachment 4970036


Is the camera playing tricks on me, or is this thing loaded with compound curves?
I'm not quite sure what you mean, the body outline or the headstock chamfers?Is the camera playing tricks on me, or is this thing loaded with compound curves?
EDIT: I stared at the image of the body for a while, and I think I know what you are seeing. The body sides are all routed perpendicular to the front and back, there's no twist or compound curve going on there. The camera is probably playing tricks on you.
Last edited:
Yeah, I think you're right. I took a longer look and let my brain catch up to my eyes.EDIT: I stared at the image of the body for a while, and I think I know what you are seeing. The body sides are all routed perpendicular to the front and back, there's no twist or compound curve going on there. The camera is probably playing tricks on you.
Really cool design.

When I saw the picture of the body I was going to suggest a chamfer instead of a roundover. Fortunately, you’re much smarter then me and way ahead.
Is the camera playing tricks on me, or is this thing loaded with compound curves?
Don't you put ideas in my head!
After reading your comment and staring at the photo for I while, I cannot help but wonder... Wouldn't it be kinda cool to actually build a body with a compound curve outline? I think it would. It won't be this on this build, but maybe someday...
I could use two templates, one on the front and one on the back of the body. They could be identical but mounted with an offset or slightly rotated to each other, or they could be slightly different in shape. Then, with a template router bit with a ball bearing at the top and(!) at the bottom, I could rout at a tilt given by the offset between the two templates, creating the compound curve. Alternatively, a sanding drum with two guides (again top and bottom) cold achieve the same thing.
It would be so weird, I love it. Has anyone done this?
Latest posts
-

-

-
What Frequency Response is Actually Needed for Low Tuning?
- Latest: bass player 53
-

