• TalkBass has been independent since 1998. Add your voice.
    Create a free account to reply to discussions, view embedded media, and browse with fewer display ads.
    Join freeLog in
    Want zero display ads or expanded classifieds tools? Compare plans.

Acoustic Electric Bass

So I started to install the threaded inserts this morning. First, I had to determine which drill bit sizes to use for the insert itself, and for the aluminum plate. So I drilled a few different sizes into some scrap maple, and installed a spare insert to make sure it would work.
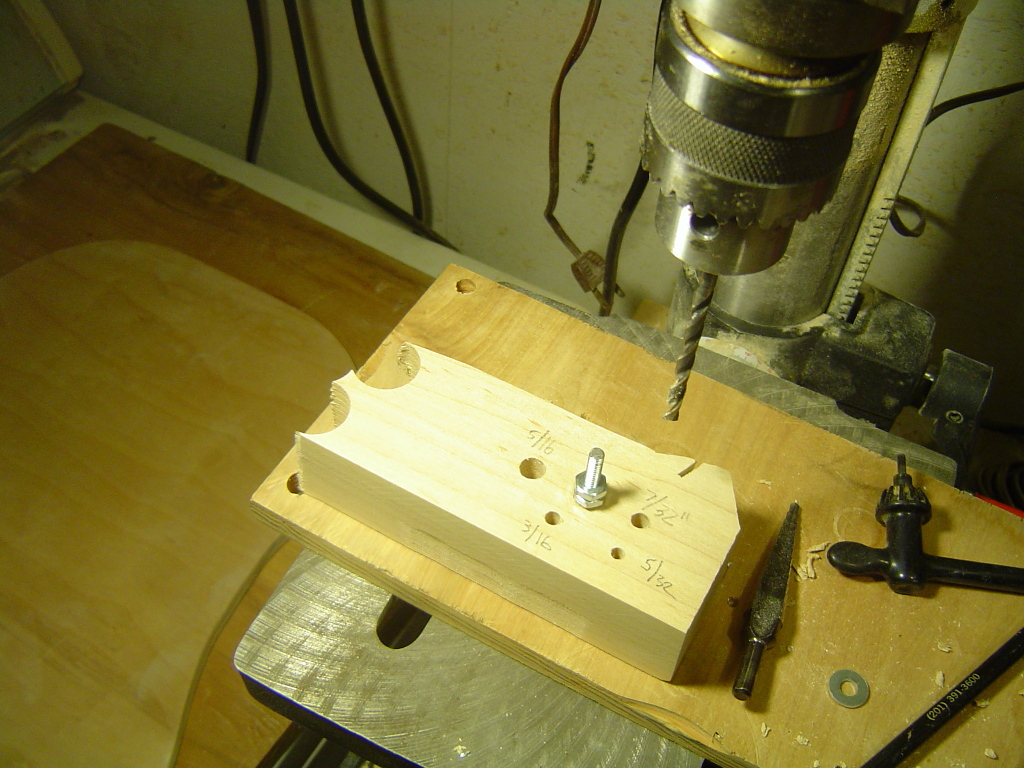
2dm9vfm.jpg


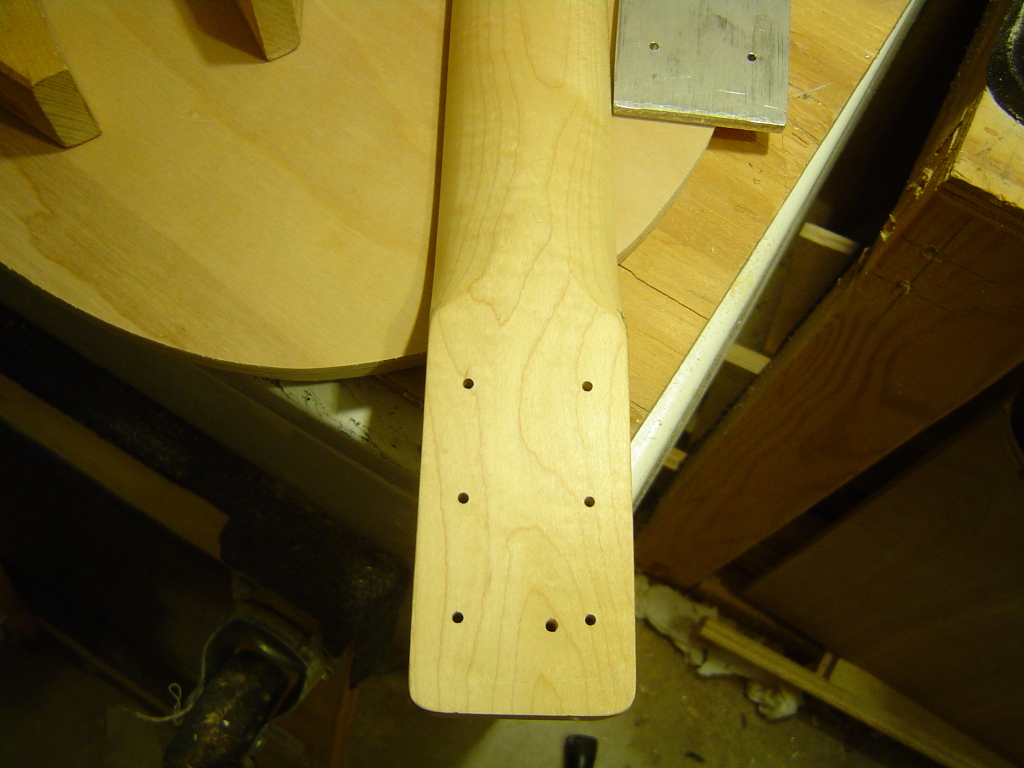
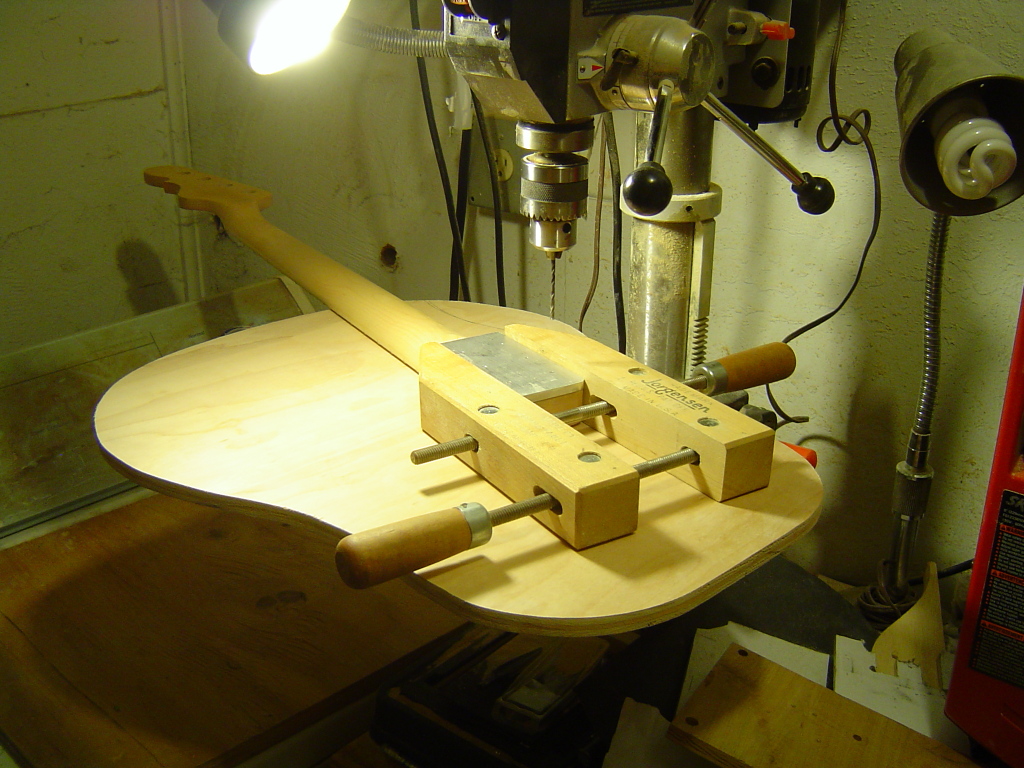
Then I transferred the hole pattern from the aluminum plate to the neck itself.
10cvhoi.jpg


28lvptu.jpg


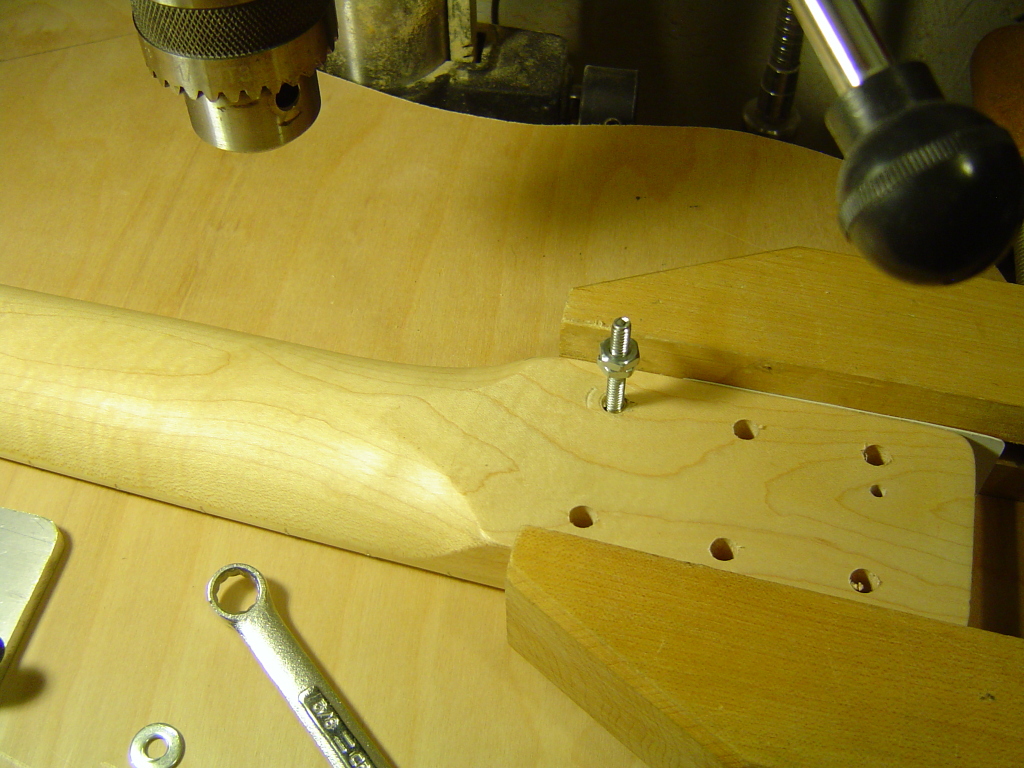
The I enlarged the holes in the neck to the right size, and installed the inserts. I used the drill press to keep the insert square to the neck back surface. I also enlarged the holes in the aluminum plate to fit the #10-24 bolts perfectly.
2i75qw0.jpg


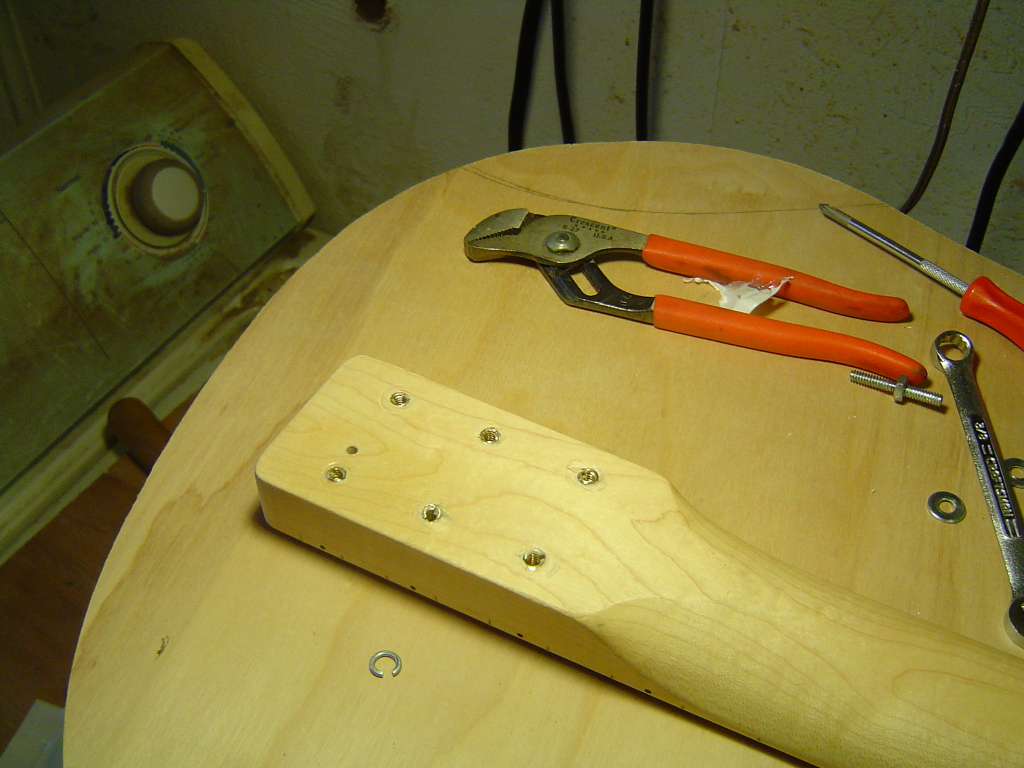
And it's done. I'll add that if I ever do this again, I'll order the stainless steel inserts. The brass is too soft I think.
103vst0.jpg


I'll also add that I found this whole process quite a pain. I think I'll stick to neck through construction.
 
  • Like
Reactions: vmabus
I rarely use threaded inserts on a bolt on, in your case I would say they were a necessity though. You are right they can be a PIA to install, but with the correct driver they aren't bad at all.

[Invalid or Expired Link Removed]
 
I rarely use threaded inserts on a bolt on, in your case I would say they were a necessity though. You are right they can be a PIA to install, but with the correct driver they aren't bad at all.

[Invalid or Expired Link Removed]

Yeah, I saw that tool, and likely should have bought it. They were cheap enough, and I think it would have made for a cleaner install.
 
So I just got back from the lumber store. They were having a sale, and I started talking with one of the guys out back who also builds guitars, and he cut me a really nice top for the bass from some shedua.

vs2p6t.jpg


They also had clamps on sale, so I picked up a pair of 24" ones.

And to demonstrate my constraint in only spending about $50.00, I submit the following:

2hi0yzo.jpg


2ir3m80.jpg


9apqhw.jpg


rbb4h2.jpg


That last shot is in the "scrap" area. I almost bought that piece of ash. It would have made a beautiful body. It was pretty light weight as well. But, I'm trying to save up for a decent band saw so I can finish my other build.
 
Maple
Wish I had a lumber candy store like that in my area! Ditto with the insert tool, didn't know they exist. I tried brass inserts on some mahogany scrap and destroyed them, too soft like you said. Where is the insert bit available from? If I had an extra bandsaw id mail it to you just to see what artistry you'd produce with it.
 
So while I was going through the next steps in my mind, I saw that after the neck rout was in the top, most of the string tension across the body would be carried by the 1/2" plywood "undertop" Since I can flex that piece by hand, I thought I'd need a little more support in that area. So I set up the table saw, and started to trim down a piece of maple.

256cosy.jpg


I don't need it that thick, so I cut it down to 5/8". I don't want to add too much to the weight of this bass either.

350l5iq.jpg


Then I cut it to length. I couldn't get the piece the full length of the body, as I wouldn't be able to get it into the body, but it will extend from the neck pocket to the bridge.

2941k7o.jpg


Like this, only underneath. Yes, I should have thought to this before I put the "undertop" in. Live and learn.

3355heq.jpg


So I clamped it into place, and I'll let that cure overnight.

21mhpvt.jpg


Next step will be to cut the actual top to fit, and then put on the final coating of resin and fabric over the back.
 
  • Like
Reactions: vmabus
I did a little more work this morning. First I cut out the top with the jig saw.

6dsf4n.jpg


Then I started setting up the jig to rout the neck pocket.

qnsdp5.jpg


I again remembered why I prefer neck through construction. Getting that centered, especially with the slight taper of the neck, was a nightmare. I think I ended up eye-balling it more than anything else. I suppose people who do this often make a template that they use over and over again. A slight "oops" where the jig had a hole, but not too bad for a first attempt.

28w1bn7.jpg


Oh, and it was here when I realized that I am using the wrong side of the shedua. I had meant to use the other side, which has a nicer grain pattern.

I drilled the holes for the neck plate/bolts, screwed it on, and mounted the bridge with one screw for the time being.

vghro4.jpg


2d6p6kh.jpg


I also drew in the first sound hole placement/size idea, using that size because I happen to have a 3" hole saw. I toyed with the idea of using some kind of design for the sound hole - maybe a bass clef or design element - but passed because I'll have to get my hand in there to mount the neck. Another issue I'm thinking about is how to clamp the top to the shell. The current plan is to use clamps through the sound hole, the mounting holes for the neck, the screw hole for the bridge, and perhaps a control panel hole. I'm still not sure where I'll mount the control(s) and output jack. I was originally thinking just a volume and jack. Top or side is the question.

Also, I see that this will not be a light weight instrument. I can see why they build acoustic instruments the way they do, with thin walls and bracing.

I also took some time to sand the shell a bit more. There was an area near the "belly cut" where the second layer of cloth didn't adhere very well, likely due to the resin mix being too hot. I sanded it off and smoothed it. That's in the first picture.

I also remembered I need to make or buy a nut.

Well, time to practice, and then finish off my halloween costume. I'm going as the teenage mutant ninja turtle Donatello.
 
Last edited:
2d6p6kh.jpg


I also drew in the first sound hole placement/size idea, using that size because I happen to have a 3" hole saw. I toyed with the idea of using some kind of design for the sound hole - maybe a bass clef or design element - but passed because I'll have to get my hand in there to mount the neck.

Well, time to practice, and then finish off my halloween costume. I'm going as the teenage mutant ninja turtle Donatello.

It's a shame you can't go with a designed shape for a sound hole as you need the access, but how about using the Ovation for some inspiration? You could cut a basic shape that lets you get int here, then glue on a piece of either contrasting wood or pickguard material as a surround for a sound hole in whatever shape you like? You could also have a control plate made of the same material with a shape to echo the sound hole surround. I'm going to do something along these lines using Birch ply to contrast with a Wenge top on this one:

Invalid Link Removed
 
It's a shame you can't go with a designed shape for a sound hole as you need the access, but how about using the Ovation for some inspiration? You could cut a basic shape that lets you get int here, then glue on a piece of either contrasting wood or pickguard material as a surround for a sound hole in whatever shape you like? You could also have a control plate made of the same material with a shape to echo the sound hole surround. I'm going to do something along these lines using Birch ply to contrast with a Wenge top on this one:

Invalid Link Removed

That's not a bad idea. I'll have to think about how that might take shape. Thanks!
 
OK, a little more work done this morning. I took Hopkins' advise and began chambering the top. First I made a template.

91jxv9.jpg


Then I clamped it to the top, and went at it with the router.

21lmn37.jpg


I left about a 1/4" of wood. It lightened up the top fairly well.

atq3jd.jpg


I also cut out the sound hole and rounded it over. I like to think that will help project the sound, like a horn.

2z9igc1.jpg


That whole process made *a lot* of saw dust.

34i4hfc.jpg


I also positioned the top to the shell temporarily. It's still pretty heavy, but not as much as before.

m9awxh.jpg


I'll have to cut down that neck plate so it will fit inside the shell. That cross line between the bridge screw and neck plate is the center position of a Precision pickup, as measured off my 2011 MIM. I'm planning on using that first pickup I wound for the Leaf, but didn't use. Single coil, alnico 5 magnets, about 8500 winds. I'll have to make a cover for it, likely with the scrap pieces of shedua. I'm still undecided about the controls, and still unsure how I'll clamp the top to the shell for gluing. I may have to make some kind of shell jig.