

Enjoy the benefits of a premium membership!
Upgrade Account
-
TalkBass has been independent since 1998. Add your voice.
Create a free account to reply to discussions, view embedded media, and browse with fewer display ads.
Join free Log in
Want zero display ads or expanded classifieds tools? Compare plans.
You are using an out of date browser. It may not display this or other websites correctly.
You should upgrade or use an alternative browser.
You should upgrade or use an alternative browser.
Build number 2: at R-V
- Thread starter J Lund
- Start date
More options
Who Replied?
slowburnaz
Commercial User
Sorry if this is too off-topic, but I've always been interested in attending R-V. Thing is, you can't have a job while going, according to their website... understandably, since a lot of time is spent in the classes.
How do folks manage this? Do most just save up enough to cover tuition, food, room and board, abandon their current employment, etc?
If we need keep this out of this thread, please just PM me.
Thanks in advance for any answers/advice.
How do folks manage this? Do most just save up enough to cover tuition, food, room and board, abandon their current employment, etc?
If we need keep this out of this thread, please just PM me.
Thanks in advance for any answers/advice.
Sorry if this is too off-topic, but I've always been interested in attending R-V. Thing is, you can't have a job while going, according to their website... understandably, since a lot of time is spent in the classes.
How do folks manage this? Do most just save up enough to cover tuition, food, room and board, abandon their current employment, etc?
I just graduated from college this past spring, so I never had the money to afford this school. Luckily, my parents supported me going to R-V and helped me get a loan. Also, because it is an accredited college, I was qualified for certain scholarships and grants. Upon graduation, I'll have loans up the wazoo, but...so is life.
R-V is a great school and I would recommend it to anyone. On the other hand, if you are in a position where you have a local luthier that is willing to take you on as an apprentice, I would jump on that and save your self several thousand dollars.


- Aug 15, 2011
- 571
- 171
- Disclosures
- Owner/Luthier:RoseBud Basses & Guitars LLC
J.L. just want to say youre doing a great job and I (like many others) love your single cut build  (and have wanted to do something like that, congrats). My 2 cents for Slowburnaz , I saved for 5 years to go to R.V. for just that reason (well worth it). You and thumpin-P make me miss it. By-the-way, what is the head stock angle theyre teaching now? I remember it at 14o. (I think we need a R.V. club)
Keep up the good work and have fun doing it.
(and have wanted to do something like that, congrats). My 2 cents for Slowburnaz , I saved for 5 years to go to R.V. for just that reason (well worth it). You and thumpin-P make me miss it. By-the-way, what is the head stock angle theyre teaching now? I remember it at 14o. (I think we need a R.V. club)Keep up the good work and have fun doing it.


I just realized that I absentmindedly posted redundant info and pictures on this thread. My mistake.
Anyway, turtle-like progress on this build. All I really did this week was drill the output jack and start leveling the fretboard in preparation for fretting.
I am going with an electrosocket which needed a 7/8" hole and a flat spot for the rim to rest. I came up with the brilliant idea to use a 1" forstner bit to create the flat spot, thus seating the OJ flush against the wood. Well... when I used the spade to drill the 7/8" hole, the hole was just slightly off center which was...obviously pretty ugly. So I had to go to plan B and sand that part down and create a flat spot for the jack. Once I did that, I blended the flat spot in with the roundovers. After "fixing" my mistake, I came up with a Plan C which involved a dremel and very steady hands....
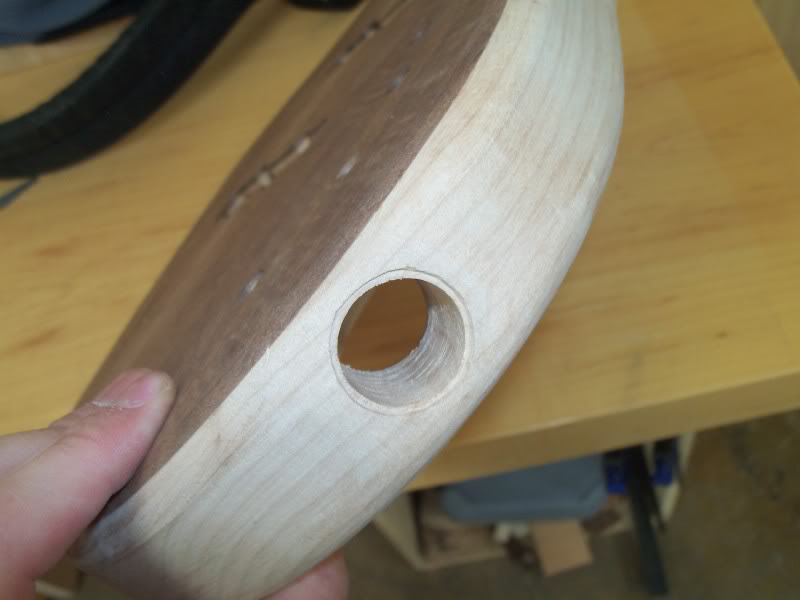
It is not 100% perfect, but I think when I get ready for finishing, if I just kiss those edges with 220 sandpaper, it will look fairly uniform. (Sorry I didn't get a picture with the jack in place).
Fretting should occur first thing on Monday!
Anyway, turtle-like progress on this build. All I really did this week was drill the output jack and start leveling the fretboard in preparation for fretting.
I am going with an electrosocket which needed a 7/8" hole and a flat spot for the rim to rest. I came up with the brilliant idea to use a 1" forstner bit to create the flat spot, thus seating the OJ flush against the wood. Well... when I used the spade to drill the 7/8" hole, the hole was just slightly off center which was...obviously pretty ugly. So I had to go to plan B and sand that part down and create a flat spot for the jack. Once I did that, I blended the flat spot in with the roundovers. After "fixing" my mistake, I came up with a Plan C which involved a dremel and very steady hands....
It is not 100% perfect, but I think when I get ready for finishing, if I just kiss those edges with 220 sandpaper, it will look fairly uniform. (Sorry I didn't get a picture with the jack in place).
Fretting should occur first thing on Monday!


More slow progress on this build, although still exciting stuff. As I said earlier, this past week was fretting week! I spend a lot of time leveling the fretboard and double, triple checking everything was perfectly flat (except for the small ramp at the body joint) before moving on. Believe it or not, hammering the frets in is actually step 5 or 6 on our handout!
So here's how it goes (WARNING: high detail!).
First, level the fretboard perfectly flat (I was jealous of everyone building guitars. 25" scale... humph). As I just mentioned, a tiny ramp is sanded into the end of the fretboard to make action a little bit better on the higher frets (and prevent any unwanted bulges that might occur after string tension is applied).
Secondly, The fret slots are widened with a tiny tapered bit in the Dremel. The bits we used came from Stew Mac. You'd think that this process would change the distance between each fret very slightly. In some respects, this is true because the conventional cut side of the dremel bit takes off a hair more material than the climb cut side. So as long as you cut each slot the same direction, your fret slots will (theoretically) remain the same distance apart. The depth of the tapered bit affects the width of the slot, so nailing that right on the head is very important in terms of frets seating properly without too much compression.
Thirdly, the edge of each fret slot is broken with a triangular needle file. This does NOT help the frets seat, but it does help prevent some amount of chip out when removing the frets. It is just a tiny bevel - about the width of the fret tang.
Fourthly, the frets are cut 1/4" over-sized and put into the FRET-A-TRON!!!!! (<--- John's term for a fret holder). The bent piece of fretwire in front is used to test fret slot depth as well as slot width.
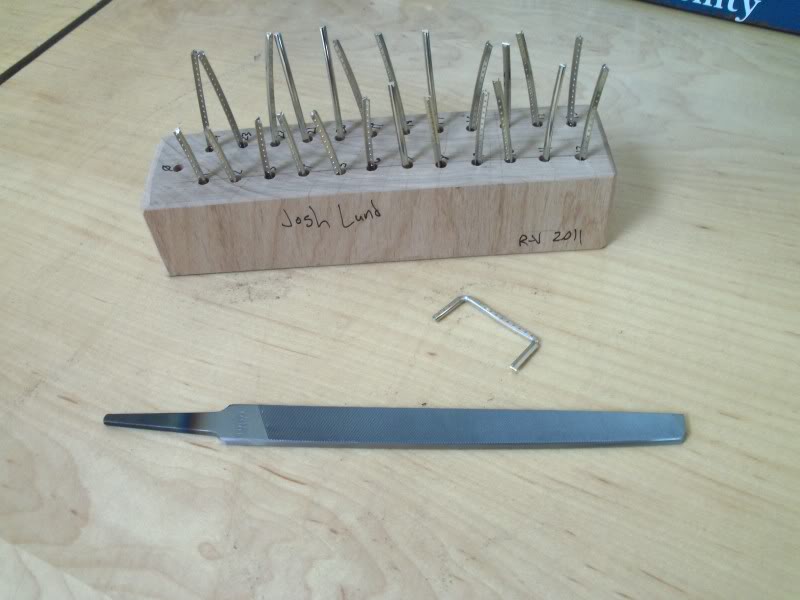
Finally, after all the preparation, the frets are hammered into place. For me, this was the easiest part of the process. I think for some people it was rather difficult, because they neglected to have proper support underneath the neck. I also found that using short dead blows worked better than using rapid bouncing attacks (just my experience). After hammering all of the frets, I had almost no issues with any of them being improperly seated. I'd like to think I was lucky, but I'd also like to think that I learned some things after fretting my brother's guitar last summer.
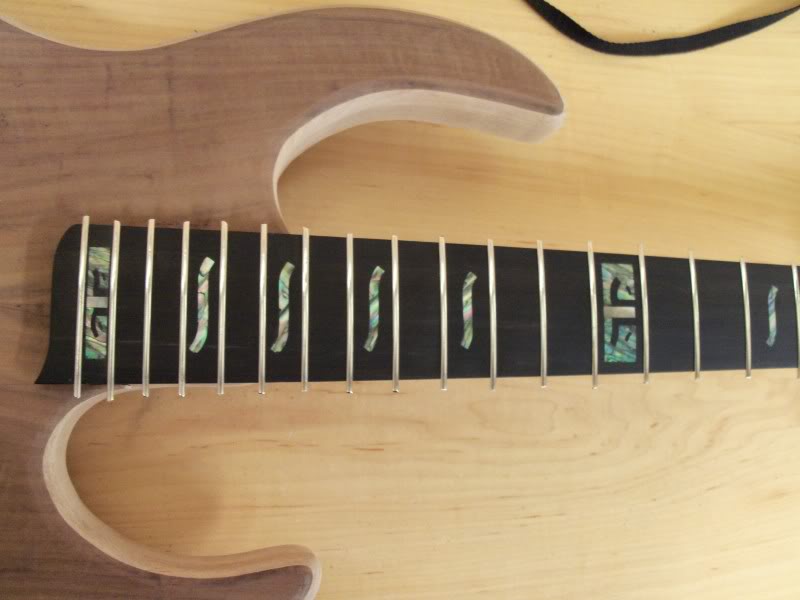
Step 5-1/2: I checked that all frets were seated properly with a feeler gauge, with a straight edge, and also with a fret rocker. Without doing any kind of leveling, I was very pleased to see that I had very minimal rocking throughout the board. The rest of part 5-1/2 involved fixing some tear-out that I had on the 24th fret. It was fixed with ebony dust and superglue.
Step 6: Trim all the fret ends flush with end nippers.
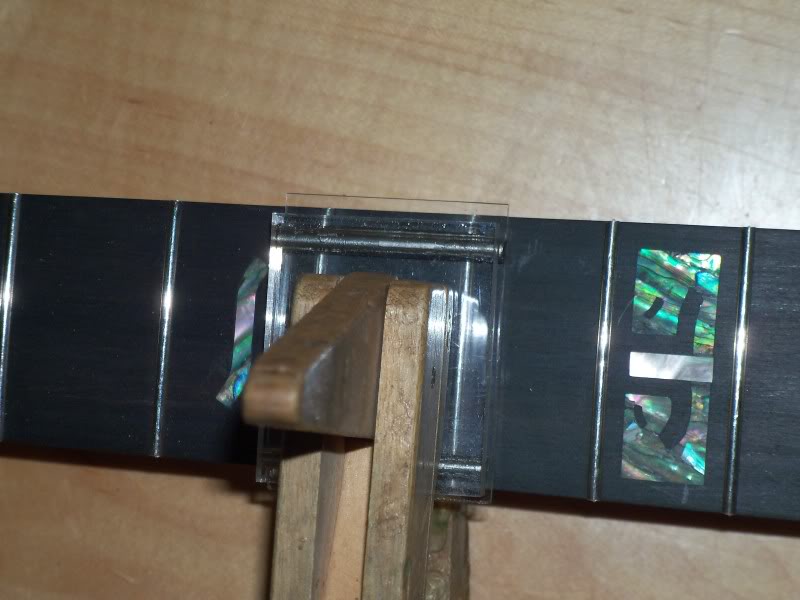
Step 7: Paul Jones, this is for you! This is where we used our fret cauls to clamp the frets in place while we wicked superglue down into each end.
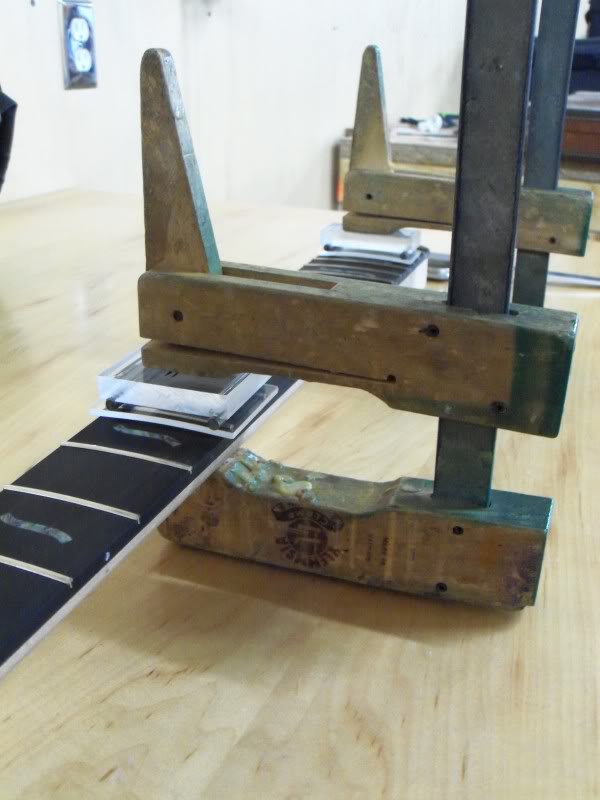
I have four sized cauls now that should work on every guitar and 4/5 string bass. Another shot:
The next step after all the superglue has cured is to file a 35-40 degree bevel into the fret ends. Go far down enough to create a 1/32" into the fingerboard itself. Then you can flush up all the fret ends with the fingerboard so that they cannot be felt. If there are any holes underneath the frets (if the fret slots were deeper than the frets...which they should be), then you can fill those holes with sawdust and superglue. After filing the ends a second time, you should have what appear to be perfect fitting frets with smooth ends. Something like this:
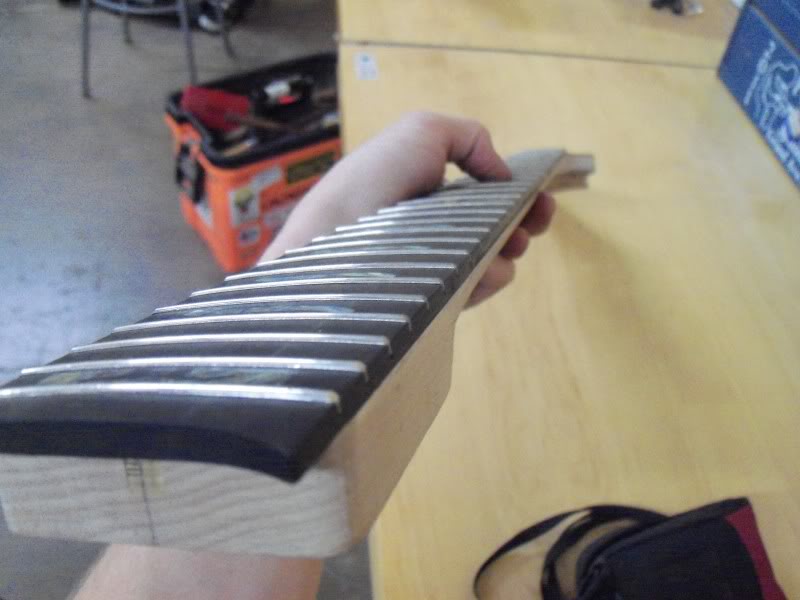
(Actually that last picture might've been taken before I filled the ends..)
Anyway, that is where we stop. The rest of the fret dressing occurs after the necks get lacquered.
And after all that, I'd like to say Happy Halloween with a frightening picture of my friend Ryan...

So here's how it goes (WARNING: high detail!).
First, level the fretboard perfectly flat (I was jealous of everyone building guitars. 25" scale... humph). As I just mentioned, a tiny ramp is sanded into the end of the fretboard to make action a little bit better on the higher frets (and prevent any unwanted bulges that might occur after string tension is applied).
Secondly, The fret slots are widened with a tiny tapered bit in the Dremel. The bits we used came from Stew Mac. You'd think that this process would change the distance between each fret very slightly. In some respects, this is true because the conventional cut side of the dremel bit takes off a hair more material than the climb cut side. So as long as you cut each slot the same direction, your fret slots will (theoretically) remain the same distance apart. The depth of the tapered bit affects the width of the slot, so nailing that right on the head is very important in terms of frets seating properly without too much compression.
Thirdly, the edge of each fret slot is broken with a triangular needle file. This does NOT help the frets seat, but it does help prevent some amount of chip out when removing the frets. It is just a tiny bevel - about the width of the fret tang.
Fourthly, the frets are cut 1/4" over-sized and put into the FRET-A-TRON!!!!! (<--- John's term for a fret holder). The bent piece of fretwire in front is used to test fret slot depth as well as slot width.
Finally, after all the preparation, the frets are hammered into place. For me, this was the easiest part of the process. I think for some people it was rather difficult, because they neglected to have proper support underneath the neck. I also found that using short dead blows worked better than using rapid bouncing attacks (just my experience). After hammering all of the frets, I had almost no issues with any of them being improperly seated. I'd like to think I was lucky, but I'd also like to think that I learned some things after fretting my brother's guitar last summer.
Step 5-1/2: I checked that all frets were seated properly with a feeler gauge, with a straight edge, and also with a fret rocker. Without doing any kind of leveling, I was very pleased to see that I had very minimal rocking throughout the board. The rest of part 5-1/2 involved fixing some tear-out that I had on the 24th fret. It was fixed with ebony dust and superglue.
Step 6: Trim all the fret ends flush with end nippers.
Step 7: Paul Jones, this is for you! This is where we used our fret cauls to clamp the frets in place while we wicked superglue down into each end.
I have four sized cauls now that should work on every guitar and 4/5 string bass. Another shot:
The next step after all the superglue has cured is to file a 35-40 degree bevel into the fret ends. Go far down enough to create a 1/32" into the fingerboard itself. Then you can flush up all the fret ends with the fingerboard so that they cannot be felt. If there are any holes underneath the frets (if the fret slots were deeper than the frets...which they should be), then you can fill those holes with sawdust and superglue. After filing the ends a second time, you should have what appear to be perfect fitting frets with smooth ends. Something like this:
(Actually that last picture might've been taken before I filled the ends..)
Anyway, that is where we stop. The rest of the fret dressing occurs after the necks get lacquered.
And after all that, I'd like to say Happy Halloween with a frightening picture of my friend Ryan...
This is a nice build indeed! Now I'm subscribed to both Thumpin P's RV Thread and yours. God I wish there was a school like that down here in Aus, not that I could attend it full time with my apprenticeship and all...
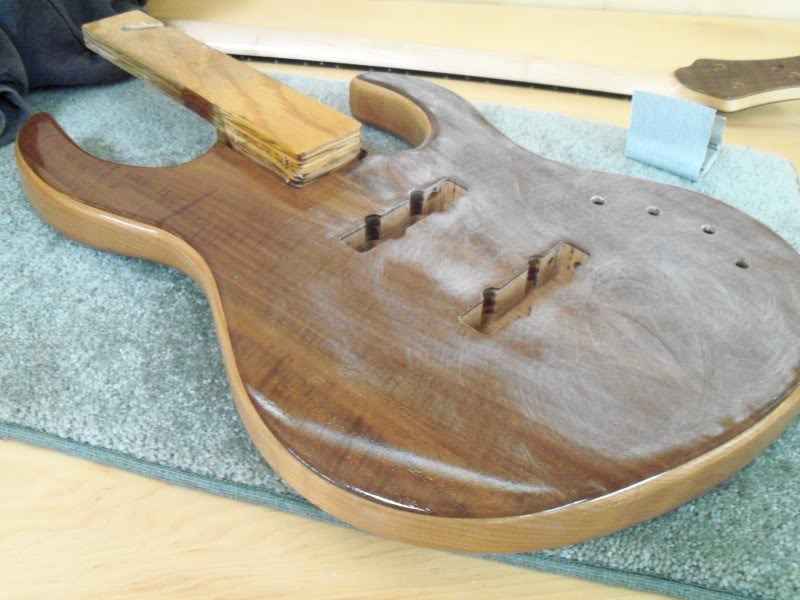
Sorry for the lack of updates. This bass has now been sprayed with about 18 coats of nitrocellulose lacquer. I'm giving it nine days to sit and cure before the buffing process will begin. Here are some shots midway through the lacquering process:
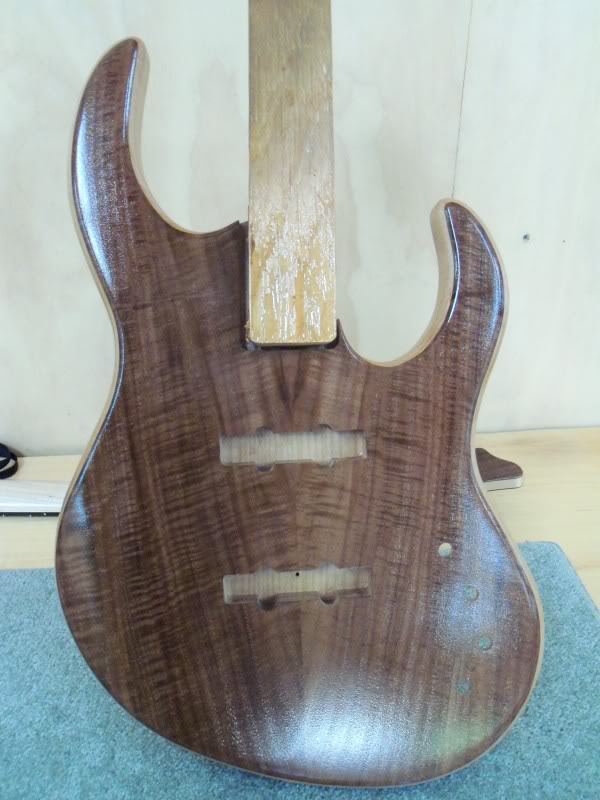
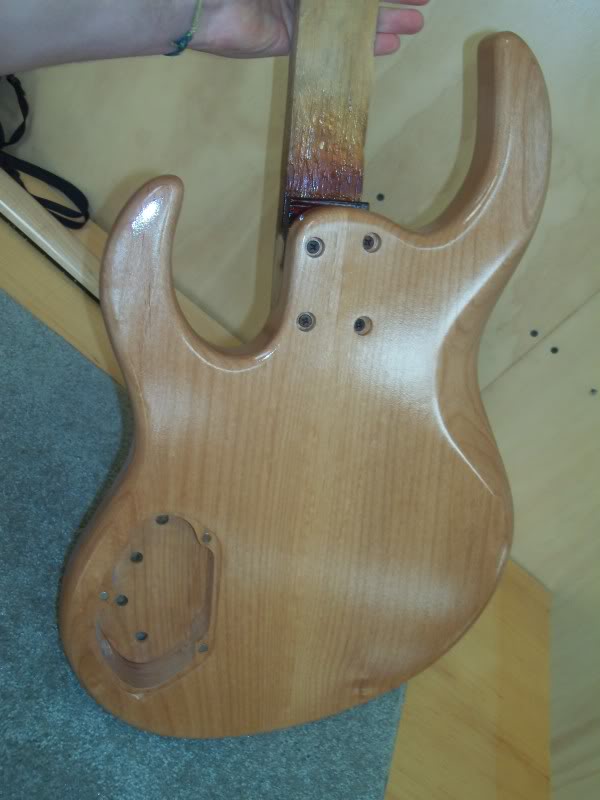
In the middle of level sanding on day 3 of finishing:
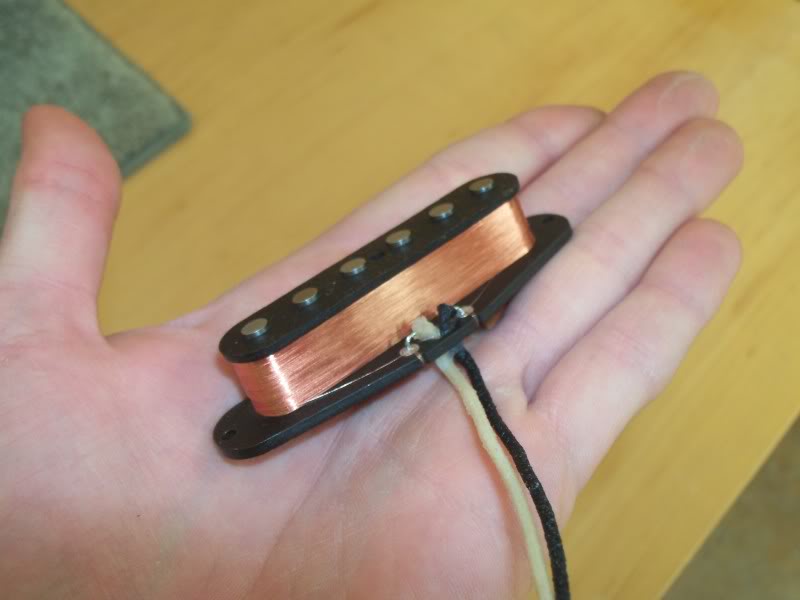
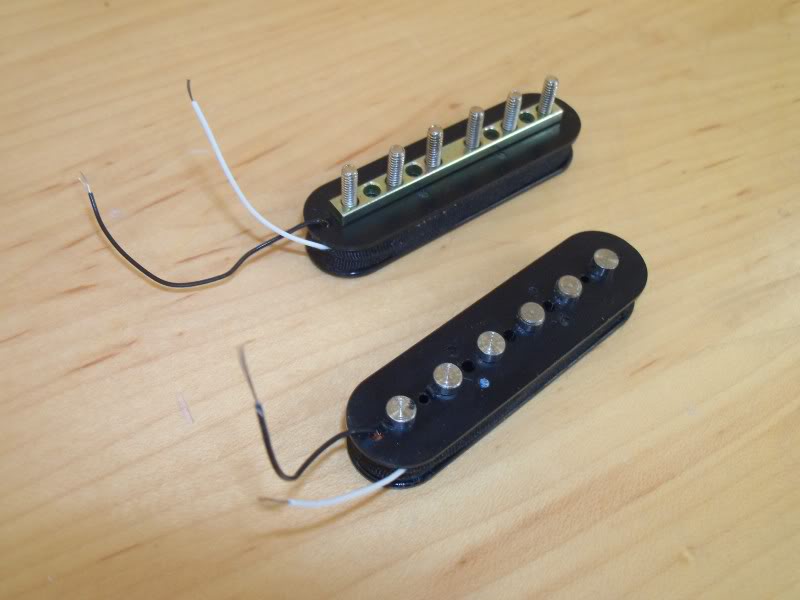
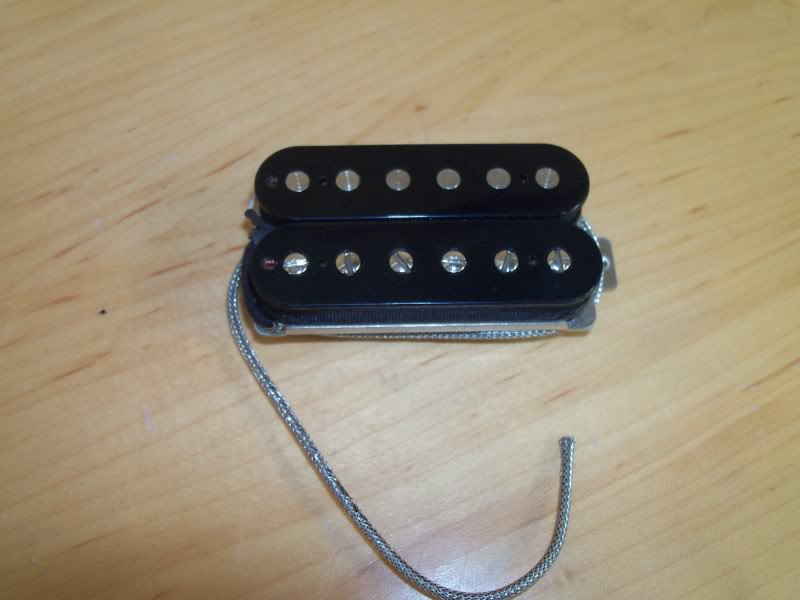
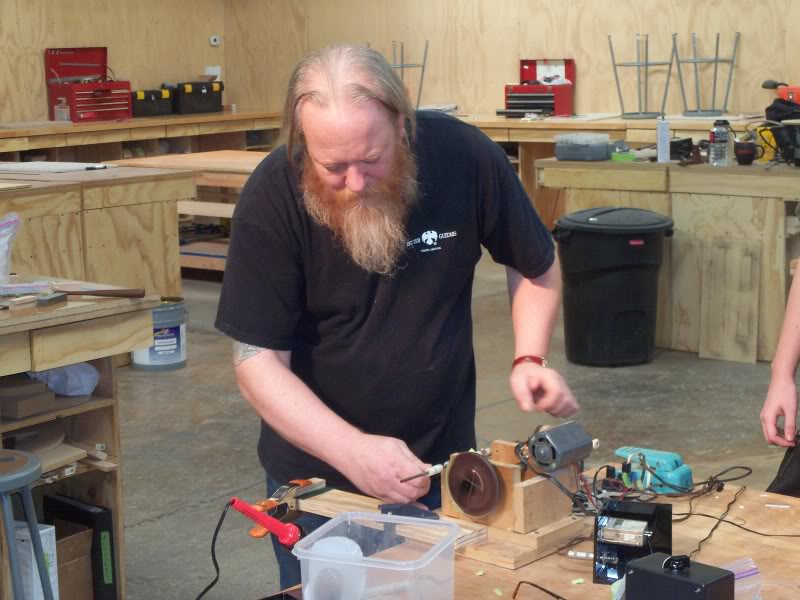
In addition, I took a pickup winding class with Jason Lollar last weekend. That was a very insightful class, and I walked away with two scatter-wound pickups: a humbucker and single-coil. Here are a few pictures from that session:
Single-coil before getting potted in wax and wrapped in tape:
Separate humbucker coils:
Finished humbucker:
Jason demonstrating proper technique:
That is all for now. Won't be much progress on this bass for a week or two, but assembly/electronics will begin soon after next week, which means this will be completed very soon!!
In the middle of level sanding on day 3 of finishing:
In addition, I took a pickup winding class with Jason Lollar last weekend. That was a very insightful class, and I walked away with two scatter-wound pickups: a humbucker and single-coil. Here are a few pictures from that session:
Single-coil before getting potted in wax and wrapped in tape:
Separate humbucker coils:
Finished humbucker:
Jason demonstrating proper technique:
That is all for now. Won't be much progress on this bass for a week or two, but assembly/electronics will begin soon after next week, which means this will be completed very soon!!
As soon as I saw the lacquer photos, I emitted a gutteral growl from my loins. Correct me if I'm wrong, but...claro walnut? Either way the figuring is gorgeous.
As soon as I saw the lacquer photos, I emitted a gutteral growl from my loins. Correct me if I'm wrong, but...claro walnut? Either way the figuring is gorgeous.
I believe that is an extraordinary piece of regular old black walnut, actually. I doubt John would've let me pay $50 for a claro walnut top... But as you said, it is beautiful no matter what it is called.
I don't think Jason regularly offers pickup winding classes, but he does have an awesome book. This is one of the new classes offered as extra curriculum at R-V. If you are interested, you could sign up for the next session in the Spring. We had three or four guys from across the country that came in just for that weekend, so don't feel like you have to be an R-V student.
I think that if you would have used a regular drill bit (I have no idea what they actually are called) with a small pilot hole all the way through first, instead of the spade bit, that your method would have worked perfectly.I just realized that I absentmindedly posted redundant info and pictures on this thread. My mistake.
Anyway, turtle-like progress on this build. All I really did this week was drill the output jack and start leveling the fretboard in preparation for fretting.
I am going with an electrosocket which needed a 7/8" hole and a flat spot for the rim to rest. I came up with the brilliant idea to use a 1" forstner bit to create the flat spot, thus seating the OJ flush against the wood. Well... when I used the spade to drill the 7/8" hole, the hole was just slightly off center which was...obviously pretty ugly. So I had to go to plan B and sand that part down and create a flat spot for the jack. Once I did that, I blended the flat spot in with the roundovers. After "fixing" my mistake, I came up with a Plan C which involved a dremel and very steady hands....

It is not 100% perfect, but I think when I get ready for finishing, if I just kiss those edges with 220 sandpaper, it will look fairly uniform. (Sorry I didn't get a picture with the jack in place).
Fretting should occur first thing on Monday!
lowsound


