
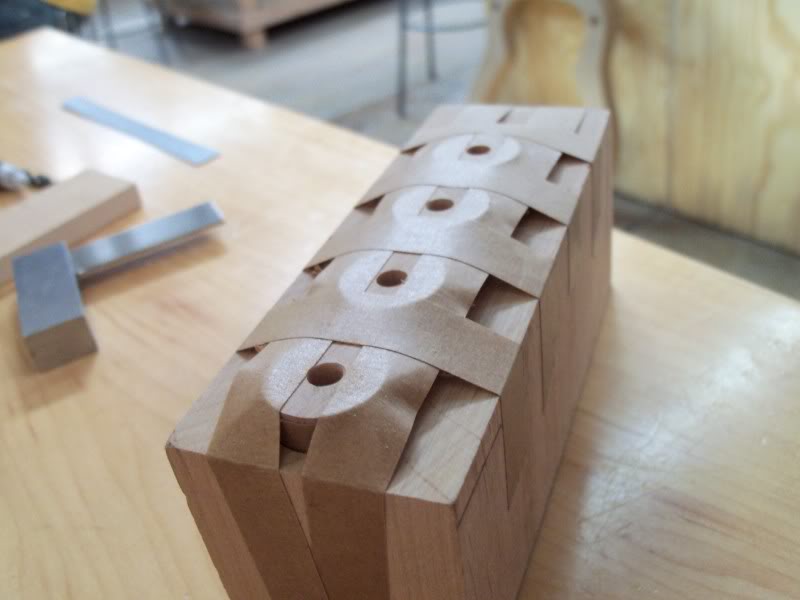
Not much of an update here, as this instrument has being in the drying room curing all week. However, I did go back to my wooden knobs and drill them out for the proper sized hole so they'll squeeze onto knurled pots. This required me to make a fixture that I could hold them into place while I drilled the holes.
I wrapped the knobs in tape so they fit snuggly into their holes, and then taped over them to further secure them. Using a twist drill bit, I lowered the press very slowly so that the bit would follow the existing hole. It was mostly successful, but one hole is a bit off. I guess that is just something I'll have to deal with for this build. In the future, I'll refine this knob making method.
The drill press jig:
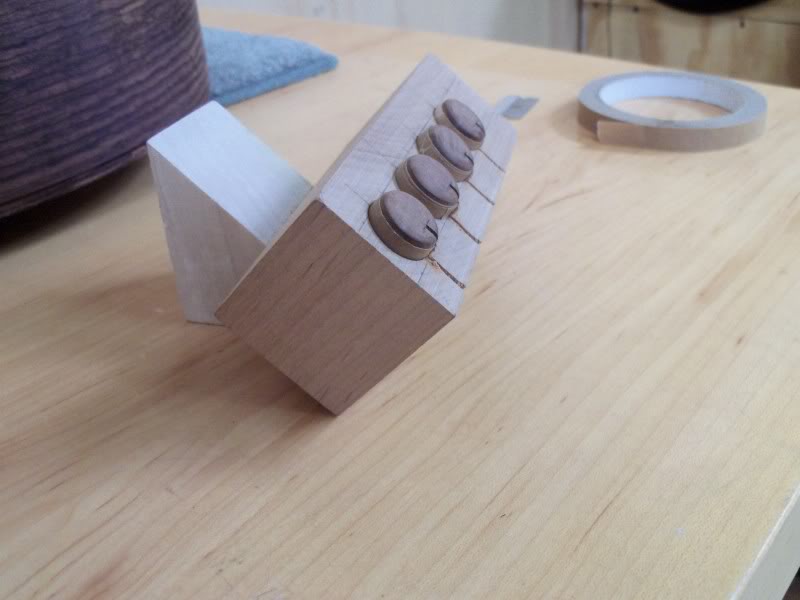
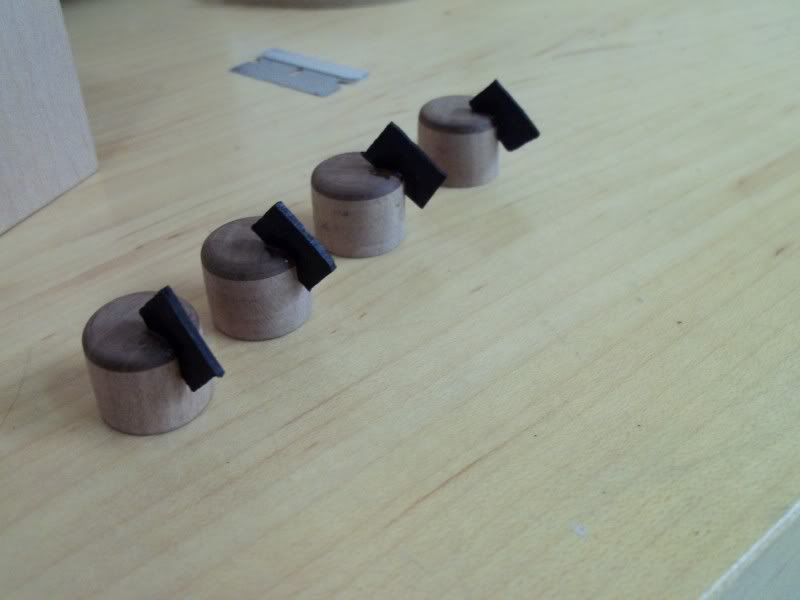
After that was done, I decided to put little indicators into each knob. I used the same jig with a wedge underneath. I took it over to the bandsaw to make an "incision" into each knob. After cleaning up the slots with a needle file, I thickness sanded some ebony to fit the slots and glued it in place.
Here's the altered jig:
Gluing ebony:
Finished knobs!
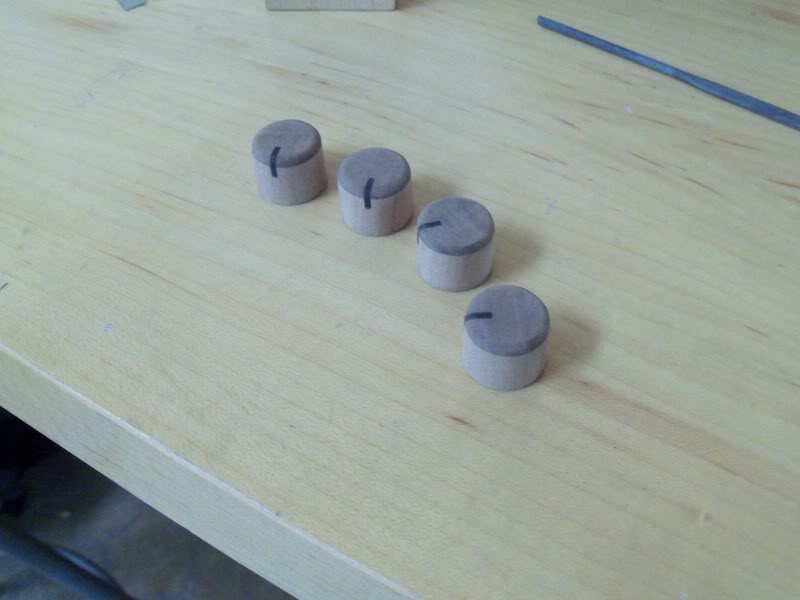
This'll give them a little more functional value, I think. These knobs are finish sanded to 220 and ready for an oil finish!
Now for sort of an un-related update. Scott Walker came to the school to teach an optional course on how he does his patina finishes. If you don't know about him, check him out. He does stunning work up in Santa Cruz.
Anyway, I won't go into the entire process, but I thought I'd show some drool pics.
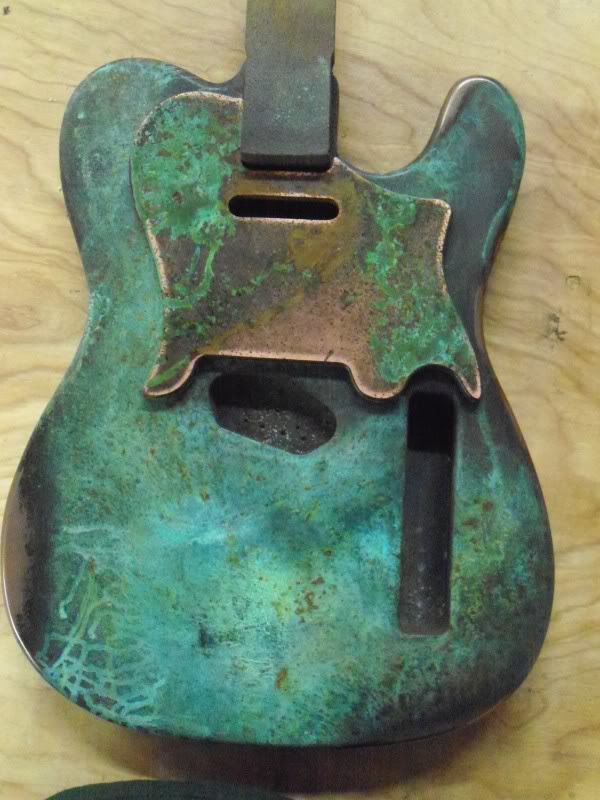
My finished franken-tele. I made the pickguard from copper.
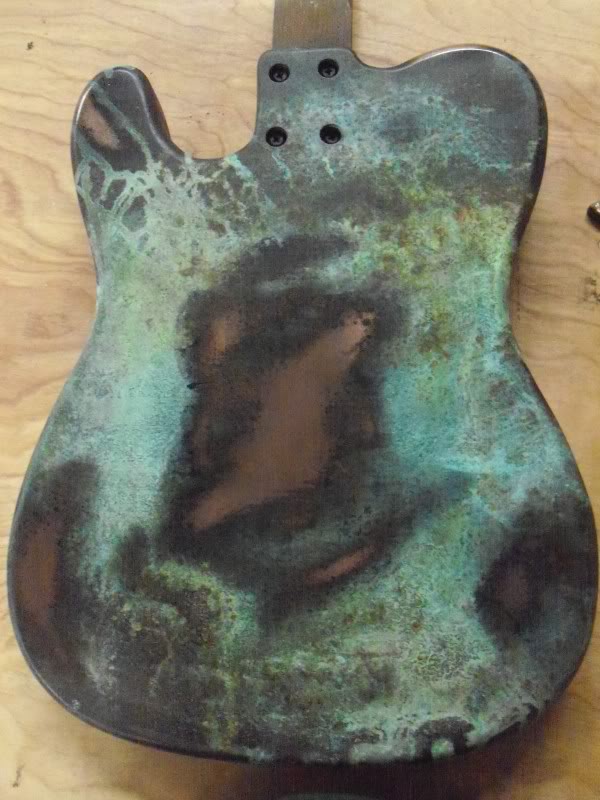
The back (I call it a "rust burst"):
One of my favorites from the class - one of the instructor's.
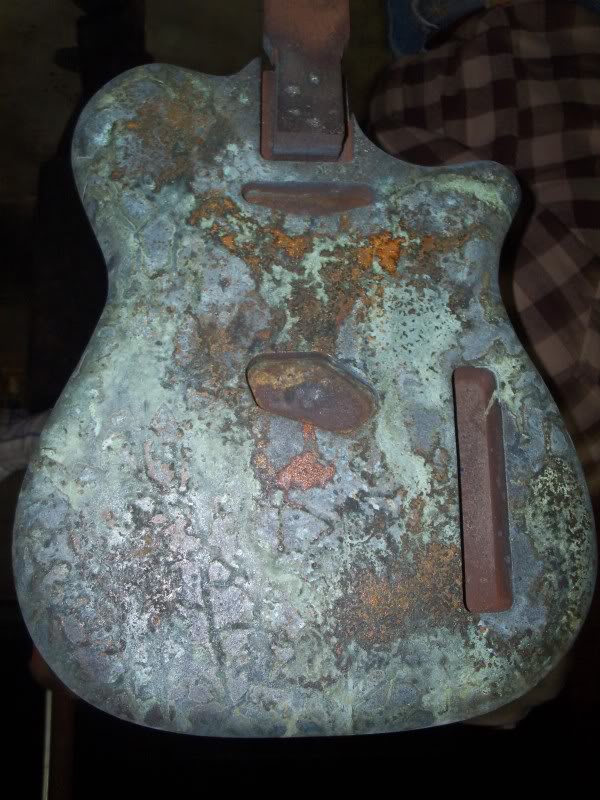
And the crazy back:
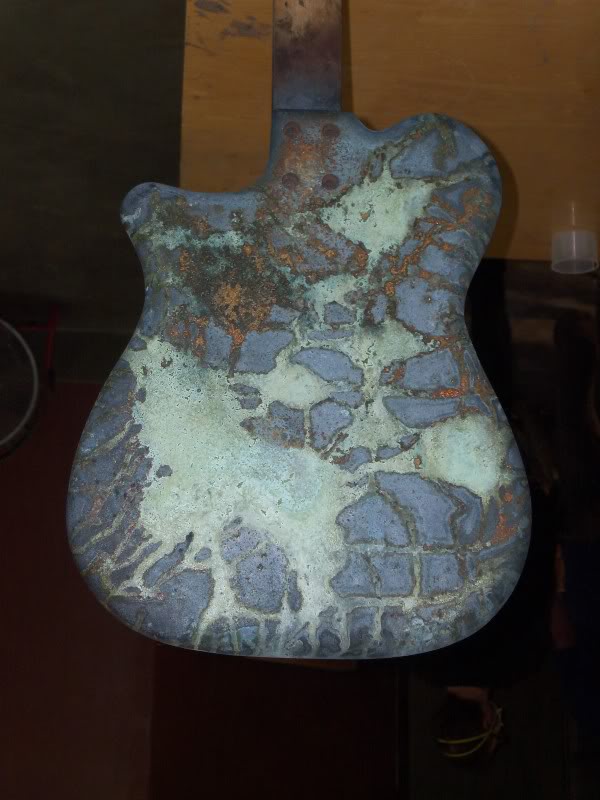
One of Scott Walker's before buffing out some bronze highlights:
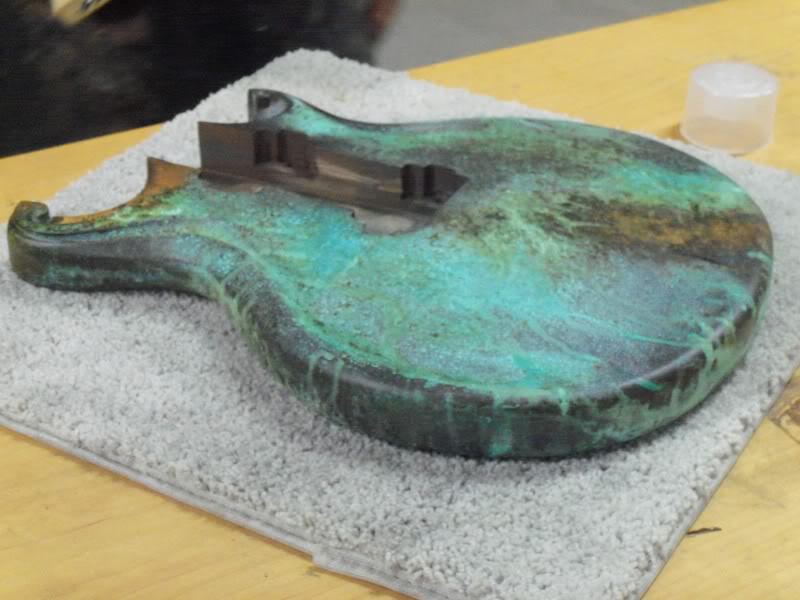
Yeah, so if you like what you see, look him up. If not, then... well.... don't!
Thanks again for looking. Next week should be assembly!!
I wrapped the knobs in tape so they fit snuggly into their holes, and then taped over them to further secure them. Using a twist drill bit, I lowered the press very slowly so that the bit would follow the existing hole. It was mostly successful, but one hole is a bit off. I guess that is just something I'll have to deal with for this build. In the future, I'll refine this knob making method.
The drill press jig:
After that was done, I decided to put little indicators into each knob. I used the same jig with a wedge underneath. I took it over to the bandsaw to make an "incision" into each knob. After cleaning up the slots with a needle file, I thickness sanded some ebony to fit the slots and glued it in place.
Here's the altered jig:
Gluing ebony:
Finished knobs!
This'll give them a little more functional value, I think. These knobs are finish sanded to 220 and ready for an oil finish!
Now for sort of an un-related update. Scott Walker came to the school to teach an optional course on how he does his patina finishes. If you don't know about him, check him out. He does stunning work up in Santa Cruz.
Anyway, I won't go into the entire process, but I thought I'd show some drool pics.
My finished franken-tele. I made the pickguard from copper.
The back (I call it a "rust burst"):
One of my favorites from the class - one of the instructor's.
And the crazy back:
One of Scott Walker's before buffing out some bronze highlights:
Yeah, so if you like what you see, look him up. If not, then... well.... don't!
Thanks again for looking. Next week should be assembly!!




 . Can't wait to see your other bass finished too
  .
.


