You mean this featherweight champion?Too bad. It sounded like a damn good price. With that you might as well stick to this side of the pond for future Dingwall purchases. John has that saweet ABZ 6er!

Enjoy the benefits of a premium membership!
Upgrade Account
-
TalkBass has been independent since 1998. Add your voice.
Create a free account to reply to discussions, view embedded media, and browse with fewer display ads.
Join free Log in
Want zero display ads or expanded classifieds tools? Compare plans.
You are using an out of date browser. It may not display this or other websites correctly.
You should upgrade or use an alternative browser.
You should upgrade or use an alternative browser.
Dingwall Owners Club
- Thread starter FroggyOne2
- Start date
More options
Who Replied?

Yup. Wenge wenge too!

If that was a 5 and had a Glock that would be tempting.
And if my next door neighbor looked exactly like Aishwarya Rai, ...If that was a 5 and had a Glock that would be tempting.


Had my Combustion about four weeks now & WOW it has a sound 'to live for'. This is the sound I've been looking for. Photos to follow.
I am, though, intrigued by the series/parallel comments. So I want to experiment, if I understand correctly the four way switch selects, the bridge solo & neck solo in parallel, bridge with neck parallel & finally, bridge with
neck in series(which I prefer).
Is it possible to re wire it so that in the solo position both pups are in series ? But how would that then affect
it when selecting the bridge with neck position (already in series) ?
Would be grateful for some guidance here.
I am, though, intrigued by the series/parallel comments. So I want to experiment, if I understand correctly the four way switch selects, the bridge solo & neck solo in parallel, bridge with neck parallel & finally, bridge with
neck in series(which I prefer).
Is it possible to re wire it so that in the solo position both pups are in series ? But how would that then affect
it when selecting the bridge with neck position (already in series) ?
Would be grateful for some guidance here.

Had my Combustion about four weeks now & WOW it has a sound 'to live for'. This is the sound I've been looking for. Photos to follow.
I am, though, intrigued by the series/parallel comments. So I want to experiment, if I understand correctly the four way switch selects, the bridge solo & neck solo in parallel, bridge with neck parallel & finally, bridge with
neck in series(which I prefer).
Is it possible to re wire it so that in the solo position both pups are in series ? But how would that then affect
it when selecting the bridge with neck position (already in series) ?
Would be grateful for some guidance here.
Series parallax can refer either to how the pickups are wired together or how the coils in a single pickup are wired against themselves. Your rotary switch does the first, almost all conversation here is about the second.
Had my Combustion about four weeks now & WOW it has a sound 'to live for'. This is the sound I've been looking for. Photos to follow.
I am, though, intrigued by the series/parallel comments. So I want to experiment, if I understand correctly the four way switch selects, the bridge solo & neck solo in parallel, bridge with neck parallel & finally, bridge with
neck in series(which I prefer).
Is it possible to re wire it so that in the solo position both pups are in series ? But how would that then affect
it when selecting the bridge with neck position (already in series) ?
Would be grateful for some guidance here.
It is my understanding that you can hardwire the pups to be in series very easily or you can add switches for the options.
The pick up wiring of the coils is it’s own thing.
The pick ups (externally)being wired is separate in the point that you can run them via the pick up selector in series or parallel ( or individually) which means that N/B when ran together can be ran :
parallel(=)
or series(- -).
So in my brain that means that the pick up signal runs either side x side(parallel) OR 1 through the other (series) in a straight line if that makes sense.
The pick ups apply the same engineering but internally and individually.
in simple terms, having an individual pickup internally wired in parallel gives you a flatter, wider frequency response. (This setting is more natural and true to the fundamental and set of overtones that the string is producing.) Wiring it in series gives a slightly narrower frequency response, so the perceived volume is louder because energy is moved from the extreme highs and lows in to the middle, creating a more forward mid-range sound. The trade-off is a slight loss of high-frequency overtones, in exchange for more pronounced mids.It is my understanding that you can hardwire the pups to be in series very easily or you can add switches for the options.
The pick up wiring of the coils is it’s own thing.
The pick ups (externally)being wired is separate in the point that you can run them via the pick up selector in series or parallel ( or individually) which means that N/B when ran together can be ran :
parallel(=)
or series(- -).
So in my brain that means that the pick up signal runs either side x side(parallel) OR 1 through the other (series) in a straight line if that makes sense.
The pick ups apply the same engineering but internally and individually.
in simple terms, having an individual pickup internally wired in parallel gives you a flatter, wider frequency response. (This setting is more natural and true to the fundamental and set of overtones that the string is producing.) Wiring it in series gives a slightly narrower frequency response, so the perceived volume is louder because energy is moved from the extreme highs and lows in to the middle, creating a more forward mid-range sound. The trade-off is a slight loss of high-frequency overtones, in exchange for more pronounced mids.
Makes sense. Tonally speaking.
Am I close with wiring aspect?
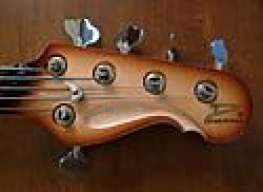
Had my Combustion about four weeks now & WOW it has a sound 'to live for'. This is the sound I've been looking for. Photos to follow.
I am, though, intrigued by the series/parallel comments. So I want to experiment, if I understand correctly the four way switch selects, the bridge solo & neck solo in parallel, bridge with neck parallel & finally, bridge with
neck in series(which I prefer).
Is it possible to re wire it so that in the solo position both pups are in series ? But how would that then affect
it when selecting the bridge with neck position (already in series) ?
Would be grateful for some guidance here.
To hard-wire one of your pickups in series, the green and black leads need to be disconnected from the switch assembly and soldered together (and insulated).
Heat shrink tubing is preferred, but a high quality electrical tape will also work. (Super 88 or Super 33, not the $0.99 vinyl crap.)Thanks very much all of you.
I shall plunge into the murky depths behind the cover & hopefully, easily find the green & black leads.
I will post my experience.

Too bad. It sounded like a damn good price. With that you might as well stick to this side of the pond for future Dingwall purchases. John has that saweet ABZ 6er!
Hands off!! haha
Such a great looking bass, far out.
Oh?!? Is someone saving up?Hands off!! haha
Such a great looking bass, far out.

It would be a great bass to drop a pre into. It would be a great bass to not drop a pre into as well.Hands off!! haha
Such a great looking bass, far out.
Thanks very much all of you.
I shall plunge into the murky depths behind the cover & hopefully, easily find the green & black leads.
I will post my experience.
The most challenging part was removing the cavity cover. Mine fits quite snugly. But seriously, you need a very small straight-blade driver to loosen the screws that connect the mysterious green and black tone conductors to the terminal block on the selector switch printed circuit board. No mystery yet.
Heat soldering iron, twist tips of green & black conductors together, apply heat & solder, let cool, insulate (I used snazzy red plastic electric tape on mine). Put the cover back on and play the frets off of it. 
A bent paperclip inserted into one of the screwholes like a little hook is probably the safest way to avoid any finish damages removing the plate.The most challenging part was removing the cavity cover. Mine fits quite snugly. But seriously, you need a very small straight-blade driver to loosen the screws that connect the mysterious green and black tone conductors to the terminal block on the selector switch printed circuit board. No mystery yet.
I’ve seen basses where it looked like someone took a butter knife to the outside edge of the plate and pried it open. So sad.
Oh?!? Is someone saving up?
Ugh, trying to...you know how it is though, life has a way of throwing up roadblocks.
Lot of hurdles with this one too, given it's in the States and I'd have to get it here. So, nothing set in stone, but John has been pretty amazing.

The Beat Buddy has more to it than I expected. I can put the SD card right in my iMac for updates and adding drum kits, songs, and other stuff. Plus, with the card in the Mac, I can use the Beat Buddy manager as a virtual machine. Very cool for practice. I just need another card to keep in my Mac. Wipe out or lose the card? No problem, download the backup content from Singular Sound's website.
The sobriety function is spot on. Drummer speeds up, slows down, unpredictable fills and misses coming back on the one. I know this guy, and his brethren in their multitudes.
For a computer challenged guy, this has gone pretty smoothly.
Next weekend's goal is figuring out the looper on the Pod 500X. The Beat Buddy might be able to midi with the Pod for locked up beats and looping. We shall see...
The sobriety function is spot on. Drummer speeds up, slows down, unpredictable fills and misses coming back on the one. I know this guy, and his brethren in their multitudes.
For a computer challenged guy, this has gone pretty smoothly.
Next weekend's goal is figuring out the looper on the Pod 500X. The Beat Buddy might be able to midi with the Pod for locked up beats and looping. We shall see...
A bent paperclip inserted into one of the screwholes like a little hook is probably the safest way to avoid any finish damages removing the plate.
I’ve seen basses where it looked like someone took a butter knife to the outside edge of the plate and pried it open. So sad.
You know what would be handy would be to just glue a magnet to the inside of the cavity cover and the next you could just use a strong magnet on the outside to pull the cover up.
Would putting a magnet in there cause any interference?


