

Enjoy the benefits of a premium membership!
Upgrade Account
-
TalkBass has been independent since 1998. Add your voice.
Create a free account to reply to discussions, view embedded media, and browse with fewer display ads.
Join free Log in
Want zero display ads or expanded classifieds tools? Compare plans.
You are using an out of date browser. It may not display this or other websites correctly.
You should upgrade or use an alternative browser.
You should upgrade or use an alternative browser.
First build in progress
- Thread starter bajerovaquero
- Start date
More options
Who Replied?
Fabulous first build, Eduardo! What was your inspiration for the headstock? I was going to guess Jerzy Drozd...

Se ve muy bien Eduardo. Felicitaciones!
It's looking good. It Le compte your inspiration for the headstock?
It's looking good. It Le compte your inspiration for the headstock?

About the headstock its kind of Tobias with Jerzy Drodz lenght.
Anyway its not a copy I just draw it on the wood and it looks good... maybe a bit small for my taste.
I broke my phone so Ive just took a couple of pictures.
I made some sanding and blade to remove scratches, tomorrow Ill make the electronics, and plug it for sound test before finishing it completely.
Enjoy :
:
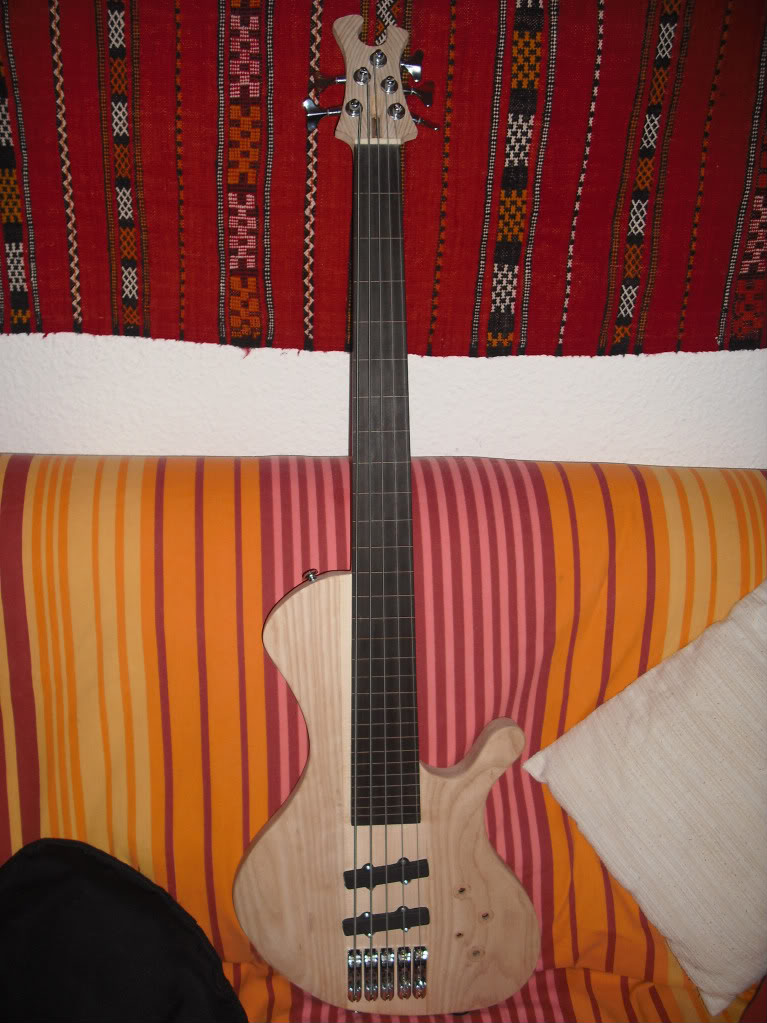

I´ve read a lot of threads about finishing ash but I cant make a decision...
Im thinking in fire, sand, linseed oil and bee wax.
What do you think?
Thanks for comments

Anyway its not a copy I just draw it on the wood and it looks good... maybe a bit small for my taste.
I broke my phone so Ive just took a couple of pictures.
I made some sanding and blade to remove scratches, tomorrow Ill make the electronics, and plug it for sound test before finishing it completely.
Enjoy
:I´ve read a lot of threads about finishing ash but I cant make a decision...
Im thinking in fire, sand, linseed oil and bee wax.
What do you think?
Thanks for comments

I'd like to see some bright color to bring out the funky in that bass. I love the shape, and it looks like it sits really well on you.
- Dec 7, 2007
- 203
- 0
- Disclosures
- Keeping the Groove staying out of Treble

Ok finally the electronics are soldered ...
...
After 4 hours of job and get burn my left index... twice
´
I love the Barts the sound is kind of HiFi style, and capture well the nuances of my crappy playing
Im still adjusting the neck relief and action, but its damm low now.
I take three quick shots in a friends house but for any reason I just can upload one
Both pickups full, tone open
The card is Edirol, dont remember the model, its recorded with cubase sx bass boosted 1db at 130hz
Let me know
...After 4 hours of job and get burn my left index... twice
´
I love the Barts the sound is kind of HiFi style, and capture well the nuances of my crappy playing
Im still adjusting the neck relief and action, but its damm low now.
I take three quick shots in a friends house but for any reason I just can upload one
Both pickups full, tone open
The card is Edirol, dont remember the model, its recorded with cubase sx bass boosted 1db at 130hz
Let me know
Attachments
Everything was going almost perfect in this build...
Unfortunately, when trying to bring out the funky in that bass, burning the wood I have messed it up completely
I practiced a little using the torch on scrap wood, but when I moved to the headstock something wasnt working
the veener started to contract and cracked in the mid joint and the tuner holes started to burn
Then I decided to sand it to remove the finish but the only thing I get was spread the burn powder
I sanded a bit more and it feel a bit better, I made another HUGE mistake, apply linseed oil

So the thing started to mix with the nasty black powder in the grain, and the instrument looks like rescued from a fire with the headstock completely messed up
Yesterday when I went to the shop and looked it again I almost cry...
I have put a lot of fine work on it...
So I decided to remove the finish
I started with 100 sandpaper but it gets clogged in a couple of strokes.
I found the best tool for cleaning is cabinet scraper so yesterday I spend 3 hours removing the disgusting finish.
The only thing still look bad are the sides of the body and the headstock due the grain orientation, it soaked a lot of oil and is a true nightmare remove it
The top and the back are full of scratches so they need to be sanded again, but It will be not easy if the sand paper starts to clog again.
Any trick to repair a oiled scratched surface
Any advice in general?
Lesson learnt: Dont play with fire guys
Wish me luck!

ouch! But it sounds great!
Very inspiring, I'm trying to work up the nerve to attempt my first build.
Very inspiring, I'm trying to work up the nerve to attempt my first build.
Youre right with sound but we all have heard about the guy who buy a 67´stratocaster for 100$ cause some stupid have done something really dirty refinishing itouch! But it sounds great!
Very inspiring, I'm trying to work up the nerve to attempt my first build.

This morning Ive made some progress with cabinet scraper and sanding to 180
Pics soon
Stay tuned

adam.beauchene
Commercial User
Great work so far-Looks salvageable to me, Eduardo. Hard to tell from the pics, but you might be able to take it down a bit with cabinet scrapers, without spreading the burnt wood dust, and get it closer to what you want. And if all else fails on the finish, paint it.

Kudos to you man for this endeavor!
Don't sweat the burned wood, I am sure you could sand it down and then go with the oil finish. Either way it looks great.
My first kit-guitar was a train wreck!
Don't sweat the burned wood, I am sure you could sand it down and then go with the oil finish. Either way it looks great.
My first kit-guitar was a train wreck!

All in all, it looks pretty good to me.bajerovaquero said:Any advice in general?
Lesson learnt: Dont play with fire guys
Wish me luck!
The burn on the body looks great.
The burn around the tuner holes will probably be covered by the tuner nuts and washers.
For the separation down the center of the headstock, you can mill out a rectangular groove, and fill it with a stripe of the wood from the center of the body, to make it match.

All in all, it looks pretty good to me.
The burn on the body looks great.
The burn around the tuner holes will probably be covered by the tuner nuts and washers.
For the separation down the center of the headstock, you can mill out a rectangular groove, and fill it with a stripe of the wood from the center of the body, to make it match.
Good ideas. Maybe some sawdust from the body and superglue for the headstock centre? It looks like the split is straight edged so it would just look like an accent stripe...if not, mill it out as above.
A nice little logo design might also hide everything but a few millimetres either side of the A string tuner as well
ya a fancy inlay would be the best cover up; like suggested a stripe, and if its combined with a lower inlay it will look intentional; on the plus side at least it wasnt something structural that started seperating!
have you tried clamping the seam? clamp 1 or 2 on the sides and a caul on the front to keep it flat? if it closes at all you should try that with some epoxy; just put some wax paper on anything that touches the epoxy; and dont try glue cuz new glue dont stick to old glue
have you tried clamping the seam? clamp 1 or 2 on the sides and a caul on the front to keep it flat? if it closes at all you should try that with some epoxy; just put some wax paper on anything that touches the epoxy; and dont try glue cuz new glue dont stick to old glue
Thanks for the comments
Good ideas everybody!
It looks good in the pictures but it was really dirty in reality
I like the inlay thing, something had gone real wrong with the veneer, the grain orientation is clearly the problem.
Maybe some dremmel and inlay is the solution
You cant see it, but the sides also slided, so maybe some binding is also posible.
I have removed all the burn with scraper and sanded to 180, a real nightmare!
I also washed the thing with alcohol to thin the oil finish
I think I´ll apply carnauba paste and no oil, I found linseed too yelow for my taste.
Any experience with wax alone finish?
Thanks again!
Good ideas everybody!
It looks good in the pictures but it was really dirty in reality
I like the inlay thing, something had gone real wrong with the veneer, the grain orientation is clearly the problem.
Maybe some dremmel and inlay is the solution
You cant see it, but the sides also slided, so maybe some binding is also posible.
I have removed all the burn with scraper and sanded to 180, a real nightmare!
I also washed the thing with alcohol to thin the oil finish
I think I´ll apply carnauba paste and no oil, I found linseed too yelow for my taste.
Any experience with wax alone finish?
Thanks again!
Good news, I repaired the crappy finish it took a ton of elbow grease:
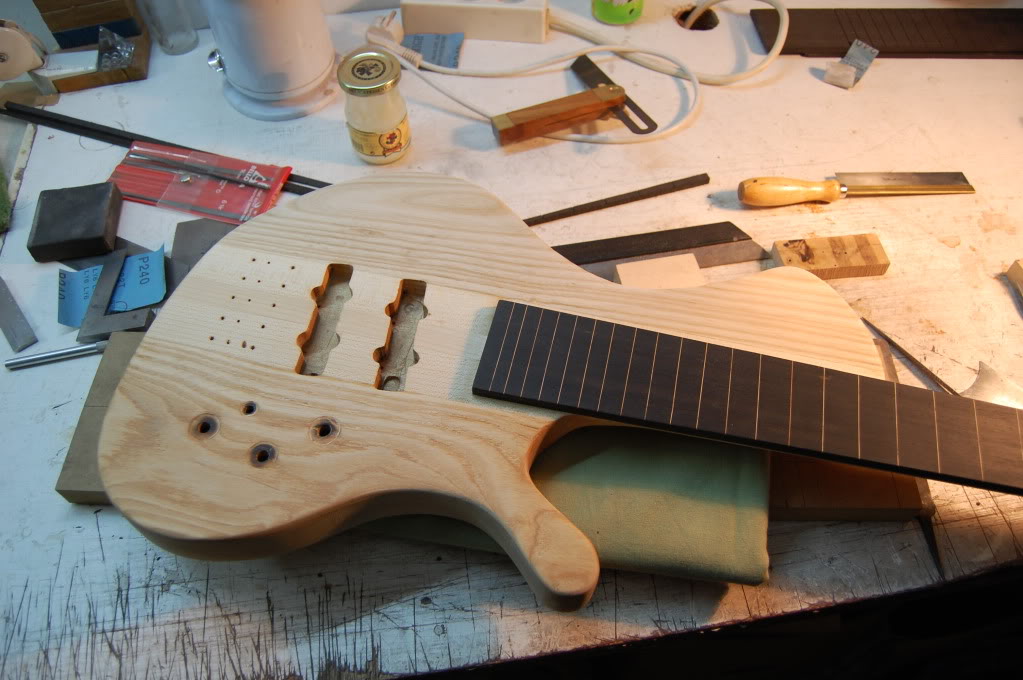
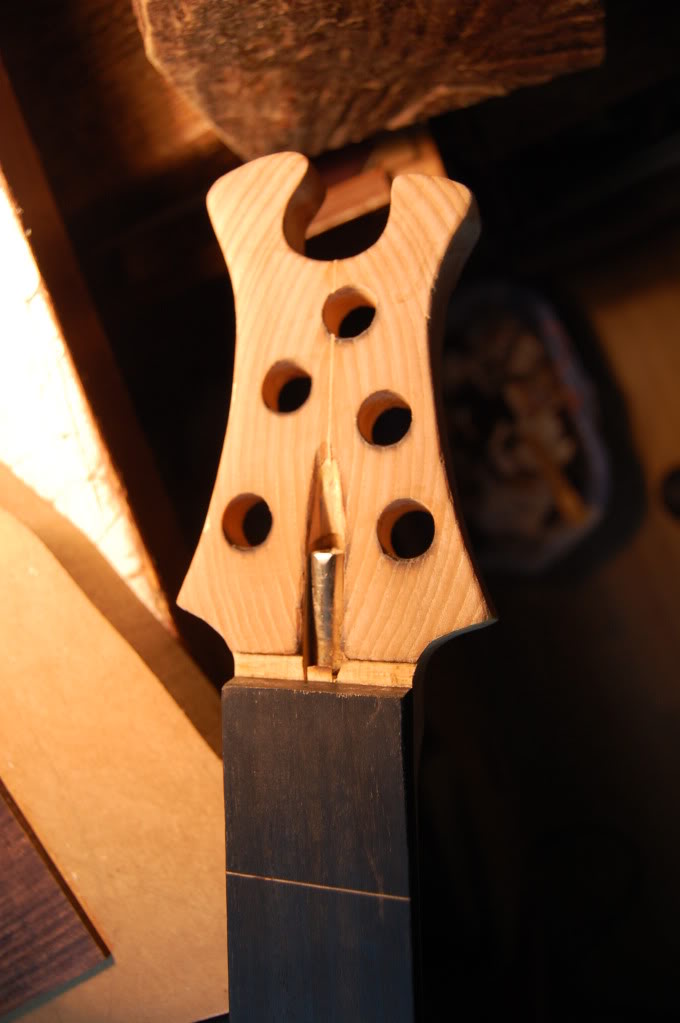
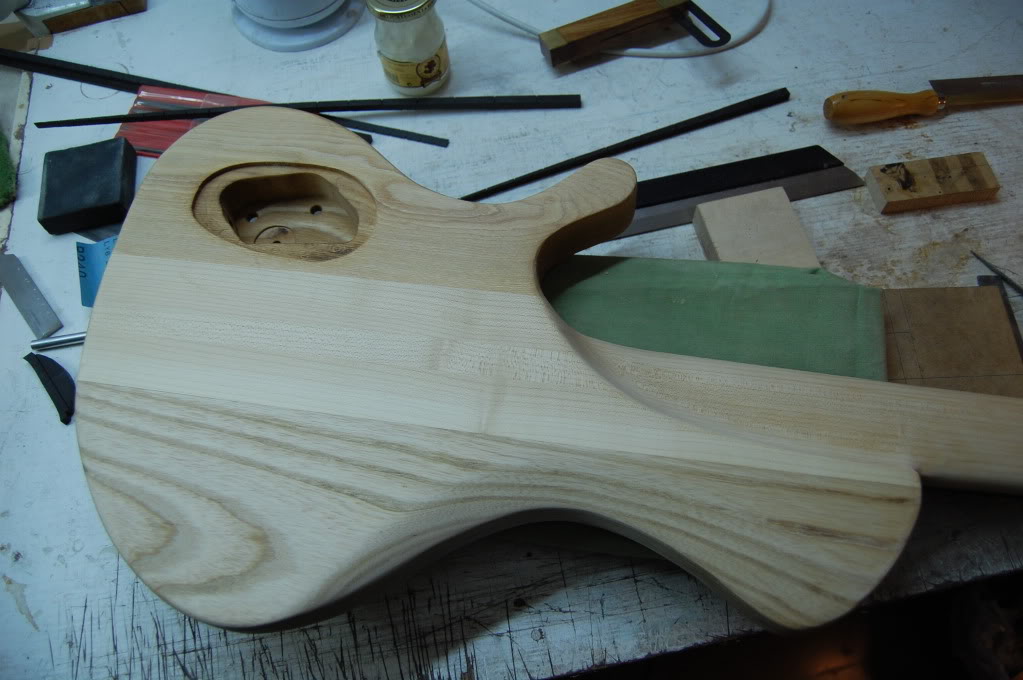
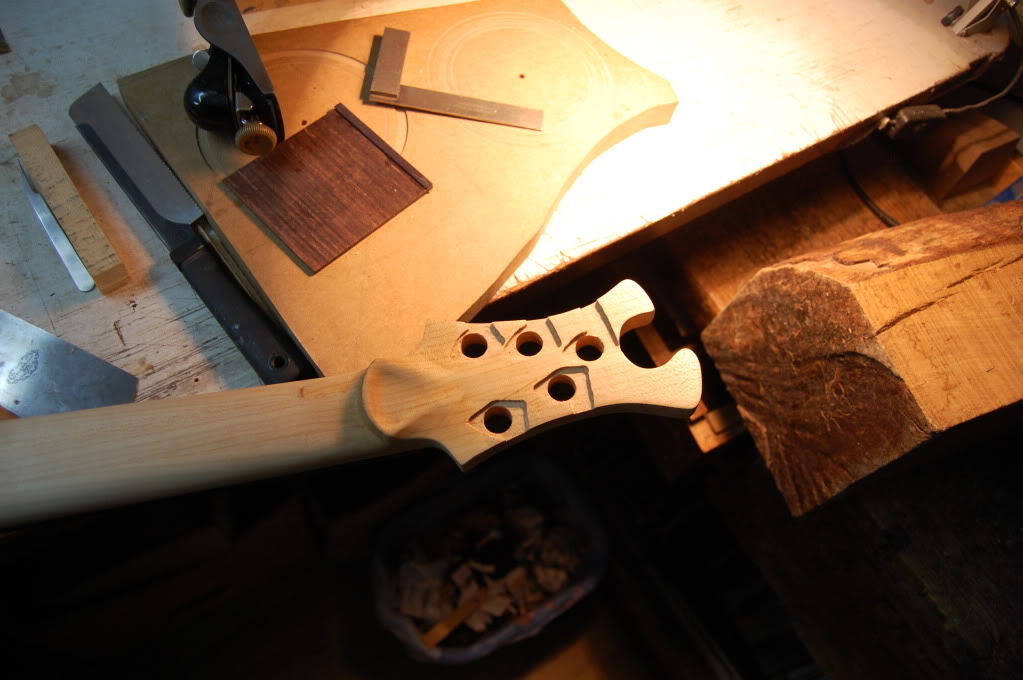
The wood looks a bit aged now, there still some burn minor spots and some grain is deeply burnt but now I want to finish it as fast as posible, I have burned a lot of stamina in the bad finish thing
So I´ve decided apply a paste made of carnauba, bees wax and turpentine:
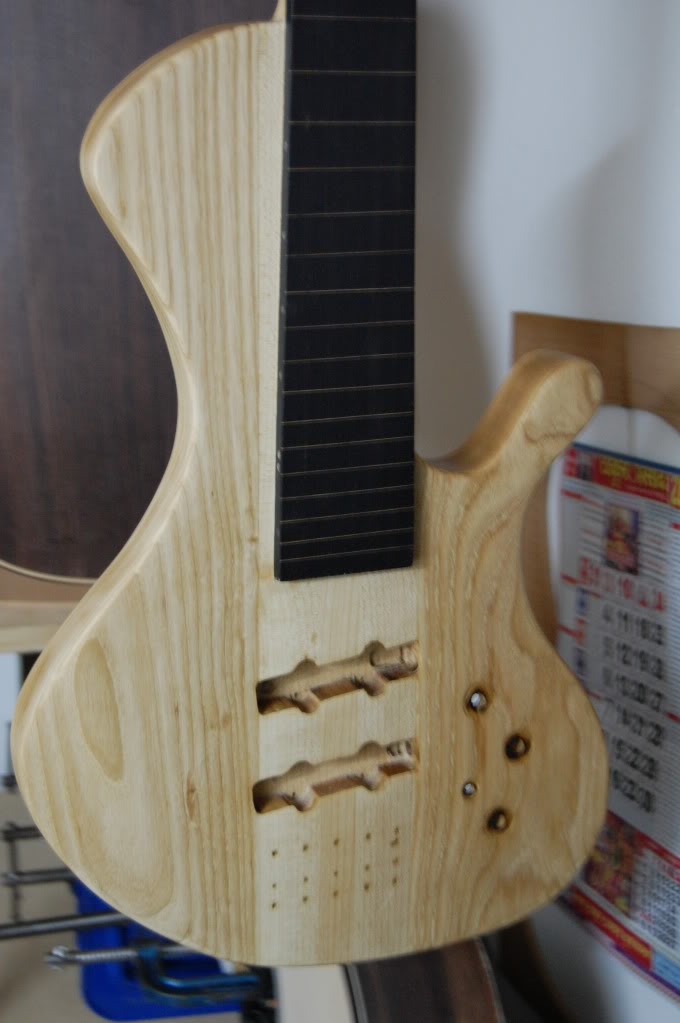

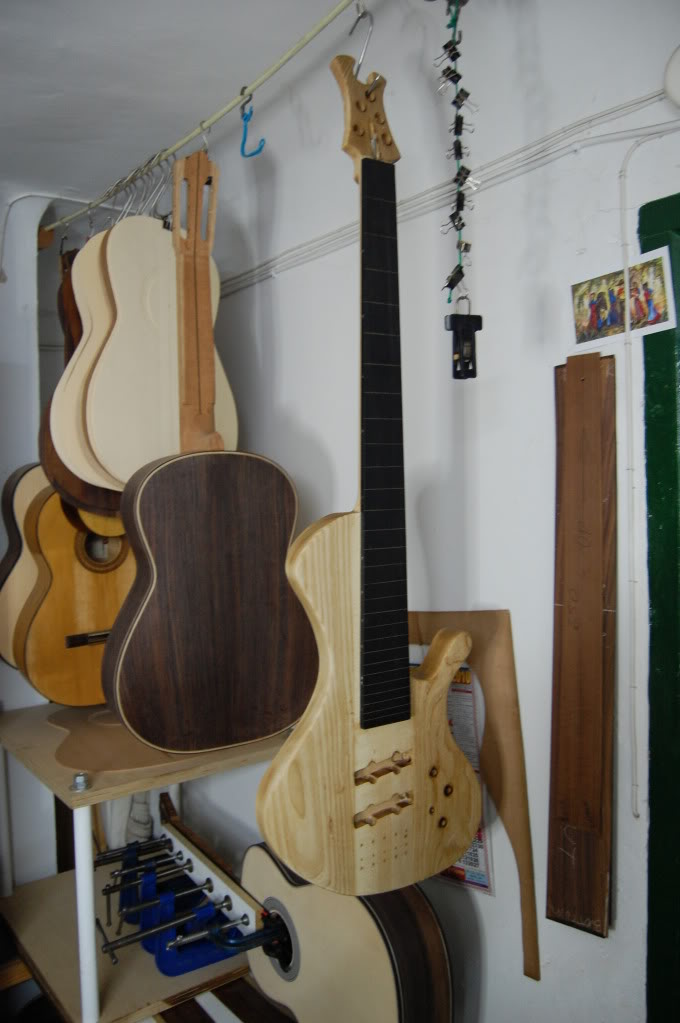
It looks very natural and doesnt darken the wood, I love it!
Today I will apply another coat, i think three will be enough.
Let me know
it took a ton of elbow grease:The wood looks a bit aged now, there still some burn minor spots and some grain is deeply burnt but now I want to finish it as fast as posible, I have burned a lot of stamina in the bad finish thing
So I´ve decided apply a paste made of carnauba, bees wax and turpentine:
It looks very natural and doesnt darken the wood, I love it!
Today I will apply another coat, i think three will be enough.
Let me know

I'm glad you were able to sand out the boo boo, Bajerovaquero
It looks really good now. I'm liking the light finish.
And I really like the Jerzy Drozd influence of your design.
If you try the flame finish again, I think if you do the flaming before you drill your holes and route your cavities, then there will be less edges to get crispy fried. But don't give up on trying it again in the future. It was looking good too.
Couldn't you still glue on a laminate to the headstock if the damage there is still bothering you?
Also... is there enough thickness on the body at the control knob holes?.... where you could recess the knobs a bit, and remove the charred wood around the holes?
Again, Well done on the build. Looking forward to see your next one.
It looks really good now. I'm liking the light finish.
And I really like the Jerzy Drozd influence of your design.
If you try the flame finish again, I think if you do the flaming before you drill your holes and route your cavities, then there will be less edges to get crispy fried. But don't give up on trying it again in the future. It was looking good too.
Couldn't you still glue on a laminate to the headstock if the damage there is still bothering you?
Also... is there enough thickness on the body at the control knob holes?.... where you could recess the knobs a bit, and remove the charred wood around the holes?
Again, Well done on the build. Looking forward to see your next one.


