
Enjoy the benefits of a premium membership!
Upgrade Account
-
TalkBass has been independent since 1998. Add your voice.
Create a free account to reply to discussions, view embedded media, and browse with fewer display ads.
Join free Log in
Want zero display ads or expanded classifieds tools? Compare plans.
You are using an out of date browser. It may not display this or other websites correctly.
You should upgrade or use an alternative browser.
You should upgrade or use an alternative browser.
I had to do it!! (Iceman Content)
- Thread starter FL Knifemaker
- Start date
More options
Who Replied?
Ooooh, not fun!
I'd quite literally have screamed....
Ya, I said a few bad words. At least nothing was damaged other than getting sand stuck to the sticky finish. It really didn't matter time wise as the body is taking MUCH longer to finish.

I prefer copper sheilding much more than using the paint. It just "looks" like it works better  I had to do some minor machining to make the double stack pots work. They're intended to mount to a thin cover plate and aren't long enough for a flush mount. Now they'll work with my flush mount application
I had to stop assembly because of where the jack hole is drilled. It's forcing me to use a long panel jack. If it was drilled just an inch away from where it is now, it would all work just fine with a 3/8" jack
Here's a tip I figured out tonight........
If your wiring with cloth insulation and you have to poke the wire through a tight hole. Put a drop of crazy glue on the end of the wire, hit it with some accelerator and the insulation won't push back. Poking the ground wire up through the little hole leading to the bridge is much easier this way
I had to do some minor machining to make the double stack pots work. They're intended to mount to a thin cover plate and aren't long enough for a flush mount. Now they'll work with my flush mount application I had to stop assembly because of where the jack hole is drilled. It's forcing me to use a long panel jack. If it was drilled just an inch away from where it is now, it would all work just fine with a 3/8" jack
Here's a tip I figured out tonight........
If your wiring with cloth insulation and you have to poke the wire through a tight hole. Put a drop of crazy glue on the end of the wire, hit it with some accelerator and the insulation won't push back. Poking the ground wire up through the little hole leading to the bridge is much easier this way
I like pointy basses and guitars. The BC Rich warlock and Bich shapes are among the most comfortable wearing guitars and basses Ive ever owned. In part due to the rear cutout acting as excellent leg rest/anchor. Those who hate nontraditional shapes are bassically just very conservative people imo.
Your iceman sounds like its coming along pretty well. Best wishes for great playing, wearing and sounding finished bass.
Your iceman sounds like its coming along pretty well. Best wishes for great playing, wearing and sounding finished bass.

"Fireman Precision-made in Japan The Japanese made Fireman is the Icemans opposite with a reverse Iceman body..."*ahem*
[Invalid or Expired Link Removed]
LOL the Fireman! Crazy!
Pointy bass threads go over almost as well as relic threads around here but...........I don't care!! I had to do it.
I've always loved the Iceman lines but never cared for the import quality. So..........
USAG neck, pau ferro fretboard, Warmoth body, ash, P/J route. Tomorrow starts the build, the rest of my parts should be here midweek. Fralin pickups, stacked knob controls, Hipshot ultralights. I will be finished in a clear semigloss.
Yes, it will probably neckdive and I might poke someones eye out but I'm not going to relic it

Nice... and you're right, the "copies" aren't nearly as good as the original ICB500 (although the original was MIJ). Here's mine -
Attachments

Nice... and you're right, the "copies" aren't nearly as good as the original ICB500 (although the original was MIJ). Here's mine -
Is is possible to find MIJ ICB500's?? I would LOVE to find a nice one. They had a smaller body, targeted at the Asian market??
Ive always liked the iceman style, i used to love daron malakian's custom iceman guitars in the toxicity days of system of a down.
I recieved a few PM's regarding this project.......
First, the USAG neck fit PERFECTLY in the Warmoth pocket. I had to use a Scotchbrite pad to remove a tiny bit of the finish on the neck to make it fit after it was sprayed. Overall this part of the build worked out beautifully.
The stacked knob kit is from Bass Parts Resource. As I mentioned above, the pots are intended to mount to a control plate. I was told that longer stemmed pots are available but I didn't feeling like searching for them. The stems on the pots in my kit ARE NOT long enough to go through the wooden body without the modification I made above. In order to make this work, I'm also going to have to machine the tone knobs because I will have to mount them upside down. They need clearance machined into them for the volume knobs to sit. A simple project as long as you have a metal lathe
Right now, the build is on hold until my long reach jack arrives. I put it together with two neck screws for the photo
First, the USAG neck fit PERFECTLY in the Warmoth pocket. I had to use a Scotchbrite pad to remove a tiny bit of the finish on the neck to make it fit after it was sprayed. Overall this part of the build worked out beautifully.
The stacked knob kit is from Bass Parts Resource. As I mentioned above, the pots are intended to mount to a control plate. I was told that longer stemmed pots are available but I didn't feeling like searching for them. The stems on the pots in my kit ARE NOT long enough to go through the wooden body without the modification I made above. In order to make this work, I'm also going to have to machine the tone knobs because I will have to mount them upside down. They need clearance machined into them for the volume knobs to sit. A simple project as long as you have a metal lathe
Right now, the build is on hold until my long reach jack arrives. I put it together with two neck screws for the photo
Attachments

It's all together. The neck needs a slight trussrod adjustment but I'm going to give it a few days for everything to settle in. I didn't route the body to access the trussrod nut because it's the screwdriver kind. I'd rather just pull the neck off. I also had to do some lathe work on the tone knobs to make the volume knobs fit inside of them. Becuase of my through body mount, I had to mount the tone knobs upside down.
The goods.........
It plays and sounds great.
I had a brand new set of DR High Beams. I never used them before but they sound nice.
Intonation was easy to dial in but I still need to work on the set up a bit more, once I give the trussrod nut a twist.
Everything lines up perfectly between the bridge, pickups, neck and nut.
The bass is dead quiet, no hums or buzz.
The not so goods........
The only problem I have is my bridge pickup volume won't roll ALL the way off. The wiring is correct based on the schematic from the Fender site. The only thing that might be mixed up is my caps. Can someone tell from the pic if I have them mixed up?? The marking on the caps makes no sense. There's supposed to be a .03 on the bridge pot and a .05 on the neck pot
Other than that, I couldn't be happier. I need to bring the volume knobs to my buddy for gold powdercoat. I also need to order a bunch of gold screws for the pickups and the control cavity cover. Other than that and some minor setup adjustments, it's ready to
The goods.........
It plays and sounds great.
I had a brand new set of DR High Beams. I never used them before but they sound nice.
Intonation was easy to dial in but I still need to work on the set up a bit more, once I give the trussrod nut a twist.
Everything lines up perfectly between the bridge, pickups, neck and nut.
The bass is dead quiet, no hums or buzz.
The not so goods........
The only problem I have is my bridge pickup volume won't roll ALL the way off. The wiring is correct based on the schematic from the Fender site. The only thing that might be mixed up is my caps. Can someone tell from the pic if I have them mixed up?? The marking on the caps makes no sense. There's supposed to be a .03 on the bridge pot and a .05 on the neck pot
Other than that, I couldn't be happier. I need to bring the volume knobs to my buddy for gold powdercoat. I also need to order a bunch of gold screws for the pickups and the control cavity cover. Other than that and some minor setup adjustments, it's ready to
Attachments



Thanks for the compliments. I've taken the neck off again and gave the truss rod a turn. I really hate to mill a groove in the body to access the truss nut but I think that would be the best thing to do  I filed the grooves in the nut and got the low action I wanted. I'm really happy now and it's playing great!! I just need to sort out my bridge volume issue. And.....................my gold straplocks should be here tomorrow!
I filed the grooves in the nut and got the low action I wanted. I'm really happy now and it's playing great!! I just need to sort out my bridge volume issue. And.....................my gold straplocks should be here tomorrow!
.........
The only problem I have is my bridge pickup volume won't roll ALL the way off. The wiring is correct based on the schematic from the Fender site. The only thing that might be mixed up is my caps. Can someone tell from the pic if I have them mixed up?? The marking on the caps makes no sense. There's supposed to be a .03 on the bridge pot and a .05 on the neck pot
Hard to tell from your pic, but from what I can see it looks ok.
Off hand, I'd say you got it right anyway. You've done a bunch of projects and wired up quite a few basses haven't you? I suspect you might have a bad volume pot. Best thing would be to check that pot with an ohmmeter. As far as the cap values are concerned, that's not going to make a whole lot of difference. The larger value will send more of the high frequencies from your signal to ground when the pot is rolled back, but it's pretty much out of the circuit when the pot is all the way up anyway.
Cool project, looking good!!
Hard to tell from your pic, but from what I can see it looks ok.
Off hand, I'd say you got it right anyway. You've done a bunch of projects and wired up quite a few basses haven't you? I suspect you might have a bad volume pot. Best thing would be to check that pot with an ohmmeter. As far as the cap values are concerned, that's not going to make a whole lot of difference. The larger value will send more of the high frequencies from your signal to ground when the pot is rolled back, but it's pretty much out of the circuit when the pot is all the way up anyway.
Cool project, looking good!!
No! I'm an idiot. I forgot to ground one of the lugs to the pot case. Another member pointed it out in the "Stacked Pot" thread. I looked at it about 10 times and missed the mistake
 2 seconds with the soldering iron and it's working perfectly now
I just weighed it and it's very light, 7.8blbs on my ULTRA accurate digital fish scale
I also filed the nut and made more truss rod ajustments. I got the action very low and buttery feeling
I'm REALLY happy with the way this turned out. My gold screws and straplocks should be here today.
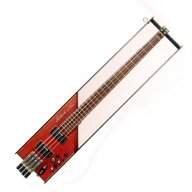
If you're gunna be poking things with your headstock anyway, may as well cause some damage an make the headstock like (forgive me for mentioning a guitar >.>) the KxK WarriorV headstock. You'll never see a more dangerous looking headstock, it's simply not possible, lol.
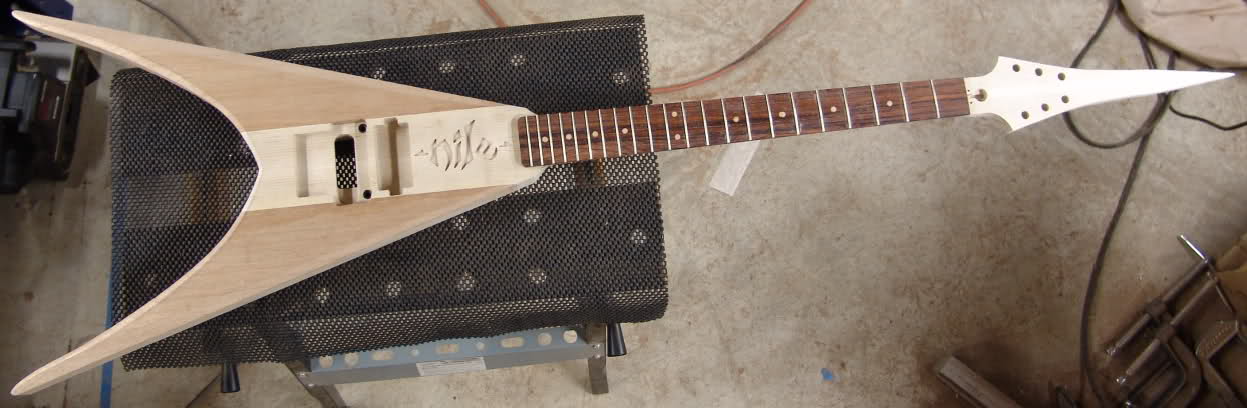
"You'll never see a more dangerous looking headstock, it's simply not possible, lol." I would say my Edwards is at least as pointy and dangerous looking. if not more so. LOL.
Attachments


Walfy said:"You'll never see a more dangerous looking headstock, it's simply not possible, lol." I would say my Edwards is at least as pointy and dangerous looking. if not more so. LOL.
That makes a great javelin/supersonic missile in the event of a zombie apocalypse


