• TalkBass has been independent since 1998. Add your voice.
    Create a free account to reply to discussions, view embedded media, and browse with fewer display ads.
    Join freeLog in
    Want zero display ads or expanded classifieds tools? Compare plans.

Restoration: Roadstar (II) to hell

Progress as promised (yaaay!):

Fretboard cleaned up, re-sanded, dents-filled, oiled, slots re-cut and new frets hammered in.
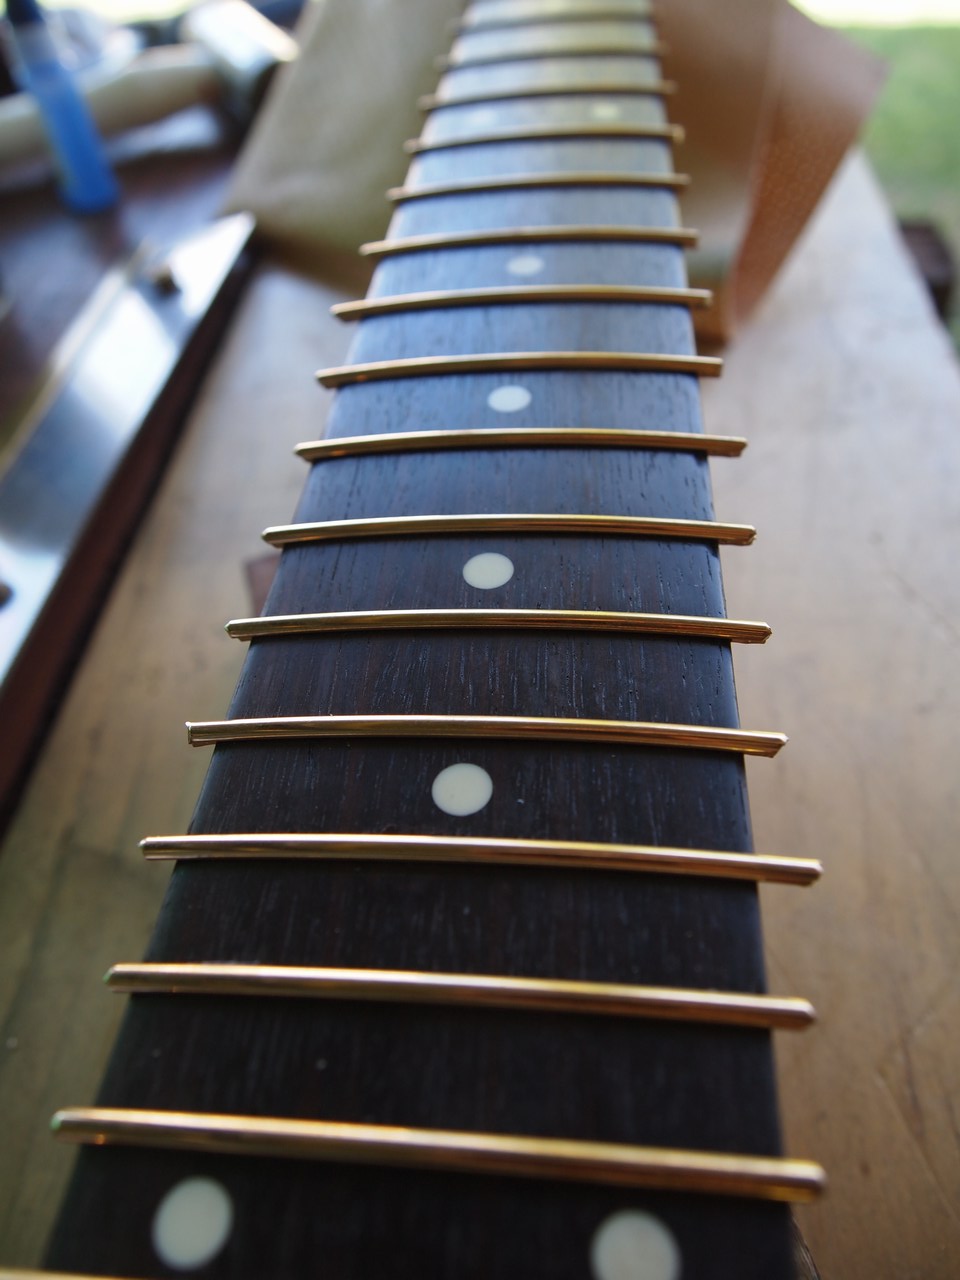
P5060778.jpg


Gave each fret a dab of CA as some of the slots were still a teeny bit rough from where the old frets were pulled.
Overall, looking lovely though.

I might trim them later today, otherwise it'll be a case of trim, level and crown tomorrow (whilst my router bits disappeared in transit, my levelling beam and crowning files survived! Whoop!).

Remedial work on the paint job seems to have been a success, and the final coat of lacquer is now drying ready for cut and polish at the end of the week (or as long as I can leave it... really.... want.... to ... finish it....)
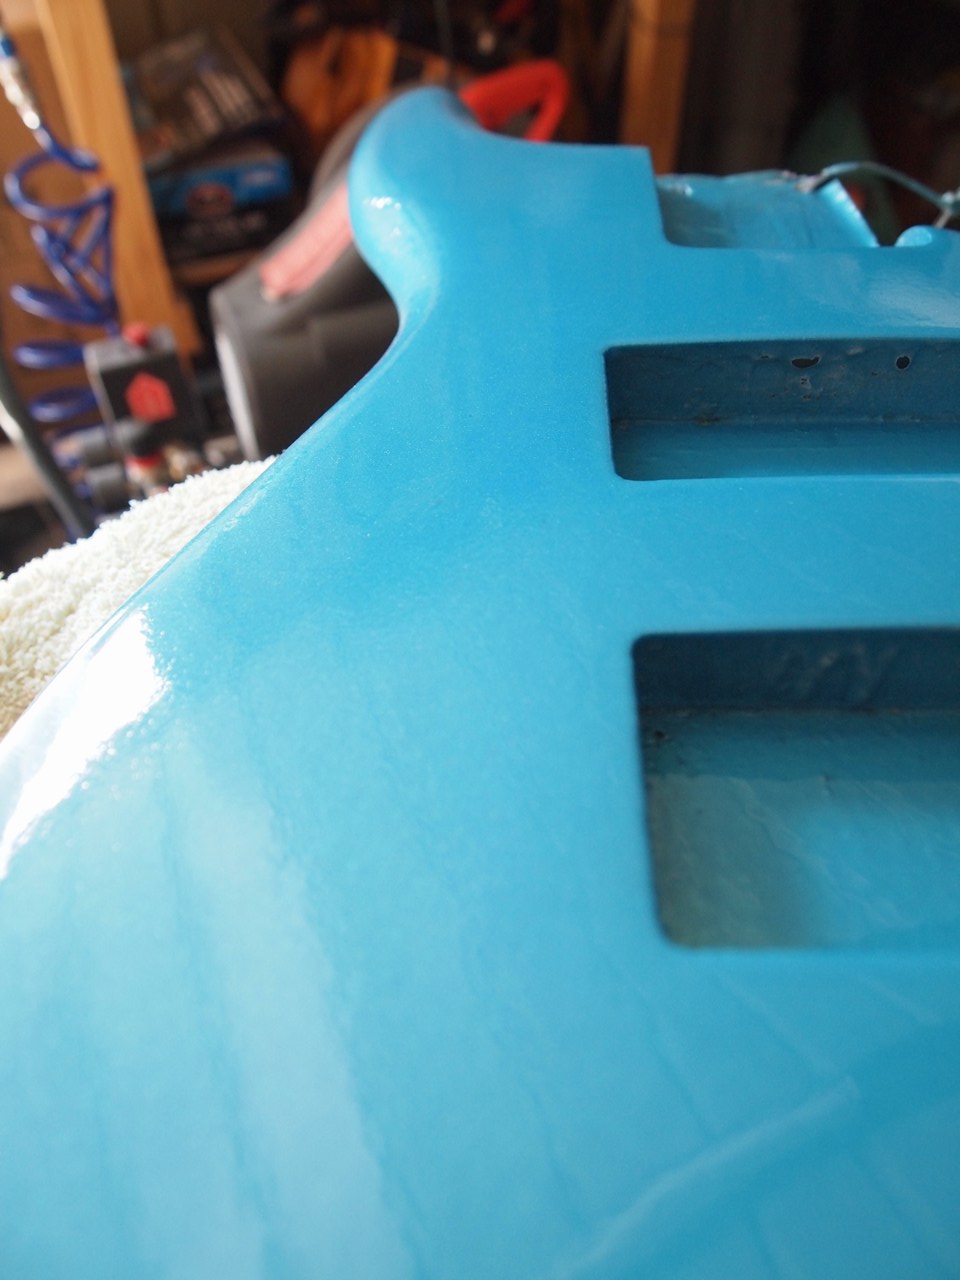
P5060779.jpg


Think I'm back on track with this.
:hyper:
 
Decided to go ahead and trim the fret ends anyway.

Normally I'd use a pair of end nippers, but since these are in the 'toolbox of mysterious disappearance' I thought I'd improvise with a radius block and a Dremel...

P5060780.jpg


... and by Jove (!), I don't think I'll ever use the nippers again!

No grunting and straining, just the high-pitched screeching of a cut-off wheel.
... and only one piece of hot metal between the toes before I put on appropriate footwear (health & safety fail).
Filing tomorrow.
 
Decided to go ahead and trim the fret ends anyway.

Normally I'd use a pair of end nippers, but since these are in the 'toolbox of mysterious disappearance' I thought I'd improvise with a radius block and a Dremel...


... and by Jove (!), I don't think I'll ever use the nippers again!

No grunting and straining, just the high-pitched screeching of a cut-off wheel.
... and only one piece of hot metal between the toes before I put on appropriate footwear (health & safety fail).
Filing tomorrow.

Any issues with the heat generated by the Dremel?
 
Any issues with the heat generated by the Dremel?

Only a perfect, fret-shaped burn in two toes.


Indeed!


Aaaaaanyho!
Finally the silence is broken with something worthy of your eyeballs!

After a lot of mucking about, disastrous mistakes, bad luck, inexcusable idiocy, and perseverance I've arrived at probably my favourite moment of any build.
... it's that moment just after my least favourite moment where you attack perfectly good lacquer with silicone carbide.
Long-story-short:

P5130790.jpg


MATT!
(... followed swiftly by...)

P5130792.jpg


I CAN SEE MY UGLY FACE IN THAT!

Shame it's such an overcast day, under bright light it's rather gorgeous.

P5130794.jpg


Some different lighting:

P5130796.jpg


mmmmmmmmm, that's better.

Incidentally, if you were wondering what any of the disastrous mistakes were, well: apart from the 'fly in lacquer' incident, I also failed to consider that thinning the lacquer down would extend the drying time quite considerably.
Then carelessly leave it on an uneven surface and...

P4270752.jpg


Ugh. The big long one went right down to the undercoat.
... but not to worry, all fixed, just took time - and taught me quite a bit about spraying.

... just got to get that sodding headstock done now... ;)
 
Incidentally, if you were wondering what any of the disastrous mistakes were, well: apart from the 'fly in lacquer' incident, I also failed to consider that thinning the lacquer down would extend the drying time quite considerably.
Then carelessly leave it on an uneven surface and...

P4270752.jpg

What kind of lacquer did you use? When I use lacquer I mix it 4 parts lacquer, 2 parts thinner, and 1 part retarder. I use retarder because thinner usually makes the lacquer hotter so it drys faster.


But anyway, That bass looks absolutely fantastic. That color is perfect.
 
Aaah sunlight my old friend:

P5160807.jpg


... but wait, is that another bridge mod I see??!


P5160806.jpg


Yes, yes it is.
(brass thumb-screws for intonation)
... and frankly my dear, it looks awesome.

The colour scheme is now officially black & brass.
... which means the gold machineheads are out (the gold looks noticeably garish against the brass, so I'll stick with black and let the coin act as an accent).

What kind of lacquer did you use?
Acrylic on this one.
Was mixing almost 1:1 (lacquer to thinner) as the colour pearls acted like flour in water.
Next time I'll be using less of the pearls as (the manufacturer did promise) a little goes a very long way.
 
Looking great. Mind if I ask where you got the brass thumb screws? I've been looking for some myself.

Looks more like stainless to me,

Both right actually.
They're brass thumb screws mounted on brass motherboard spacers screwed to some M3 stainless stud.

P5230815.jpg


Sorry about my zombie-thumb.

Got the brass thumb-screws off of eBay here:
http://www.ebay.com/itm/ws/eBayISAPI.dll?ViewItem&item=330720580200&ssPageName=ADME:L:OC:GB:3160#ht_1120wt_1163

P5230817.jpg


... but it doesn't look like the seller has any more.
(took me a while to find anything suitable, and a lot of Googling "knurled brass". Those seem the best search terms.)

Finally - the coin has a new home - inlaid flush between the machineheads...

P5230814.jpg


... so I can (at last) get on with the business of matching the headstock.
Rejoice!
 
As an eBay Associate, TalkBass may earn a commission from qualifying purchases.
  • Like
Reactions: DubHunter