
Enjoy the benefits of a premium membership!
Upgrade Account
-
TalkBass has been independent since 1998. Add your voice.
Create a free account to reply to discussions, view embedded media, and browse with fewer display ads.
Join free Log in
Want zero display ads or expanded classifieds tools? Compare plans.
You are using an out of date browser. It may not display this or other websites correctly.
You should upgrade or use an alternative browser.
You should upgrade or use an alternative browser.
Scary Neck Repairs: Two Wal Necks
- Thread starter Bruce Johnson
- Start date
More options
Who Replied?

Your custom fret slotting saw is pure magic. Have the Stewmac guys called you yet?
Hah! It's way too complex and expensive for them to offer and sell. By the way, I've known Dan Erlewine for years. I've even done a few jobs for him. We have a friendly competition trying to outdo each other with custom fixtures and tools. He's a good man. Probably the most experienced instrument repair guy alive.

Luthier Deathmatch!Hah! It's way too complex and expensive for them to offer and sell. By the way, I've known Dan Erlewine for years. I've even done a few jobs for him. We have a friendly competition trying to outdo each other with custom fixtures and tools. He's a good man. Probably the most experienced instrument repair guy alive.
More progress on Alex's Wal neck. Slowly but surely. I mentioned a few times before that I have big serious problems going on here in the Secret Underground Lab right now, and I've barely been able to get a few hours a week in the shop working on instruments.
Anyway, it was refreshing to sit down at the bench late Saturday night and spend some enjoyable time trimming its new fingerboard.
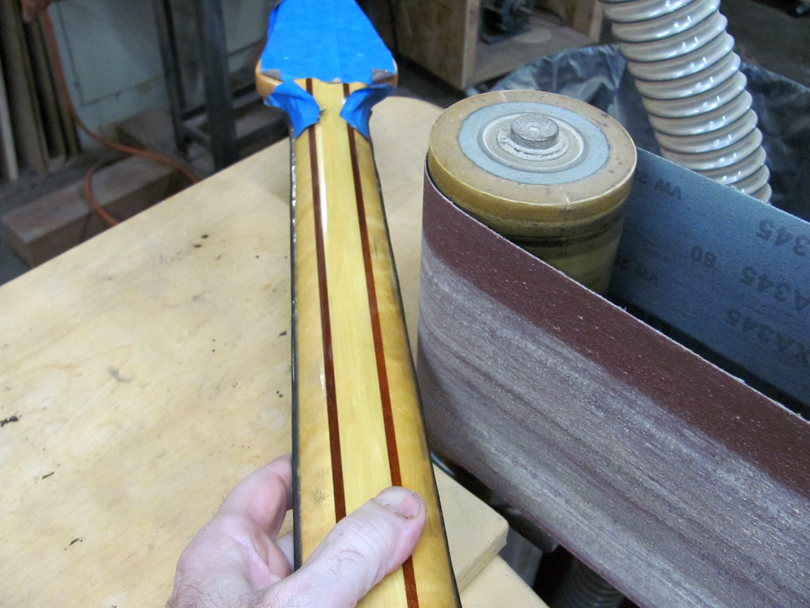
The first step is to remove the bulk of the excess ebony overhanging the sides. Very carefully running the edge along the end roller of my edge sander. Very carefully. Sanding divots in the side of an old Wal neck is not acceptable!
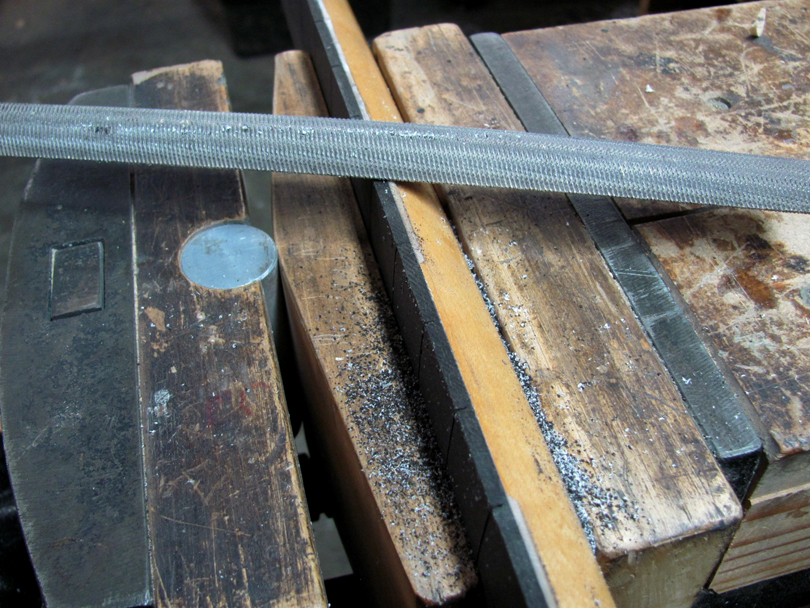
Then clamp the neck sideways and go at it with files. All hand work from here. I'm using an 8" Half Round Bastard file to Very Carefully file the ebony down to just flush with the maple. Trying really hard not to scratch the finish or take any maple off. This takes patience and a delicate touch.
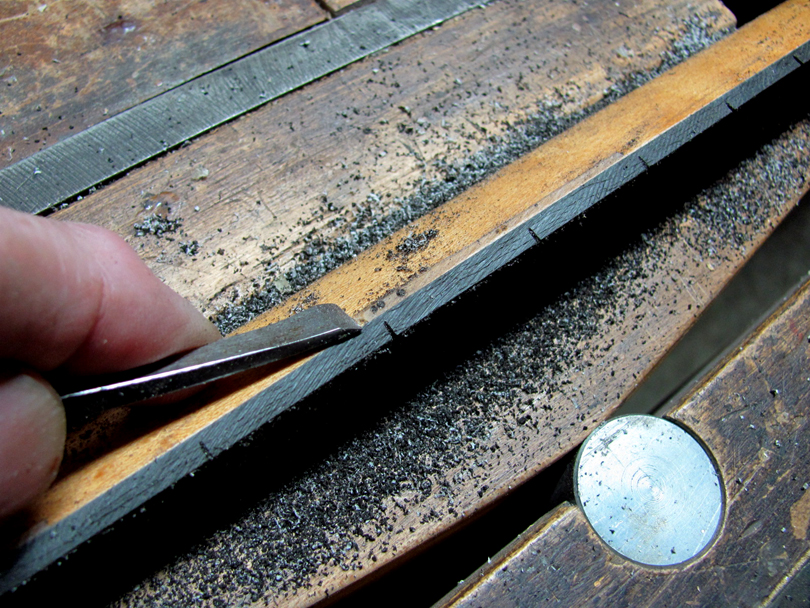
When the ebony is down to flush, I use a small chisel to pop off the epoxy squeeze out. It pops right off because of the wax I put on back in the glue-up stage.
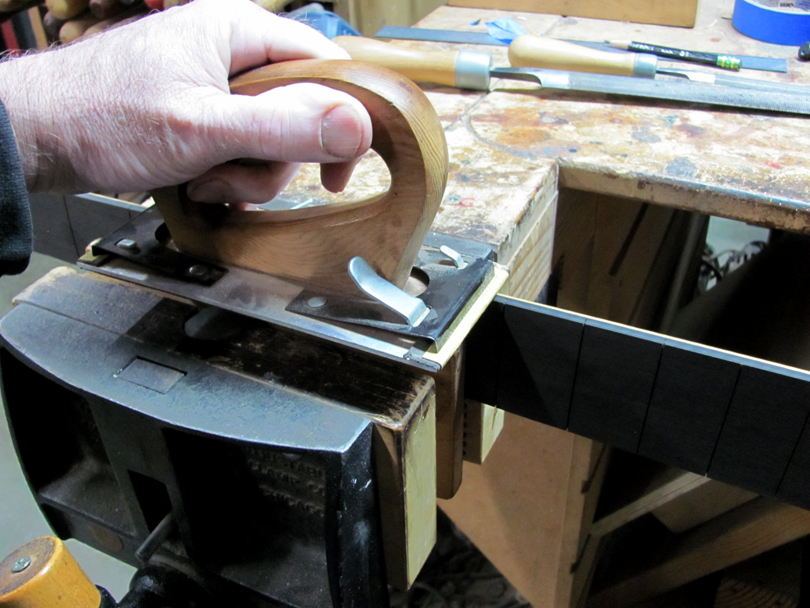
Going over the edge of the fingerboard with a hard short board and 120 grit paper, to get it straight and flat.
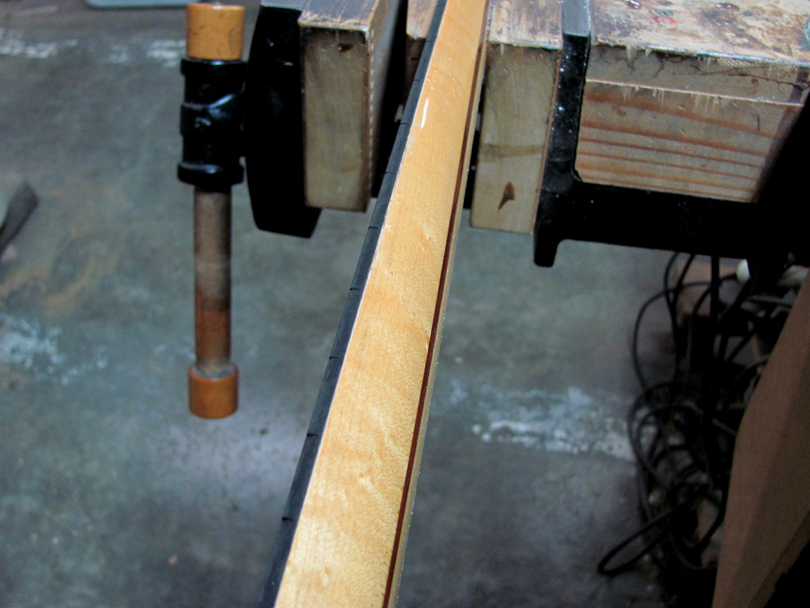
After some more filing with Smooth and #4 Swiss files, the edge is about there. I've used Windex to clean off the wax goop, and inspect it carefully. It's looking good, barely any scratches on the finish.
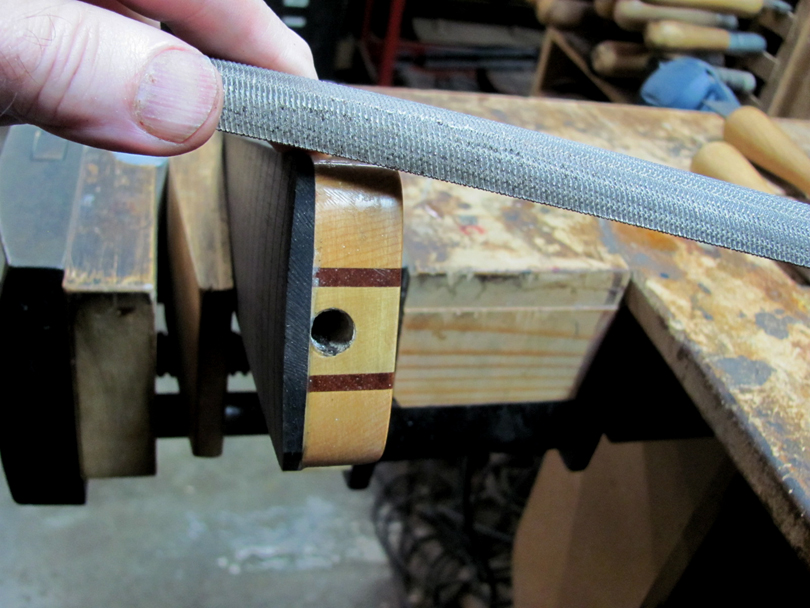
Trimming the fingerboard around the heel. Same process. Careful strokes with a Bastard file to get it close, then smoothing it with Smooth and #4 Swiss files. Trying hard not to scratch the finish.
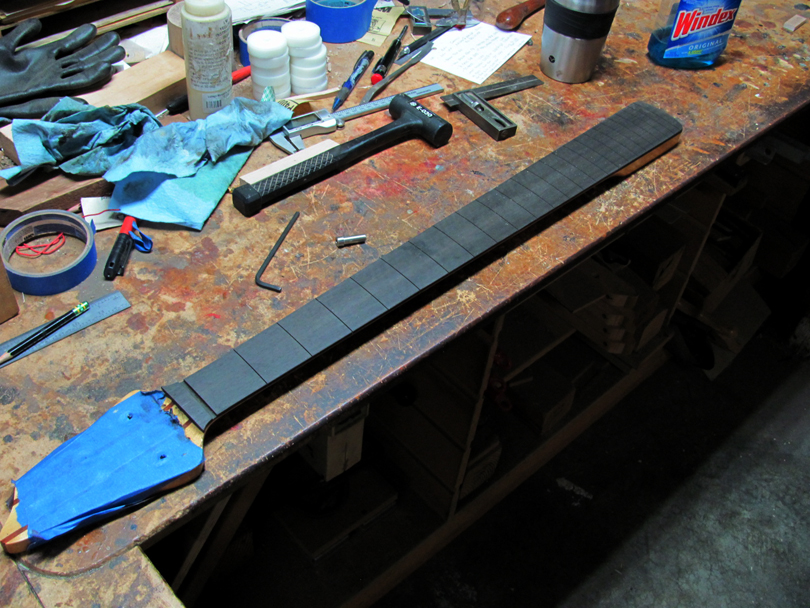
Okay, The fingerboard is basically trimmed to size on the neck. It took about an hour and a half of careful, gentle hand work.
Next up: Scooping and smoothing the flare at the headstock, putting in the side dots, and the final sanding and polishing of the fingerboard. Then the frets.
Anyway, it was refreshing to sit down at the bench late Saturday night and spend some enjoyable time trimming its new fingerboard.
The first step is to remove the bulk of the excess ebony overhanging the sides. Very carefully running the edge along the end roller of my edge sander. Very carefully. Sanding divots in the side of an old Wal neck is not acceptable!
Then clamp the neck sideways and go at it with files. All hand work from here. I'm using an 8" Half Round Bastard file to Very Carefully file the ebony down to just flush with the maple. Trying really hard not to scratch the finish or take any maple off. This takes patience and a delicate touch.
When the ebony is down to flush, I use a small chisel to pop off the epoxy squeeze out. It pops right off because of the wax I put on back in the glue-up stage.
Going over the edge of the fingerboard with a hard short board and 120 grit paper, to get it straight and flat.
After some more filing with Smooth and #4 Swiss files, the edge is about there. I've used Windex to clean off the wax goop, and inspect it carefully. It's looking good, barely any scratches on the finish.
Trimming the fingerboard around the heel. Same process. Careful strokes with a Bastard file to get it close, then smoothing it with Smooth and #4 Swiss files. Trying hard not to scratch the finish.
Okay, The fingerboard is basically trimmed to size on the neck. It took about an hour and a half of careful, gentle hand work.
Next up: Scooping and smoothing the flare at the headstock, putting in the side dots, and the final sanding and polishing of the fingerboard. Then the frets.

It's so satisfying to see all this fine work being detailed as such. 

It's been crazy here, but I finally got some more time in on the Wal necks. I hope to finish them up this week.
Detailing out the new ebony fingerboard on Alex's neck:
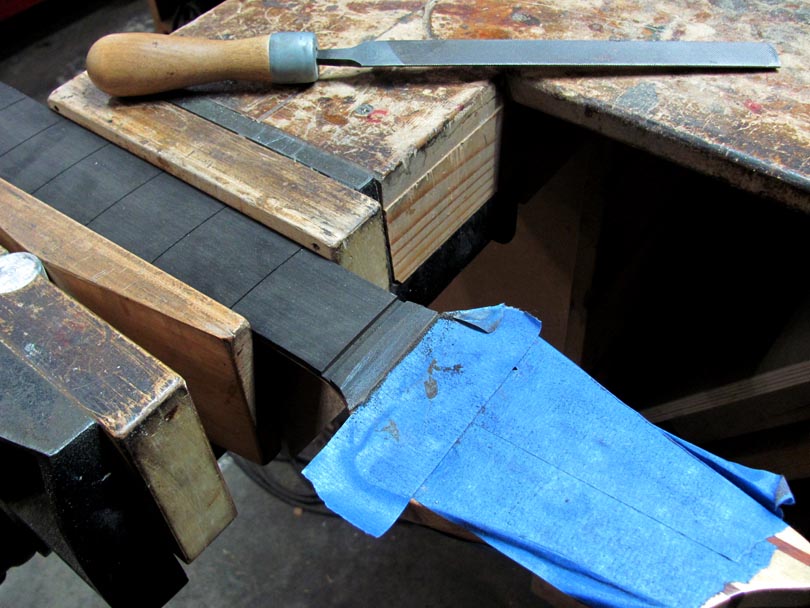
Shaping the outboard "nose" of the fingerboard. With some protective tape on the headstock, I touched it lightly on the end roller of my edge sander, to roughly round it off.
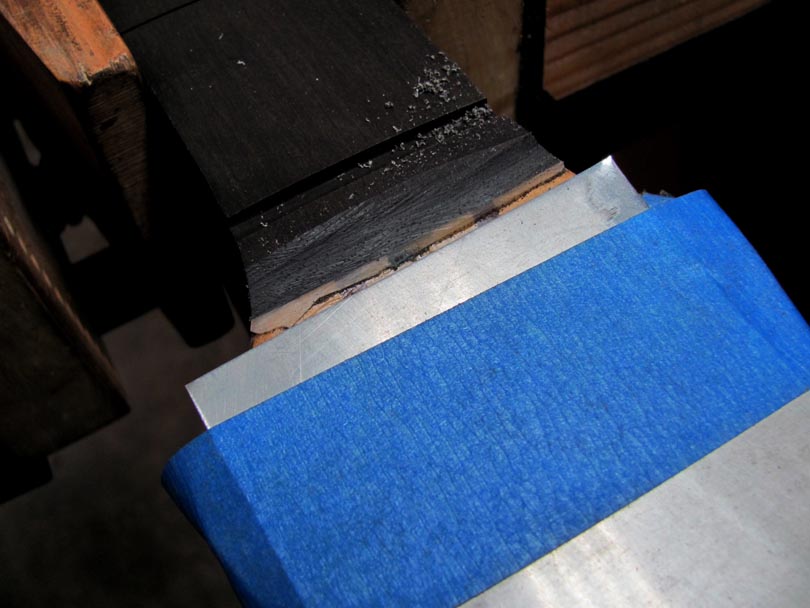
Hand filing the scoop with a small half-round file. A classic Luthier trick is to tape down a scrap of thin aluminum. This allows me to file the overhanging ebony down flush to the neck without scratching the finish on the headstock. I also pre-waxed the headstock surface before gluing the fingerboard on. That epoxy squeeze-out popped right off as soon as I started filing the ebony.
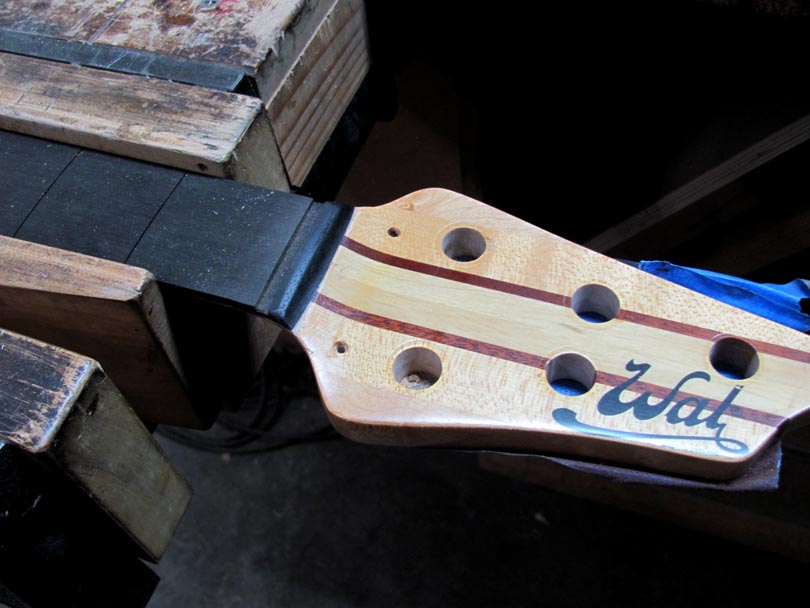
And there's the end of the fingerboard shaped to the same contour as the original. And yes, I left the little flares on the corners. The surface of the fingerboard hasn't been finish-sanded and polished yet.
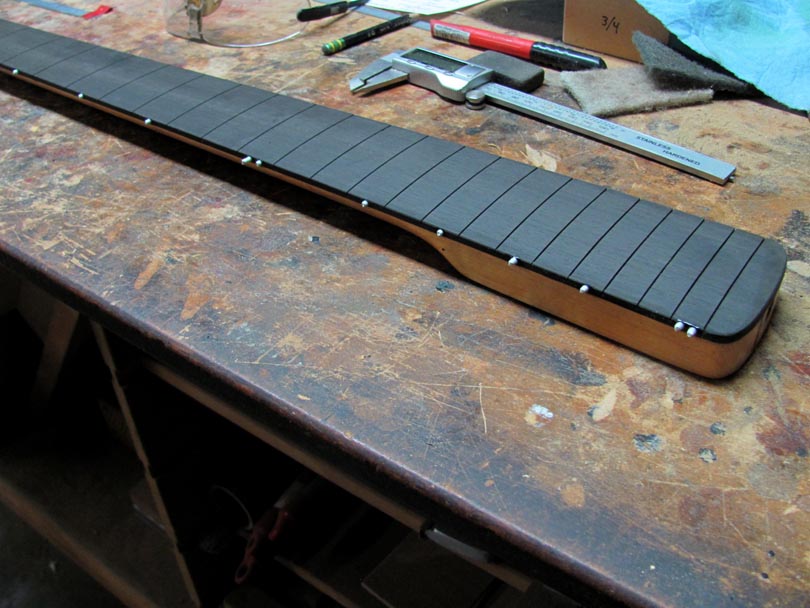
Side dots: I'm using 0.093" white styrene for the dots. Same diameter, locations, and spacing as the factory dots, but brighter white. I marked and drilled the holes carefully, and glued in pieces of the rod stock with CA glue.
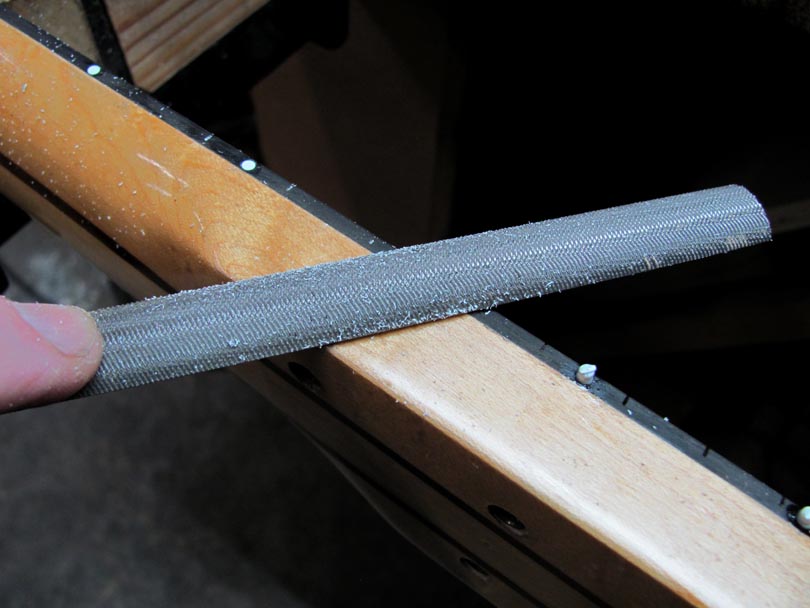
Filing the dots down flush with the edge of the fingerboard. First with a 6" Bastard file, then a #4 Swiss file, then 400 sandpaper on a block, then polished up with grey and white Scotchbrite.
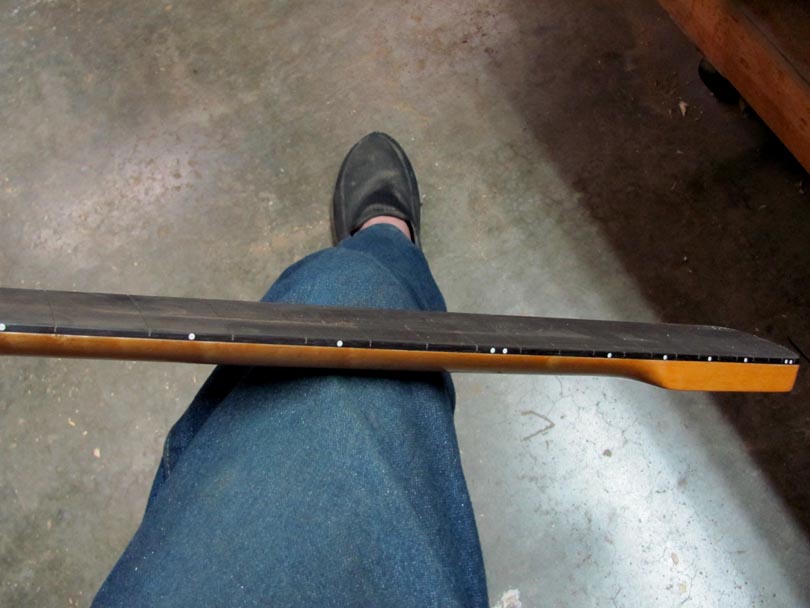
And there's the finished dots. They are more visible than the original dots, but not too big. Keeping the classic Wal look.
Next up: Polishing up the fingerboard. Then I'll be ready to install the frets. And I'll be refretting Mike's neck too.
Detailing out the new ebony fingerboard on Alex's neck:
Shaping the outboard "nose" of the fingerboard. With some protective tape on the headstock, I touched it lightly on the end roller of my edge sander, to roughly round it off.
Hand filing the scoop with a small half-round file. A classic Luthier trick is to tape down a scrap of thin aluminum. This allows me to file the overhanging ebony down flush to the neck without scratching the finish on the headstock. I also pre-waxed the headstock surface before gluing the fingerboard on. That epoxy squeeze-out popped right off as soon as I started filing the ebony.
And there's the end of the fingerboard shaped to the same contour as the original. And yes, I left the little flares on the corners. The surface of the fingerboard hasn't been finish-sanded and polished yet.
Side dots: I'm using 0.093" white styrene for the dots. Same diameter, locations, and spacing as the factory dots, but brighter white. I marked and drilled the holes carefully, and glued in pieces of the rod stock with CA glue.
Filing the dots down flush with the edge of the fingerboard. First with a 6" Bastard file, then a #4 Swiss file, then 400 sandpaper on a block, then polished up with grey and white Scotchbrite.
And there's the finished dots. They are more visible than the original dots, but not too big. Keeping the classic Wal look.
Next up: Polishing up the fingerboard. Then I'll be ready to install the frets. And I'll be refretting Mike's neck too.

I spent about an hour today working on Alex's Wal neck, detailing out the fingerboard. Gently rounding the edges with files, smoothing out the shape of the nose, sanding the surface up to a semi-shine.
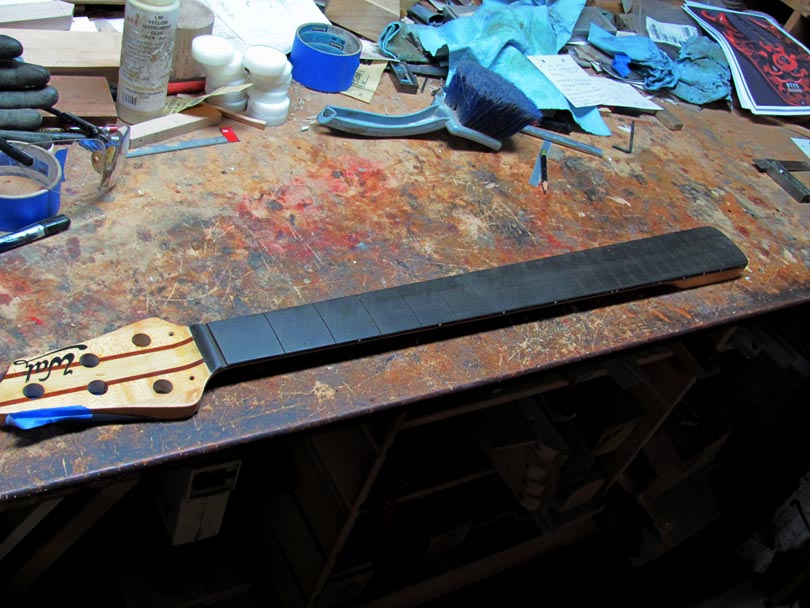
My standard sequence for polishing up an ebony fingerboard is: 220 and 400 paper on large firm rubber blocks, followed by Light Grey and White Scotchbrite on small rubber blocks. That takes the ebony up to a nice semi shine.
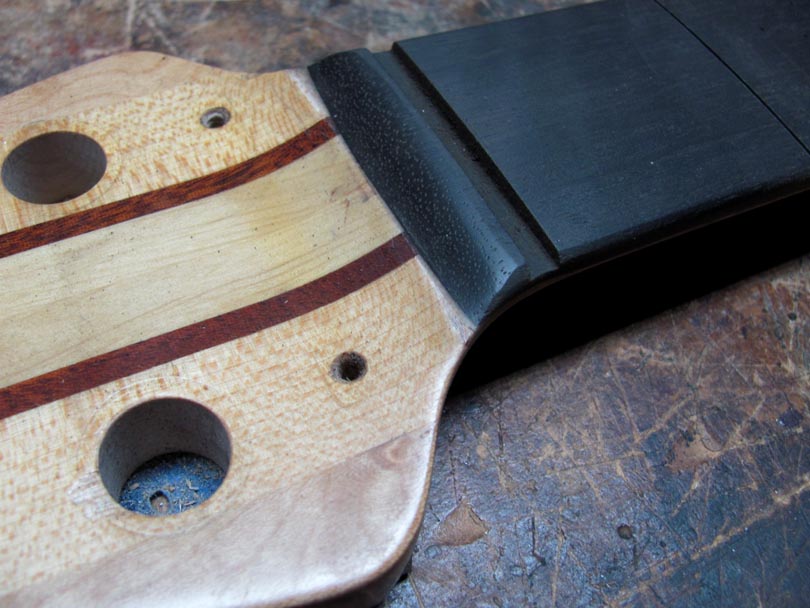
I cleaned up and polished the fingerboard nose with the same sequence.
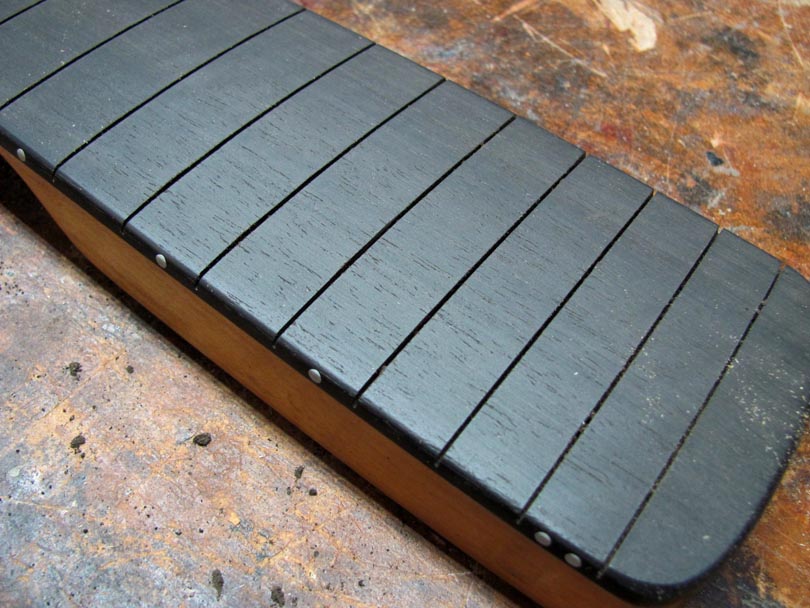
Inspecting the surface up close to find any scratches I missed. I put a small radius on the edge of the fingerboard, a little more than what Wal did. I do this on all my basses to make them feel more comfortable and "worn in". Coming up, you'll see how I blend the ends of the frets right into that small radius.
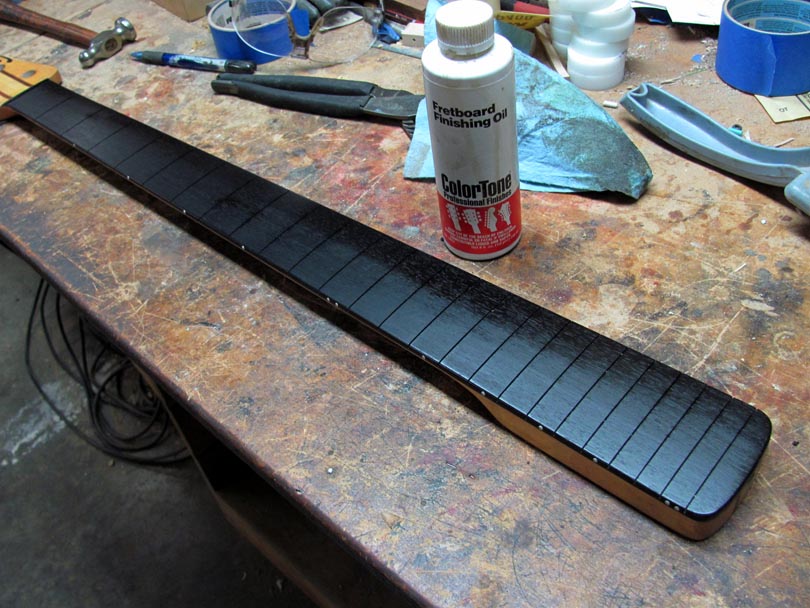
I wiped on a coat of Stew-Mac's Fingerboard Oil. I let it soak in for about a half hour, then wipe the excess off the surface. This is a penetrating, hardening type of oil finish. Its purpose is to sink down deep into the pores of the wood and harden, creating a permanent seal against moisture. I'll put on a second coat in a bit, but then that's it. This fingerboard will be permanently sealed up and doesn't need any more oil or slime applied to it.
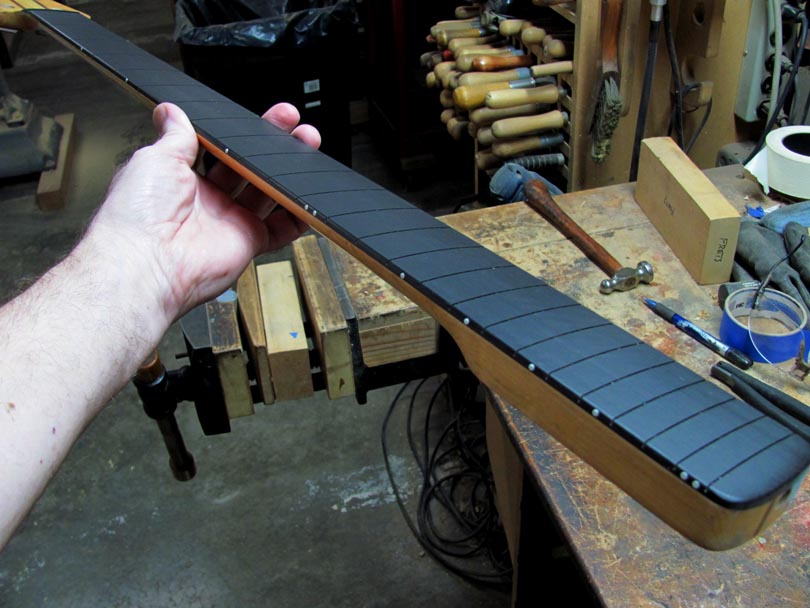
Inspecting it carefully. The first coat of Stew-Mac oil really shows up any flaws in the sanding. And, sure enough, there's a small area down near the heel that needs a bit more work. Then it'll get the second coat of Stew-Mac oil.
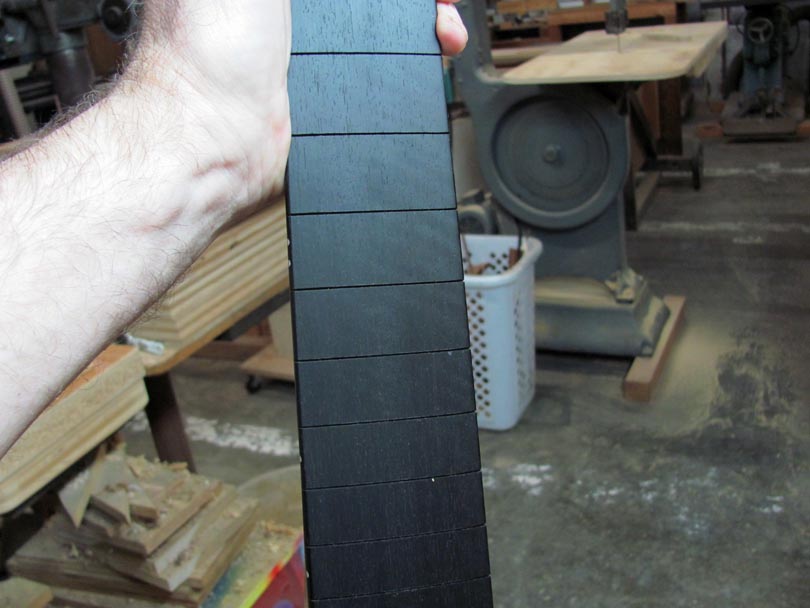
This piece of ebony has some "flame" in it. It goes diagonally downward at about a 45 degree angle to the direction of the grain. And it's very uniform in spacing over the whole length of the fingerboard. Interesting. I sometimes see African ebony with flame in it, but this one is so uniform.
My standard sequence for polishing up an ebony fingerboard is: 220 and 400 paper on large firm rubber blocks, followed by Light Grey and White Scotchbrite on small rubber blocks. That takes the ebony up to a nice semi shine.
I cleaned up and polished the fingerboard nose with the same sequence.
Inspecting the surface up close to find any scratches I missed. I put a small radius on the edge of the fingerboard, a little more than what Wal did. I do this on all my basses to make them feel more comfortable and "worn in". Coming up, you'll see how I blend the ends of the frets right into that small radius.
I wiped on a coat of Stew-Mac's Fingerboard Oil. I let it soak in for about a half hour, then wipe the excess off the surface. This is a penetrating, hardening type of oil finish. Its purpose is to sink down deep into the pores of the wood and harden, creating a permanent seal against moisture. I'll put on a second coat in a bit, but then that's it. This fingerboard will be permanently sealed up and doesn't need any more oil or slime applied to it.
Inspecting it carefully. The first coat of Stew-Mac oil really shows up any flaws in the sanding. And, sure enough, there's a small area down near the heel that needs a bit more work. Then it'll get the second coat of Stew-Mac oil.
This piece of ebony has some "flame" in it. It goes diagonally downward at about a 45 degree angle to the direction of the grain. And it's very uniform in spacing over the whole length of the fingerboard. Interesting. I sometimes see African ebony with flame in it, but this one is so uniform.
More detailing of Alex's Wal neck:
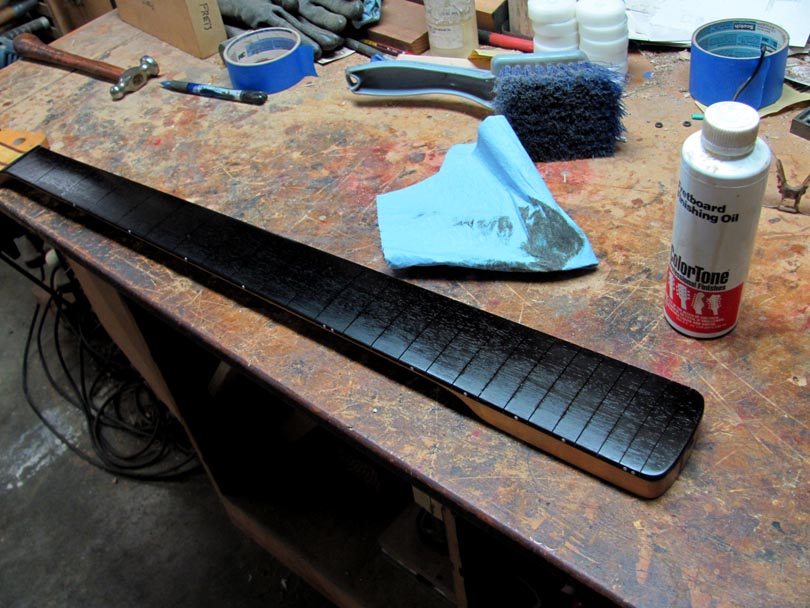
I spent another 15 minutes on Alex's neck, sanding that one spot of scratches that I saw near the heel, and detailing the edges a bit more. Then wiped on the 2nd coat of Stew-Mac oil. I'll let it sit for a few hours, wipe off the residue, and lightly buff the fingerboard. Then it'll be ready for frets!
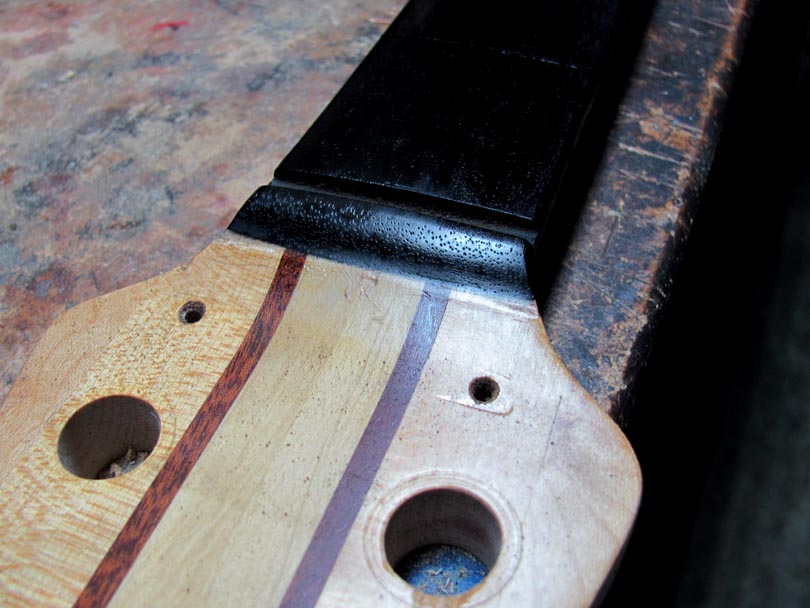
A better look at how I shaped the nose of the fingerboard. I matched the Wal shape as close as I could.
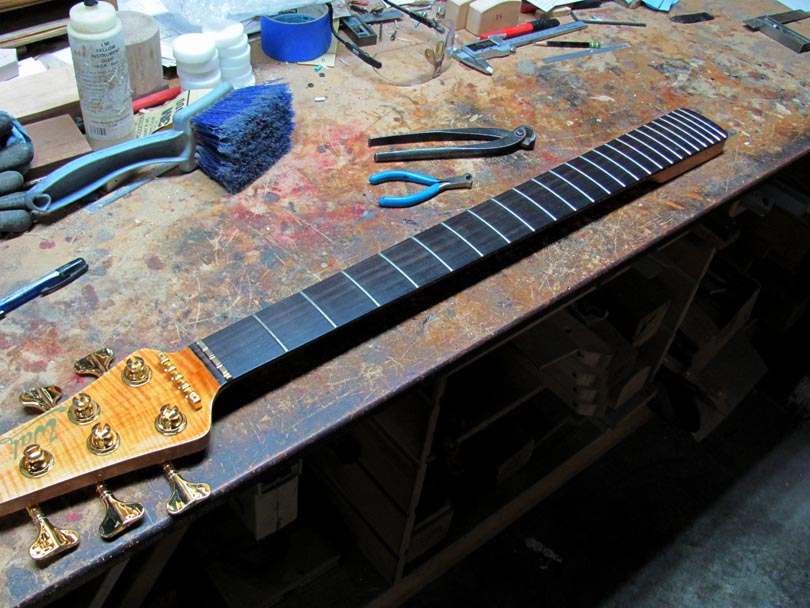
Then, back over to Mike's Wal neck! Its truss rod is healthy and working. Now I'm going pull its frets, and do a very light level sanding of the fingerboard surface. It has a small dip around the 3rd-5th fret area. I'm going to clean that up, taking a minimal amount off of the fingerboard. Then I'll refret it with new stainless frets.
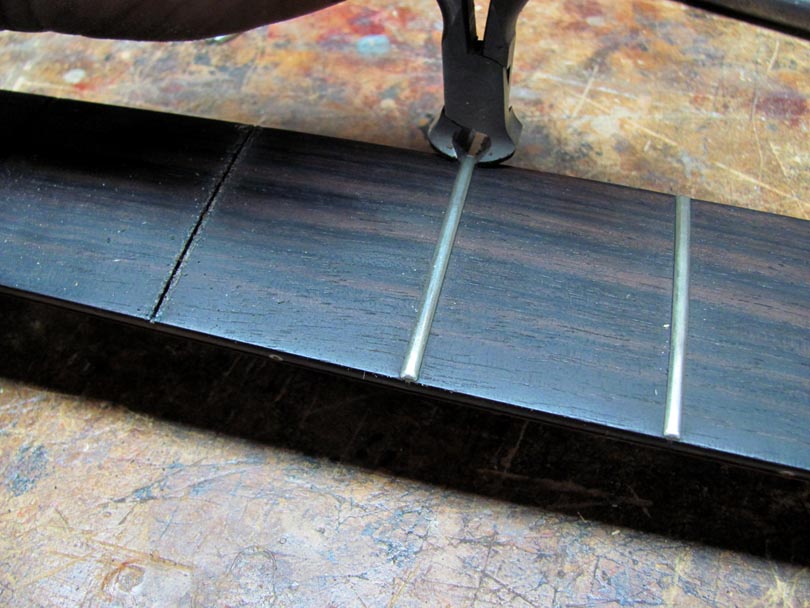
Pulling out the frets. Sometimes this can be an ugly job, but it went smoothly on this Wal neck. No real problems. No heating or heavy violence needed. No real chip-out of the surface. A nice piece of Macassar ebony.
I used the classic technique for pulling the frets. That's a pair of Stew-Mac Fret Pulling Pliers. I start at one end of the fret, gently squeezing the pliers so that the sharp edges slip under the crown of the fret. The jaws wedge the fret up a little bit, while pushing down on the wood. Just a little pinch, then slide the pliers 1/4" and pinch again.
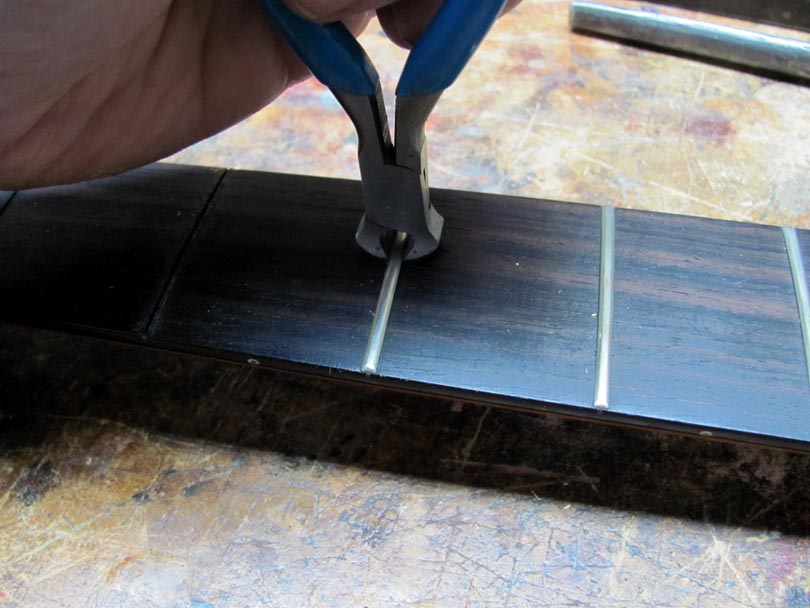
Keep repeating all the way across. A small pinch every 1/4". Resist the urge to pry up. That'll damage the wood.
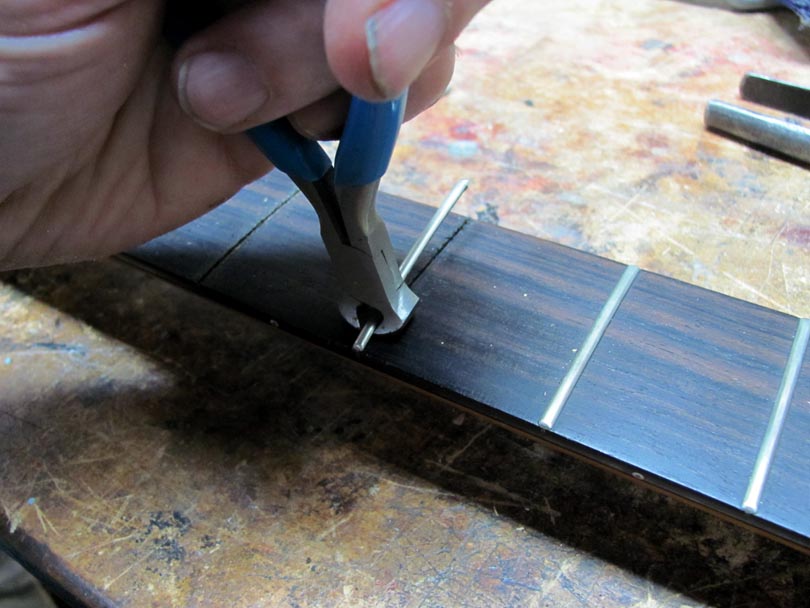
Nibble, nibble all the way across, until the fret lifts up free.
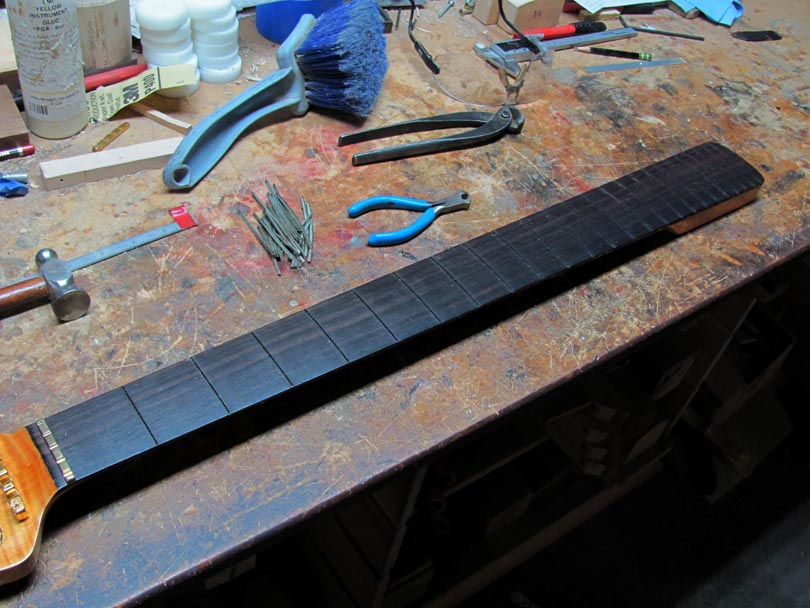
And all the frets are out. It took about 15 minutes. And I didn't even have to use the bigger, nastier fret pulling pliers in the background. I had them on the bench in case the Wal was uncooperative. But it was fine.
Next up: Lightly level sanding the fingerboard.
I spent another 15 minutes on Alex's neck, sanding that one spot of scratches that I saw near the heel, and detailing the edges a bit more. Then wiped on the 2nd coat of Stew-Mac oil. I'll let it sit for a few hours, wipe off the residue, and lightly buff the fingerboard. Then it'll be ready for frets!
A better look at how I shaped the nose of the fingerboard. I matched the Wal shape as close as I could.
Then, back over to Mike's Wal neck! Its truss rod is healthy and working. Now I'm going pull its frets, and do a very light level sanding of the fingerboard surface. It has a small dip around the 3rd-5th fret area. I'm going to clean that up, taking a minimal amount off of the fingerboard. Then I'll refret it with new stainless frets.
Pulling out the frets. Sometimes this can be an ugly job, but it went smoothly on this Wal neck. No real problems. No heating or heavy violence needed. No real chip-out of the surface. A nice piece of Macassar ebony.
I used the classic technique for pulling the frets. That's a pair of Stew-Mac Fret Pulling Pliers. I start at one end of the fret, gently squeezing the pliers so that the sharp edges slip under the crown of the fret. The jaws wedge the fret up a little bit, while pushing down on the wood. Just a little pinch, then slide the pliers 1/4" and pinch again.
Keep repeating all the way across. A small pinch every 1/4". Resist the urge to pry up. That'll damage the wood.
Nibble, nibble all the way across, until the fret lifts up free.
And all the frets are out. It took about 15 minutes. And I didn't even have to use the bigger, nastier fret pulling pliers in the background. I had them on the bench in case the Wal was uncooperative. But it was fine.
Next up: Lightly level sanding the fingerboard.
"Resist the urge to pry up" - thanks Bruce. I'll keep that gem in mind.
Yes, use the geometry of the special fret pulling pliers to gently work the fret up out of the slot. Don't just grab the fret and yank. Be a surgeon, not a sadistic dentist.
Even if I know I'm going to be routing off the fingerboard, like on Alex's neck, I still pull the frets out gently. Out of professionalism and respect for the neck.
Last edited:

LOL... reminds me of the dentist who removed my wisdom teeth. Was totally indifferent to the exposed nerve and debilitating pain he left behind.Yes, use the geometry of the special fret pulling pliers to gently work the fret up out of the slot. Don't just grab the fret and yank. Be a surgeon, not a sadistic dentist.
Why does W. C. Fields come to mind...Yes, use the geometry of the special fret pulling pliers to gently work the fret up out of the slot. Don't just grab the fret and yank. Be a surgeon, not a sadistic dentist.

Well, there go my plans for the weekend…Be a surgeon, not a sadistic dentist.

Here's something interesting that I found on Mike's Wal neck:
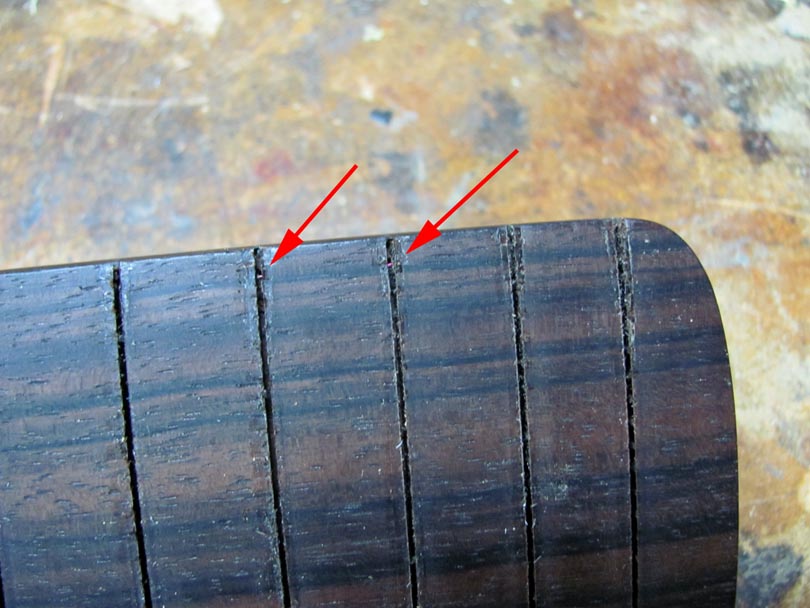
Down in the fret slots, there appears to be an exposed thin copper wire. It's only on the treble side, and runs parallel to the edge of the fingerboard. It's visible in most of the slots. I assume it's part of the wiring for the Sims LED circuit. Wal probably sent the fingerboard, blanked out and slotted, to Sims. Then Sims routed slots on the underside and installed the LED's and wiring. Back to Wal to be glued on the neck and finished up.
But I'm curious why the wire is all the way over on the far edge? And the slot for the wire breaks through into the underside of the fret slots? And it sure looks like a bare, uninsulated copper wire? Were they trying to have the ground side of the circuit make electrical contact with the frets?? I don't really understand why they would want to.
Does anyone out there know more details about the Sims LED installation? I'm just curious.
I'm glad I spotted this. Normally, when I resurface a fingerboard, I'll drag a fret slotting saw and a hook tool through all the slots, to make sure they are all clear and full depth. But here, I'm going to have to be really careful. I don't want to risk breaking that wire and killing the LEDs.
Down in the fret slots, there appears to be an exposed thin copper wire. It's only on the treble side, and runs parallel to the edge of the fingerboard. It's visible in most of the slots. I assume it's part of the wiring for the Sims LED circuit. Wal probably sent the fingerboard, blanked out and slotted, to Sims. Then Sims routed slots on the underside and installed the LED's and wiring. Back to Wal to be glued on the neck and finished up.
But I'm curious why the wire is all the way over on the far edge? And the slot for the wire breaks through into the underside of the fret slots? And it sure looks like a bare, uninsulated copper wire? Were they trying to have the ground side of the circuit make electrical contact with the frets?? I don't really understand why they would want to.
Does anyone out there know more details about the Sims LED installation? I'm just curious.
I'm glad I spotted this. Normally, when I resurface a fingerboard, I'll drag a fret slotting saw and a hook tool through all the slots, to make sure they are all clear and full depth. But here, I'm going to have to be really careful. I don't want to risk breaking that wire and killing the LEDs.


Its powered by 9v battery. You can easily test they still work.
But don't forget a series resistor to limit the current!


