
Enjoy the benefits of a premium membership!
Upgrade Account
-
TalkBass has been independent since 1998. Add your voice.
Create a free account to reply to discussions, view embedded media, and browse with fewer display ads.
Join free Log in
Want zero display ads or expanded classifieds tools? Compare plans.
You are using an out of date browser. It may not display this or other websites correctly.
You should upgrade or use an alternative browser.
You should upgrade or use an alternative browser.
Show off your bass room
- Thread starter kulit17
- Start date
More options
Who Replied?


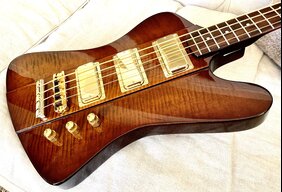
LOL - when I get a creative block or get frustrated trying to figure out a specific bassline, I just put the bass down and play a few moves on the chess board. Does a great job of clearing your mind and allowing you to start over fresh. But a warning to potential challengers - I'm even worse at playing chess than I am at playing the bass.Who's got time to play chess in a room like that?

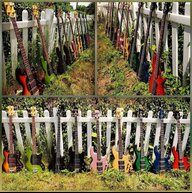

is it weird that going through this thread again make me GAS for a better house
I don't know if better means bigger, but I've found that bigger isn't necessarily better. A bigger house often leads to more stuff, which in my case hasn't lead to more happiness...quite the opposite at times. However, I've always been fortunate to have enough space for gear.

- Feb 24, 2004
- 4,103
- 642
- 68
- Disclosures
- Endorsing Artist: Phantom Guitars, Eastwood Guitars

mark beem
Wait, how does this song start again??

This is a terrible picture and I'm missing a few in here, AND there's a couple guitars - bear with me here, folks, maybe I'll take a better pic over the weekend
(left to right) 60's Bradford (Guyatone) guitar, early 60's Gibson LG-0 acoustic, 1962 slab-neck Precision bass, 1962 Jazz bass franken-bass, 1962 slab-neck Precision bass
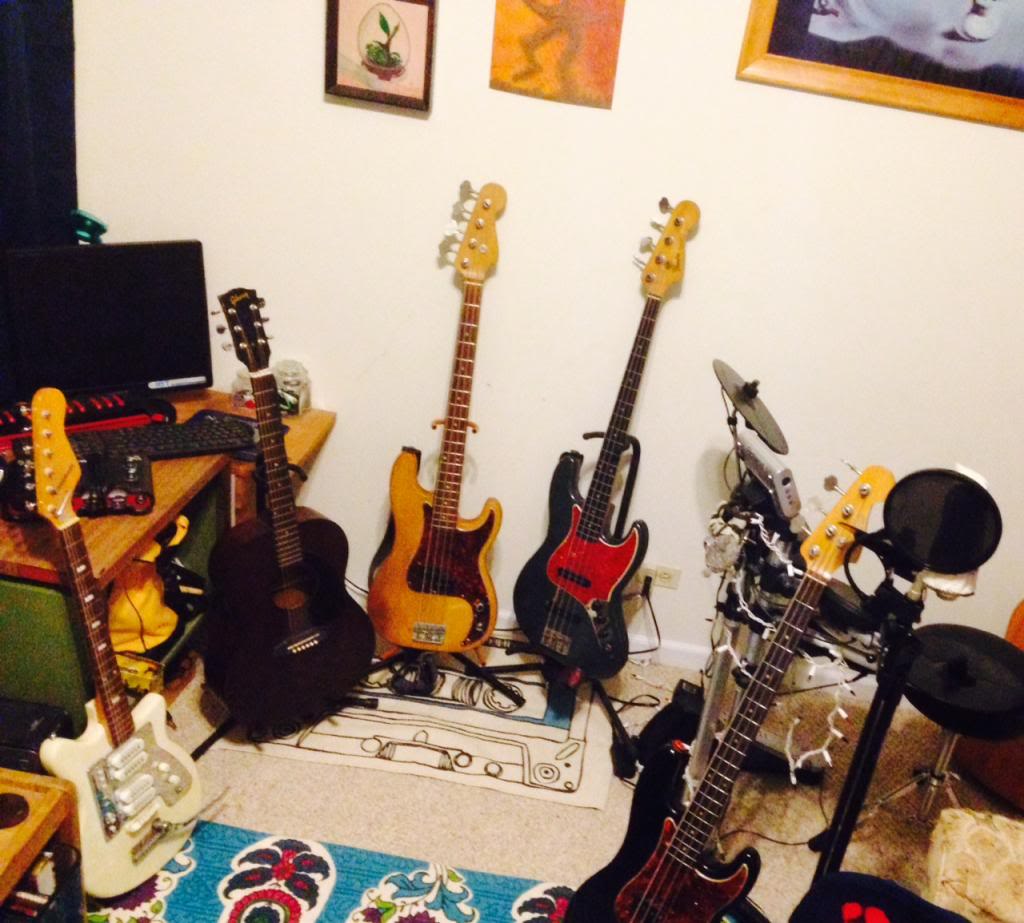
(left to right) 60's Bradford (Guyatone) guitar, early 60's Gibson LG-0 acoustic, 1962 slab-neck Precision bass, 1962 Jazz bass franken-bass, 1962 slab-neck Precision bass

I'm planning to leave the PRK when I retire - I'll miss the weather but not much else, San Diego is a LOT different than when I moved here.
Anyway, I'm planning to do a Home Theatre / music / entertainment area in a walk out basement. That should keep me out of trouble for a while!
Dan K.
Anyway, I'm planning to do a Home Theatre / music / entertainment area in a walk out basement. That should keep me out of trouble for a while!
Dan K.

- Nov 24, 2008
- 5,687
- 19,487
- 41
- Disclosures
- DroppingAcidPedalEtching.com
I just got the new monitors and cleaned everything. I'm pretty excited to make some noise!

I like those Ibanez Blazer Basses. What color finish is on yours?
A little late on the reply, but it's black.
Here's a newer pic after we cleared out some space in the spare bedroom. My husband didn't want all the music stuff in the living room. I need to take an updated picture - I got a rack case for all the rack stuff.

BassHappy
Supporting Member
The Laboratory....
Small but quite functional, actually....
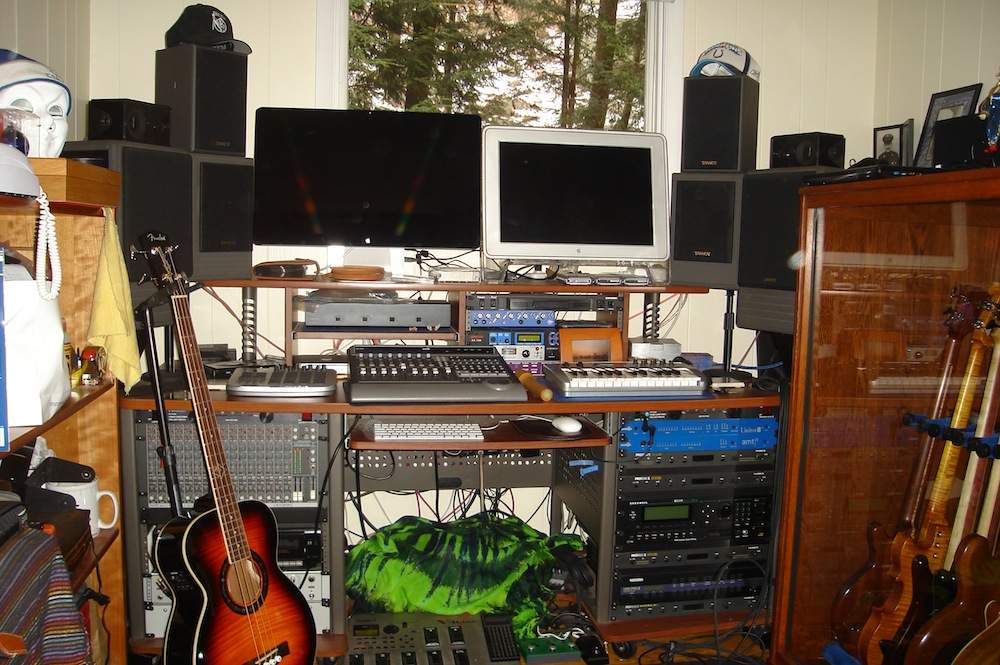
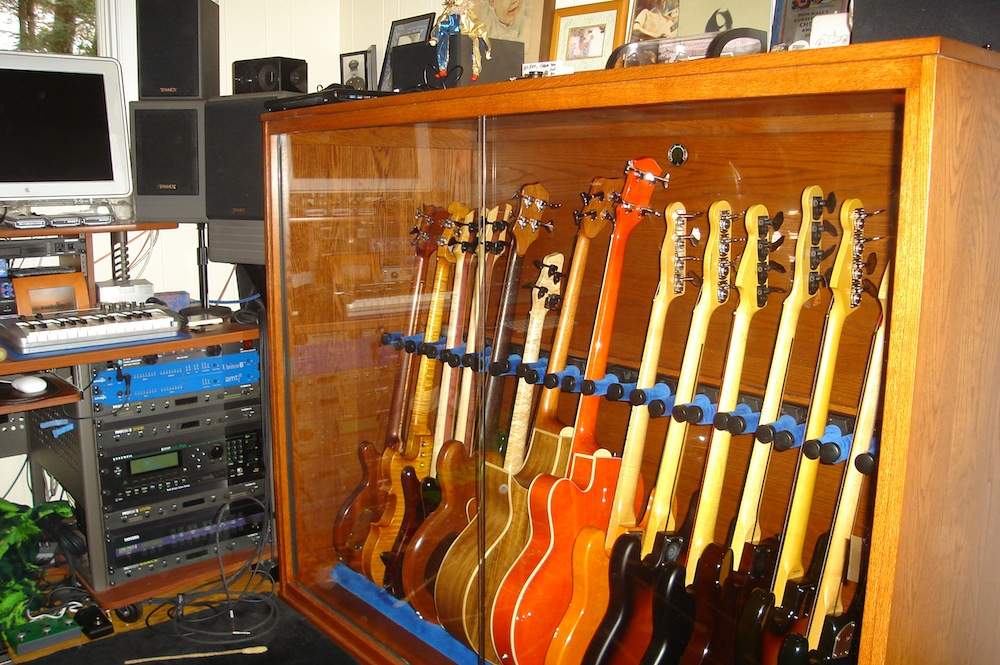
Small but quite functional, actually....

The Laboratory....
Small but quite functional, actually....
View attachment 524709
View attachment 524710
Is that case a custom build? Or did you find it at a showcase store and fit it fo the basses. That is a great idea!
BassHappy
Supporting Member
Is that case a custom build? Or did you find it at a showcase store and fit it fo the basses. That is a great idea!
Hey
I had it custom built out of white oak by an Amish carpenter in Pennsylvania to my design specs. I got sick of covering up the basses in the stands with nice fabric - I like to see them, and I also got sick of handing some pretty fine instruments to players with dust all over them. I also wanted to control the temp and humidity on all of the basses simultaneously. Here is the scoop, just copied in from my website about it, if you are interested:
So when you are a player and the amount of basses you own kind of gets out of control - you need to figure out a way to keep your instruments close at hand. I like to have mine tuned up and ready to go - at all times. I consider my basses - and the wide variety of features and sounds they provide - to be not only my arsenal, but my artistic palette. I considered all the options, but didn't like any of them. If you hang them on the wall or keep them on stands, they get dusty - and you seem to spend more time wiping them down than you do playing them. You can cover them up with with nice fabric - but what is the point of that? And even if you do, somehow, they still manage to gather dust. There is nothing worse than showing someone your instruments and handing them a dusty bass. If you keep them in their cases, they are not handy for immediate use. If you are like me, when inspiration strikes - you want to be able to make a quick choice from your palette of available instruments - do a quick tuning check and be off and running. I have several acoustic basses, so the other issue is keep them properly humidified. When they are all in a big box together it is easy to regulate the humidity of the entire box. Since I could not find what I wanted as far as a storage cabinet goes - I decided to have mine custom built.
My first rule was - I wanted the cabinet to be adjustable. That way if I swap things around and sell a couple or buy a couple - the cabinet would be flexible enough to adjust to it. Unlike many players, I am not into buying and "flipping" basses. I decided to use heavy duty tool hangers from Amazon to cradle the neck of the basses. I bought a variety of nylon washers and end caps and used plastic fixtures which slide on a track rail side to side - with a set screw to lock them down when they are in position. I then bought protective foam tubing to slide over the tool hangers for extra padding and protection. You can see the one on the right has the foam tubes and the end cap in place.
I ended up having the rack rails powder coated black to match the fixtures. The original plan was to use a roll-top tambour door for the cabinet, because my studio space is very limited. I had sent emails to over a dozen cabinet makers in the greater New York area, but due to the tambour door they were not interested in helping me with the project. As it turns out, they were wise to pass on the tambour door part. I finally sent my plans down to Lancaster County, Pennsylvania, to see if any of the fine Amish carpenters would be interested. I found one and we got started near the end of 2013. We chose white oak with a Harvest finish. Here is the wood used for the cabinet.
Here is what the cabinet looked like as the build began.
We were summoned to Lancaster County as they had the roll-top tambour style door installed, but they found that even with substantial counter-weight the door was simply too heavy to be usable. Here is what the cabinet looked like with the tambour door on it.
I loved the look and the idea of the tambour door - and it was very hard to reconcile and admit that it simply wasn't going to work. Since space is so limited in my studio the Amish carpenter suggested that we do sliding glass doors on the front - which we finally settled on as the best solution. He decided to use numerous strips of sturdy oak to provide very attractive wood trim which also covered up the routs for the tambour door.
For the bottom cradle rails, I scored a couple of rounded hand rails from Home Depot which were flattened on one side, which allowed them to sit flat on the bottom of the cabinet. These were mounted from the bottom. I then had them covered with a thick layer of very soft foam. There is no way I would let any of this foam be in direct contact with any of the basses, so I settled on royal blue velvet. Certain types of chemicals in foam can damage the finish on your precious guitars. Certain types of velvet are treated with chemicals to be flame retardant. I chose a very nice European untreated cotton velvet. It was on the expensive side but I didn't need much. I had a local tailor Rosie, who is in my office building - make custom booties to completely cover the tool hangers and also to cover the bottom rails. Here is how the cabinet looks with the support beam, track rails and bottom rails in position for a fitting. I took a couple of basses with me and we dialed in the exact positioning.
The next step was to get the bottom rails finished and secured - and to get the glass and the glass track rails mounted for the door. There were also interior trim boards needed - to dress up the interior of the cabinet and provide additional strength. Here is how the finished cabinet looked as they delivered it in my living room before the glass was installed.
And here is how it looks with the glass doors in place and the basses loaded in.
It's a little tight for the acoustics, but to get 16 basses in 66" internal width is super great. You learn how to rotate the basses in and out of the case without harm. A special thanks goes out to all the folks responsible for making this happen. The cabinet looks fantastic and as a practical matter, it solves all the problems that I had hoped it would. It makes it so exciting to want to fire the studio up and play.
Hey
I had it custom built out of white oak by an Amish carpenter in Pennsylvania to my design specs. I got sick of covering up the basses in the stands with nice fabric - I like to see them, and I also got sick of handing some pretty fine instruments to players with dust all over them. I also wanted to control the temp and humidity on all of the basses simultaneously. Here is the scoop, just copied in from my website about it, if you are interested:
So when you are a player and the amount of basses you own kind of gets out of control - you need to figure out a way to keep your instruments close at hand. I like to have mine tuned up and ready to go - at all times. I consider my basses - and the wide variety of features and sounds they provide - to be not only my arsenal, but my artistic palette. I considered all the options, but didn't like any of them. If you hang them on the wall or keep them on stands, they get dusty - and you seem to spend more time wiping them down than you do playing them. You can cover them up with with nice fabric - but what is the point of that? And even if you do, somehow, they still manage to gather dust. There is nothing worse than showing someone your instruments and handing them a dusty bass. If you keep them in their cases, they are not handy for immediate use. If you are like me, when inspiration strikes - you want to be able to make a quick choice from your palette of available instruments - do a quick tuning check and be off and running. I have several acoustic basses, so the other issue is keep them properly humidified. When they are all in a big box together it is easy to regulate the humidity of the entire box. Since I could not find what I wanted as far as a storage cabinet goes - I decided to have mine custom built.
My first rule was - I wanted the cabinet to be adjustable. That way if I swap things around and sell a couple or buy a couple - the cabinet would be flexible enough to adjust to it. Unlike many players, I am not into buying and "flipping" basses. I decided to use heavy duty tool hangers from Amazon to cradle the neck of the basses. I bought a variety of nylon washers and end caps and used plastic fixtures which slide on a track rail side to side - with a set screw to lock them down when they are in position. I then bought protective foam tubing to slide over the tool hangers for extra padding and protection. You can see the one on the right has the foam tubes and the end cap in place.
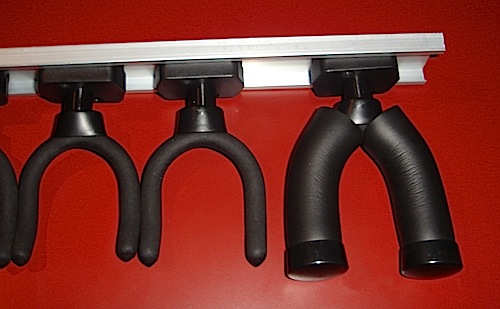
I ended up having the rack rails powder coated black to match the fixtures. The original plan was to use a roll-top tambour door for the cabinet, because my studio space is very limited. I had sent emails to over a dozen cabinet makers in the greater New York area, but due to the tambour door they were not interested in helping me with the project. As it turns out, they were wise to pass on the tambour door part. I finally sent my plans down to Lancaster County, Pennsylvania, to see if any of the fine Amish carpenters would be interested. I found one and we got started near the end of 2013. We chose white oak with a Harvest finish. Here is the wood used for the cabinet.
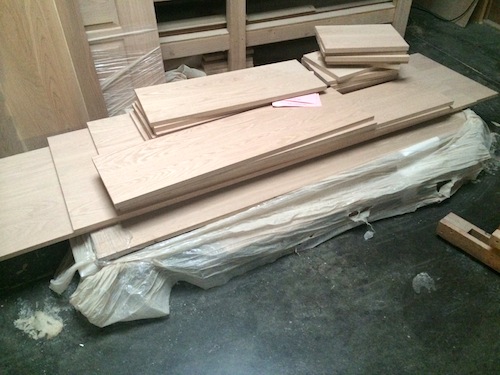
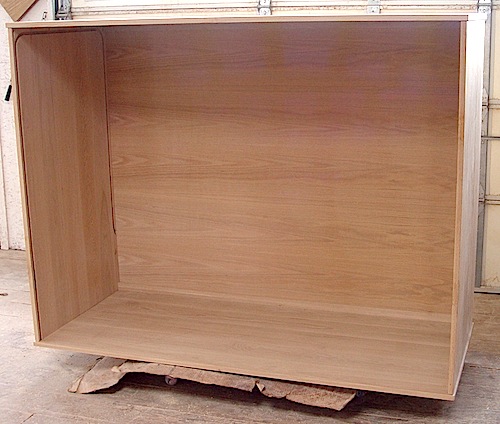
Here is what the cabinet looked like as the build began.
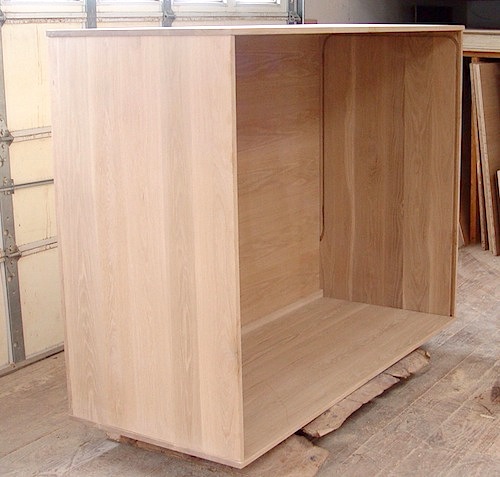
We were summoned to Lancaster County as they had the roll-top tambour style door installed, but they found that even with substantial counter-weight the door was simply too heavy to be usable. Here is what the cabinet looked like with the tambour door on it.
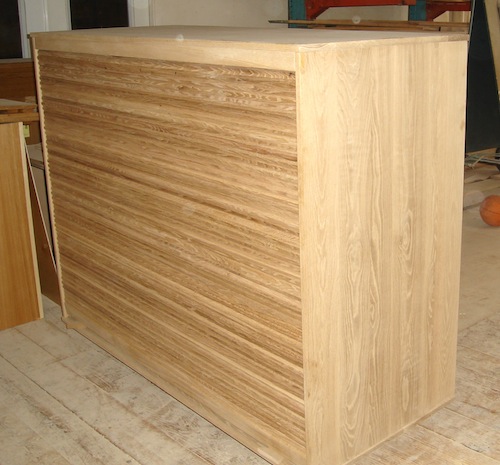
I loved the look and the idea of the tambour door - and it was very hard to reconcile and admit that it simply wasn't going to work. Since space is so limited in my studio the Amish carpenter suggested that we do sliding glass doors on the front - which we finally settled on as the best solution. He decided to use numerous strips of sturdy oak to provide very attractive wood trim which also covered up the routs for the tambour door.
For the bottom cradle rails, I scored a couple of rounded hand rails from Home Depot which were flattened on one side, which allowed them to sit flat on the bottom of the cabinet. These were mounted from the bottom. I then had them covered with a thick layer of very soft foam. There is no way I would let any of this foam be in direct contact with any of the basses, so I settled on royal blue velvet. Certain types of chemicals in foam can damage the finish on your precious guitars. Certain types of velvet are treated with chemicals to be flame retardant. I chose a very nice European untreated cotton velvet. It was on the expensive side but I didn't need much. I had a local tailor Rosie, who is in my office building - make custom booties to completely cover the tool hangers and also to cover the bottom rails. Here is how the cabinet looks with the support beam, track rails and bottom rails in position for a fitting. I took a couple of basses with me and we dialed in the exact positioning.
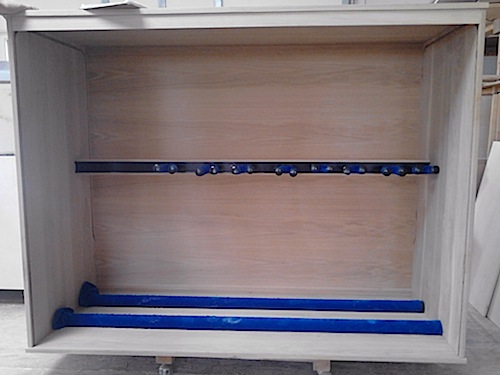
The next step was to get the bottom rails finished and secured - and to get the glass and the glass track rails mounted for the door. There were also interior trim boards needed - to dress up the interior of the cabinet and provide additional strength. Here is how the finished cabinet looked as they delivered it in my living room before the glass was installed.
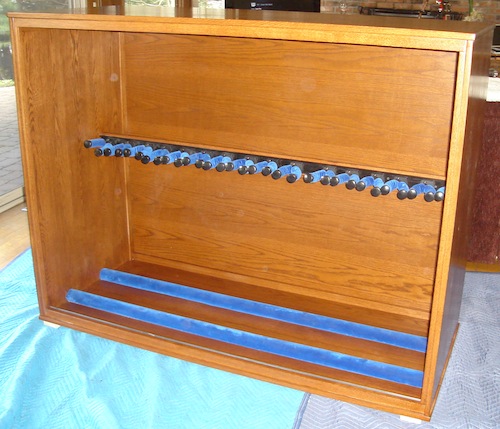
And here is how it looks with the glass doors in place and the basses loaded in.
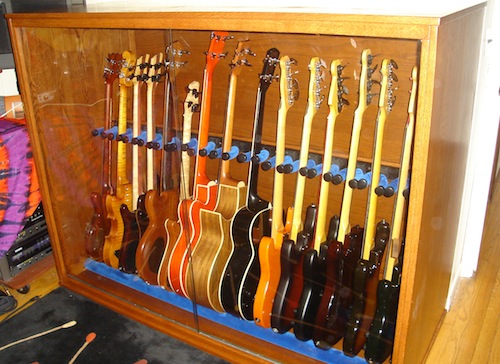
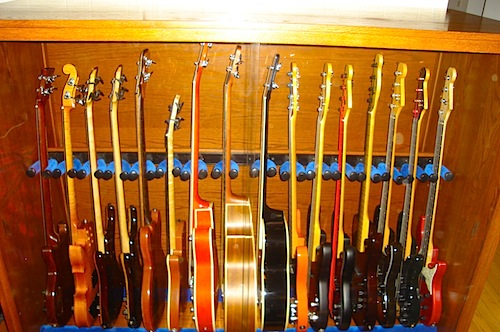
It's a little tight for the acoustics, but to get 16 basses in 66" internal width is super great. You learn how to rotate the basses in and out of the case without harm. A special thanks goes out to all the folks responsible for making this happen. The cabinet looks fantastic and as a practical matter, it solves all the problems that I had hoped it would. It makes it so exciting to want to fire the studio up and play.
Freaking awesome. When I get my house back next summer, and get to build my own music chamber, I might create something like that! Love the detail. While i think the tambour door is pretty cool, I think the glass allows the guitars to be showcased and stored. We had cello and bass cabinets like that when I was at college - not of the level of craftsman ship - but with out the glass. They were huge and not portable.
BassHappy
Supporting Member
Freaking awesome. When I get my house back next summer, and get to build my own music chamber, I might create something like that! Love the detail. While i think the tambour door is pretty cool, I think the glass allows the guitars to be showcased and stored. We had cello and bass cabinets like that when I was at college - not of the level of craftsman ship - but with out the glass. They were huge and not portable.
Hey UptheIrons
Thanks so much for the kind words. Yeah, I just got sick of all the other options, which were always huge compromises and time wasters in my mind. Nothing like having that gun in the holster, strapped in, loaded and ready to go at a moment's notice. Those cello and bass cabinets sound pretty awesome. Have any pics?

Awesome cabinet, and a great idea!
One note of concern, however.
I have read that some types of foam do indeed outgas and the gas softens instrument finishes, but according to the source no fabric covering will prevent the gasses from harming the finish, since it's not actual physical contact that causes the reaction.
You may need to look at replacing the foam with a different type, unless you lucked out and it's already safe.
I have had issues with guitar stands marking the finish on the headstocks (wall hangers) and body (floor stands) of my Ricks.
One note of concern, however.
I have read that some types of foam do indeed outgas and the gas softens instrument finishes, but according to the source no fabric covering will prevent the gasses from harming the finish, since it's not actual physical contact that causes the reaction.
You may need to look at replacing the foam with a different type, unless you lucked out and it's already safe.
I have had issues with guitar stands marking the finish on the headstocks (wall hangers) and body (floor stands) of my Ricks.

Gaolee
Official leathers tester and crash dummy
It looks like I never did put up any photos of the finished room. It's not quite done, since I still haven't dealt with the rattly sound bouncing off the walls, but I like being down there. The ceiling is collecting dents from being low, but the neighbors don't complain when I make noise, so I don't complain about much of anything.
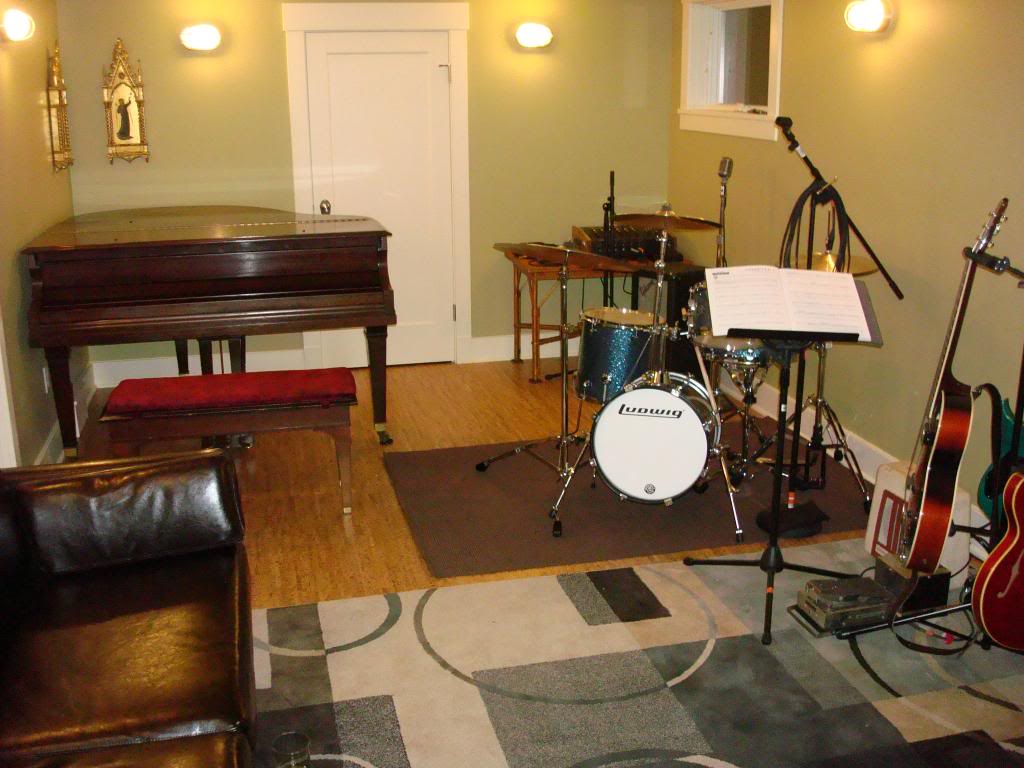
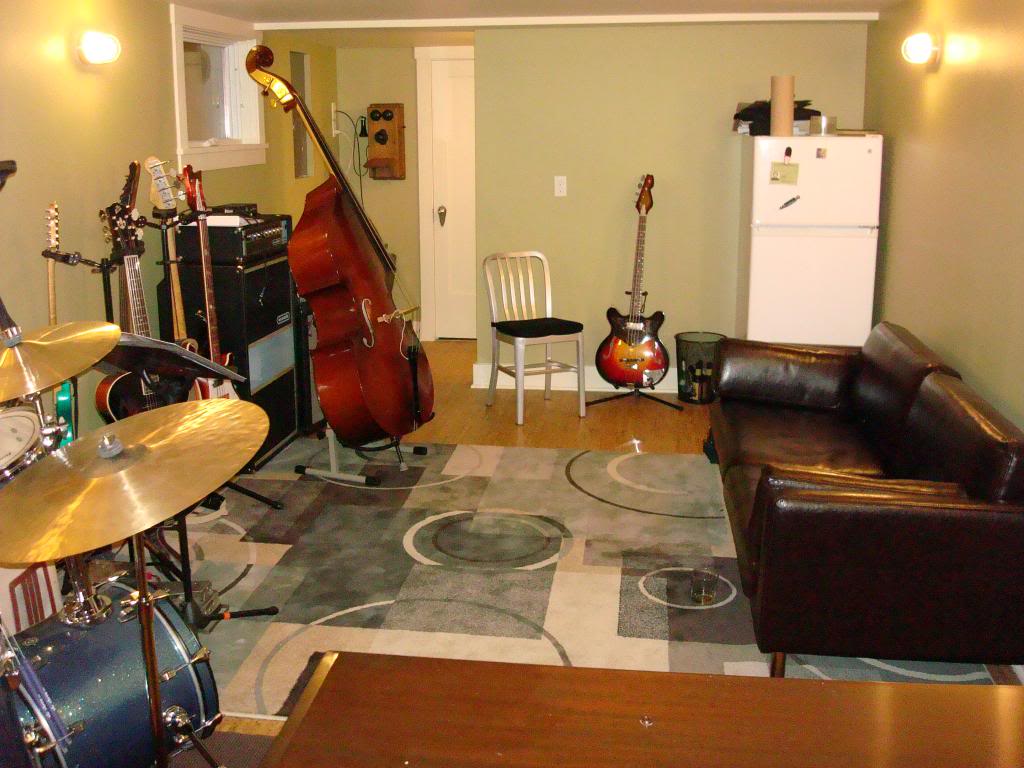
The refrigerator holds beer and not much else. There's an adjacent room that works well as a control booth for recording, too. Life is good.
The refrigerator holds beer and not much else. There's an adjacent room that works well as a control booth for recording, too. Life is good.
- Nov 24, 2008
- 5,687
- 19,487
- 41
- Disclosures
- DroppingAcidPedalEtching.com
PE and PU foams will outgas in less than 2 weeksAwesome cabinet, and a great idea!
One note of concern, however.
I have read that some types of foam do indeed outgas and the gas softens instrument finishes, but according to the source no fabric covering will prevent the gasses from harming the finish, since it's not actual physical contact that causes the reaction.
You may need to look at replacing the foam with a different type, unless you lucked out and it's already safe.
I have had issues with guitar stands marking the finish on the headstocks (wall hangers) and body (floor stands) of my Ricks.
The stands which caused my issues were several years old at the time, so it must have been the composition of the foam itself.
I've replaced the foam with rubber tubing and had no problems.
I've replaced the foam with rubber tubing and had no problems.


