
• TalkBass has been independent since 1998. Add your voice.
    Create a free account to reply to discussions, view embedded media, and browse with fewer display ads.
    Join freeLog in
    Want zero display ads or expanded classifieds tools? Compare plans.

Special Edition Build Off - Phony Abalone

Special Edition Build off - Build em if ya got em

I've been working on this bass for too long. I'm submitting this project for the build off mainly as a way to encourage myself to finish it soon. I was gonna make a build-ography thread for it anyway, why not start it now?

The Backstory
This is a remodel of a remodel of a remodel of my very first bass: a 2011 Squier Affinity Precision Bass, black, white pickguard, rosewood fretboard. My parents bought it for me new as part of the starter pack. I was then able to stop borrowing my friend's bass guitar and play my own in our band, freshman year of college. A few years later, I decided, "I want mwah..." and that's how it all began.

This project has taken so long I had to get a 2nd bass. A mixture of indecision on what exactly I want to do and trying to do right and final this time. First couple remodels were rushed and poorly executed.

I live in a 1 bedroom apartment, so no workshop. The only power tools I have are a drill and a jigsaw. The vast majority of the work will be (and has been) done by hand.

List of Final Changes, from stock
  • Defretted, fingerboard will be finished with CA (correctly, this time)
  • Replaced pickups with Seymour Duncan QPs
  • New harness (AxeGrinderz?) to replace my endlessly spinning, scratchy volume pot
  • Replace bridge with black Kickass bridge
  • Replace tuners with black Hipshot Ultra Lites
  • Restring with GHS Boomers B-E-A-D string set, but will be tuning A-D-G-C
  • Deepen the cutaway to allow easier access to higher frets, cut mirrored shape on opposite horn
  • Cut headstock to match horn shape and redrill to allow 3+1 instead of 4 inline pegs (for easier tuning, less neck dive, and looks)
  • Replace knobs with real abalone-inset knobs
  • Refinish the stripped down body (and maybe headstock) with a combination of translucent pinkish-purple and green spray paint to look like "phony abalone." Idea is to use the grain of the wood to be the lines of the abalone look; I decided I want to use an undercoat of charring and a streaky, whitewash to exaggerate the contrast of the grain and give the translucent colors more pop.
Pics
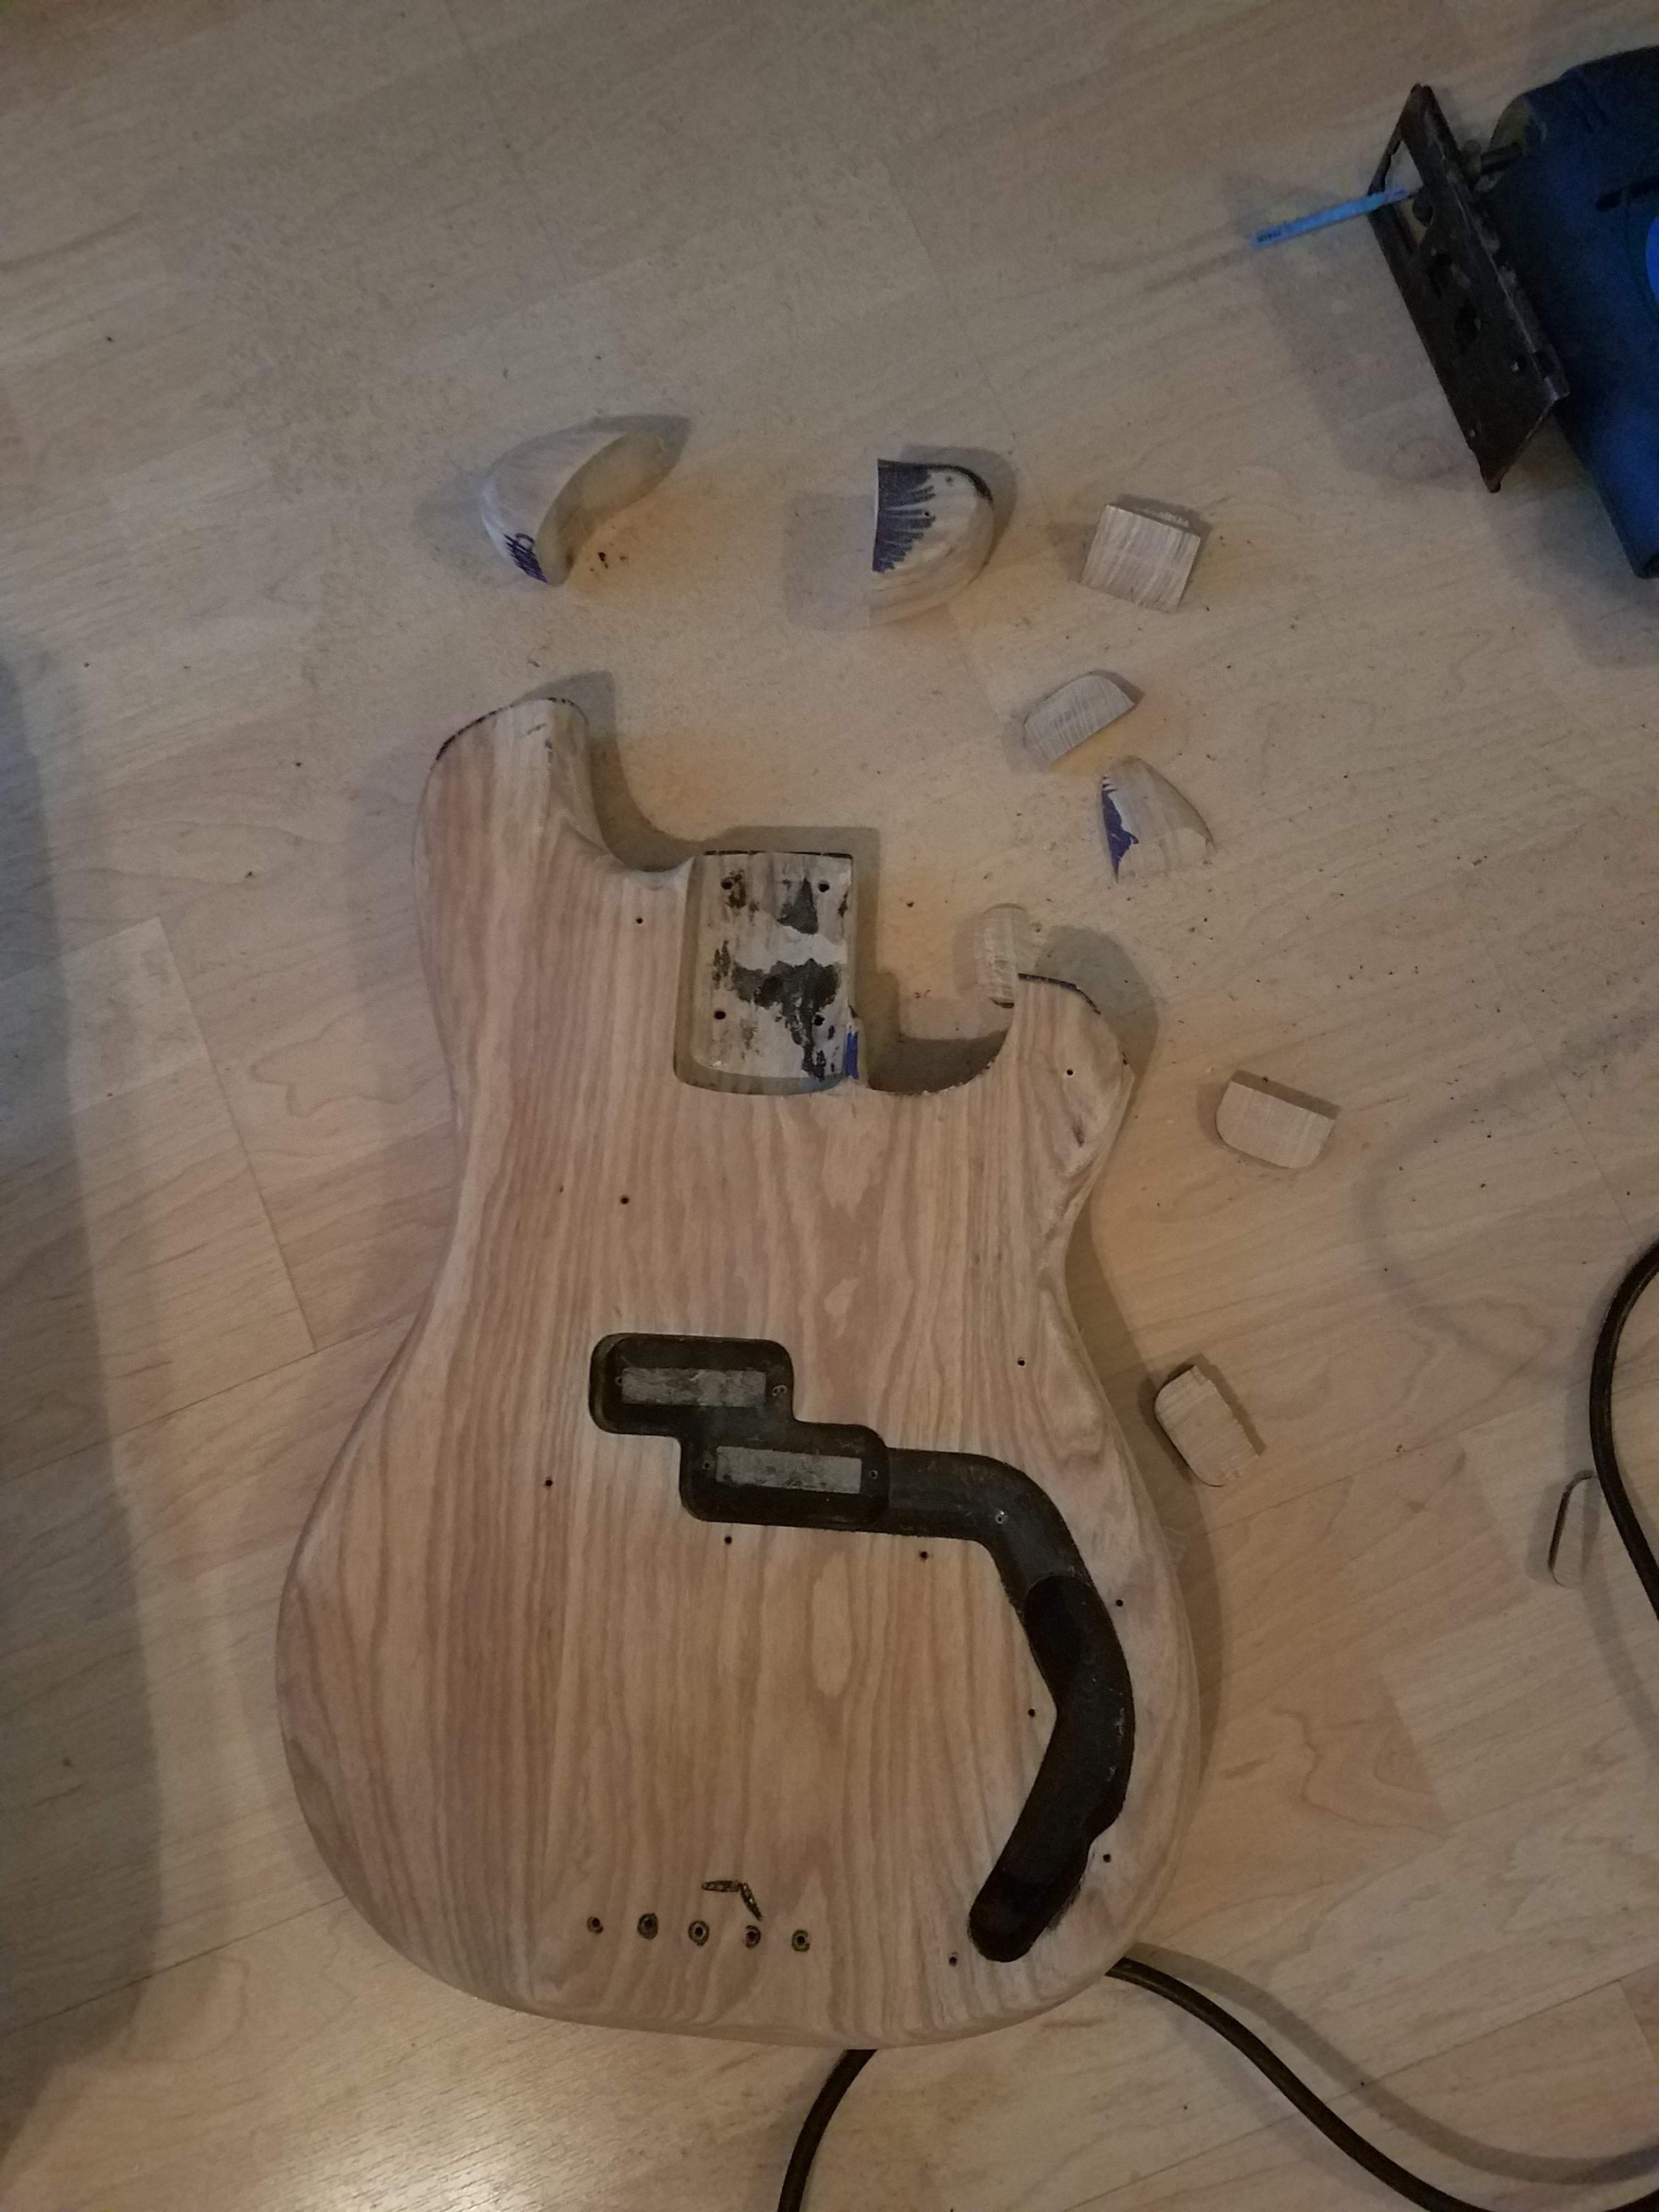
The body immediately after cutting with the jigsaw. Before, it looked just like a plain ol' P slab. Check out the nice grain on this 3-piece body. I've sanded it a whole lot more since this pic.
20200122_162603.jpg


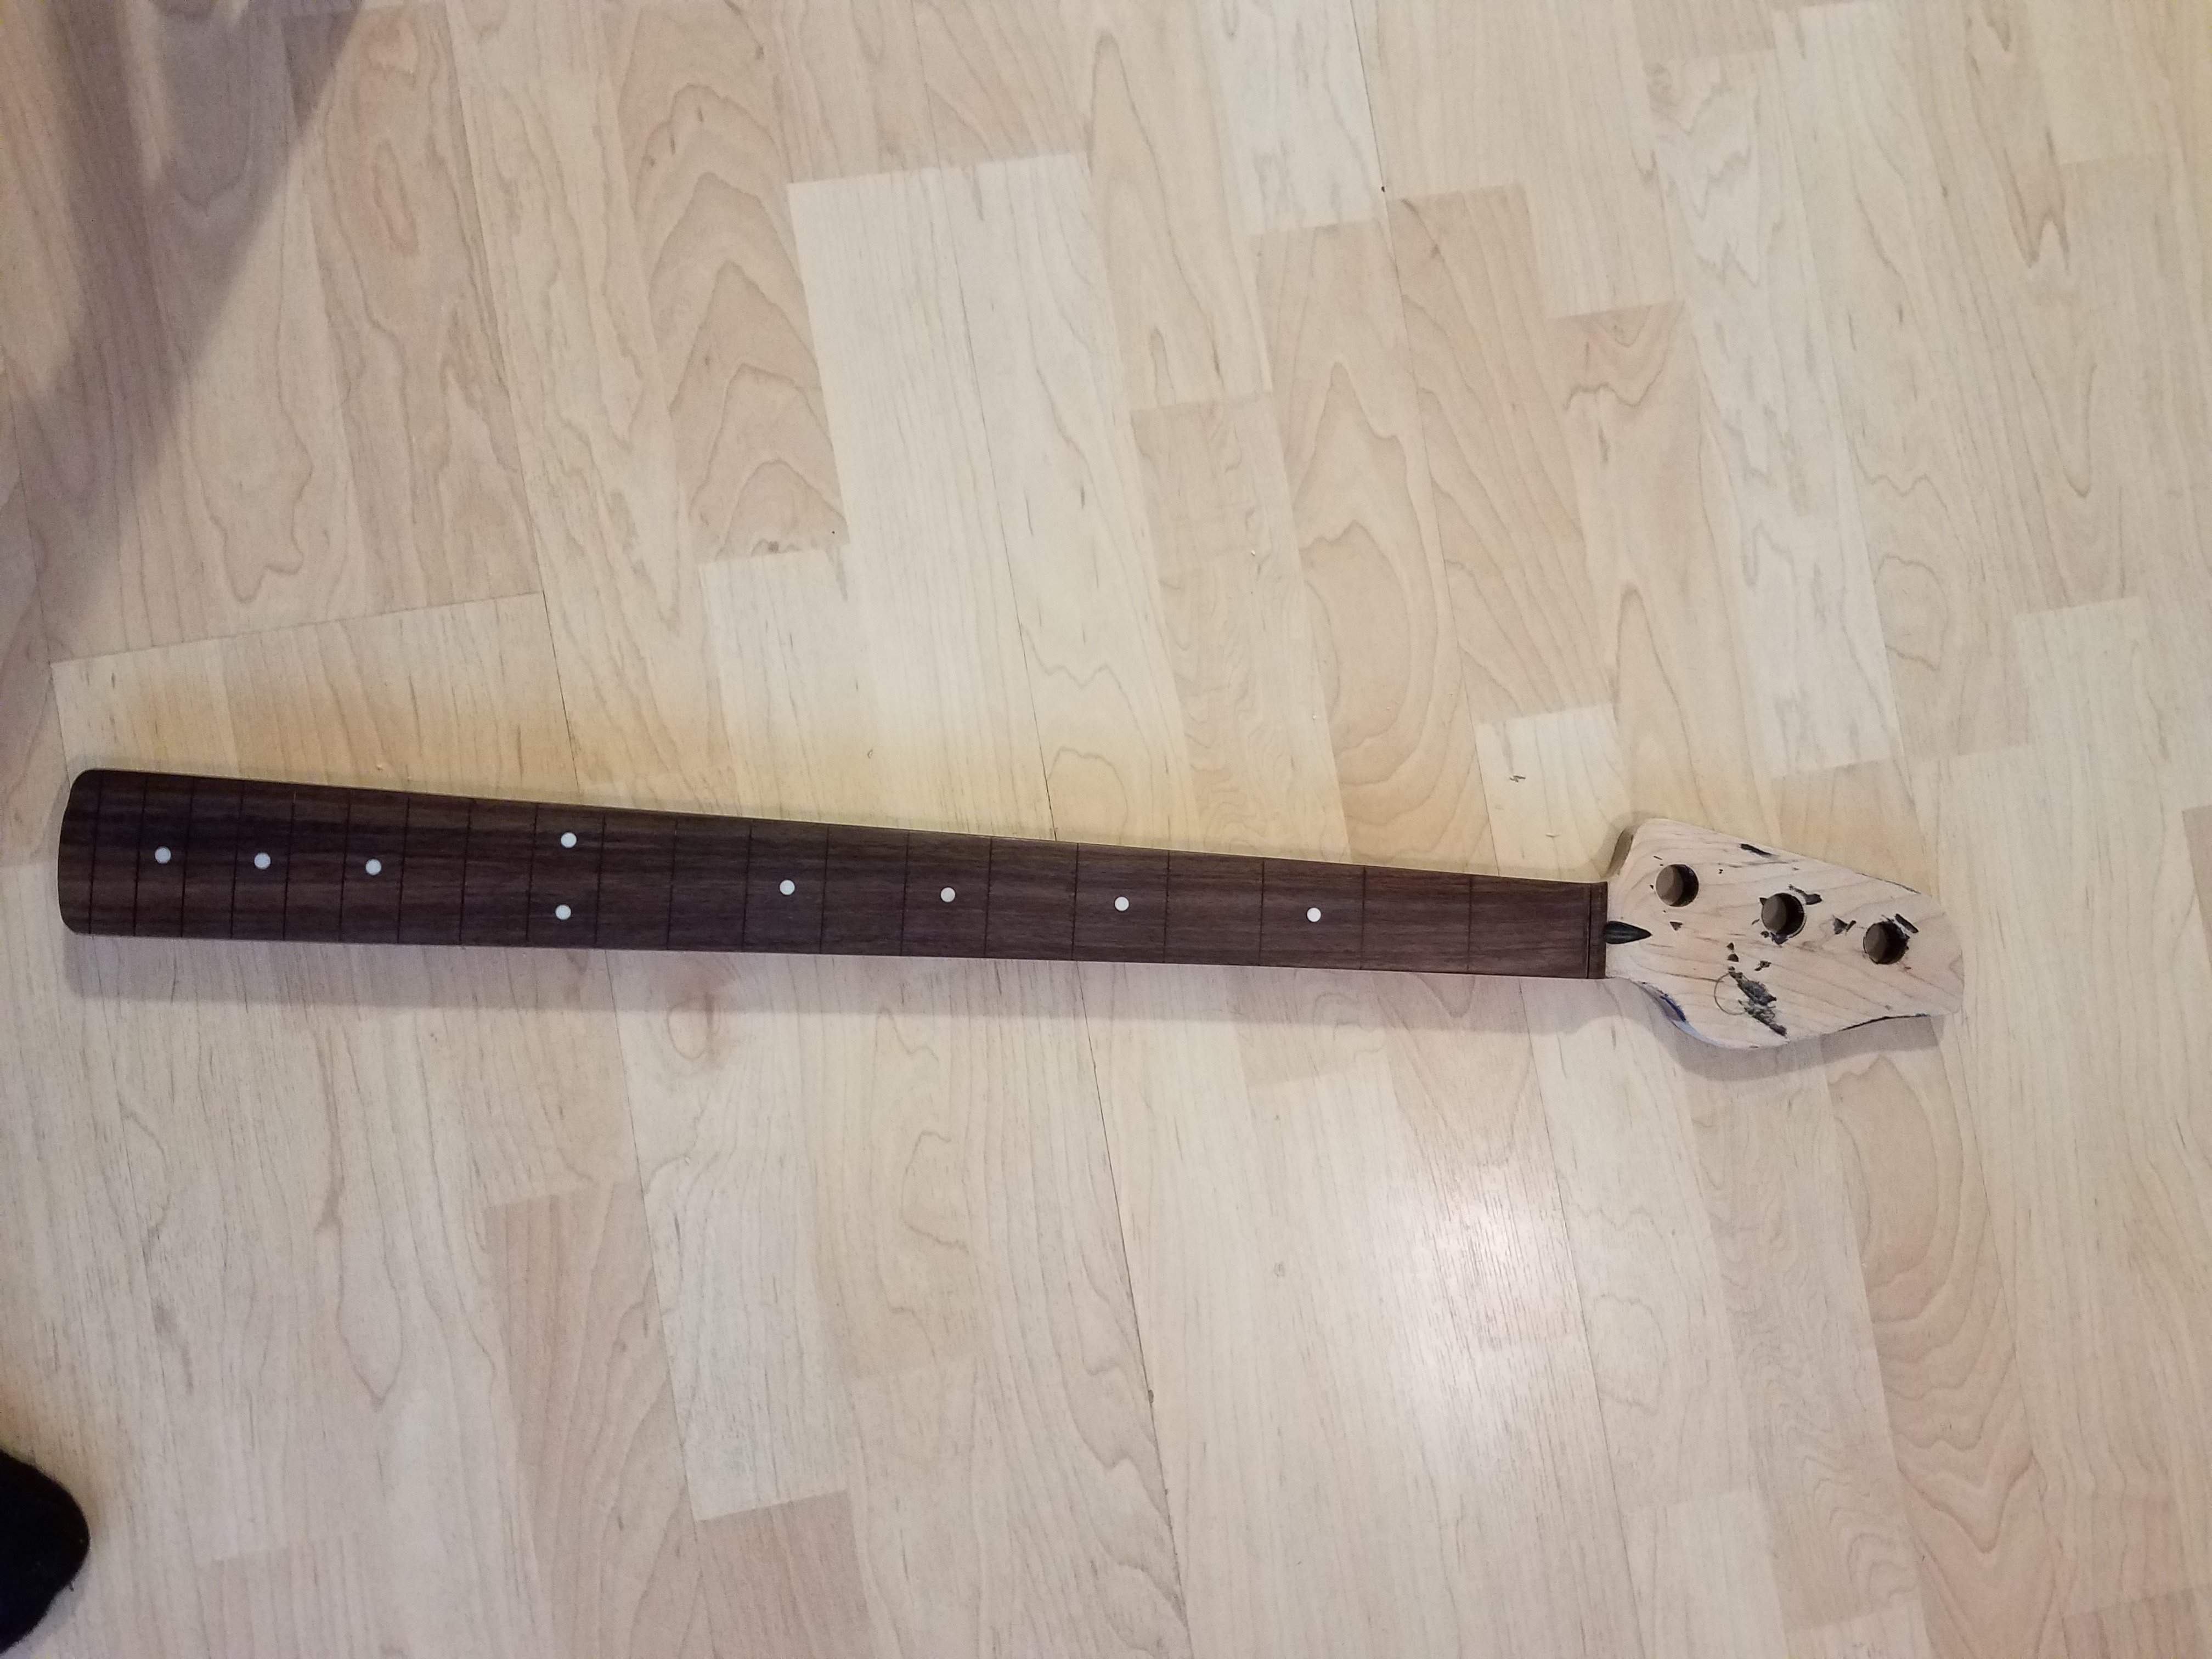
The neck. Headstock is cut, still needs a new hole. Black marks are what is left of the black spray paint from before, residing in the divots from scraping off the paint I brushed on before that...
20200409_152043.jpg


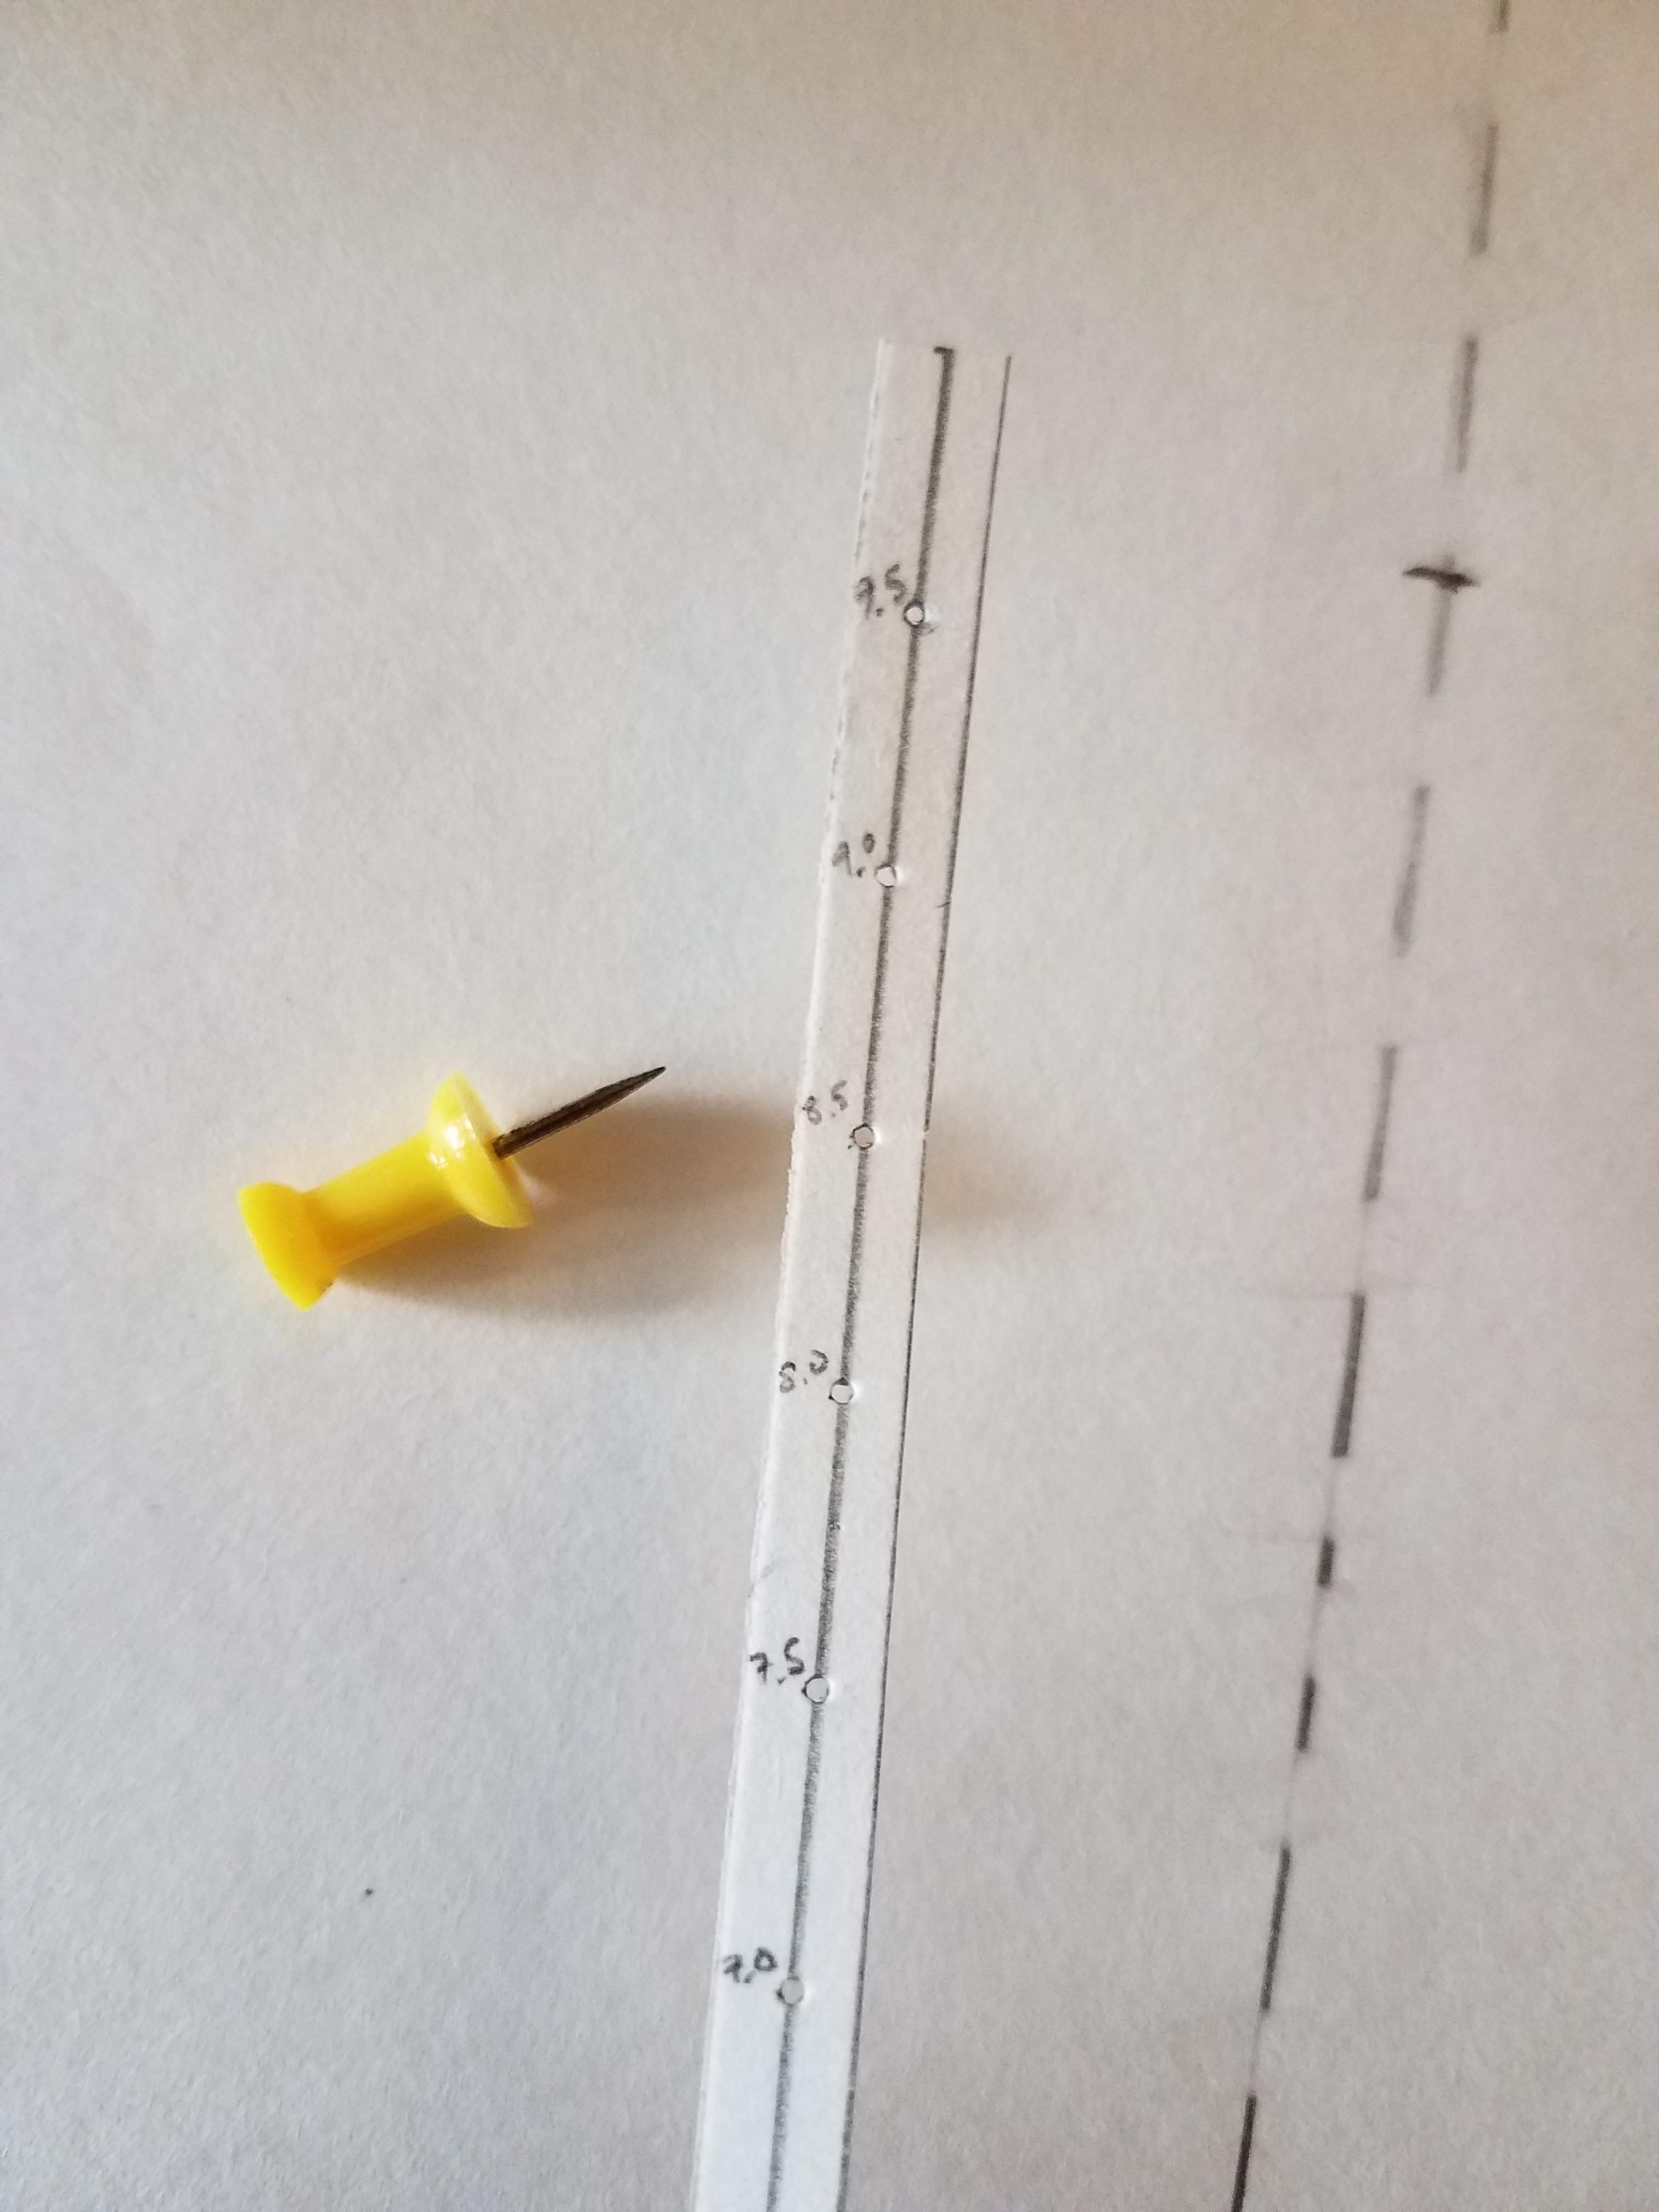
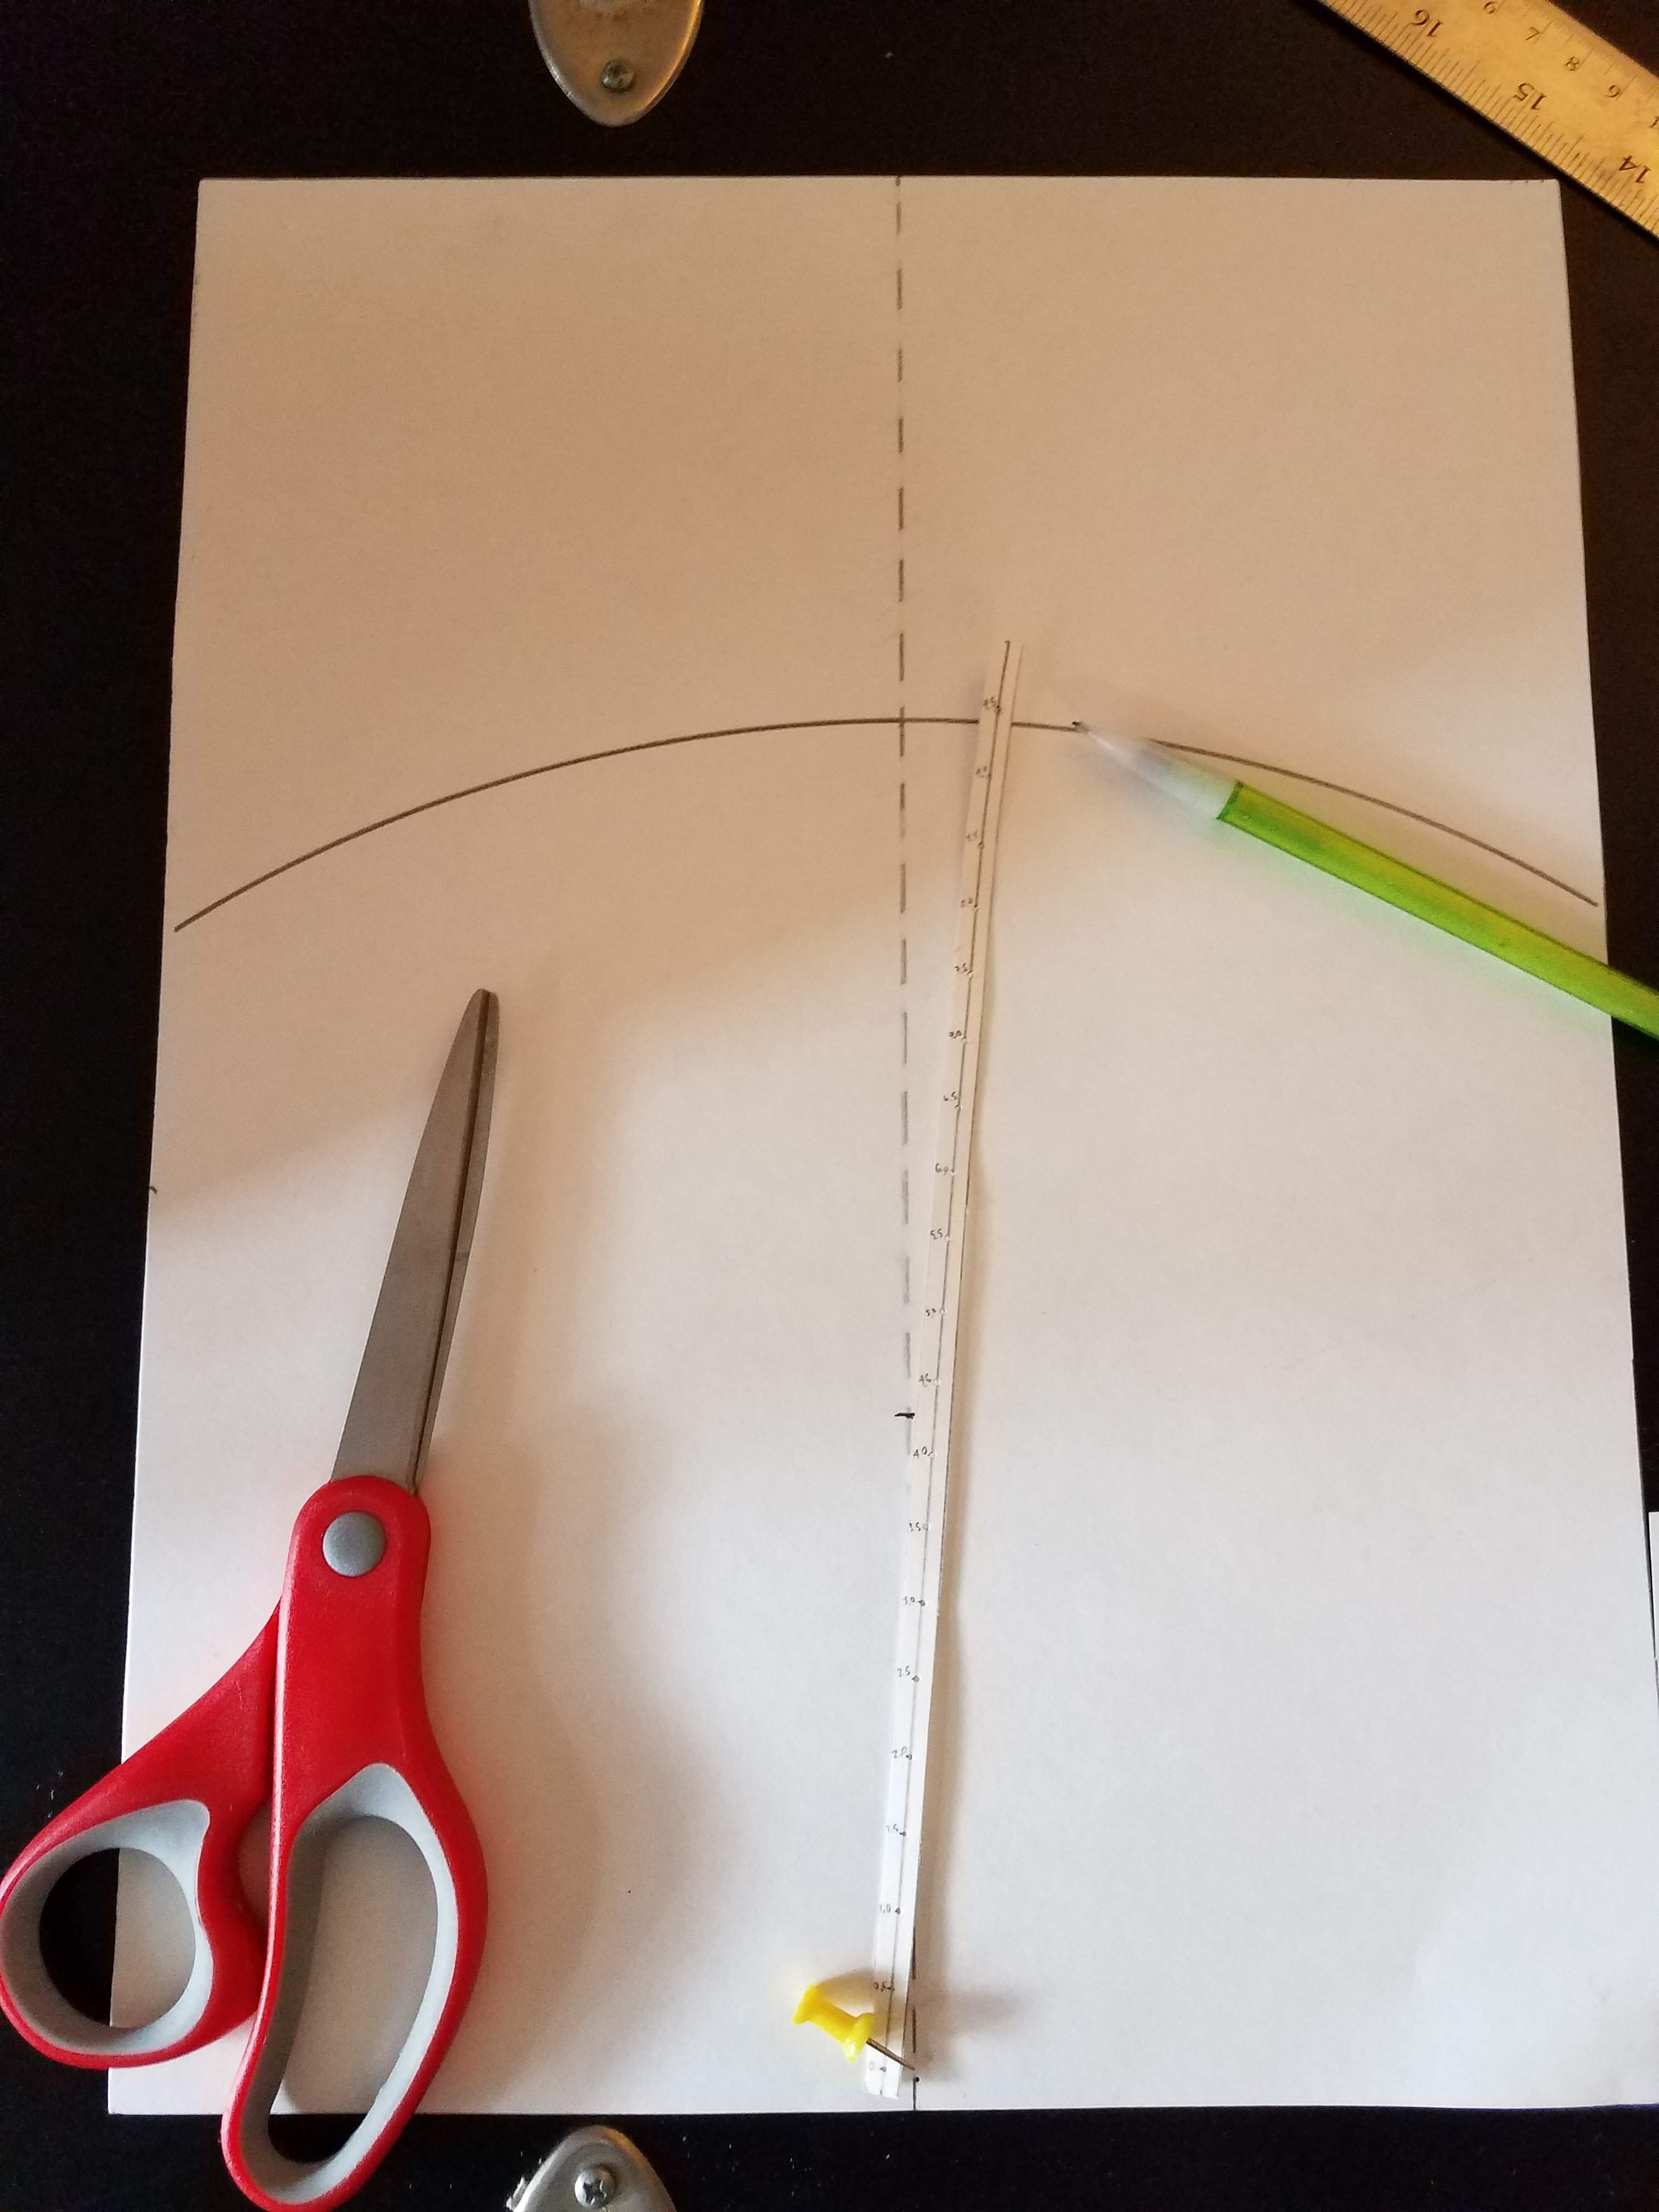
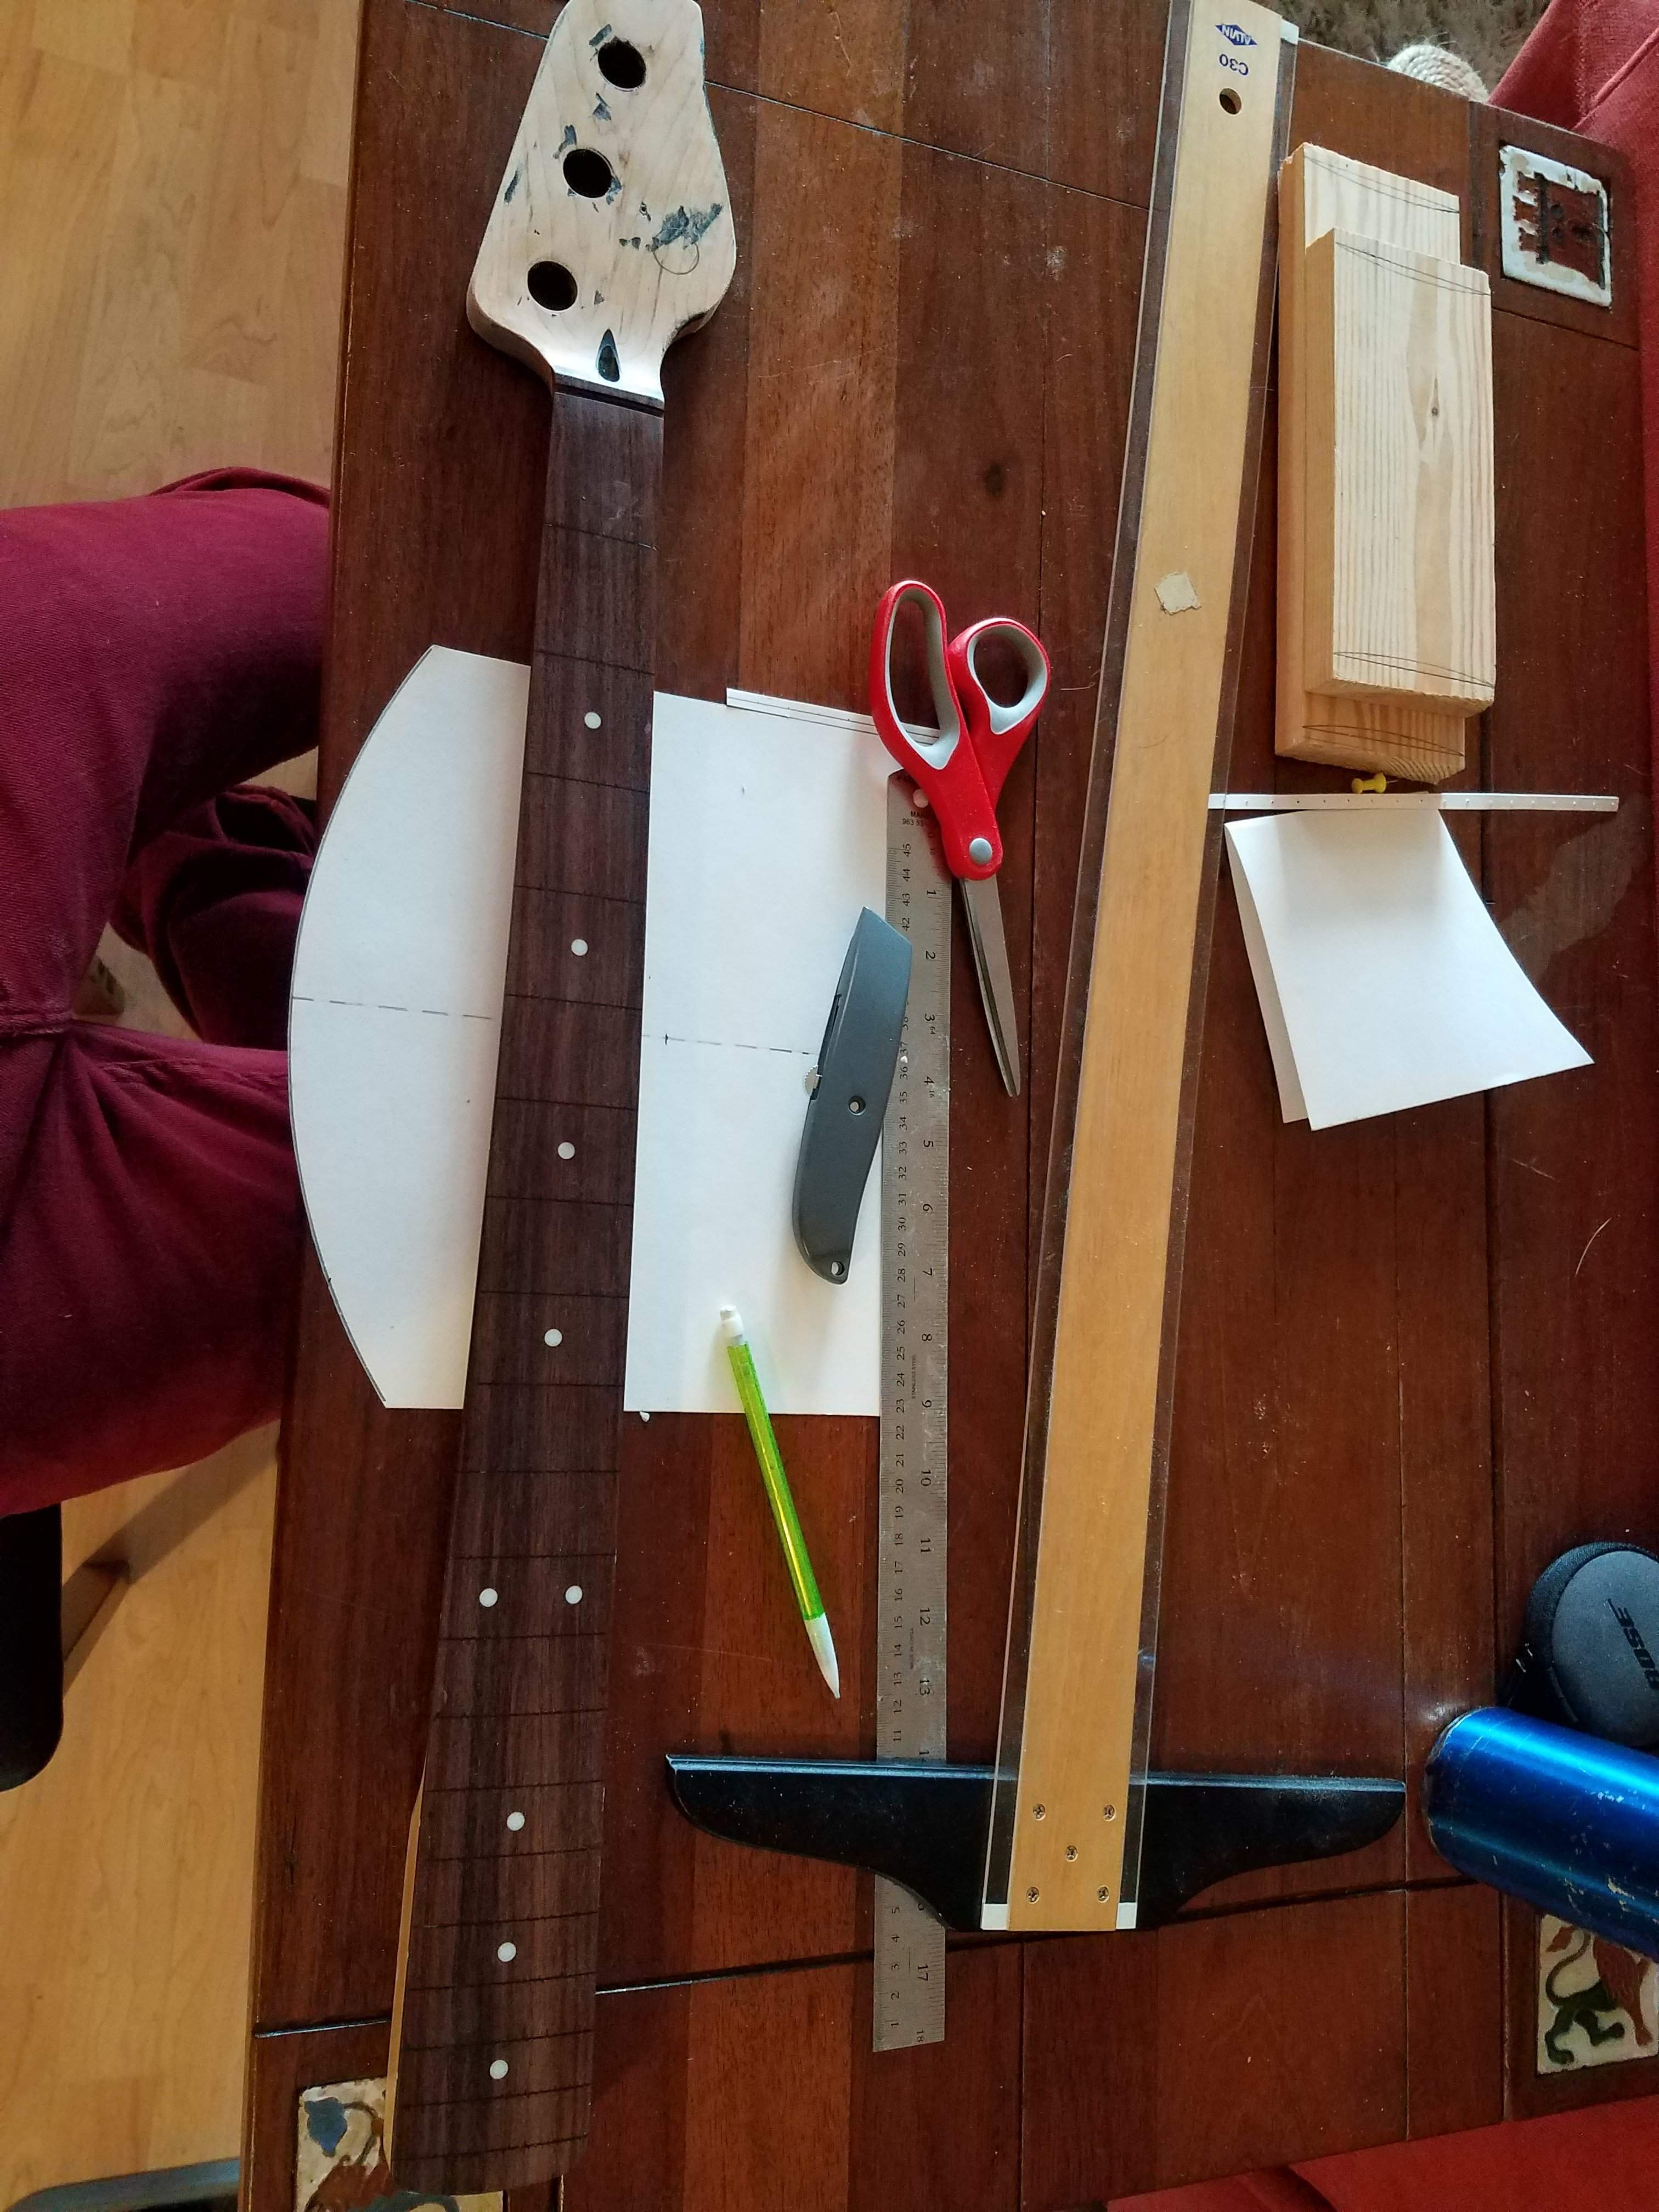
I didn't think about the fingerboard radius the first time around, and now it is a little flatter, so now I'm making a paper compass in order to make a 9.5in radius sanding block.
20200409_110940.jpg


"Action" shot, sorta, of compass in use. This is where that third hand would've come in handy...
20200409_111028.jpg


Wooden blocks in top right of image will be cut and attached together to form, hopefully, a nice sanding block.
20200409_152027.jpg


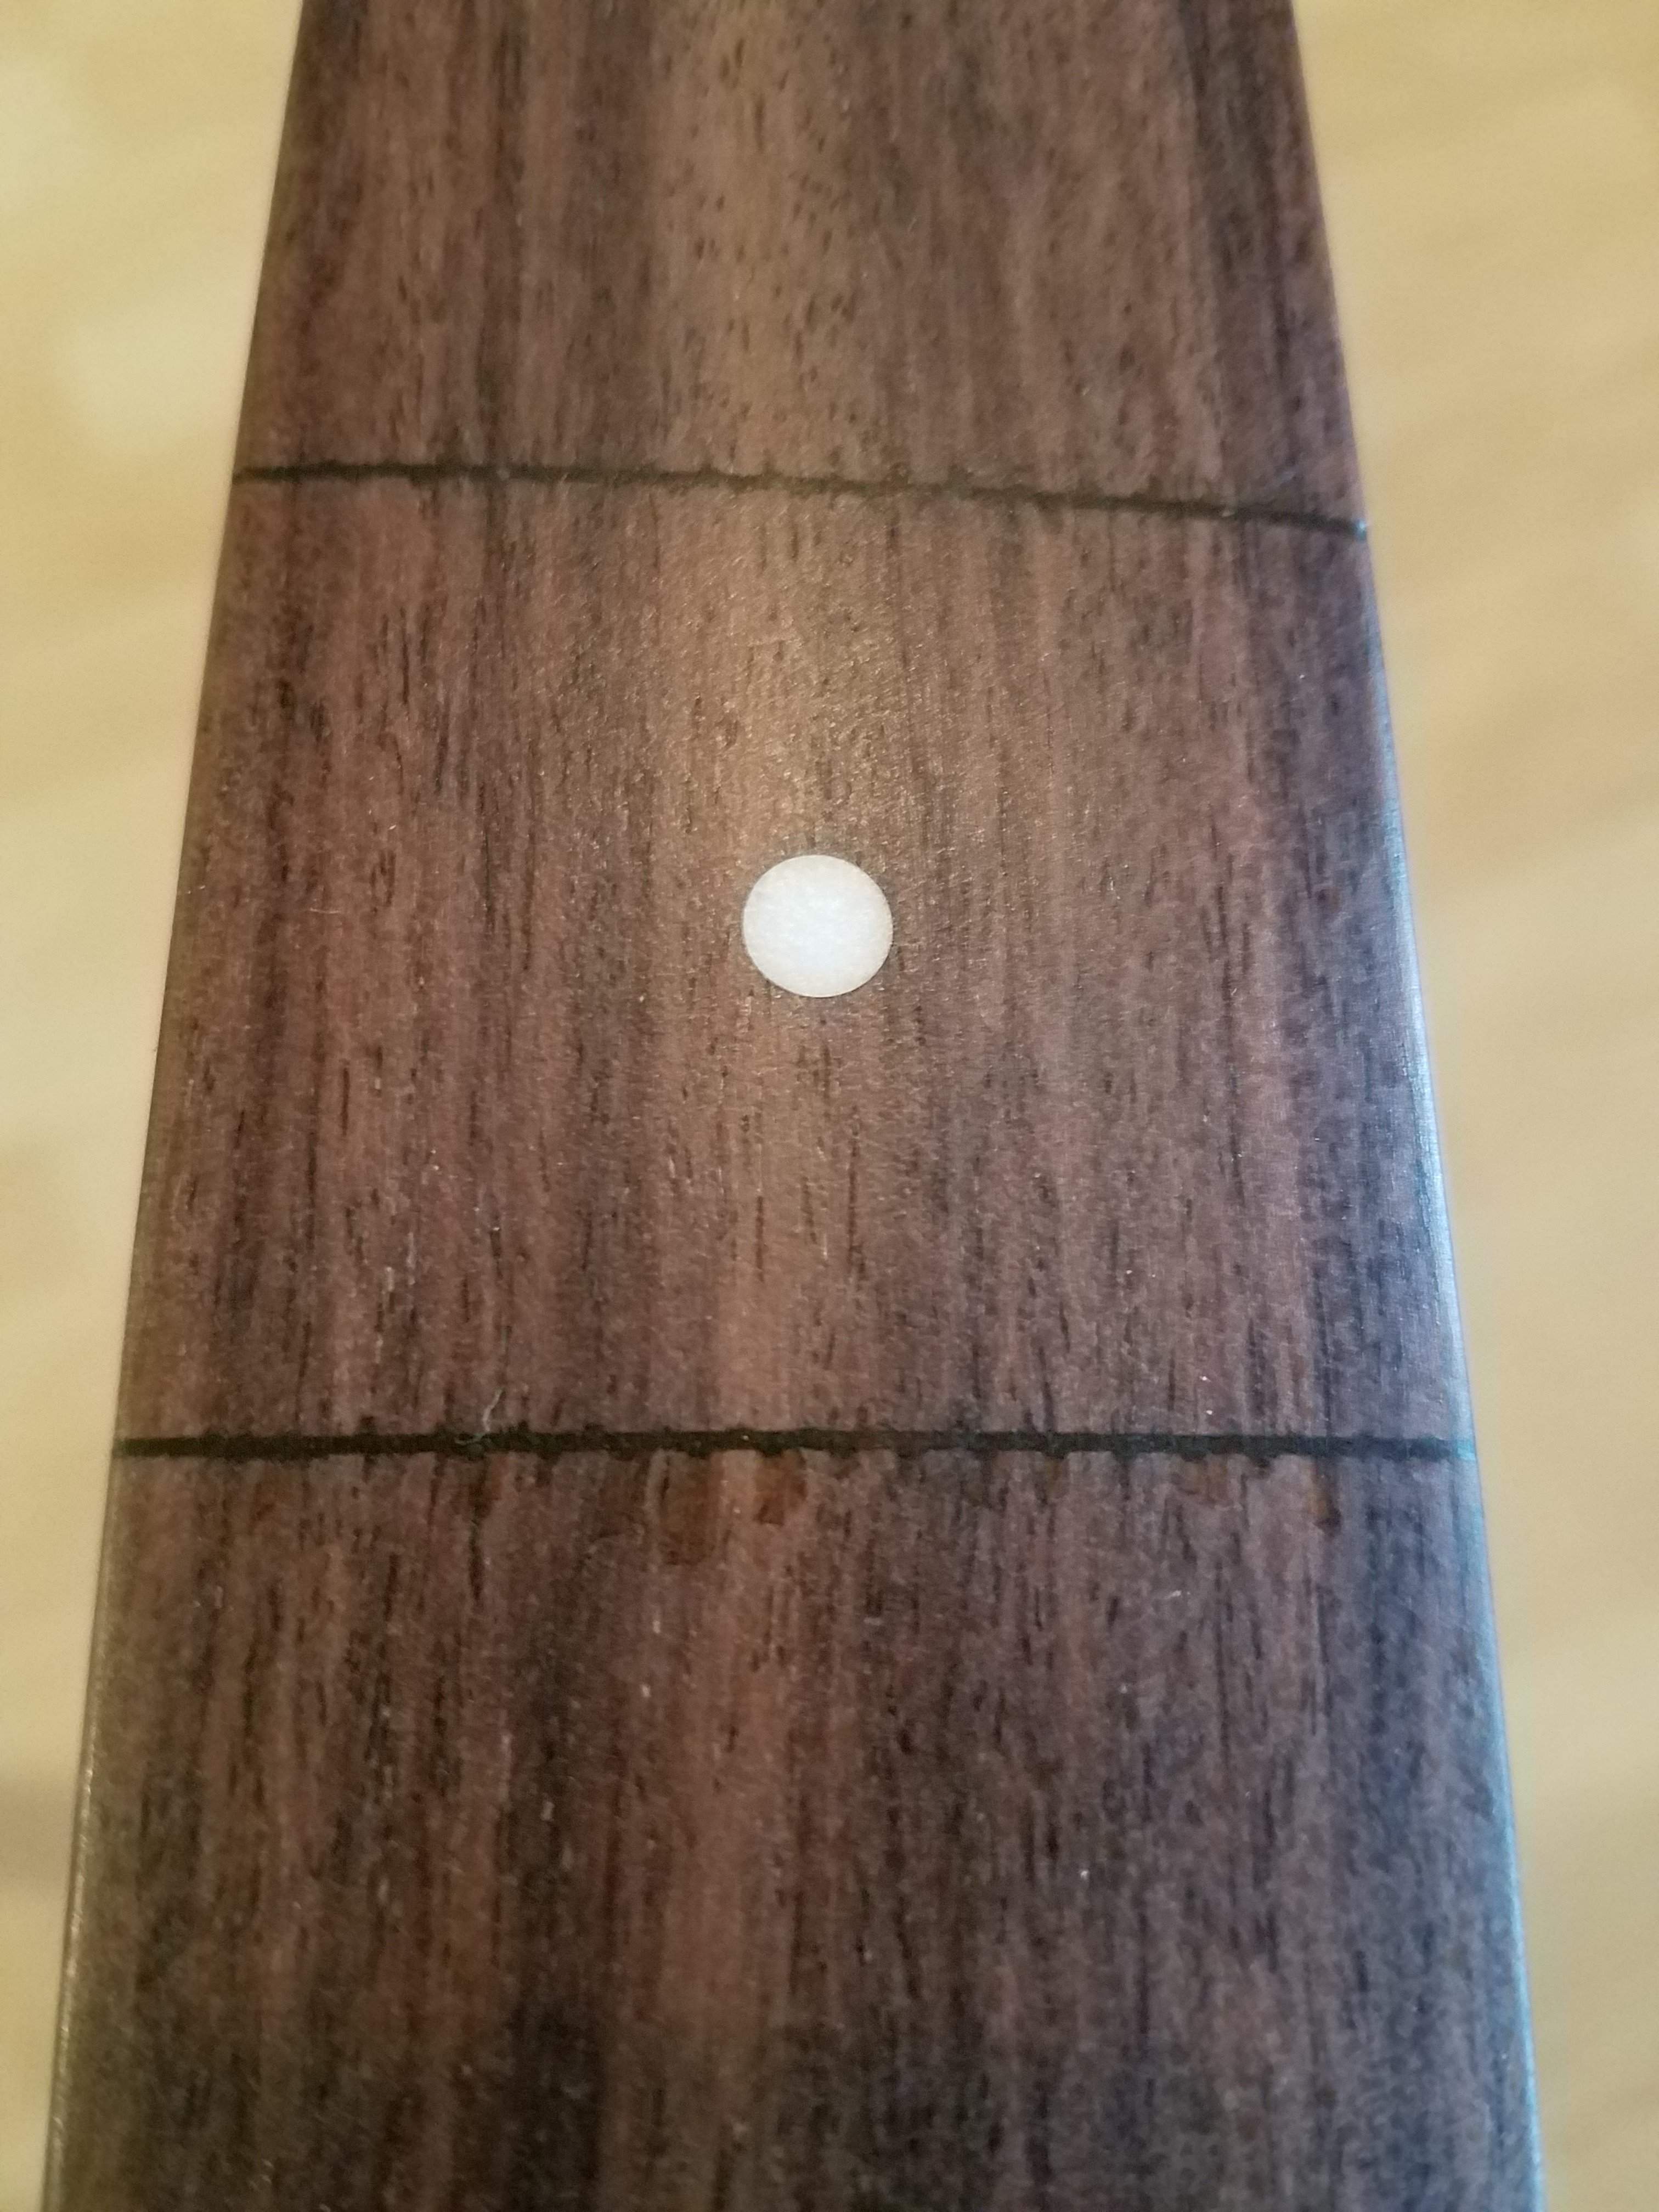
In addition to rushing into a sticky finish on the neck the first couple times around, I made a huge mistake by not filling in the fret holes with something structurally sound. All I did was fill it with the CA glue, and now the neck has a slight bow to it. Rather than rely on the truss rod to fix this problem, which will probably just get worse, I decided I am going to clean em out, and fill it with... something around here. Here you can see the CA slots and the slight chippage from the rushed defretting job. In the end, I actually like the chips because the more I played it; they just looked stylized.
20200409_152108.jpg


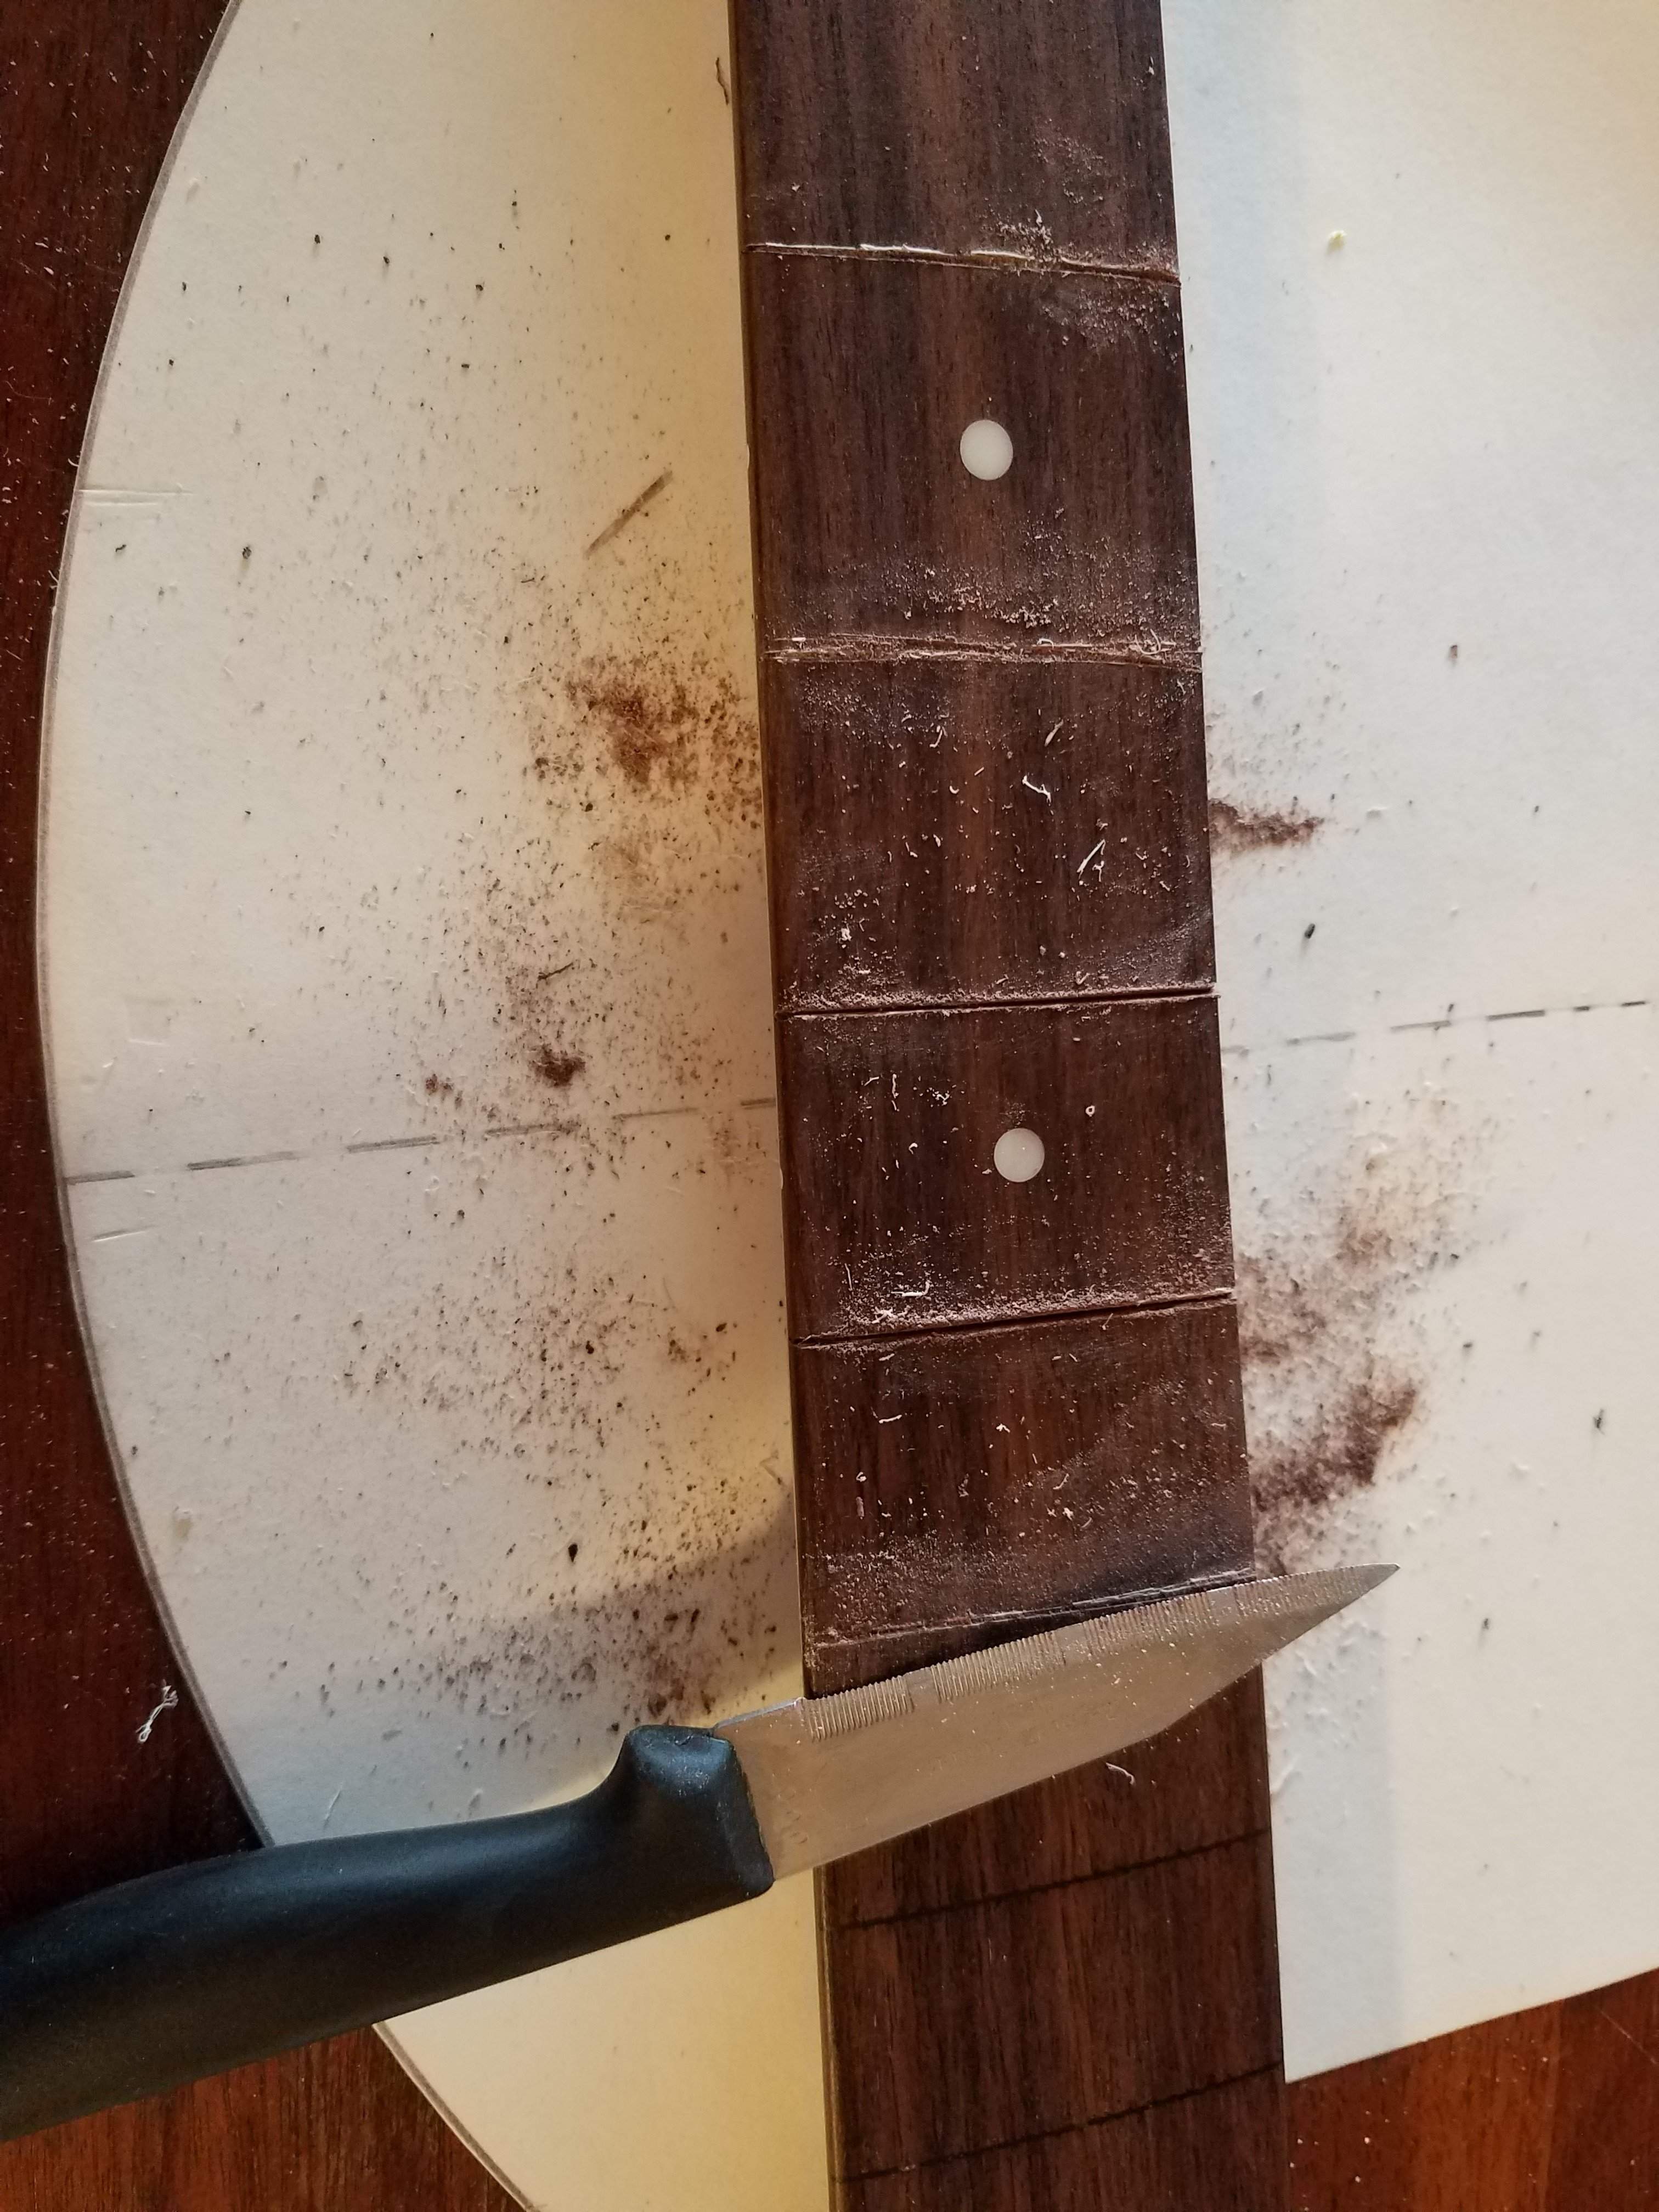
Since I am now planning to seal, paint black, then finish with CA, I don't mind getting a little rough with the removal of the CA. I plan to use JB Weld Kwikwood as a filler, scraping the top as even as possible during application to avoid a lot of sanding. It's the best I got at the moment. No veneer, only sawdust and Titebond wood glue as another option, and that will be messier and need more sanding. And sanding usually leads to sanding...
20200409_161155.jpg


More pics to come as the build progresses. I still have to practice and write music with the other bass.
 
I like the remod of the body. Sort of a Westone / Matsumoku vibe. My only concern is if you use wood filler on the fret slots you’re going to be right back to a bowed neck. The filler can compress and keep the neck from being as stable as you’d like. That’s part of why the standard recommendation is plastic strips or Vermeer.

Looking forward to seeing what you come up with!
 
I like the remod of the body. Sort of a Westone / Matsumoku vibe. My only concern is if you use wood filler on the fret slots you’re going to be right back to a bowed neck. The filler can compress and keep the neck from being as stable as you’d like. That’s part of why the standard recommendation is plastic strips or Vermeer.

Looking forward to seeing what you come up with!
Well dang, I'm sure you're right. Another good reason to post here...

I have a bunch of incense sticks. If I crumble the ends, where there's no incense, just stick, I can get some fine strands going I think. Then I could stuff those in the gaps with some Titebond.

Besides that, another option would be to use paper. Paper doesn't really compress, right? I have cardstock I could use, folded maybe. With or without being soaked in wood glue first.
 
I don’t know if you’re familiar with Unicorn Spit gel stain, but it seems like it’d work for making a pretty convincing faux-abalone look ...

Link Removed

here are a few pics I found on google where people used it for finish .... there are a bunch of colors

View attachment 3780392 View attachment 3780393 View attachment 3780394
That product is able to get a look that I like, though I'd like for the wood grain to be darker, closer to what the real abalone in the knobs looks like. Pics of them to come.

I already have the translucent spray cans in the two colors. I have a really cheap spray can of white, but looking at those pictures you included, I can probably get by without the white undercoat, and still get enough color. I want to show as much grain as possible anyways. I was very pleasantly surprised by what I found under the stock coat of black.
 
  • Like
Reactions: Dark Horse
Right now I'm leaning towards filling my gaps with either cardstock or aluminum.

For the cardstock, I would size it, fold it, and use clamps to compress it before wedging it in. I believe this would have decent compression strength.

For the aluminum, I could use the metal from canned food; it could be cleaned, flattened, folded, and snipped to size relatively easily.

I have some scrap wood that I could shave into little wedges, but I think I'll get a better fit in the gaps with the cardstock or aluminum.

No matter what I use, I think I'll still have to use some of the Kwikwood to fill in the superficial scrapes and gouges.
 
Where are you located? I have miles of cherry veneer, stamps, and envelopes. If you want, PM me your address and I'll mail you a few pieces of veneer.

I applaud your sense of creativity on finding a material to fill the slots with - just wanted to offer this as an option if you want to go a more "traditional" route.
That's awesome :thumbsup:

@Sunk by Sirens I think you should take him up on this offer. I don't see cardstock working very well and aluminum from cans... I don't know...

If you get some dark wood veneers and some black super glue to secure em and fill cracks I think you'll get a much better end result (just my humble opinion :))
 
Yeah, use wood veneer or thin plastic (binding material works well). Putty-type products do nothing to structurally help and usually dry out differently and get raised/loose/otherwise un-good. You can usually get .020"-.030" hardwood veneer sheets/strips for surprisingly cheap from any number of suppliers, and that's the best way to go, in my opinion. I'm not certain, but I might have a sheet or two of maple veneer I can send you if you need it.

Open your fret slots up clean, flat, and square on the bottom, and sand the bottom edge of each fretline inlay strip perfectly flat before you glue them in. CA glue works well. It helps to have a flush-cut saw to trim the veneer strips, but lots of people do it with a chisel or knife, too. Just be very careful not to let the veneer/plastic split and go below the fingerboard level.

I don't think paper would work, and I know you'd never get aluminum to act right without DAYS of sanding, and even at that you might ruin the fingerboard while you're at it.
 
Last edited:
Yeah, use wood veneer or thin plastic (binding material works well). Putty-type products do nothing to structurally help and usually dry out differently and get raised/loose/otherwise un-good. You can usually get .020"-.030" hardware veneer sheets/strips for surprisingly cheap from any number of suppliers, and that's the best way to go, in my opinion. I'm not certain, but I might have a sheet or two of maple veneer I can send you if you need it.

Open your fret slots up clean, flat, and square on the bottom, and sand the bottom edge of each fretline inlay strip perfectly flat before you glue them in. CA glue works well. It helps to have a flush-cut saw to trim the veneer strips, but lots of people do it with a chisel or knife, too. Just be very careful not to let the veneer/plastic split and go below the fingerboard level.

I don't think paper would work, and I know you'd never get aluminum to act right without DAYS of sanding, and even at that you might ruin the fingerboard while you're at it.
What do you mean by getting aluminum to "act right," which will need days of sanding?

Would it really be that bad to have the aluminum insert less than 1 mm lower than the fingerboard? Either to then sand the fingerboard, or just seal, paint, and then CA finish on top of that; by then the layers will even out.
 
Right now I'm leaning towards filling my gaps with either cardstock or aluminum.

For the cardstock, I would size it, fold it, and use clamps to compress it before wedging it in. I believe this would have decent compression strength.

For the aluminum, I could use the metal from canned food; it could be cleaned, flattened, folded, and snipped to size relatively easily.

I have some scrap wood that I could shave into little wedges, but I think I'll get a better fit in the gaps with the cardstock or aluminum.

No matter what I use, I think I'll still have to use some of the Kwikwood to fill in the superficial scrapes and gouges.
Card stock is an alright choice- contrasting, made of wood, you can cram the slot full, and it should be slightly softer than the rosewood so good for getting flush.

Aluminum is a cool looking horrible choice due to its different expansion/contraction rate to wood, will leave little ridges in the board.
 
Card stock is an alright choice- contrasting, made of wood, you can cram the slot full, and it should be slightly softer than the rosewood so good for getting flush.

Aluminum is a cool looking horrible choice due to its different expansion/contraction rate to wood, will leave little ridges in the board.
Are normal frets made of specific material with this in mind? I thought since it would be replacing what originally was metal, though a different kind, it would be okay.

Yeah, my original hunch about cardstock is that when compressed, it will have structural similarities to wood, to a certain degree. And yes, since it is softer than the wood, can be forced to fill a gap and not leave edges.
 
Frets are usually "nickel silver" or stainless steel, but there are other compounds in use as well. Aluminum has a bigger expansion/contraction rate than fret material. :) I also think if you can find some then veneers or something similar that will be your best bet. Kwikwood will be useful to fill in any gaps, but CA glue is much harder than kwikwood and most/all wood putties. I'd install them with thin CA glue myself and then file them flush before sanding with a radius block :thumbsup:
 
I have a Carvin neck thru 5 string that was made into a fretless by Mike Lull (RIP) and he used maple veneer to fill the slots, I'm just sayin'.
I do have a question though, it looks like the body is a single slab, is that true ? it's hard to believe a Squier would be built like that. good score.
 
  • Like
Reactions: Sunk by Sirens
I have a Carvin neck thru 5 string that was made into a fretless by Mike Lull (RIP) and he used maple veneer to fill the slots, I'm just sayin'.
I do have a question though, it looks like the body is a single slab, is that true ? it's hard to believe a Squier would be built like that. good score.
3 piece body, I found both seams while sanding, but they did a great job of matching the grains. Looks like it all could've been from the same tree.
 
What do you mean by getting aluminum to "act right," which will need days of sanding?

Would it really be that bad to have the aluminum insert less than 1 mm lower than the fingerboard? Either to then sand the fingerboard, or just seal, paint, and then CA finish on top of that; by then the layers will even out.
I figured you meant to inlay them like you would plastic or veneer strips so they'd be flush. I suppose you could do it the way you're describing, but I really don't think it'd look or feel very good. I also know that aluminum and wood react to heat, cold, humidity and so on RADICALLY differently, I can see the CA glue (which is crystalline and hard/brittle when it dries) cracking or puking out of the slots if stuff doesn't jive with each other. I don't know that there would be enough aluminum mass to matter a whole lot, but I figure if it worked, it would've been done by now (because it probably would be cool looking if executed properly). To my knowledge, it hasn't.
 
Last edited:
  • Like
Reactions: Sunk by Sirens

Latest posts