

Enjoy the benefits of a premium membership!
Upgrade Account
-
TalkBass has been independent since 1998. Add your voice.
Create a free account to reply to discussions, view embedded media, and browse with fewer display ads.
Join free Log in
Want zero display ads or expanded classifieds tools? Compare plans.
You are using an out of date browser. It may not display this or other websites correctly.
You should upgrade or use an alternative browser.
You should upgrade or use an alternative browser.
The Über-Jay Mark2
- Thread starter miziomix
- Start date
More options
Who Replied?
Looks good to me!
Thank you mate

There has been a delay. Hopefully spraying will start tomorrow. In the meantime I am fine-tuning the bridge prototype for the next build. Updates soon

I'd seriously considered putting a hinged cavity cover in my last build but because of space and time (a very small cavity and quick build schedule, not the concepts of continuity and physics) I decided to leave that for another day. Still if access is required it's gotta be easier for the player and easier on the bass than constantly taking out screws
Here's an interesting cavity cover: Schack bass
good one Stumbo! There are new ideas out there. If only I had found someone here to do a mold for me, I'd post one too
 still searching......
I'd seriously considered putting a hinged cavity cover in my last build but because of space and time (a very small cavity and quick build schedule, not the concepts of continuity and physics) I decided to leave that for another day. Still if access is required it's gotta be easier for the player and easier on the bass than constantly taking out screws
It's true. it should be easier than dealing with screws. That's quite a nuisance. I still think a battery box is a good solution, since replacing batteries is mostly the reason why one has to open the cavity cover. This bass is passive, hence no need for that. But the next two will not... need to find that mold guy soon

Neodymium magnets are a great solution. But really, with this kind of cavity cover it just doesn't feel 100% safe from accidentally falling off. And a bass played by a paying customer must be 100% reliable. Well, at the least this one has only 4 screws - and they're Allen. I love Allen screws
ps: Work has delayed this last part of the build. I am in Singapore now and flying to Indonesia tomorrow. One week.... oh well.........


I am seriously blown away by your work man...Great stuff.
I'd love to get my mits on one of these someday!
I'd love to get my mits on one of these someday!
....I'd love to get my mits on one of these someday!
Thank you! I too wish it would be easier. A bassist's feedback is priceless. So far only Sergio - the future owner of my next 4 stringer - has been able to play it long enough. His opinion was very insightful - and he still owes me (us!) his evaluation in writing
Two TBers came to recent gigs and I'm hoping to have them over for a free session with the bass and some Über-beer
You're more than welcome to join. Malaysia is at its best this time of the year
Hi there, I got back from Indonesia yesterday after ten days of back-breaking, eye-frying work.
This is one of the locations where I was working, somewhere in the south of Sumatra.

OK, OK... enough with digressing. here are the pictures you want to see
Work on Über resumed right away. Hopefully I will be done with the lacquer before I'm off again next month.
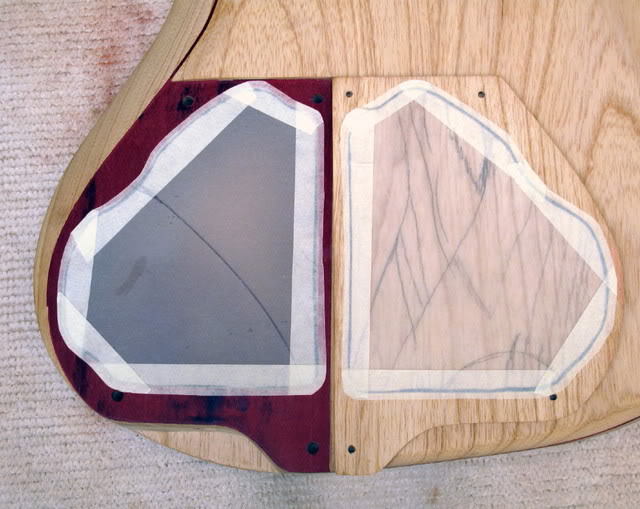
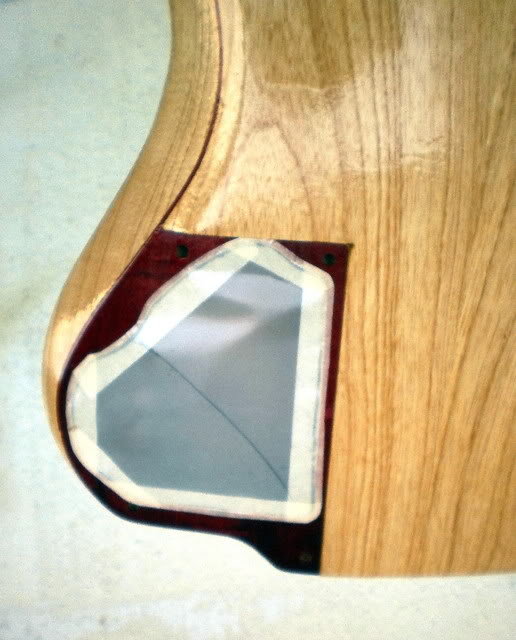
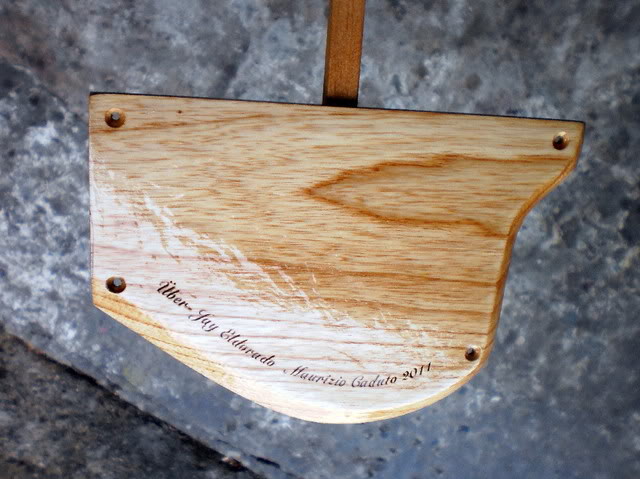
Before spraying I masked the neck pocket, screw threads, cavity and cover.
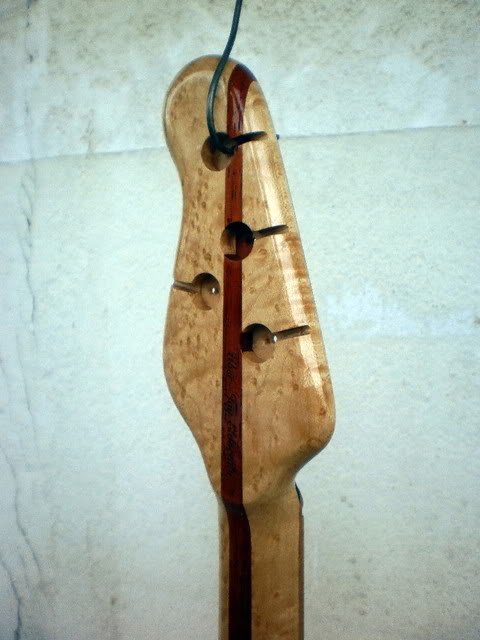
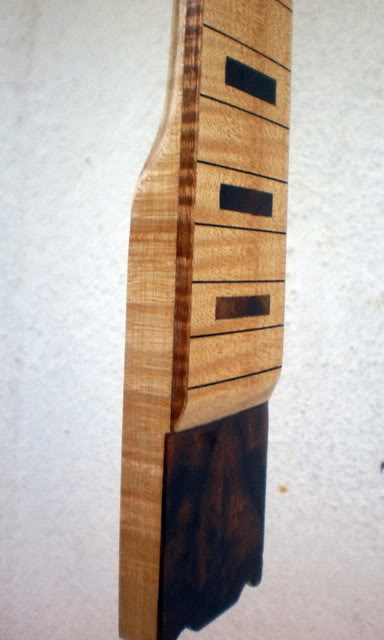
Swamp Ash, Camphor Burl and Padauk pores were filled with CA.
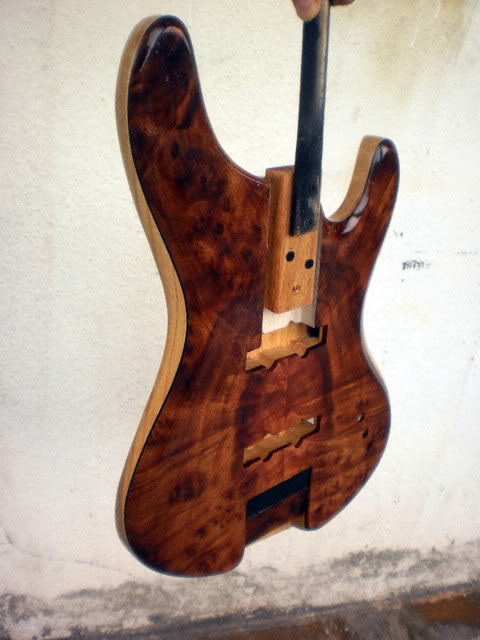
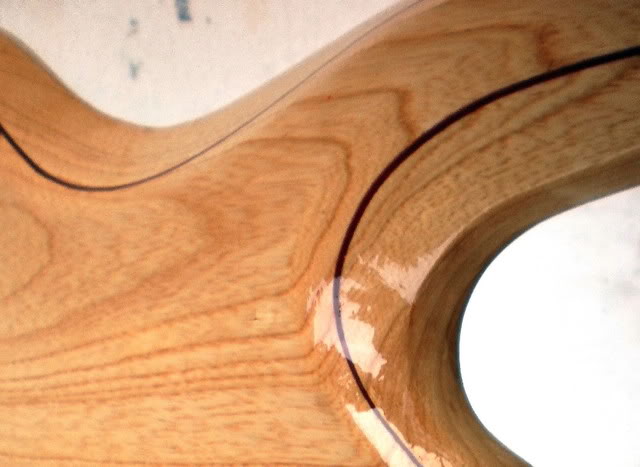
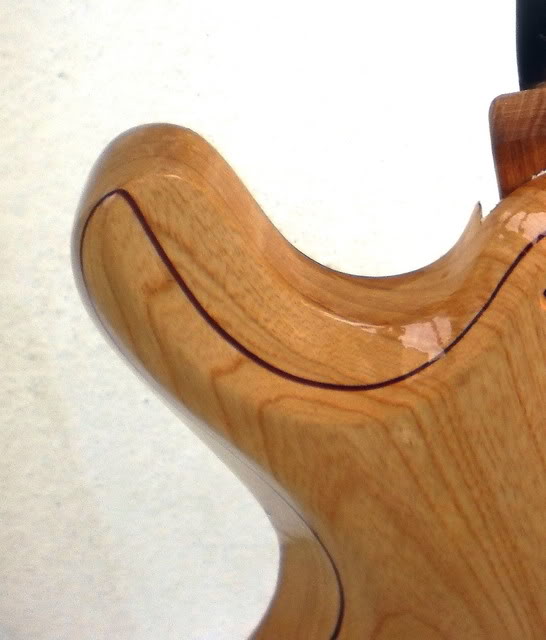
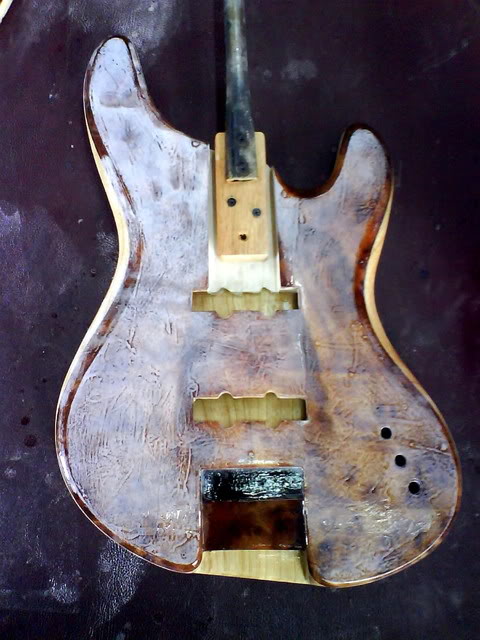
These are pictures of the bass after the first two coats. The pictures are a bit high on contrast so the Padauk and Camphor Burl - especially the block inlays - look rather dark. In reality they aren't.
Hope you like what you see. I do
This is one of the locations where I was working, somewhere in the south of Sumatra.
OK, OK... enough with digressing. here are the pictures you want to see
Work on Über resumed right away. Hopefully I will be done with the lacquer before I'm off again next month.
Before spraying I masked the neck pocket, screw threads, cavity and cover.
Swamp Ash, Camphor Burl and Padauk pores were filled with CA.
These are pictures of the bass after the first two coats. The pictures are a bit high on contrast so the Padauk and Camphor Burl - especially the block inlays - look rather dark. In reality they aren't.
Hope you like what you see. I do

Spraying/sanding/spraying/sanding/spraying/yada-yada-yada...
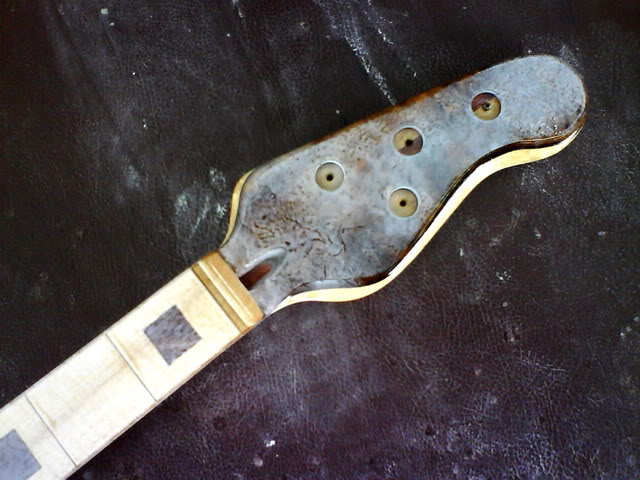
I'll take compliments for the pictures. Thank you.
MUST. FINISH. FRIDAY.
I'll take compliments for the pictures. Thank you.
MUST. FINISH. FRIDAY.
so that you can gig it on saturday?
yeah man... for that, I need a miracle....

ps: But I'm counting on this dude for August gigs
Thanks!
....more sanding and spraying... coatings no.5 and 6.... The Camphor Burl is overall less red than expected - rather reddish brown. There are some wonderful shades of pink and, surprisingly, some green shades are popping up too. Under the lacquer the black veneer blends slightly with the top. I was hoping it would happen
I'm hoping to finish by Saturday. I really want to assemble the bass before I leave and test combinations of Nickel Chrome and black hardware
....more sanding and spraying... coatings no.5 and 6.... The Camphor Burl is overall less red than expected - rather reddish brown. There are some wonderful shades of pink and, surprisingly, some green shades are popping up too. Under the lacquer the black veneer blends slightly with the top. I was hoping it would happen
I'm hoping to finish by Saturday. I really want to assemble the bass before I leave and test combinations of Nickel Chrome and black hardware


