• TalkBass has been independent since 1998. Add your voice.
    Create a free account to reply to discussions, view embedded media, and browse with fewer display ads.
    Join freeLog in
    Want zero display ads or expanded classifieds tools? Compare plans.

The Hossenfeffer Bass Build

Bakelite nut blank shaped and polished. I filed the slots to .022" clearance above unfretted first fret as an initial setting, .015" neck relief at the 7th fret, and 3/64" string clearance above 20th fret. No string buzz anywhere, though the actions still feels a tad high to me. Played it for an hour or so, danged if it doesn't sound just like an unplugged Rickenbacker! Greatly relieved to have a achieved a playable instrument! I had a little scare with out of tune chords above the 12th fret until I remembered I haven't adjusted intonation yet. D'Oh! My ear isn't good enough to do that, have to wait until the electronics are wired up.
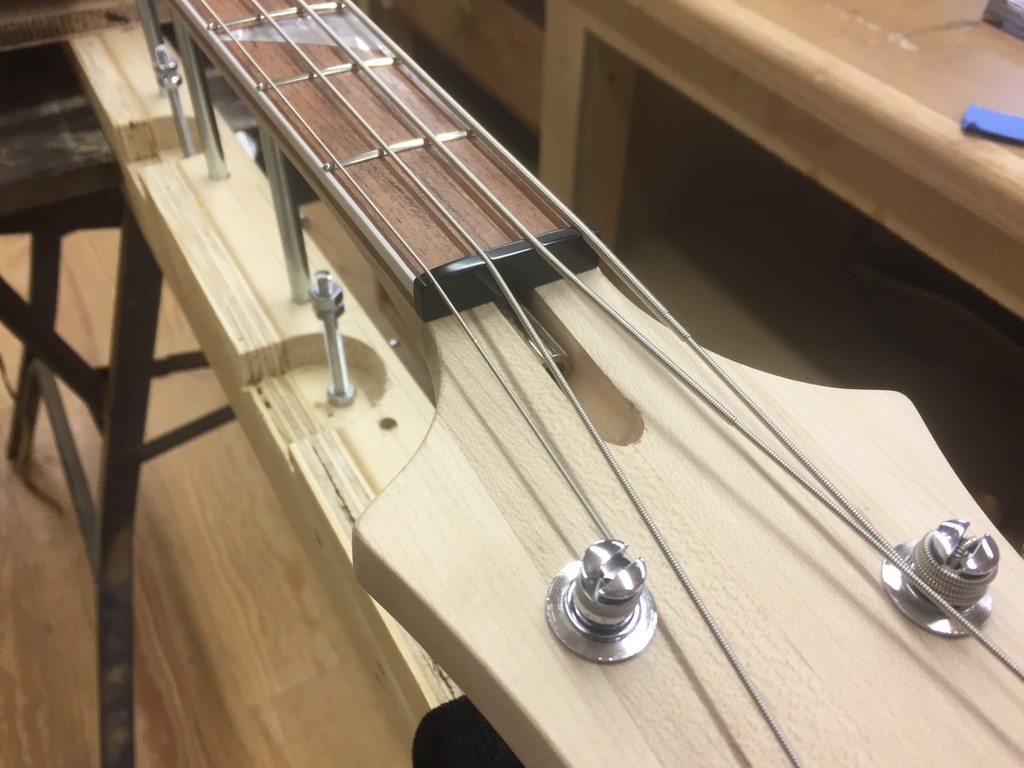
IMG_5786_zpsdldvlbb6.jpg

IMG_5787_zpsvgbmzikz.jpg


In it's un-glued state, the nut tends to want to pull to the e-string side, an effect of the angled string path over the nut, I presume. I suppose a drop of CA glue should hold it, but is this common on Ric bass builds? I used a fine tooth file to cut the bottom of the nut a little, maybe not enough "tooth" to grab onto the wood? Anybody pin the nut with cut off staples or similar? You can see the nut has "drifted" about 1/16" towards the E string side here:
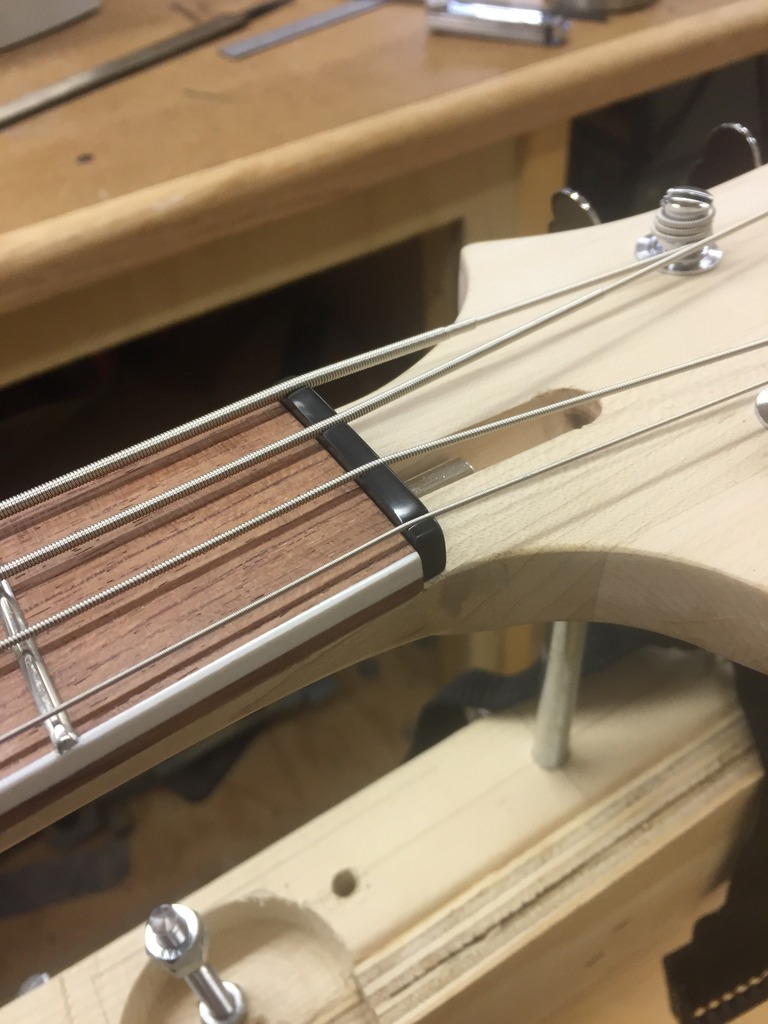
IMG_5788_zpsv5bsei5d.jpg


Here she is in my cheap Road Runner case. Not a perfect fit length-wise, but the velcro neck hold-down works well, and the width is nearly perfect. Lost heat in my shared shop, managed to get it up to around 40 degrees with a space heater, so home it goes. I'm curious to see what the 30 degree difference in temperature will do to neck relief.
IMG_5789_zpsykt96vhh.jpg

Edit:
Forgot to ask- what's the consensus on drilling holes for hardware? before or after paint? My instinct is to do a full dress assembly with the pickup ring, straplocks, etc., but that creates holes that can absorb water during wetsanding. I'm tempted to get some of the Mirka Abralon sandpaper @Bruce Johnson recommends, and only dry sand. Suggestions?
 
Last edited:
Looks awesome!

No opinions on the hole-drilling question, as I don't really sweat little things like that. Drill before and the hole should get a bit of finish in it prior to wet-sanding, or drill after; either way the hardware stays on. :)

Abralon is pretty awesome.
 
  • Like
Reactions: Gilmourisgod
Thanks CT, i read someplace about people putting a couple drops of candle wax in the holes to seal them up, I'd worry about contaminating the finish. Maybe a drop of Elmers white glue? That would be easy enough to drill out again once the finish is done. What i DONT want to do is chip the finish right at the end.
 
  • Like
Reactions: ronaldpdbrandt
I drill as few holes as possible before finishing. Pick guard, pickup rings, bridge and bridge I usually do after finishing, because the wood around those holes will swell during the wet sanding stage causing the finish to raise around the holes.
 
  • Like
Reactions: rojo412
I drill as few holes as possible before finishing. Pick guard, pickup rings, bridge and bridge I usually do after finishing, because the wood around those holes will swell during the wet sanding stage causing the finish to raise around the holes.
Hopkins, do you ever have a problem with finish chipping out by drilling the holes later? I may go the Mirka Abralon sandpaper route per @Bruce Johnson suggestion on the waterbase finish thread, still hoping to use 100% water base, but haven't decided which system yet. He and @mapleglo had success with Parks Pro Finisher and dry sanding, but I don't have a spraygun, and can't justify buying one for one job, so I'm a bit torn.
 
Hopkins, do you ever have a problem with finish chipping out by drilling the holes later? I may go the Mirka Abralon sandpaper route per @Bruce Johnson suggestion on the waterbase finish thread, still hoping to use 100% water base, but haven't decided which system yet. He and @mapleglo had success with Parks Pro Finisher and dry sanding, but I don't have a spraygun, and can't justify buying one for one job, so I'm a bit torn.

No problems with the finish tearing out, just use a drill press with a sharp bit, at a higher speed and drill slowly. As far as water based finish, I can't help you. I have never used it as I am a 2k solvent kind of guy
 
  • Like
Reactions: Gilmourisgod
Ric nuts do tend to drift towards the E side if not glued. I think it's because the A string exerts more lateral force than the D string. A couple of drops of wood glue will probably do the job. You also have to be careful to leave some height on the nut or else the A string will pop out. Yours looks OK but don't make it any lower.

The build is awesome!
 
Spent a few hours fitting the electronics, found I had to relieve both the output jack and neck pup routes a bit to fit things. The jacks are a tight fit, won't know if they work properly until I solder it all up.
IMG_5814_zpszfc4vnsd.jpg
IMG_5816_zpstp4db8zr.jpg

IMG_5823_zps121p3uyw.jpg

Had to widen the neck pup route a little, didn't account for the room required for the pup screws and pickup wire.
IMG_5813_zpssbivhpaj.jpg


First "Full Dress" mockup, an incredibly long time in coming
IMG_5822_zpsydadfiiu.jpg

IMG_5821_zpsapblkca5.jpg


Clear plastic TRC made for me by a TB'er , brown protective paper layer still on it. That one will get used on the Hossenfeffer II, used it as a template for this pearloid one cut from scrap matching the pickguard by Pickguardian. Bandsawed to rough size
IMG_5819_zpsteqe8cgy.jpg

And the finished TRC with plastic protective film still in place. I'll bevel it to 45 degrees to match the pickguard.
IMG_5820_zpseodbyduw.jpg


Time to tear it down again and start finish sanding!
 
Last edited:
Now comes the final agonizing over which finish to use! Leaning heavily towards rattlecan Varathane Heavy Use water based poly clearcoat over a black colorcoat, that's what's got me stumped as far as compatibility. Nobody makes a WB colorcoat that dries hard from what ive found online. Time for some paint science experiments. Think I'll make a quick body wing mockup with binding to practice on, won't be warm enough to paint in my garage for another month anyway. I need to see if its possible to mask the binding or if if I need to learn how to scrape it like this guy:
 
Trans tint? Tell me more! Do they make an opaque jet black?

Edit:
I have actually used this stuff before in other colors. It could be used to tint a water based poly, but alas, I have no spray gun. I wonder if it could be used to tint WB poly through a Preval? Applied directly over maple it would make it a semi transparent black with grain showing through. Given the number of mistakes and bondo fills, an opaque finish is mandatory. I'm going to call Rustoleum product support and see what's compatible under Varathane.
 
Last edited: