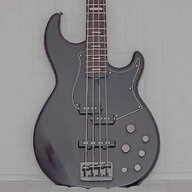
You're welcome, we love all kinds of mods/builds!
That's right #1110, as all of us are.
And you see, we have wings! YAY
thanks! By the way, I have been a flying models builder too (better than bass builder...).

TalkBass has been independent since 1998. Add your voice.
Create a free account to reply to discussions, view embedded media, and browse with fewer display ads.
Join free Log in
Want zero display ads or expanded classifieds tools? Compare plans.
You're welcome, we love all kinds of mods/builds!
That's right #1110, as all of us are.
And you see, we have wings! YAY
So then you have a flying V bass, right?thanks! By the way, I have been a flying models builder too (better than bass builder...).

mmm... the closest model was a depron "Stealth"... apologies for the wine bottles in the backgroundSo then you have a flying V bass, right?

You're forgiven if it's Italian wine, preferably Abruzzo...

There is also a Rioja thereYou're forgiven if it's Italian wine, preferably Abruzzo...

That's like putting a Chianti there... no charm, it should have been a Valdepeñas to measure up to the Abruzzo.There is also a Rioja there
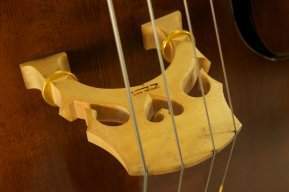
Well you're exactly in the right place. No limits here, modding, building, half building, projects experimental or not, it's all ok.Just found this interesting thread. I always felt there should be a subgroup for bass mods for the rest of us, IE ameuture mods & such - a place to ask questions & learn.
My skills are nowhere in the leauge of the luthiers corner.
I’ve got a couple basses I want to mod. A cheap Traveller bass has some issues: guitar tuners (cheap ones at that) dont hold up well to the tension of bass strings, the bride has no adjustability & the tonal output is a bit harsh.
For now I’ve got a pair of stubby hipshots for it and a plan on how to make them fit.
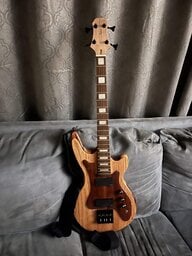
ssssllllaaaaaammmm!
I showed the owner of the custom guitar shop 3 designs I have.
He is not only willing to sell my work, He loves them. He especially likes the floating top. He said he knows of several collectors who he guarantees will by them at $2,000.00 or even higher. He also builds custom necks. I swear they are the most beautiful necks i have ever seen. he will build them for me in the mean time, and teach me how to build them. We are working out the prices and commission. but he is as excited as I am. He currently has my floating bass so he can measure the neck and build the new ones to match it since i already have templates.
Gotta go for now but i'll be back later.
well i had to run before i could finish my post....
I have no intention of charging $2000 for a bass. I am looking more at costs to me at between $800 and $900 with my price being $1200 so that i can afford to build up a parts supply to be sustainable. we agreed that he deserved $300 for the shop and reputation, and sales space on top of that. He has a number of repeat customers who are wealthy collectors of custom instruments.
This guy is a far better builder than I am, but i have a design that he is sure will sell. Part of the agreement is free lessons on the parts of building that i have yet to master. He is a master at making custom necks. often with 3 or 4 different woods in them. And i need to perfect my techniques so that I eliminate the tiny imperfections which i am ok with on instruments for my own use. with only an hour notice that i was coming he had a bass player there to play and evaluate my bass. They loved the design but were critical of some of my finish work. they were spot on with every comment. overall they also loved the tone and playability, but i need to shorten the top horn by 2 inches, it was hard to play sitting. I was embarrassed that I left this bass with action that was too high. I was intending to disassemble to modify it for better action, but forgot to finish it.
this is going to work. my workmanship will improve, and he gets to add a very well designed line of basses and baritones to his shop. he measured everything about the bass so we can design great necks.
We agreed that everything has to be top of the line:
Wow i guess at this point i can actually call myself a Luthier
- I build the floating top and body as i have been.
- No more mail order necks. we will be building custom necks for custom axes.
- I am standardizing my head design including my signature logo. templates will be used to ensure consistency.
- all electronics will be EMG active systems with either 2 or 3 band Eq.
- The first neck he will build while teaching me his tricks. (value = $350 ouch the price just went up a couple hundred.)then i will build them myself. insets will be included as an option for all instruments.
- EMG external power supplies will be included with each.
- all basses will be fitted with LaBella flats.
- All baritones will be fitted with Stringjoy special baritones.
- He liked the Cherry wood, he also considers Cherry one of the best sounding tone woods. but he asked if i would be willing to work with other woods upon request, which of course i would enjoy.
- Bridges will be either hot shot 3 axis bridges or depending on how i finish the instrument Tune-o-matic brushed pewter.
- all pickguards and opening covers will be made of wood. no manufactured pickguards.
- He will display and sell any quality instruments i want to put on consignments, but expects that mostly i will be asked to build custom to suit customer requests. I am already making up customization selection sheets for special orders. i committed to being able to build 1 instrument for custom order per month.
nah I'll wait until the first one actually sells.
ps. i will also be building and selling the wagon wheel bass design. but only after i am established with the floating top. i need to completely change how i make f-holes, and fabricate templates before i will be ready for building them.
Nofretbacker projectnofretbacker project.
I finally got my bridge pickup cover and just ordered the pickup with surround set.
This set also has a pup cover but that one's made of metal and just a little too close to the strings on this bass. I know this from experience with my tealbacker where I did the exact same thing and needed to buy the rick oem pup cover which is a fair bit higher, that worked perfectly.
The bridge pickup in this set is for 17 mm standard string spacing. Having the chinabridge that won't do as it has 19 mm and I cannot use the Ric compatible bridges because they would have to be mounted much closer to the bridge pickup. I have no problem with the Chinabridge, it's fairly decent, even though many people have problems with it, I don't, it just works. So I will replace the bridge pickup in the set with the original bridge chinapickup which isn't bad either. The toaster neck pickup is better replaced by a high gain all parts version, which does give a noticeable difference. This one I don't mind since I mostly play neck or both pickups
If I remember correctly last time I bought two ric 3-way switches so I should have one in my parts box and I have a complete set of ric alike knobs so not much left to acquire to start the project. Ah of course I forgot, still waiting for the veneer to be delivered, otherwise this whole project make no sense at all.

I like the grain.Nofretbacker project
After two tries with the veneer, I gave up. The veneer I intended to use is very nice but too thin to successfully apply.
The first time it moved below the polystyrene foam which I used to keep it pressed onto the fretboard, resulting in a very ugly fold.
The second time I used a different glue which resulted in way too many bubbles visible after a first layer of pore-filler.
Removal again and another resurfacing of the fretboard.
So I set out to find a different veneer, one that is just a little bit thicker and has a pre-glued backing.
I found a roll of 1 meter at 10 cm wide and 0.45 mm thick, perfect for the neck which is 60 mm at its widest point. Only thing that wasn't to my liking was the color, light white oak.
Anyway, today I did the job using a heat iron and it went straight out perfect. Sticks completely, no bubbles, no irregularities, perfectly straight.
View attachment 4406723
I'm very pleased with the result, exactly as I wanted it and the thickness is just enough to cover the height of the frets so my action will be exactly the same.
I had planned on using a color varnish to have it colored just as the original neck, BUT seeing this result it got me thinking of maybe leaving it just as it is, with just a very light maple varnish this would actually have the same color as the body and I kind of like the nerves as they are right now. They'll be even a bit more accentuated after the varnish. I might even try that on a piece of leftover just to be sure.
I don't have a maple neck fretless bass so this could make a unique addition to my flock.
What do you guys think?
Nofretbacker project
Well a lot of time has passed since my last post back in may about this project. I had personal affairs take me away from any progress so the project was halted.
Yesterday I finally picked up the thread of starting on the real work since the bass was still untouched (except for some playing).
So I started with removing the frets.
View attachment 4394182
no big deal, some chipping but that doesn't matter as the fretboard will be beneath a glued on layer of veneer, so any small damage won't be visible. Equally the sharkfin inlays will disappear below the veneer.
During this work I got the sensation of the bridge pickup not being correctly centered.
So I did some checking.
View attachment 4394183
Indeed, off centered by nearly half a centimeter.
Next I removed the pickguard to see if there any room for relocation.
View attachment 4394184
Between the upper left screwhole and the pup routing and the lower right screwhole and pup routing there's room enough to move pickguard a little downward to center the pup correctly.
View attachment 4394185
Simple check to see if at all possible, yes seems there's no problem to correct this failure. I'll have to enlarge the pup cavity a bit so it'll fit, but there's also room for that.
View attachment 4394187
Also checked the electronics to see if I can use it to have original Ric wiring. Luckily the pup switch is the correct one for that, not the typical chinese enclosed one. This is the one needed.
The rest is just standard stuff.
Now this bass is 34" scale, but since I removed the frets and there will be no marker lines I will be able to convert this into 33.25" scale by just moving the bridge a little further up the body.
View attachment 4394188
The bridge had some overhang on the lower corner, but by moving it a bit further up the body this problem is also solved. Here is the position as I marked it on the body. The original screw holes are covered by the bridge so that's ok.
I have an allparts Ric oem bridge which I could have used, but the problem is that those bridges have the mute bar in front of the saddles. Thus the position of the saddles is further downwards which would mean I'd have to move the bridge even more upwards on the body leaving about 2 inches of space between the bridge and the bottom of the body. It would also mean it would probably be too close to the bridge pup. Not an acceptable position to me. So I'll stick with the China bridge which isn't too bad either.
Next I have sanded the fretboard with my 10" radius block. It didn't need much work and after cleaning is now ready for the veneer glue job. The veneer is about 0.15 mm thick so no real change that would affect the setup of the bass. I like low action and without frets you can go a bit lower so it actually comes in perfectly.
More to come...
If these are mediocre, I belong in the less than crappy club. Particularly love the home grown Rics: they look amazingI'm in! I feel a big sense of superiority over all those poor sods in the Crappy Builders Club, Mediocre is a big step up in my mind! Three builds under my belt:
View attachment 4253006
View attachment 4253007
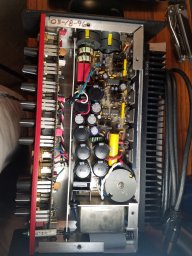
Where's that 1000 Likes button!since i have arranged with a local custom guitar shop to carry my work, i have been working like crazy. But everything has to be perfect, so much of what i have been doing i have had to do multiple times. I have come up with three variations of the floating top bass i made earlier, and these have become the bulk of my work. I am in the process of building 4 at once right now, and keeping them straight as to what parts go with which build has been challenging.
In the mean time I finished the build of my 30" baritone. It is not strung yet because I an waiting for the sticker velum for printing the neck logo to arrive. but other than that it is functional.
This is not going on sale at the store, this is for my own personal use. It features a floating top, but with a closed back and hollowed chambers like a semi-hollow. the pickguard is my own design and is the prototype for any custom requests for instruments with pickguards, regardless of pickup configuration. the body is oak, the neck maple, and the top is cherry.
View attachment 4408209
View attachment 4408213 View attachment 4408214
I have been working on hand carving the woods and making inlays using metallic epoxy resins. As well as hand shaping necks and making my own fretboards. currently i am working on making parts out of maple butcher block lumber. I bought this 36" x 72" piece which i intend to make 3 bodies, at least 2 necks, and at least 3 fretboards from.
View attachment 4408217
I also bought a bandsaw and drill press to make it possible to make my custom necks and fretboards. next step is to build a routing fixture for cutting the truss rod slot.
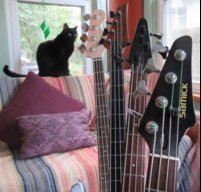
while i don't actually play guitar, I am learning. this is how my new baritone worked out.
at least i hope i posted that right.