

Enjoy the benefits of a premium membership!
Upgrade Account
-
TalkBass has been independent since 1998. Add your voice.
Create a free account to reply to discussions, view embedded media, and browse with fewer display ads.
Join free Log in
Want zero display ads or expanded classifieds tools? Compare plans.
You are using an out of date browser. It may not display this or other websites correctly.
You should upgrade or use an alternative browser.
You should upgrade or use an alternative browser.
The Squier Mini Precision Bass Club
- Thread starter sabre79
- Start date
More options
Who Replied?

Welcome to the party
Here's a pic of my nearly finished mini... need to buff the headstock and move the bridge. Then it's time to string up and play!View attachment 4474194
Wow! This looks great! I'm going for a similar look, but black and gold.
I have so many questions... (If you don't mind.)
1) Is that the Hipshot Kickass bridge?
1a) If yes, how far back does it sit on the body? Does it extend past the end of the body or strap button?
1b) How does it affect what string length you can use?
2) Are those Hipshot tuners, too?
2a) If yes, did you need to drill new screw holes into the headstock?
3) How did you paint the headstock?
4) Where did you get the black pickguard?
4a) Did the black pickguard screws fit the holes properly?
5) Did you replace the strap buttons?
5a) Did you also replace the strap button screws, or did you use the original screws?
6) What control knobs are you using?
7) Did you change the electronics at all?
Okay, I think that's it for now.
 Hope it wasn't too much. Thanks!
Last edited:
Wow! I'm happy to answer some questions. Let's see...Wow! This looks great! I'm going for a similar look, but black and gold.
I have so many questions... (If you don't mind.)
1) Is that the Hipshot Kickass bridge?
1a) If yes, how far back does it sit on the body? Does it extend past the end of the body or strap button?
1b) How does it affect what string length you can use?
2) Are those Hipshot tuners, too?
2a) If yes, did you need to drill new holes into the headstock?
3) How did you paint the headstock?
4) Where did you get the black pickguard?
4a) Did the black pickguard screws fit the holes properly?
5) Did you replace the strap buttons?
5a) Did you also replace the strap button screws, or did you use the original screws?
6) What control knobs are you using?
7) Did you change the electronics at all?
Okay, I think that's it for now.
1. Yes, it's a Hipshot Kickass bridge!
1a. It doesn't extend past the bottom of the body at all!
1b. With this bridge I still have the same issue as others where the E string sits on the tuner past the taper a small amount.
Side note - my bridge come from the factory crooked which I didn't notice until I installed the bigger bridge. I had to drill new holes for the bridge to be straight, so maybe watch out for this. I haven't seen anyone else with the same issue.
2. Yes! These are 3/8" ultralites and were a direct replacement as was the bridge.
3. I painted the headstock with primer and nitro lacquer from Stew Mac. I did this after removing the stock finish and staining/finishing the neck with Minwax Gunstock stain and Minwax wipe-on satin poly.
4. I got the pickguard from a seller on Reverb but I believe he removed the sale for that item specifically. There is a seller on eBay someone mentioned to me a few threads up from this, and the guards themselves look great. The screw holes on mine fit perfectly (I replaced the screws with black Fender screws from Stew Mac).
5. I replaced the buttons with black Schaller strap locks. The stock buttons were garbage. The Schallers came with their own screws, and I did enlarge the screw holes very slightly. I believe the info in the strap lock box mentioned the recommended size.
6. The control knobs are black knurled knobs from Vintage Forge which I found on eBay. The string tree is also Vintage Forge.
7. I replaced all of the electronics - 2x Bourne mini pots, 1x pro tone multi contact jack, 1x .047 orange cap, and a pair of Dimarzio split p pickups. I followed a wiring diagram from six string supplies on YouTube.
I think that's it! Let me know if I missed anything
Wow! I'm happy to answer some questions. Let's see...
1. Yes, it's a Hipshot Kickass bridge!
1a. It doesn't extend past the bottom of the body at all!
1b. With this bridge I still have the same issue as others where the E string sits on the tuner past the taper a small amount.
Side note - my bridge come from the factory crooked which I didn't notice until I installed the bigger bridge. I had to drill new holes for the bridge to be straight, so maybe watch out for this. I haven't seen anyone else with the same issue.
2. Yes! These are 3/8" ultralites and were a direct replacement as was the bridge.
3. I painted the headstock with primer and nitro lacquer from Stew Mac. I did this after removing the stock finish and staining/finishing the neck with Minwax Gunstock stain and Minwax wipe-on satin poly.
4. I got the pickguard from a seller on Reverb but I believe he removed the sale for that item specifically. There is a seller on eBay someone mentioned to me a few threads up from this, and the guards themselves look great. The screw holes on mine fit perfectly (I replaced the screws with black Fender screws from Stew Mac).
5. I replaced the buttons with black Schaller strap locks. The stock buttons were garbage. The Schallers came with their own screws, and I did enlarge the screw holes very slightly. I believe the info in the strap lock box mentioned the recommended size.
6. The control knobs are black knurled knobs from Vintage Forge which I found on eBay. The string tree is also Vintage Forge.
7. I replaced all of the electronics - 2x Bourne mini pots, 1x pro tone multi contact jack, 1x .047 orange cap, and a pair of Dimarzio split p pickups. I followed a wiring diagram from six string supplies on YouTube.
I think that's it! Let me know if I missed anything
Oh man! Thanks so much for the great details!
Re: 2. Did you also need to drill new screw holes for the tuners, or did they use the same screw holes from the original tuners. I don't mean the holes for the actual tuners. I'm talking about the screw holes to secure the tuners in place. (I can see that one of the original tunes on my Mini P is not aligned straight...)
Re: 5. When you say you enlarged the screw holes for the strap buttons, did you pre-drill them first, or just go in straight with the new screws?
Re: 7. How are you liking those Dimarzio pickups? I'm looking to get a set of the Dimarzio Sixties P pickups that have the same type of look and shape as the Relentless pickups.
2. Nope, everything was a direct fit. No adjustments needed here!
Re 5. I pre-drilled the holes first. I taped my bit to the same length as the new screw and only drilled that deep. I believe the new pilot hole was 5/32" but you want to search a bit just to make sure.
Re 7. They're great! Besides noodling, I've only used this bass to play Rocksmith and they've had no issues with note detection.
I will say if you plan to replace all of the electronics, look elsewhere than the Bourne mini pots. They take up a lot more space than I was hoping for and it wasn't exactly an easy swap. They're also slightly too large for the pickguard, so I had to alter that as well by drilling slightly larger holes.
Re 2. Nope, the tuners were a direct swap. No adjustments here!Oh man! Thanks so much for the great details!
Re: 2. Did you also need to drill new screw holes for the tuners, or did they use the same screw holes from the original tuners. I don't mean the holes for the actual tuners. I'm talking about the screw holes to secure the tuners in place. (I can see that one of the original tunes on my Mini P is not aligned straight...)
Re: 5. When you say you enlarged the screw holes for the strap buttons, did you pre-drill them first, or just go in straight with the new screws?
Re: 7. How are you liking those Dimarzio pickups? I'm looking to get a set of the Dimarzio Sixties P pickups that have the same type of look and shape as the Relentless pickups.
Re 5. I pre-drilled the holes first. I taped my bit to the same length as the new screw and only drilled that deep. I believe the new pilot hole was 5/32" but you want to search a bit just to make sure.
Re 7. They're great! Besides noodling, I've only used this bass to play Rocksmith and they've had no issues with note detection.
I will say if you plan to replace all of the electronics, look elsewhere than the Bourne mini pots. They take up a lot more space than I was hoping for and it wasn't exactly an easy swap. They're also slightly too large for the pickguard, so I had to alter that as well by drilling slightly larger holes.
Last edited:
2. Nope, everything was a direct fit. No adjustments needed here!
Re 2. Nope, the tuners were a direct swap. No adjustments here!
Re 5. I pre-drilled the holes first. I taped my bit to the same length as the new screw and only drilled that deep. I believe the new pilot hole was 5/32" but you want to search a bit just to make sure.
Re 7. They're great! Besides noodling, I've only used this bass to play Rocksmith and they've had no issues with note detection.
I will say if you plan to replace all of the electronics, look elsewhere than the Bourne mini pots. They take up a lot more space than I was hoping for and it wasn't exactly an easy swap. They're also slightly too large for the pickguard, so I had to alter that as well by drilling slightly larger holes.
Thanks again! Very much appreciated!

please let me know if i missed giving someone a club number... i feel sure i haven, and it's nothing personal. it's been hectic for me. just hit me up, and i'll add you!
sure - and welcome, number 24
congrats - you are officially signed up, number 25!
Volker Kirstein - #1
G19Tony - #2
hangnail - # 3
pcake - # 4
MakoMan - #5
Diver - #6
Bassylocks - #7
FinialBassist - #8
WildWes - #9
TK4261 - #10
pistonrod8 - #11
Bass-jay - #12
SBassman - #13
Jackcrow - #14
PBassPaul - #15
xboxdude - #16
andare - #17
Stephen Davis - #18
1uca5x - #19
negativeions24 - #20
BadMonk - #21
honeydorick - #22
Zapple - #23
GuillermoW - #24
Philtastic - #25
Frank Vozak - #52
DavesnothereCA - auxiliary member
Can I join the club?
sure - and welcome, number 24
congrats - you are officially signed up, number 25!
Volker Kirstein - #1
G19Tony - #2
hangnail - # 3
pcake - # 4
MakoMan - #5
Diver - #6
Bassylocks - #7
FinialBassist - #8
WildWes - #9
TK4261 - #10
pistonrod8 - #11
Bass-jay - #12
SBassman - #13
Jackcrow - #14
PBassPaul - #15
xboxdude - #16
andare - #17
Stephen Davis - #18
1uca5x - #19
negativeions24 - #20
BadMonk - #21
honeydorick - #22
Zapple - #23
GuillermoW - #24
Philtastic - #25
Frank Vozak - #52
DavesnothereCA - auxiliary member
please let me know if i missed giving someone a club number... i feel sure i haven, and it's nothing personal. it's been hectic for me. just hit me up, and i'll add you!
sure - and welcome, number 24
congrats - you are officially signed up, number 25!
Volker Kirstein - #1
G19Tony - #2
hangnail - # 3
pcake - # 4
MakoMan - #5
Diver - #6
Bassylocks - #7
FinialBassist - #8
WildWes - #9
TK4261 - #10
pistonrod8 - #11
Bass-jay - #12
SBassman - #13
Jackcrow - #14
PBassPaul - #15
xboxdude - #16
andare - #17
Stephen Davis - #18
1uca5x - #19
negativeions24 - #20
BadMonk - #21
honeydorick - #22
Zapple - #23
GuillermoW - #24
Philtastic - #25
Frank Vozak - #52
DavesnothereCA - auxiliary member
You may have missed me

How can I be a part of the Squier mini club!?
you can - and you are, #26!
You may have missed me
i was just tracking your older posts down, as i was sure i missed the one above.
[URL='https://www.talkbass.com/members/volker-kirstein.344042/']Volker Kirstein - #1
G19Tony - #2
hangnail - # 3
pcake - # 4
MakoMan - #5
Diver - #6
Bassylocks - #7
FinialBassist - #8
WildWes - #9
TK4261 - #10
pistonrod8 - #11
Bass-jay - #12
SBassman - #13
Jackcrow - #14
PBassPaul - #15
xboxdude - #16
andare - #17
Stephen Davis - #18
1uca5x - #19
negativeions24 - #20
BadMonk - #21
honeydorick - #22
Zapple - #23
GuillermoW - #24
Philtastic - #25[/URL]
Trevor Driscol - #26
[URL='https://www.talkbass.com/members/frank-vozak.360475/']Frank Vozak - #52
DavesnothereCA - auxiliary memberl[/URL]
How does your foam mute work. Early Mustang Basses came with a foam mute wh8ich I found worked well
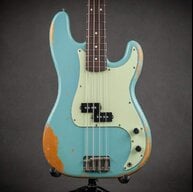
The eBay vendor for Mini P pickguards is earlpilanz in Glasgow.
I bought a Bronco PG from him and it's a very good fit. High quality printed plastic. Good return policy as well.
I bought a Bronco PG from him and it's a very good fit. High quality printed plastic. Good return policy as well.
I forgot to mention that I finished the headstock paint job with clear lacquer from Stew Mac as well, but during the gloss process was when I applied the waterslide decal which I bought from an Etsy seller.Thanks again! Very much appreciated!
How does your foam mute work. Early Mustang Basses came with a foam mute wh8ich I found worked well
It works okay, though the bass goes out of tune a bit faster than normal when using it, especially on the G string. And I realized that trying to tune up with the mute in place is probably not a good idea. But I cut some grooves in the foam for the G string, so it wouldn't get pushed up so much. It's just regular foam I had lying around, that happened to be just the right thickness, about 14 mm or 15 mm. I just started playing bass, though, so I probably have no idea what I'm doing. Just learning from YouTube.
The eBay vendor for Mini P pickguards is earlpilanz in Glasgow.
I bought a Bronco PG from him and it's a very good fit. High quality printed plastic. Good return policy as well.
I forgot to mention that I finished the headstock paint job with clear lacquer from Stew Mac as well, but during the gloss process was when I applied the waterslide decal which I bought from an Etsy seller.
Thanks. I'm actually thinking of using some black vinyl wrap for the headstock and pickguard, for a couple reasons.
First, I'm in an apartment, so I have nowhere to properly use spray paint, and I don't want streaks from using a brush. Plus I'm about 97% sure I'd get drips where I don't want them, anyway. Also, I want to have the pickguard bevel in gold, instead of white, but I haven't found any pickguard material with a gold ply in the middle. So I thought I'd use a paint marker for the gold rim, and then put the vinyl wrap on after, which would cover any inevitable paint errors on the top. There are special markers for plastic model kits, so that should work on the pickguard.
Second is the cost. I think it would be about $10, all in, for the marker and a couple small sheets of vinyl from the local hobby shop. If it doesn't turn out well, it might even be reversible (except for the gold marker paint). It probably won't last as long, but it could always be redone later. And I won't be left with a bunch of half-used paint cans/bottles. The Ebay option looks okay, but it's quite a bit pricier, and this build is already getting a bit out of control...
If anyone thinks this vinyl idea is a particularly bad one, please do let me know before I do something stupid. Or if you've done it with good results, I'd also like to know.
It works okay, though the bass goes out of tune a bit faster than normal when using it, especially on the G string. And I realized that trying to tune up with the mute in place is probably not a good idea. But I cut some grooves in the foam for the G string, so it wouldn't get pushed up so much. It's just regular foam I had lying around, that happened to be just the right thickness, about 14 mm or 15 mm. I just started playing bass, though, so I probably have no idea what I'm doing. Just learning from YouTube.
Thanks. I'm actually thinking of using some black vinyl wrap for the headstock and pickguard, for a couple reasons.
First, I'm in an apartment, so I have nowhere to properly use spray paint, and I don't want streaks from using a brush. Plus I'm about 97% sure I'd get drips where I don't want them, anyway. Also, I want to have the pickguard bevel in gold, instead of white, but I haven't found any pickguard material with a gold ply in the middle. So I thought I'd use a paint marker for the gold rim, and then put the vinyl wrap on after, which would cover any inevitable paint errors on the top. There are special markers for plastic model kits, so that should work on the pickguard.
Second is the cost. I think it would be about $10, all in, for the marker and a couple small sheets of vinyl from the local hobby shop. If it doesn't turn out well, it might even be reversible (except for the gold marker paint). It probably won't last as long, but it could always be redone later. And I won't be left with a bunch of half-used paint cans/bottles. The Ebay option looks okay, but it's quite a bit pricier, and this build is already getting a bit out of control...
If anyone thinks this vinyl idea is a particularly bad one, please do let me know before I do something stupid. Or if you've done it with good results, I'd also like to know.
I've seen a few people here use vinyl with good results. I believe you could find this in the very beginning of this thread. Fortunately I've got more use for the paint than just this bass!

New Pic of my Mini P. Its still my go to bass for sitting on the couch and learning new stuff or going through my set list...Just got a pair of those Boss Waza Air Bass headphones from the wife for Xmas and I am super happy to sit and practice now.
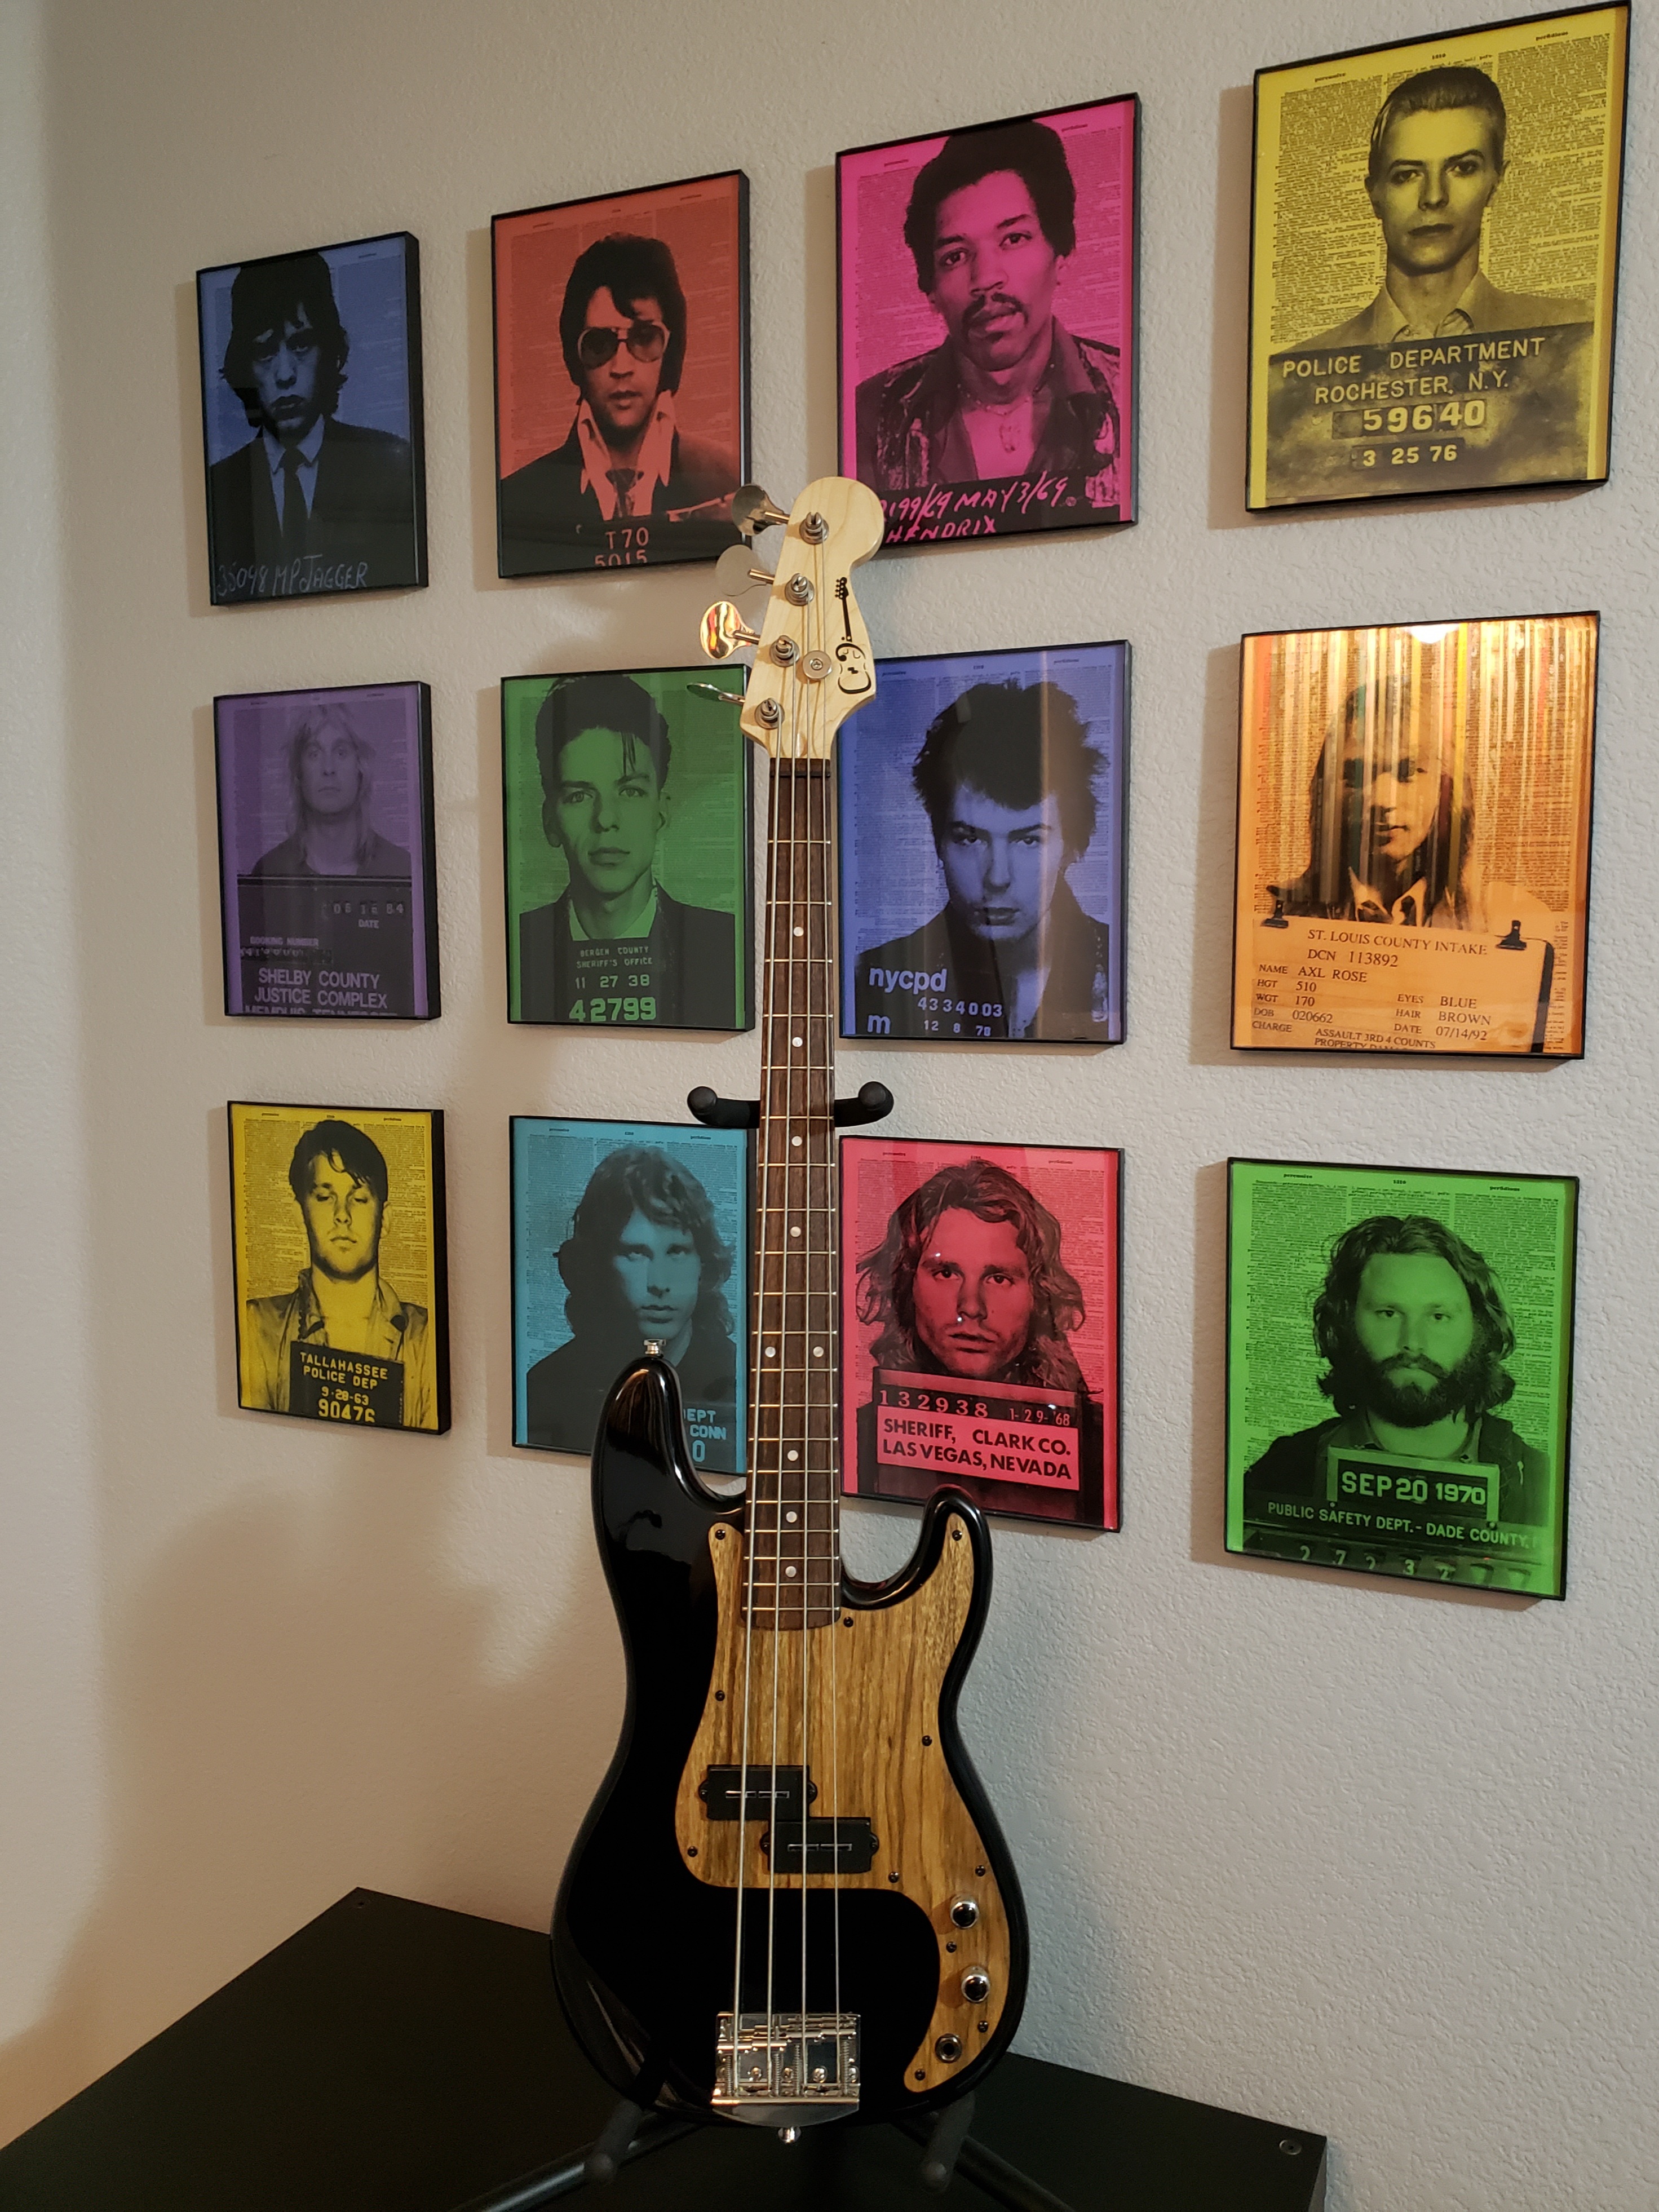
New Pic of my Mini P. Its still my go to bass for sitting on the couch and learning new stuff or going through my set list...Just got a pair of those Boss Waza Air Bass headphones from the wife for Xmas and I am super happy to sit and practice now.
View attachment 4519346
Nice! And those posters are awesome! The three Jim Morrison ones are a particularly nice touch.
Nice! And those posters are awesome! The three Jim Morrison ones are a particularly nice touch.
Thanks! Jim actually has the whole bottom row...He is the winner of my wall of shame

Thanks! Jim actually has the whole bottom row...He is the winner of my wall of shame
Haha! Even better! I didn't recognize him with the short hair.


