• TalkBass has been independent since 1998. Add your voice.
    Create a free account to reply to discussions, view embedded media, and browse with fewer display ads.
    Join freeLog in
    Want zero display ads or expanded classifieds tools? Compare plans.

The Status Register - Official Status Graphite Club

I'm not sure if this helps necessarily, but if you (or anyone else) want to use a method that I like, you can actually figure it out from a picture pretty closely.

- Print out a picture of the bass you want to draw out, as big as you can make it.
- Measure the distance from the 12th fret to the nut (or 0 fret or headpiece, depending on the model) on that picture. Be as accurate as possible.
- If that pic is of a 34" scale bass, the distance you measure in the pic should be 17". So figure out what the ratio is to get that picture to full scale. Let's say the pic of that area measures 4.25".
17/4.25=4
So every other measurement you make, multiply it by that ratio and it should be full scale.
- And let's say you want to measure the pic in millimeters to be easier than fractions. Just remember that the inch to mm ratio is 25.4.
If the measurement is 89 mm, divide that into inches (89/25.4=3.504), then follow the other math above (17/3.504=4.852) to get the ratio for full scale.

It sounds harder than it is. And oddly enough, math was my worst subject in school, but somehow this makes sense to me. I've used it to scale up pics for bass builds and it works well enough to keep me busy.

Hope that helps.

 
Hi from Italy,
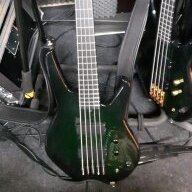
after assembling a PJ fretless Bass with a Status Jazz neck on a Fender Precision body (an excellent result, indeed), I bought my first proper Status a few months ago.
Despite the age (it should be dated to 1989-90 and even Rob couldn't give me more details) this fretless 5-string S2000 still has a marvellous voice and a distinct personality!

View attachment 3278139

This bass is a pleasure to play, always in tune, lightweight and perfectly balanced, with a slim and fast neck, absolutely stable.
Now all I need is... a Status Register Official Club number
Beautiful, classy looking Status - congrats.
 
  • Like
Reactions: Felix Lopez
I have a question for those of you who use Status basses in live band settings. I've been listening to a couple of Level 42 concerts and I'm wondering if the sound of Mark's bass on these recordings represents the "Status sound" for you. Granted, his strings are lighter gauge (.030-.090) than what most people would use but, barring that detail... Here is an example of the sound I'm referring to:

 
I think it is one of the typical percussive sounds you can get. its thesignature sound from Mark King. I once tried to dial it in. Tried to cut the mids, boost the 100, and boost the high freq. cut everything else.
But there must be more to it, as just cutting the mids would usually let you disappear in the mix. So i think he has particualry some mid freq boostet, to get exactly this sound and is heared in the mix.
My opinion is, that status basses are great for finding your space in the mix. they can cut through. especially with the active electronics.
The MK sound is not the only sound you can get and not the only style of music status basses are great for. I think the new bass player from slipknot plays status, as does the bass player from Muse.
of Course Jon Entwistle had his signature model as well as MK.

More players here:
Status Graphite. The finest hand-made graphite basses and guitars. Made in England.

For me Status basses are great for everything, but i am a fanboy. ;)
 
Hi everyone I've got a Status bass here in my shop. It looks like it could be an Empathy 4. There are 4 battery cavities on the back of the body and I'm hoping someone here knows how they're supposed to be wired together. 4x9=36 and I'm afraid that if I wire them together like any other 18 or 27 volt circuit I may blow the preamp in here. Does anyone have a clue what do do with these batteries? Answers here or to my email would be appreciated. It's [email protected] Thanks to all for reading this
 
  • Like
Reactions: Fred312b
Hi everyone I've got a Status bass here in my shop. It looks like it could be an Empathy 4. There are 4 battery cavities on the back of the body and I'm hoping someone here knows how they're supposed to be wired together. 4x9=36 and I'm afraid that if I wire them together like any other 18 or 27 volt circuit I may blow the preamp in here. Does anyone have a clue what do do with these batteries? Answers here or to my email would be appreciated. It's [email protected] Thanks to all for reading this
Have you considered contacting Rob Green from Status directly and asking him? I'm sure he'd be happy to help.

Edit: I'm assuming two of the batteries are for LEDs?
 
Last edited:
  • Like
Reactions: Lesfunk and Wilkins
Have you considered contacting Rob Green from Status directly and asking him? I'm sure he'd be happy to help.

Edit: I'm assuming two of the batteries are for LEDs?
I have contacted Status through the website contact form but since it's Friday and after hours I don't expect to hear anything back until Monday at the earliest. i'm Ok with that. I assume that if there were LED's in the neck there would be some kind of contact or connection point between batteries and the LED's. There are none. That's really the mystery for me. If there was a contact for the neck I would not even have a question. 18v makes sense for a preamp and set of LED's. It could be that this isn't the original neck but I'm not aware of that. It all fits together quite nicely. I'm also waiting to hear from my customer about that as well. Thank you for your help. I appreciate it.
 
  • Like
Reactions: Fred312b and bass12
The Jonas Hellborg model used a 36v preamp setup, no LEDs.

Screen Shot 2019-02-08 at 5.11.10 PM.png


If it's that one, I'd say go ahead and wire it in series... that's what Rob did!
From the Status catalog:
Screen Shot 2019-02-08 at 5.14.42 PM.png
 
The Jonas Hellborg model used a 36v preamp setup, no LEDs.

View attachment 3315413

If it's that one, I'd say go ahead and wire it in series... that's what Rob did!
From the Status catalog:
View attachment 3315424
Hmmm That looks like what I've got. I'm waiting to hear from either Status or my customer. Thanks for the info though. I'm going wait just a little longer and then go for it like you suggest.
 
Hello there!

I am about to buy a Status Graphite Neck for this 2019 Fender American Performer Precision P. Have you ever prayed a Fender P ( Not a Warmoth or any other brand! ) but an American P with a Status Graphite Neck? Do you have any recommendations for me on this project?

Any input will be highly appreciated!

Thank you
View attachment 3364857 View attachment 3364858
I recommend that you do it quickly! Joy awaits!

Also, if you plan on installing yourself, take time to line everything up.
Measure twice. Drill once!
 
I'm not sure if this helps necessarily, but if you (or anyone else) want to use a method that I like, you can actually figure it out from a picture pretty closely. Camera lense distortion, angle discrepancy, and printer distortion will all wreck the accuracy

- Print out a picture of the bass you want to draw out, as big as you can make it.
- Measure the distance from the 12th fret to the nut (or 0 fret or headpiece, depending on the model) on that picture. Be as accurate as possible.
- If that pic is of a 34" scale bass, the distance you measure in the pic should be 17". So figure out what the ratio is to get that picture to full scale. Let's say the pic of that area measures 4.25".
17/4.25=4
So every other measurement you make, multiply it by that ratio and it should be full scale.
- And let's say you want to measure the pic in millimeters to be easier than fractions. Just remember that the inch to mm ratio is 25.4.
If the measurement is 89 mm, divide that into inches (89/25.4=3.504), then follow the other math above (17/3.504=4.852) to get the ratio for full scale.

It sounds harder than it is. And oddly enough, math was my worst subject in school, but somehow this makes sense to me. I've used it to scale up pics for bass builds and it works well enough to keep me busy.

Hope that helps.


This is good enough advice for a starting point but a printer won't be accurate for fret placement, you have to do the fret slot calculations yourself and don't rely on the printed image or they'll be off. Camera lense distortion, angle discrepancy, and printer distortion will all wreck the accuracy
 
Oh yeah, for sure. I wouldn't rely on a scaled up pic for fret spacing. Use the fret calculators available for that.
But for body shape and size it's pretty close. I just built this bass in the style of a Rick body shape, using a pic that I printed then scaled up:

IMG_5188.JPG

And since this is the Status Register, I have to show this pic:

Screen Shot 2019-03-24 at 9.53.31 AM.png