MK and I have been trading emails and we started talking about cleaning. Since I never do anything 1/2 way I though I would share my procedure with all. This furthers my quest to have everyone's bass sounding and looking great. Sorry about the formatting, it doesn't like indents.
This will be another primer so hang on.
Cleaning is just that so don’t be too afraid of hurting the instrument. A good cleaning takes good old fashion elbow grease, time and patience. I just finished a 64 Fender J for a guy that was sickeningly bad. I just about yelled at the guy for letting such an amazing bass get that bad. It took me about 4 hours, now it is great.
1. Play the guitar, note any buzzing or other sound problems. This is helpful for the setup you will do when the cleaning is done.
2. Set it on your bench, support the neck off the bench. My rest is about 4” high.
3. Check your neck relief and make initial adjustments, I do this before the cleaning since it gives the neck time to rest.
4. Take off the strings and throw them away, a fresh bass needs new strings.
5. At this point I look things over, look for loose knobs, tuners, bridge screws, pickup screw consistency, etc. Take note.
6. Clean the finger board with a cloth, i.e. old t-shirt, and straight warm water.
a. Start by rubbing across the grain, parallel to the frets. This will remove the majority of the schmutz and won’t embed it further into the fret board. You may have to do this 3-5 times to get it relatively clean.
b. Now do the same thing but with the grain. This gets more of the grime out. A rosewood neck will turn kind of a milky grey, when it dry’s, this in normal, the color will return when you oil it.
c. Clean next to all of the frets, I use q-tips and tooth picks. Lots of gunk collects here.
d. I now take a very close look at the frets and fret board with a magnifying glass. I check for fret wear, loose frets, fingerboard divots, and other issues. Fixing these issues is a whole other email.
7. Now dress the frets.
a. Take painters tape and put it up-tight on both sides of every fret.
b. Use 2000 grit sand paper, wet, and clean all the frets, making sure you remove very little fret material, smooth out any sharp edges produced by string wear.
c. Take off the tape, wipe with rag and water one more time, black schmutz now.
d. Let it dry.
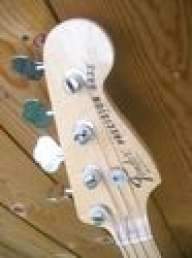
8. The head stock is next. You can remove the tuners, this tells how to do it with leaving them in.
a. Clean it with water and a rag, tooth picks, q-tips and a tooth brush.
b. Check tightness of all tuner screws for snugness.
c. Tighten the tension on the end of the shaft of the tuner knob. Make sure your screw driver seats well, the screws are soft.
d. Clean the tuners with a brass instrument polish rag.
9. Remove and disassemble the bridge, take out all of the saddles, springs and screws. If they are different, keep track of the locations
a. Clean all parts with a rag, tooth-brush and water
b. Let Dry
c. Remove control knobs, pick-guard, control plate, rear control panel cover, etc. The only thing left should be the pickups.
10. Clean the Body and back of the neck. This procedure is for gloss bodies, mat or oiled is a different process
a. Clean with water, rag and tooth brush
b. Let dry
11. Oil the finger board. I do this now in case any wax gets on the finger board. It is much easier to remove if there is oil on the board.
a. Use 100% orange or lemon oil. (I use orange) A little goes a long way. Most music stores carry this for about $4.00
b. Apply the first coat, with the grain, you will be amazed at how much gunk you are still removing.
c. Let the oil sit for a while and soak in, then wipe it off.
d. Repeat these steps 3 or 4 times, be sure to get it right up to the frets
12. Polish the body and head stock
a. I use between 3 and 5 steps of rubbing compound and wax depending in the amount and depth of scratches. I prefer Mequiars products. These can all be found at automotive paint stores.
b. You will always apply it from coarse to less coarse in these steps, follow mfg application instructions.
i. Coarse rubbing compound (optional)
ii. Less coarse rubbing compound (optional)
iii. Fine-cut cleaner
iv. Swirl remover
v. 100% carnauba wax
c. Wax (step 5) the bridge, body, back of the neck, pick-guard, control plate cover etc.
d. Once the wax-on / wax-off is done use a dry soft tooth brush to remove any leftover wax residue from the crevices and screw heads
e. With your brass instrument polishing rag
i. Do the saddles, springs, and intonation screws
ii. Strap buttons (check these for tightness too)
iii. Knobs, if metal
iv. Bridge screw heads
f. Pull out you pickups and blowout the cavities with canned air and clean the excess wax and shmutz from the covers
13. Reassemble the bass, strings and do proper setup
This is time consuming but your bass will look and play great. It also removes the other guys DNA if it is used.
Hope this helps




 ), it is real eye-candy. Now i got more less money to get it, got to get rid of my 5stringer before, but oh well.


