• TalkBass has been independent since 1998. Add your voice.
    Create a free account to reply to discussions, view embedded media, and browse with fewer display ads.
    Join freeLog in
    Want zero display ads or expanded classifieds tools? Compare plans.

Tricked Out Squier Club Part 3

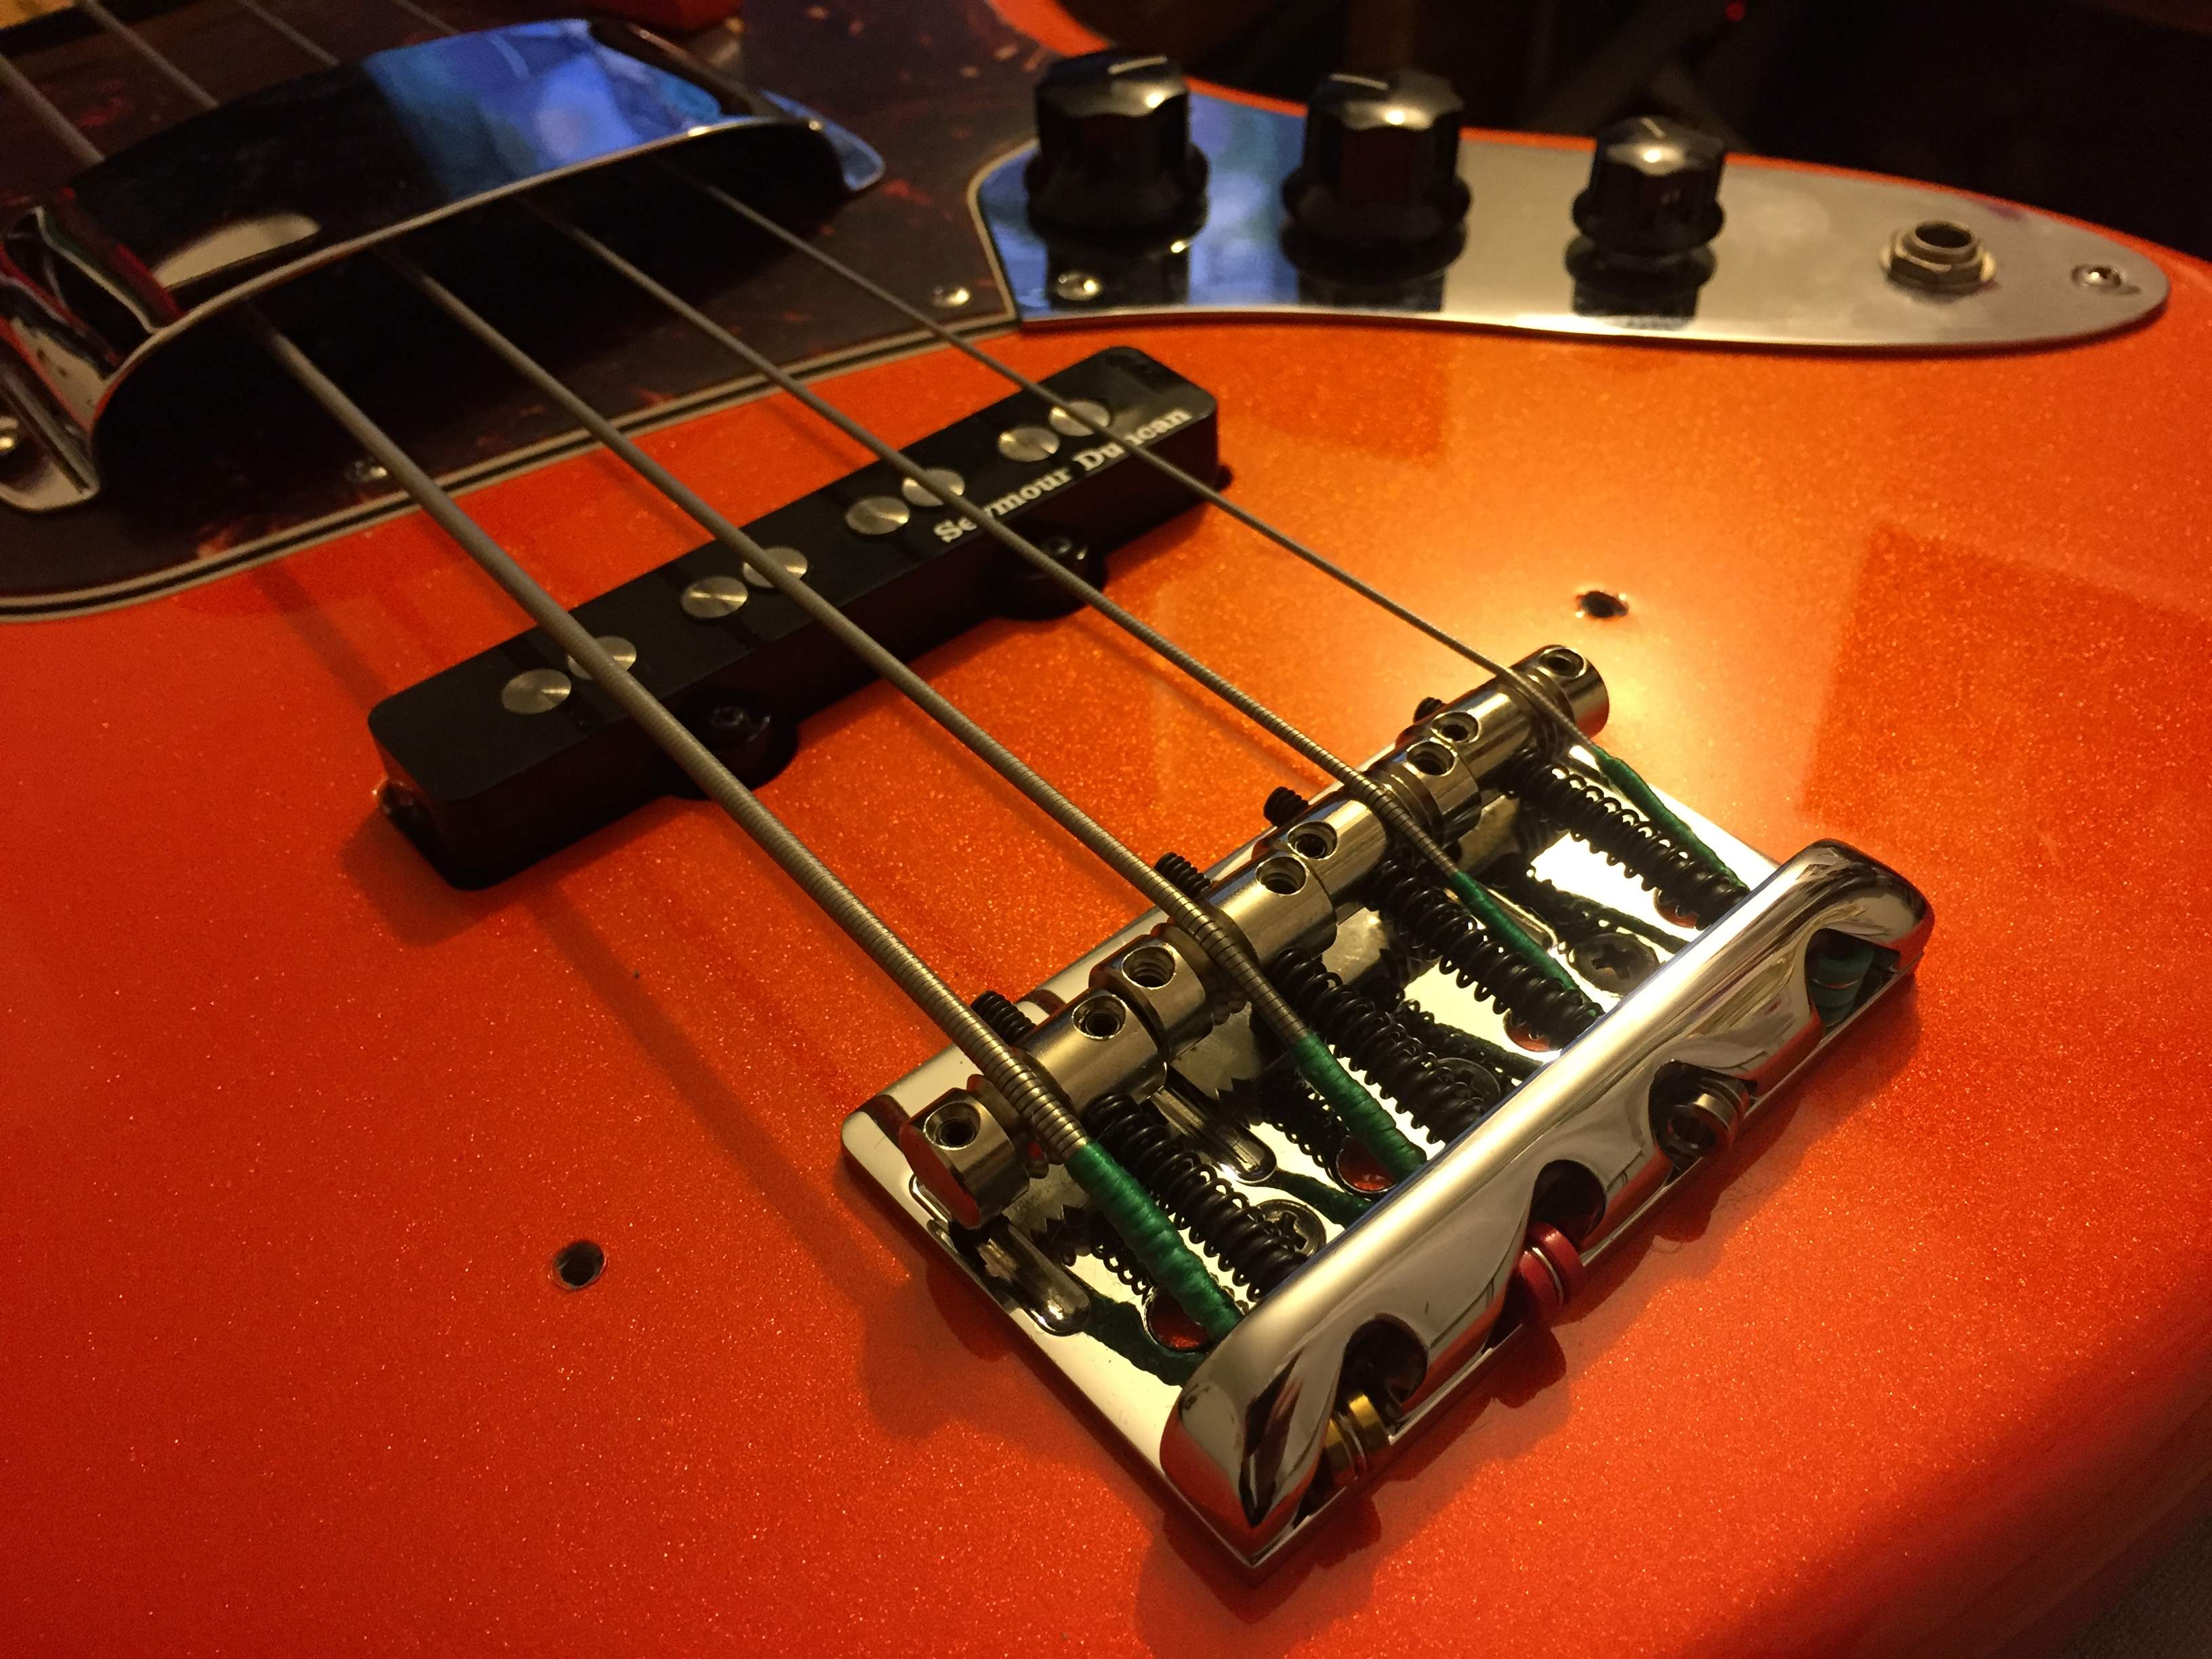
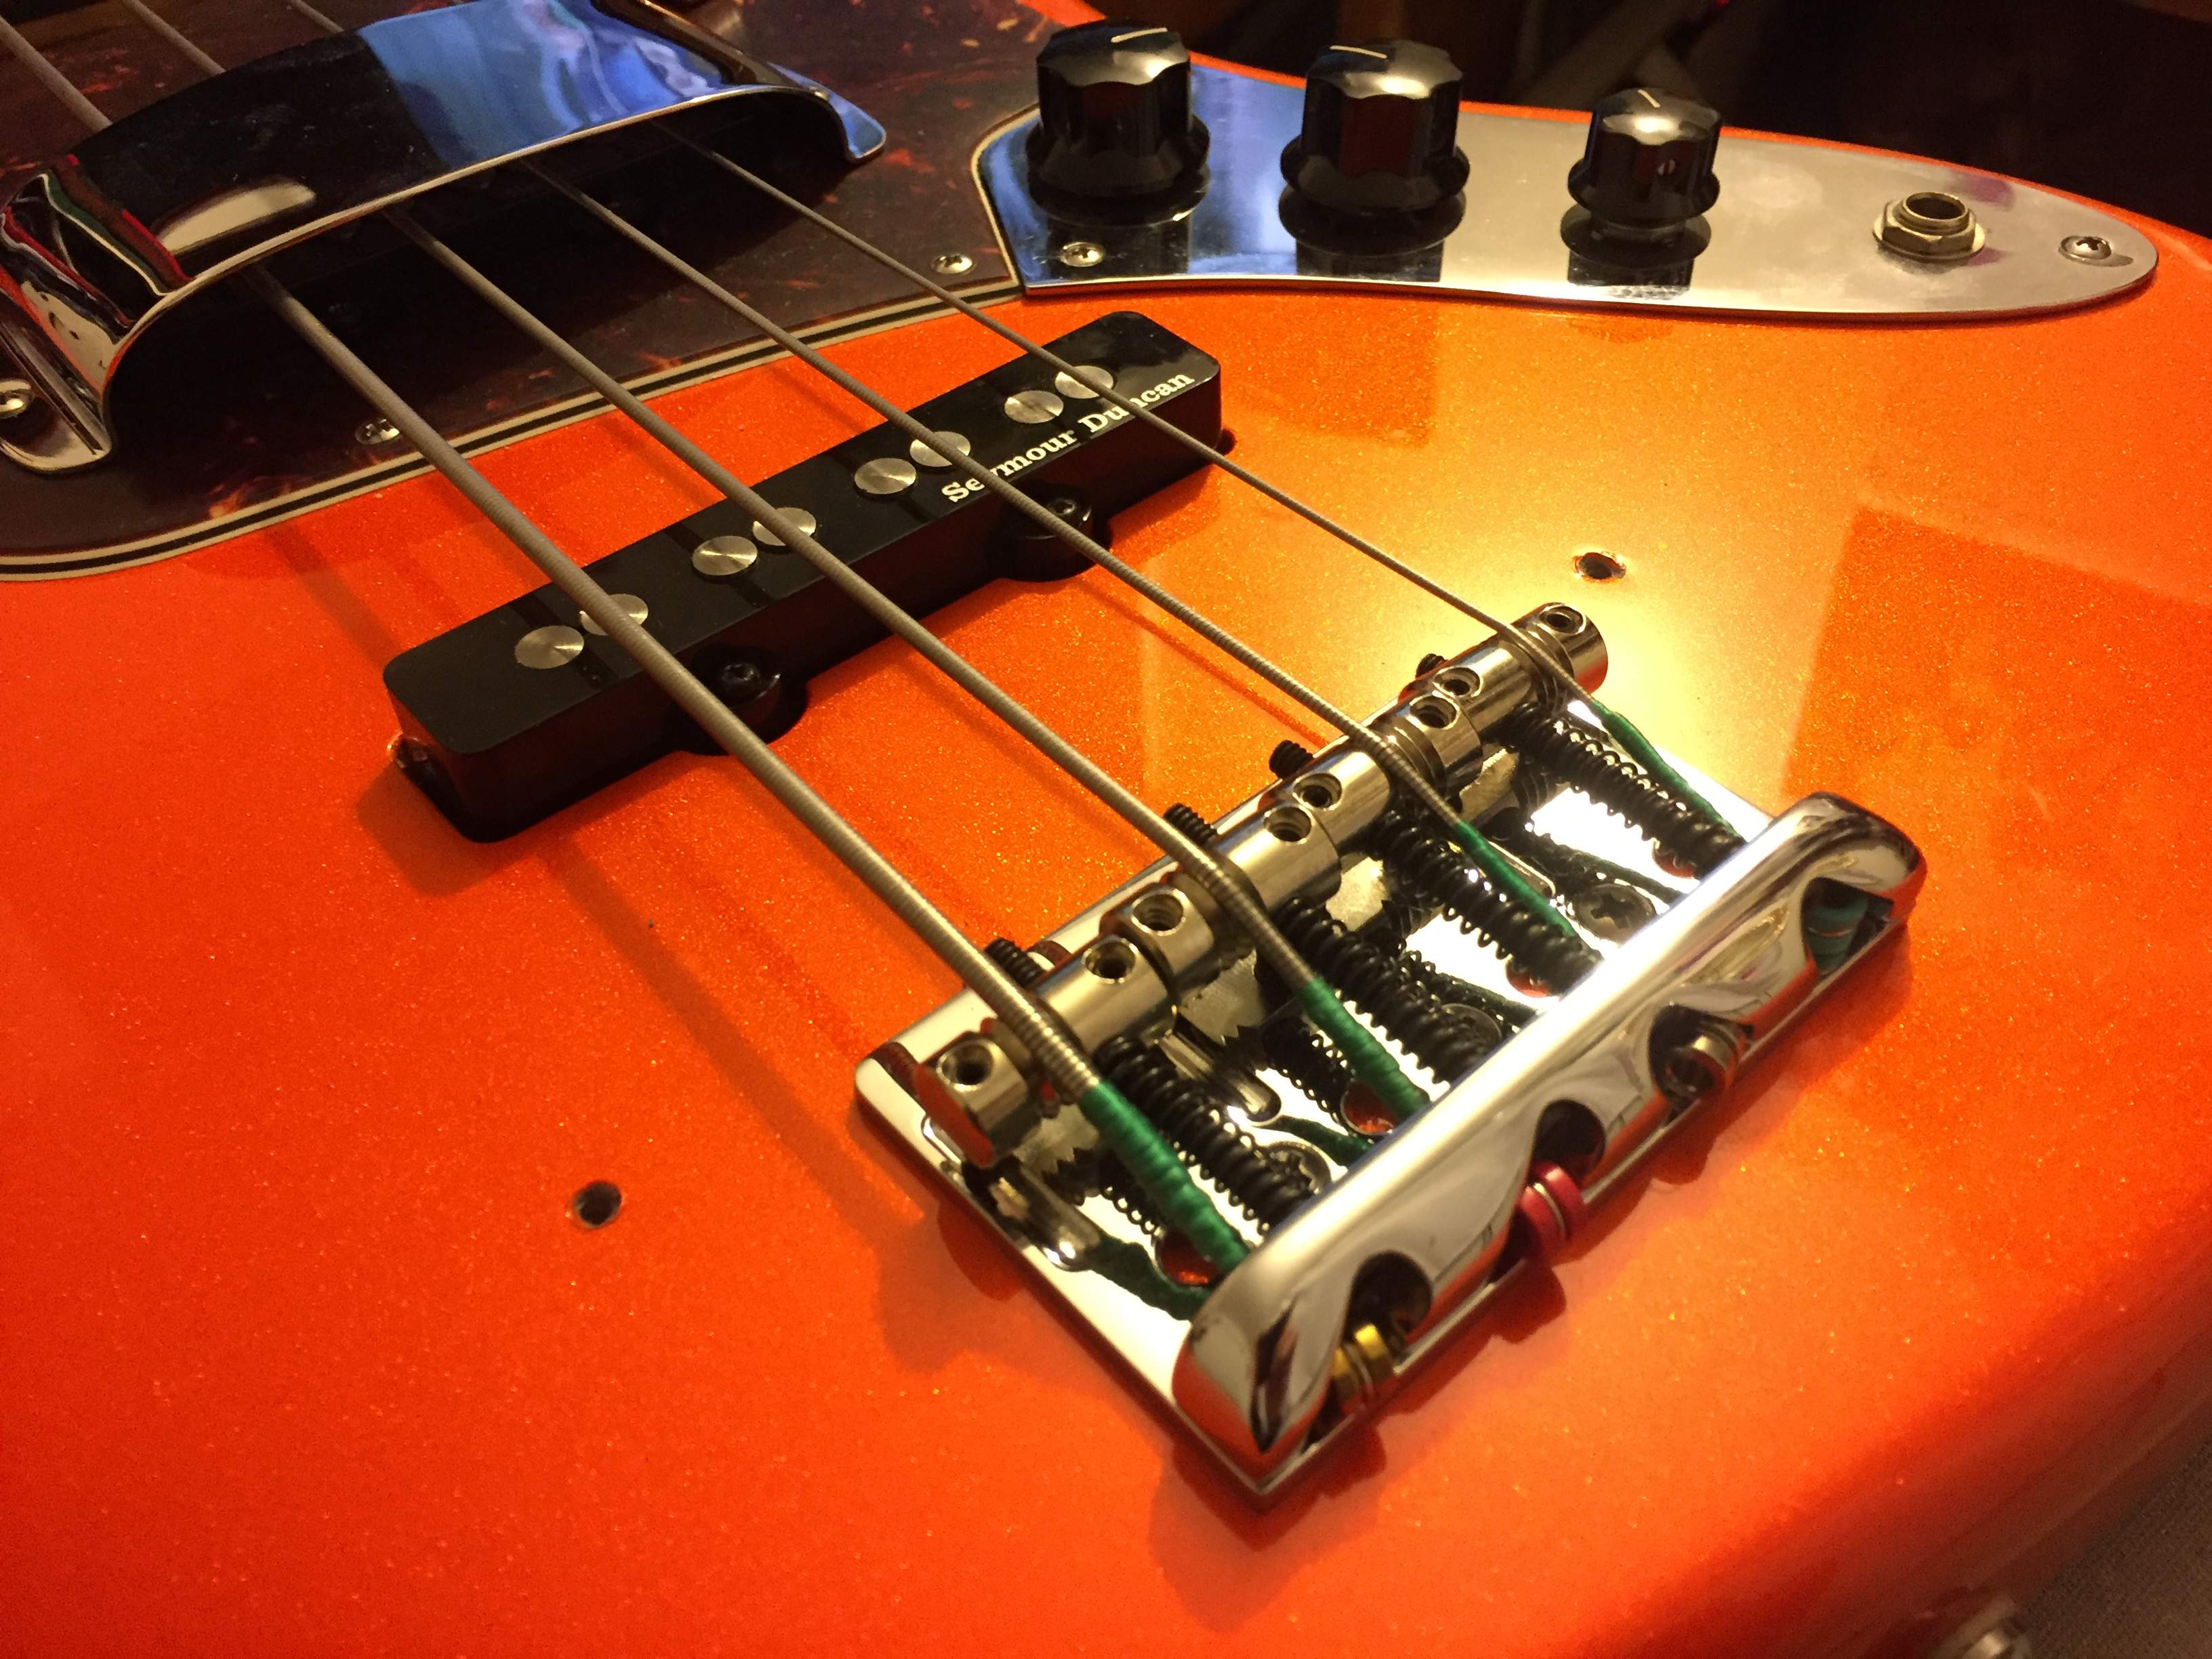
I’ve just made a new modification to my VM Jazz. A new Fender Vintage High Mass bridge (like the ones on the American Standards and American Pros) I had it laying around for about a year and just decided to use it on my VM Jazz.

4701DA1D-4A8B-4D58-90A9-E990BA63615C.jpeg
3083A1BF-1344-44EA-9A4A-376BE7FFB800.jpeg
 
Last edited:
I’ve just made a new modification to my VM Jazz. A new Fender Vintage High Mass bridge (like the ones on the American Standards and American Pros) I had it laying around for about a year and just decided to use it on my VM Jazz.

View attachment 2860330 View attachment 2860331

I love those medium/high-mass bridges…sexy-sleek and very versatile, what with the threaded barrels. I only wish I could get them in other colors, especially in a smoked chrome/black nickel finish. :thumbsup:
 
I love those medium/high-mass bridges…sexy-sleek and very versatile, what with the threaded barrels. I only wish I could get them in other colors, especially in a smoked chrome/black nickel finish. :thumbsup:
You can get chrome tint paint in various colors at auto parts stores,I have used them in the past for custom projects and they make chrome look awesome.
metalcast.png
 
You can get chrome tint paint in various colors at auto parts stores,I have used them in the past for custom projects and they make chrome look awesome.
View attachment 2861501

Last autumn, I tried out this kit on a bridge, control plate and strap pins…

shadow.png


The results were okay. It darkened the metal, but it didn't end up with a mirror-like finish. The base-coat came out a bit speckled, but it is possible I was holding the can too far away. Perhaps I need more practice with it. Fortunately, I intentionally got less-expensive hardware to try it out on.

In the meantime, I'll have to look up those Dupli-Color Metalcast colors. Thanks for the heads-up, Prog! :thumbsup:
 
Last autumn, I tried out this kit on a bridge, control plate and strap pins…

View attachment 2862056

The results were okay. It darkened the metal, but it didn't end up with a mirror-like finish. The base-coat came out a bit speckled, but it is possible I was holding the can too far away. Perhaps I need more practice with it. Fortunately, I intentionally got less-expensive hardware to try it out on.

In the meantime, I'll have to look up those Dupli-Color Metalcast colors. Thanks for the heads-up, Prog! :thumbsup:
No problem Dude!. What works really well is after you lay on a coat of tint give it time to dry and then give it a nice heavy coat of clear on top, that brings out the gloss in the color and gives it a hard protective surface. I usually give it about 3 good coats of clear, one coat each time soon after the previous coat gets tacky.
 
B086CEEA-E612-45BA-B2CC-41DA40B871F3.jpeg
I’ve just made another upgrade to my VM Jazz. Copper shielding in cavities. I think it’s a good job for a noob like me. I think that’s good for now. I’m thinking in making anothe upgrade with a 3 band preamp, but I don’t know yet because that involves making the cavity for the battery... Any advice on this? Cheers.
 
  • Like
Reactions: EdBo and Big Hoss
Remember, any time you're going to use rattle-can spray paint for something serious: Soak the can in hot tap water, as hot as it comes out of your faucet at home, for about 10 minutes. DO NOT use boiling water ! This will make the paint flow better, and be sure to shake the can very well, and often.
 
Remember, any time you're going to use rattle-can spray paint for something serious: Soak the can in hot tap water, as hot as it comes out of your faucet at home, for about 10 minutes. DO NOT use boiling water ! This will make the paint flow better, and be sure to shake the can very well, and often.

Or just leave it outdoors in Texas and August same result. It's actually a good idea though because what you're doing is increasing the pressure inside the can so the pressure differential from inside the outside would be greater with us allowing better propulsion of a more complete mix of the paint and propellant
 
  • Like
Reactions: EdBo
View attachment 2867405 I’ve just made another upgrade to my VM Jazz. Copper shielding in cavities. I think it’s a good job for a noob like me. I think that’s good for now. I’m thinking in making anothe upgrade with a 3 band preamp, but I don’t know yet because that involves making the cavity for the battery... Any advice on this? Cheers.

Very nice looking job I have not been able to manage copper that well but instead have been using the shielding paint. It worked fantastic on my Affinity jazz.
 
  • Like
Reactions: sgtpepper and EdBo
Very nice looking job I have not been able to manage copper that well but instead have been using the shielding paint. It worked fantastic on my Affinity jazz.

I use a combination of both - carbon paint for the bulk of surfaces and slug-tape on the floor of each cavity and the underside of the control cavity cover. The copper tape can be soldered for grounding.

fullsizeoutput_c9c.jpeg
 
  • Like
Reactions: jay tay and EdBo
Not the best of pics ever, but before/after of my 2015 affinity Precision. Ignore the dog, he's a good boy. Ignore the rick if that's not your thing either, but he is also a good boy. Before:
20170929_184925.jpg

After:
20171111_170408.jpg

20171202_203054.jpg

Has so far had;
-jazz neck
-red tort guard
-gold wilkinson tuners
-gold wilkinson bridge with brass saddles
-gold knurled metal knobs
-gold Schaller strap-loks
-gold pickguard screws
-gold string tree
-headstock sprayed black to match body
-custom Rothko and frost logo

Planning more in the future, with the main mod planned being a rickenbacker humbucker at the neck in the 4001 position, and associated wiring upgrades. Good stuff!

Let me know what you think so far! Any opinion, good or bad is welcome.
Cheers!
-M
 
Not the best of pics ever, but before/after of my 2015 affinity Precision. Ignore the dog, he's a good boy. Ignore the rick if that's not your thing either, but he is also a good boy. Before: View attachment 2868344
After: View attachment 2868346
View attachment 2868347
Has so far had;
-jazz neck
-red tort guard
-gold wilkinson tuners
-gold wilkinson bridge with brass saddles
-gold knurled metal knobs
-gold Schaller strap-loks
-gold pickguard screws
-gold string tree
-headstock sprayed black to match body
-custom Rothko and frost logo

Planning more in the future, with the main mod planned being a rickenbacker humbucker at the neck in the 4001 position, and associated wiring upgrades. Good stuff!

Let me know what you think so far! Any opinion, good or bad is welcome.
Cheers!
-M

Nice transition and I like the Rick pickup idea.
 
  • Like
Reactions: EdBo
I use a combination of both - carbon paint for the bulk of surfaces and slug-tape on the floor of each cavity and the underside of the control cavity cover. The copper tape can be soldered for grounding.

View attachment 2868105

It took some creativity but I used the spray on conductive paint and I soaked a Q-tip with it to make the connection and shield the wiring holes and I made the connection all the way to the bridge and to the ground on the jack. The only place I used copper shielding tape was in the pickup covers and honestly the results of that left a lot to be desired it cause me a lot of problems.

Not that the problem was the tape it was actually me being the problem I just stink it installing it.
 
  • Like
Reactions: EdBo and JIO
It took some creativity but I used the spray on conductive paint and I soaked a Q-tip with it to make the connection and shield the wiring holes and I made the connection all the way to the bridge and to the ground on the jack. The only place I used copper shielding tape was in the pickup covers and honestly the results of that left a lot to be desired it cause me a lot of problems.

Not that the problem was the tape it was actually me being the problem I just stink it installing it.

Wasn't aware of spray-on shielding paint. Is it a waterborne black carbon, or silver? What do you mean by "using a Q-tip to make the connection"? ... so you saturated it with the paint and lined the walls of the narrow wire channels between cavities? (I think that's what you're stating) I went that far when I first started doing it but frankly it probably marks a point of diminishing results.
 
  • Like
Reactions: EdBo
Yes, soaked a q tip with the paint and coated the walls of the holes, all the way to make connection to the cavity shielding.

Invalid Link Removed

The only area that tape worked well for me is under the pickguard.

FYI, That's a 2014 Affinity Jazz with CV 60s bridge, and Duncan Designed VM pickups.
 
  • Like
Reactions: EdBo
Cheers man! Was toying with the idea of a MM in the bridge, or a Gibson EB humbucker in the neck (a là Mr. Sheehan) but you never really see a p with a rick pickup in it!
My Squier P/J has a Thunderbird neck pickup in the jazz location, it is amazing how much influence that Thunderbird pickup has because in that location I suspected the tone to come off very weak. If I roll my split coils back to zero and let the Thunderbird pickup act solo it sounds damn near like Im playing my Thunderbird, not trebley at all back by the bridge. I never would have believed that myself.
 

Attachments

  • IMG_2209.JPG
    IMG_2209.JPG
    758.3 KB · Views: 36
  • Like
Reactions: EdBo
My Squier P/J has a Thunderbird neck pickup in the jazz location, it is amazing how much influence that Thunderbird pickup has because in that location I suspected the tone to come off very weak. If I roll my split coils back to zero and let the Thunderbird pickup act solo it sounds damn near like Im playing my Thunderbird, not trebley at all back by the bridge. I never would have believed that myself.

That looks great pal! I like that! Must say I've never been a fan of thunderbirds, owned a few now and never found one that was "me" if you feel me? Cool, great sounding basses though!