
Enjoy the benefits of a premium membership!
Upgrade Account
-
TalkBass has been independent since 1998. Add your voice.
Create a free account to reply to discussions, view embedded media, and browse with fewer display ads.
Join free Log in
Want zero display ads or expanded classifieds tools? Compare plans.
You are using an out of date browser. It may not display this or other websites correctly.
You should upgrade or use an alternative browser.
You should upgrade or use an alternative browser.
Winter Build Off 2019 - Kubickenbacker
- Thread starter rojo412
- Start date
More options
Who Replied?


Why make it easy when you can make it ... well great looking. Saw and file MOP inlays to those cavities. Bit more work but will look great.

Get some cream or white abs binding and some acetone. Cut small strips to fit the slots, cut flush and flood with acetone. If you have any gaps, use shavings to fill and dissolve with acetone.
Come to think about it, ABS rods used for side dots could work as well.
Come to think about it, ABS rods used for side dots could work as well.

@Jon Clegg I do have all that plastic stuff and acetone. And I now have a bunch of test holes, too. I'll give that a shot.
@Matt Liebenau, I did think about mixing up the body color and spraying the holes, then filling with epoxy. I may also give that a shot with the test pieces.
@MPU, that does sound awesome, but it's not where I'm wanting to be for this project. It wouldn't be impossible, I'd just have to cut a 1/8" strip, chop those into 3/8" wide dashes, then round them over. Perhaps next year?
@BritFunk, I have thought about that! I actually did that on another neck, but into smaller dots. The powder didn't really mix thoroughly into the epoxy in tests, though maybe I didn't use enough. I ended up packing powder into the holes and using CA to finish.

@Matt Liebenau, I did think about mixing up the body color and spraying the holes, then filling with epoxy. I may also give that a shot with the test pieces.
@MPU, that does sound awesome, but it's not where I'm wanting to be for this project. It wouldn't be impossible, I'd just have to cut a 1/8" strip, chop those into 3/8" wide dashes, then round them over. Perhaps next year?
@BritFunk, I have thought about that! I actually did that on another neck, but into smaller dots. The powder didn't really mix thoroughly into the epoxy in tests, though maybe I didn't use enough. I ended up packing powder into the holes and using CA to finish.
The fingerboard has now been trimmed around the neck. This is starting to look like a bass!
View attachment 3331089
View attachment 3331088
Good thing, too... this "less than a month left" business has me a little stressed.
Those are some gorgeous lines.

Perhaps the SIDE DOTS are the most shining example of how Kubicki overcomplicated things.
In most situations, you can just drill a hole and fill it with a contrasting color material and you're good.
But no... Kubicki does the rounded dashes (or pills?):
View attachment 3337801
In my head, I figure "drill press, stop block, mark carefully, drill a few holes, then trim them out with a knife."
NOPE!
The drill press couldn't drill 3 small holes in a row to save its life. And since I made a mess of it, I decided I had to make another fingerboard because this was gonna be awful on the sides. No amount of wood filler or tinted epoxy would have made me happy.
(I suppose binding, but... nah.)
The proper way is to rout it. But how?
- The table is a blind method and you have the headstock shape to make it complicated.
- By hand would be nightmarish!
- Wizardry? Explosives?
Nope. A jig.
I slapped together a relatively simple jig. Took some MDF, routed out 1/2" channel that would accept router guide bushings, then mounted that to a plank of wood, which I clamped in the vise. The board would then be clamped onto the plank, line up the lines with the jig, then go at it.
View attachment 3337829
View attachment 3337827
After testing it a few dozen times on cutoffs from the board, I managed to make it work.
View attachment 3337830
So after a WHOLE day of work, I now have side markers.
Now I just need to figure out how to make epoxy go from clear to milky white and still dry tough as nails.
I am very, very impressed with the outcome, but part of me wishes you would have attempted the explosives route.

Here's a question: Can you mix WB milk paint with West Epoxy to color it?
If so, how much is the ratio?
(I feel like @Bruce Johnson knows the answer )
)
- I saw on the WB paint thread that milk paint can be used to tint the WB varathane finish. That is what I was planning for this build and I now have that in my possession.
- If I can tint epoxy with it, we're good.
- If I can paint with it, then epoxy over it (for the inlays), we're also good.
I just don't want to paint something, then find out that the epoxy won't cure over it.
Thanks in advance for any help.
If so, how much is the ratio?
(I feel like @Bruce Johnson knows the answer
)- I saw on the WB paint thread that milk paint can be used to tint the WB varathane finish. That is what I was planning for this build and I now have that in my possession.
- If I can tint epoxy with it, we're good.
- If I can paint with it, then epoxy over it (for the inlays), we're also good.
I just don't want to paint something, then find out that the epoxy won't cure over it.
Thanks in advance for any help.

I haven't tried it, but I don't think that would be good. West Systems epoxy can be colored with any of the standard colorants and pigments, like Mixol, Smooth-On, TransTint, or the standard Universal colorants available in the hardware stores. You don't need much. Maybe 5% will get you an opaque color. You can make it pretty much any color except pure white. West Systems has an inherent amber, so you have to figure for that in your color mix.
Thanks for that info, I very much appreciate it.
I may try some minor experiments and see what becomes of it, and I will definitely post results.
I may try some minor experiments and see what becomes of it, and I will definitely post results.

This weekend and the next 2 days are pretty much a bass weekend. I'm hoping I can maximize my time for it, but unexpected things keep popping up... so I'm trying.
- Decided to try my hand at side inlays. I mixed up some epoxy and - despite the warning - some milk paint (is it supposed to be like a Greek yogurt consistency?). And then I threw in some glow powder as well.
The way I figured it, I can always rout these out again if they suck and try something else. I know, not the best use of my time with 17 days left... but if it works, it's gonna be great! And I'd be done with that.
Here's what it looks like wet and glowing:
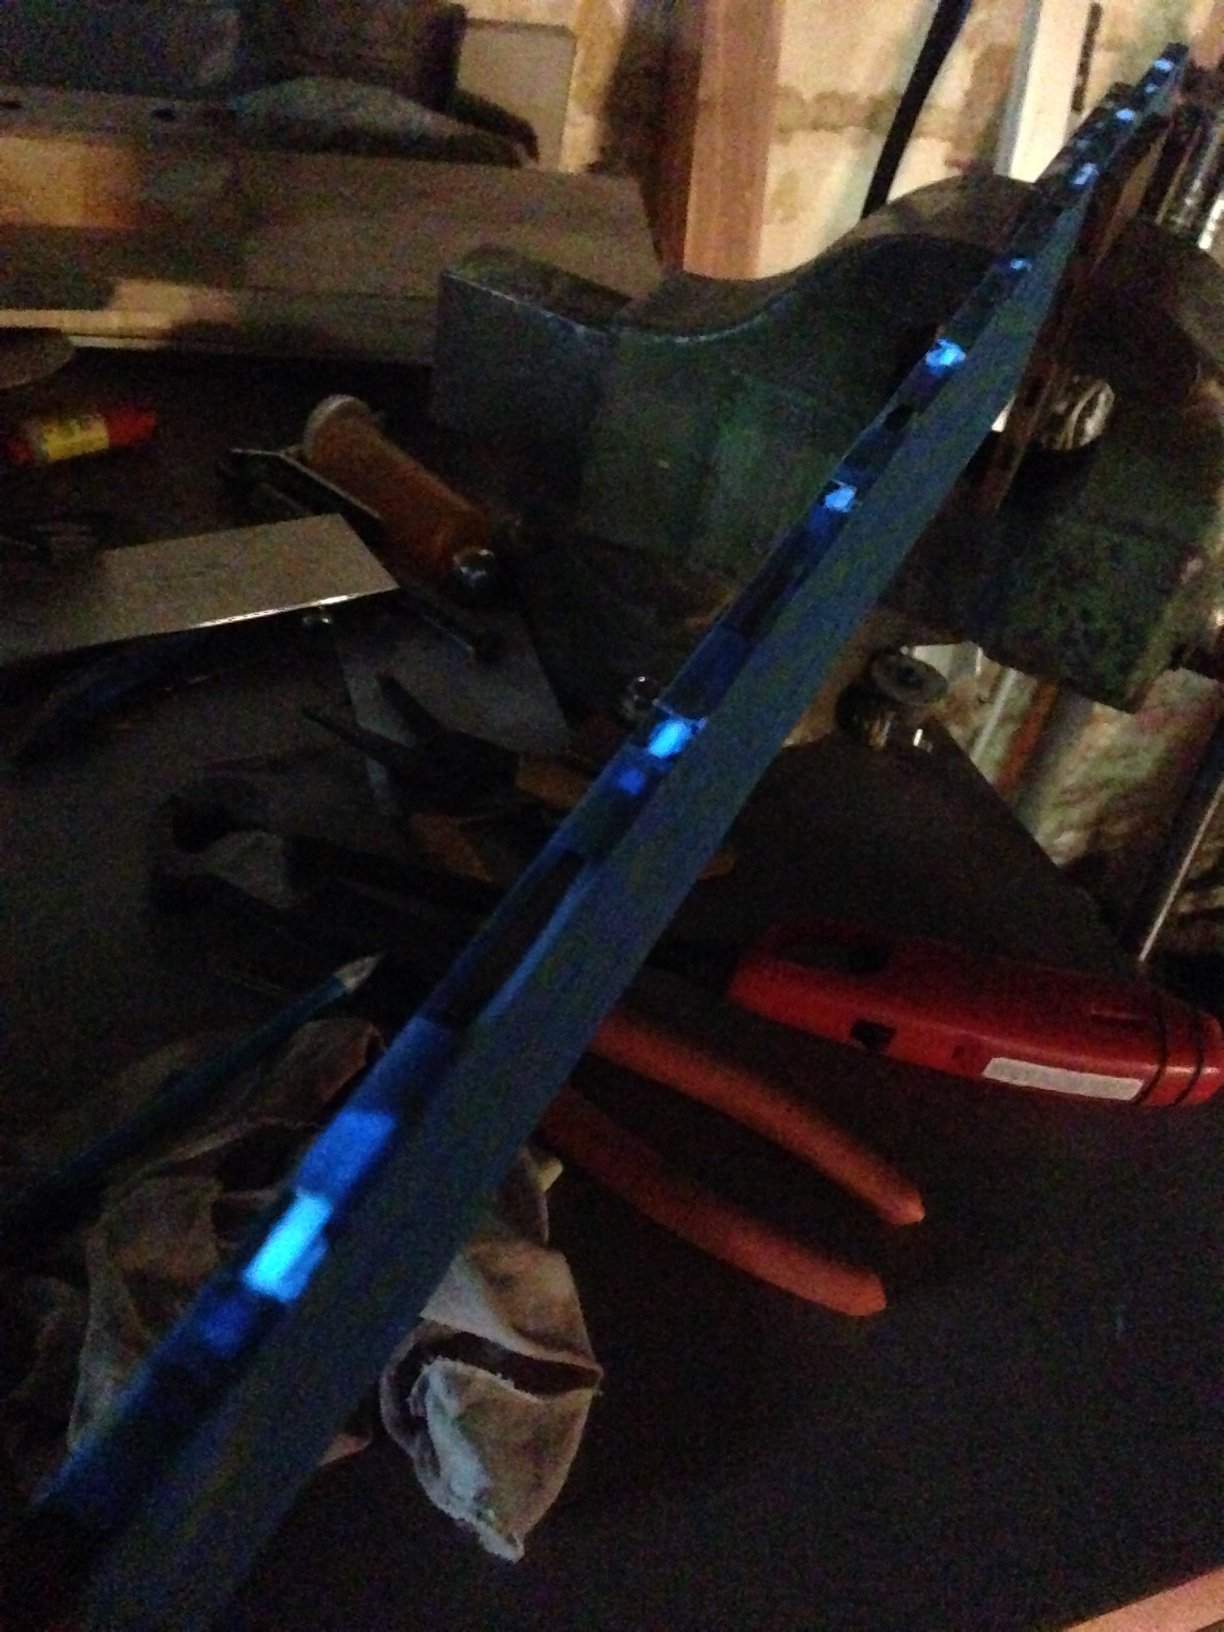
Tomorrow, I'll see how it cures and go from there. But if it's good, this is HAWT!
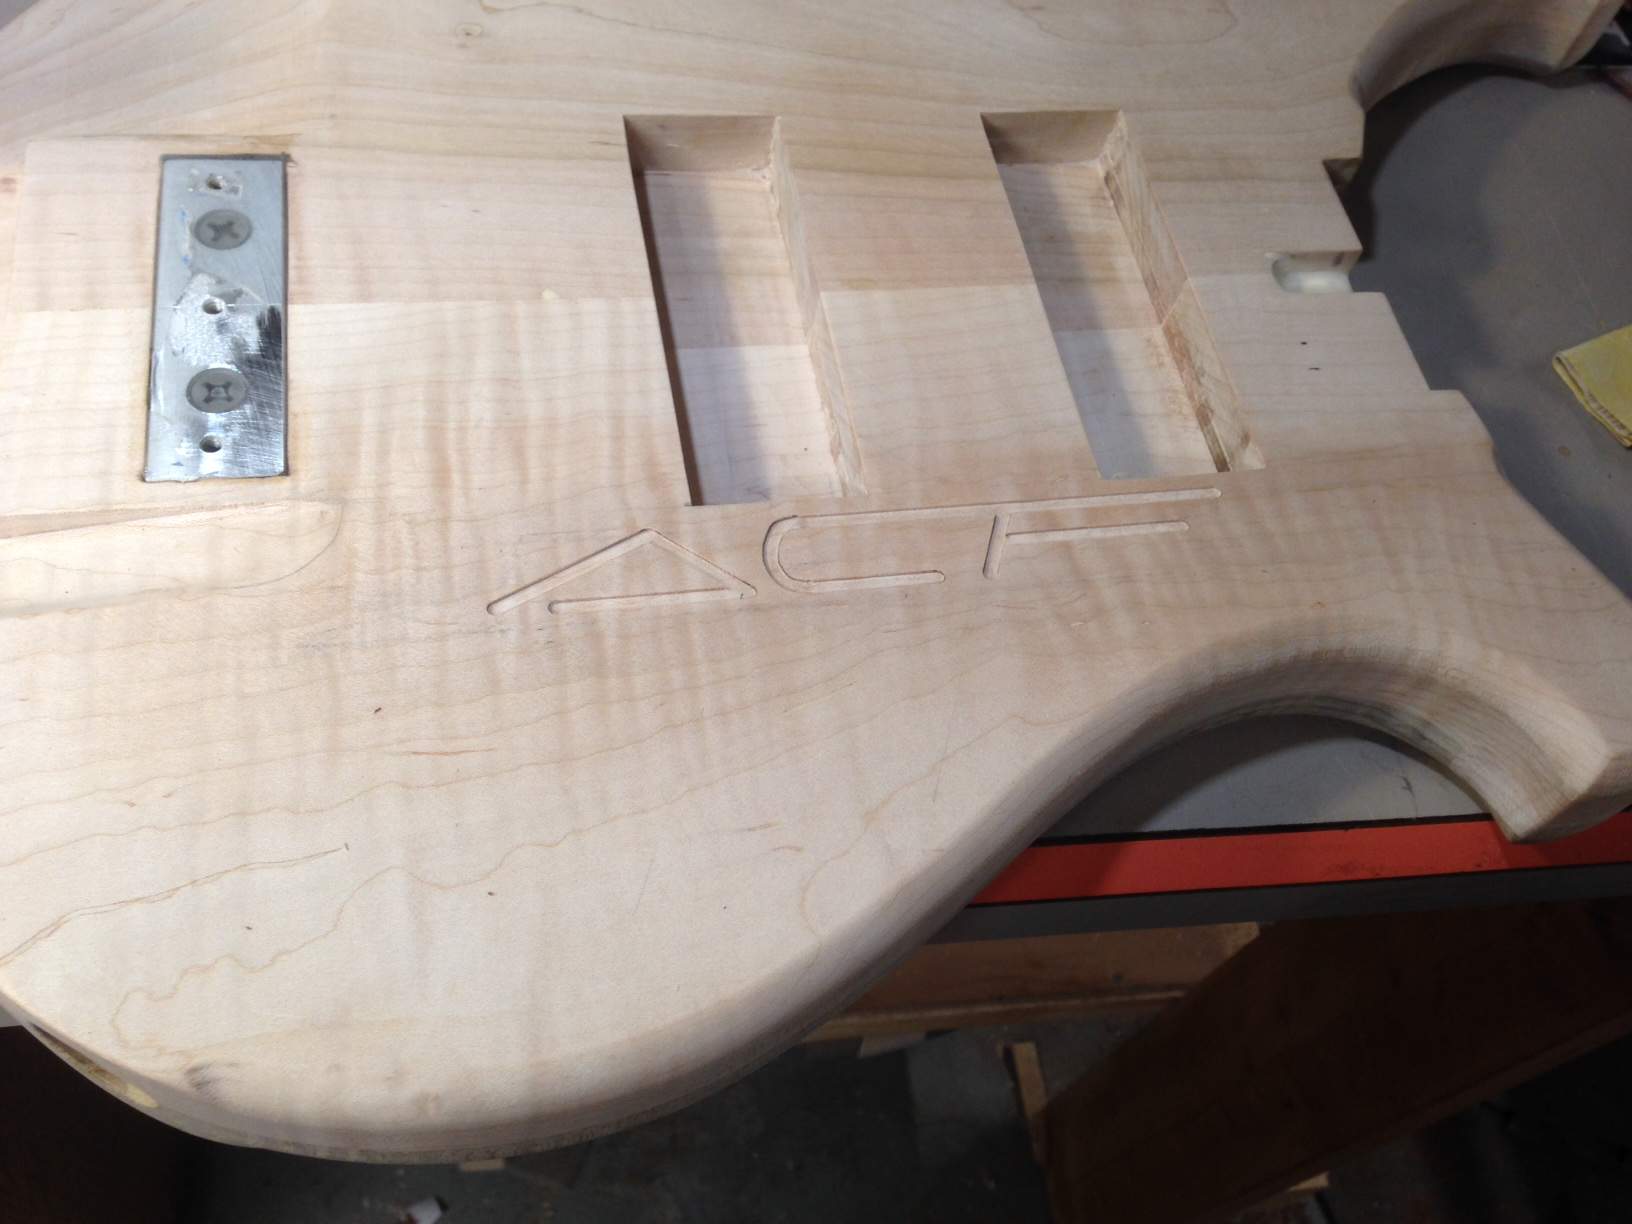
- The body logo was a must, because of Kubicki. And wouldn't you know it, the first 3 letters of FACTOR are my initials, ACF. Using straight edges and a steady hand, I managed to carve it out with the router:
- With that done and some final sanding, I hit the body with some initial coats. The WB finish thread provided me some great info on using the Varathane WB poly and milk paint, so I mixed it up and shot it. But the consistency was coming out spotty. Added more poly and mixed it up, seems to be better. Essentially, this is the primer coating. I'll let this cure, sand it, then hit it with more finish. Once the white covers the maple coloration, I'll just switch to clear coat and go from there.
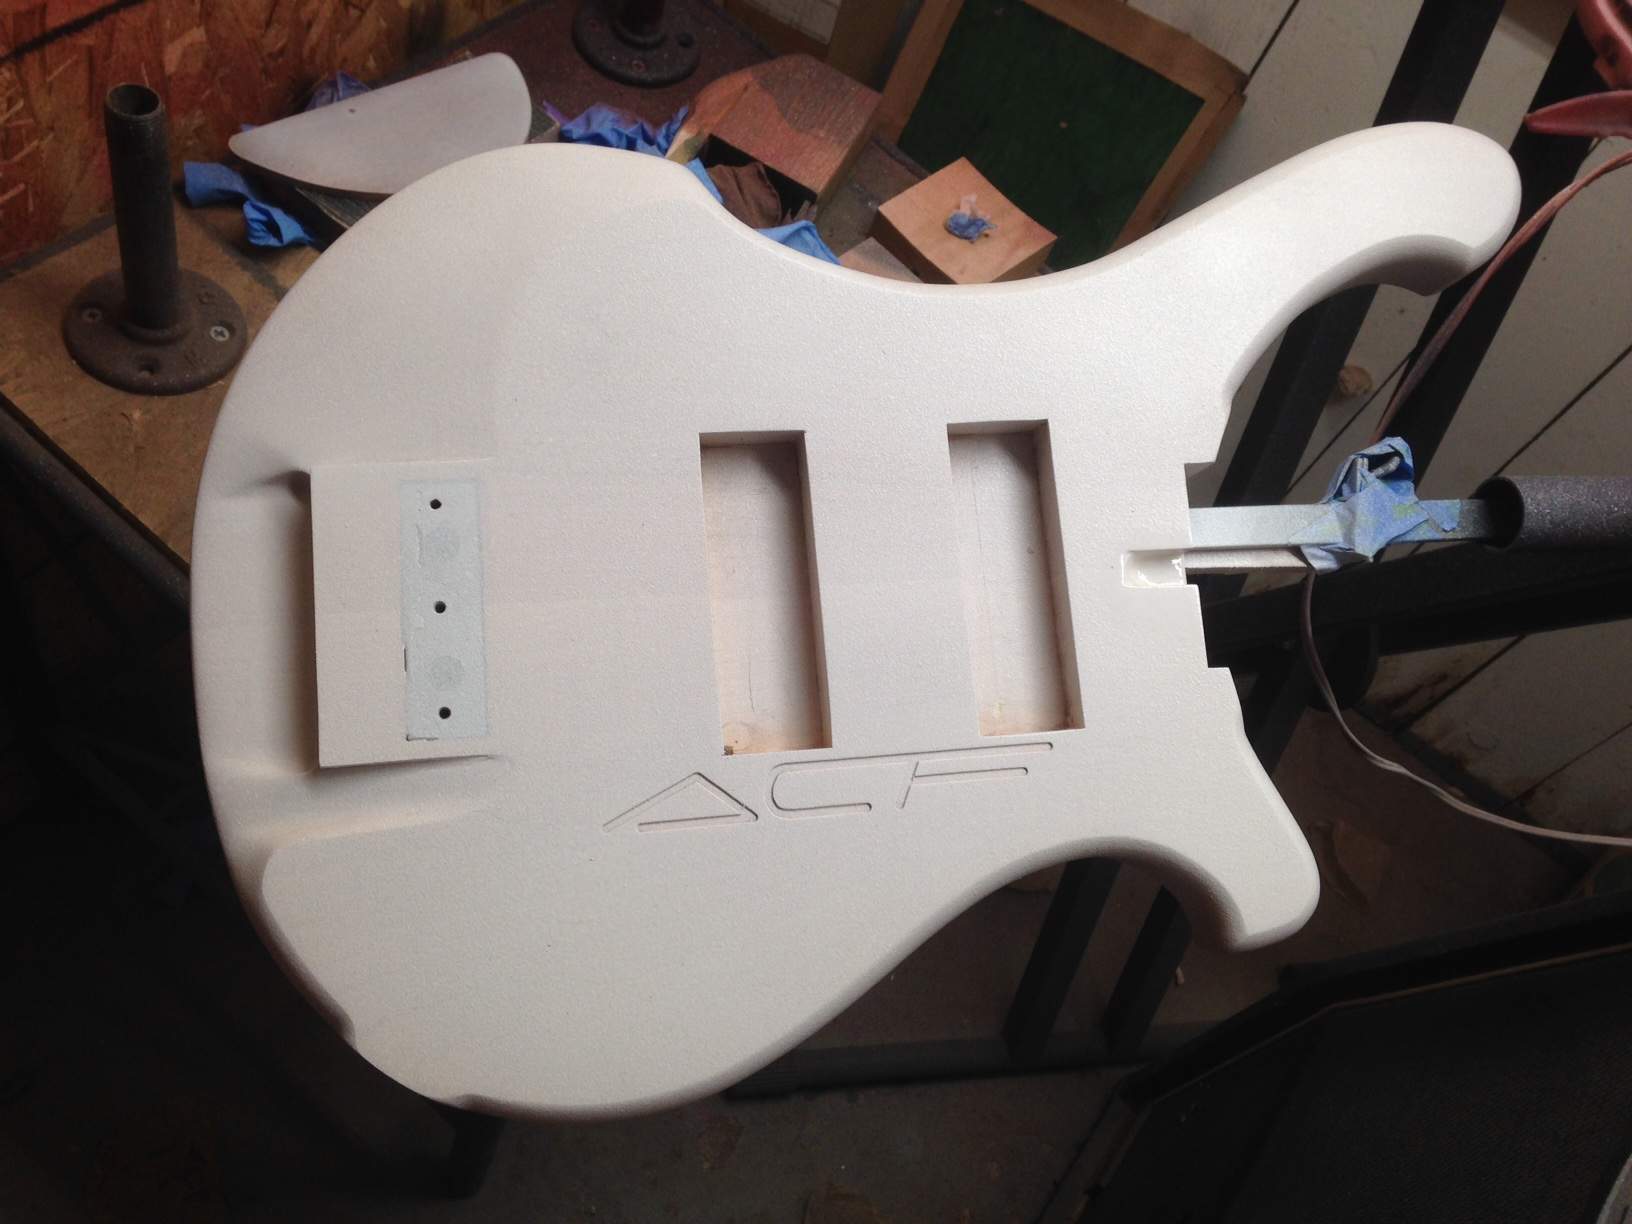
The ACF will be filled with black filler after the color coats are done, then I'll clear over it.
If I had someone who could do silk screen or decals, I'd love to put the smaller print underneath, like:
K U B I C K E N B A C K E R
... but the lack of time means I won't be doing that before the contest is closed.
Oh well, I dig this a lot as it is!
- Decided to try my hand at side inlays. I mixed up some epoxy and - despite the warning - some milk paint (is it supposed to be like a Greek yogurt consistency?). And then I threw in some glow powder as well.
The way I figured it, I can always rout these out again if they suck and try something else. I know, not the best use of my time with 17 days left... but if it works, it's gonna be great! And I'd be done with that.
Here's what it looks like wet and glowing:
Tomorrow, I'll see how it cures and go from there. But if it's good, this is HAWT!
- The body logo was a must, because of Kubicki. And wouldn't you know it, the first 3 letters of FACTOR are my initials, ACF. Using straight edges and a steady hand, I managed to carve it out with the router:
- With that done and some final sanding, I hit the body with some initial coats. The WB finish thread provided me some great info on using the Varathane WB poly and milk paint, so I mixed it up and shot it. But the consistency was coming out spotty. Added more poly and mixed it up, seems to be better. Essentially, this is the primer coating. I'll let this cure, sand it, then hit it with more finish. Once the white covers the maple coloration, I'll just switch to clear coat and go from there.
The ACF will be filled with black filler after the color coats are done, then I'll clear over it.
If I had someone who could do silk screen or decals, I'd love to put the smaller print underneath, like:
K U B I C K E N B A C K E R
... but the lack of time means I won't be doing that before the contest is closed.
Oh well, I dig this a lot as it is!


This weekend and the next 2 days are pretty much a bass weekend. I'm hoping I can maximize my time for it, but unexpected things keep popping up... so I'm trying.
- Decided to try my hand at side inlays. I mixed up some epoxy and - despite the warning - some milk paint (is it supposed to be like a Greek yogurt consistency?). And then I threw in some glow powder as well.
The way I figured it, I can always rout these out again if they suck and try something else. I know, not the best use of my time with 17 days left... but if it works, it's gonna be great! And I'd be done with that.
Here's what it looks like wet and glowing:
View attachment 3344167
Tomorrow, I'll see how it cures and go from there. But if it's good, this is HAWT!
- The body logo was a must, because of Kubicki. And wouldn't you know it, the first 3 letters of FACTOR are my initials, ACF. Using straight edges and a steady hand, I managed to carve it out with the router:
View attachment 3344168
- With that done and some final sanding, I hit the body with some initial coats. The WB finish thread provided me some great info on using the Varathane WB poly and milk paint, so I mixed it up and shot it. But the consistency was coming out spotty. Added more poly and mixed it up, seems to be better. Essentially, this is the primer coating. I'll let this cure, sand it, then hit it with more finish. Once the white covers the maple coloration, I'll just switch to clear coat and go from there.
View attachment 3344166
The ACF will be filled with black filler after the color coats are done, then I'll clear over it.
If I had someone who could do silk screen or decals, I'd love to put the smaller print underneath, like:
K U B I C K E N B A C K E R
... but the lack of time means I won't be doing that before the contest is closed.
Oh well, I dig this a lot as it is!

Man, that is some clean, tight work, love this body shape! Nice job on the initials, I was expecting to read that they were CNC cut ("when did HE get a CNC?") I'll be watching your paint process closely, just about to start an MIM P bass refin project using Ultimate Varathane and milk paint for color and straight Ultimate for the clear. All through my cheap-a** HF all-in-one HVLP gun. Whoot! What kind of spray equipment you using?

Next build needs to be the Dirty Laundry Bass.
Kick 'em when they're upNext build needs to be the Dirty Laundry Bass.
Kick 'em when they're down
Kick 'em when they're up
Kick 'em all around


