
Great to have you on board. I enjoy the baritone sound as well, that's why I decided to build one. FYI, I'm currently also building a rather weird 5-string multiscale (34-36") bass that I will likely set up for bass Bb standard to go with this baritone. Check it out here: Ergonomic bass build "Twisted Sister"Oh whoops, didn't see that it was baritone guitar Bb instead of bass Bb standard! I'll still stick around for the ride, I always liked the baritone guitar's range more than the regular guitar's.

Enjoy the benefits of a premium membership!
Upgrade Account
-
TalkBass has been independent since 1998. Add your voice.
Create a free account to reply to discussions, view embedded media, and browse with fewer display ads.
Join free Log in
Want zero display ads or expanded classifieds tools? Compare plans.
You are using an out of date browser. It may not display this or other websites correctly.
You should upgrade or use an alternative browser.
You should upgrade or use an alternative browser.
Winter Build Off 2023 - Supersymmetry
- Thread starter TFM94
- Start date
More options
Who Replied?
I intended to struggle through your presentation, after viewing the explanatory pictures.I didn't really expect anyone to do that.
After reading this, I fully intend to conform to your expectations.

Good luck with the build.

Alright, enough physics for now, let's get to the actual build. Here's the first proper update.
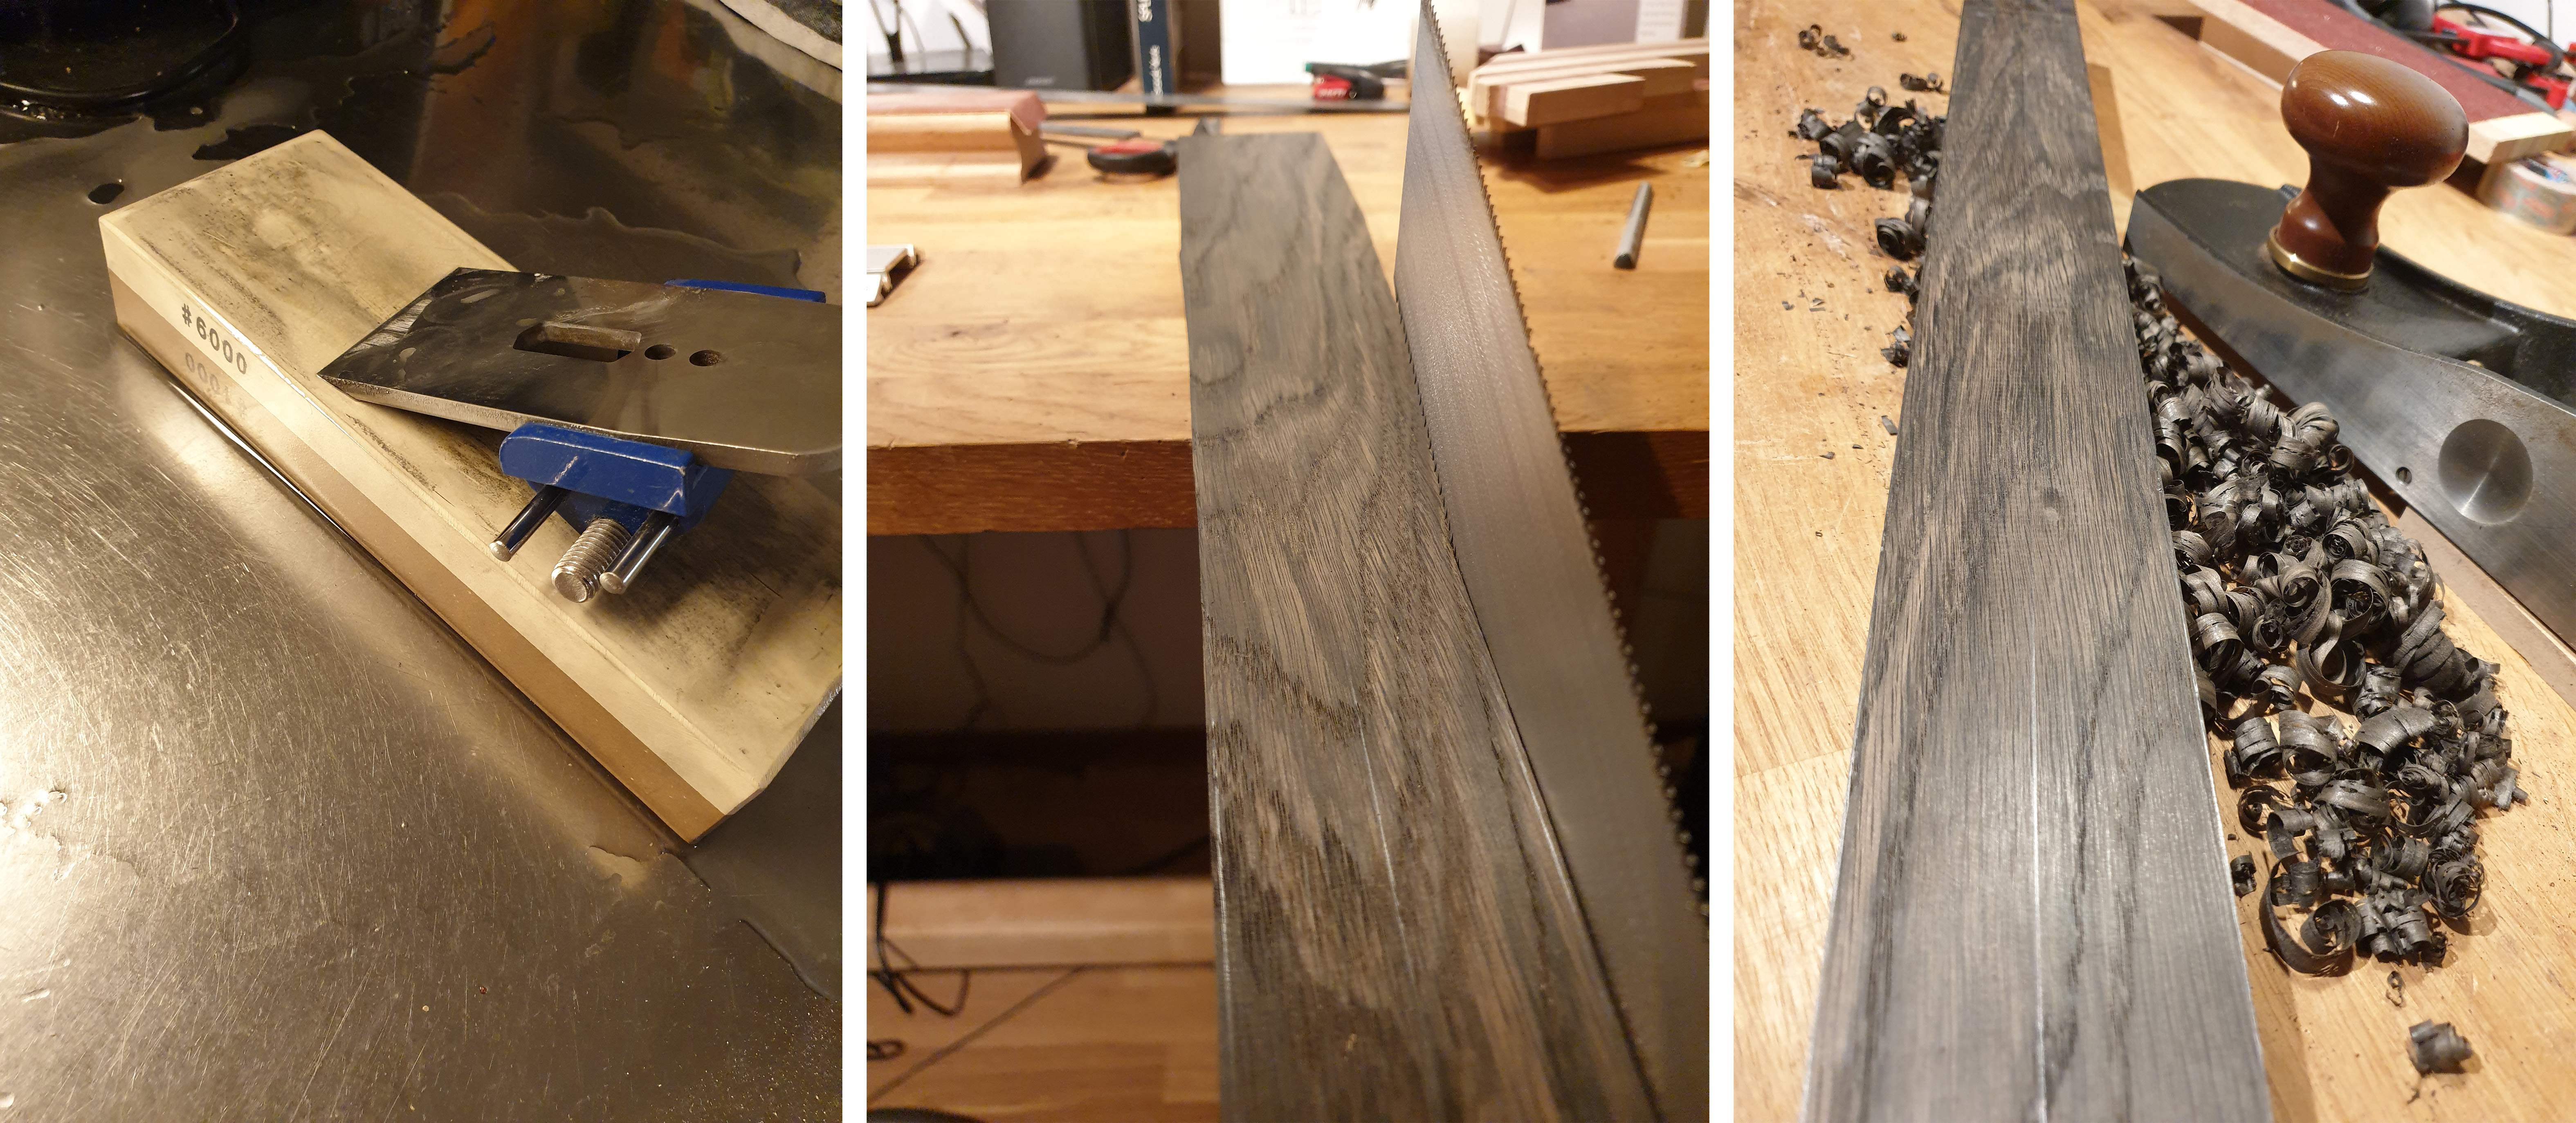
First off, how is it possible that we are three days into the build off and haven't talked about tool nerds yet? The first step of every build is sharpening a basic set of tools and making some space on my workbench, so I got out my water stones and let my tool nerd flag fly. I then planed the fretboard to just over 6mm thickness, cut out the shape and used a plane to get the right taper. This is important because I will later use it as a router guide for the neck width.
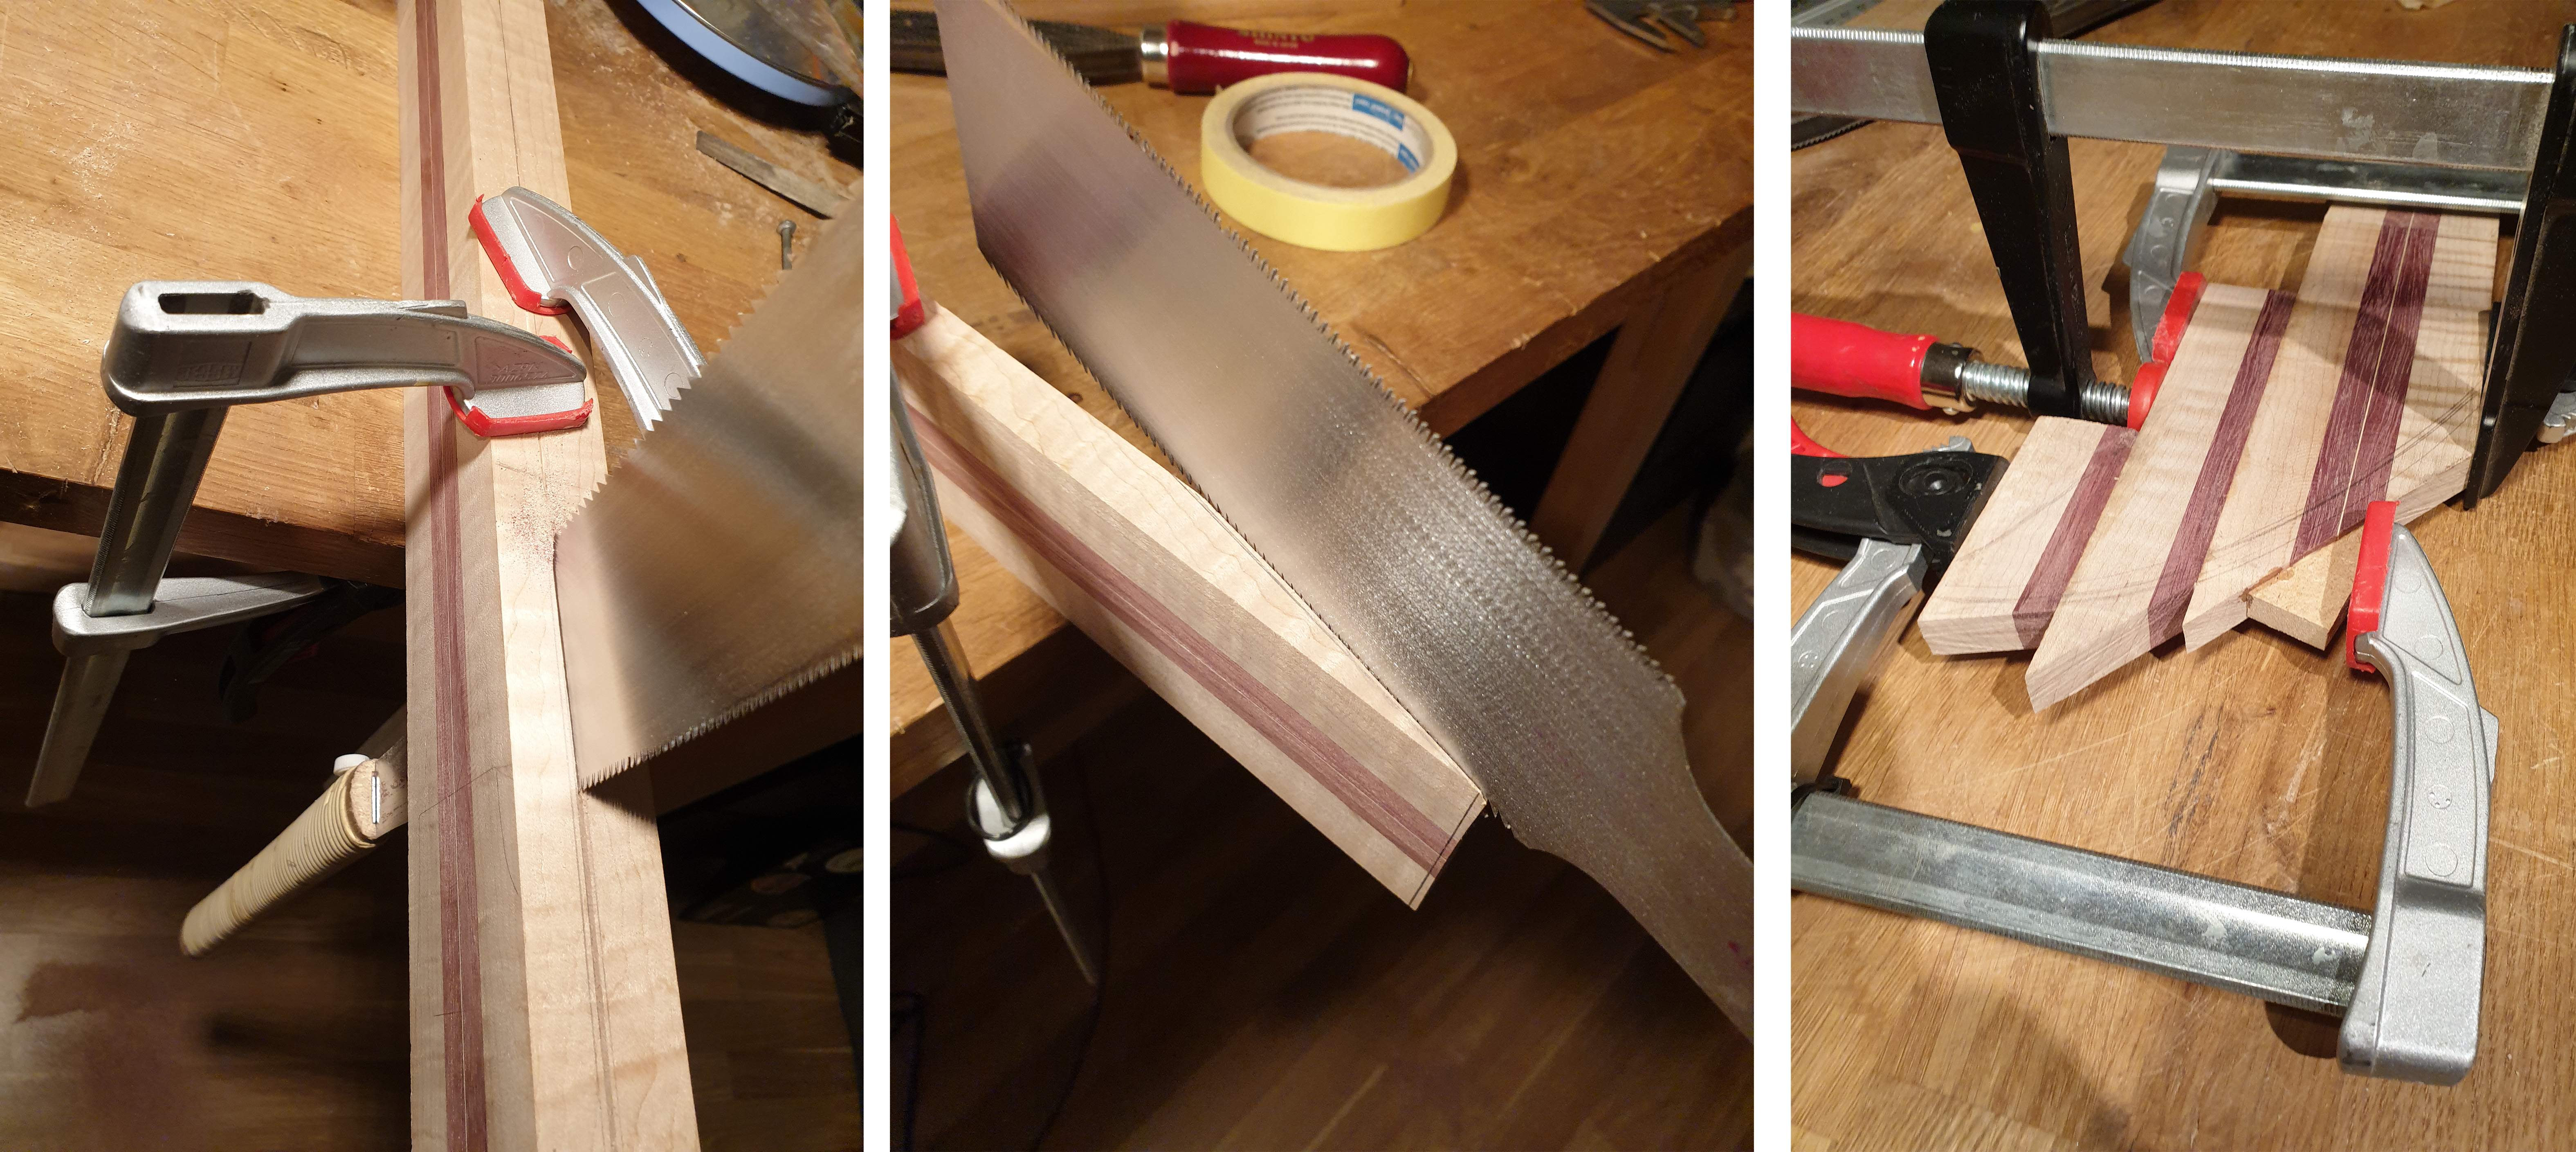
On to the neck blank. It's a maple and purpleheart laminate that I made from maple offcuts and a purpleheart fretboard blank. You may have noticed that it's a very short blank, so we'll need a scarf joint. I used my ryoba to cut out the neck and headstock pieces with a 9 degree angle. I glued some offcuts to the headstock to get to the necessary width.
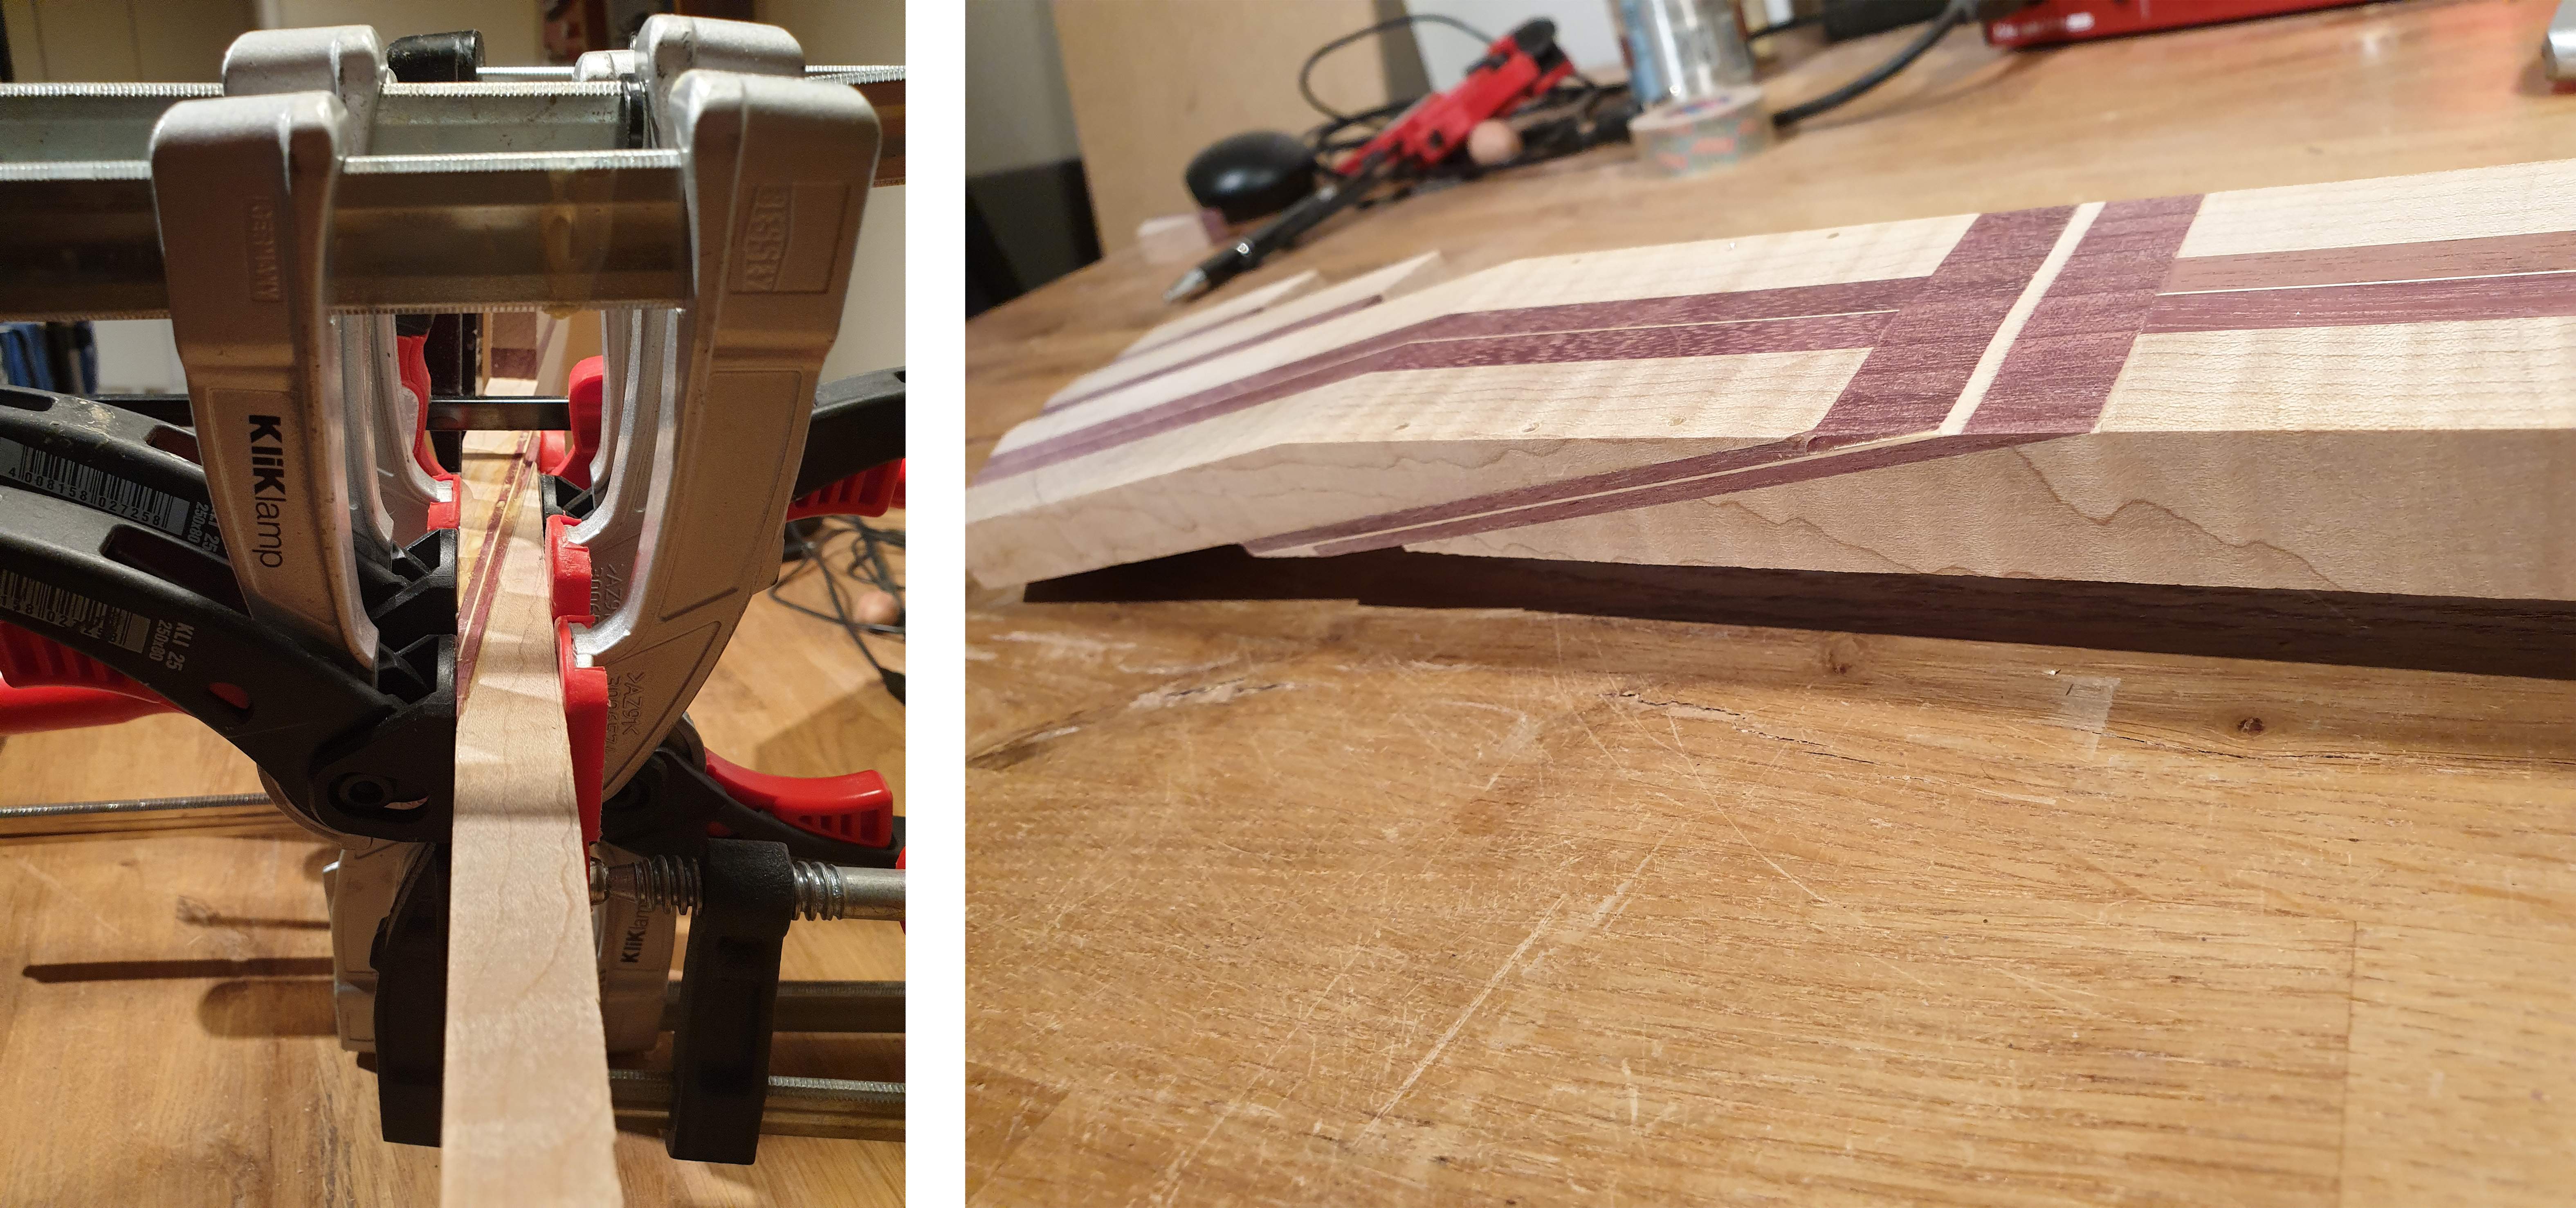
And glued it all up. Aligning scarf joints on this multilaminate neck is very tricky, because the thin veneer layer in the middle shows every miniscule misalignment. I've tried this before and it turned out acceptable, but never perfect. That's why I included a purpleheart-maple-purpleheart sandwich layer within the scarf joint to visually separate the two pieces (and hide all my mistakes).
Every time I make a scarf joint I have to think of @Beej 's poem during the summer build off:
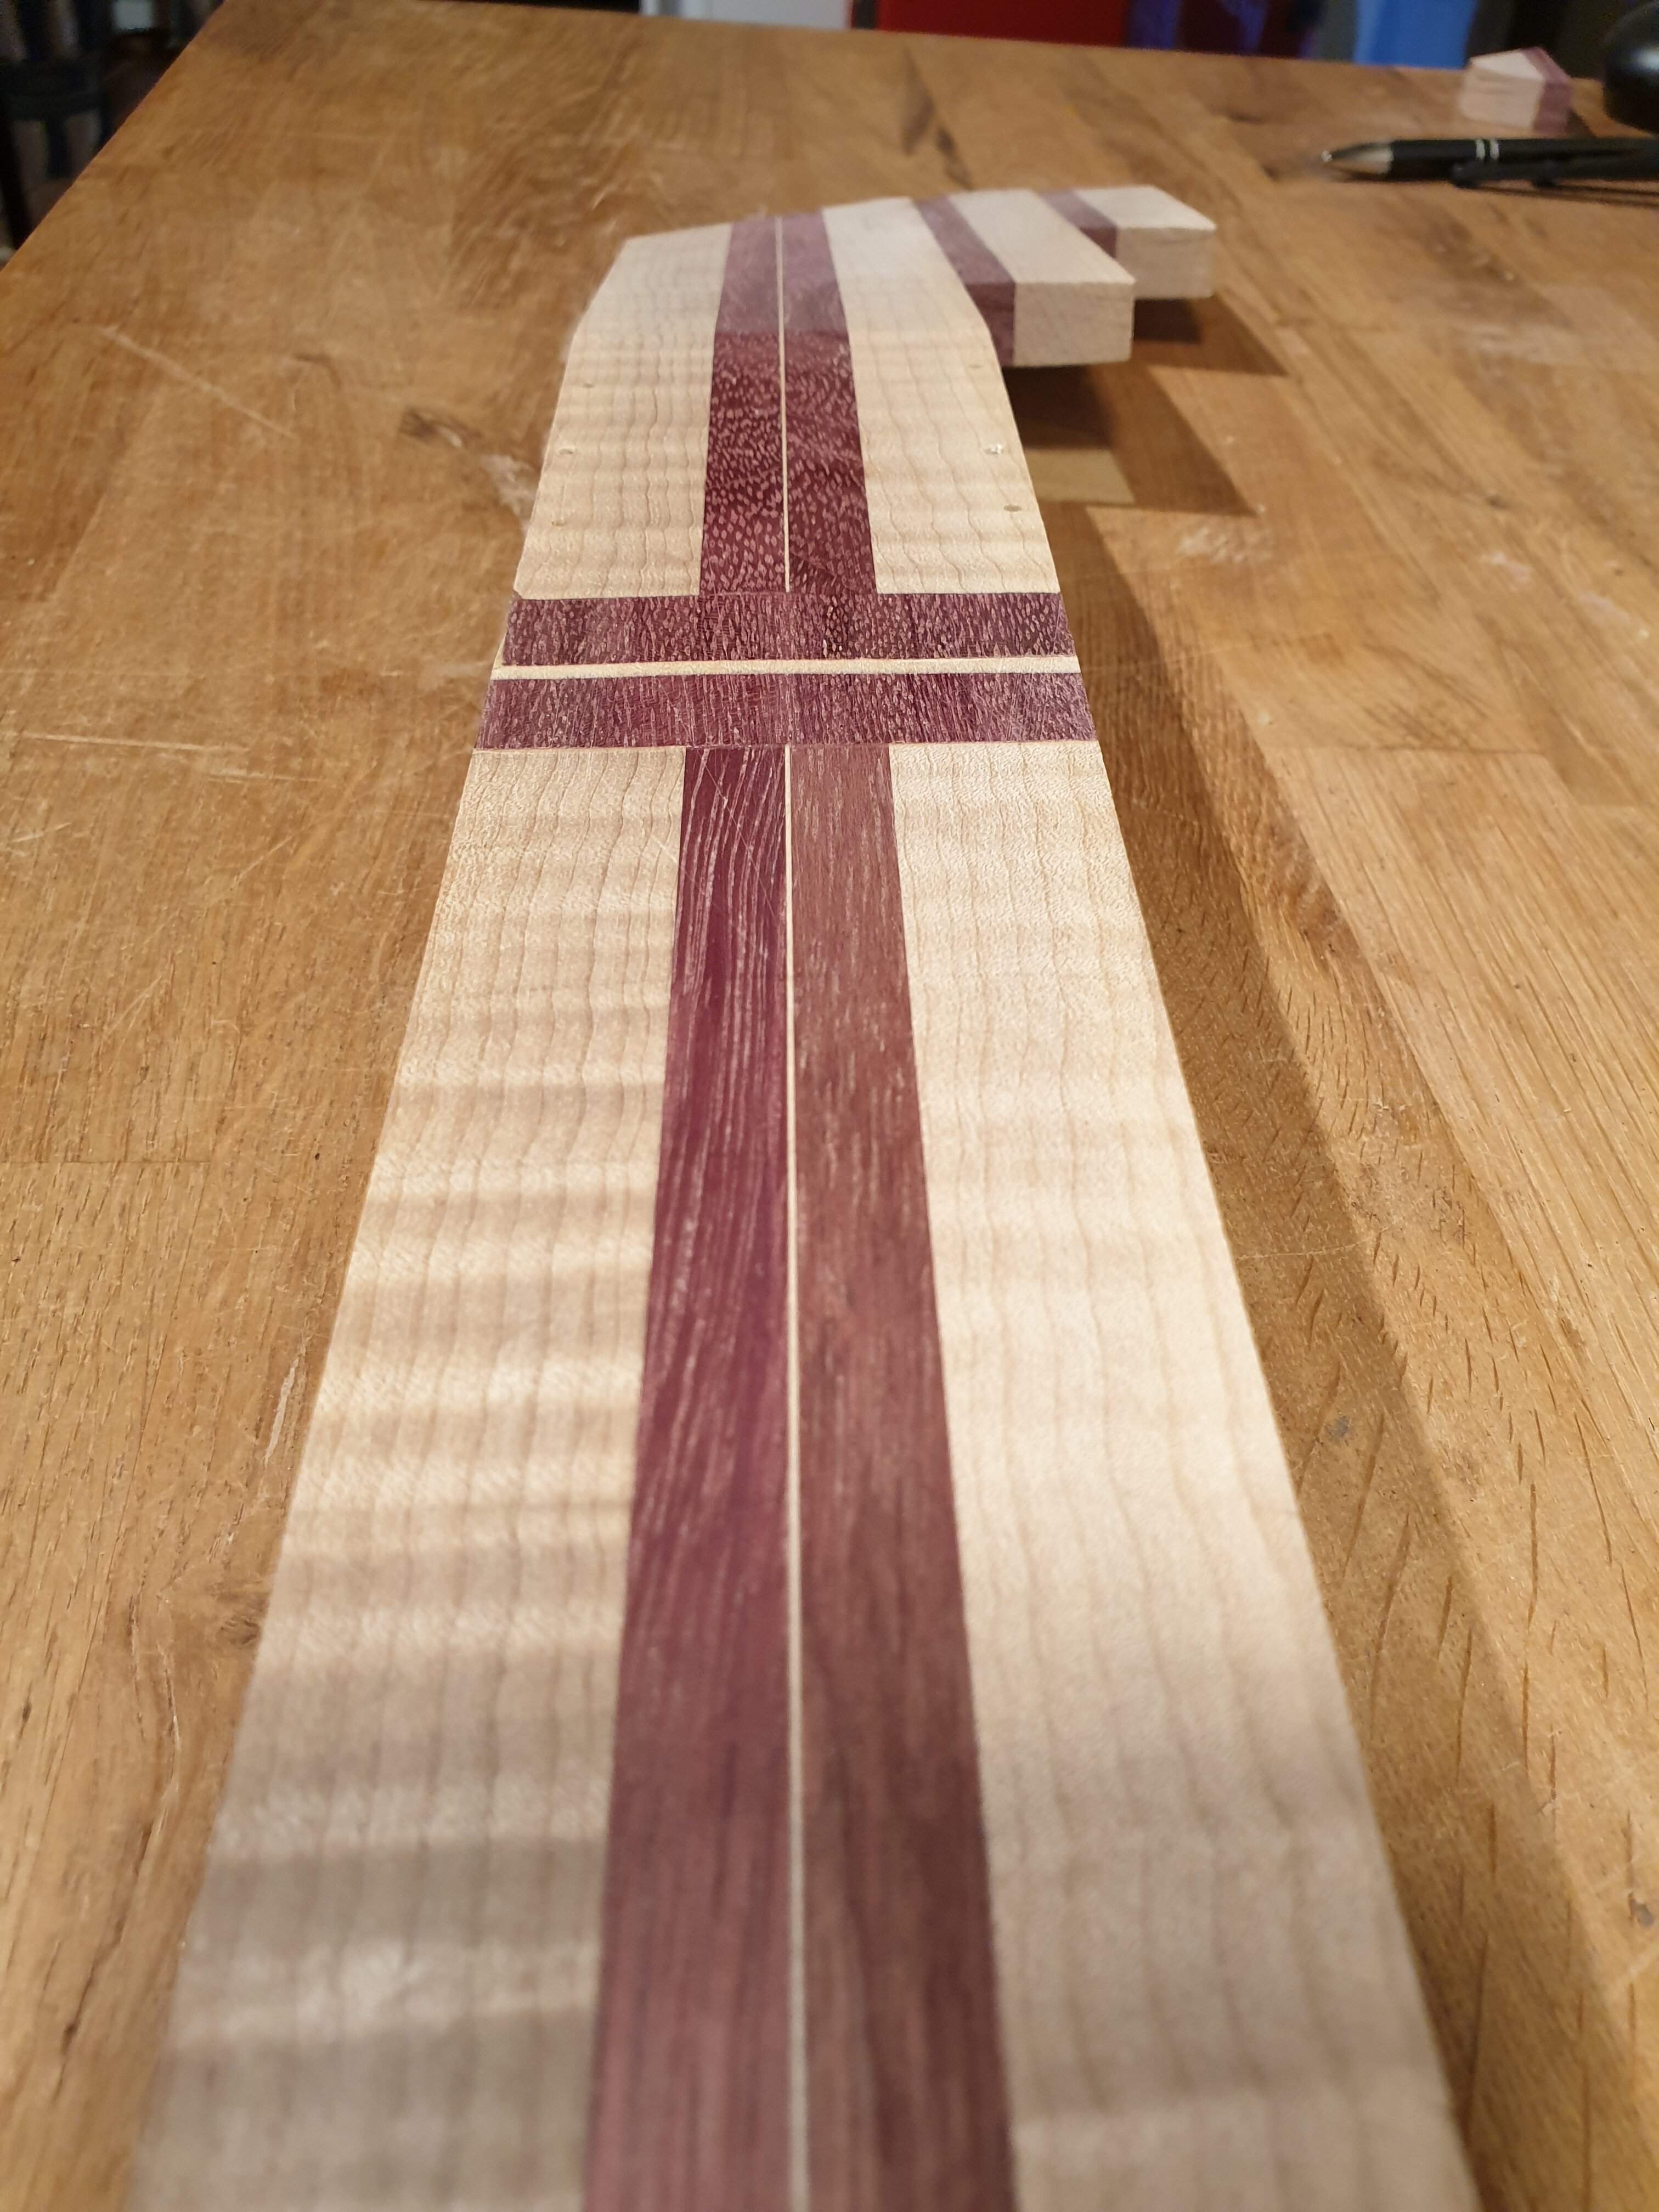
I'll leave you with one more picture of the scarf joint. The trussrod will not arrive until Tuesday, so the TR channel has to wait, perhaps I'll work on the headstock until then.
Merry Christmas everyone!
First off, how is it possible that we are three days into the build off and haven't talked about tool nerds yet? The first step of every build is sharpening a basic set of tools and making some space on my workbench, so I got out my water stones and let my tool nerd flag fly. I then planed the fretboard to just over 6mm thickness, cut out the shape and used a plane to get the right taper. This is important because I will later use it as a router guide for the neck width.
On to the neck blank. It's a maple and purpleheart laminate that I made from maple offcuts and a purpleheart fretboard blank. You may have noticed that it's a very short blank, so we'll need a scarf joint. I used my ryoba to cut out the neck and headstock pieces with a 9 degree angle. I glued some offcuts to the headstock to get to the necessary width.
And glued it all up. Aligning scarf joints on this multilaminate neck is very tricky, because the thin veneer layer in the middle shows every miniscule misalignment. I've tried this before and it turned out acceptable, but never perfect. That's why I included a purpleheart-maple-purpleheart sandwich layer within the scarf joint to visually separate the two pieces (and hide all my mistakes).
Every time I make a scarf joint I have to think of @Beej 's poem during the summer build off:
I scarf two joints in the mornin',
I scarf two joints at night,
I scarf two joints in the afternoon,
They make my necks alright...
I'll leave you with one more picture of the scarf joint. The trussrod will not arrive until Tuesday, so the TR channel has to wait, perhaps I'll work on the headstock until then.
Merry Christmas everyone!
Last edited:



I never said I understood it.I intended to struggle through your presentation, after viewing the explanatory pictures.
After reading this, I fully intend to conform to your expectations.
Good luck with the build.

Nobody really does. It's a halfway-developed, unconfirmed theory. No shame in being confused. We all are.I never said I understood it.
There's one idea I want to run by the LC hive mind: the inlay. This baritone should have a modern vibe with just a 12th fret inlay. It should be nerdy, of course, and it should have some science background.
Here's what I came up with: A simplified sketch of a particle collision, as seen in big particle accelerators like CERN. I think it would be kind of cool to make it a luminescent inlay. I'm going to use super blue Luminlay side dots anyways, and Luminlay is also available as sheets, for example in blue. Here's the inlay shape I'm envisioning:
I don't have a CNC, so I'll do the routing with a dremel. An epoxy inlay would probably come out a bit wavy, that's why I am considering luminlay. I could either cut the sheet into 1mm strips and bend them to the correct radii of each inlay piece, or I could use a radius jig to cut out the curves. Either way, the inlay would consist of 12 curved strips of luminlay with a 3mm dot in the middle. I have indicated the seams with thin lines in the sketch.
I've never made anything other than dots out of luminlay, so I'm a bit unsure. I would appreciate it if the inlay experts could weigh in if this is possible.
Each strip would be 1mm thick, so significantly thinner than typical dots. Luminlay say on their webpage that it's made from acrylic resin. But I've never tried it, that's why I'm asking.I don't think you can bend Luminlay, can you? So while it works for dots, you're not gonna flex it in a groove like that.
If it can't be bent, I could use a radius jig for my dremel to cut the curved shape. Each piece is supposed to have a constant radius.


Why would an epoxy inlay come out wavy? Is it because of the dremeling? If that's what you mean, I think I would do the radius jig like you were saying.
I've done a couple of epoxy inlays and I think that's a good option if the Luminlay strips can't be bent (I don't know if they can or not). You might be able to find some glow powder to mix in.
I've done a couple of epoxy inlays and I think that's a good option if the Luminlay strips can't be bent (I don't know if they can or not). You might be able to find some glow powder to mix in.
Not the physical act of inlaying it, the design itself. It's gonna be pretty small, I'm not sure that you'll get "particle collision" and I'd be worried it just looked a little random.Why would an epoxy inlay come out wavy? Is it because of the dremeling? If that's what you mean, I think I would do the radius jig like you were saying.
I've done a couple of epoxy inlays and I think that's a good option if the Luminlay strips can't be bent (I don't know if they can or not). You might be able to find some glow powder to mix in.
Not the physical act of inlaying it, the design itself. It's gonna be pretty small, I'm not sure that you'll get "particle collision" and I'd be worried it just looked a little random.
Ohhh, I get what you're saying.
I was going to suggest the dot in the middle of the design be centered on the 12th fret and the design should go a couple of frets up and down the board but that may be more then you want to do.
Yeah, why didn't I think of that? I thought I'd be cutting the inlay grooves by hand, but of course a radius jig makes a lot more sense. That way it won't be wavy and I can use resin or superglue and powder. Problem solved, thanks!Why would an epoxy inlay come out wavy? Is it because of the dremeling? If that's what you mean, I think I would do the radius jig like you were saying.
I get your concern, but let me explain. I should have included a scale bar. The height of my sketch (black area) corresponds to the fretboard width of a little over 2" at the 12th fret. The inlay would be almost 5" left to right, spanning from the 9th to the 15th fret, it is not supposed to fit in between the 11th and 12th.It's gonna be pretty small, I'm not sure that you'll get "particle collision" and I'd be worried it just looked a little random.
Edit: Exactly was @Matt Liebenau says.
That's a cool design, too.I think with your current inlay design and the limited space of a 12th fret you run the risk of it just reading like a bunch of squiggles. Maybe something more like this?
View attachment 4915825
Yeah, why didn't I think of that? I thought I'd be cutting the inlay grooves by hand, but of course a radius jig makes a lot more sense. That way it won't be wavy and I can use resin or superglue and powder. Problem solved, thanks!
I get your concern, but let me explain. I should have included a scale bar. The height of my sketch (black area) corresponds to the fretboard width of a little over 2" at the 12th fret. The inlay would be almost 5" left to right, spanning from the 9th to the 15th fret, it is not supposed to fit in between the 11th and 12th.
Edit: Exactly was @Matt Liebenau says.
Hey! I finally got one right! Where’s Groucho?
I've done a couple of epoxy inlays and I think that's a good option if the Luminlay strips can't be bent (I don't know if they can or not). You might be able to find some glow powder to mix in.
What is the better choice here, superglue or epoxy? I've seen a lot of people use superglue for inlay powders, but after a quick internet search I see mostly epoxy used for luminescent stuff.
At a first glance, thin superglue seems like the easier solution. Fill the rout with poweder, soak with superglue and sand level. Is there any downside to this?
What is the better choice here, superglue or epoxy? I've seen a lot of people use superglue for inlay powders, but after a quick internet search I see mostly epoxy used for luminescent stuff.
At a first glance, thin superglue seems like the easier solution. Fill the rout with poweder, soak with superglue and sand level. Is there any downside to this?
I use a clear casting resin and mix in mica powder. I'd be wearing a ventilator either way, but superglue's smell is so strong I wouldn't want to use that much of it.

I’ve used superglue and luminous powder mixed with sawdust and baking soda.
I tried to get a mother of pearl look in the fret lines and the dots.
FAIL. the lines barely work. Too much filler I think.
But it glows and looks ok. I did a design in a knife handle with epoxy and glow powder. That went much better.
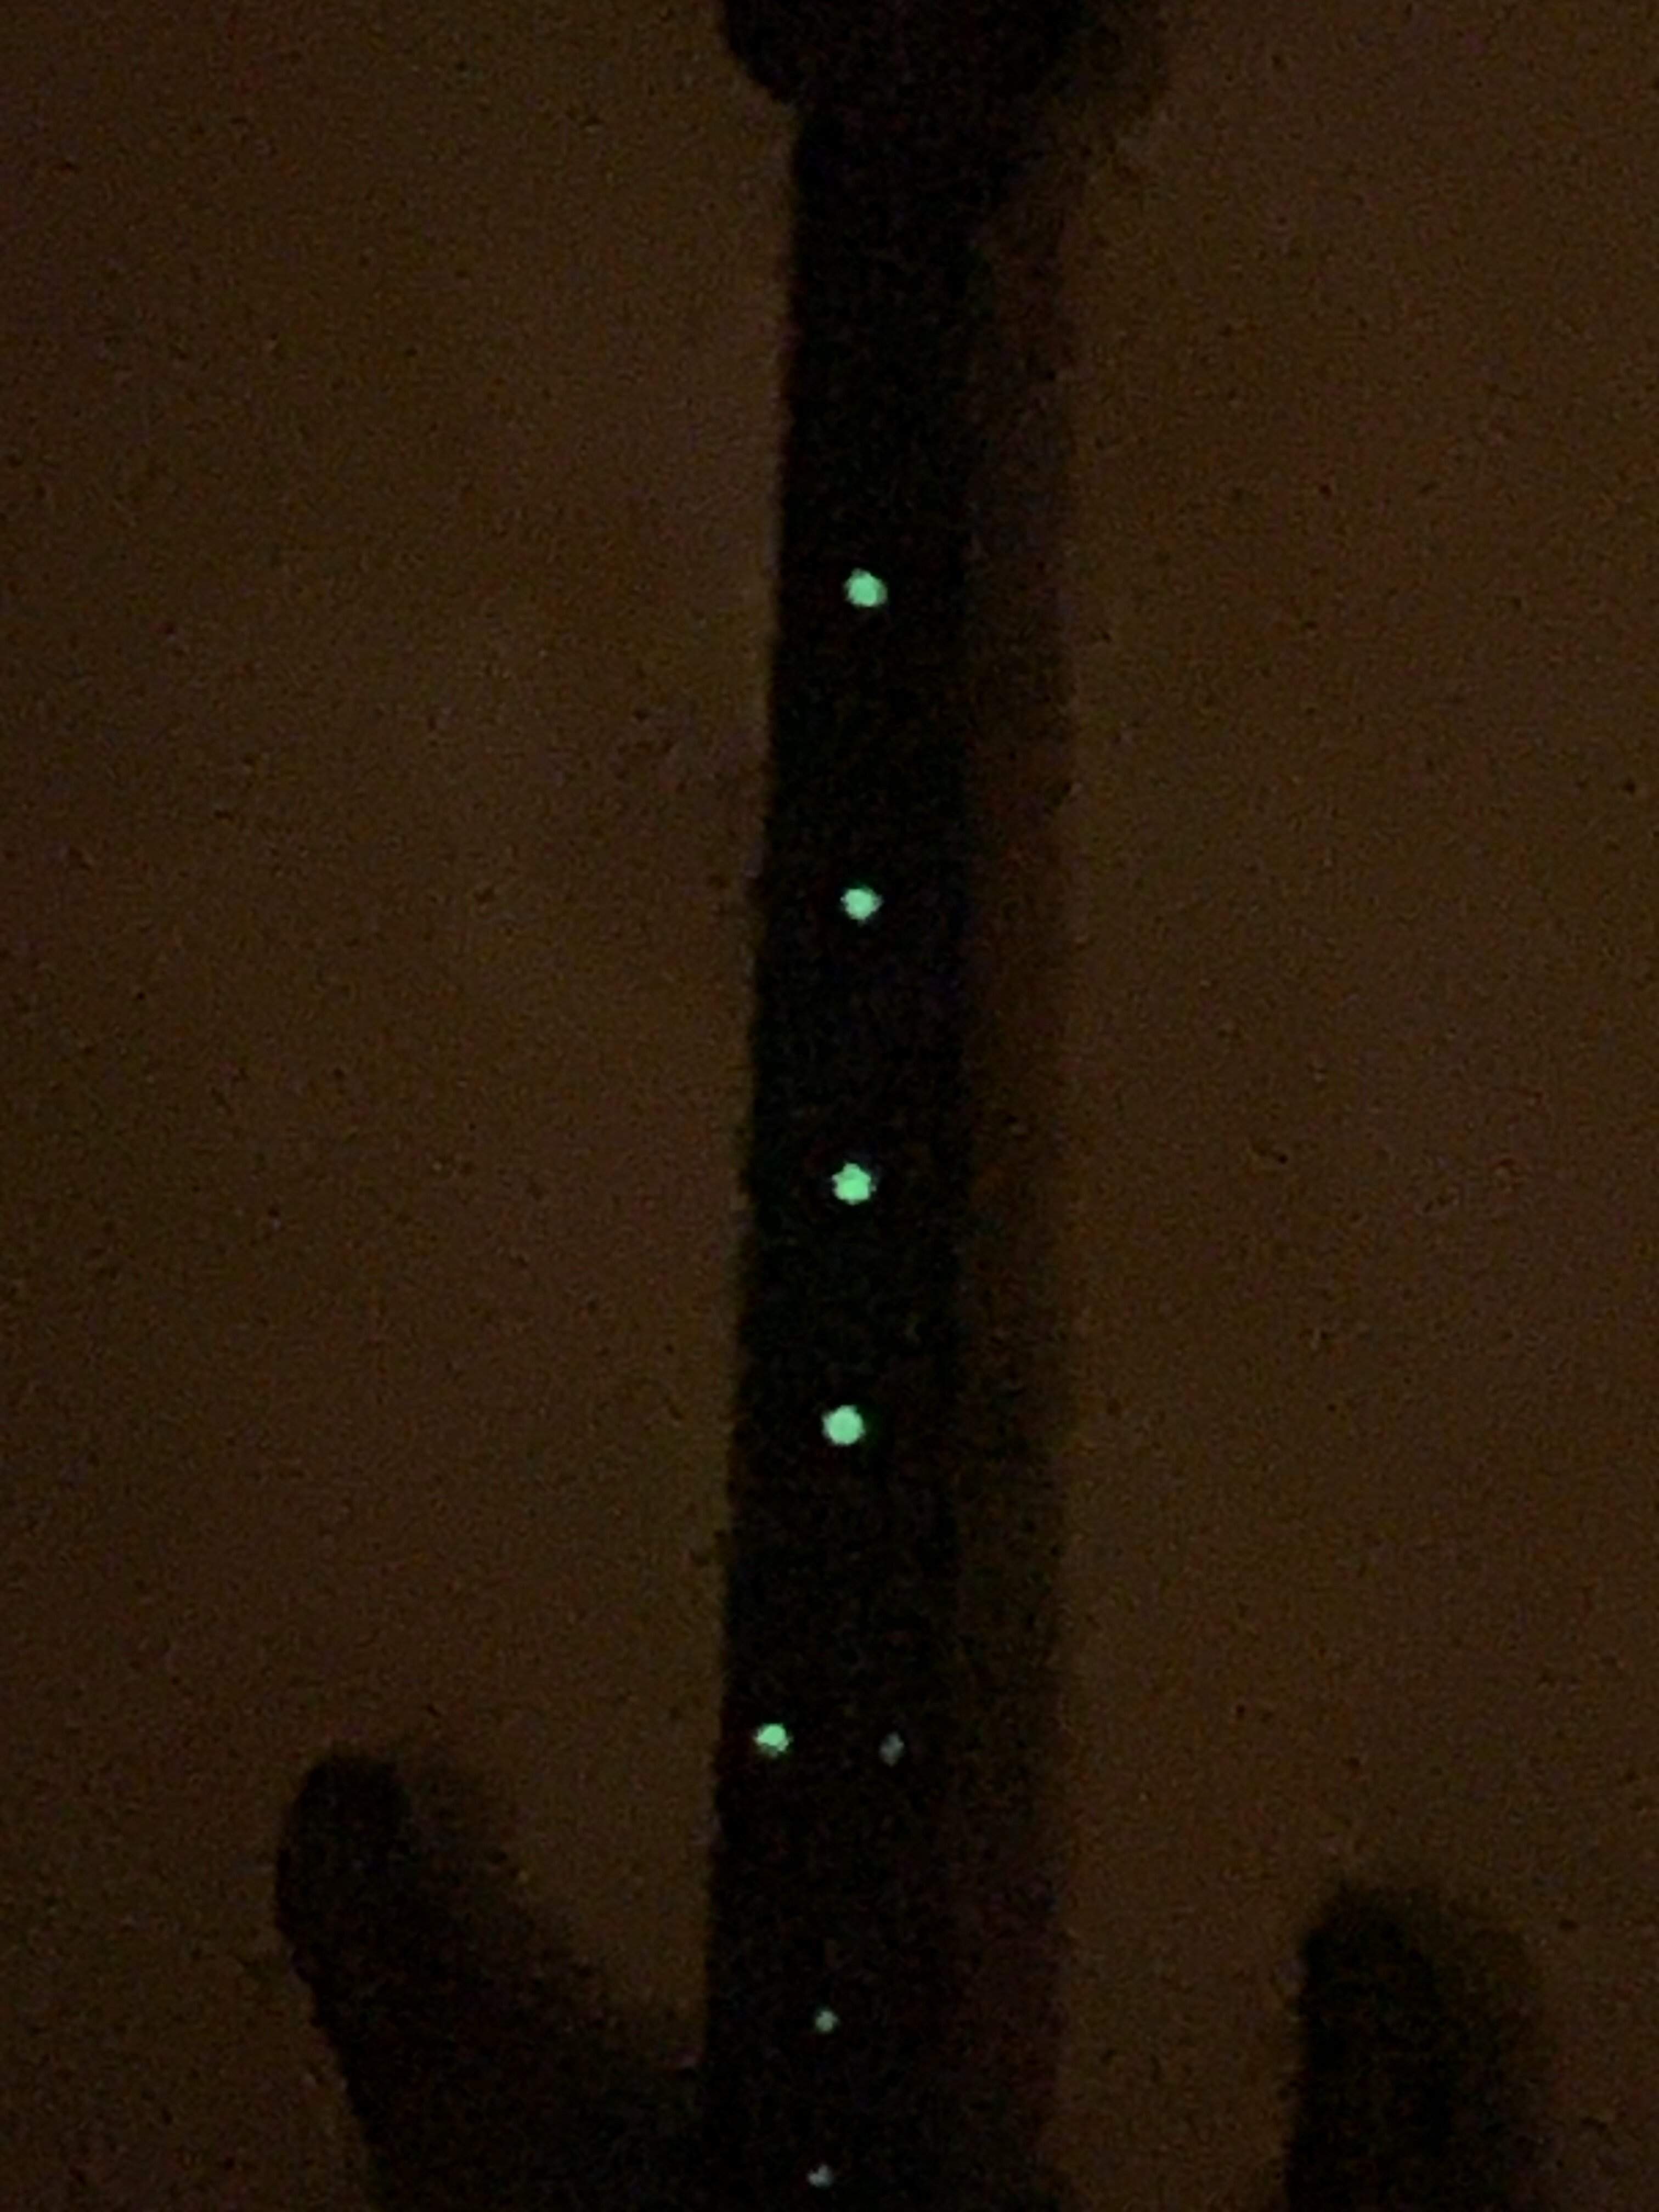
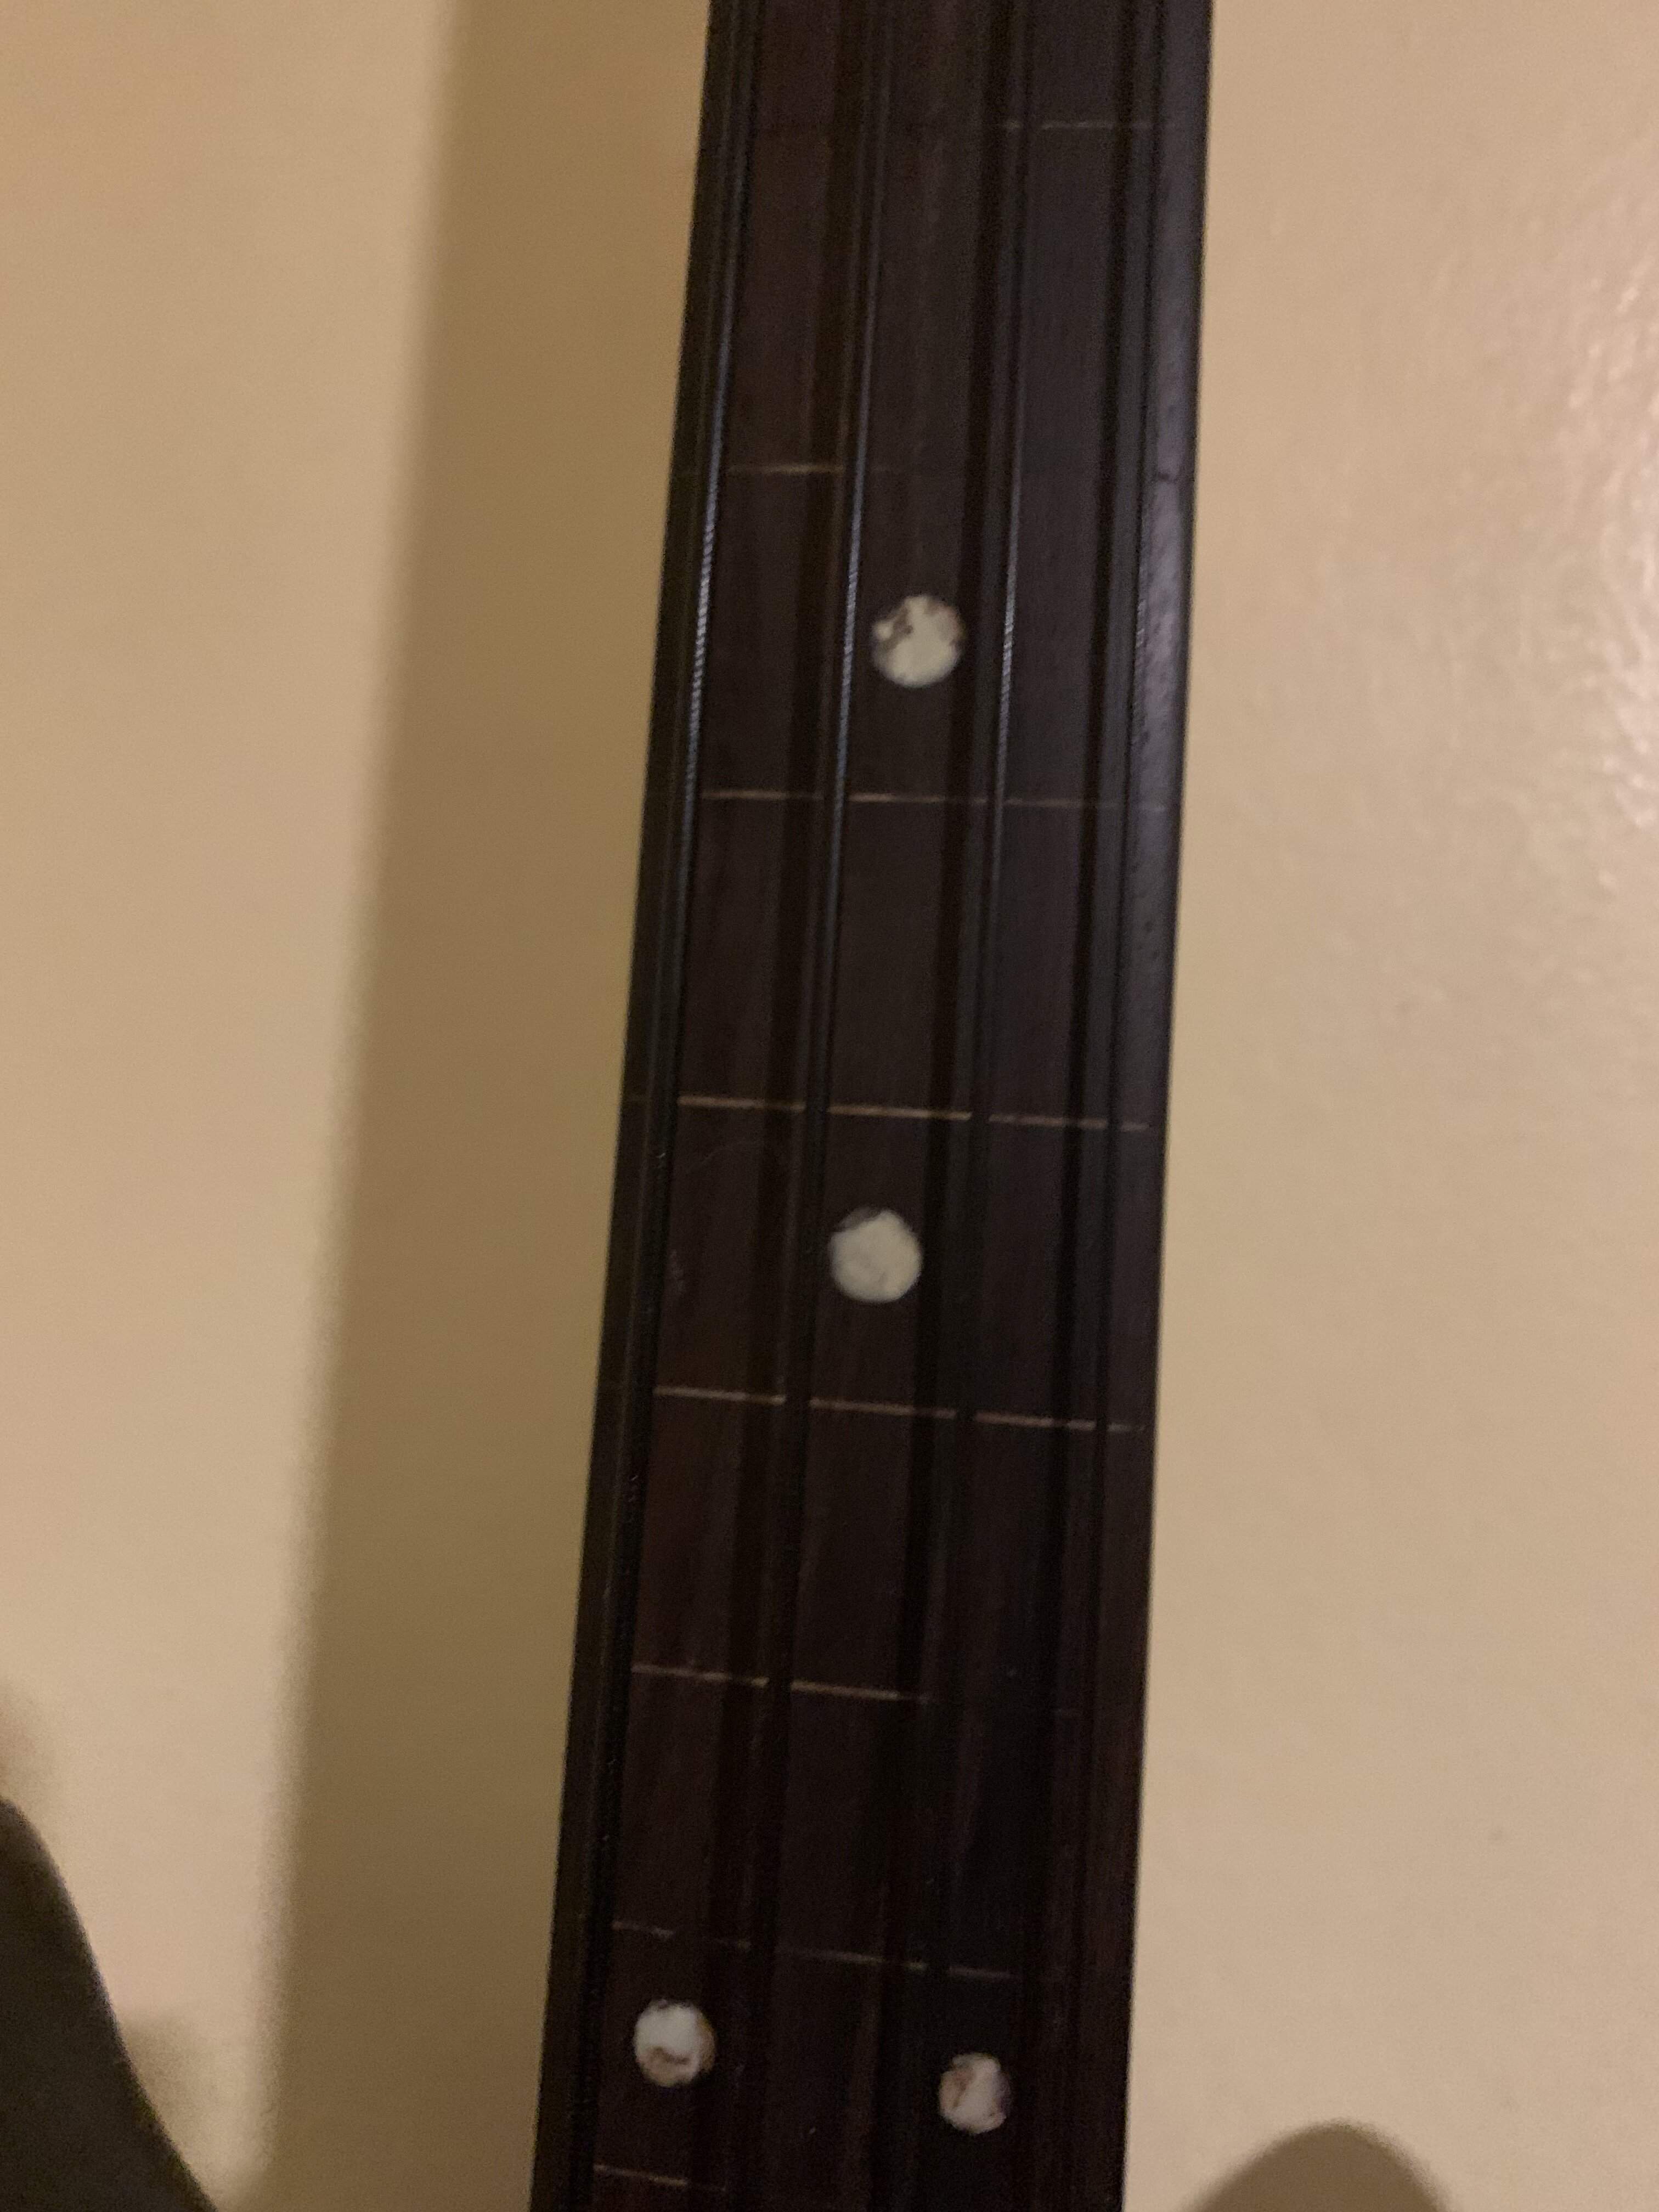
I tried to get a mother of pearl look in the fret lines and the dots.
FAIL. the lines barely work. Too much filler I think.
But it glows and looks ok. I did a design in a knife handle with epoxy and glow powder. That went much better.
Thanks everyone for sharing your tips and ideas about the inlay. I ordered a 40g bag luminescent pigment in blue-green and some clear casting epoxy. Until its arrival I will make the radius jig and practice routing the inlay on a scrap piece of oak.
The trussrod and some more parts arrived yesterday, so I could move ahead and routed the TR channel. Now that I didn't need the straight side of the neck anymore, I also cut along the sides and headstock. It will have to wait at this stage until the inlay is done.
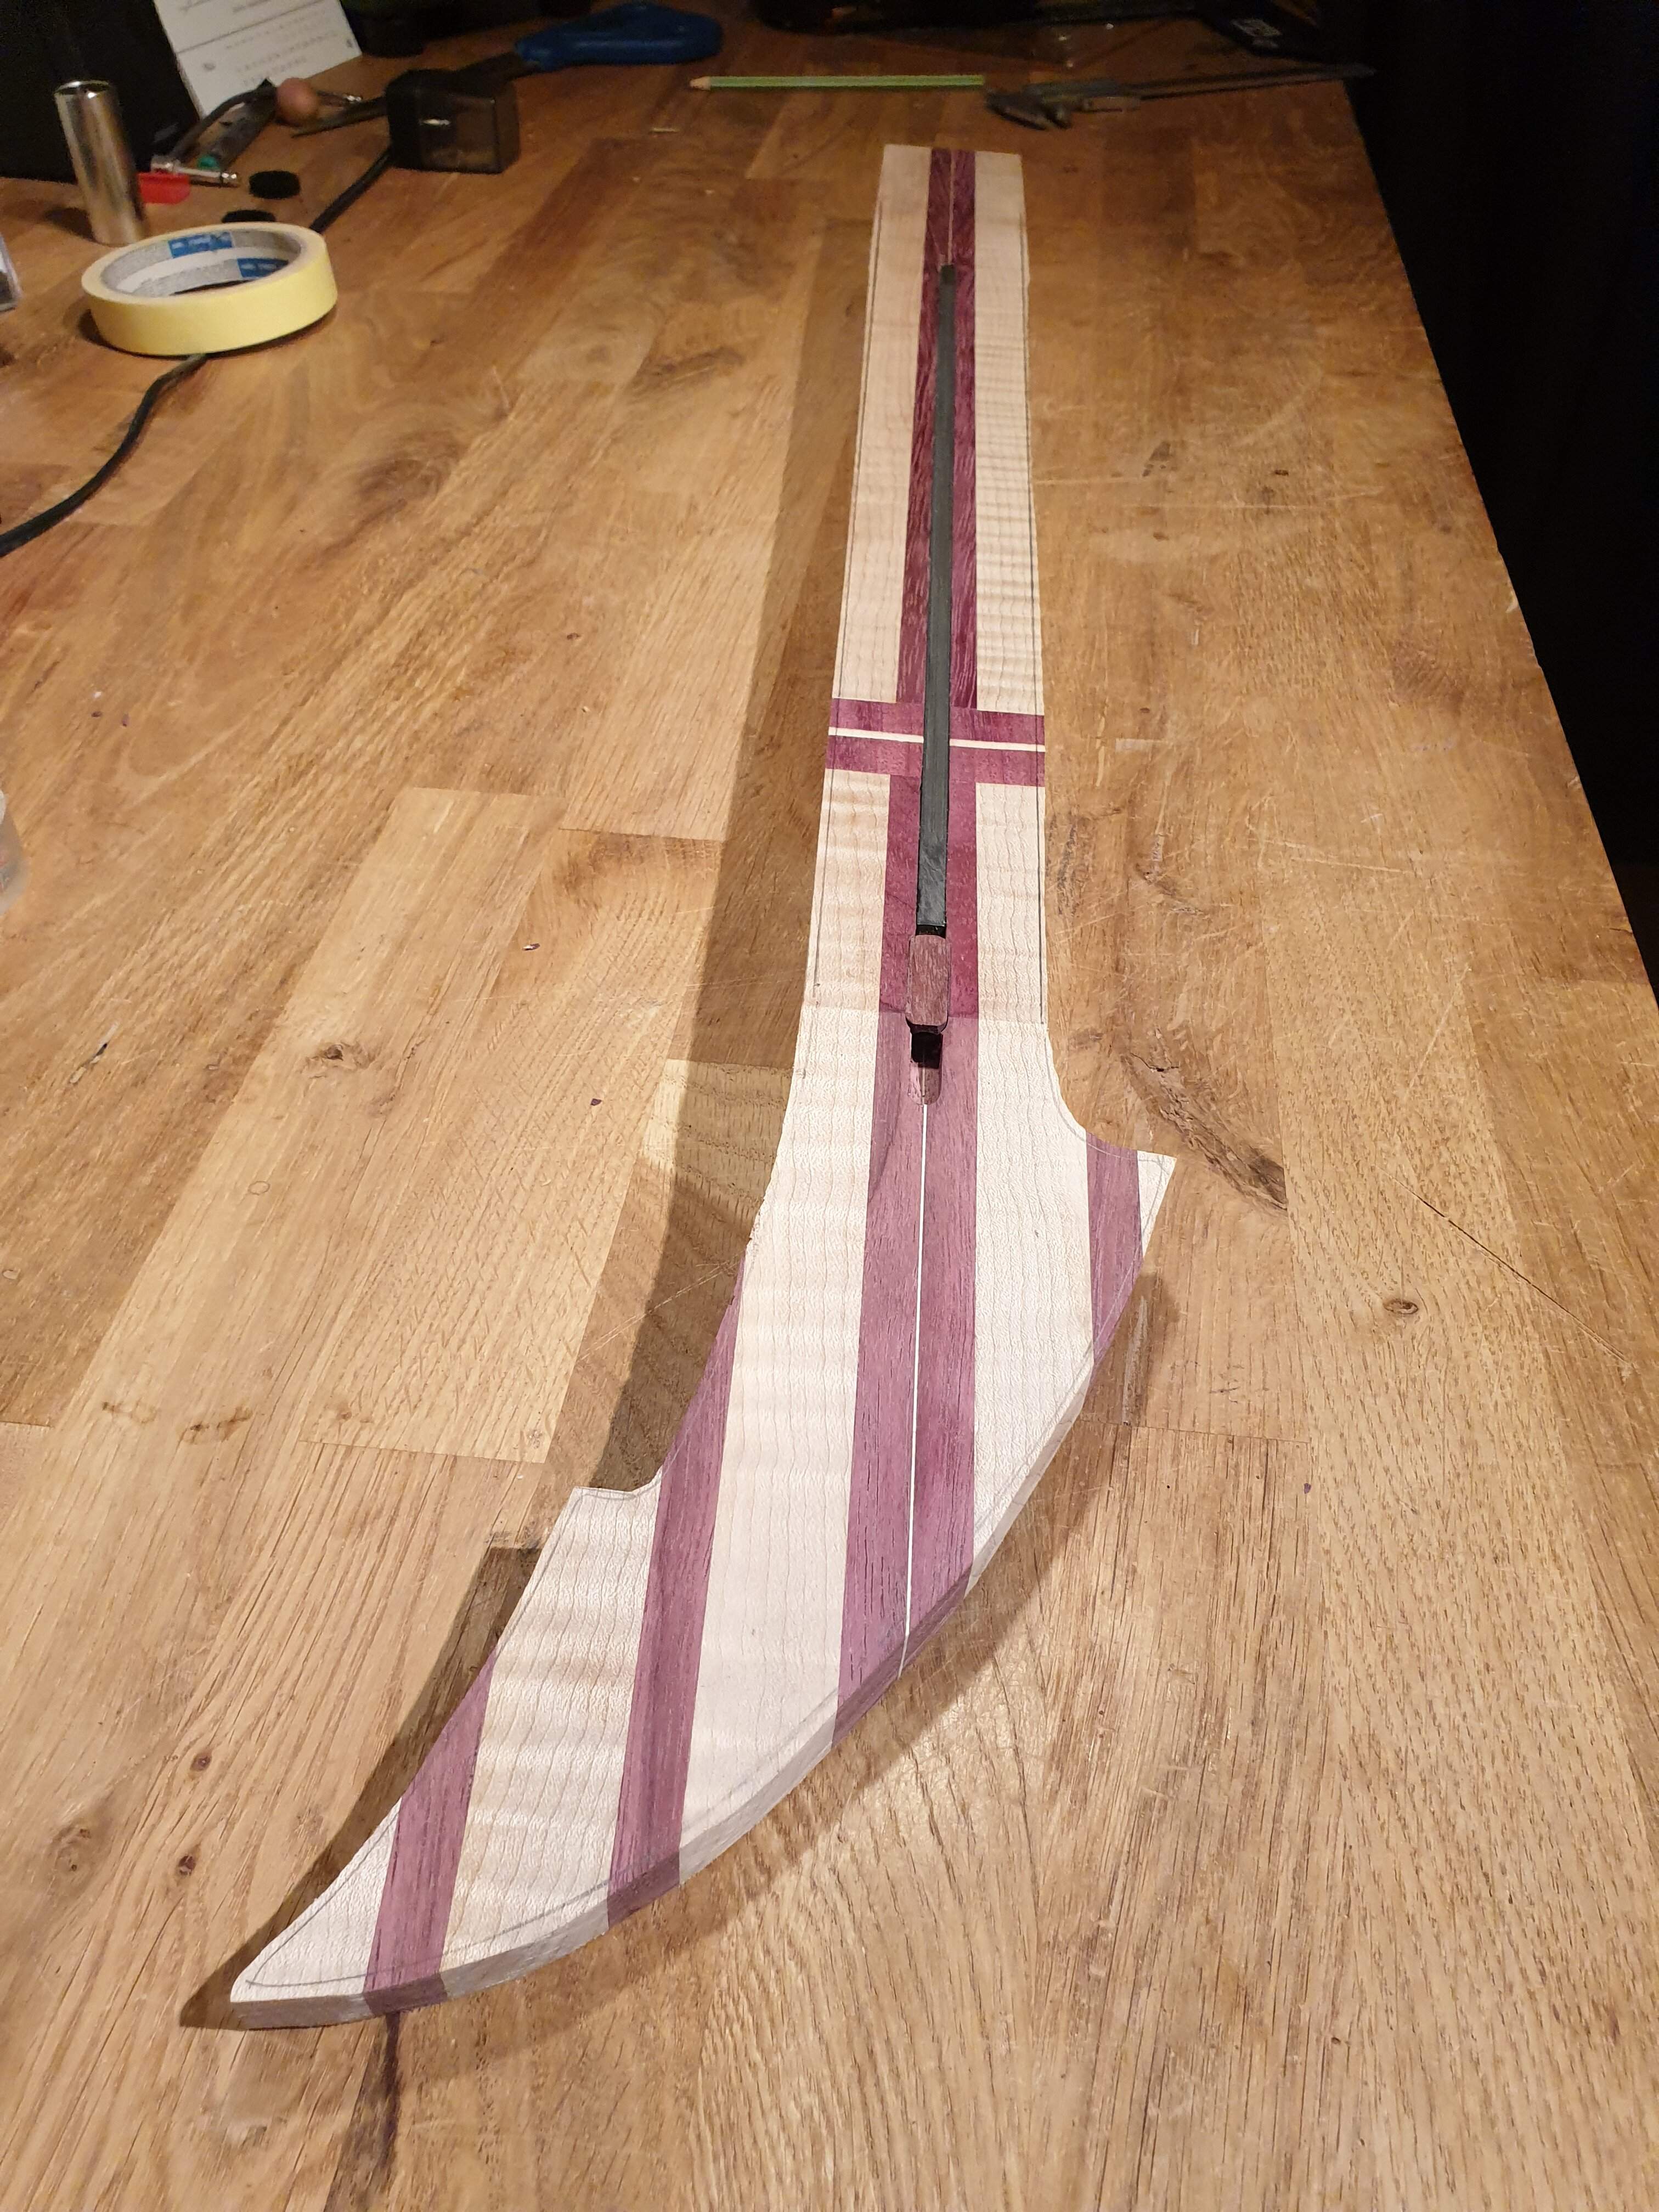
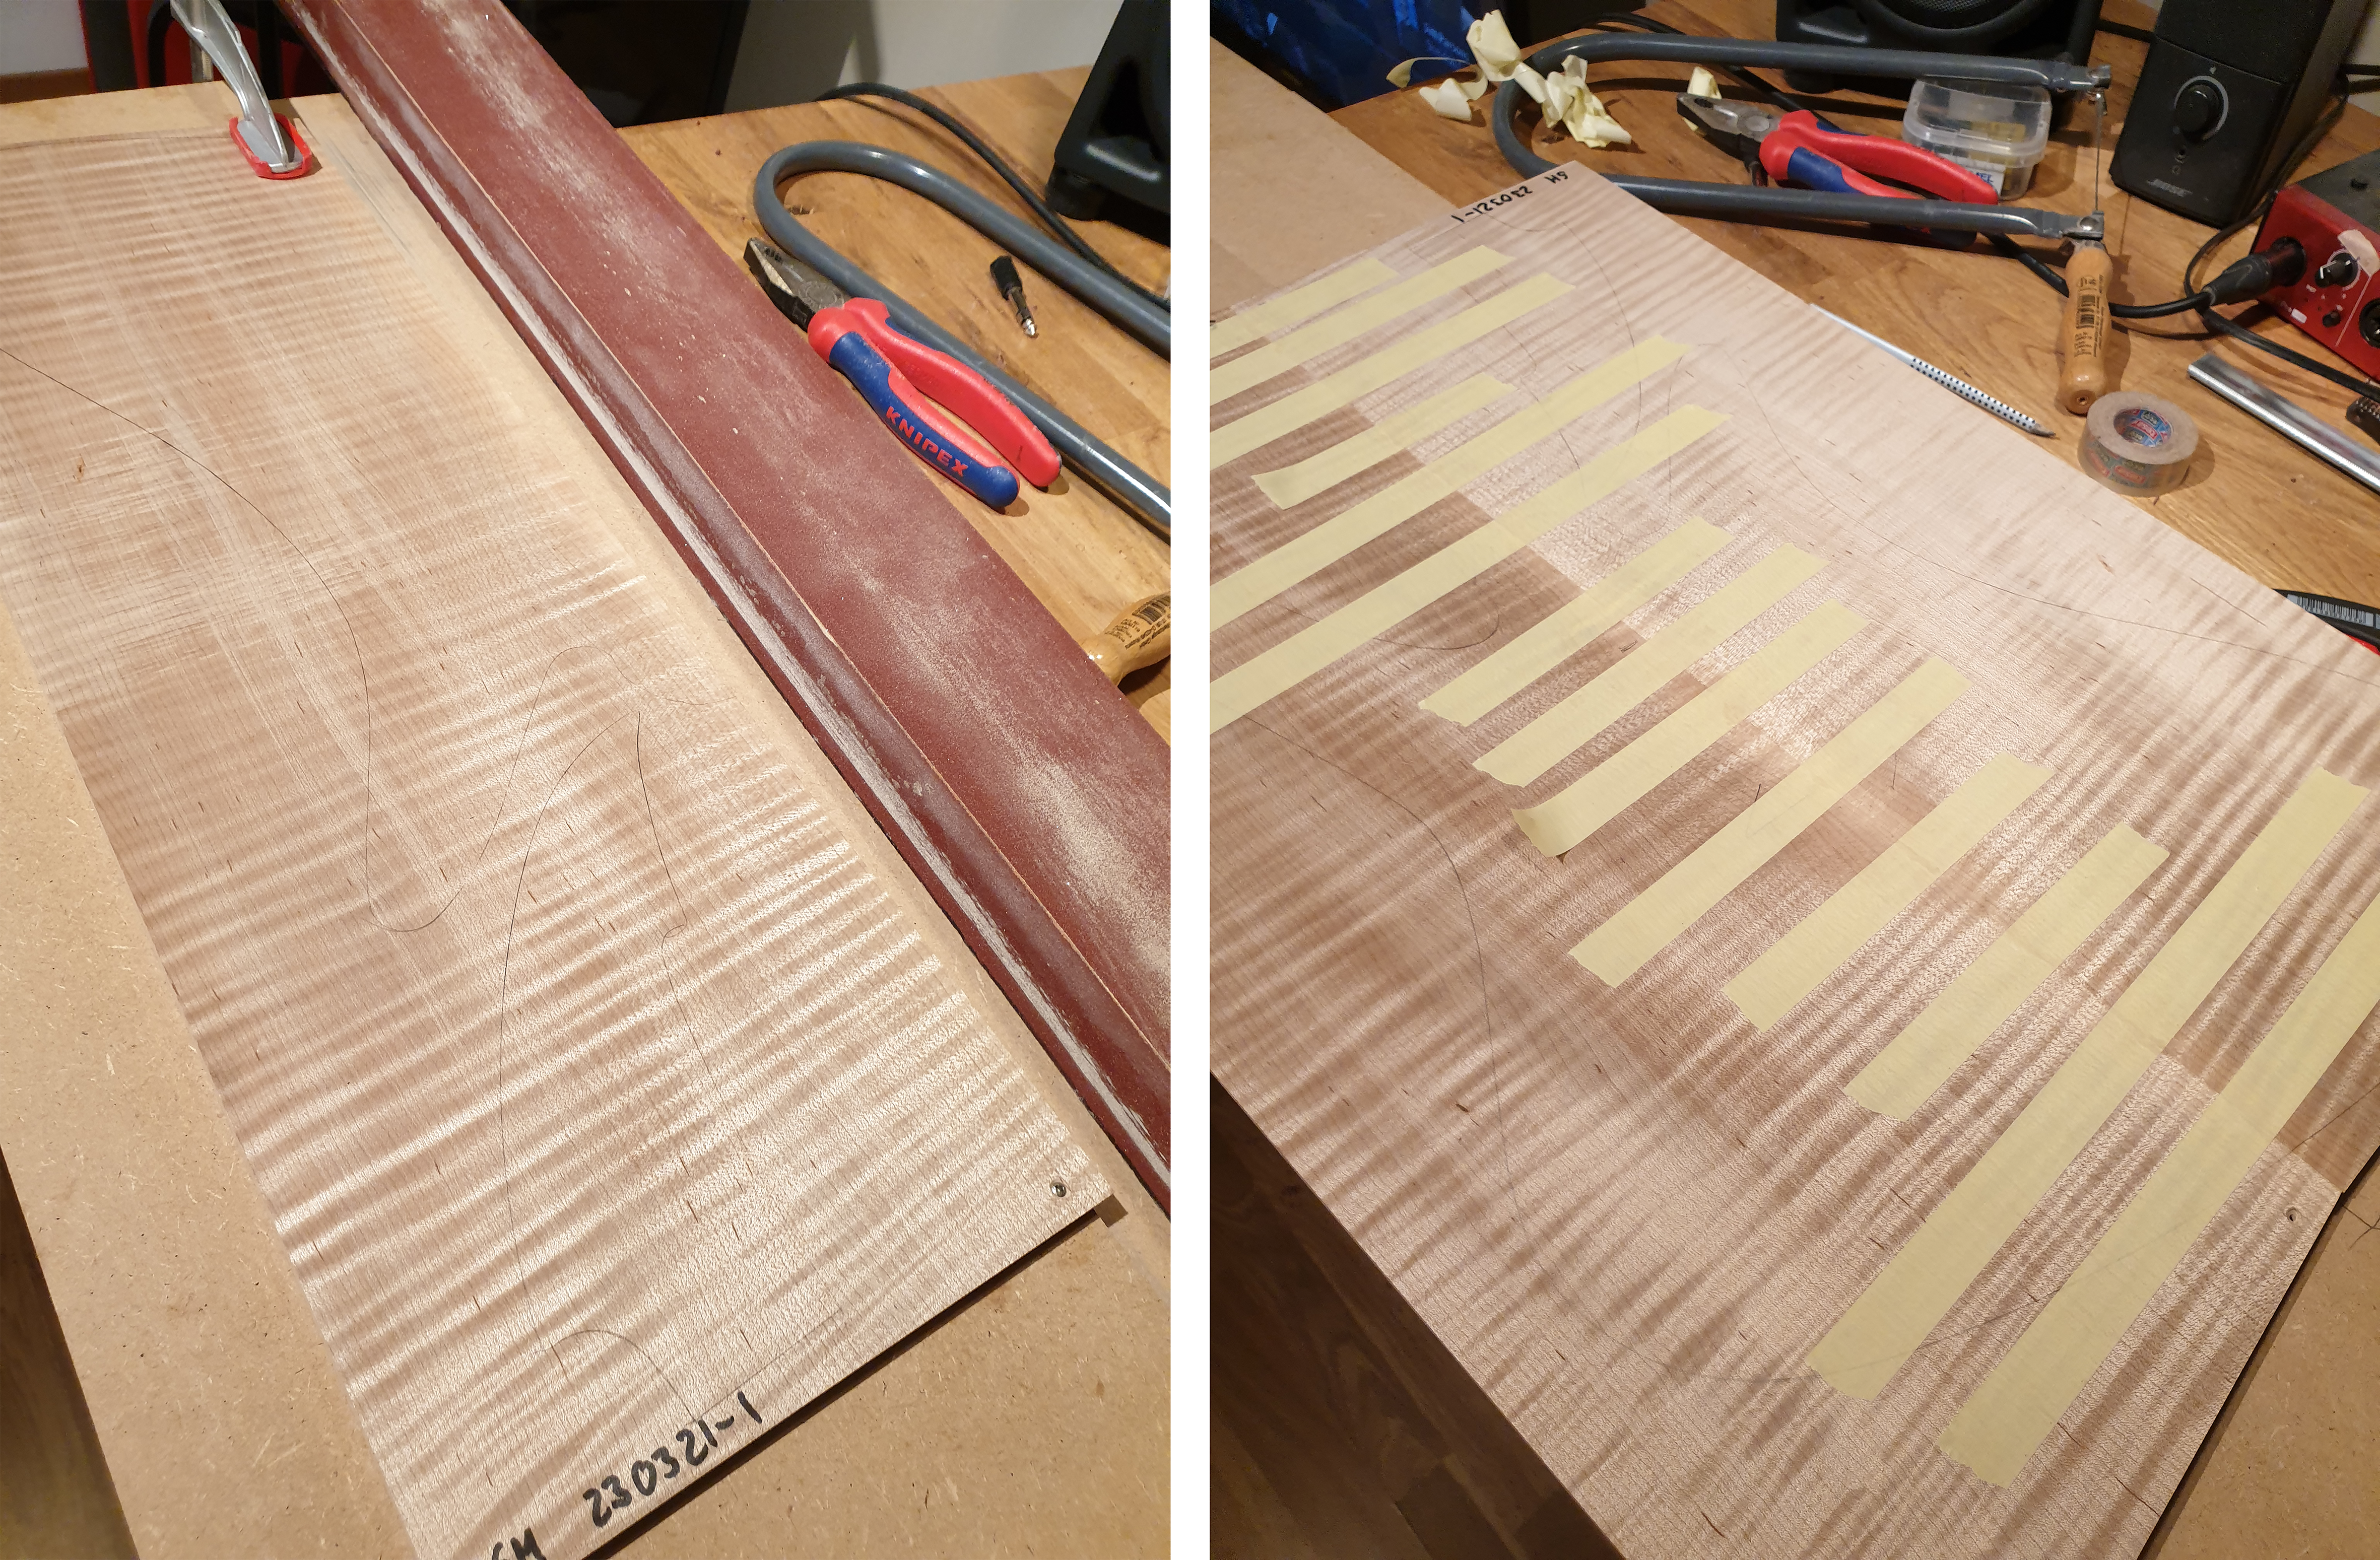
I also got started on the top by jointing the center joint and gluing it up. It's quite heavily flamed, so I used a sanding beam instead of the hand plane.
The trussrod and some more parts arrived yesterday, so I could move ahead and routed the TR channel. Now that I didn't need the straight side of the neck anymore, I also cut along the sides and headstock. It will have to wait at this stage until the inlay is done.
I also got started on the top by jointing the center joint and gluing it up. It's quite heavily flamed, so I used a sanding beam instead of the hand plane.


