Lab Journal #12: Time for the fingerboard. Normally I would cut the neck to it's final shape then glue on the fingerboard, slightly oversize, and trim it flush with a router. Since I still have a solid neck black to work with I am going to precut the fingerboard to it's final shape and actually use it as a guide for cutting the neck profile with a router. To cut the fingerboard taper I am going to use a trick from my commercial woodshop days. This is a variation of a jig that I use to cut multiple identical parts on the table saw, but it can be modified for many uses.
I will start with a plywood board. Rip the board to width and leave the saw set where it is.
Draw the taper on the fingerboard and set it on the plywood with the cut lines even with the edge of the board.
With the fingerboard held in place, nail or screw 1 long block of wood against the edge of the fingerboard and then a short block to hold the back edge of the fingerboard.
Now, with the table saw still set to the width of the plywood, run the plywood through with the fingerboard set in the blocks, leaving the edge cut exactly along the cutline.
Turn the fingerboard around, move the block, and repeat the same steps for the other side of the taper. This leaves you with a perfectly tapered fingerboard.
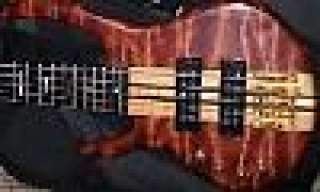
Since the fingerboard is cut to size I can go ahead and install the position markers now. I laid the fingerboard against a fret template and marked the major fret positions at 35" scale. This bass was originally going to be a 6 string till this competition came along so I have decided to go with a 29 fret board to give me the range of a six. The one issue with the Pale Moon is that the side of the fingerboard facing the player is light colored. My main bass for the last fifteen years has a maple board with black dots and in low light situations the black dots get lost and finding positions gets much more difficult. Also, a black dot might just blend in with the figure of the fingerboard. This bass will be used in orchestra pits and other low light environments so I need a marker that will stand out.
I sandwiched a piece of maple veneer between pieces of black fiber veneer.
I then cut matching notches 3/16" deep with the band saw and then squared them with a file. I used CA glue to glue the markers into place and sanded them flat. I think these will work perfectly.
I decided to go with something a little more festive for the 12th and 24th fret so I sandwiched a thicker piece of maple between 2 of the original markers.
And installed the 12th fret:
And the 24th fret. Here you can see the extended fingerboard. The pencil line represents the 24th fret.
Finally, since I ran out of fiber veneer I glued three very thin wenge strips under the fingerboard to leave a black accent line between the fingerboard and neck. Trim them to the fingerboard and it is ready to be glued.
As Miziomix said, next comes the neck shaping. I have been working in the lab and I have finally found a solution for carving the neck out of this giant blank. I have to admit, working with the fingerboard and headstock veneer on a solid neck block is far easier than trying to work with a neck that is close to shape. Until next time my friends, sleep calls with mad dreams of world domination...




 , by that design.


 .
.








 Guess it's time to take off the lab coat and rosin up the old bow...


