• TalkBass has been independent since 1998. Add your voice.
    Create a free account to reply to discussions, view embedded media, and browse with fewer display ads.
    Join freeLog in
    Want zero display ads or expanded classifieds tools? Compare plans.

Double Bass I was shopping for an igloo

IMG_6707.JPG
IMG_6744.JPG

You know the type of fiberglass doghouse that's shaped like the domicile of the far North? So when I typed in "doghouse", up popped the add that read something like this:

For sale
Old doghouse bass made in the 1930's.
$250
Call Marvin

No pic was included, it was 200 miles away.
I began driving west immediately, before Marvin even answered my call. When he did call back, I asked him to tell me about the bass.
"Well, its an old American Standard, needs a the neck shimmed a little bit."
I told him I would there by 7PM.
Well, ol' Marvin wasn't lyin'.

My new/old bass made its debut here on the forum as the subject of James Condino’s March CSI Luthier post. James has been very helpful and encouraging as I venture on my first bass overhaul. I hope to share progress reports and ideas with the TB members.
 
".....needs the neck shimmed a little bit."[/QUOTE] ;)

That pretty much sums up half the phone calls I get. When they arrive, the neck looks like this one....and the person is all worked up like it is my fault.....

Since the lockdown and travel limitations, I've been doing a lot of facetime lessons for projects like this over the last two months! Feel free to give me a shout.

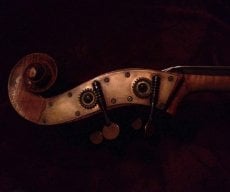
From what I've seen on my end, progress is coming quite well. You should show off the new neck and scroll graft!
 
Last edited:
AD6E3D11-180E-479B-9DF2-27EA737D4576.jpeg
651EA1CD-3CC8-4364-8D2D-843134A48757.jpeg

I “appropriated” an idea from James C’S web page and fabbed a routing jig to begin the rehab work. He graciuosly donated an hour one evening with me on the video link , loading me up with ideas, suggestions, assignments, and motivation.
Using my Engelhardt as a shorter scale model, a day or two later a neck stub began to take shape. Sorry James, its a two piece riftsawn, butterfly glue up job, but the carbon fiber stiffeners are en route.
 
I'm guessing the whole thing's epoxied together. Isn't the whole end pin assy just a taper fit into a tapered socket in the block? I would think that you could tie a 3 or 4 lb weight to the end pin thumbscrew with a heavy nylon cord and use it like a slide hammer and the whole thing would just pop loose. But what do I know?
 
  • Like
Reactions: Roxbororob
Depends. If the endpin plug is also glued in with a difficult to remove glue, might have to ream the endpin plug out and replace the whole assembly.

I'm facing the same thing with my Alcoa, someone in the past glued the original old hardwood endpin plug in place with some sort of aircraft grade contact cement. The plug is radially cracked in a number of places, but hasn't failed yet. I have a new CF endpin / endpin plug assembly waiting to install, but I'm just waiting for the old endpin plug to fail at which time I'll go for it...

From some sage advice provided by @james condino, I understand I might be able to get by without buying the endpin reaming tool, which is pricey, by drilling out the old plug as well as possible with a drill motor and then using the new plug as a sanding block to re-taper the hole in the endblock area, but I'm still waiting for the old plug to finally fail.

That old hardwood endpin plug and the old wooden endpin itself are the only original wooden parts still on this Alcoa. I do still have the original sound post, but it's been retired in favor of a custom adjustable sound post.
 
  • Like
Reactions: Hogslapper
Thanks for the ideas/suggestions. I pulled the endpin by hand and it broke at the steel collar. Obviously the reason for the peanut butter epoxy. I would like to resolve this now while I have the top off. I am going to try an EZ-out in the pin hole next. I do want to preserve the original button.
 
  • Like
Reactions: Don Hergert
Thanks for the ideas/suggestions. I pulled the endpin by hand and it broke at the steel collar. Obviously the reason for the peanut butter epoxy. I would like to resolve this now while I have the top off. I am going to try an EZ-out in the pin hole next. I do want to preserve the original button.

Since you've got the top off, it seems like you could just drive the endpin assembly out from the inside with a drift and a big hammer (what the millwrights call a BFH; I like the big red Stanley dead blow hammers, myself). Then you can figure out how much of it you can salvage.
 
Well, you know to go slow.

Something a lot of people don't realize is that the BFH can actually allow you to use MORE finesse, because with its weight working for you, you can use less of your own strength to move something so you have better fine control over just how hard you tap something. Trying to drive something out with a too-small hammer is like trying to solder with an iron that's too small. In one case you just batter everything to hell, where one solid tap with the right size "commander" would just have got-er done. In the other case you end up over heating everything within five feet of the solder joint rather than getting the immediate vicinity up to temp, making the joint, and getting the heck out of there.
 
  • Like
Reactions: M0ses
I wasn’t aware it was a Lutherie tool!

Any time I’ve ever popped the top on a bass, I’ve used my Swiss Army penknife. I’ve used crutches as go-bars to press a sunken top back into round. EVERYTHING is a lutheirie tool if you’re creative.

To get that endpin out I’d set the corpus upright and wick a tiny bit of machine oil or melted parrafin into the moving parts, let it soak for a week, and then try to turn the pin with channel locks. Generally if you can get it to break free, you’re basically set.
 
You can destroy that endpin with no worries- NOBODY I know wants to keep that part original!

With the BFH, you risk stressing the block and its connections with the ribs and the back. I don't have photos, so I'll try to describe my preferred method:

- remove the endpin lock key
- take a 2x4 or larger size scrap of wood
- drill a hole in 2 x 4 large enough for the whole endpin to fit through it, but still secure around the perimeter next to the endpin hole.
- slip 2 x 4 over the endpin
- Put a large C clamp going against the 2x4, over the ribs & block, then making contact on the inside of the endpin, so that in a very controlled manner you should be able to gradually tighten the clamp such that it "pops" the endpin back away from the body while keeping everything else intact and secure...

If no luck on the first attempt: repeat multiple times until clamp, 2x4, and BFH smash the whole thing to splinters, then call me for a replacement. I have a drawer full of old janky endpins that are technically "vintage, period correct"

Every old American Standard that I have been inside of has a couple of giant compression circles on the inside of the spruce blocks where they use one specific clamp to glue them in and someone liked a LOT of pressure.