
Enjoy the benefits of a premium membership!
Upgrade Account
-
TalkBass has been independent since 1998. Add your voice.
Create a free account to reply to discussions, view embedded media, and browse with fewer display ads.
Join free Log in
Want zero display ads or expanded classifieds tools? Compare plans.
You are using an out of date browser. It may not display this or other websites correctly.
You should upgrade or use an alternative browser.
You should upgrade or use an alternative browser.
Laguna burger build
- Thread starter RichterScale
- Start date
More options
Who Replied?


I don't recall seeing one from the old days either, not specifically on neck-thrus. Might be a handy resource  It would be good collectively put some thought into revamping the stickies as they aren't all super current... I betcha @Joshua would be supportive of such an initiative.
It would be good collectively put some thought into revamping the stickies as they aren't all super current... I betcha @Joshua would be supportive of such an initiative. 
It's tough. I asked that same question in my build thread and a few people shared their list for various "parts" of the build, but not a comprehensive list all the way through. The problem you're gonna run into (and this goes for the sticky thread idea too) is that everyone kind of does it a bit differently. One guy may do side dots before gluing wings on, the next guy doesn't. Add that to the myriad of other things that everyone does in a different order and it'll most likely turn into a "why would you do it that way?" thread.

That's okay. I know there's no way to keep any type of thread completely orderly.It's tough. I asked that same question in my build thread and a few people shared their list for various "parts" of the build, but not a comprehensive list all the way through. The problem you're gonna run into (and this goes for the sticky thread idea too) is that everyone kind of does it a bit differently. One guy may do side dots before gluing wings on, the next guy doesn't. Add that to the myriad of other things that everyone does in a different order and it'll most likely turn into a "why would you do it that way?" thread.
I want to hear how all the experienced builders do it (and hear any issues new builders are experiencing). Even if there are different approaches, as long as they are successful and they explain how/why they do it that way.
It would definitely be helpful to at least me. I can sift through the subjective debates and still get good info out of it.
So this is what I cobbled together from my thread. I think @Gilmourisgod was the biggest contributor, but I may be wrong there. -
Neck -
1. Headstock angle
2. Truss rod route - for a head-adjust neck, carry the route all the way through the headstock, keeping it level of course
3. Headstock ears (if needed)
4. Headstock shaping
5. Tuner hole drilling
6. Headstock sanding
7. Fretboard slotting (if not already slotted when purchased)
8. Truss rod installation (important!)
9. Fretboard gluing
10. Match fretboard taper to neck taper
11. Fretboard face inlays (if any...)
12. Fretboard radius (if not already radiused when purchased)
13. Fretboard sanding to at least 220
14. Fretting (installation, end dressing, preliminary levelling)
15. Neck carving
16. Heel transition and headstock transition (volute)
17. More neck carving
18. More heel transition and headstock transition (volute)
19. Sneaking up on the final neck carving
20. Sanding the neck carve to at least 180
21. Fine-tuning the neck carving
22. Sanding the neck carve again
23. Side dots (oh yeah, I guess I forgot that step on my build )
)
24. (after which comes the series of body operations)
Keeping in mind that this list does not take into account any rough cutting or glue up of various laminates. So pretend you had a neck blank in hand at step 1.
Unfortunately, I never got a list for body operations. But I could say, based on my experience so far, it would look something like this -
Body -
1. Determine break angle of neck/bridge
2. Rough shape wings
3. Glue wings to neck blank
3a. If using a laminate top, I suggest routing your wiring channels from your pickup locations to the electronics cavity now. I see others do it and I wish I was using a laminate top so I could have done it, because drilling later is gonna su-u-u-uck.
4. Surface top, or glue top on if using laminate top. Get the top flat all the way across
5. Same for back
6. Shape body, neck blank "tail"
7. Carve bevels (if required)
8. Carve neck heel transition
9. Determine and place bridge (this is really as far as I've gotten)
10. Determine and mark pickup locations, rout cavity
11. Determine electronics cavity and route it out
12. Drill wiring holes from pickups to cavity, bridge ground, etc. (if you did step 3a ignore this)
13. Sand
14. Sand
15. Sand
16. Sand
17. Sand
18. Sand
19. Sand
20. Sand
21. Start considering finish, but keep sanding
22. I really don't know, from what I understand the sanding doesn't ever end.
Hope that helps! Keep in mind there's about a Brazillian other things that I probably left out because I'm a rookie who hasn't actually completed a build yet. So yeah, others are gonna go "You forgot...." about "a leventy-dozen" times as my old man always say.
Neck -
1. Headstock angle
2. Truss rod route - for a head-adjust neck, carry the route all the way through the headstock, keeping it level of course
3. Headstock ears (if needed)
4. Headstock shaping
5. Tuner hole drilling
6. Headstock sanding
7. Fretboard slotting (if not already slotted when purchased)
8. Truss rod installation (important!)
9. Fretboard gluing
10. Match fretboard taper to neck taper
11. Fretboard face inlays (if any...)
12. Fretboard radius (if not already radiused when purchased)
13. Fretboard sanding to at least 220
14. Fretting (installation, end dressing, preliminary levelling)
15. Neck carving
16. Heel transition and headstock transition (volute)
17. More neck carving
18. More heel transition and headstock transition (volute)
19. Sneaking up on the final neck carving
20. Sanding the neck carve to at least 180
21. Fine-tuning the neck carving
22. Sanding the neck carve again
23. Side dots (oh yeah, I guess I forgot that step on my build
)24. (after which comes the series of body operations)
Keeping in mind that this list does not take into account any rough cutting or glue up of various laminates. So pretend you had a neck blank in hand at step 1.
Unfortunately, I never got a list for body operations. But I could say, based on my experience so far, it would look something like this -
Body -
1. Determine break angle of neck/bridge
2. Rough shape wings
3. Glue wings to neck blank
3a. If using a laminate top, I suggest routing your wiring channels from your pickup locations to the electronics cavity now. I see others do it and I wish I was using a laminate top so I could have done it, because drilling later is gonna su-u-u-uck.
4. Surface top, or glue top on if using laminate top. Get the top flat all the way across
5. Same for back
6. Shape body, neck blank "tail"
7. Carve bevels (if required)
8. Carve neck heel transition
9. Determine and place bridge (this is really as far as I've gotten)
10. Determine and mark pickup locations, rout cavity
11. Determine electronics cavity and route it out
12. Drill wiring holes from pickups to cavity, bridge ground, etc. (if you did step 3a ignore this)
13. Sand
14. Sand
15. Sand
16. Sand
17. Sand
18. Sand
19. Sand
20. Sand
21. Start considering finish, but keep sanding
22. I really don't know, from what I understand the sanding doesn't ever end.
Hope that helps! Keep in mind there's about a Brazillian other things that I probably left out because I'm a rookie who hasn't actually completed a build yet. So yeah, others are gonna go "You forgot...." about "a leventy-dozen" times as my old man always say.

- Apr 18, 2008
- 16,013
- 1
- 31,725
- Disclosures
- I'm highly opinionated and extremely self-assured
Nice @TerribleTim68 ! (Especially steps 13 to the end…  )
)
Sometimes there is some flexibility. For instance, sometimes I taper the neck and then route the truss rod slot, and other times it happens in the reverse order.
But I’m shaking my head at the people who glue the wings on before doing side dots…..
)Sometimes there is some flexibility. For instance, sometimes I taper the neck and then route the truss rod slot, and other times it happens in the reverse order.
But I’m shaking my head at the people who glue the wings on before doing side dots…..
Yeah, like I said, I haven't gotten that far yet, but I'm going on what I've learned from reading other build threads.Nice @TerribleTim68 ! (Especially steps 13 to the end…
…..

Yeah..........But I’m shaking my head at the people who glue the wings on before doing side dots…..



I don't recall seeing one from the old days either, not specifically on neck-thrus. Might be a handy resource
You betcha! No idea how to go about it, but I'm all for whatever all y'all regulars think will help the place the most.
I wasn't really thinking "sticky", but if it gains traction and we can get more of "those guys" posting in it, I'm good with it being stickied.You betcha! No idea how to go about it, but I'm all for whatever all y'all regulars think will help the place the most.

I took a break of more than 20 years30+ yrs doing frets? I wish you were here doing mine right now.

I'm not at all happy with how they are coming out now. The next one I'm going to try wood glue followed by a CA chaser to fill any last gaps. I might also just tap them in and then CA the end gaps. It's really only the ends I've ever seen come up.
I've watched a ton of YouTube stars tap them in and wick thin CA into the ends of the slots. Of course, that doesn't work if you bind the neck, but still.I took a break of more than 20 years
I'm not at all happy with how they are coming out now. The next one I'm going to try wood glue followed by a CA chaser to fill any last gaps. I might also just tap them in and then CA the end gaps. It's really only the ends I've ever seen come up.
I did a search for fret crowing and found a thread from a few years ago where Bruce mentioned using a wet stone with a groove.
I had a small stone, not sure what it was from, but really small, like 3/8 x 3/4. I took a needle file and made a groove on 3 sides, each one a little shallower than the next. Then proceeded to crown the frets. A tiny drop of oil on the stone about every 3-4 frets. It seemed to be working. After that I used the needle file to put a groove in a small block of stiff foam rubber and wrapped it with 600 then 800, loosely and lightly trying to take out scratches. I'm not going to attempt to get them perfect and polished, just smooth. Hopefully I was able to save them after butchering them with the leveling and triangle file. A little more work and then I'll string it up and test it. At this point, I'm not working for a nicely finished bass. I'm working for a good sound clip.
I didn't take any pics last night. I'll try to get a few tonight. Don't look if you're squeamish.
I had a small stone, not sure what it was from, but really small, like 3/8 x 3/4. I took a needle file and made a groove on 3 sides, each one a little shallower than the next. Then proceeded to crown the frets. A tiny drop of oil on the stone about every 3-4 frets. It seemed to be working. After that I used the needle file to put a groove in a small block of stiff foam rubber and wrapped it with 600 then 800, loosely and lightly trying to take out scratches. I'm not going to attempt to get them perfect and polished, just smooth. Hopefully I was able to save them after butchering them with the leveling and triangle file. A little more work and then I'll string it up and test it. At this point, I'm not working for a nicely finished bass. I'm working for a good sound clip.
I didn't take any pics last night. I'll try to get a few tonight. Don't look if you're squeamish.
First, no close ups. But you can still see how I roughed up the fingerboard.
To be honest, I'm not really sure why I rushed through at the end and made a mess of everything. I really did stop being careful. Who knows. I just have to solder and string it up tomorrow. I may go back and do some touchups later, maybe try to clean up the finger board, not sure. But for now I want to get it playing and focus on the next bass.
Also looking at some alternative knob options.
To be honest, I'm not really sure why I rushed through at the end and made a mess of everything. I really did stop being careful. Who knows. I just have to solder and string it up tomorrow. I may go back and do some touchups later, maybe try to clean up the finger board, not sure. But for now I want to get it playing and focus on the next bass.
Also looking at some alternative knob options.
Attachments


- Apr 18, 2008
- 16,013
- 1
- 31,725
- Disclosures
- I'm highly opinionated and extremely self-assured
Nice! Definitely has more flair, and still looks quite ergonomic.
I've been looking at the bare headstock for so long, it kinda looks funny with tuners now.

Rôckhewer
Commercial User
- Feb 28, 2015
- 2,922
- 9,028
- Disclosures
- Owner/Builder- RockHewer Custom Guitars LLC
Bass looks cool af.To be honest, I'm not really sure why I rushed through at the end and made a mess of everything
Don't feel bad.
I've gouged up a board so bad...I felt it necessary to cut individual sanding backer boards from plastic... ...one for each size fret-inbetween.... to get an even finish (forced to sand cross grain).
....
Wait...
 did I say that out loud?
I only admit the big mistakes.
...
 besides...it didn't leave the shop that way.
"an Error Doesn't Become A Mistake Until You Refuse to Correct It."
- John F. Kennedy
Thanks man.
I'm gonna do the whole Rocky comeback montage. I need to build some quality jigs for radiusing and leveling/jointing and I need a few task-specific tools.
I think the best way to remedy these errors is to not monkey around with a halfass rebuild of a bass I didn't like and just build a killer first scratch build. And do a good job!
With all the help and knowledge around here and my background with building stuff, there's no reason I can't build a nice bass, even with a lack of experience.
No slack or excuses on the next one.
Unless I get held up with losing a limb or getting decapitated in a car wreck,... But that's not much of an excuse either.
I'm gonna do the whole Rocky comeback montage. I need to build some quality jigs for radiusing and leveling/jointing and I need a few task-specific tools.
I think the best way to remedy these errors is to not monkey around with a halfass rebuild of a bass I didn't like and just build a killer first scratch build. And do a good job!
With all the help and knowledge around here and my background with building stuff, there's no reason I can't build a nice bass, even with a lack of experience.
No slack or excuses on the next one.
Unless I get held up with losing a limb or getting decapitated in a car wreck,... But that's not much of an excuse either.
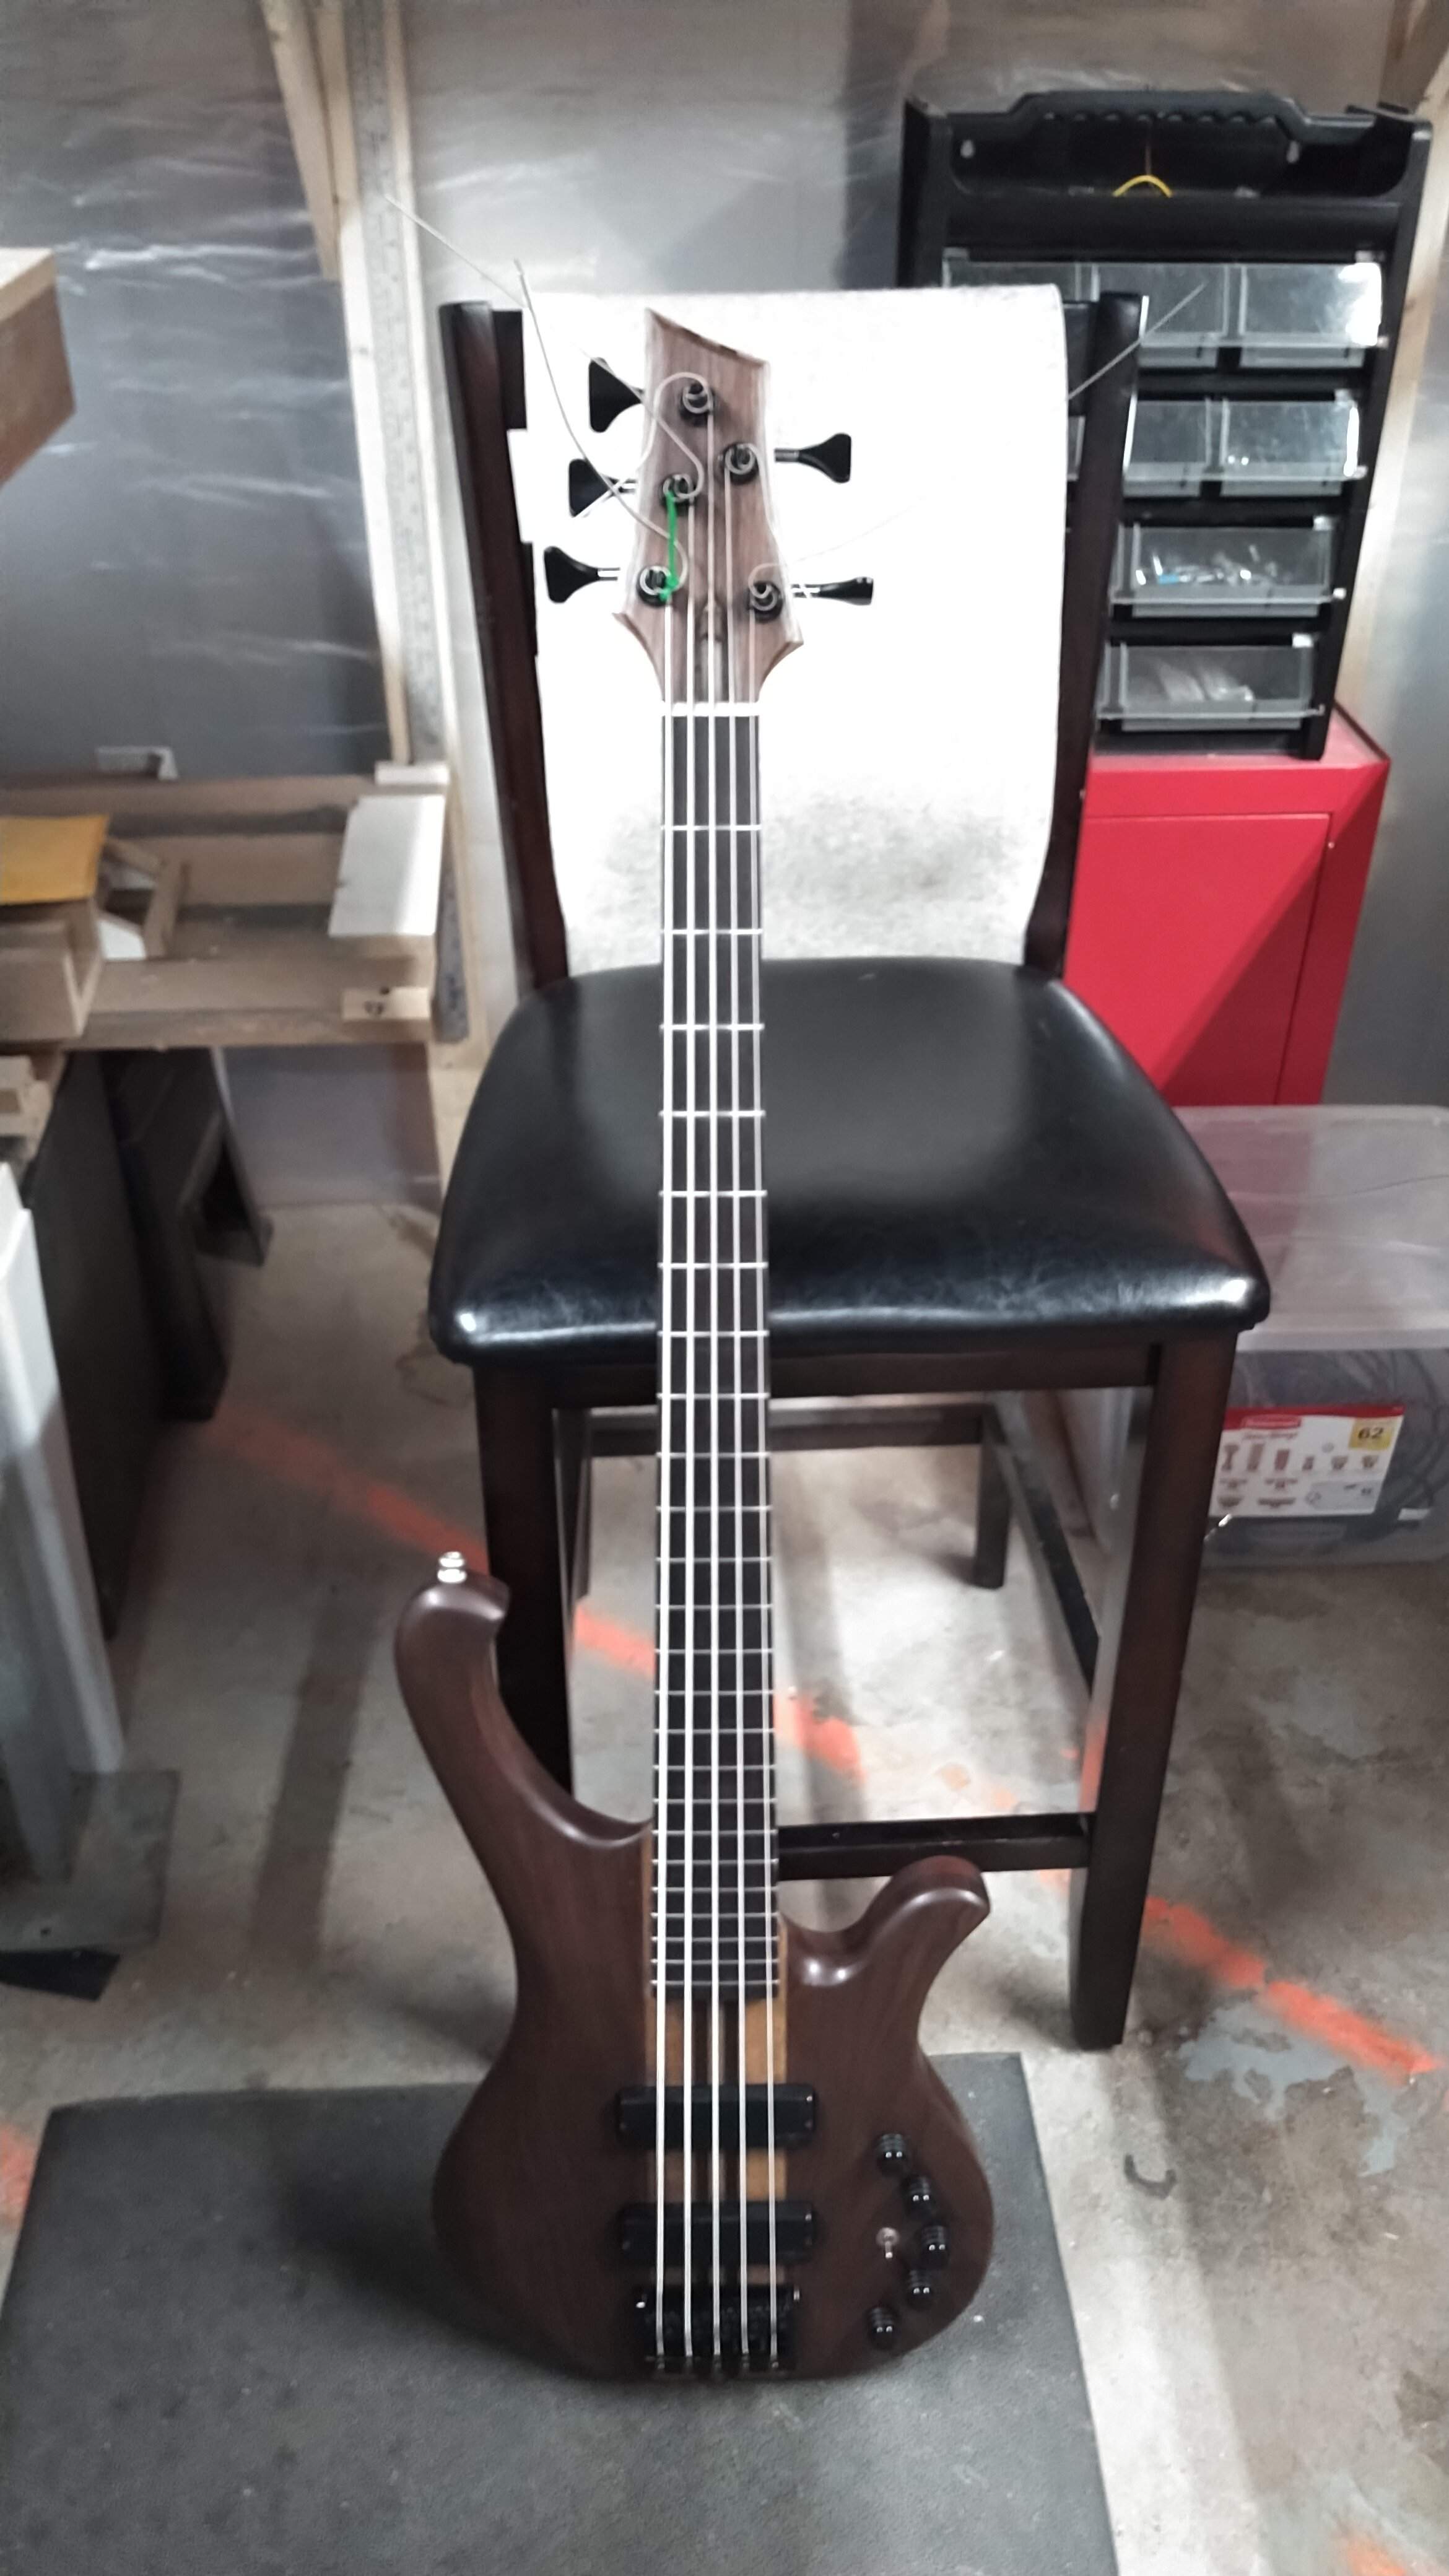
Got everything soldered and control cavity buttoned up. Plugged it in before the strings were on and tapped the pups,.... They made noise, all the knobs worked, no loud buzzing and none of the magic smoke leaked out, so should be good to go. Got the strings on and the nut is way too high. I made the fingerboard thicker than the original so I put a piece of walnut veneer down to raise the nut. It was way too much. So, I'll get that worked out tomorrow and then try my hand at setup and fine tuning. I really just put the strings on to see what it looks like and make sure the truss rod wouldn't break or fingerboard didn't pop off.
I honestly didn't mean to make the pic blurry. I even hit the focus button and took 3 pics, but they're all a little blurry.
That's ok, you get the gist.
From 4' away, the shiny strings hiding the board and a little blurry, it actually doesn't look too bad.
(Kinda like dating back in the day).
I honestly didn't mean to make the pic blurry. I even hit the focus button and took 3 pics, but they're all a little blurry.
That's ok, you get the gist.
From 4' away, the shiny strings hiding the board and a little blurry, it actually doesn't look too bad.
(Kinda like dating back in the day).


