• TalkBass has been independent since 1998. Add your voice.
    Create a free account to reply to discussions, view embedded media, and browse with fewer display ads.
    Join freeLog in
    Want zero display ads or expanded classifieds tools? Compare plans.

Rattle Can Refinish Club

I did this Epiphone-made Toby Deluxe V with minwax poly-shade on the back and minwax oil-based clear all over. Its the first time I've done something like this, and the first time I wet sanded and buffed (I also added the woods on top)

Wow! I’m sure your refinish is an upgrade from original! I think most everybody here is way ahead of me. That’s ok, you guys are inspiring. Good job!
 
  • Like
Reactions: Reedt2000
Only one recommendation... as you may have seen in pics of bodies being painted/finished - a small footprint connection to your body at the neck rout is the best way to go. Your attachment that fills the cavity (like a neck) will lead to issues. Overflow of the finish is easy to carefully remove from the cavity (if you choose) or just avoid major overspray there with a minimal bar/support.

Thanks for the advice. I’ve always taped up the neck pocket to keep it from getting layers and layers of finish in there. Most of the necks and bodies on my guitars have a very good, tight fit which is why I tape them up.

I made an effort to fill up the neck pocket for stability/security.

Could you elaborate on what issues it would cause? I can easily trim it down. I was just wondering the reason to do so.

Thanks for the reply!
 
Wow! I’m sure your refinish is an upgrade from original! I think most everybody here is way ahead of me. That’s ok, you guys are inspiring. Good job!

If you look, you'll find its not perfect. I did a lot of reading here and online and watched a bunch of demo videos. I figure everyone has their first project at one point or another, no reason not to dive in. Prep work really is the key to a good result. If you educate yourself and take your time, there is no reason you can't do a good job. I sanded my project back a number of times during the work, but I also learned quite a bit :D
 
If you look, you'll find its not perfect. I did a lot of reading here and online and watched a bunch of demo videos. I figure everyone has their first project at one point or another, no reason not to dive in. Prep work really is the key to a good result. If you educate yourself and take your time, there is no reason you can't do a good job. I sanded my project back a number of times during the work, but I also learned quite a bit :D
The very, unfinished, latest version of mine....:eek:...

IMG_1165.jpeg
 
The very, unfinished, latest version of mine....:eek:...

View attachment 3990900
!@# $%^& it Freddy, you drive me absolutely crazy o_O

Every time you put down your ability, your plan, and your project...

...you post a pic that looks amazing :woot:

I don't know how much more I can take :roflmao:

(Seriously, that looks great. With the multi-color-glowy-faux-frets, it really is a well put together design, despite your insistence to the contrary ;))
 
!@# $%^& it Freddy, you drive me absolutely crazy o_O

Every time you put down your ability, your plan, and your project...

...you post a pic that looks amazing :woot:

I don't know how much more I can take :roflmao:

(Seriously, that looks great. With the multi-color-glowy-faux-frets, it really is a well put together design, despite your insistence to the contrary ;))
Thanks man.....I appreciate the kind words.....

Just praying that I can get the rest of the clear on without further stress.....:nailbiting:
 
  • Like
Reactions: Reedt2000
Thanks for the advice. I’ve always taped up the neck pocket to keep it from getting layers and layers of finish in there. Most of the necks and bodies on my guitars have a very good, tight fit which is why I tape them up.

I made an effort to fill up the neck pocket for stability/security.

Could you elaborate on what issues it would cause? I can easily trim it down. I was just wondering the reason to do so.

Thanks for the reply!

I tape off the pocket also if a tight fit, it can go either way depending on that. (allowing some overspray or not)

This shows where a metal paddle was connected to the neck pocket for spraying. (ghosted area w/writing on it) Overspray is minimal. The small footprint flat paddle allows hitting the edges, which having the pocket filled like having a neck heal there would tend to build up spray between the pocket edges and that tight insert. It also may not get the edges sprayed sufficiently. That is my main concern having it filled as a neck heal.
upload_2020-9-21_8-6-25.jpeg
 
  • Like
Reactions: Bassist59
I tape off the pocket also if a tight fit, it can go either way depending on that. (allowing some overspray or not)

This shows where a metal paddle was connected to the neck pocket for spraying. (ghosted area w/writing on it) Overspray is minimal. The small footprint flat paddle allows hitting the edges, which having the pocket filled like having a neck heal there would tend to build up spray between the pocket edges and that tight insert. It also may not get the edges sprayed sufficiently. That is my main concern having it filled as a neck heal.
View attachment 3991243

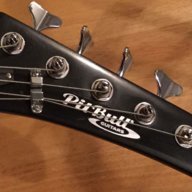
Copy that. That makes sense - possible issues with the edges, thanks for the input. This refinish of the inexpensive/abandoned Dean Zone bass is kind of a practice run for a raw, unfinished V bass kit I’ve got coming in November. I might adjust my holder now, thanks.

I did a few coats weeks ago using an inadequate wire holder. I should peel back that painters tape a bit. Fortunately, I checked and it appears the edges got sprayed sufficiently this time.

A31C56FD-8C4A-481D-8966-A9B43C6F6BB1.jpeg


On my upcoming kit build, I’m going for the most professional job I can do in the garage. I always liked the neatness of Warmoth’s replacement bodies, for example, with no finish in the neck pocket. That’s what I’m going to strive for. It’s impossible to do this with a refinish of an old guitar, but I’m going to give it a try with my new body.

It would be cool to get a wood burner branding iron and burn in a logo like they did....now I’m getting OCD but that would be cool, IMO. (It’s probably really only been rubber stamped )

D1030C0C-EA9B-46D7-AA50-F5864678E5EE.jpeg
 
Last edited:
If you like the paint job you’d love the electronics. The switch changes the volume and tone knobs between 500K and 250k Pots.

It was an interesting wiring experiment which makes precisely zero difference to the tone.
Sounds like an interesting experiment. I've seen where guys have put switches in to use different caps and cap values. On YouBoob, I couldn't tell any difference and I have a decent stereo setup on my computer.
 
  • Like
Reactions: 5tring
I did some light wet-sanding with 800 grit and sprayed 1 more coat of color.

The streaky bits that were bugging me seem to be a non issue now! I think there's a little debris that got stuck in the finish though, so I'm gonna do another round or 2 of this sand/spray over the next few days, and I should be ready to shoot clear in a week or 2!

20200921_165045.jpg
20200921_165121.jpg
 
I did some light wet-sanding with 800 grit and sprayed 1 more coat of color.

The streaky bits that were bugging me seem to be a non issue now! I think there's a little debris that got stuck in the finish though, so I'm gonna do another round or 2 of this sand/spray over the next few days, and I should be ready to shoot clear in a week or 2!

View attachment 3991632 View attachment 3991631
I was painting in my driveway and a lot of debris was getting into the finish. I would have been done 2 weeks ago if it hadn't been for that.
 
  • Like
Reactions: primussucks9126