• TalkBass has been independent since 1998. Add your voice.
    Create a free account to reply to discussions, view embedded media, and browse with fewer display ads.
    Join freeLog in
    Want zero display ads or expanded classifieds tools? Compare plans.

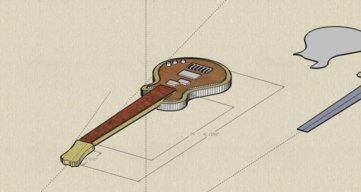
singlecut chambered.

I was thinking the SAME thing. I bet it will look even better ones its finished.

its only sanded to about 220 at the moment so I hope sanding it to higher grits, sealing the wood with CA, and a satin finish, will help bring out the flame.

I decided to CA the fb. I am pretty much wrapping a piece of painter's tape around the back of my flush cut saw, and jamming that into a fret slot, finger smearing 1/2 the fret, putting the fret slot blocker in the other slot, and doing the other half. Working pretty good so far. Taking a while though. Been working on it 2 hours tonight, and i am only up to fret 7. looks good though. I am glad that there is about zero chance it will loose any of its sweet color now. Can't wait till it gets sanded all the way up to 800GRIT Should really be insane with color then.
Also, if all goes well, this friday or monday, I can ingrave the fingerboard and headstock, and fret the fingerboard. Still trying to figure out my design for the logo, and the 12th fret, though. I would LOVE help designing that.
 
all you need for fretting is a rubber mallet with a small head and if you want to glue them in regular old super glue. clean out the slot put a bead of super glue push it in 220 sand the excess off and hammer the fret in. o yea and a fret bender wich is easy enough to make yourself. i have designs for the one i use if you want cost like 20 bux in parts at home depot. id be happy to send them to you if youd like :D
 
pic updates. nothing big though.

glued on the transition block. I'm still in the annoying process of cutting it flush, and checking to make sure it is level, even, and square to the top
(A tip: do this often. fix problems asap, and you will save yourself a bigger headache down the road. also, you can take a thick, sturdy, squared up piece of wood (like around 2" thick X 2" wide), put different grits of adhesive sandpaper on it, and clamp it down to a trusted flat (like the top of your table saw), and use that instead of hand sanding when possible, to lower risk of things like that. )

Picture070.jpg


Picture071.jpg


side view
Picture083.jpg
 
here is what i am doing to CA seal the fretboard. mask it all off, cut the tape on the slots, cover the edge of my flush-cut japanese pull saw, squeeze it into the slot, smear krazy glue around with my finger, only doing roughly half the fret, put the slot cover (saw) in the other side, and smeap up the other half, then put aditional glue where needer, and even the coat out, then just do that for all of it. then level it by draging a razor across it to get the bulk of the excess, then finish it off with a sanding block.the goal is not to create a CA overcoat, but to soak the CA into the wood.

Picture072.jpg


The simple tools of the job
Picture074.jpg


sealed the 1st fret...
Picture076.jpg


Here, i have already sealed of about 1/2 of the total fingerboard, leveled and sanded it. it feels like glass, and i only sanded it to what it was before i sealled it (220). I am planing to bring it up to at least 800 before i put a finish on (if i do finish the fingerboard, other than CA.) one thing i have noticed, is that there is more depth to it. the grain/color looks different at different angles. couldn't find a bad angle.
Picture078.jpg

Picture079.jpg

Picture080.jpg

Picture081.jpg

Picture082.jpg


Here is the fb, pre clean-up, after sealling
Picture086.jpg
 
also, finally started to wood covers. i couldn't decide what wood combo would look best, but these should do pretty alright. all the wood is from scraps from this project.

Here, it is not glued, just lined up. woods from left to right are 1/4" bloodwood, 1/16" walnut, thin maple accent veneer, 3/16" cherry, maple accent veneer, 1/16" walnut, 1/4" bloodwood.
Picture092.jpg


the woods and the pups. still deciding if I will use the screw config. of common plastic jazz covers, or screwss at the top and bottom.
Picture094.jpg


glue up (btw, this was taken about an hour ago)
Picture095.jpg


Picture096.jpg


this bass is a good example of why you hang onto all those tiny little scraps. I think i am going to shape the pups into an organic shape, rather then the usual rectangles. basically, my version Jerzy Drozd's pup style. i spent over 2 hours looking at his work. love the organic shaped pup covers, bridge pieces, and esp. the soundholes. ANYWAYS, after i have them shaped to my liking, i am going to bind them in walnut.
 
Six straight posts. wow. why isn't anyone else commenting??

Because of a few mistakes, the fingerboard is now less wide than originally planned. It is no longer wide enough for my preferences, to be an 8-string octaves bass. It is still fine for a regular 4-string, so thats the route I will go. No big deal. Now i will just have some extra parts to make an 8er when i have some more experence, and a really sweet 4 string.
Besides, I have been wanting to try making a wooden bride, which this thing is screaming for. Still trying to design it.
Unfortunately, i already drilled the head for 8 tuners. I just need to come up with some cool way to hide the extra holes. I am not angry about that either. This bass has taken on a mistakes-gone-right theme, so it works out.
Hopefully i should get a decent amount done on the bass this Thanxgiving break (happy holidays everyone). On my list of things knock off my to-do list, are getting the pup covers made, fix the extra tuner holes issue, ingrave the head and fb, fret the fb, finish cutting the tranistion block flush, make sure the taper of the neck is true, and get a good start on the wood bridge. things are starting to come together, and i hope to finish this bass off by new years, or a few weeks into 2010 (holly crap!!!! we are now a decade away from the 90's, which really sux.)
 
are you going to just do a simple wooden bridge or an adjustable?

I have been wanting to use a piece of steel cut-off from the high-school metal-shop for the saddle on an un-adjustable type bridge, but i will wait till i do a fretless, as they are more forgiving intonation wise. I am going to do adjustable. I am going to use black saddles that have an angled hex screw, that presses against the sides of the saddle spacers, to hold it right in place. It's pretty cool. I am still trying to sketch up a few ideas. will post the good ones. Some suggestions are very welcomed
I am think I will do the string-ball holders someting one of these:
[Invalid or Expired Link Removed]
http://www.flickr.com/photos/digitalverve/185659340/
 
u could plug the holes dowels and then cover the front and back with a venner of some sort.
That would be the obvious fix, but the top of the headstock looks pefect for this bass. I don't want to cover it up. I'l just have to get creative.

I did basicaly a hipshot A style out of rosewood, worked out really well.

I was looking at it a few hours ago. how did that come out, btw, have any pics of the finished bridge?
 

Latest posts