
Enjoy the benefits of a premium membership!
Upgrade Account
-
TalkBass has been independent since 1998. Add your voice.
Create a free account to reply to discussions, view embedded media, and browse with fewer display ads.
Join free Log in
Want zero display ads or expanded classifieds tools? Compare plans.
You are using an out of date browser. It may not display this or other websites correctly.
You should upgrade or use an alternative browser.
You should upgrade or use an alternative browser.
Tele body bass - My first build
- Thread starter BassShifter21
- Start date
More options
Who Replied?

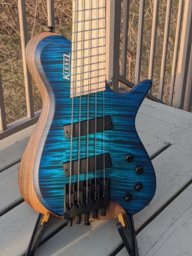
And then on to the body finishing. The center section of the body is rock maple and the wings are cherry. In the original parts photo, you may have noticed a can of automotive paint. I had thought the wood was not decent at all when I first received the body, and I originally intended to paint this bass GM Medium Red Metallic. But when I saw the grain come out in the cherry as I sanded and worked the wood, I knew I just couldn't do it! Guess I'll save the paint for my next build.








Thanks, man! It is a gel stain by General Finishes and the color is Georgian Cherry. Prior to that I used a stain conditioner to allow it to take evenly. I liked the results!That stain is great on the cherry dude!
Here is the body clear coated, wet sanded and buffed out. I used the same General Finishes poly/oil product that I used on the neck. About 12 coats, with some leveling after every 3 coats. Then I wet sanded the last coat with 600, 1200, then 1500 grit. Final buffing with with 3M compound and a lambs wool wheel on a drill motor. Then a little carnuba car wax for good measure. Looks three feet deep!

Yes, it is best applied with a piece of old t-shirt material. You can also use a foam brush, but I found that it results in runs and drips if you put it on too thick. This finish is quite thin, so you have to be patient. When I use it again, I will most likely put on more coats before wet sanding. Easy to go through to the stain. Also, I'll start with much finer paper. Lessons learned! Very nice product to work with, though.Gorgeous finish! It's wipe-on, right?
Here is my copper shielding work. I used adhesive backed copper foil from Stew-Mac. I had intended to just tack solder the bottom and sides together, but then I noticed how nicely the solder flowed into the joint, so I went ahead and sealed them right up! I used a small piece of wire to connect the shielding in each cavity to the bridge ground. Worked like a charm! This bass has no hum, hiss, pops, or any of those other disturbing noises. I am going to shield my Rick next. It could really use it!!


And now, for the unveiling










Thanks to all on TB who have commented and especially to those who offer advice here at the Luthier's Corner. I did a lot of studying before I embarked on this project. I think my homework really paid off. I welcome your comments and suggestions. This will definitely not be my last build. I'd love to get into the business
Thanks to all on TB who have commented and especially to those who offer advice here at the Luthier's Corner. I did a lot of studying before I embarked on this project. I think my homework really paid off. I welcome your comments and suggestions. This will definitely not be my last build. I'd love to get into the business
This bass looks absolutely stunning!!! What a beauty!! Quick job too.. How does it sound? One for the G.A.S. 
Thanks for the kind words! The project actually took about two months to complete. However, I was refurbishing a banjo mandolin for my Dad as a birthday present at the same time, so I think I could do it more quickly next time.This bass looks absolutely stunning!!! What a beauty!! Quick job too.. How does it sound? One for the G.A.S.
The bass sounds really cool. Jazz influence, certainly, but the lipstick adds something to the mix. Good growl. I am very happy with the sound.
Thanks for the kind words! The project actually took about two months to complete. However, I was refurbishing a banjo mandolin for my Dad as a birthday present at the same time, so I think I could do it more quickly next time.
The bass sounds really cool. Jazz influence, certainly, but the lipstick adds something to the mix. Good growl. I am very happy with the sound.
Very nice! If you'd ever record a sound clip, keep us posted

Wow! That looks...perfect! I really wish I could describe with more words, but I can't! Everything looks balanced and complimentary to the elements around it. I hope you record a sound clip of it too

PM me. We'll chat about that!That looks great - you should build a few and sell them.....to me.
 I dig it much!
Beautiful! And I don't even usually dig Tele bodies as much as others...but this is a major exception. Well done, man.


