Would that be the equivalent of a click track for drummers?. With the LP pickguard guard you would be governed at playing at 33 RPM's or 45 RPM's? or if your playing ragtime classics you will be required to play at 78 RPM's?.I guess to have to have your personal tempo thing together.

Enjoy the benefits of a premium membership!
Upgrade Account
-
TalkBass has been independent since 1998. Add your voice.
Create a free account to reply to discussions, view embedded media, and browse with fewer display ads.
Join free Log in
Want zero display ads or expanded classifieds tools? Compare plans.
You are using an out of date browser. It may not display this or other websites correctly.
You should upgrade or use an alternative browser.
You should upgrade or use an alternative browser.
Thunderbird Club
- Thread starter TBird1958
- Start date
-
- Tags
- club thunderbird
More options
Who Replied?

220 posts later: I've played both the LTD and Japanese made ESP Streams, and really like 'em both. Of course the ESP is a much better made bass, but that's what you're paying more for. I would also say that if you want one and can swing it, grab it. Seems that ESP has slimmed the Stream offerings down which might mean they're considering dropping it from the line.
Thanks for responding! While I like the black finish of the ESP, don't like the transparent pickguard. Why they felt the need to put that on there, I don't know. Interesting that the neck/nut width differs between the Japan and the LTD.... 38mm nut on Japan ESP vs 40mm on ESP LTD, according to specs.
E-II STREAM (Made in Japan)
STREAM-1004
Was that hard to get used to at first ?I actually live underground. Well, when I'm sleeping I'm below ground level anyway.
Opal miners in Lightning Ridge have their houses underground because of the heat.
I tend to agree. The 1004 is a much more attractive bass. How oddThanks for responding! While I like the black finish of the ESP, don't like the transparent pickguard. Why they felt the need to put that on there, I don't know. Interesting that the neck/nut width differs between the Japan and the LTD.... 38mm nut on Japan ESP vs 40mm on ESP LTD, according to specs.
E-II STREAM (Made in Japan)
View attachment 2804282
STREAM-1004
View attachment 2804283

I tend to agree. The 1004 is a much more attractive bass. How odd
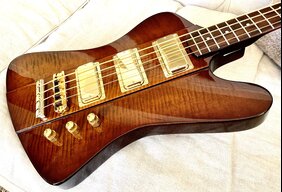
Yeah, they also felt the need to put that transparent pickguard on the $5k CTM "custom shop" model as well. Not that I could ever afford it, but it would be my reason not to buy it, even if I could afford it.
ESP STREAM CTM

Gaolee
Official leathers tester and crash dummy
The close up of the break makes it look like it might have been repaired once before.Here are a few pictures of my '66 birds neck repair. The work was done by Ben Bruton, I am very pleased !View attachment 2804020 View attachment 2804022 View attachment 2804023 View attachment 2804023 View attachment 2804024
[edit] aaand, I'm only about the 43rd person to notice.
It would be interesting to do a shootout between the 3 different models, to find out exactly what it is yer payin' for on those more expensive models.Yeah, they also felt the need to put that transparent pickguard on the $5k CTM "custom shop" model as well. Not that I could ever afford it, but it would be my reason not to buy it, even if I could afford it.
ESP STREAM CTM
View attachment 2804313
FrankenGoth Neck Dye update..
OK folks, the proofs in the pudding - Does the StewMac fretboard dye really have what it takes to turn a medium light Rosewood fretboard into more of a black Ebony look? Judge for yourself...
Before
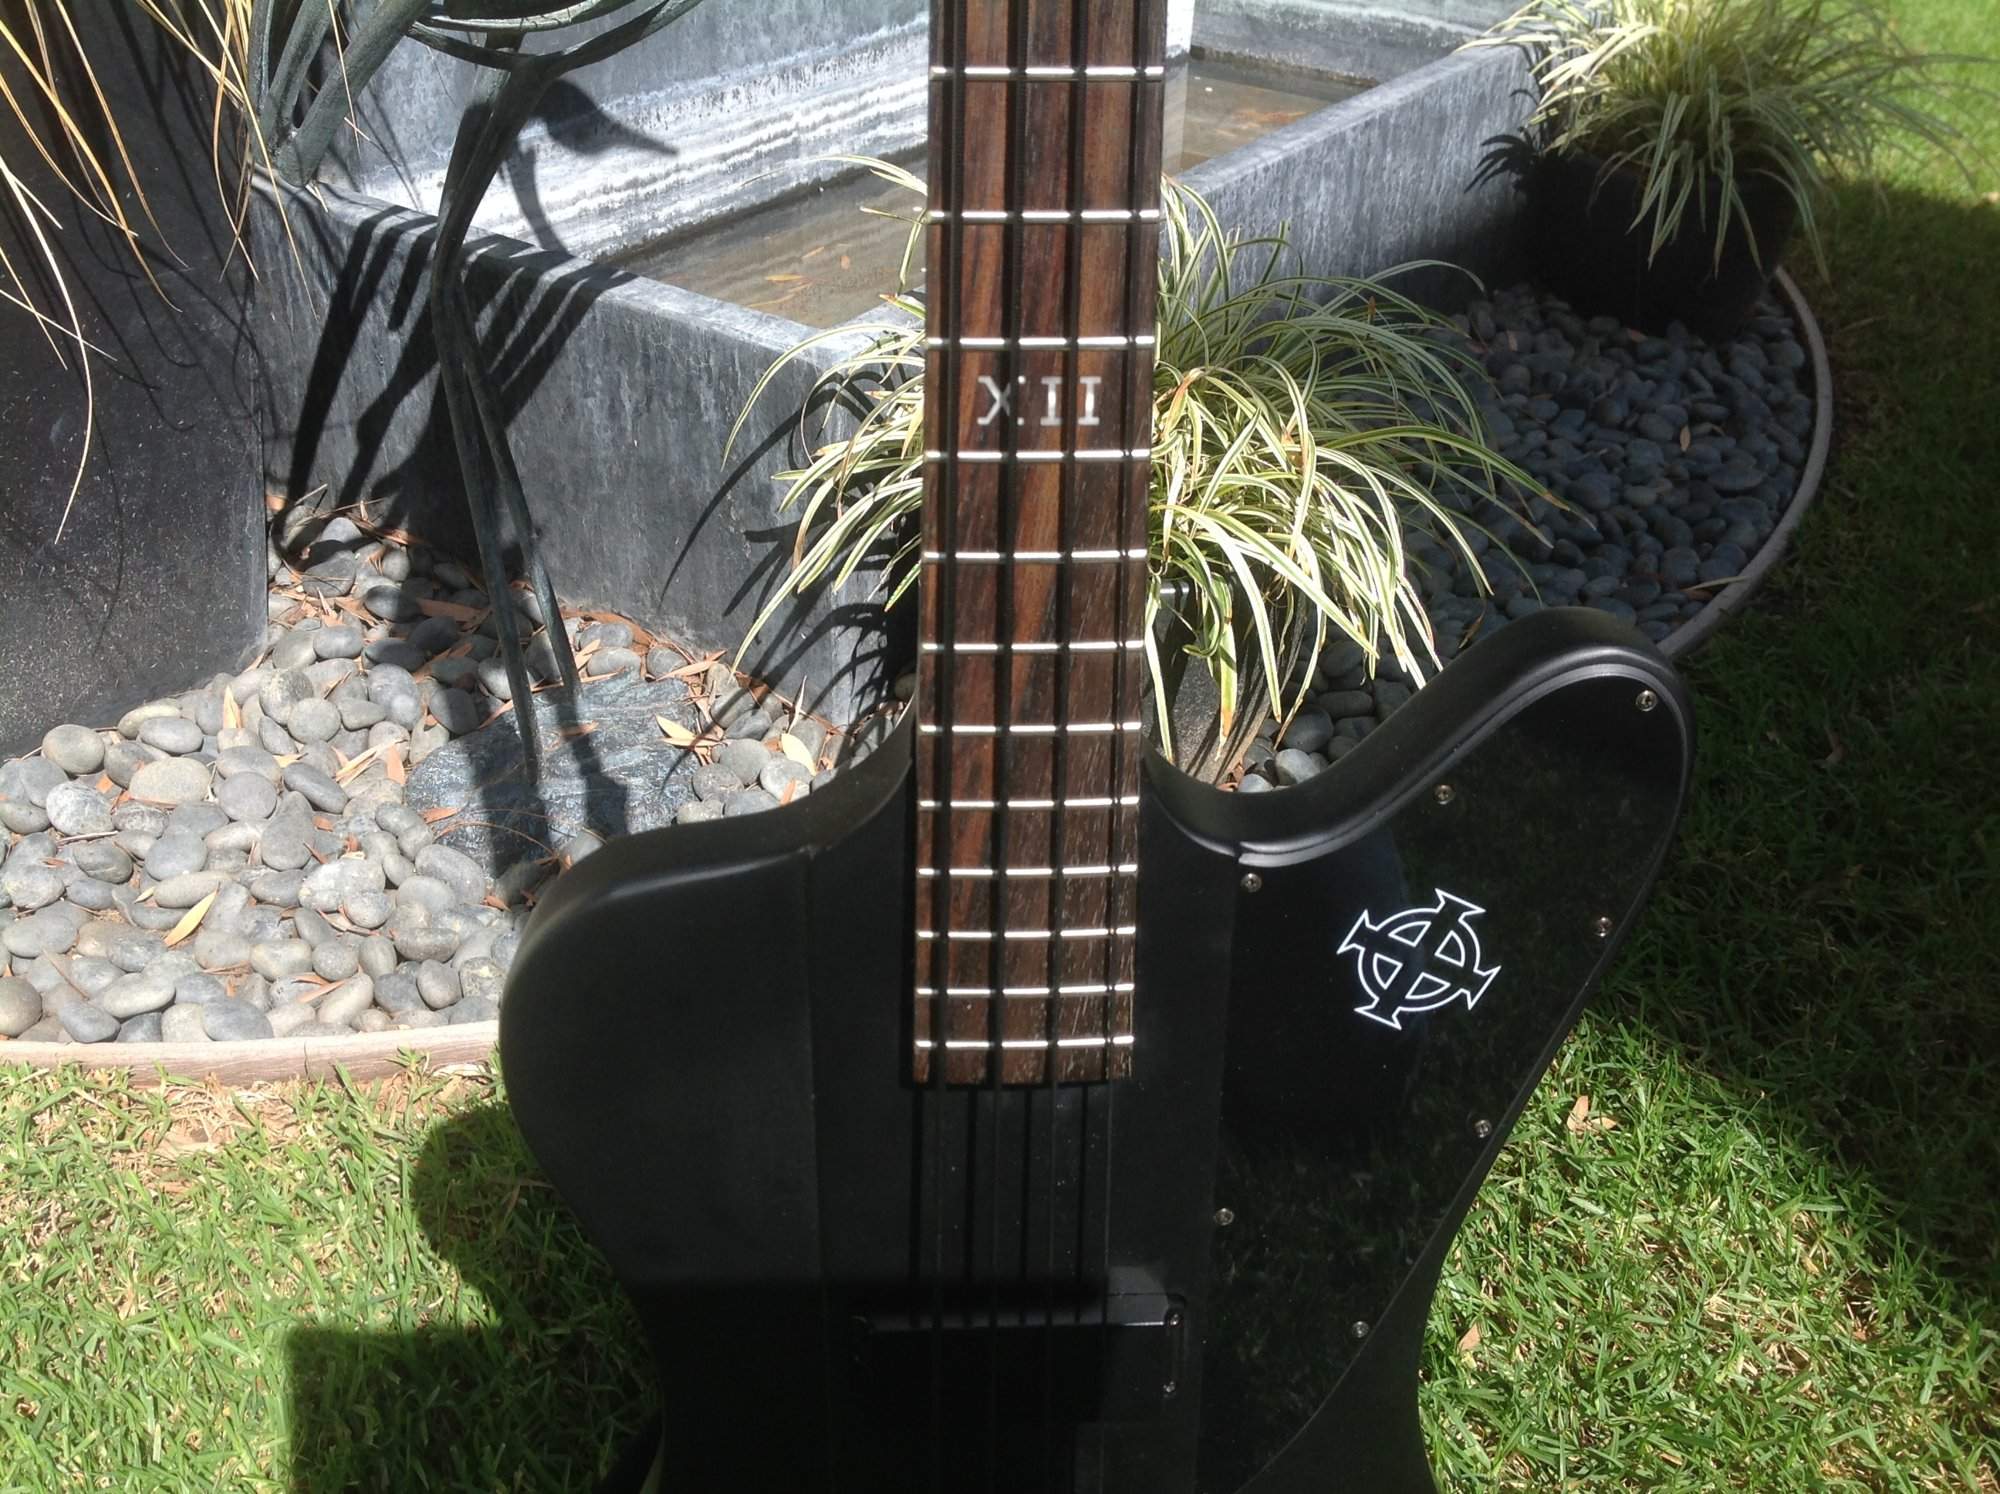
After
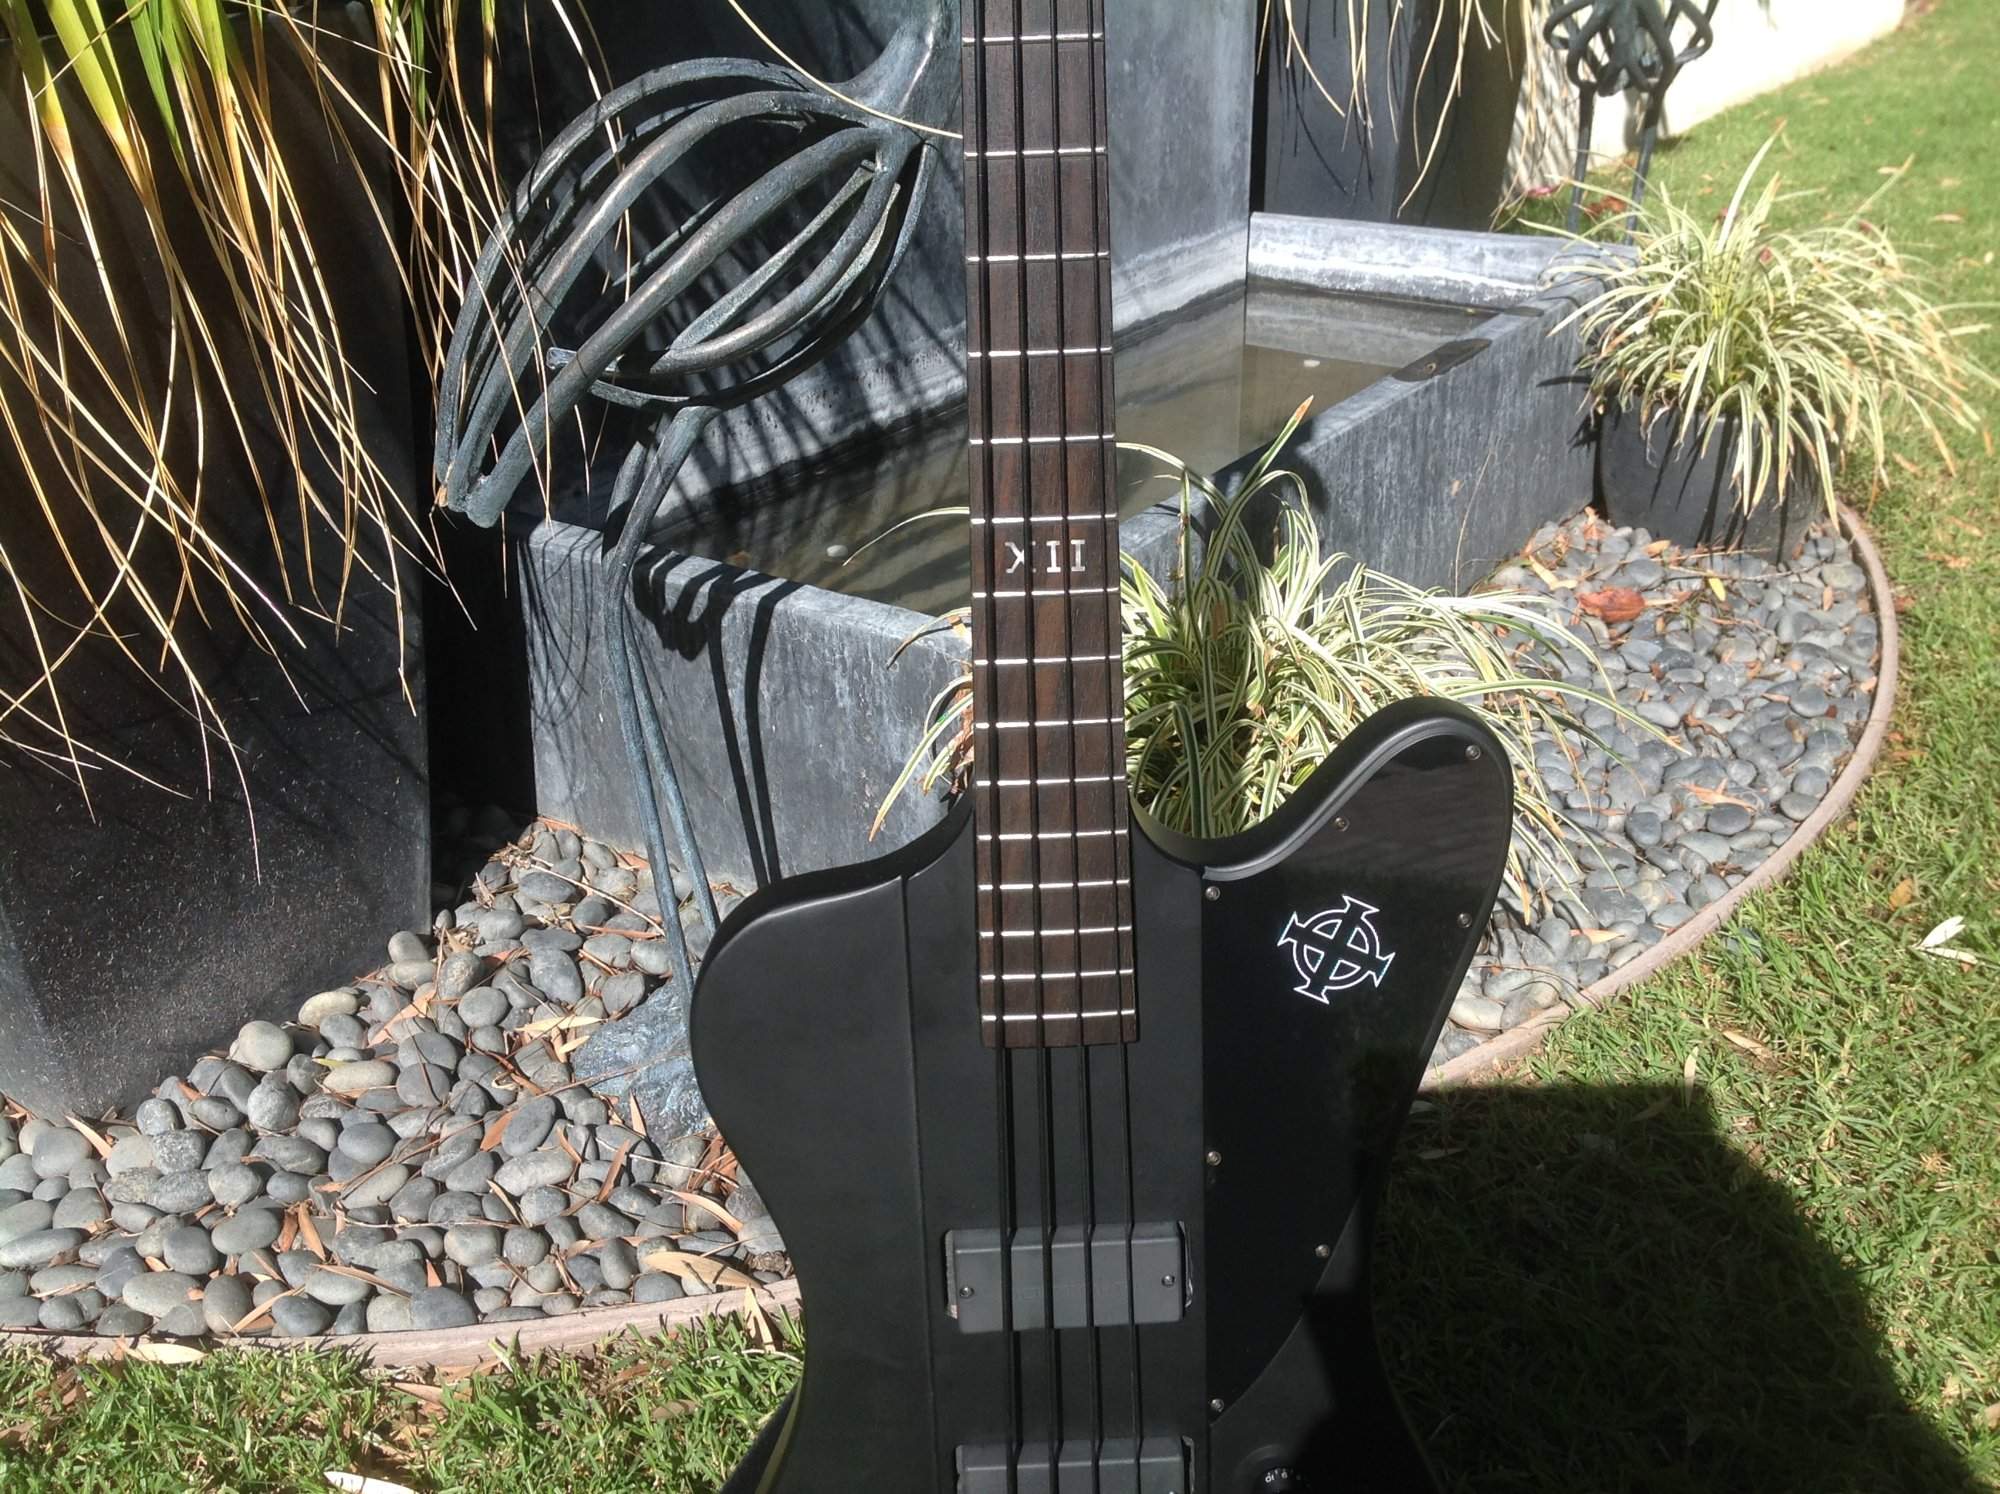
Conclusion - if you want to darken a fretless board or fretted board that doesn't have the frets in place yet, this product might work for you. However, if you have a fretted board don't waste your time and money on this product. I'll be looking into other darkening options in the near future.
Disclaimer: the instructions called for a prewipe of naphtha, I didn't have any so I used several applications of Isopropyl Alcohol to remove any oils. The instructions also called for a complete sanding of the neck with 600 grit sandpaper before applying the dye (actually it's India ink). However, I wasn't about to attack my frets with sandpaper and worse yet, sand the board in a cross grain fashion (which is the only way you can sand a fretted neck. So I used 000 steel wool which isn't nearly as abrasive as 600 grit sandpaper. Those two things combined may be the reason there's no significant difference between the before and after pics.
OK folks, the proofs in the pudding - Does the StewMac fretboard dye really have what it takes to turn a medium light Rosewood fretboard into more of a black Ebony look? Judge for yourself...
Before
After
Conclusion - if you want to darken a fretless board or fretted board that doesn't have the frets in place yet, this product might work for you. However, if you have a fretted board don't waste your time and money on this product. I'll be looking into other darkening options in the near future.
Disclaimer: the instructions called for a prewipe of naphtha, I didn't have any so I used several applications of Isopropyl Alcohol to remove any oils. The instructions also called for a complete sanding of the neck with 600 grit sandpaper before applying the dye (actually it's India ink). However, I wasn't about to attack my frets with sandpaper and worse yet, sand the board in a cross grain fashion (which is the only way you can sand a fretted neck. So I used 000 steel wool which isn't nearly as abrasive as 600 grit sandpaper. Those two things combined may be the reason there's no significant difference between the before and after pics.

FrankenGoth update..
OK folks, the proofs in the pudding - Does the StewMac fretboard dye really have what it takes to turn a medium light Rosewood fretboard into more of a black Ebony look? Judge for yourself...
Before
View attachment 2804370
After
View attachment 2804372
Conclusion - if you want to darken a fretless board or fretted board that doesn't have the frets in place yet, this product might work for you. However, if you have a fretted board don't waste your time and money on this product. I'll be looking into other darkening options in the near future.
Disclaimer: the instructions called for a prewipe of naphtha, I didn't have any so I used several applications of Isopropyl Alcohol to remove any oils. The instructions also called for a complete sanding of the neck with 600 grit sandpaper before applying the dye (actually it's India ink). However, I wasn't about to attack my frets with sandpaper and worse yet, sand the board in a cross grain fashion (which is the only way you can sand a fretted neck. So I used 000 steel wool which isn't nearly as abrasive as 600 grit sandpaper. Those two things combined may be the reason there's no significant difference between the before and after pics.
All of what you described makes complete sense. And it looks great.

I agree with your assessment. It looks nicer, but doesn't look like it's worth the effort with how much change you got.FrankenGoth Neck Dye update..
OK folks, the proofs in the pudding - Does the StewMac fretboard dye really have what it takes to turn a medium light Rosewood fretboard into more of a black Ebony look? Judge for yourself...
Before
View attachment 2804370
After
View attachment 2804372
Conclusion - if you want to darken a fretless board or fretted board that doesn't have the frets in place yet, this product might work for you. However, if you have a fretted board don't waste your time and money on this product. I'll be looking into other darkening options in the near future.
Disclaimer: the instructions called for a prewipe of naphtha, I didn't have any so I used several applications of Isopropyl Alcohol to remove any oils. The instructions also called for a complete sanding of the neck with 600 grit sandpaper before applying the dye (actually it's India ink). However, I wasn't about to attack my frets with sandpaper and worse yet, sand the board in a cross grain fashion (which is the only way you can sand a fretted neck. So I used 000 steel wool which isn't nearly as abrasive as 600 grit sandpaper. Those two things combined may be the reason there's no significant difference between the before and after pics.
Well... now it looks like a dark rosewood instead of a medium rosewood. Though it falls short of the mark... at least it's an improvementFrankenGoth Neck Dye update..
OK folks, the proofs in the pudding - Does the StewMac fretboard dye really have what it takes to turn a medium light Rosewood fretboard into more of a black Ebony look? Judge for yourself...
Before
View attachment 2804370
After
View attachment 2804372
Conclusion - if you want to darken a fretless board or fretted board that doesn't have the frets in place yet, this product might work for you. However, if you have a fretted board don't waste your time and money on this product. I'll be looking into other darkening options in the near future.
Disclaimer: the instructions called for a prewipe of naphtha, I didn't have any so I used several applications of Isopropyl Alcohol to remove any oils. The instructions also called for a complete sanding of the neck with 600 grit sandpaper before applying the dye (actually it's India ink). However, I wasn't about to attack my frets with sandpaper and worse yet, sand the board in a cross grain fashion (which is the only way you can sand a fretted neck. So I used 000 steel wool which isn't nearly as abrasive as 600 grit sandpaper. Those two things combined may be the reason there's no significant difference between the before and after pics.


https://app.box.com/s/yusqr66b6rbpvgx1j4xptrnfenqnyl9p
Recorded audio of “She Sells Sanctuary” Oh man...I love that song, anyway...TBird is growling and it soooo good to play it! Hope you like it guys.
Recorded audio of “She Sells Sanctuary” Oh man...I love that song, anyway...TBird is growling and it soooo good to play it! Hope you like it guys.
FrankenGoth Pickup and Control update...
The work has been done, a decision has been made and the transplant is a success!
After trying the stock Goth pups with several different pot and cap values, and doing the same with after market Bartolini pups the Goth pups were set aside in favor of the Bart's. The Goth pups were very mid range focused and lacking both the top end and bottom end of the Bart's.
Then after trying coil switching options (neck coil/Humbucker/bridge coil tap for each pup in parallel mode ) vs a single switch (that selects the neck pup neck coil in humbucking series with the bridge pup bridge coil or both pups in full Humbucker series mode) the hands down favorite was the more simplified and much more powerful single coil tap series wired switch. Two switches with three positions each and not a lot of tonal difference from position to position plus the weaker sounding parallel wiring conspired to sink the twin coil tap option. The single more powerful two position switch combined with the volume controls provides nearly as many options with much bolder series wired sound.
Finally, the passive coil tap wiring option was tested against an active option using a Spector Tonepump preamp, which failed to work properly (in hindsight I think I had the stereo output jack wired wrong) and an Aguilar OBP-2 two band preamp. The 18db bass boost of the Aggie preamp utterly destroyed the bottom end of the passive option and just completely hammered the front end of my 150watt Musicman HD150/Bergantino HT322 rig for gobs of thick gooey distortion with onboard dials maxed out and yet sounded like a concert grand piano at less insane settings. So the Aggie stays in this Bird as does the single coil tap switch. There's a time and a place for single coils (like when doing chord or harmonics work or with some effect pedals) and I now have the option to continue playing my Bird but switching from a single neck coil or a single bridge coil or both single coils in humbucking series all in one position of the switch or flipping the switch to the other position and running a full neck Humbucker or full bridge Humbucker or both humbuckers all wired in series for earth shattering effect if needed. I strongly recommend this $10 option to anyone with a Bird that has four conductor coil split capable PUPs regardless of which mode (passive or active) you have.
So here's the finished control pics...
From three knob passive (vol, vol, tone) with front mounted output jack, to four knob active (vol, vol, bass with 18db cut or boost sweep, treb with 18db cut or boost sweep) with two position coil tap switch (just the neck coil of neck pup and the bridge coil of the bridge pup combined in humbucking series, or both full humbuckers in series) and a side mounted output jack with a rear mounted battery box.
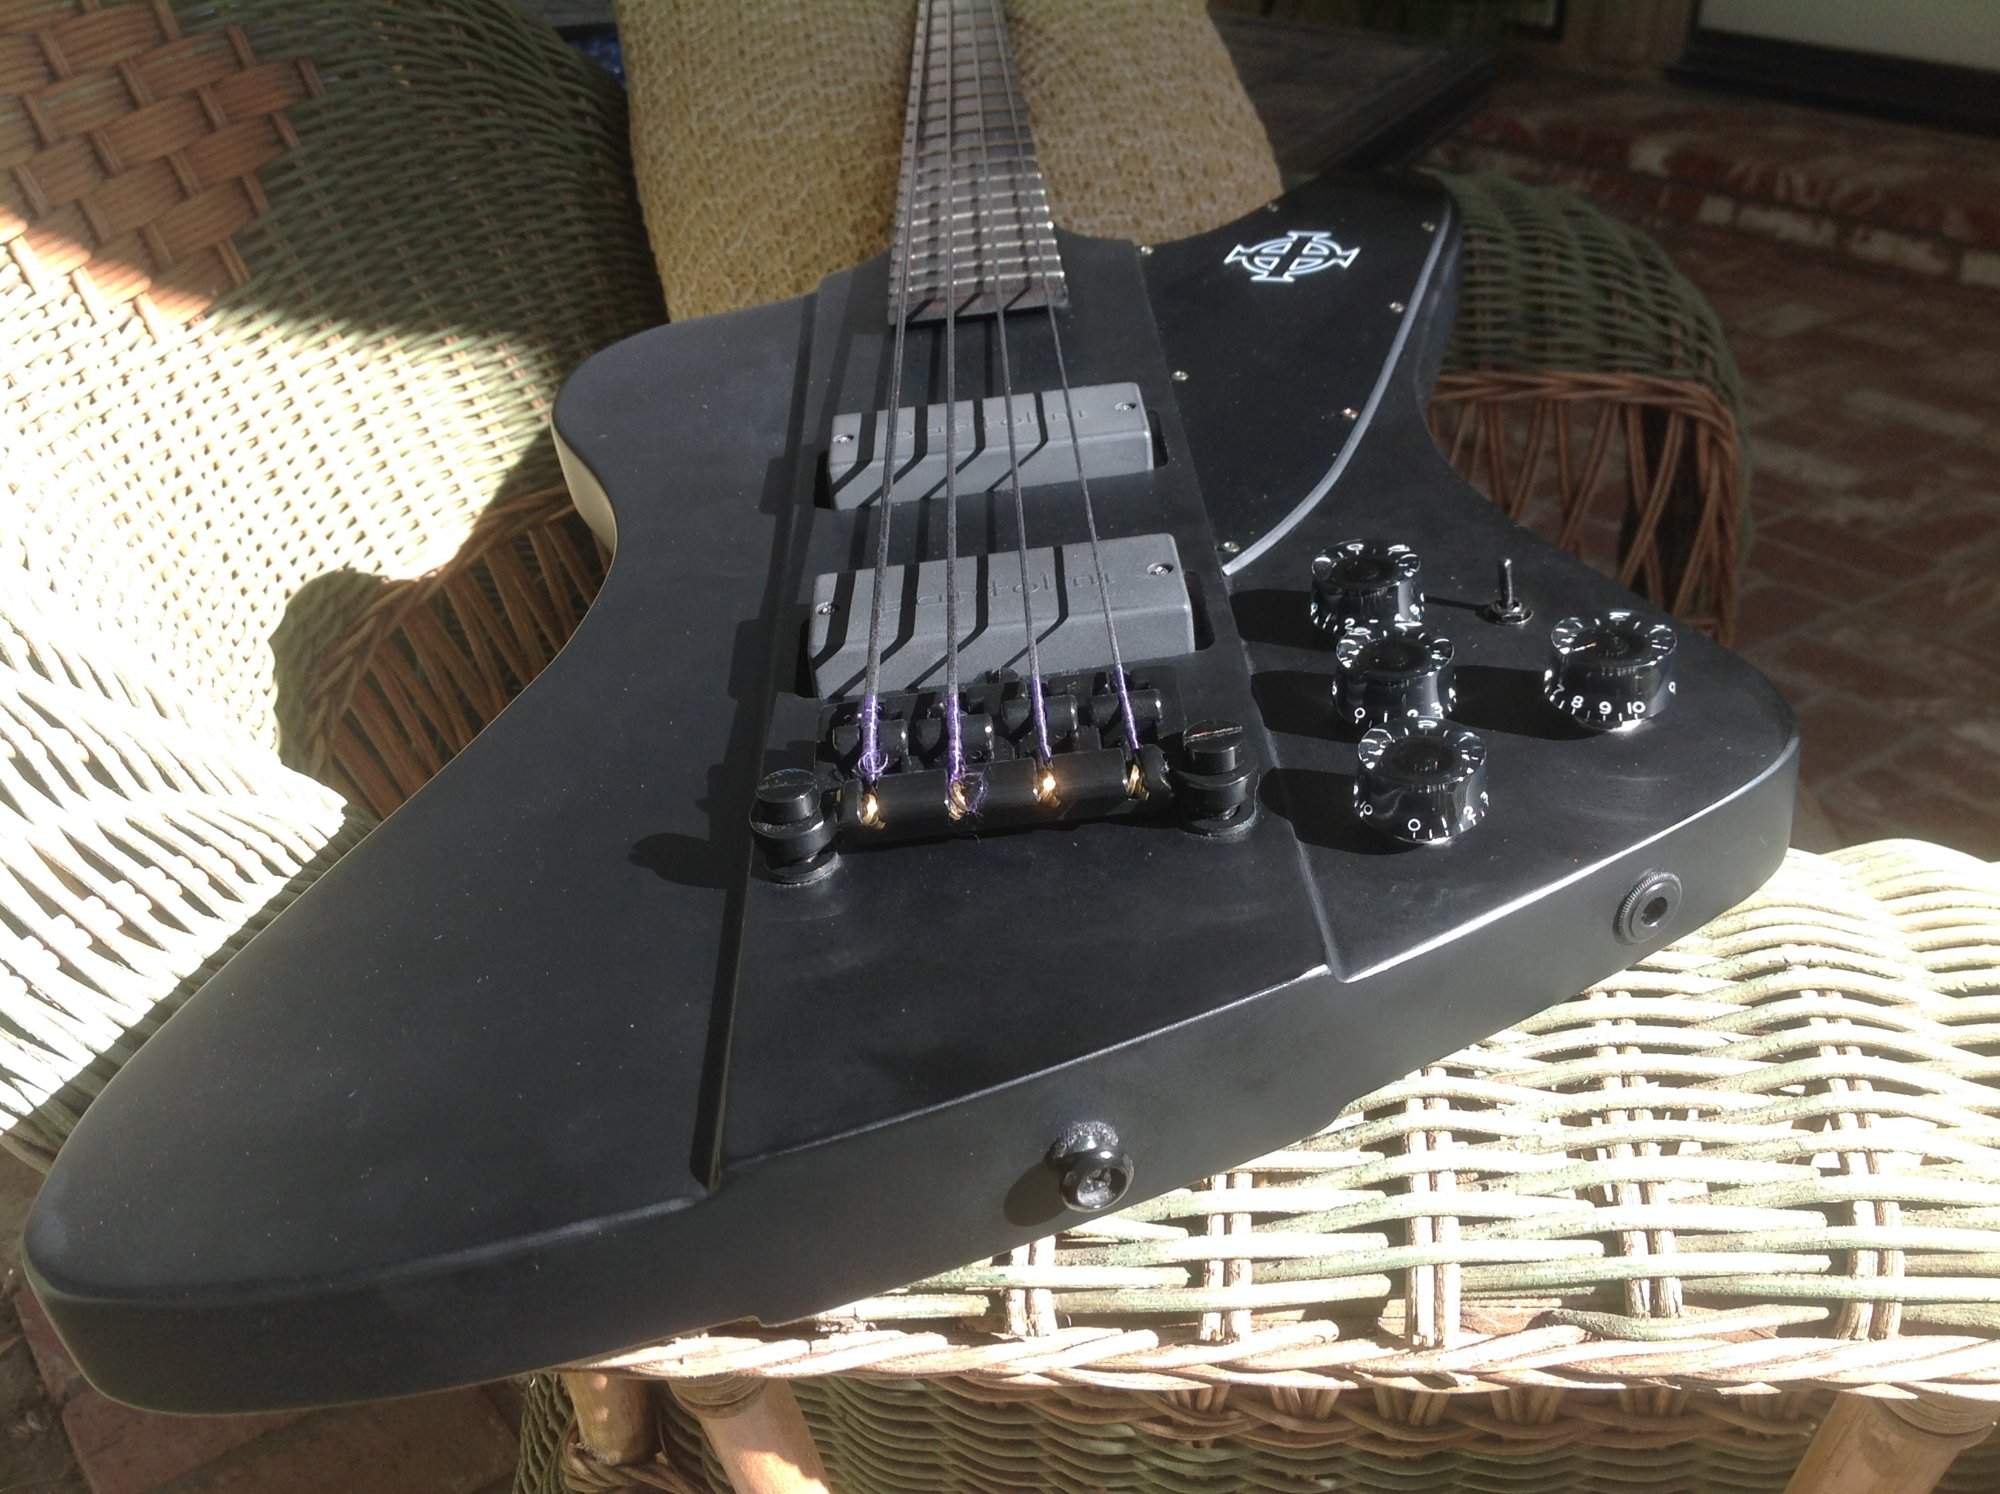
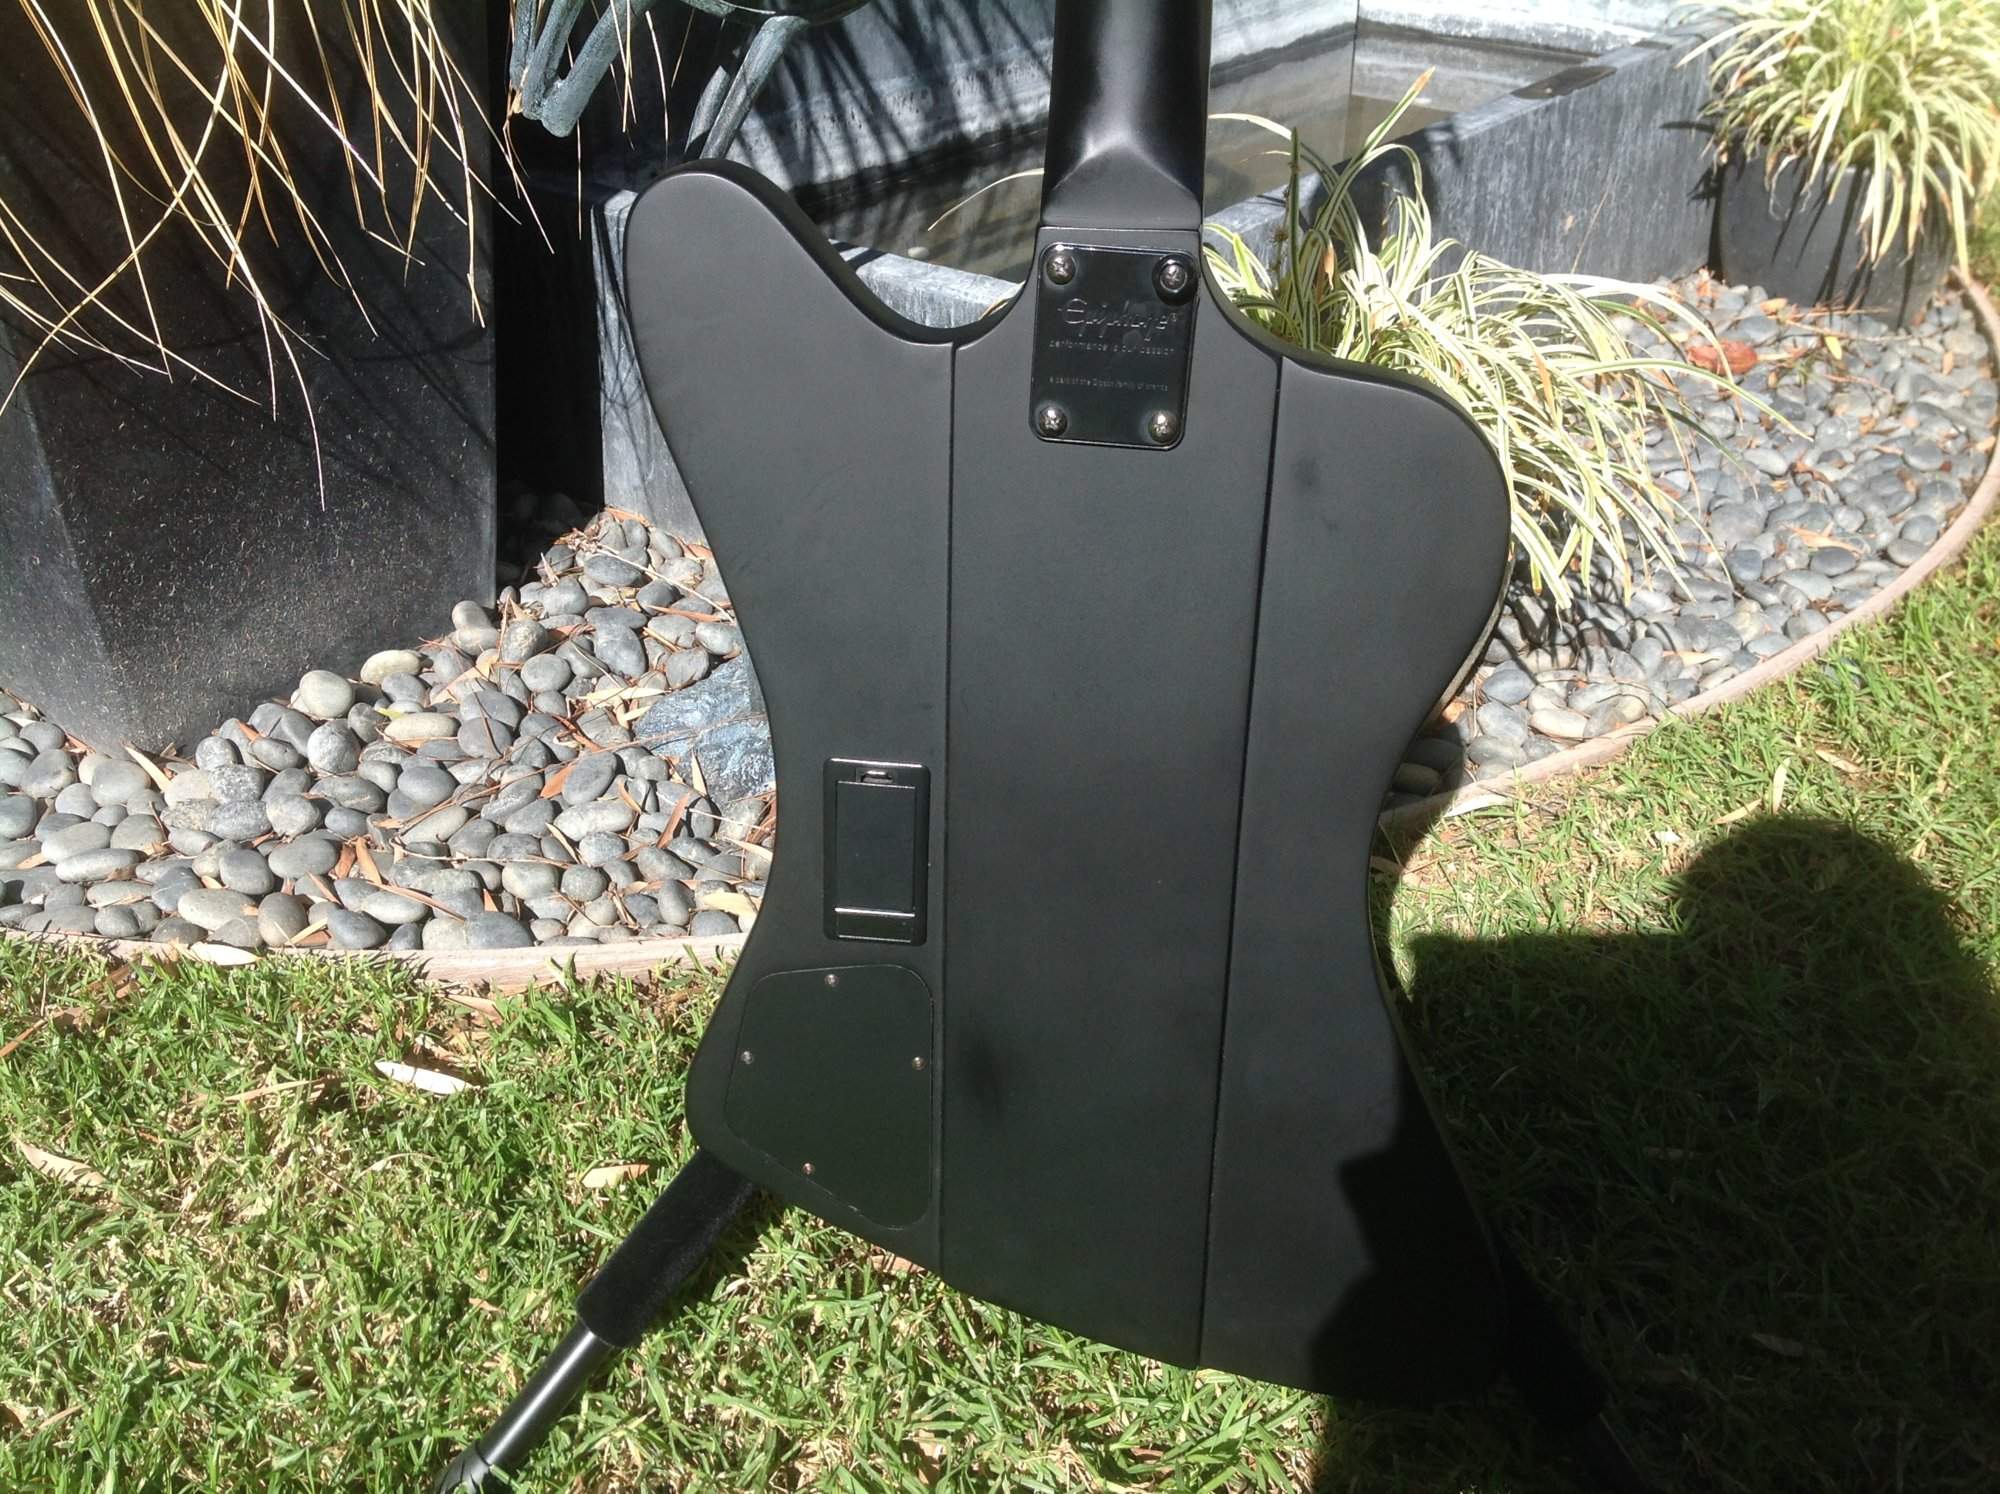
Now that I have the engine finely tuned and running smooth I'll start to focus on the aesthetic features of the bass. Trim rings, a unique pickguard and truss cover and maybe even some contour routing and accent painting along with darkening that darn rosewood fretboard. I don't want to lose the TBird look or vibe but I do want it to be unique and personal. I'm half way to where I want to be and learning a lot along the way.
The work has been done, a decision has been made and the transplant is a success!
After trying the stock Goth pups with several different pot and cap values, and doing the same with after market Bartolini pups the Goth pups were set aside in favor of the Bart's. The Goth pups were very mid range focused and lacking both the top end and bottom end of the Bart's.
Then after trying coil switching options (neck coil/Humbucker/bridge coil tap for each pup in parallel mode ) vs a single switch (that selects the neck pup neck coil in humbucking series with the bridge pup bridge coil or both pups in full Humbucker series mode) the hands down favorite was the more simplified and much more powerful single coil tap series wired switch. Two switches with three positions each and not a lot of tonal difference from position to position plus the weaker sounding parallel wiring conspired to sink the twin coil tap option. The single more powerful two position switch combined with the volume controls provides nearly as many options with much bolder series wired sound.
Finally, the passive coil tap wiring option was tested against an active option using a Spector Tonepump preamp, which failed to work properly (in hindsight I think I had the stereo output jack wired wrong) and an Aguilar OBP-2 two band preamp. The 18db bass boost of the Aggie preamp utterly destroyed the bottom end of the passive option and just completely hammered the front end of my 150watt Musicman HD150/Bergantino HT322 rig for gobs of thick gooey distortion with onboard dials maxed out and yet sounded like a concert grand piano at less insane settings. So the Aggie stays in this Bird as does the single coil tap switch. There's a time and a place for single coils (like when doing chord or harmonics work or with some effect pedals) and I now have the option to continue playing my Bird but switching from a single neck coil or a single bridge coil or both single coils in humbucking series all in one position of the switch or flipping the switch to the other position and running a full neck Humbucker or full bridge Humbucker or both humbuckers all wired in series for earth shattering effect if needed. I strongly recommend this $10 option to anyone with a Bird that has four conductor coil split capable PUPs regardless of which mode (passive or active) you have.
So here's the finished control pics...
From three knob passive (vol, vol, tone) with front mounted output jack, to four knob active (vol, vol, bass with 18db cut or boost sweep, treb with 18db cut or boost sweep) with two position coil tap switch (just the neck coil of neck pup and the bridge coil of the bridge pup combined in humbucking series, or both full humbuckers in series) and a side mounted output jack with a rear mounted battery box.
Now that I have the engine finely tuned and running smooth I'll start to focus on the aesthetic features of the bass. Trim rings, a unique pickguard and truss cover and maybe even some contour routing and accent painting along with darkening that darn rosewood fretboard. I don't want to lose the TBird look or vibe but I do want it to be unique and personal. I'm half way to where I want to be and learning a lot along the way.
Attachments

Last edited:
godofthunder59
Life is short, buy the bass.
- Feb 19, 2006
- 9,057
- 38,405
- Disclosures
- Endorsing Cataldo Basses, Whirlwind products, Thunderbucker pickups
FrankenGoth Pickup and Control update...
The work has been done, a decision has been made and the transplant is a success!
After trying the stock Goth pups with several different pot and cap values, and doing the same with after market Bartolini pups the Goth pups were set aside in favor of the Bart's. The Goth pups were very mid range focused and lacking both the top end and bottom end of the Bart's.
Then after trying coil switching options (neck coil/Humbucker/bridge coil tap for each pup in parallel mode ) vs a single switch (that selects the neck pup neck coil in humbucking series with the bridge pup bridge coil or both pups in full Humbucker series mode) the hands down favorite was the more simplified and much more powerful single coil tap series wired switch. Two switches with three positions each and not a lot of tonal difference from position to position plus the weaker sounding parallel wiring conspired to sink the twin coil tap option. The single more powerful two position switch combined with the volume controls provides nearly as many options with much bolder series wired sound.
Finally, the passive coil tap wiring option was tested against an active option using a Spector Tonepump preamp, which failed to work properly (in hindsight I think I had the stereo output jack wired wrong) and an Aguilar OBP-2 two band preamp. The 18db bass boost of the Aggie preamp utterly destroyed the bottom end of the passive option and just completely hammered the front end of my 150watt Musicman HD150/Bergantino HT322 rig for gobs of thick gooey distortion with onboard dials maxed out and yet sounded like a concert grand piano at less insane settings. So the Aggie stays in this Bird as does the single coil tap switch. There's a time and a place for single coils (like when doing chord or harmonics work or with some effect pedals) and I now have the option to continue playing my Bird but switching from a single neck coil or a single bridge coil or both single coils in humbucking series all in one position of the switch or flipping the switch to the other position and running a full neck Humbucker or full bridge Humbucker or both humbuckers all wired in series for earth shattering effect if needed. I strongly recommend this $10 option to anyone with a Bird that has four conductor coil split capable PUPs regardless of which mode (passive or active) you have.
So here's the finished control pics...
From three knob passive (vol, vol, tone) with front mounted output jack, to four knob active (vol, vol, bass with 18db cut or boost sweep, treb with 18db cut or boost sweep) with two position coil tap switch (just the neck coil of neck pup and the bridge coil of the bridge pup combined in humbucking series, or both full humbuckers in series) and a side mounted output jack with a rear mounted battery box.
View attachment 2804437
View attachment 2804436
Now that I have the engine finely tuned and running smooth I'll start to focus on the aesthetic features of the bass. Trim rings, a unique pickguard and truss cover and maybe even some contour routing and accent painting along with darkening that darn rosewood fretboard. I font want to lose the TBird look or vibe but I do want it to be unique and personal. I'm half way to where I want to be and learning a lot along the way.
Frankly all I see is TerrI Garr.
FrankenGoth Pickup and Control update...
The work has been done, a decision has been made and the transplant is a success!
After trying the stock Goth pups with several different pot and cap values, and doing the same with after market Bartolini pups the Goth pups were set aside in favor of the Bart's. The Goth pups were very mid range focused and lacking both the top end and bottom end of the Bart's.
Then after trying coil switching options (neck coil/Humbucker/bridge coil tap for each pup in parallel mode ) vs a single switch (that selects the neck pup neck coil in humbucking series with the bridge pup bridge coil or both pups in full Humbucker series mode) the hands down favorite was the more simplified and much more powerful single coil tap series wired switch. Two switches with three positions each and not a lot of tonal difference from position to position plus the weaker sounding parallel wiring conspired to sink the twin coil tap option. The single more powerful two position switch combined with the volume controls provides nearly as many options with much bolder series wired sound.
Finally, the passive coil tap wiring option was tested against an active option using a Spector Tonepump preamp, which failed to work properly (in hindsight I think I had the stereo output jack wired wrong) and an Aguilar OBP-2 two band preamp. The 18db bass boost of the Aggie preamp utterly destroyed the bottom end of the passive option and just completely hammered the front end of my 150watt Musicman HD150/Bergantino HT322 rig for gobs of thick gooey distortion with onboard dials maxed out and yet sounded like a concert grand piano at less insane settings. So the Aggie stays in this Bird as does the single coil tap switch. There's a time and a place for single coils (like when doing chord or harmonics work or with some effect pedals) and I now have the option to continue playing my Bird but switching from a single neck coil or a single bridge coil or both single coils in humbucking series all in one position of the switch or flipping the switch to the other position and running a full neck Humbucker or full bridge Humbucker or both humbuckers all wired in series for earth shattering effect if needed. I strongly recommend this $10 option to anyone with a Bird that has four conductor coil split capable PUPs regardless of which mode (passive or active) you have.
So here's the finished control pics...
From three knob passive (vol, vol, tone) with front mounted output jack, to four knob active (vol, vol, bass with 18db cut or boost sweep, treb with 18db cut or boost sweep) with two position coil tap switch (just the neck coil of neck pup and the bridge coil of the bridge pup combined in humbucking series, or both full humbuckers in series) and a side mounted output jack with a rear mounted battery box.
View attachment 2804437
View attachment 2804436
Now that I have the engine finely tuned and running smooth I'll start to focus on the aesthetic features of the bass. Trim rings, a unique pickguard and truss cover and maybe even some contour routing and accent painting along with darkening that darn rosewood fretboard. I font want to lose the TBird look or vibe but I do want it to be unique and personal. I'm half way to where I want to be and learning a lot along the way.
Looks fantastic Dude, never pass up an opportunity to provide an audio sample if an opportunity should present itself.
FrankenGoth Neck Dye update..
OK folks, the proofs in the pudding - Does the StewMac fretboard dye really have what it takes to turn a medium light Rosewood fretboard into more of a black Ebony look? Judge for yourself...
Before
View attachment 2804370
After
View attachment 2804372
Conclusion - if you want to darken a fretless board or fretted board that doesn't have the frets in place yet, this product might work for you. However, if you have a fretted board don't waste your time and money on this product. I'll be looking into other darkening options in the near future.
Disclaimer: the instructions called for a prewipe of naphtha, I didn't have any so I used several applications of Isopropyl Alcohol to remove any oils. The instructions also called for a complete sanding of the neck with 600 grit sandpaper before applying the dye (actually it's India ink). However, I wasn't about to attack my frets with sandpaper and worse yet, sand the board in a cross grain fashion (which is the only way you can sand a fretted neck. So I used 000 steel wool which isn't nearly as abrasive as 600 grit sandpaper. Those two things combined may be the reason there's no significant difference between the before and after pics.
The slight difference I can see could be attributable to difference in angle and/or lighting. Which is to say, there may not be any difference or the difference is small. But, being india ink, preparation is everything, so using IPA in place o f naptha may not be adequate. Acetone could be adequate. I suspect that naptha is specified as many commercial preparations of IPA and acetone (as you would buy them in the drug store) contain perfumes which will leave a residue.
What pickups are those and how do they sound? Do you like them?


Yep.... The problem of course being, that no-one stocks any model higher than the (still Indo made and Ltd badged) STREAM-1004, so it's gonna be nigh-on impossible to try 'em side-by-side, anywhere other than the ESP stand at NAMM.It would be interesting to do a shootout between the 3 different models, to find out exactly what it is yer payin' for on those more expensive models.
From my guitar playing days, (rather than bass), I'm familiar with Japanese made ESP quality, but whether it's worth multi-thousands.... People raising eyebrows about the 2k street price of new Gibson 'Birds. The MIJ ESP Stream CTM and "Original Stream" make that look like chump-change! LOL.

- Jul 1, 2005
- 4,291
- 21,932
- 79
- Disclosures
- CataldoBasses: Designer/Builder ThunderBuckerPickups:Consultant
FrankenGoth Neck Dye update..
OK folks, the proofs in the pudding - Does the StewMac fretboard dye really have what it takes to turn a medium light Rosewood fretboard into more of a black Ebony look? Judge for yourself...
Before
View attachment 2804370
After
View attachment 2804372
Conclusion - if you want to darken a fretless board or fretted board that doesn't have the frets in place yet, this product might work for you. However, if you have a fretted board don't waste your time and money on this product. I'll be looking into other darkening options in the near future.
Disclaimer: the instructions called for a prewipe of naphtha, I didn't have any so I used several applications of Isopropyl Alcohol to remove any oils. The instructions also called for a complete sanding of the neck with 600 grit sandpaper before applying the dye (actually it's India ink). However, I wasn't about to attack my frets with sandpaper and worse yet, sand the board in a cross grain fashion (which is the only way you can sand a fretted neck. So I used 000 steel wool which isn't nearly as abrasive as 600 grit sandpaper. Those two things combined may be the reason there's no significant difference between the before and after pics.
Exactly why I will NEVER use any product from ScrewMac that purports to have special guitar mojo.
From top: Fiebing's alcohol based leather dye, rosewood Squier board cleaned with naptha and a few coats of Fiebings applied, rosewood undyed Squier board, Allparts supposed ebony fretboard. Pretty sure AP's Japan supplier dyes them, black ebony has become insanely expensive.
Dots can be obliterated with a sharpie if desired.


