

Enjoy the benefits of a premium membership!
Upgrade Account
-
TalkBass has been independent since 1998. Add your voice.
Create a free account to reply to discussions, view embedded media, and browse with fewer display ads.
Join free Log in
Want zero display ads or expanded classifieds tools? Compare plans.
You are using an out of date browser. It may not display this or other websites correctly.
You should upgrade or use an alternative browser.
You should upgrade or use an alternative browser.
Winter Build Off 2019 - Kubickenbacker
- Thread starter rojo412
- Start date
More options
Who Replied?

- Apr 18, 2008
- 16,015
- 1
- 31,729
- Disclosures
- I'm highly opinionated and extremely self-assured
 Not trying to be difficult on that, I’m just a sucker for figured maple. Lots of people shoot solid over maple, so who am I to protest?
I’m loving that body shape too!

That is the million dollar question! Finishing gives me fits.Man, I love that body shape. Sometimes mashups don’t work, this one does. What’s your paint process, spray gun?
I do have the HVLP setup and have been experimenting with things, but always seem to run into snags.
Being a solid color, I feel like it will need primer, then color (this will be white), then clear. But I don't exactly know what to use for that, as most of the finish experiments that have failed me involve the clear aspect turning to a sticky mess when it goes over the underlying finish. Or I can't get it sanded flat without going through to bare wood.
That said, I recently tested finish over epoxy and found the results to be sturdy. There's still some tweaking to be done to the gun so I can get the finish to not look like orange peel and pebbly, but I'm working on that.
If anyone has a great suggestion, please let me know.
And yes, I'm aware of the floor finish thread, that's why I ended up with the HVLP setup and floor finish. I just need to practice more.
Oh, as for the shape, I also dig it. Part of me thinks that listening to a lot of Devo helped with that reversed lower horn, not just the Kubicki-inspired part of it.

@mapleglo swears by the epoxy grain filler, I still haven’t tried it. The theory is sound, it doesn’t shrink later. Maple shouldn’t need much filling anyway, but you got some grain change there. Go with the WB floor finish if you can, enough evil vapors floating around already. I spent WEEKS practicing on plywood scrap, never did get a real glass smooth surface with WB until I buffed it out.
Last edited:
The neck got trimmed down a bit today. I've never cut one this way, so there was a lot of trepidation, but I made it work. Basically, I cut the area after the tenon to the headstock to an approximate thickness, then used a tall guide bit on the router with the straight edge screwed into the top. I kept the sacrificial wood on the ends to screw into for this, then used a shallower screw in the sub-FB area. Those areas will be cut away for TOW/epoxy anyway.
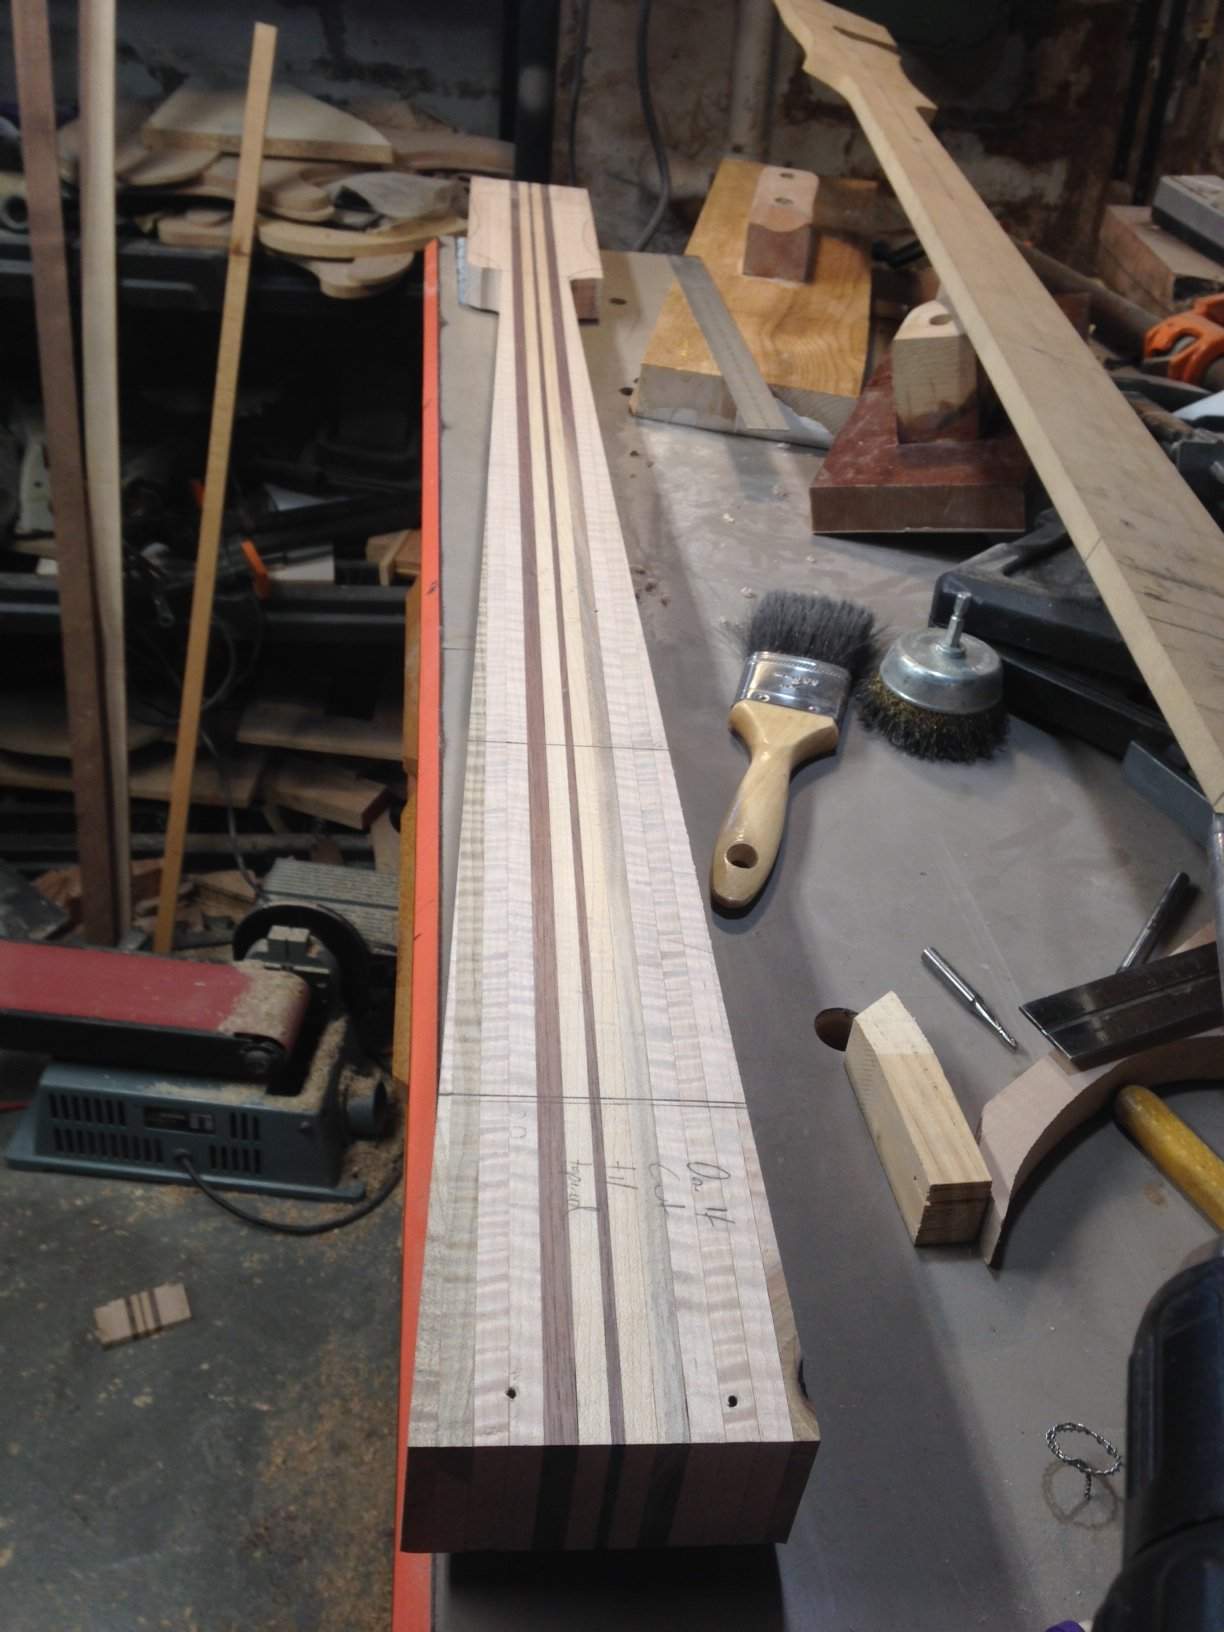
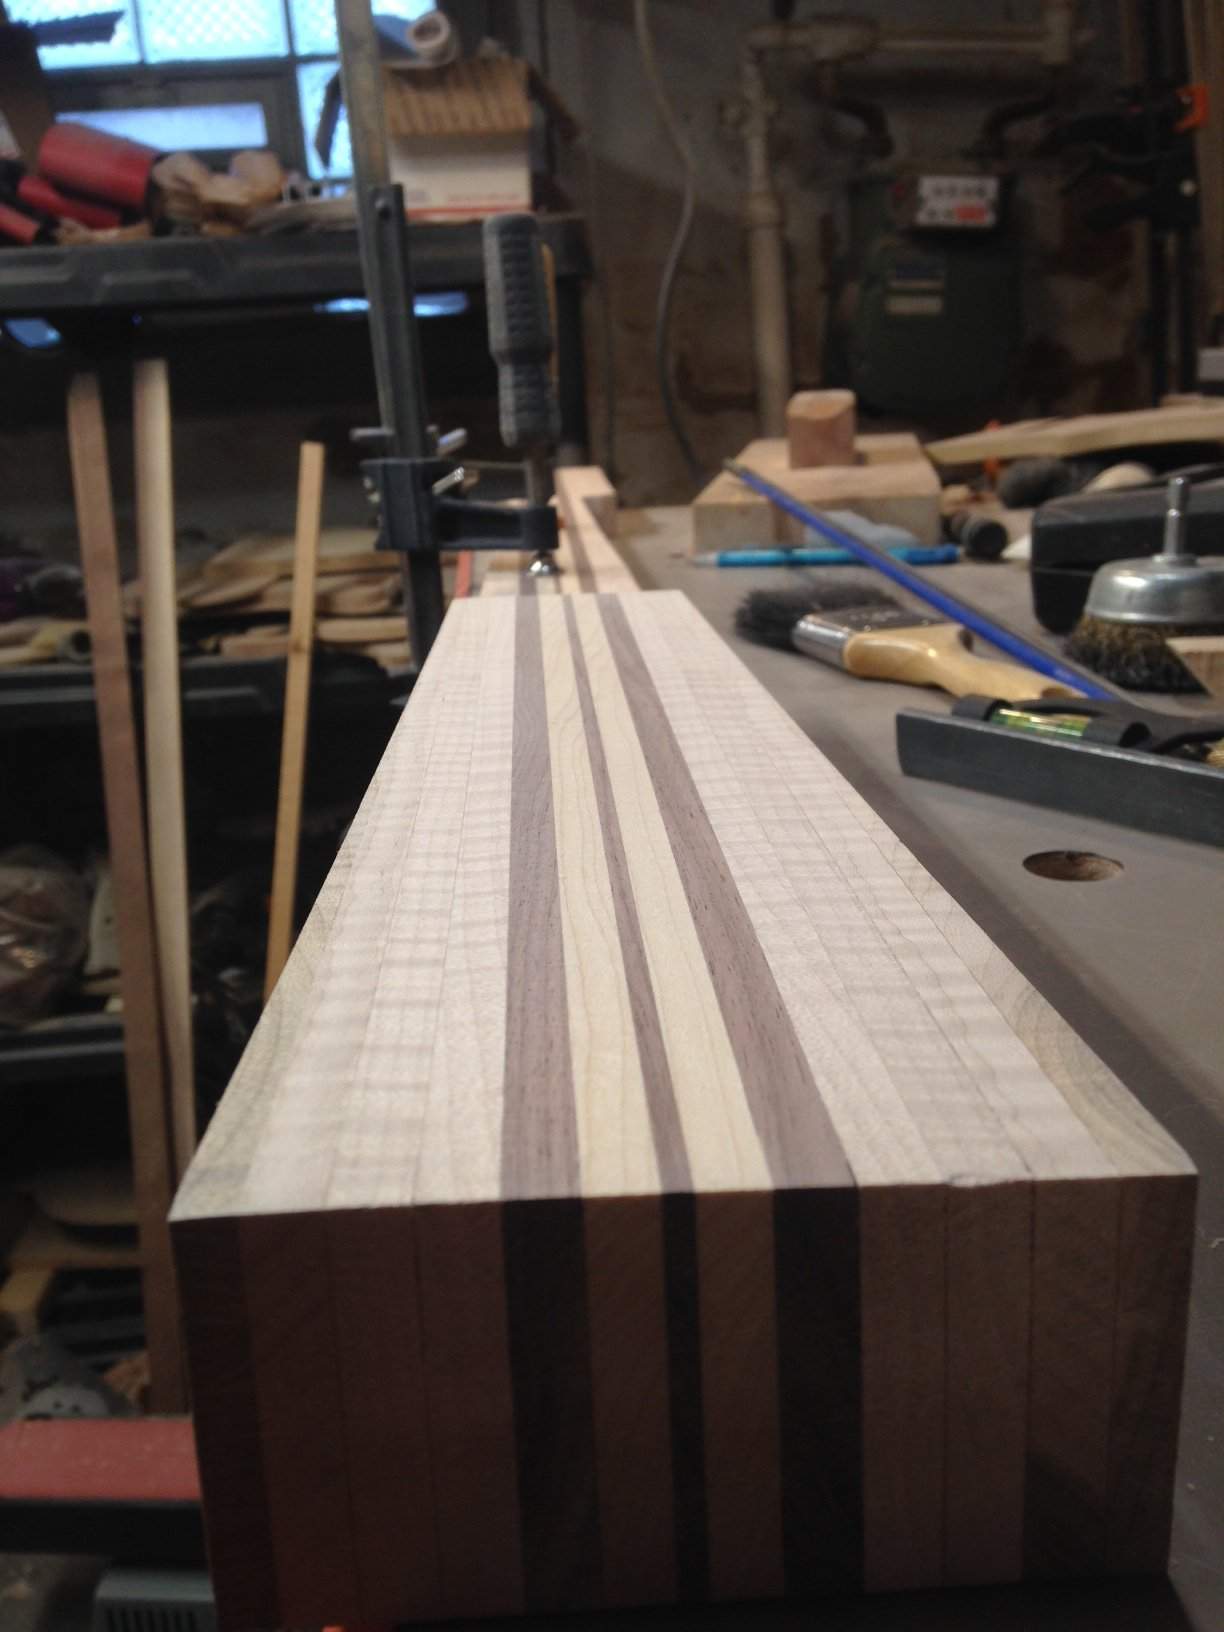
I sanded the hell out of that tenon. It even needs to be thinner, but we'll wait until the dry fit before I do that.
And a question to anyone who's experienced in TOW/epoxy use:
Is it really as simple as cutting a channel, adding a few strips of TOW, flooding it with epoxy, letting it cure, then prepare for a fretboard install?
I sanded the hell out of that tenon. It even needs to be thinner, but we'll wait until the dry fit before I do that.
And a question to anyone who's experienced in TOW/epoxy use:
Is it really as simple as cutting a channel, adding a few strips of TOW, flooding it with epoxy, letting it cure, then prepare for a fretboard install?

Do you mean that if I were to "presoak" a few strips before laying them in, press them together as neatly as possible, then put them into the channels and top off the void with more epoxy, you're saying that is the better method?
In other words, the closer that the TOW is to itself, the stronger that support channel becomes?
In other words, the closer that the TOW is to itself, the stronger that support channel becomes?

Can you take a pic from the side of the neck taper? I've always thought it would look cool, but since I never saw anyone cut through the laminate like that I haven't ever done it.
No. It’s about cf/epoxy ratio. The more cf and less epoxy you have the better. I’d route a channel, wet the channel with epoxy, wait to see that no more epoxy is soaked in the wood, lay the tows in the channel, wet the tows with epoxy and press a wood strip over it. The strip should be a bit loose on channel to have room for excess epoxy to come out.Do you mean that if I were to "presoak" a few strips before laying them in, press them together as neatly as possible, then put them into the channels and top off the void with more epoxy, you're saying that is the better method?
In other words, the closer that the TOW is to itself, the stronger that support channel becomes?
@MPU That is the way I'll have to do it next time. I ended up keeping it simpler with the basic method.
However, I did do 4 channels of it, so hopefully that adds whatever extra benefit that I need.
@Jisch Here's the side shot, though not terribly impressive:
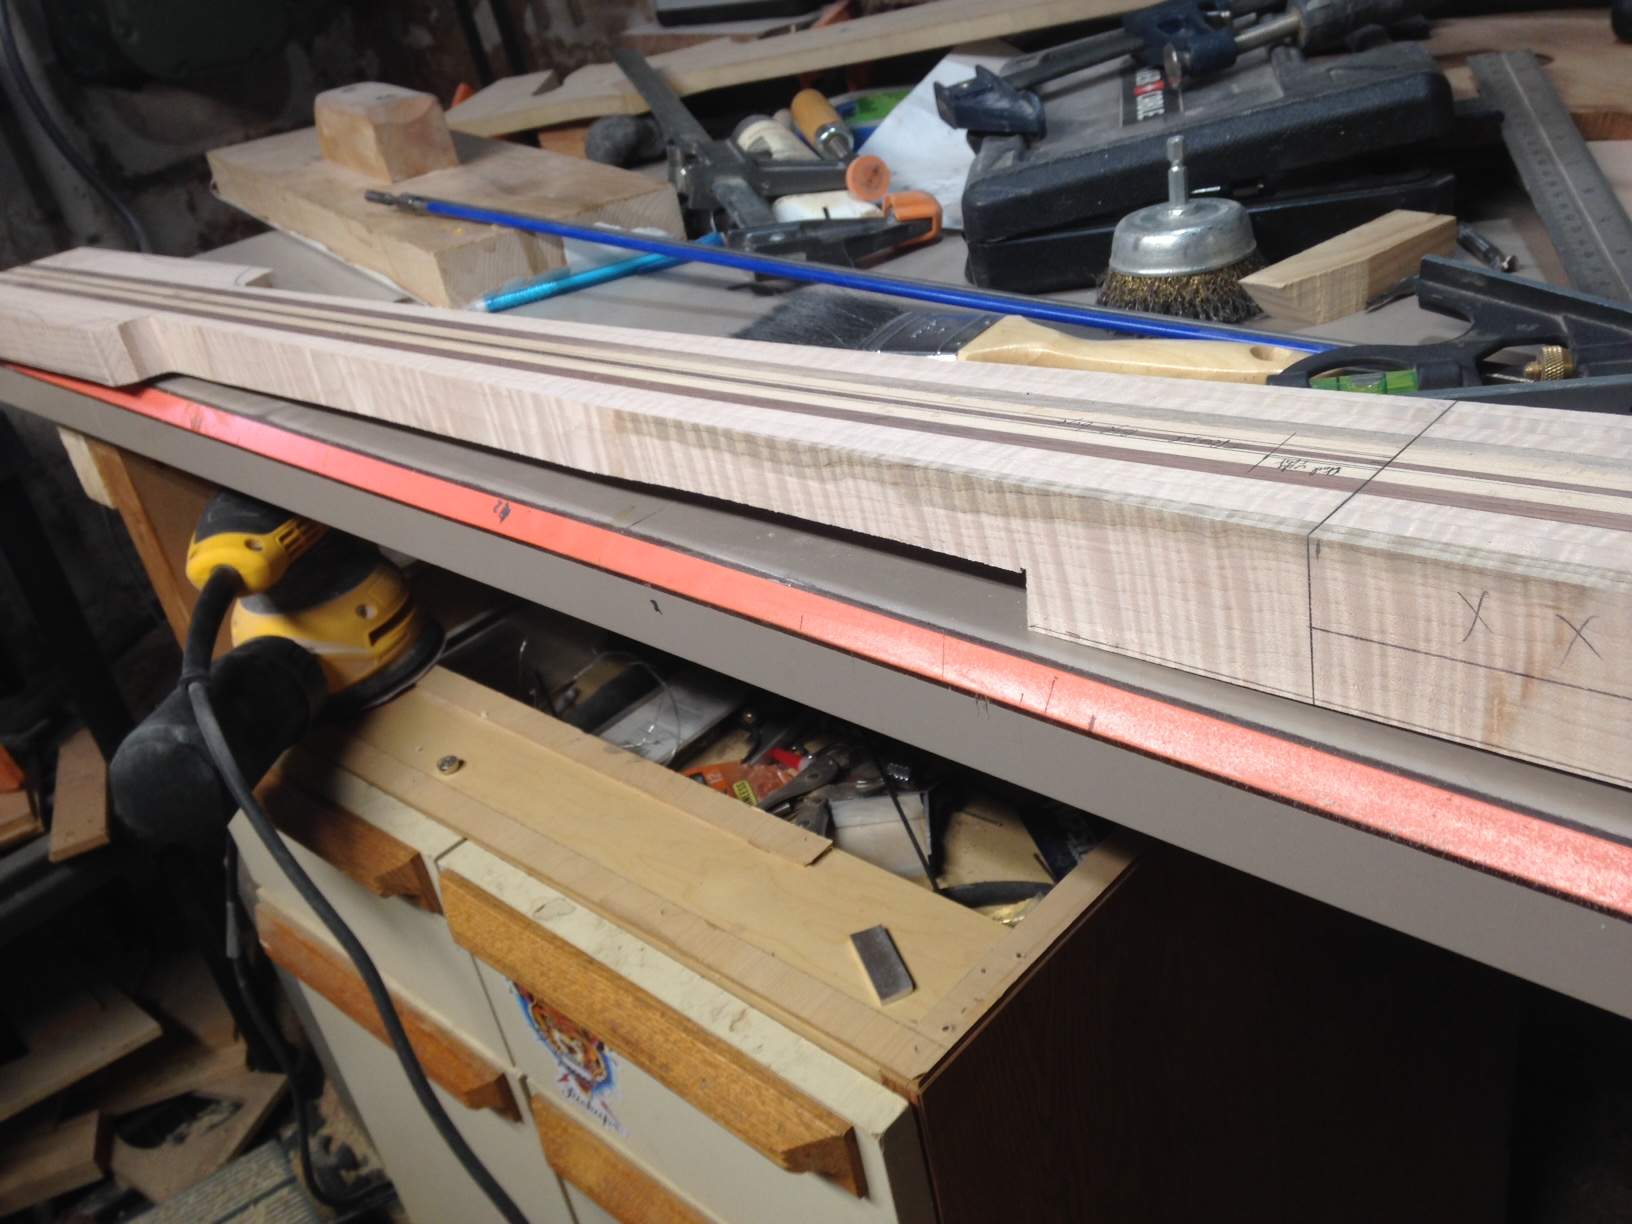
Here's a shot of a different neck I have where the method was similar, in walnut:
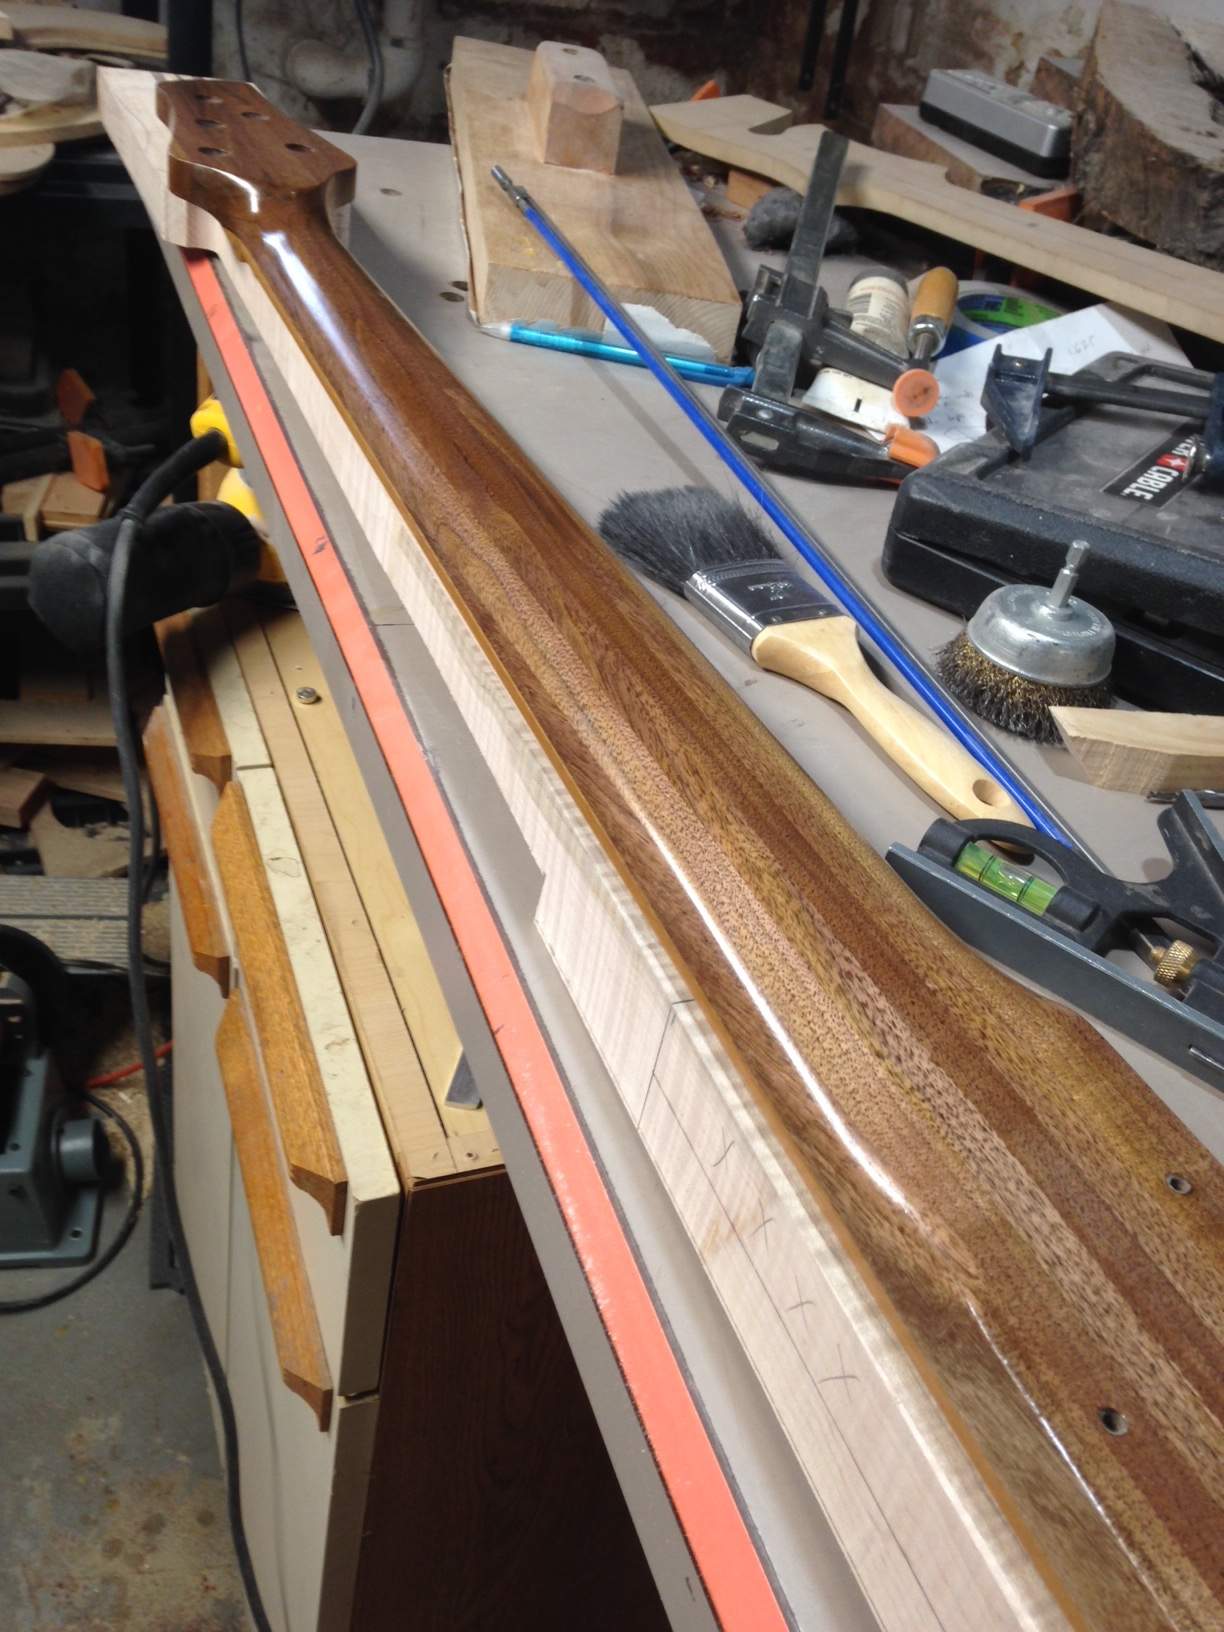
It's pretty subtle.
However, I did do 4 channels of it, so hopefully that adds whatever extra benefit that I need.
@Jisch Here's the side shot, though not terribly impressive:
Here's a shot of a different neck I have where the method was similar, in walnut:
It's pretty subtle.

I guess there are three ways to do it - avoid cut through on the taper, which most of us do, cut a tapered center block (like Wyn) or cut through like you did. I always default to the first one, I should expand.
Gibson made a body entirely out of colored laminates, the contours look cool for sure.
Gibson made a body entirely out of colored laminates, the contours look cool for sure.
Prisma Guitars does stuff like this, made out of skateboard decks.

Today was a good and productive day.
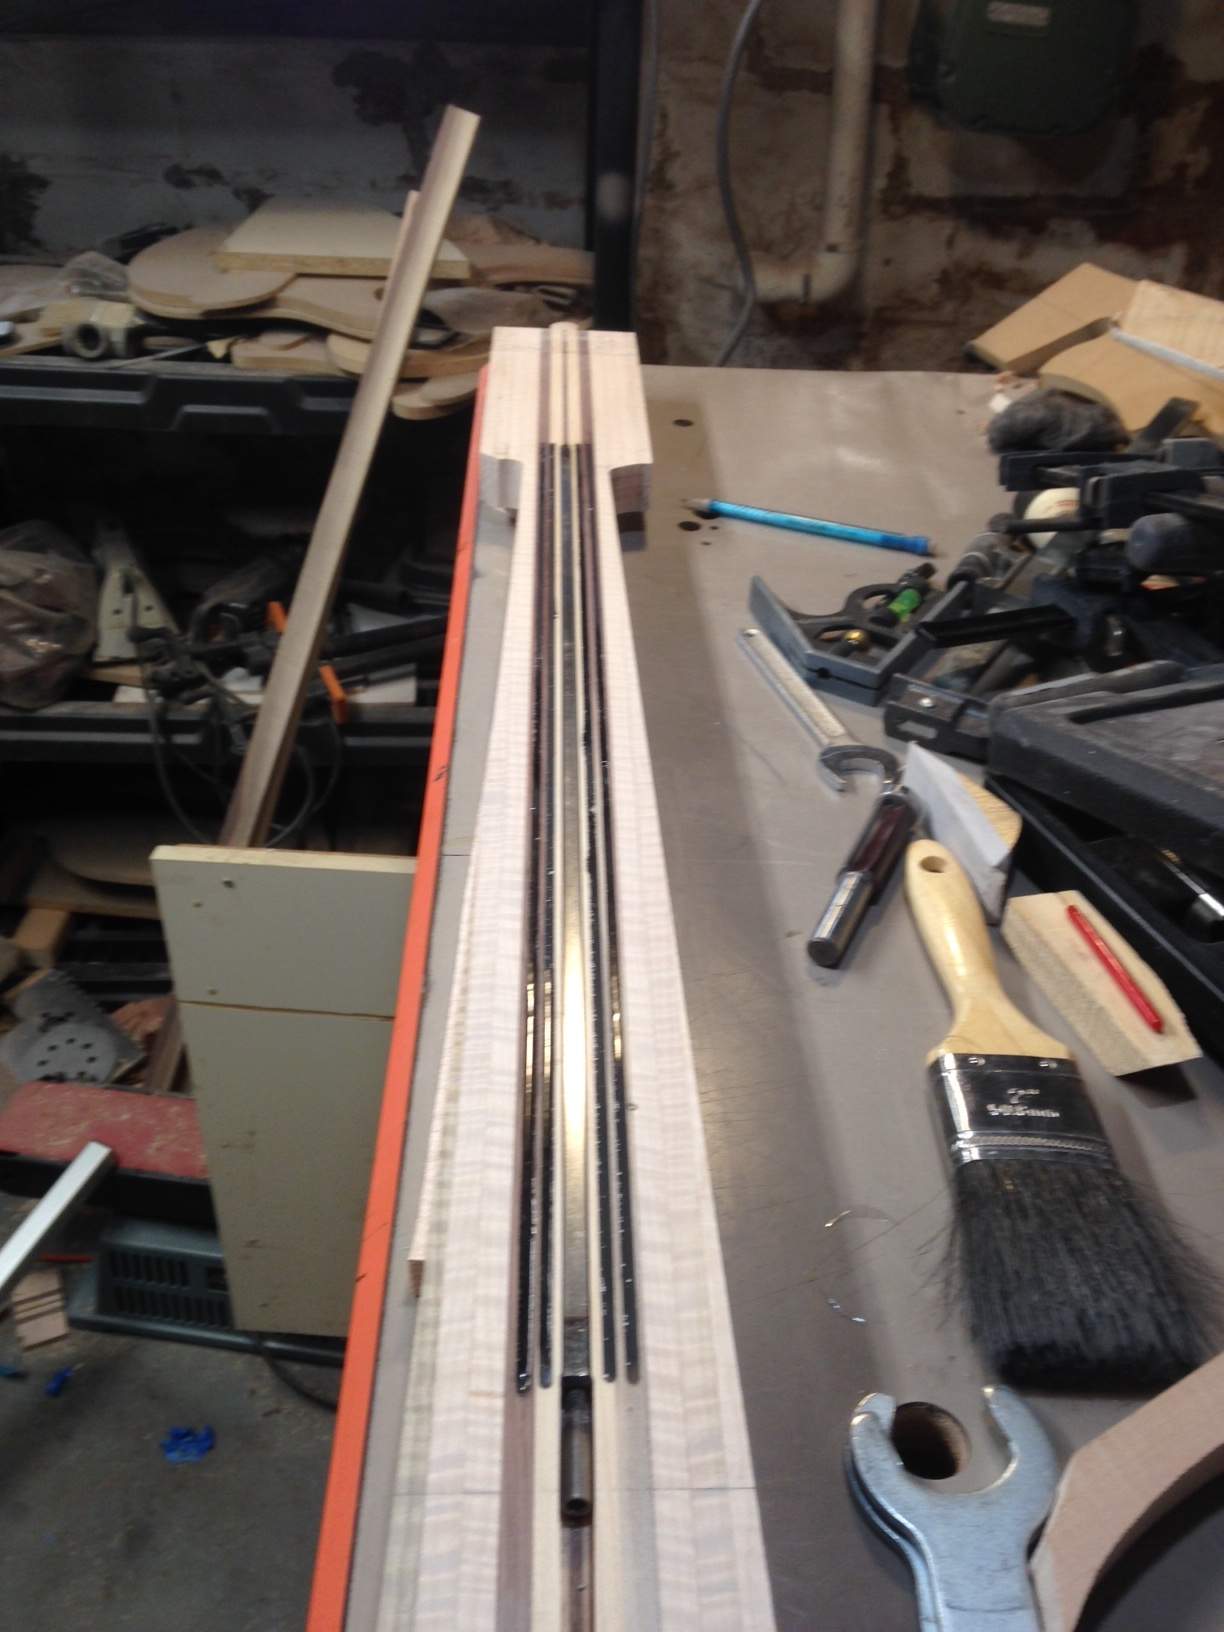
The supports look good:
Neck tenon got cut
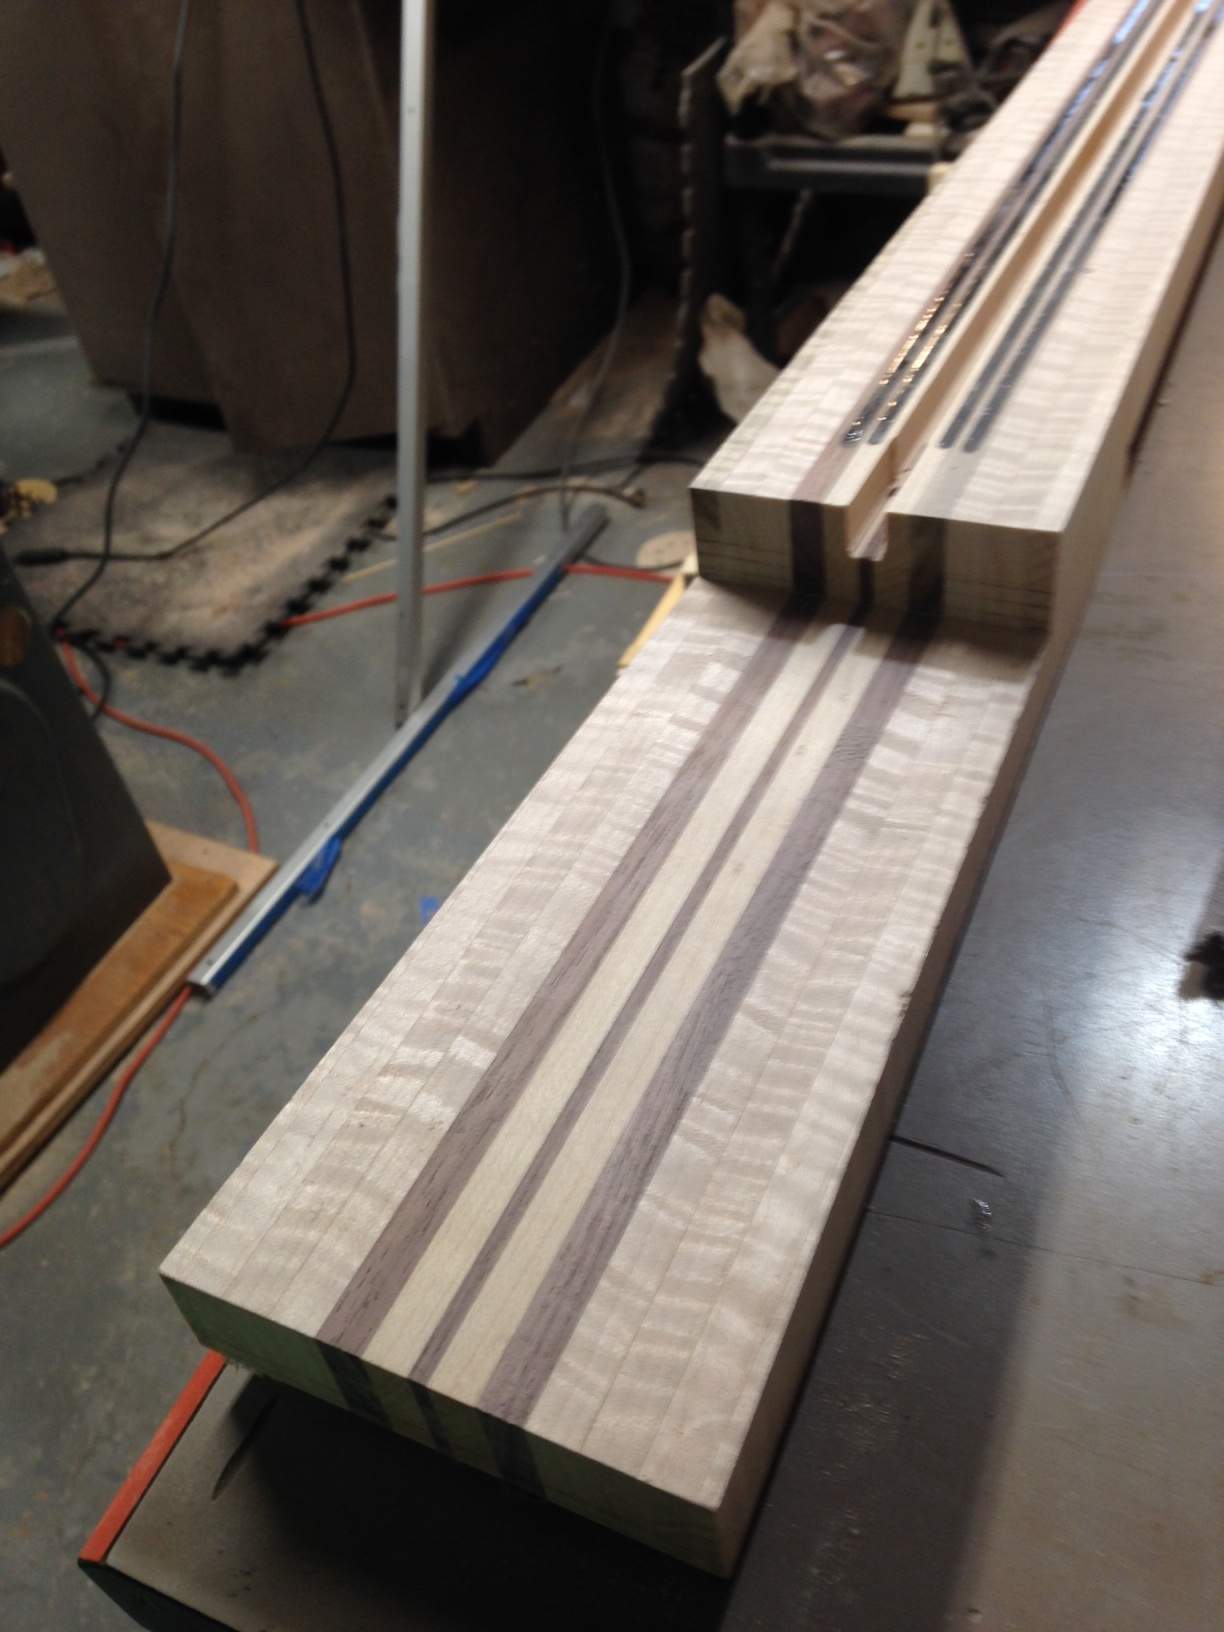
Neck pocket cut out
 (oops, no shot of the inside)
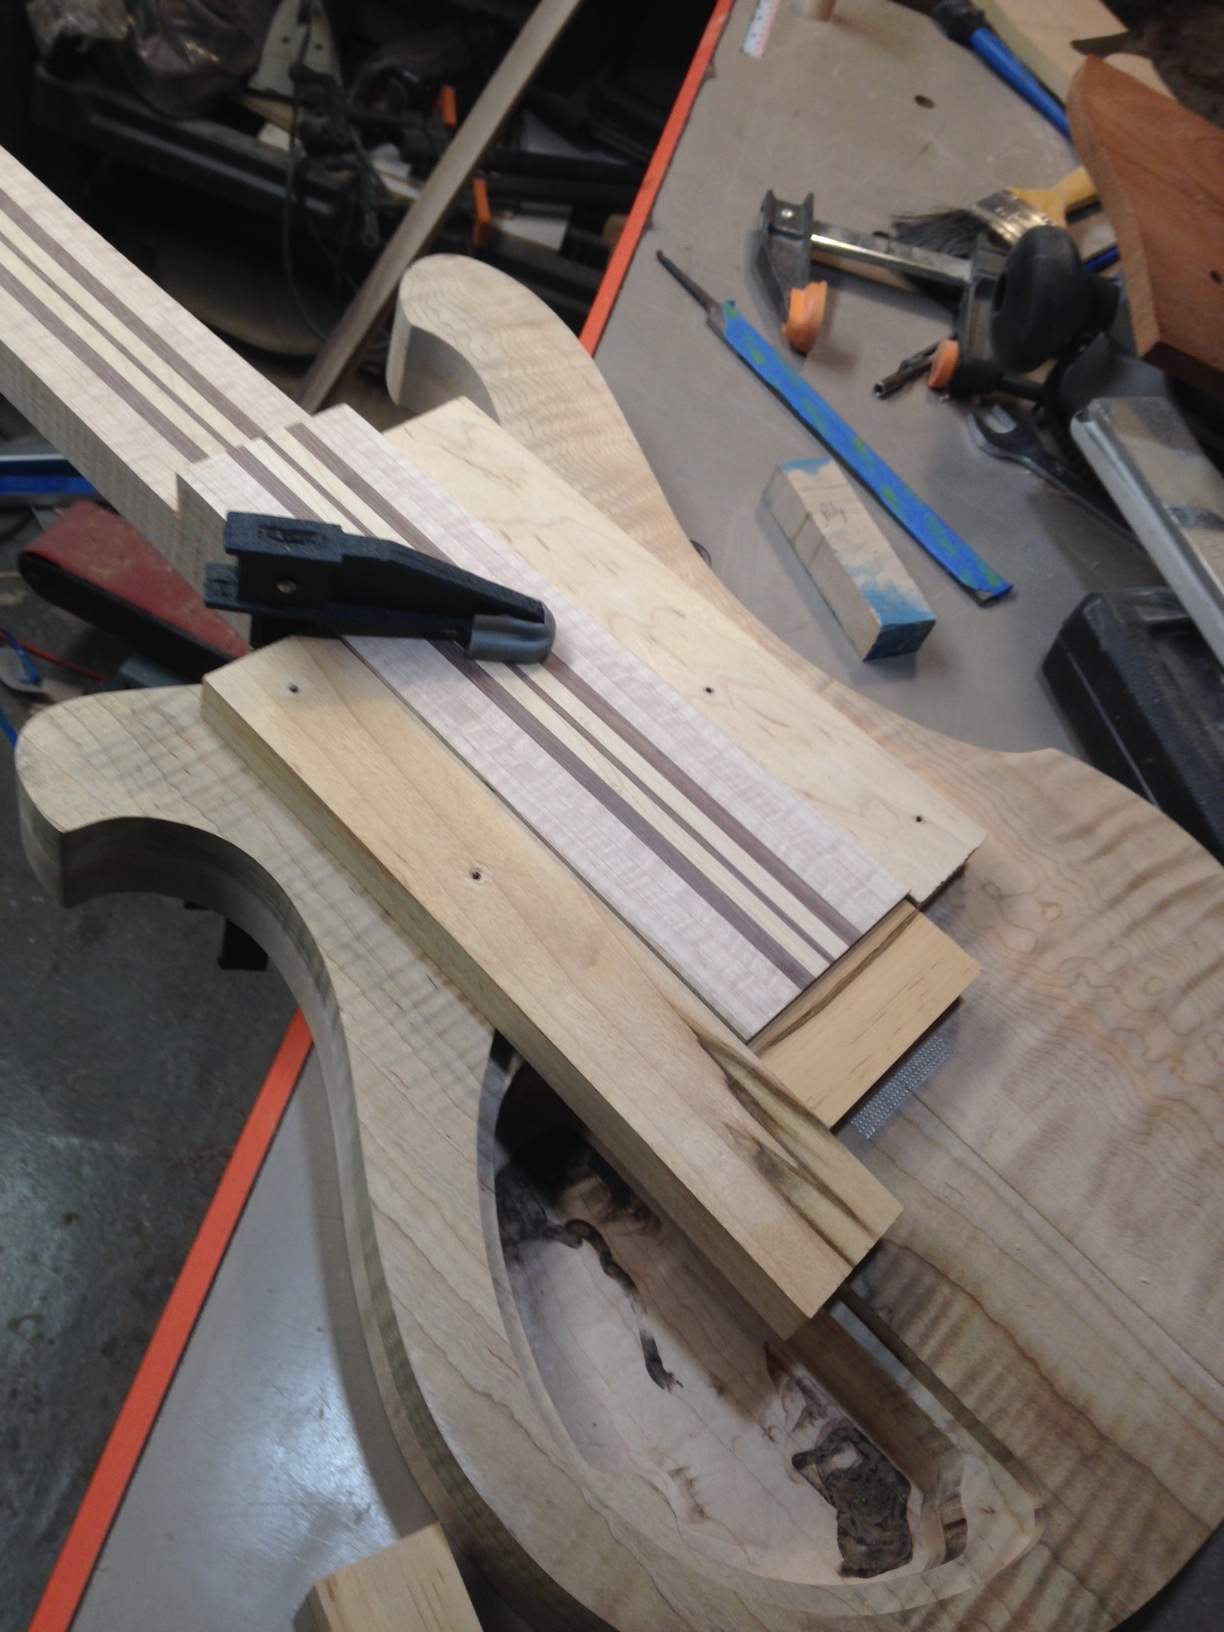
Neck fits!
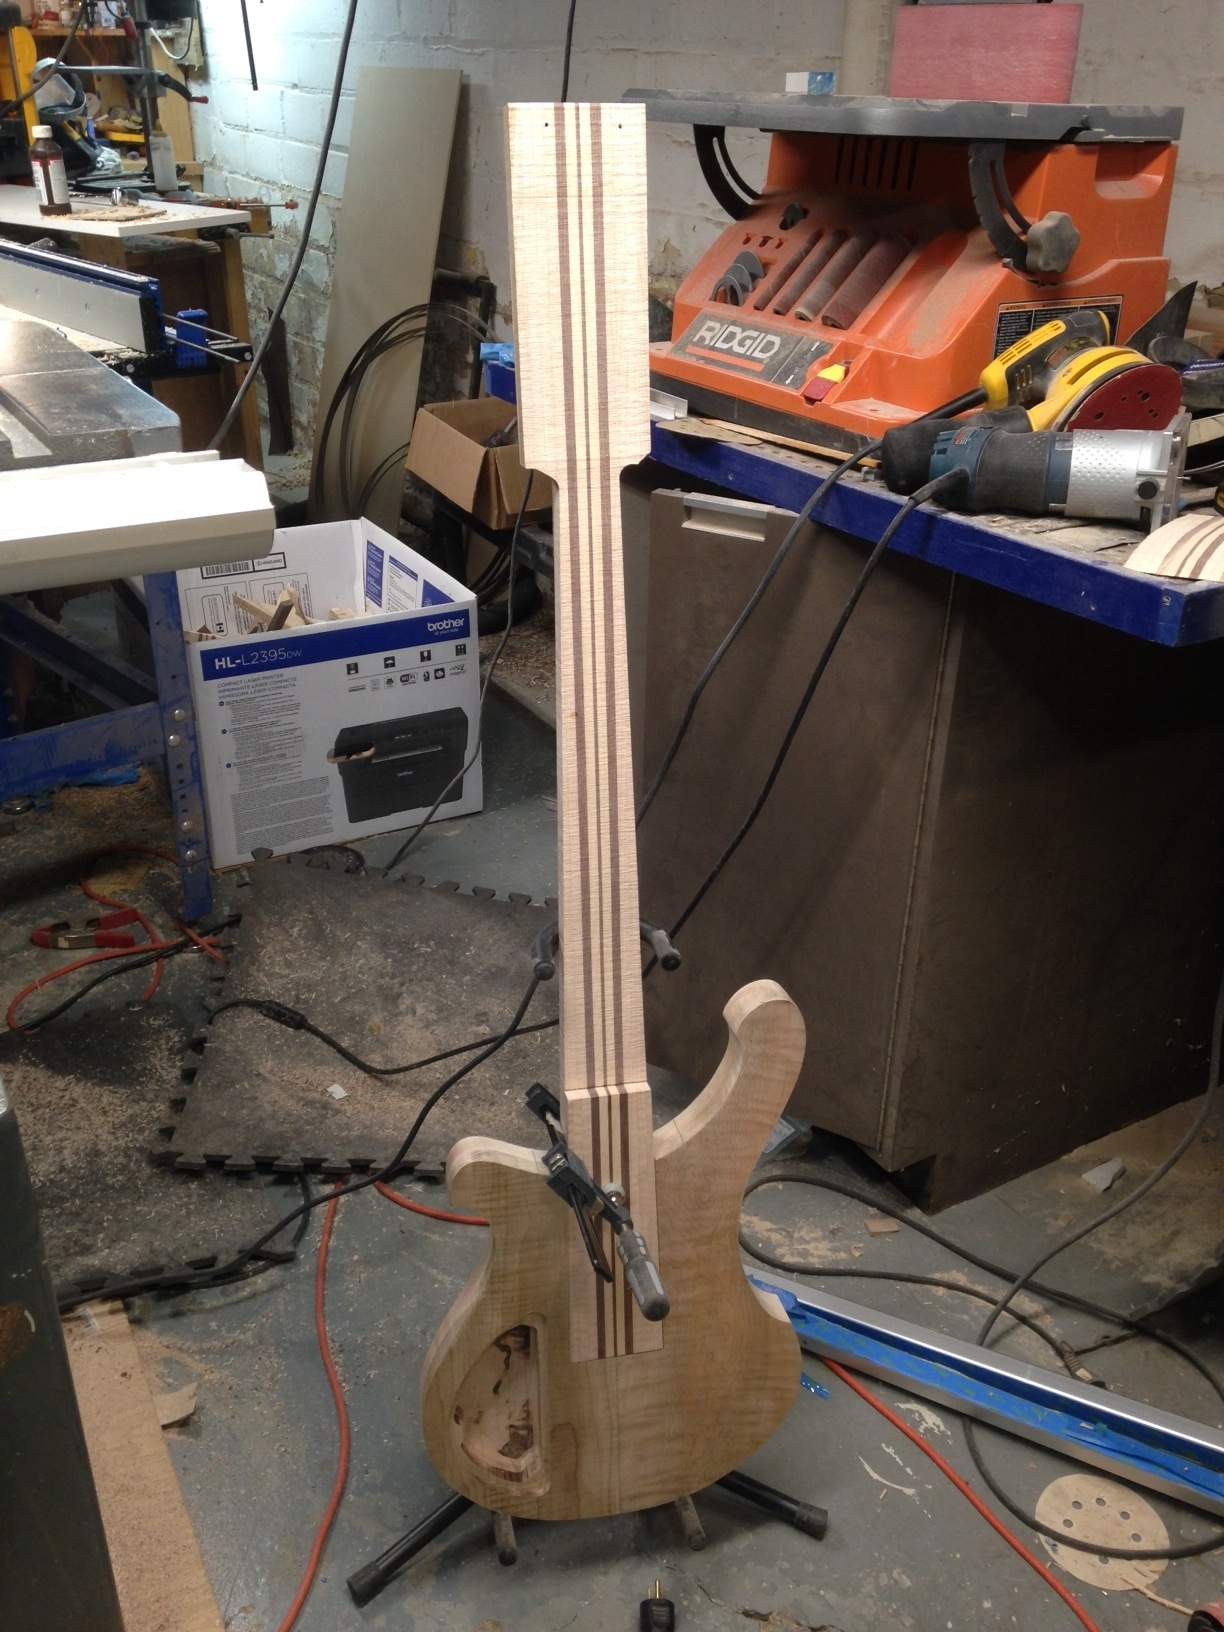
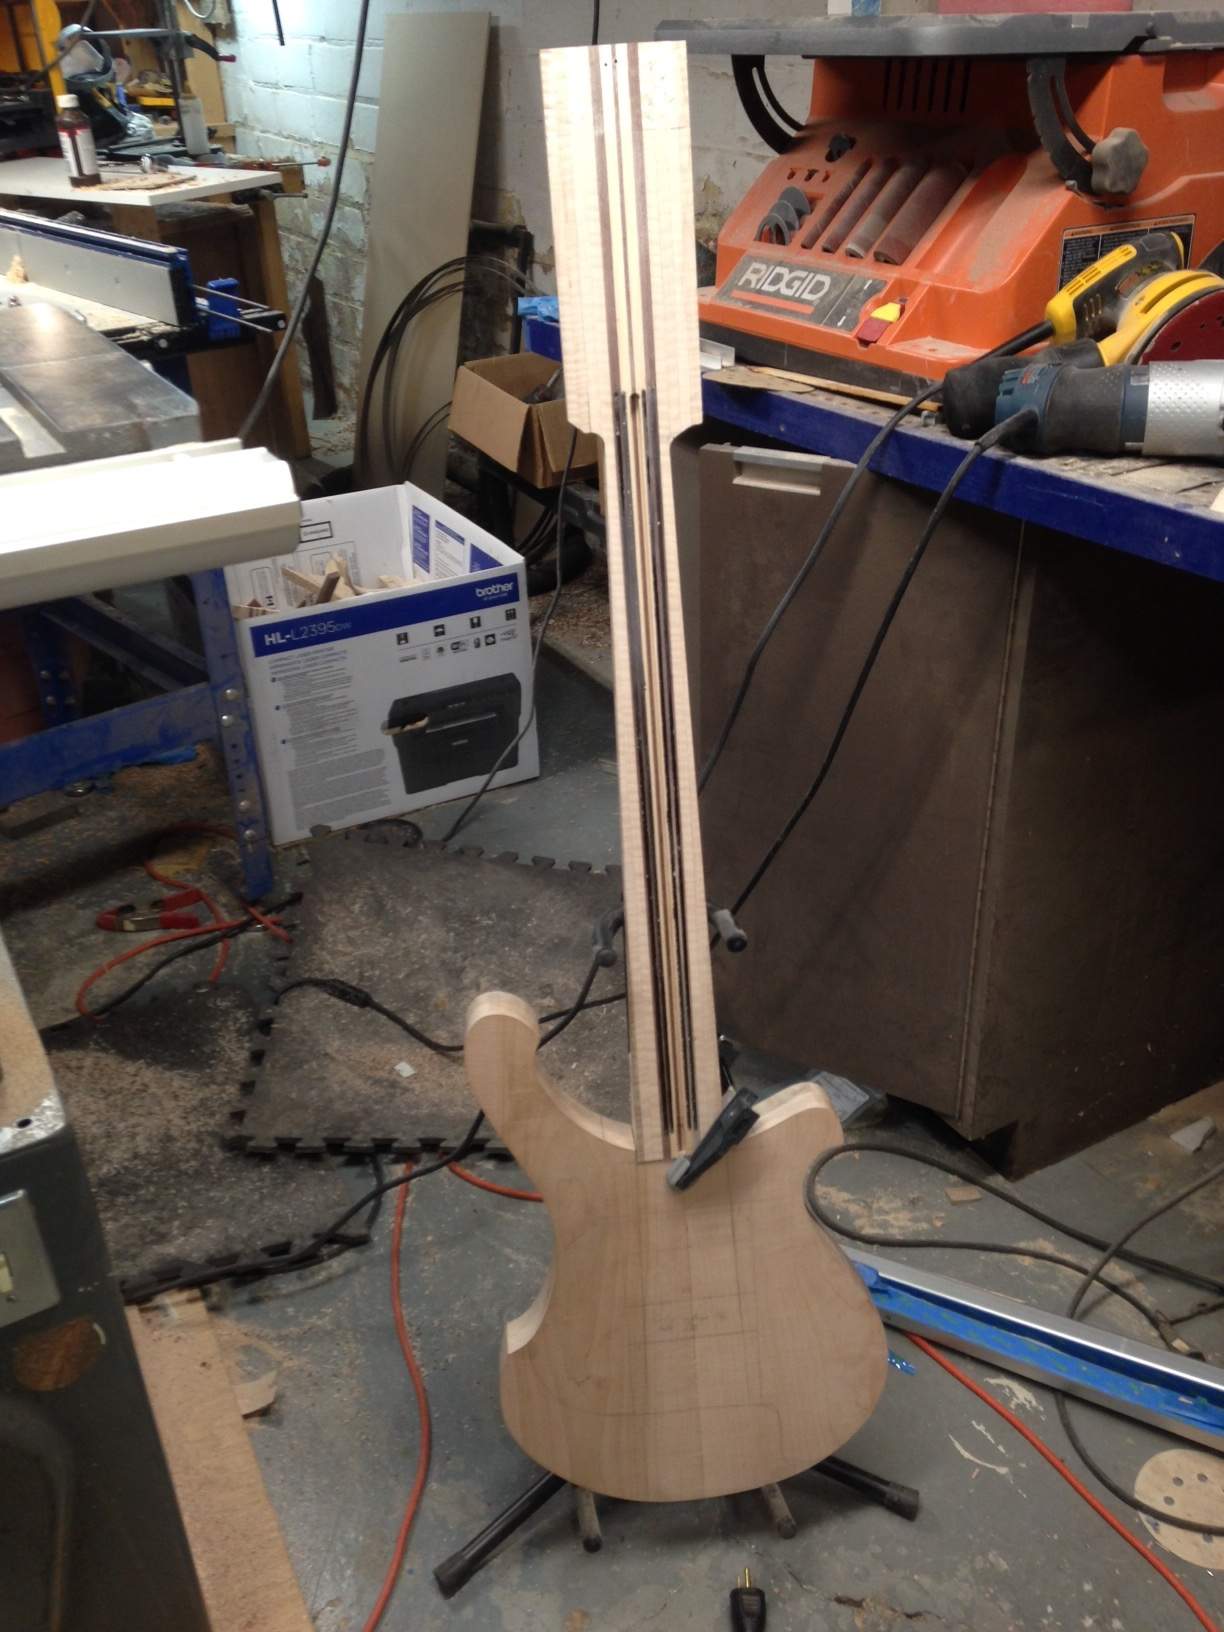
And there's pickup routs
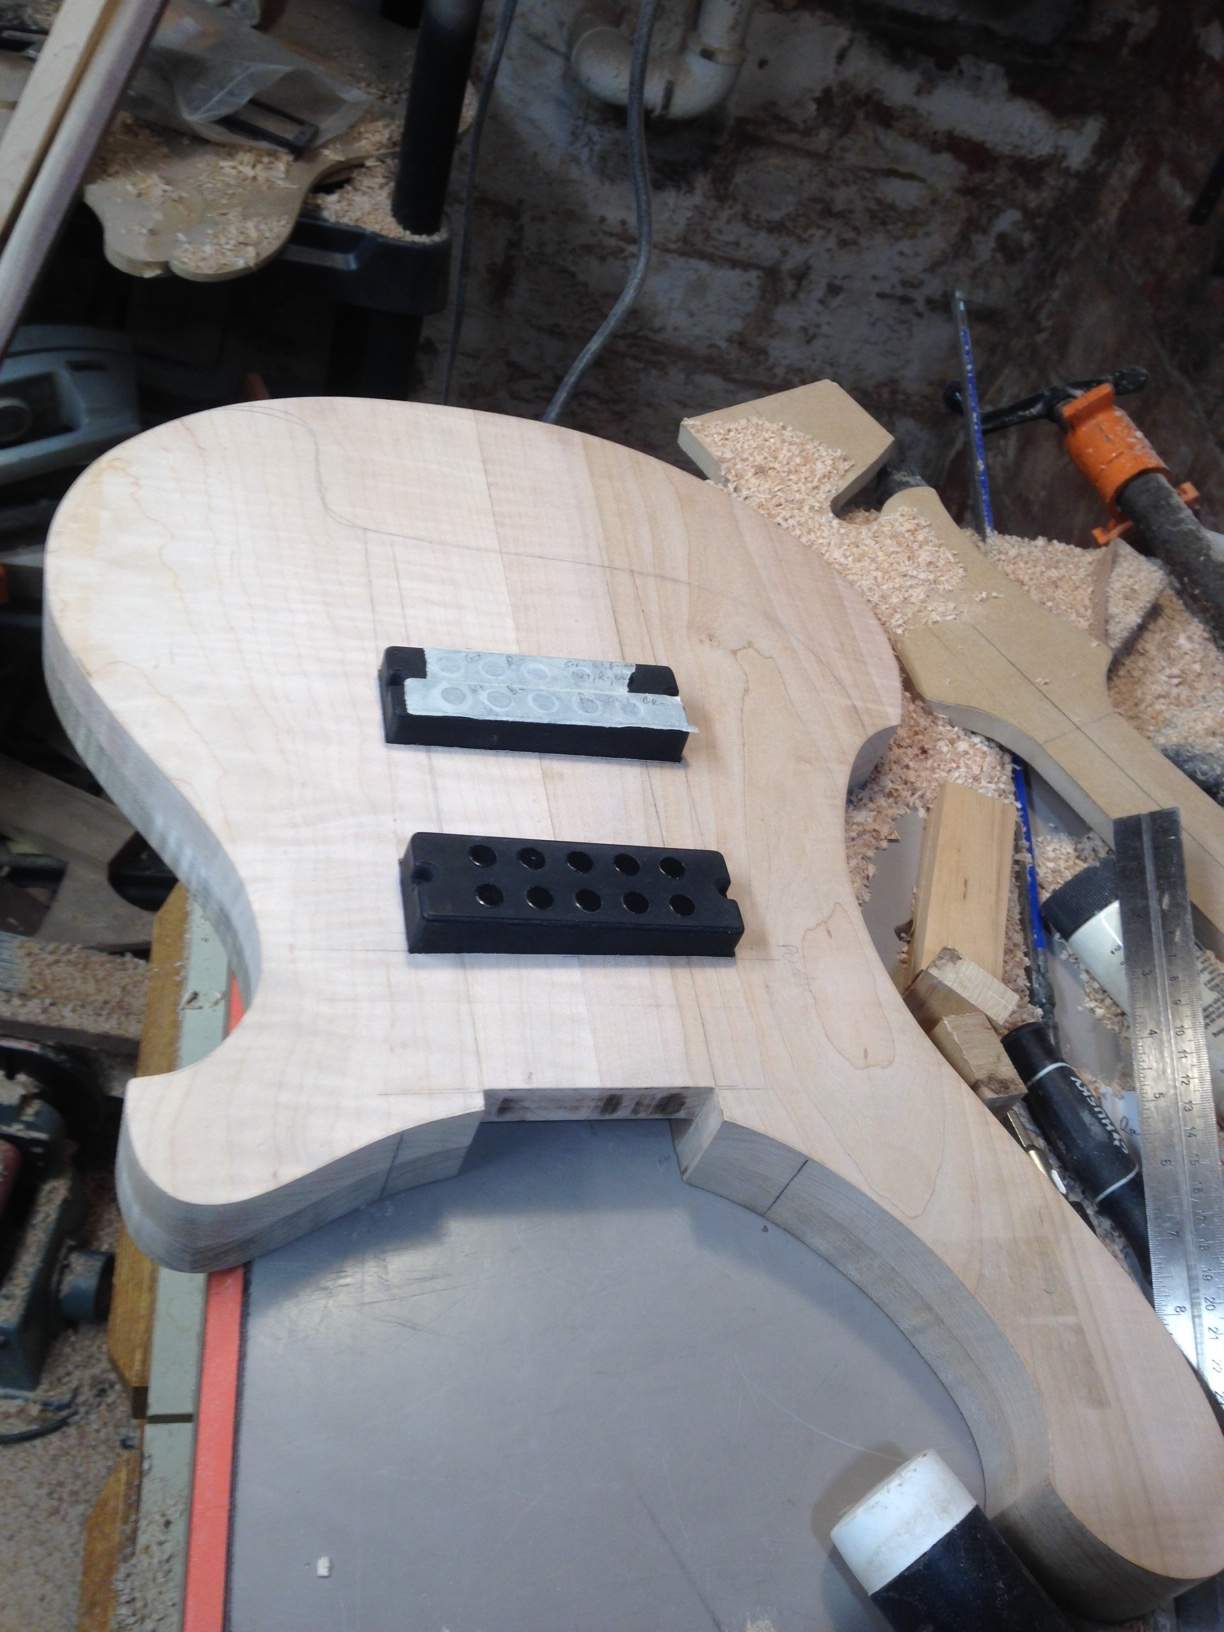
There's a bit of fine sanding and fitment adjustments, but now I can get the neck mount sorted.
Thing is, there's only about 1/4" body thickness below the pickups, and those may need to go deeper (or I get shallower pickups). The dream of doing full-on structural bolts in the pickup cavities may be kinda tough at this point.
I did think about doing metal plates under the pickups. They could span the width of each cavity, leaving a hole for the pickup screws to go to the wood (or tap them for machine screws for the pickups), while also being mounted to said wood sections with screws into the body... but I don't think the physics line up well for that.
Had I thought about it when building the body, I could have inserted bars between the layers and made a REALLY strong mount for the neck. Oh well, maybe next year!
There may still be screws under the pickups, into the neck because it's always nice to have more support wherever possible. But I think I'm gonna have to do some that still go from the back of the neck tenon into the underside of the top, using threaded inserts.
The supports look good:
Neck tenon got cut
Neck pocket cut out
Neck fits!
And there's pickup routs
There's a bit of fine sanding and fitment adjustments, but now I can get the neck mount sorted.
Thing is, there's only about 1/4" body thickness below the pickups, and those may need to go deeper (or I get shallower pickups). The dream of doing full-on structural bolts in the pickup cavities may be kinda tough at this point.
I did think about doing metal plates under the pickups. They could span the width of each cavity, leaving a hole for the pickup screws to go to the wood (or tap them for machine screws for the pickups), while also being mounted to said wood sections with screws into the body... but I don't think the physics line up well for that.
Had I thought about it when building the body, I could have inserted bars between the layers and made a REALLY strong mount for the neck. Oh well, maybe next year!
There may still be screws under the pickups, into the neck because it's always nice to have more support wherever possible. But I think I'm gonna have to do some that still go from the back of the neck tenon into the underside of the top, using threaded inserts.
Love the neck mount, it seems like a Kubicki kind of thing to do. I may end up stealing that for the T-bird VI build.




