

Enjoy the benefits of a premium membership!
Upgrade Account
-
TalkBass has been independent since 1998. Add your voice.
Create a free account to reply to discussions, view embedded media, and browse with fewer display ads.
Join free Log in
Want zero display ads or expanded classifieds tools? Compare plans.
You are using an out of date browser. It may not display this or other websites correctly.
You should upgrade or use an alternative browser.
You should upgrade or use an alternative browser.
Winter Build Off 2020 - Malefactor 5
- Thread starter Beej
- Start date
More options
Who Replied?
Haven't tried to....I'm mostly just happy that nobody figured mine out yet.

 .....
.....Leaving you girls to fight it out.....Byeeeee


- Apr 18, 2008
- 16,027
- 1
- 31,763
- Disclosures
- I'm highly opinionated and extremely self-assured
It's a conversation....
Indeed it is!
I just butted into it I guess....

No I didn't!.....LMNO goldfish doesn't make sense!.....You left out LMNO goldfish


I'll just leave this here, as an explanation. Wouldn't want anyone thinking I'm weird or anything.Haven't tried to....
Leaving you girls to fight it out.....Byeeeee

#BigHairAndScreaminGuitarSolos #MissThoseDays #2817668
Edit - Yes, I've called that number. Just like everybody called 8675309 too. Don't @ me.

Unless maybe Abby was an adult? I can see her saying " 'Ell, 'em ain't no goldfish!"No I didn't!.....LMNO goldfish doesn't make sense!.....
Nope....that would be EEAN goldfish.....Can't you people read???.....Unless maybe Abby was an adult? I can see her saying " 'Ell, 'em ain't no goldfish!"
 ......
You can't just change the rules like that! How are little people supposed to follow along and understand? It's bad enough we have to filter this through all those weird accents in the British Isles...Nope....that would be EEAN goldfish.....Can't you people read???.....
You can't just change the rules like that! How are little people supposed to follow along and understand? It's bad enough we have to filter this through all those weird accents in the British Isles...
Weird accents?.......Ahhh....you must mean the Welsh.....
.....I didn't change the rules...you just don't understand them....
.....Now get back to thrilling us all with some cool and groovy build pics.....


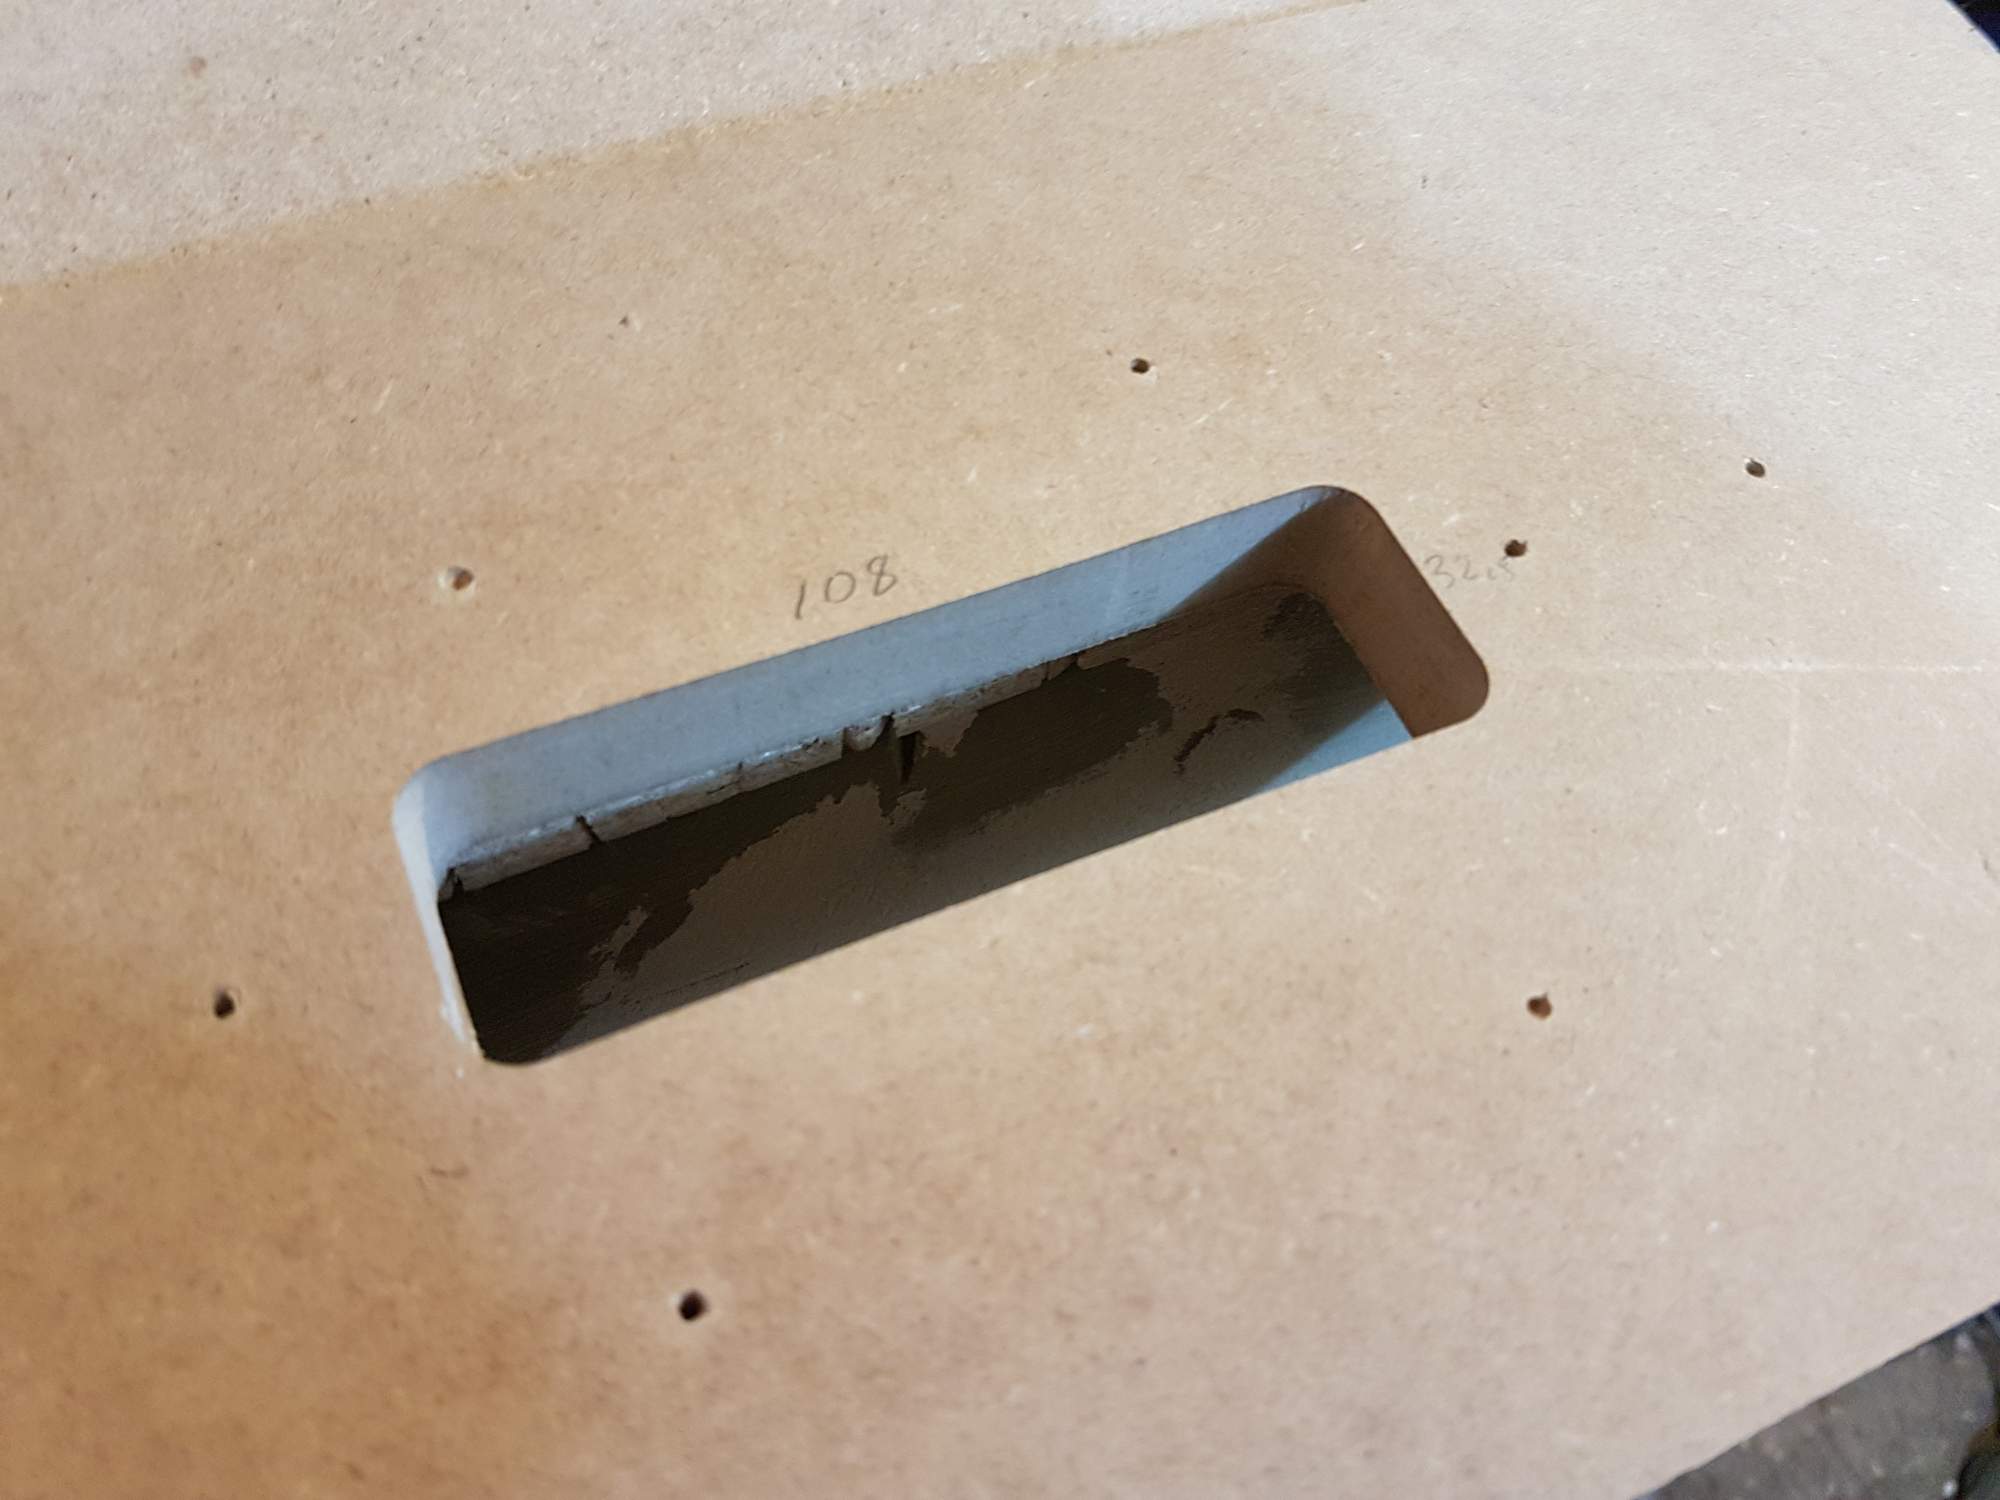
I had a to make a new slightly smaller soapbar pickup routing template to make my new covers.
And special for @JIO here are some pics of the inserts I used. They are glued in with epoxy glue. The toothed ones on the left side are the ones I like to use, but could not do so here as the aluminum stiffening rods are in the way of the holes I'd have to drill.
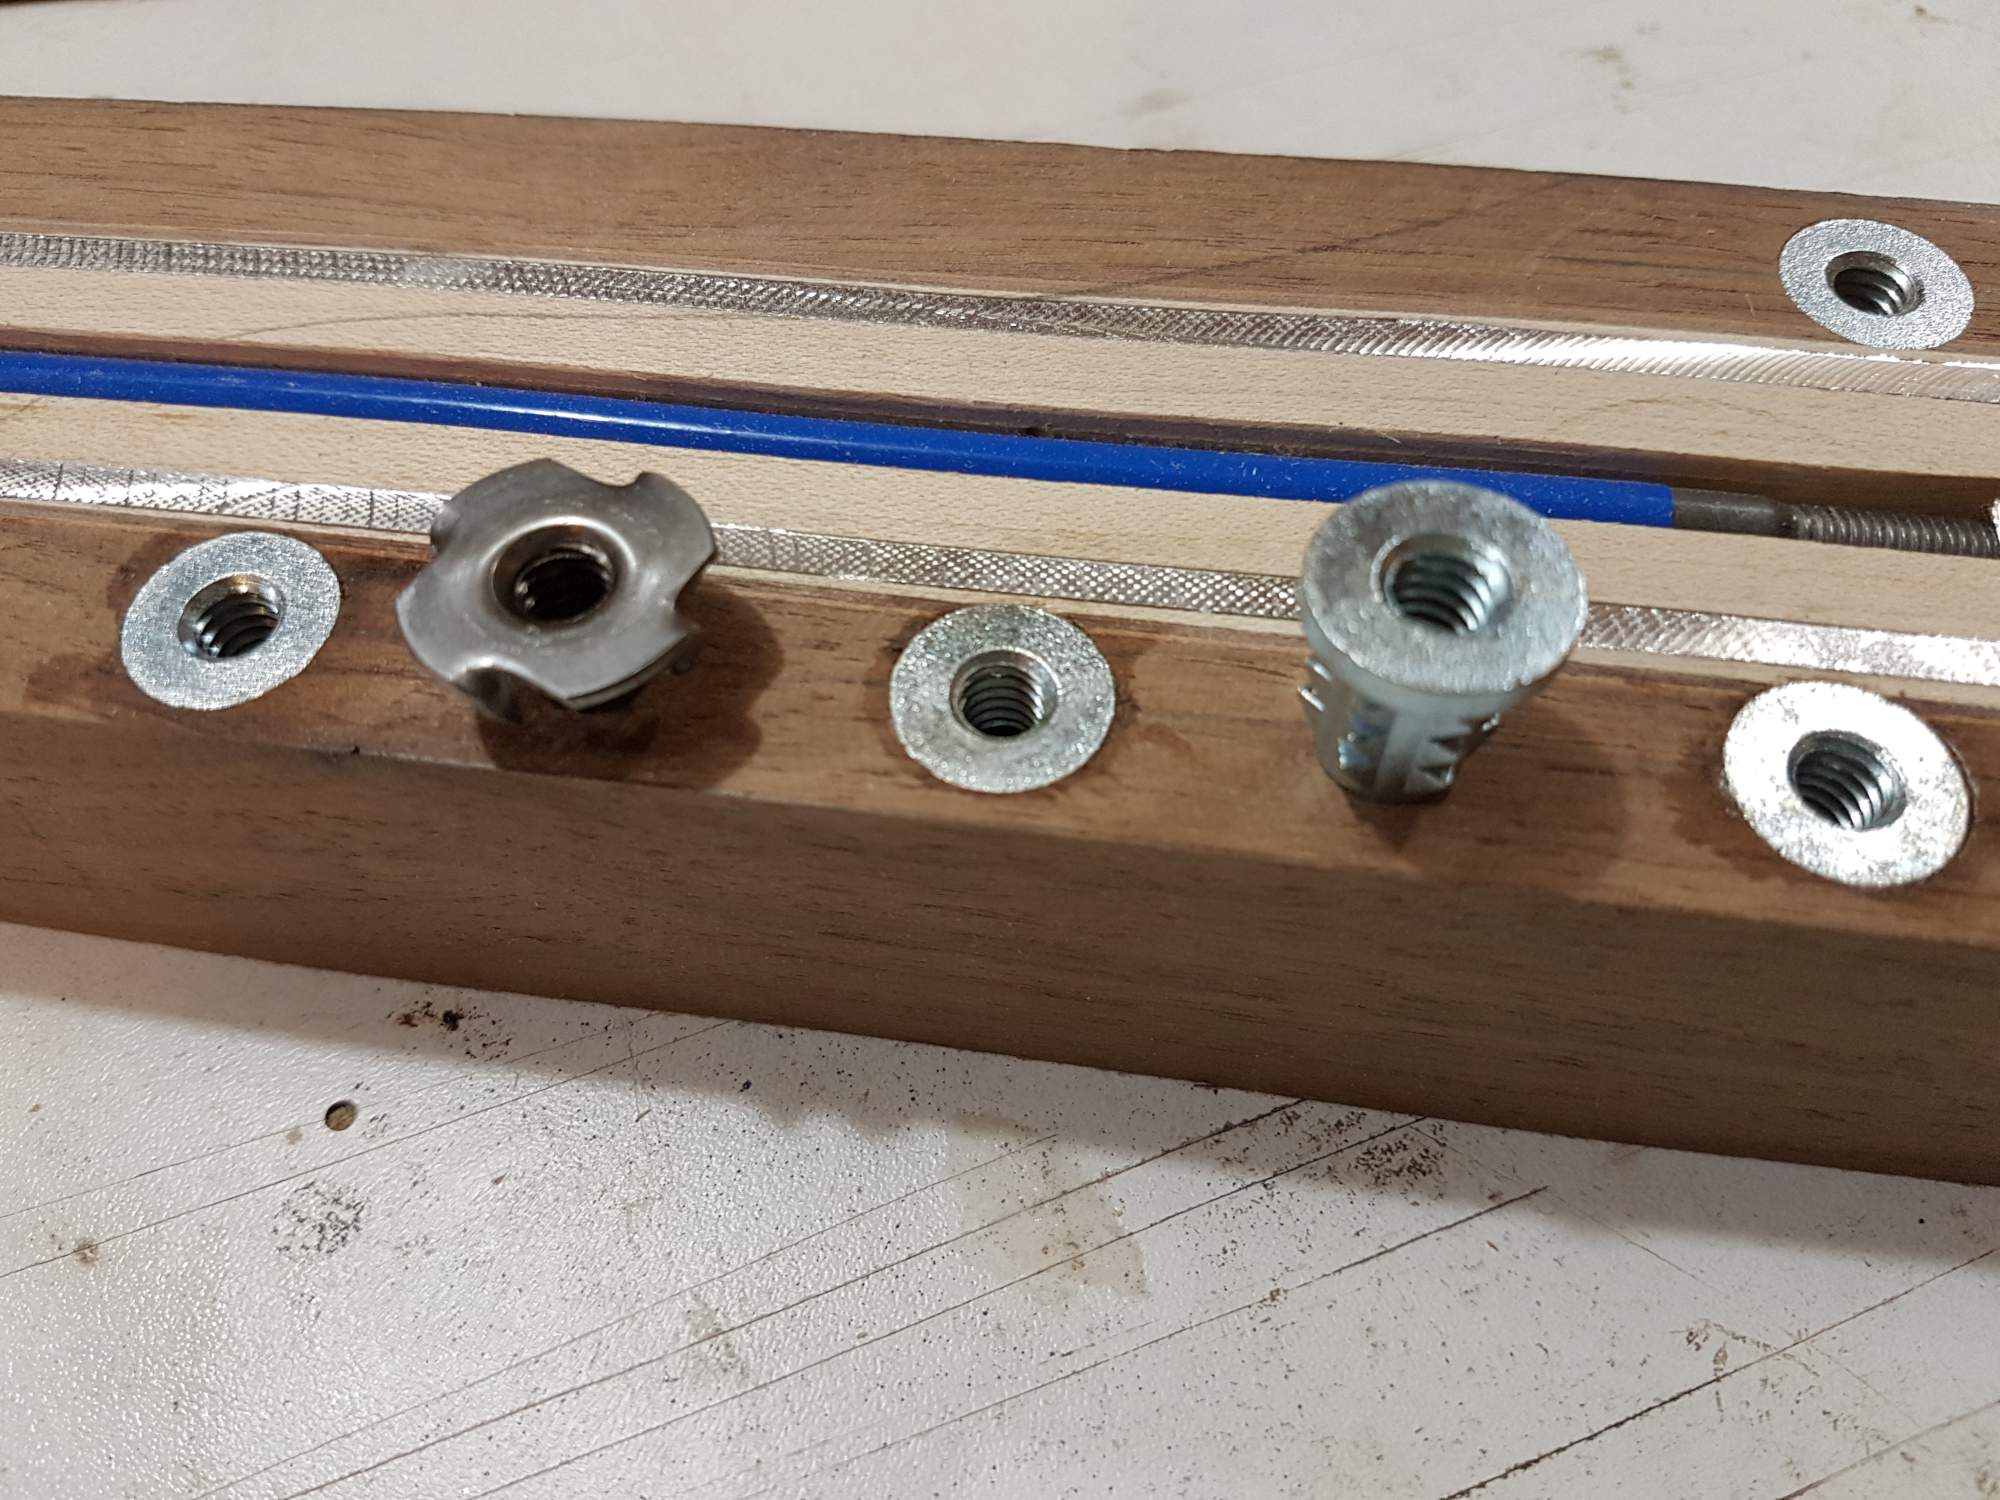
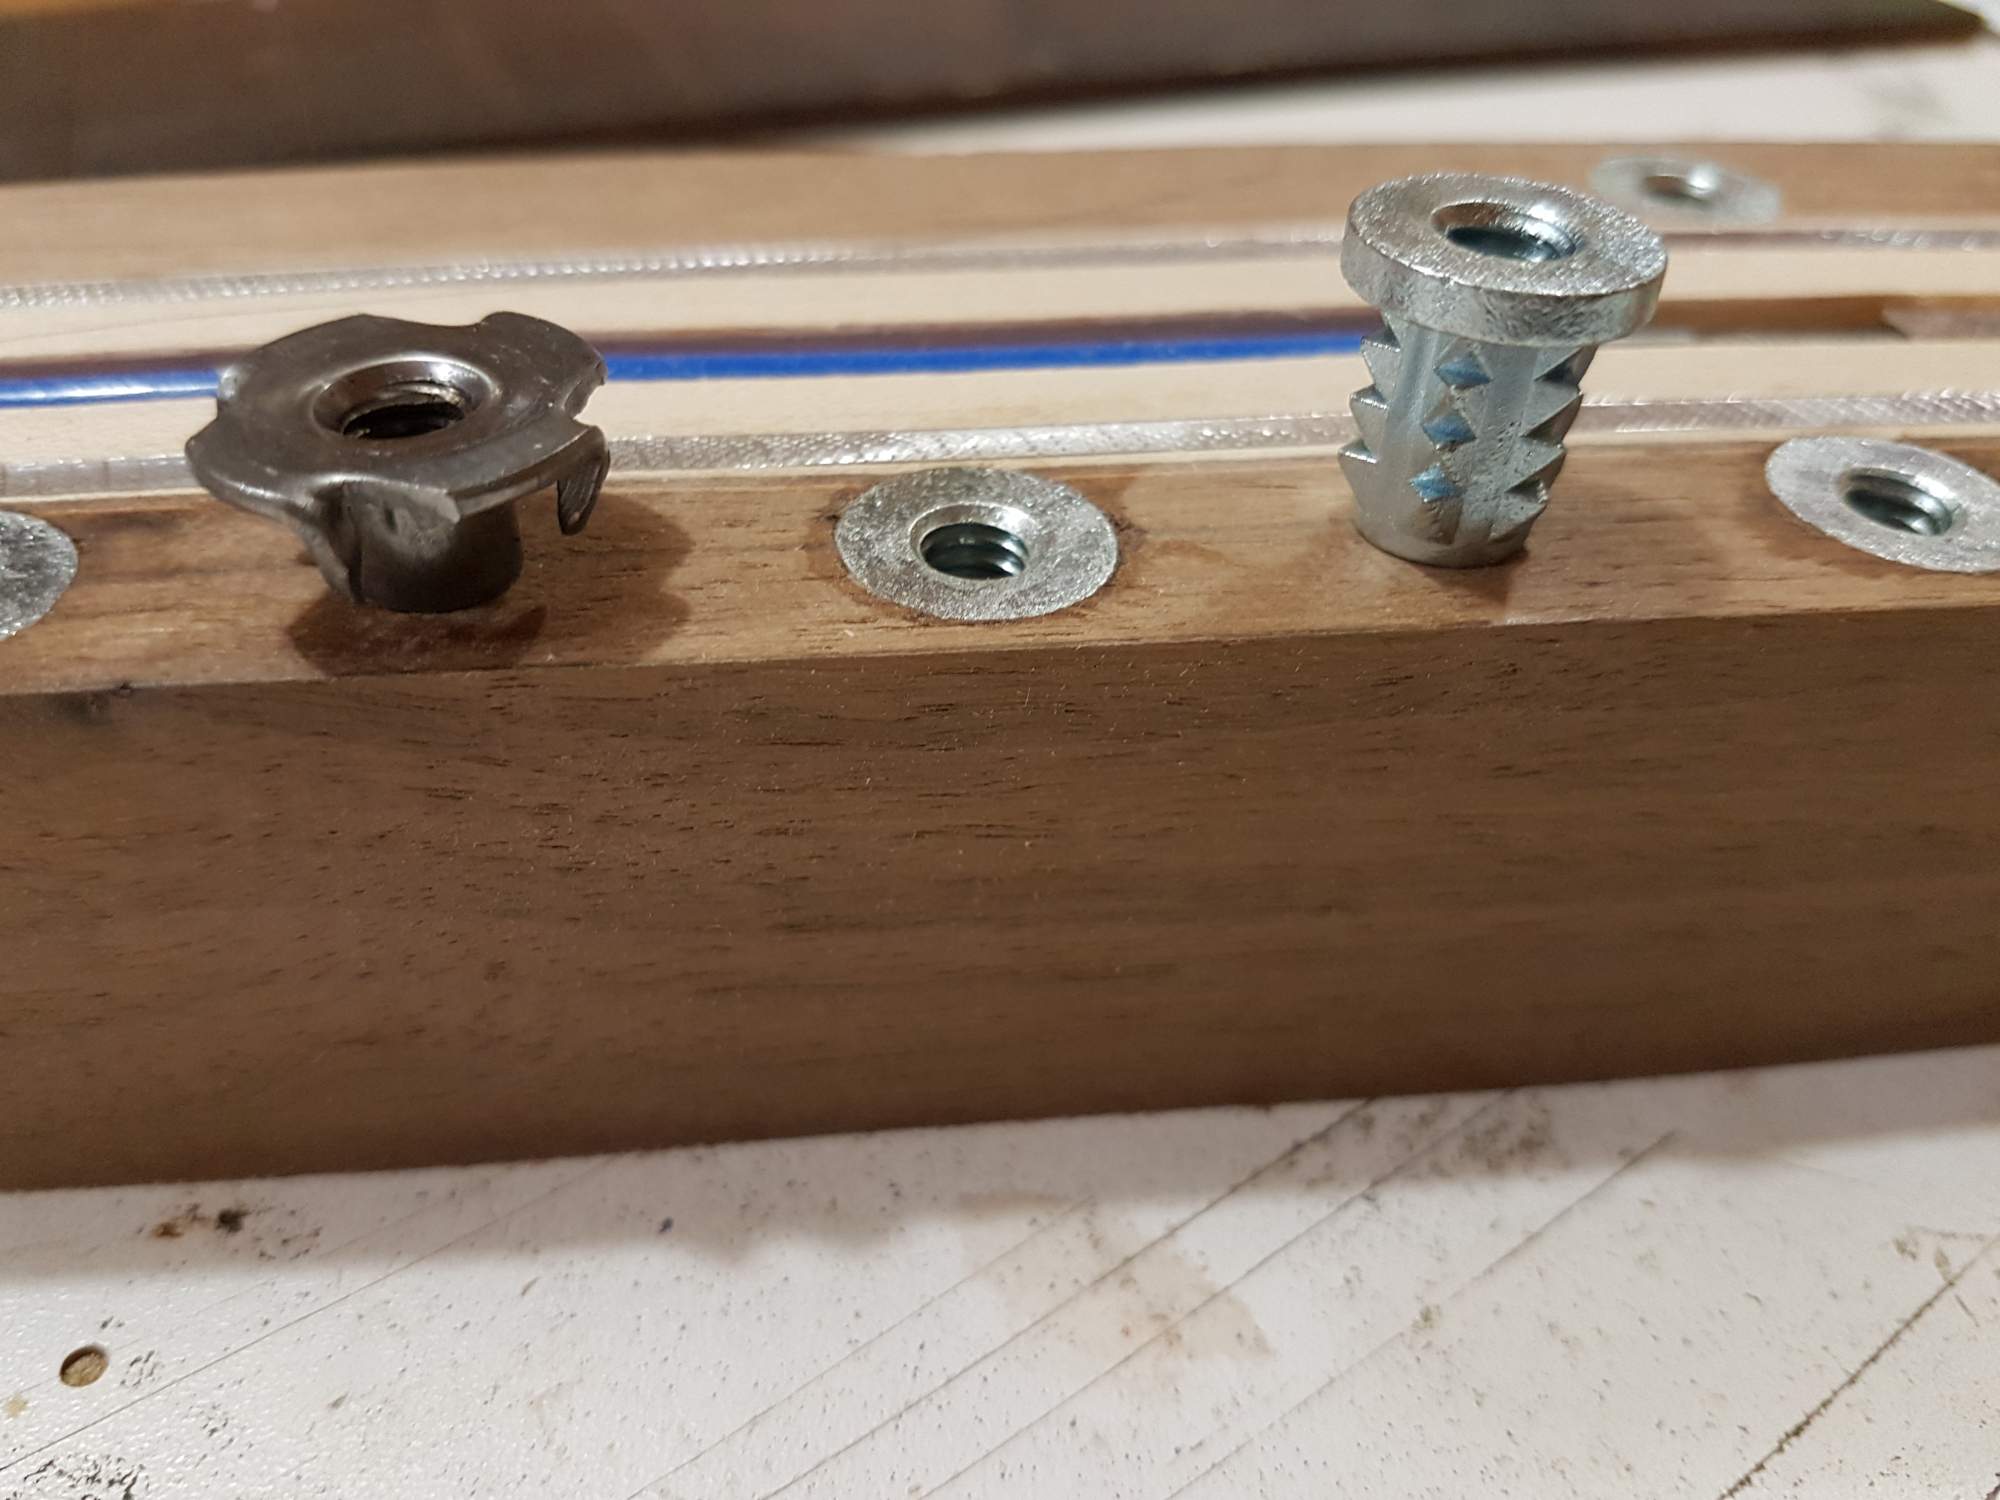
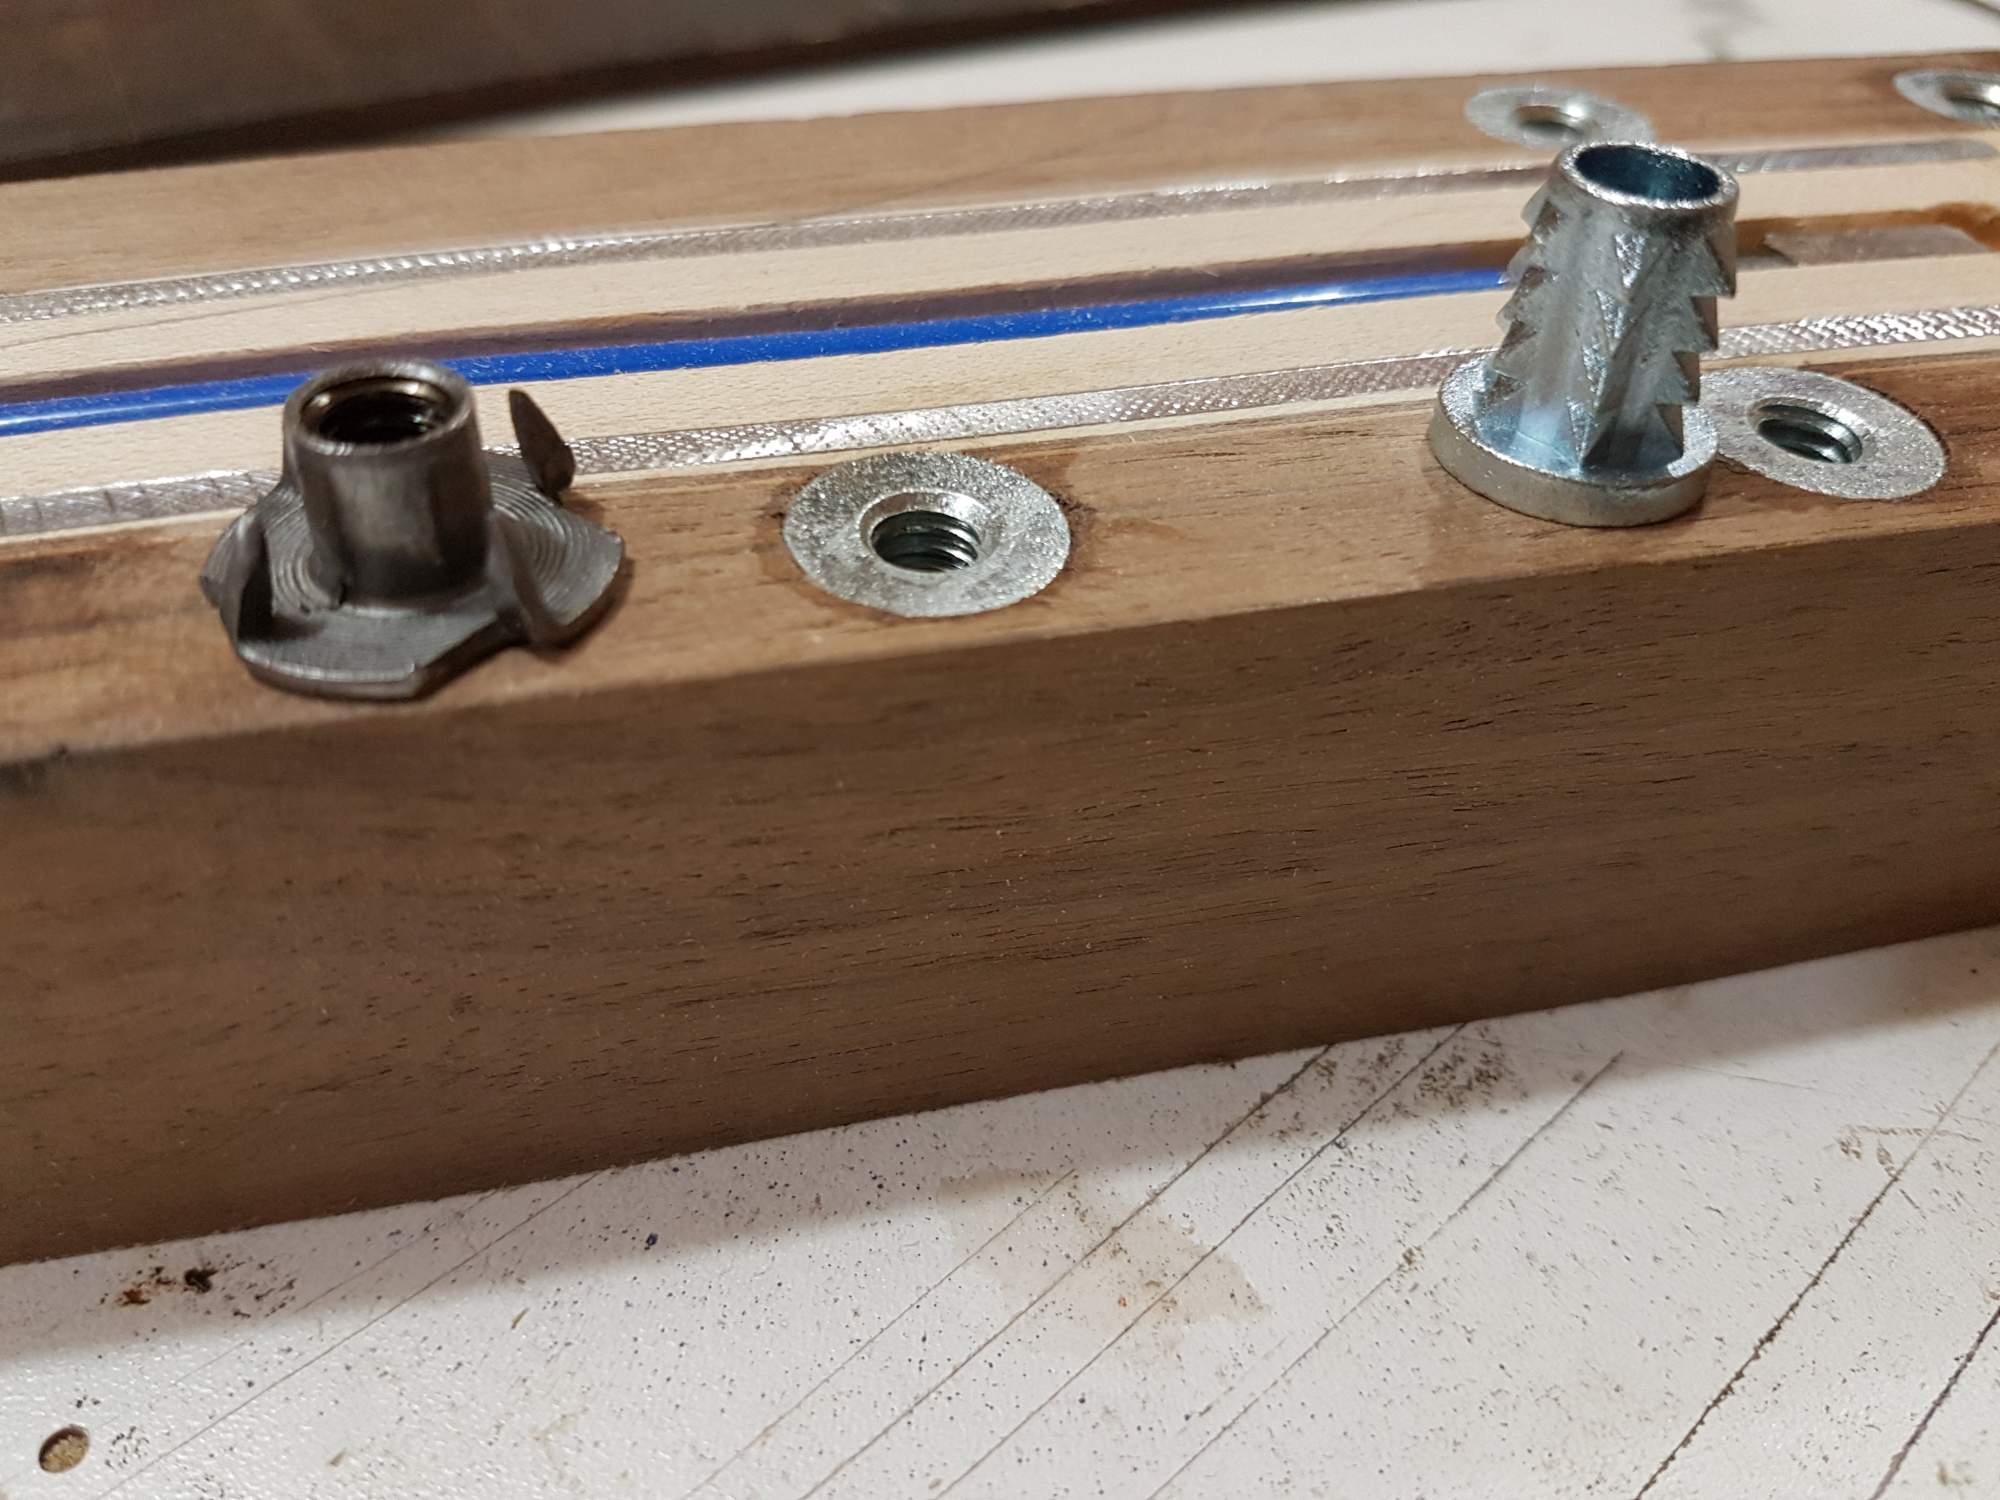
And special for @JIO here are some pics of the inserts I used. They are glued in with epoxy glue.
The toothed ones on the left side are the ones I like to use, but could not do so here as the aluminum stiffening rods are in the way of the holes I'd have to drill.

- Jun 30, 2010
- 49,632
- 222,241
- Disclosures
- musician/artist/owner - Gildaxe
I had a to make a new slightly smaller soapbar pickup routing template to make my new covers.
And special for @JIO here are some pics of the inserts I used. They are glued in with epoxy glue.
Thanks for the pics - I've not seen ones like that. (the non-flanged/toothed ones) I'm assuming you being in BC that they are metric threading.
Most of our hardware up here comes from the same suppliers as the US, so typically things are sae or imperial at the big box. These ones aren't metric, and came from home depot, so may be available down there too?Thanks for the pics - I've not seen ones like that. (the non-flanged/toothed ones) I'm assuming you being in BC that they are metric threading.
I'm making a new neck for a friend's strat, and in the meantime, I roughed out the pickup covers.
No pics, but I first routed the pickup cavities into the blanks that would be used to make the covers. The cavities are routed deep, leaving only 2mm at the tops of the covers over the pickups. Then I bandsawed them out within 1/8" of the line. I then carefully measured and drilled the mounting holes through the ends of the oval covers from both sides so they would be spot on. Then I screwed the cover onto the cover routing template and mounted that to a sheet of MDF that I clamped to the workbench. Then I used a pattern bit and routed around the perimeter of each one.
Here is a shot mid-routing.
 This process gives me something that is dimensionally accurate and repeatable without sanding.


No pics, but I first routed the pickup cavities into the blanks that would be used to make the covers. The cavities are routed deep, leaving only 2mm at the tops of the covers over the pickups. Then I bandsawed them out within 1/8" of the line. I then carefully measured and drilled the mounting holes through the ends of the oval covers from both sides so they would be spot on. Then I screwed the cover onto the cover routing template and mounted that to a sheet of MDF that I clamped to the workbench. Then I used a pattern bit and routed around the perimeter of each one.
Here is a shot mid-routing.
Last night I worked on the top plate a bit. I joined the top pieces a little while ago and "something" happened, so I set them aside for later. Normally I join tops by laying down wax paper on a flat MDF board in my clamping jig, clamp one side flat on the edge and then fit the other side to the clamped side, and clamp that one in place tightly. I'm describing it terribly and will have to take a pic of it in action.
Anyway, because this top has already been fine sanded to 320, and the bleaching is sensitive to sanding, I wanted to be very careful about extra glue left on the top of the join. So, I applied masking tape all along the edge of both boards where they would be joined with clear epoxy. Again, pics would have helped. Anyway, the thickness of the masking tape seems to have affected how flat the boards became when clamped in the jig, and as a result, one side of the top was about 0.3 mm higher than the other. Doesn't sound like much, but you could see it clearly from all angles. I set it aside to think about it.
Normally, I'd just sand back a boo boo like that and be done with it, but I didn't want to have to re-bleach the board several times in case it cupped. So last night, I ultra-carefully block planed that high side, and then scraped it down as much as I dared before running over it with more 320 on a flat block. In the shot below, you can see that a little maple colour has come back into the top along the join for a few inches of width. I'm hoping one bleach treatment will take care of it, plus along that section it will mostly be hidden by fingerboard, pickup covers and bridge. You can still see the seam from this angle - this angle is the worst. From the other side, and from the top and bottom, you can't see it at all. Unfortunately, this is the player's angle.
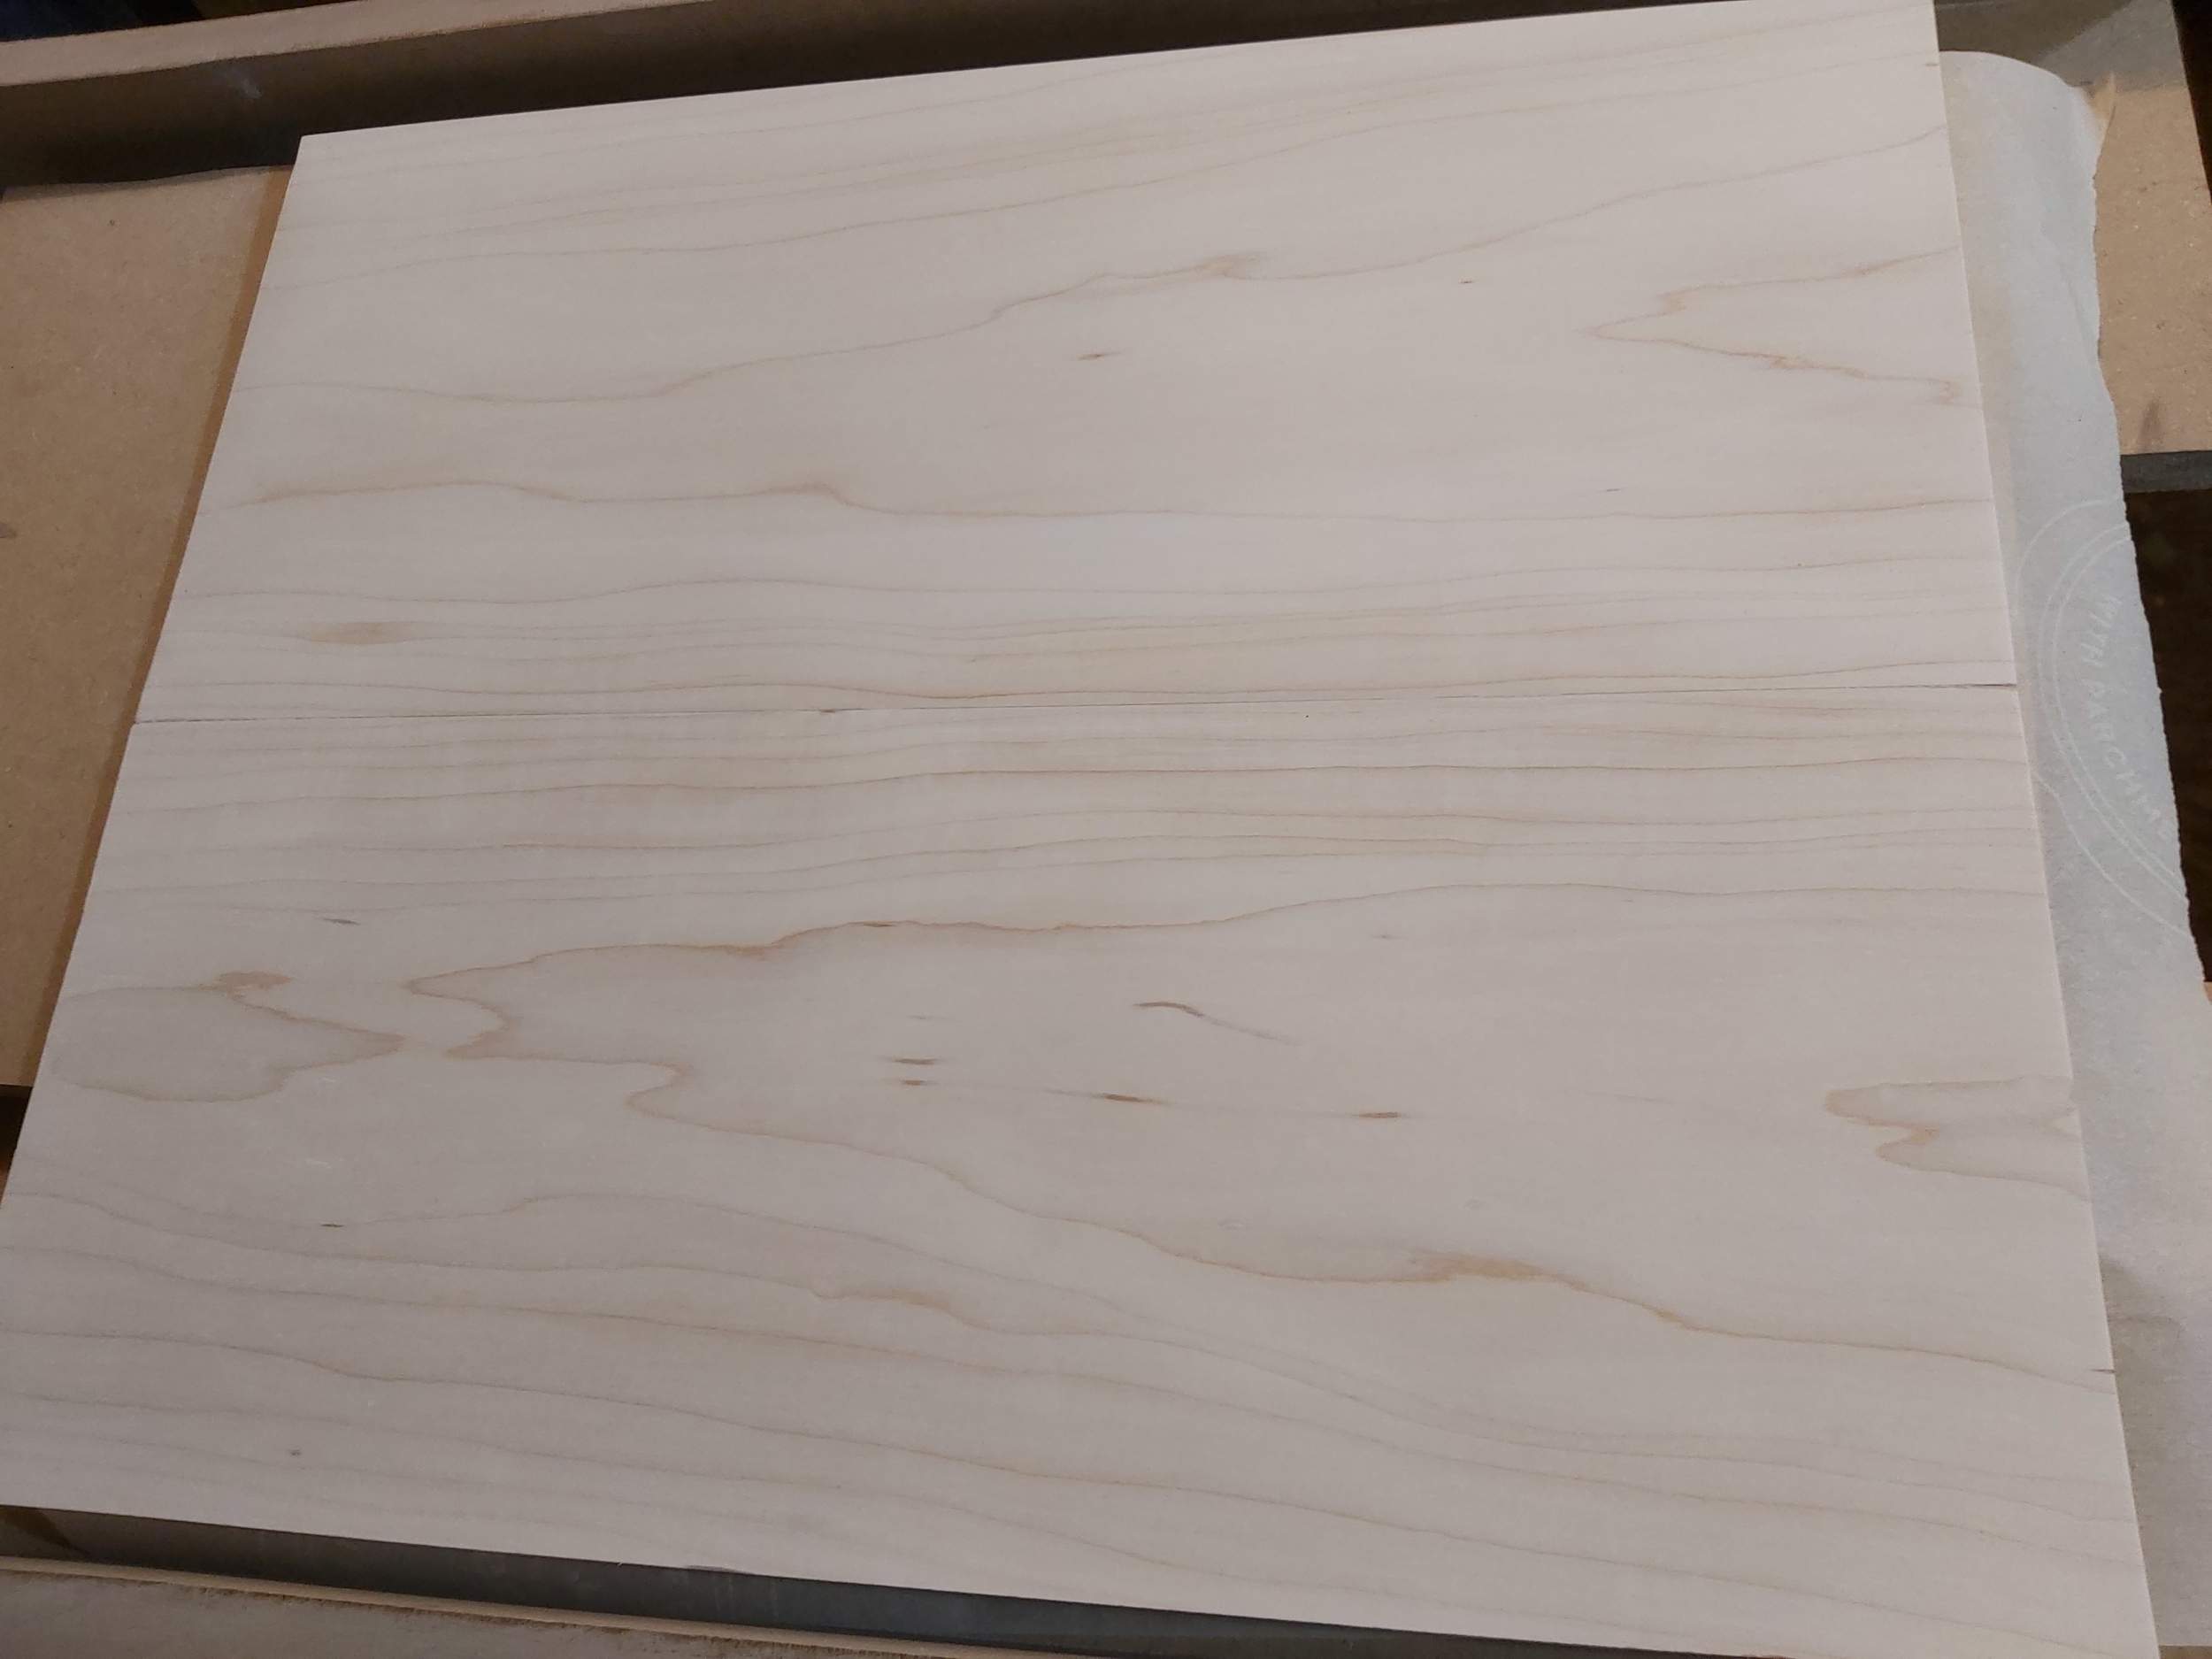
Anyway, because this top has already been fine sanded to 320, and the bleaching is sensitive to sanding, I wanted to be very careful about extra glue left on the top of the join. So, I applied masking tape all along the edge of both boards where they would be joined with clear epoxy. Again, pics would have helped.
Anyway, the thickness of the masking tape seems to have affected how flat the boards became when clamped in the jig, and as a result, one side of the top was about 0.3 mm higher than the other. Doesn't sound like much, but you could see it clearly from all angles. I set it aside to think about it. Normally, I'd just sand back a boo boo like that and be done with it, but I didn't want to have to re-bleach the board several times in case it cupped. So last night, I ultra-carefully block planed that high side, and then scraped it down as much as I dared before running over it with more 320 on a flat block. In the shot below, you can see that a little maple colour has come back into the top along the join for a few inches of width. I'm hoping one bleach treatment will take care of it, plus along that section it will mostly be hidden by fingerboard, pickup covers and bridge. You can still see the seam from this angle - this angle is the worst. From the other side, and from the top and bottom, you can't see it at all. Unfortunately, this is the player's angle.
I did a bit more fussy work. I'm mounting the bridge to a block of walnut the same shape as the pickup covers, and will be mounting the walnut bridge block into a routed pocket, much like the pickups, except with more screws and some glue for good measure. I also wanted to have the bridge inset into the walnut block.
First I made a template that fit the base of the bridge nicely. I mentioned earlier that this bass has many recycled components, and this bridge is one of them. It will be painted.
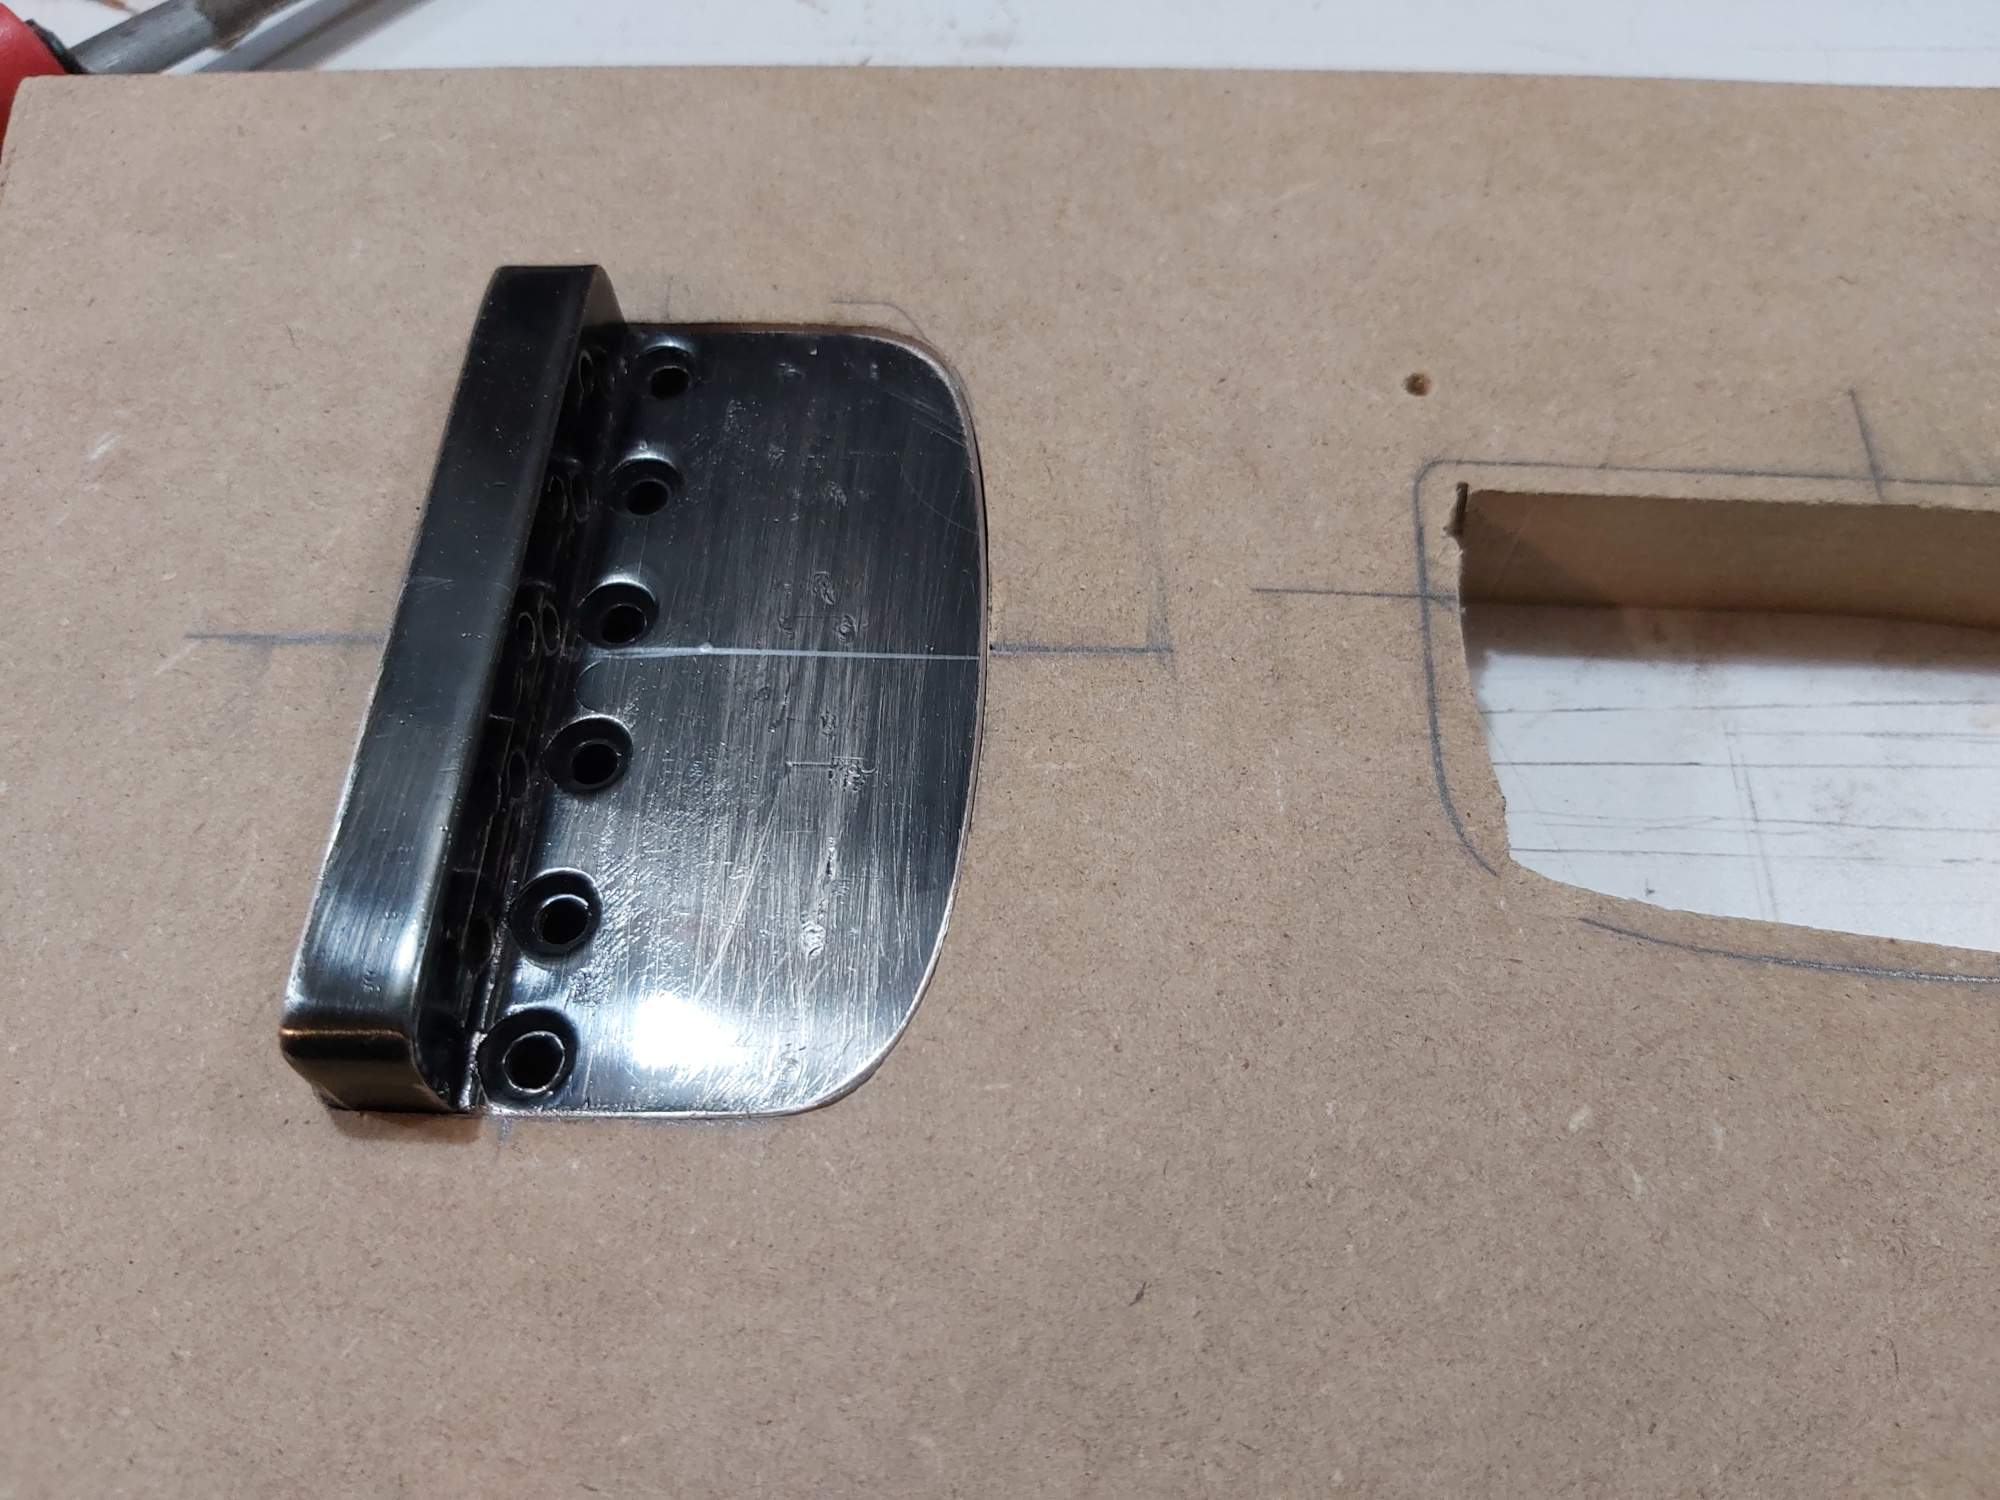 Then I made a second template and stacked the two together to allow me to rout out the shallow pool for the bridge; 3mm deep.
 Here is the cavity post-routing. I also pre-drilled those little holes with a forstner before routing it out. They are to provide clearance for the ball ends of the strings, since the bridge will now be countersunk.
 Bridge just sitting on there to help figure out where to trim the edges so it falls in flush.
 Trimmed and flush-mounted. The small holes worked.
 I then routed out the bridge block into an oval using the same templates and method as the pickup covers. The two holes in the walnut block are only to mount the block to the jig. The walnut block itself will be glued in place, and screwed with four screws. Then there are the six mounting screws that the bridge already has, and two more that I'll be adding to it shortly.
Here's another shot. In both this pic and the one above, the pickup covers have been sanded to 220 and then pore-filled before being sanded to 220 again. The bridge block is right off the jig.
I've done some more things, but no time to share them right yet...
First I made a template that fit the base of the bridge nicely. I mentioned earlier that this bass has many recycled components, and this bridge is one of them. It will be painted.
Here's another shot. In both this pic and the one above, the pickup covers have been sanded to 220 and then pore-filled before being sanded to 220 again. The bridge block is right off the jig.


I've done some more things, but no time to share them right yet...
Last edited:

That's a good idea making a third oval for the bridge block!

Crisp, clean lovely work, per usual Sir Beej.
Latest posts
-

-
 This Tiny Pedalboard Replaced My Massive Touring Rig - Janek Gwizdala
- Latest: ColonelZulu
-

-

